Your Account and Subscription
let's begin
While the use of CalTopo does not require an account, creating an account will allow you to return to saved maps, share maps more easily, and much more.
Here we cover how to create and manage a CalTopo account. In the following lesson in this chapter, we look at all the information stored in your account as you use CalTopo.
Topics On this Page:
- Account Creation and Login
- Logout of CalTopo
- Changing Subscription and setting auto-renewal.
- Updating your Card
- Managing Your Login
Lessons in this Chapter:
- Managing Your Account Items, which reviews the tabs in the Your Account display box, including Your Maps, Your Layers, Your PDFs, and more.
Account Creation and Login
This section will cover how to create and log into a CalTopo account from a computer. If you are using the mobile app, please scroll down to the mobile section.
First, navigate to caltopo.com in your web browser.
Please note: previously first responders had to log into SARTopo, which included additional first responder specific tools. Since we combined the CalTopo and SARTopo servers in January 2022 (you can learn more in this blog post), all users will now log in through CalTopo. First responder specific tools (like assignments and clues) are now tied to the map mode.
Sign Up vs Login: In the top right corner of the page are two buttons: Sign Up and Log In. If you have never signed into CalTopo before, choose Sign Up. If you have previously logged in, choose Log In.
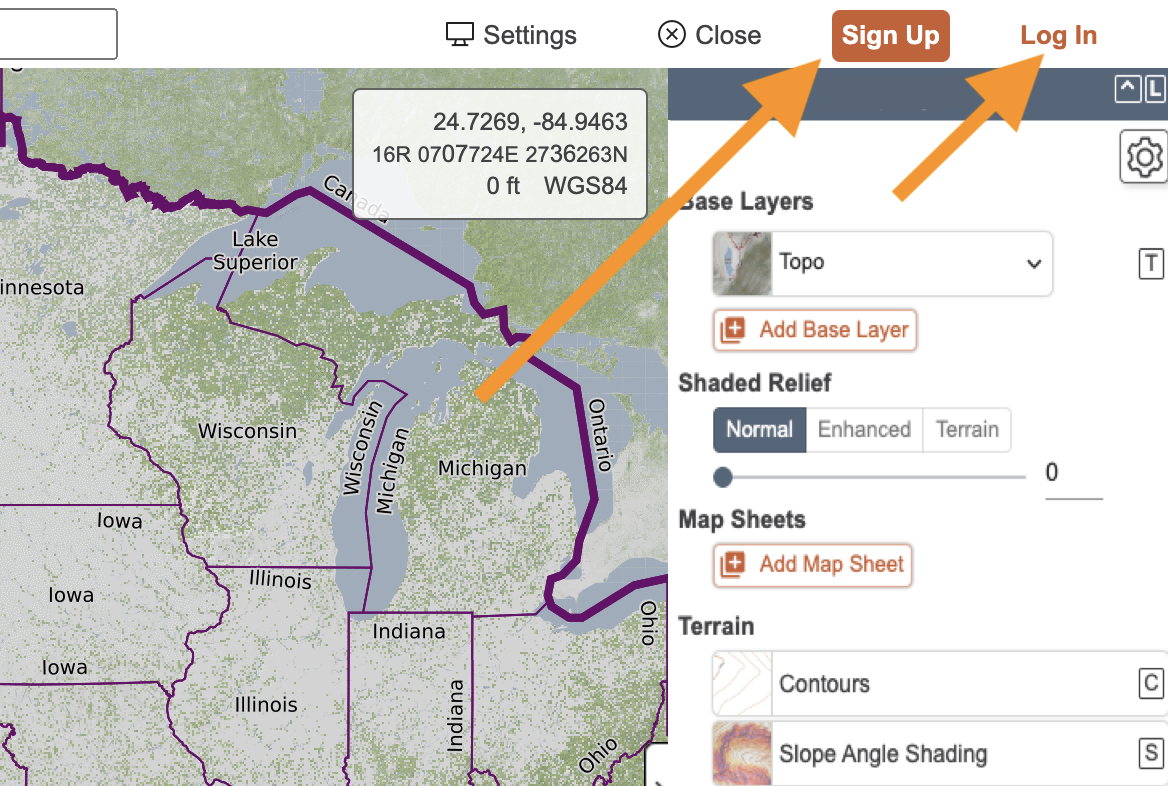
ID provider: When you click sign up or login, it will ask you which account provider you want to use. You will use an existing email address with one of these account providers to create or access your CalTopo account. These account providers give CalTopo a way to verify your account access without us having to write our own login credentials and store your information. Read more about why we use this method in our FAQs.
Both the email address and account provider will be associated with your CalTopo account. To log into your CalTopo account, you must use the same account provider and email every time. For example, let’s say you originally created your CalTopo account using Google. If you use the same email address but choose Facebook the next time you log in, you will receive a notification that no account exists. This is because your CalTopo account uses Google as the account provider when you log in, not Facebook.
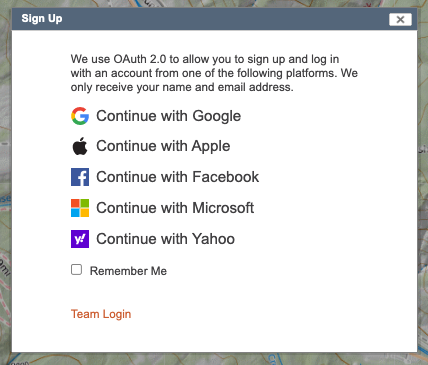
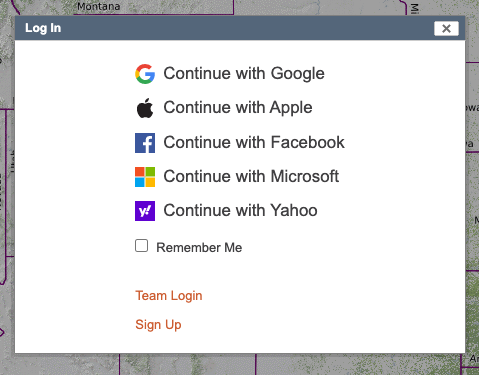
If you would like CalTopo to not automatically sign you out when you close the browser tab, click the “Remember Me” box. This is only recommended for personal computers and is not recommended for use on shared computers.
If you are the member of an enterprise account that has its own organizational server, you will choose “Team Login” to log in through your custom server. This does not apply to most users. Even if you are a member of a team account, most users will log in using one of the account providers, which is described below.
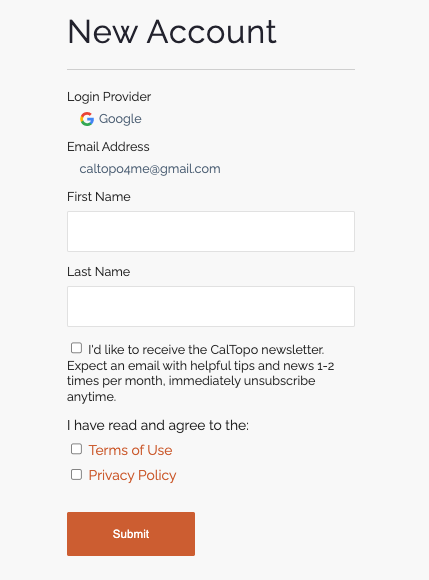
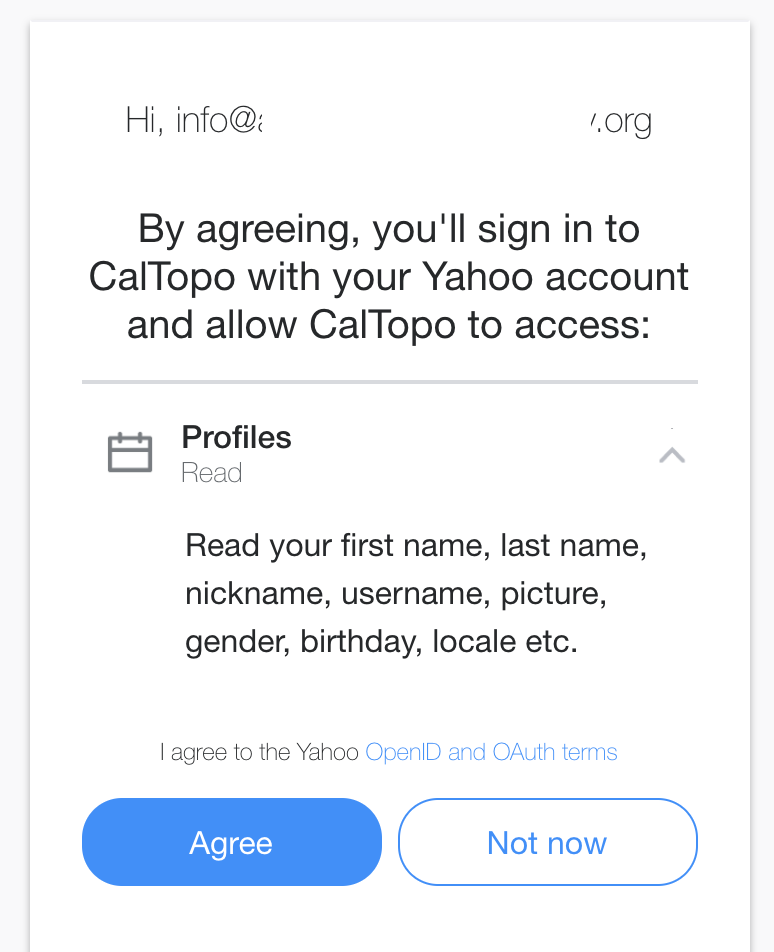
Next, select your account provider from the list and log in. For example, if you click on Google, it will take you to sign into your Google account. Enter your Gmail and password to login. Then you will be returned to CalTopo to finish creating your account. You will have to authorize CalTopo to use the account provider for access.
When you sign up and create a new account, you will have to agree to the Terms of Use and Privacy Policy. You'll have the option to sign up to receive CalTopo's email newsletter. We only use opt in marketing and you can unsubscribe at anytime if you wish.
If you end up with multiple accounts and want to connect them, please contact our support team for help with merging your accounts. See below for instructions.

Creating and Account on a Mobile Device
You can download the CalTopo mobile app for free from the Google Play or Apple Store.
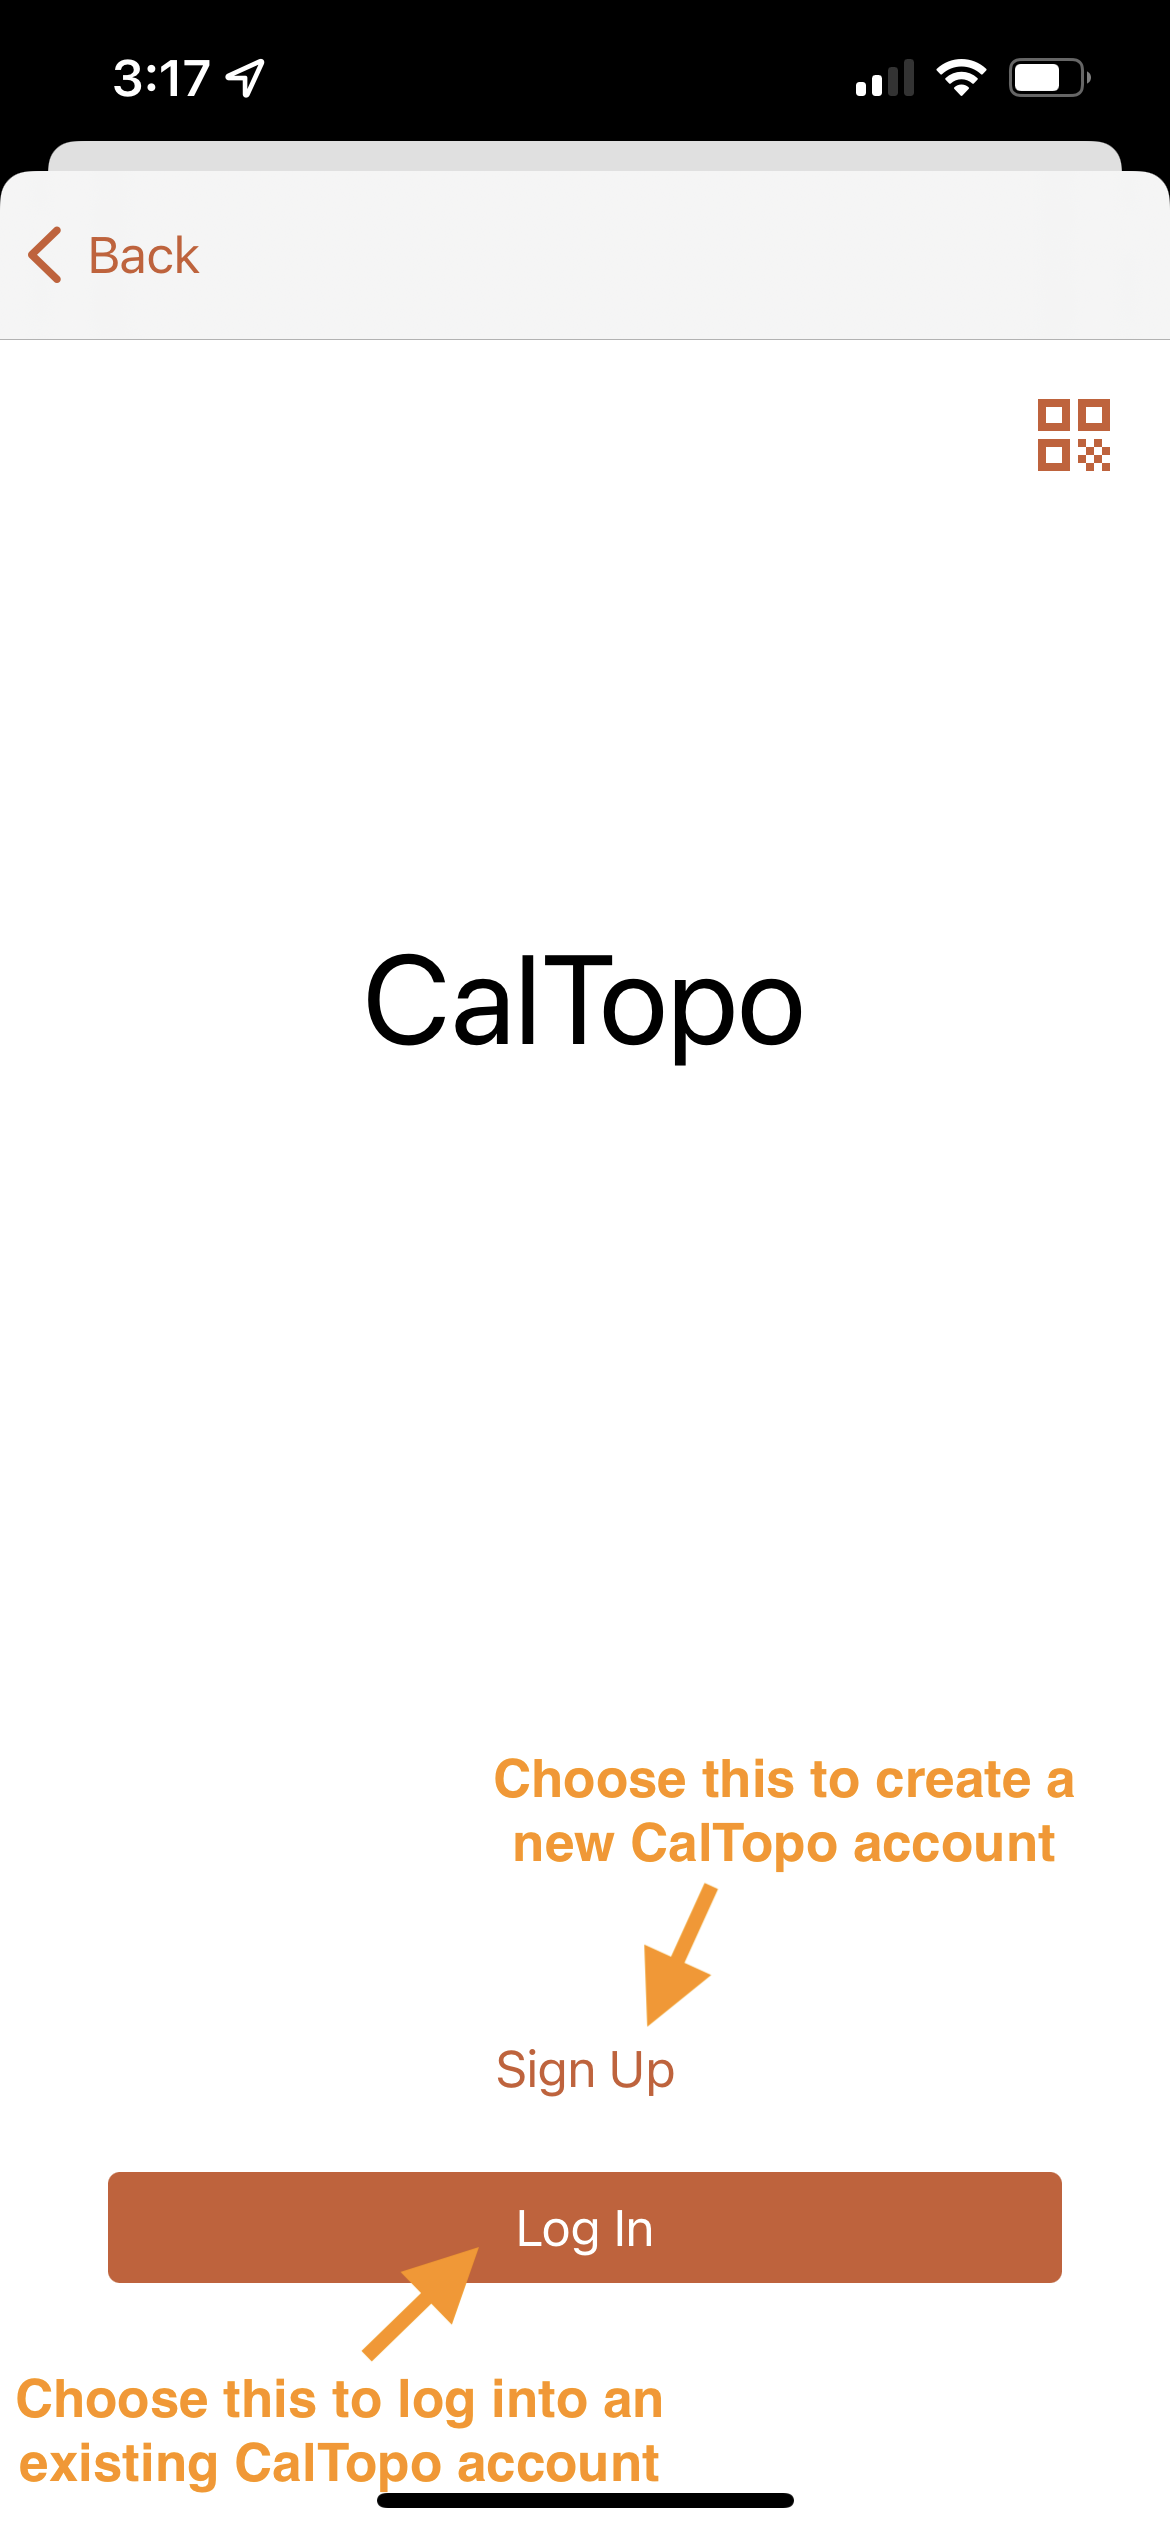
You can create or log into an existing CalTopo account from the mobile app. When you first open up the mobile app, you will be prompted to Sign Up or Log In. If you have never signed into CalTopo before, choose Sign Up. If you have previously logged in, choose Log In.
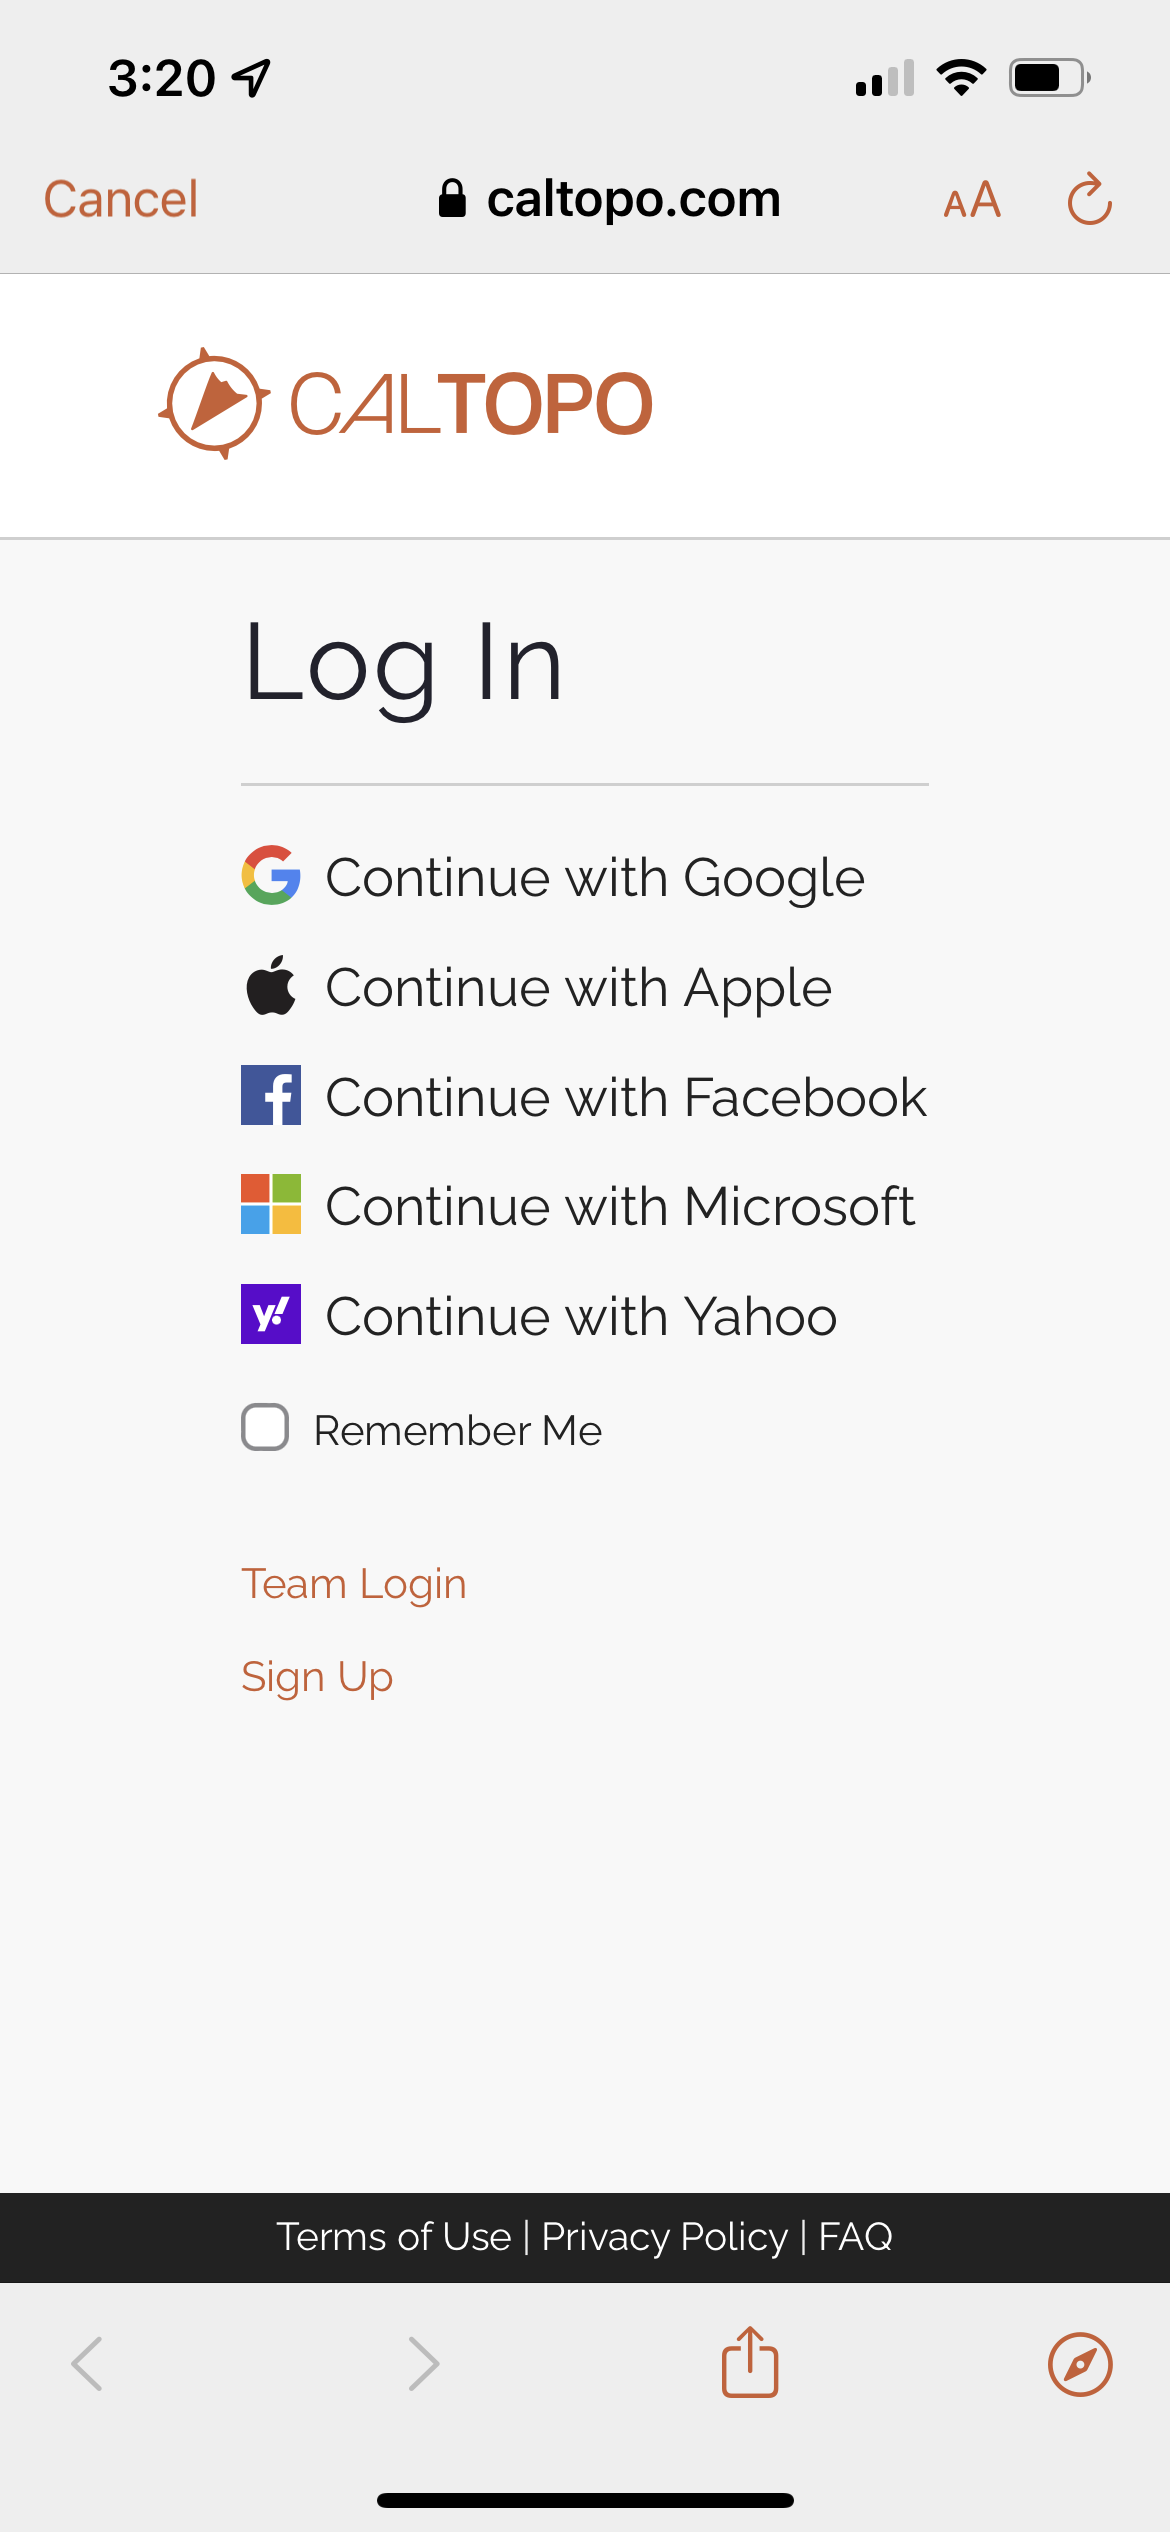
Similar to the steps described above for signing up or logging in on a computer, you will be prompted to choose an account provider. You will use an existing email address with one of these account providers to create or access your existing CalTopo account. Both the email address and account provider will be associated with your CalTopo account. To log into your CalTopo account, you must use the same account provider and email every time.
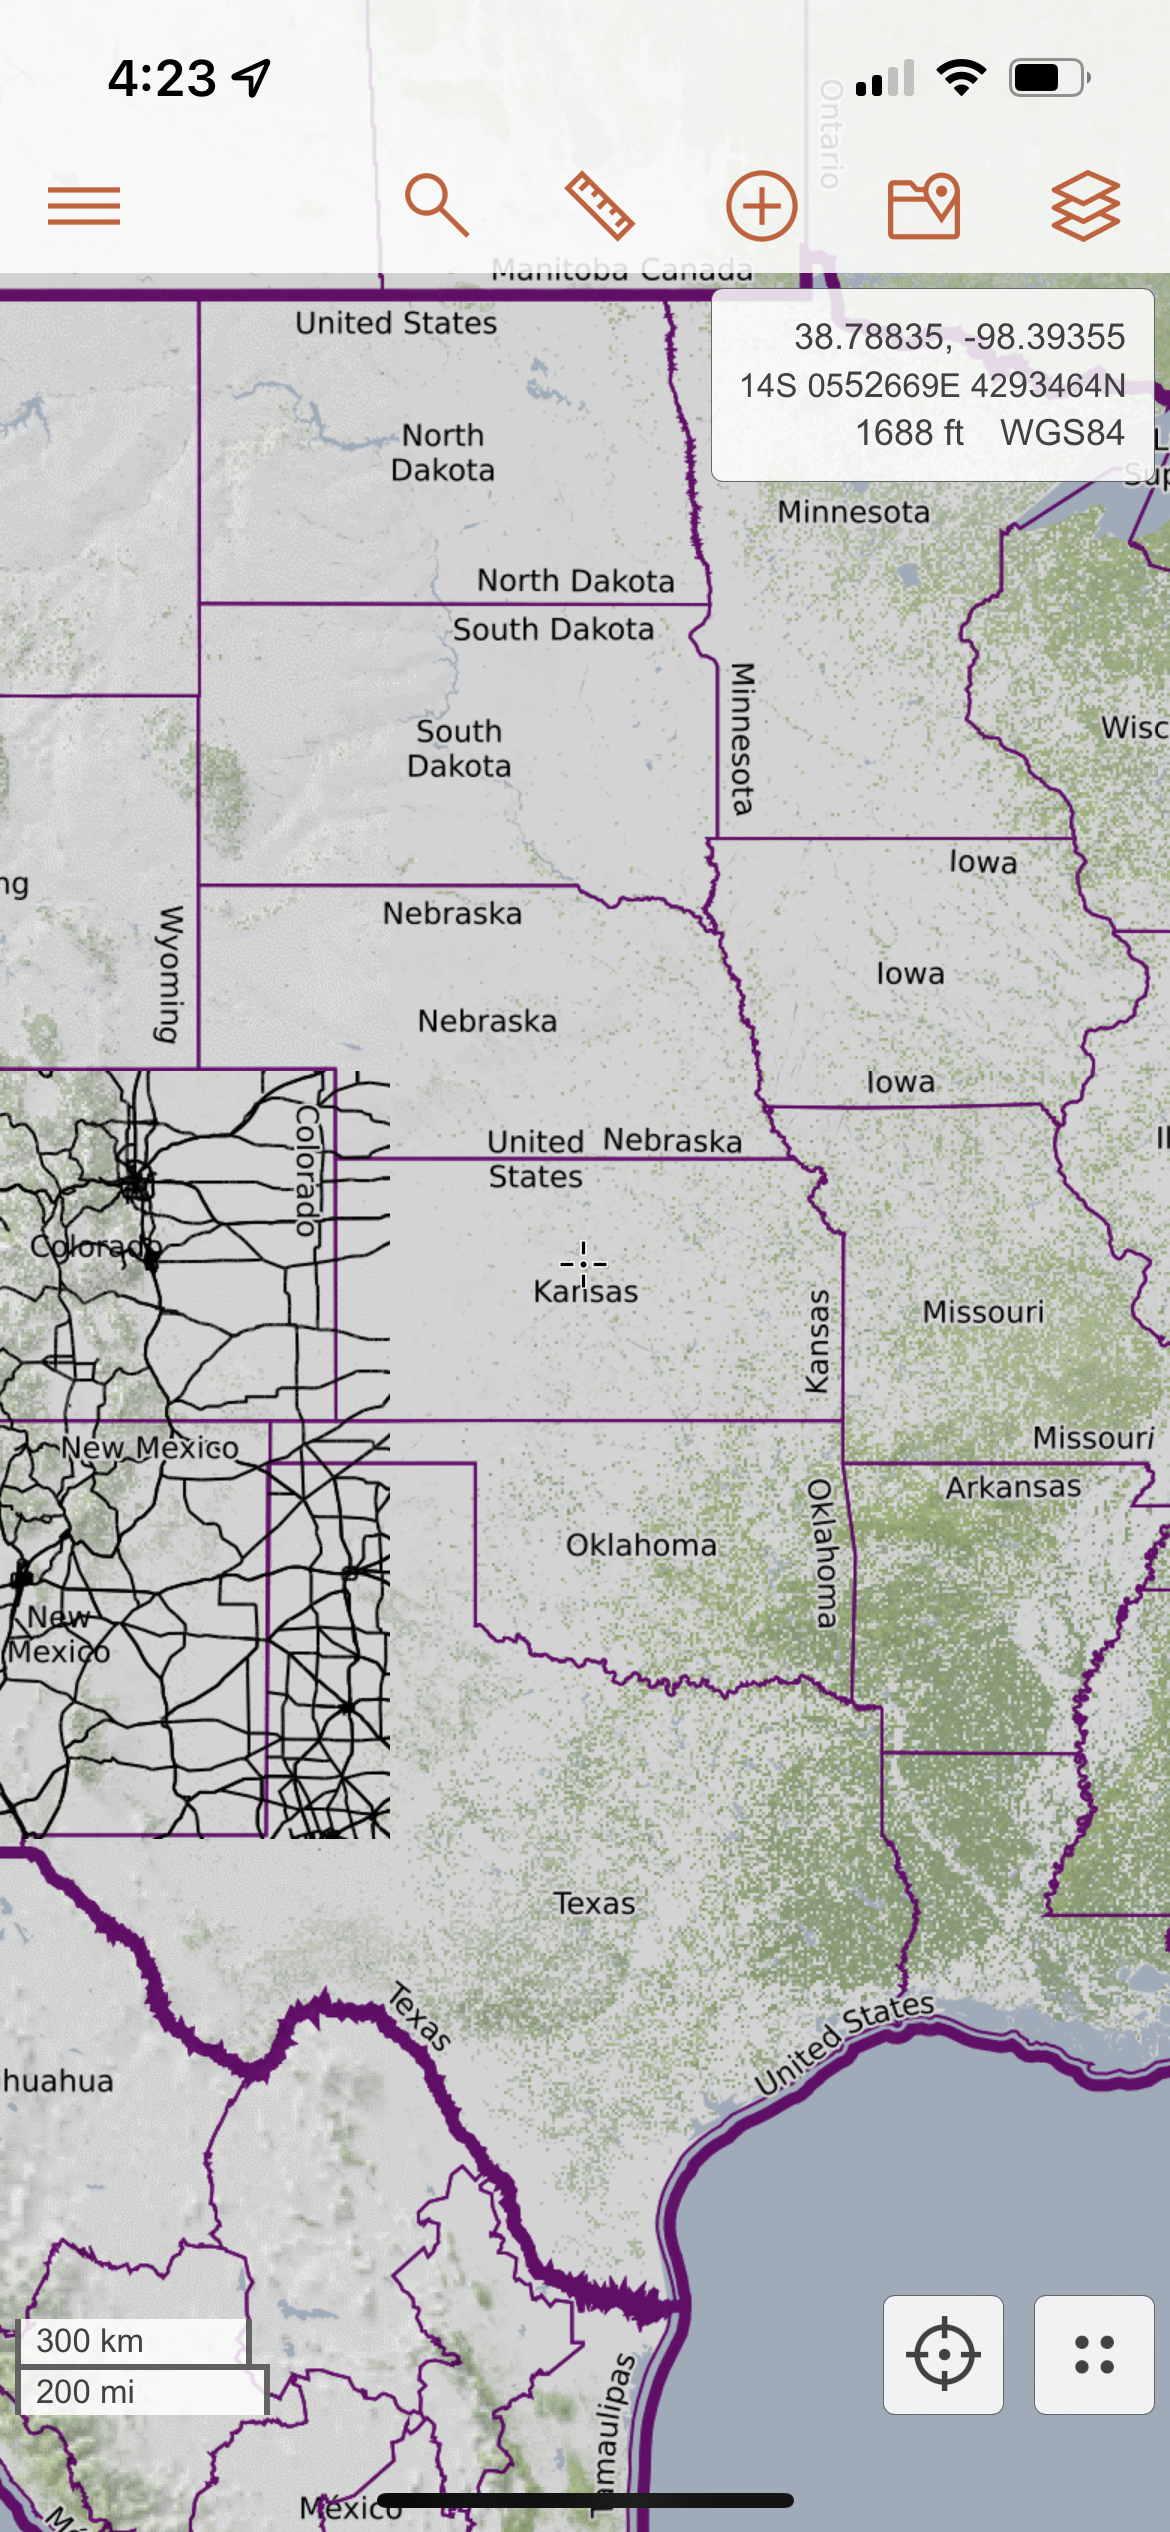
Once you choose your account provider, you will then be directed to sign into your account. Once signed in, you’ll be returned to CalTopo and the mobile app map viewer will open.
Logout
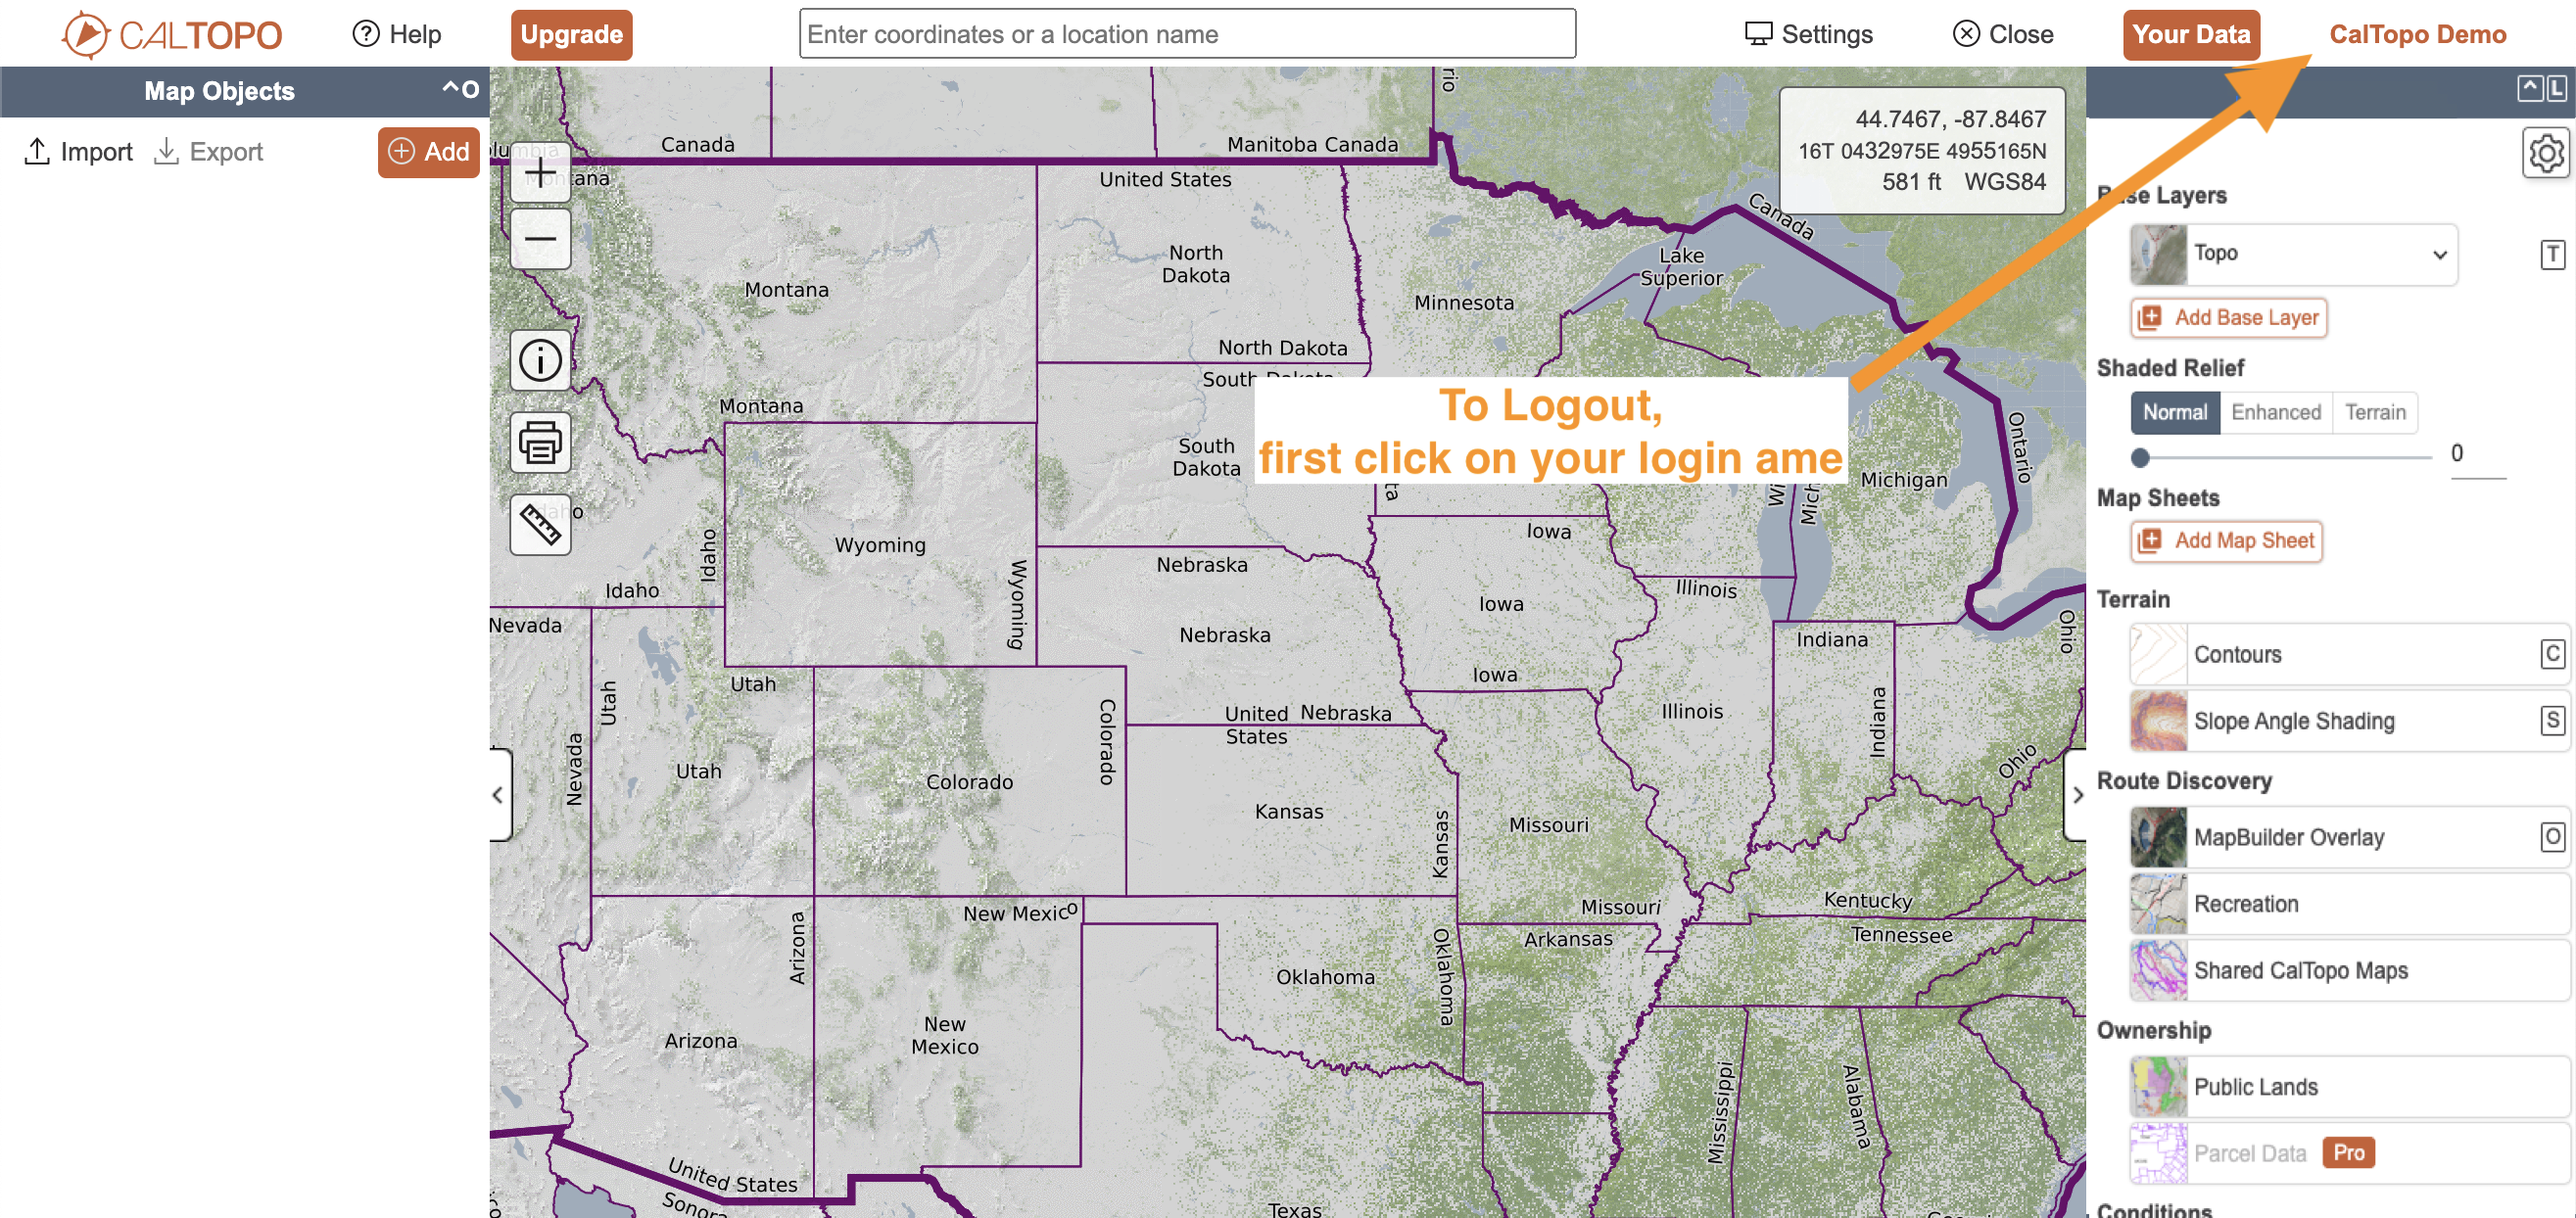
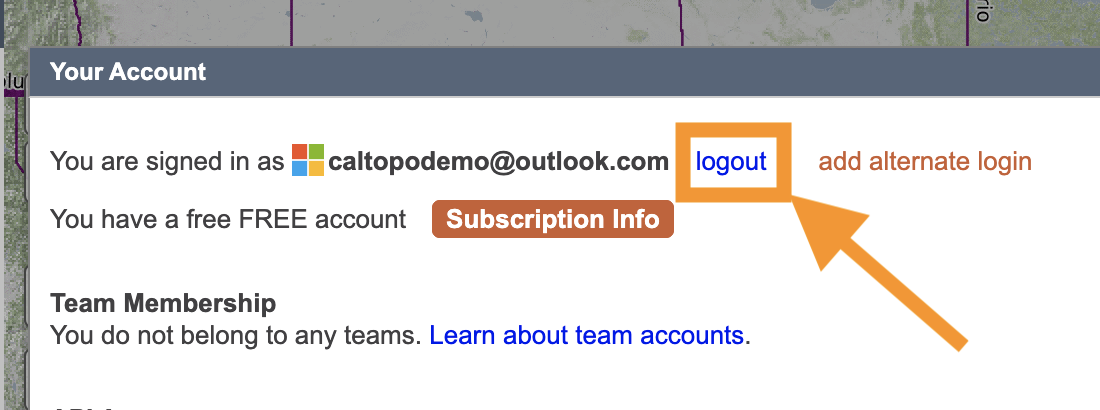
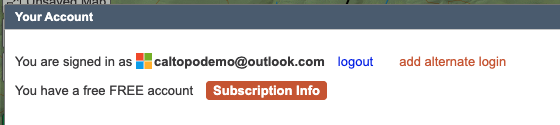
To logout of your account on the web, click your user name in the upper right hand corner to open the Your Account dialog.
Next to your username is the link to logout.
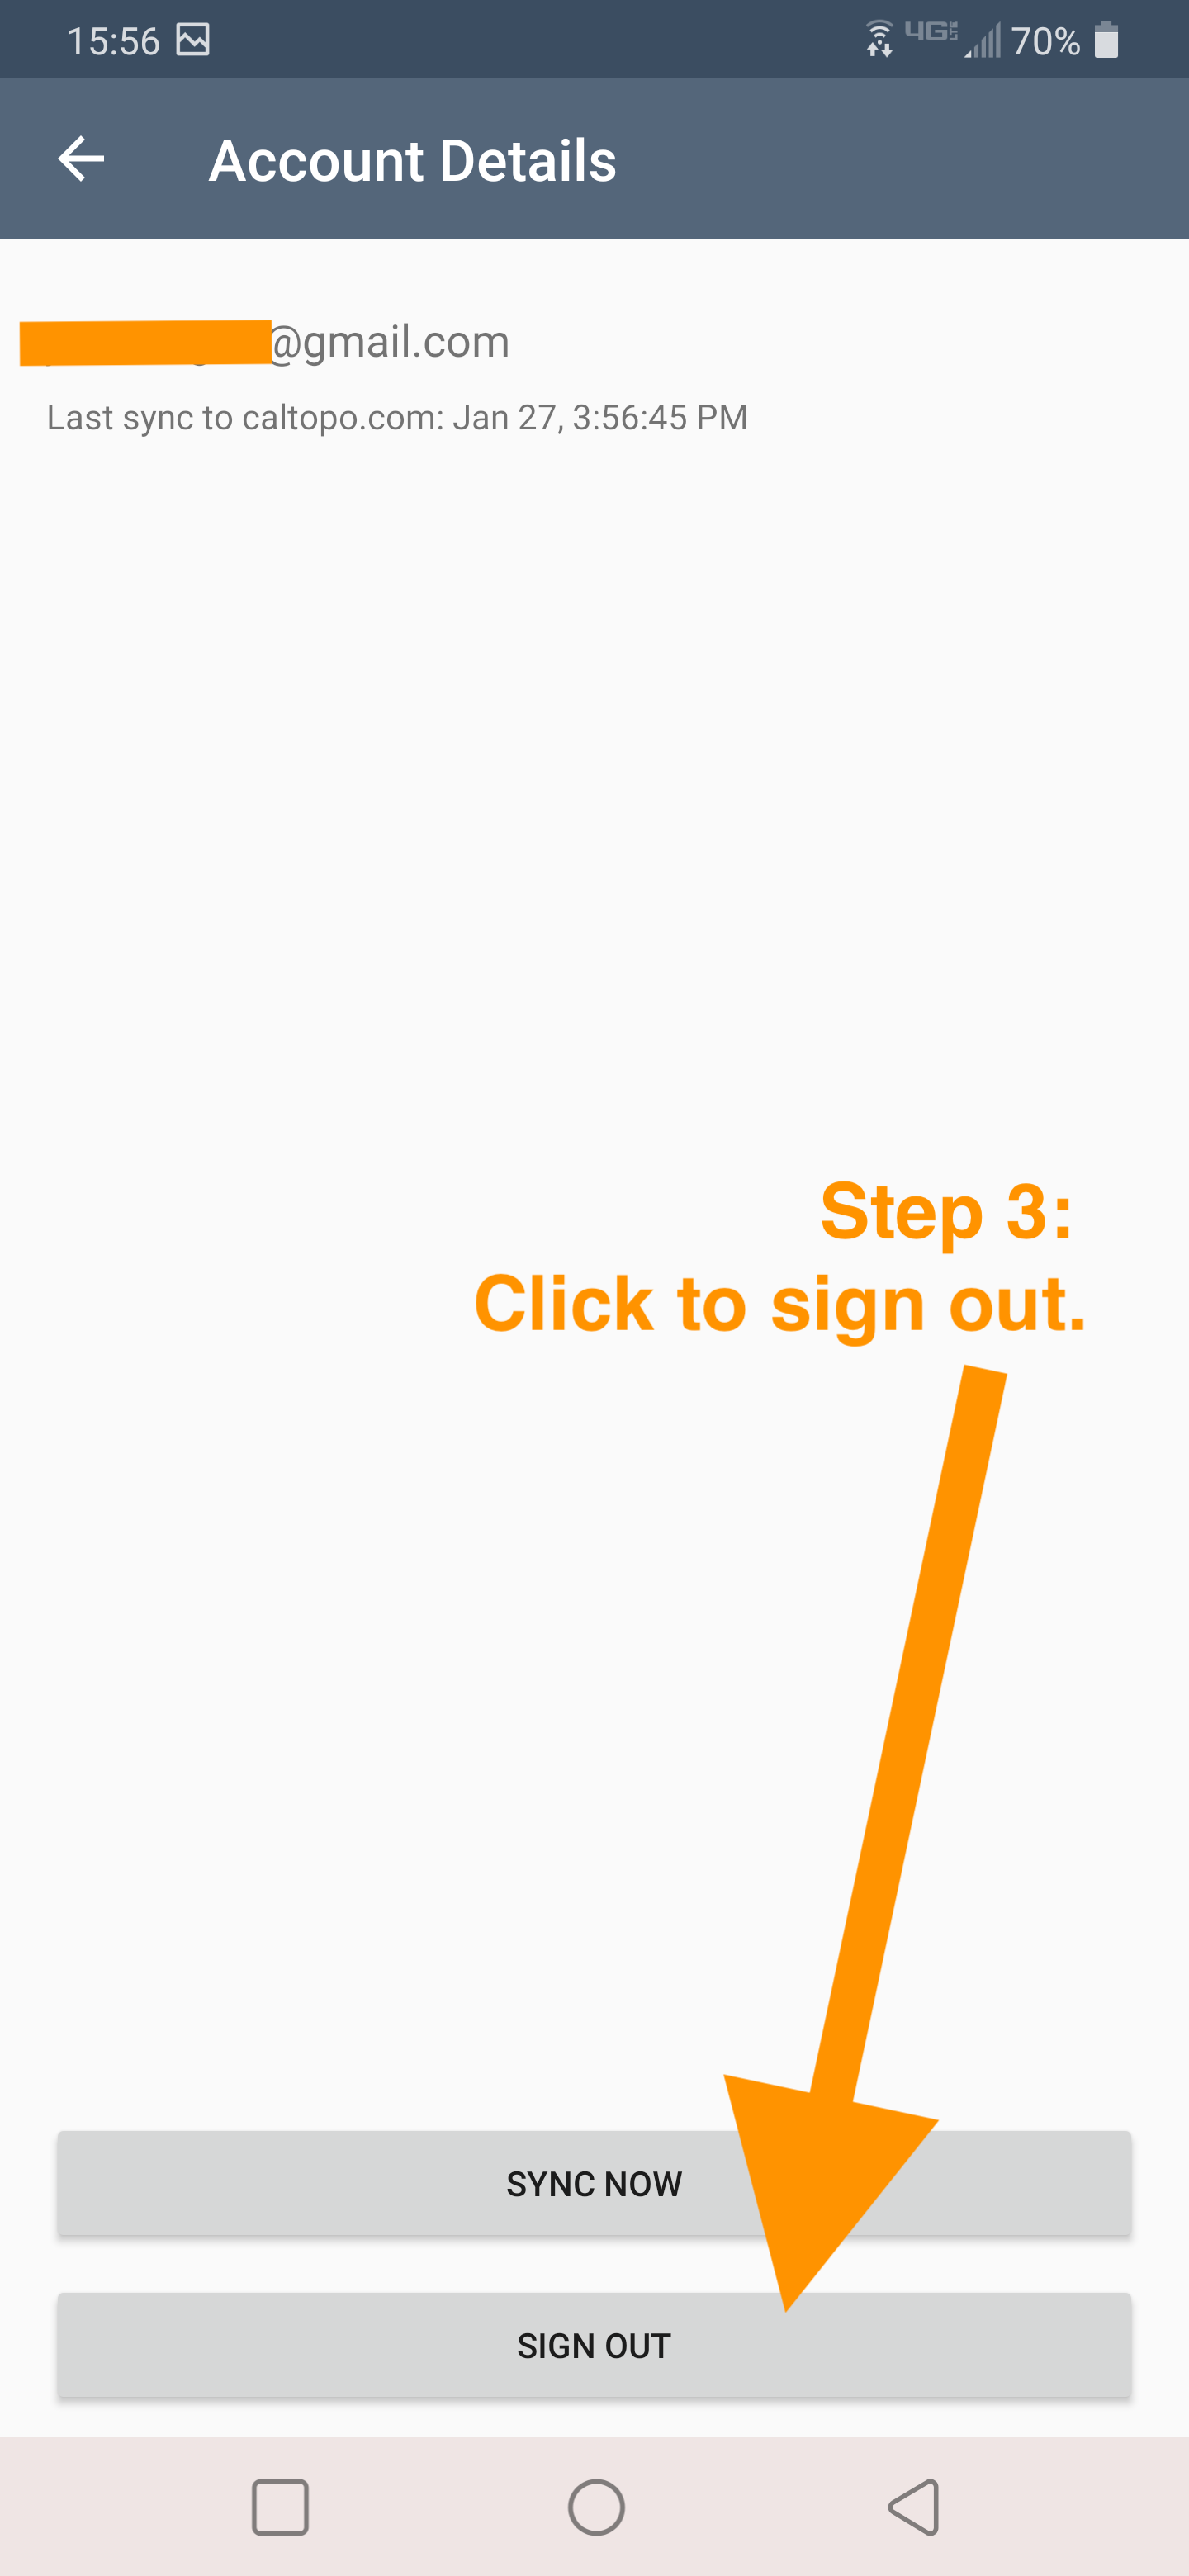
Logging Out of the Mobile App
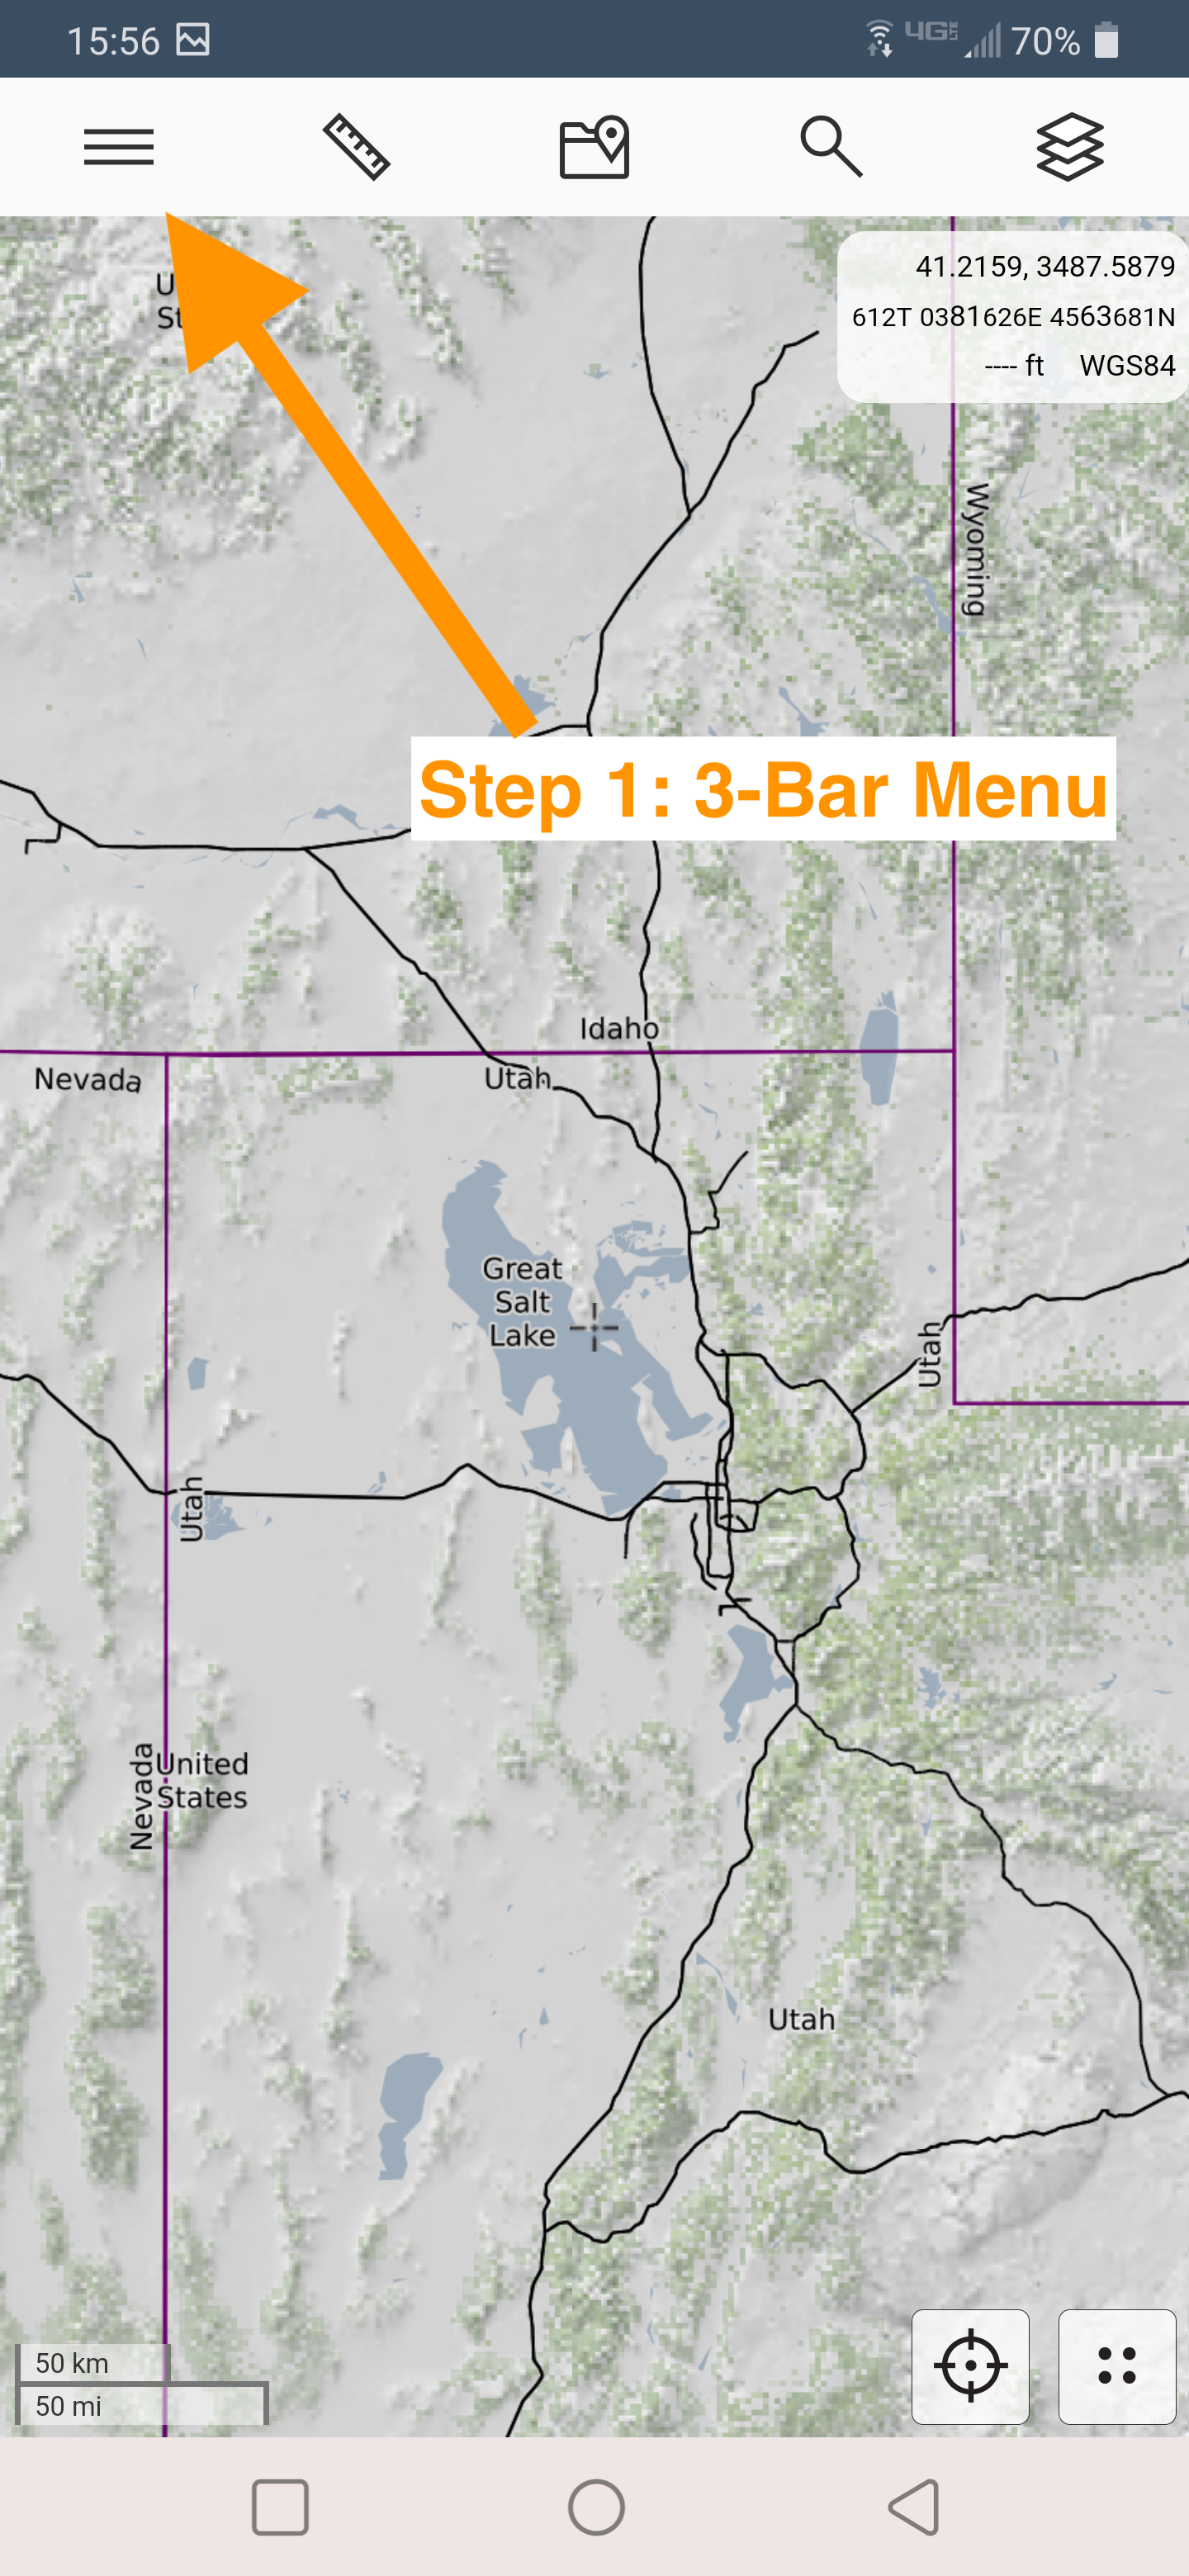
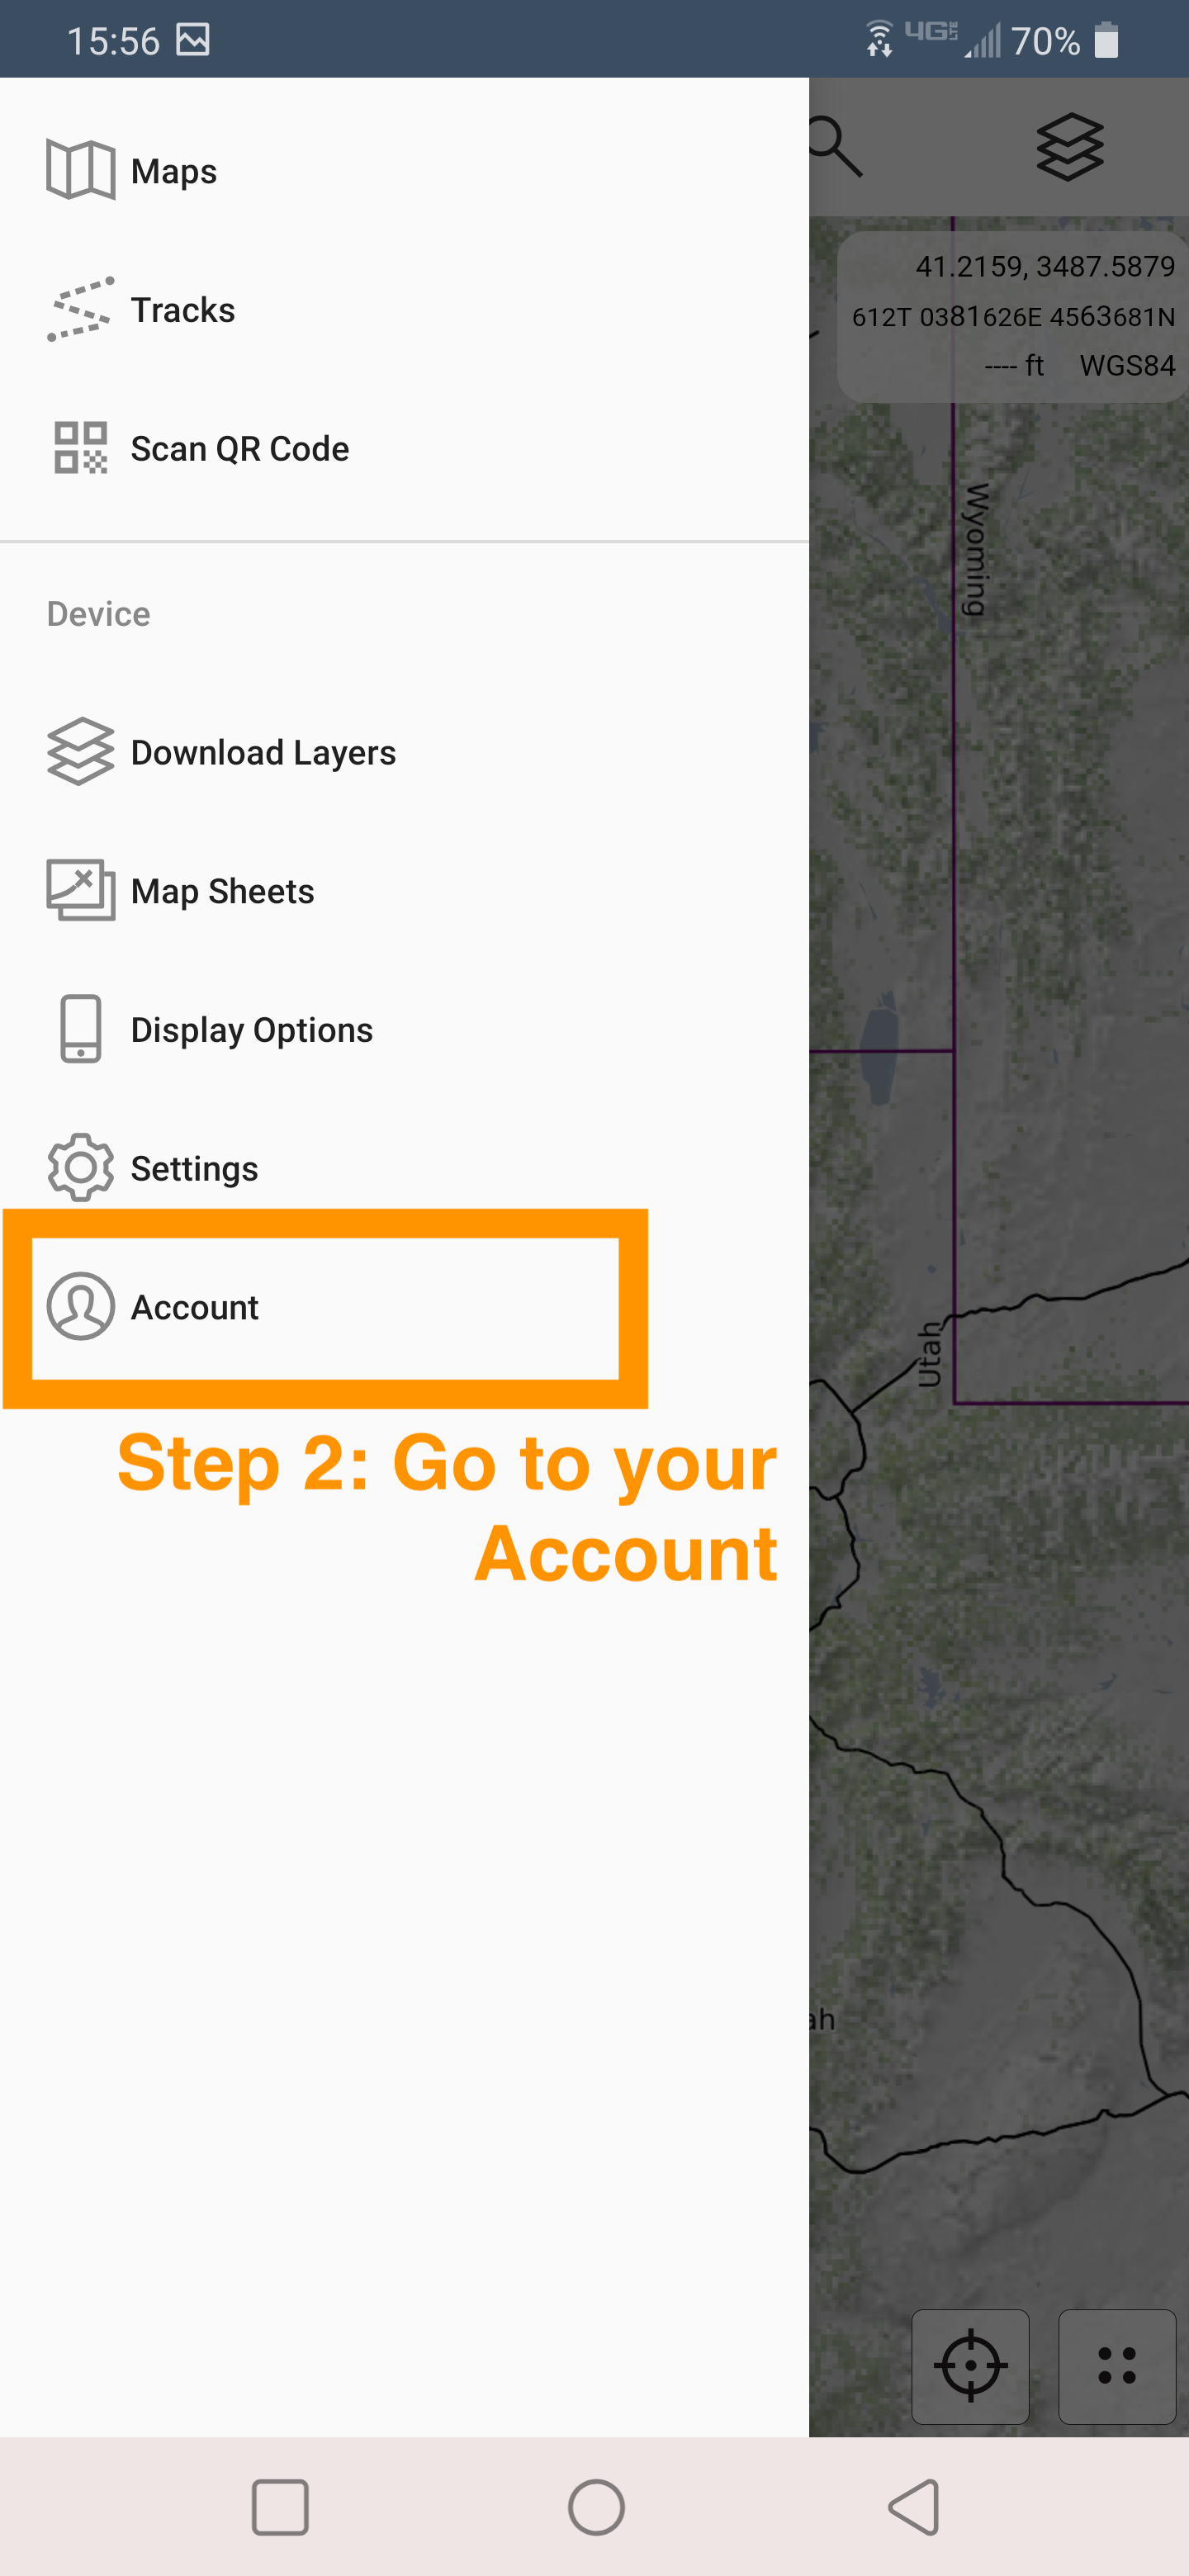
To log out of your account on the mobile app, go to the 3-bar main menu in the upper left corner of the app. Then select Account. At the bottom of the screen is the button to log out of the app.
Account Basics
Account types and privileges
- Our platform is free to use as long as you want, with additional features available via an annual subscription.
- See this page for details regarding account types and what you can access from each subscription level. Also check out the FAQs for additional information.
- If you plan to use the mobile app offline, you will need to subscribe to the Mobile subscription level at a minimum in order to download base layers to your device.
Subscribing or Managing your Subscription
- You can change your account subscription yourself at any time.
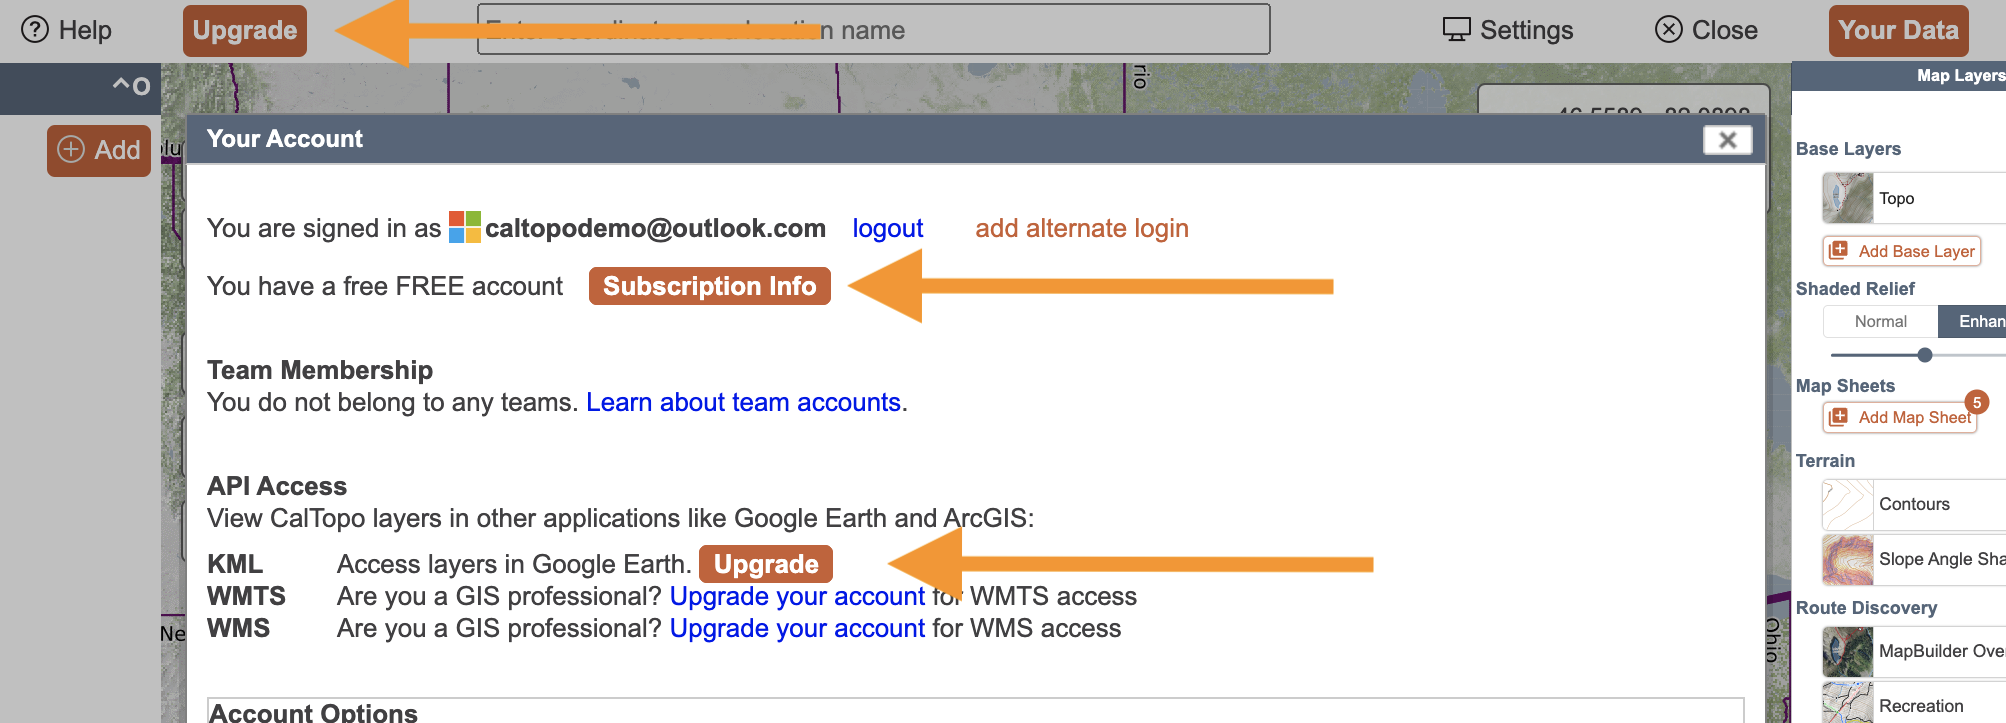
- Login to your account, and click the Upgrade button at the top of the page, or navigate to your account by clicking on your user name, then the your account tab. Your current subscription will be listed, along with a button linking to Subscription Info.
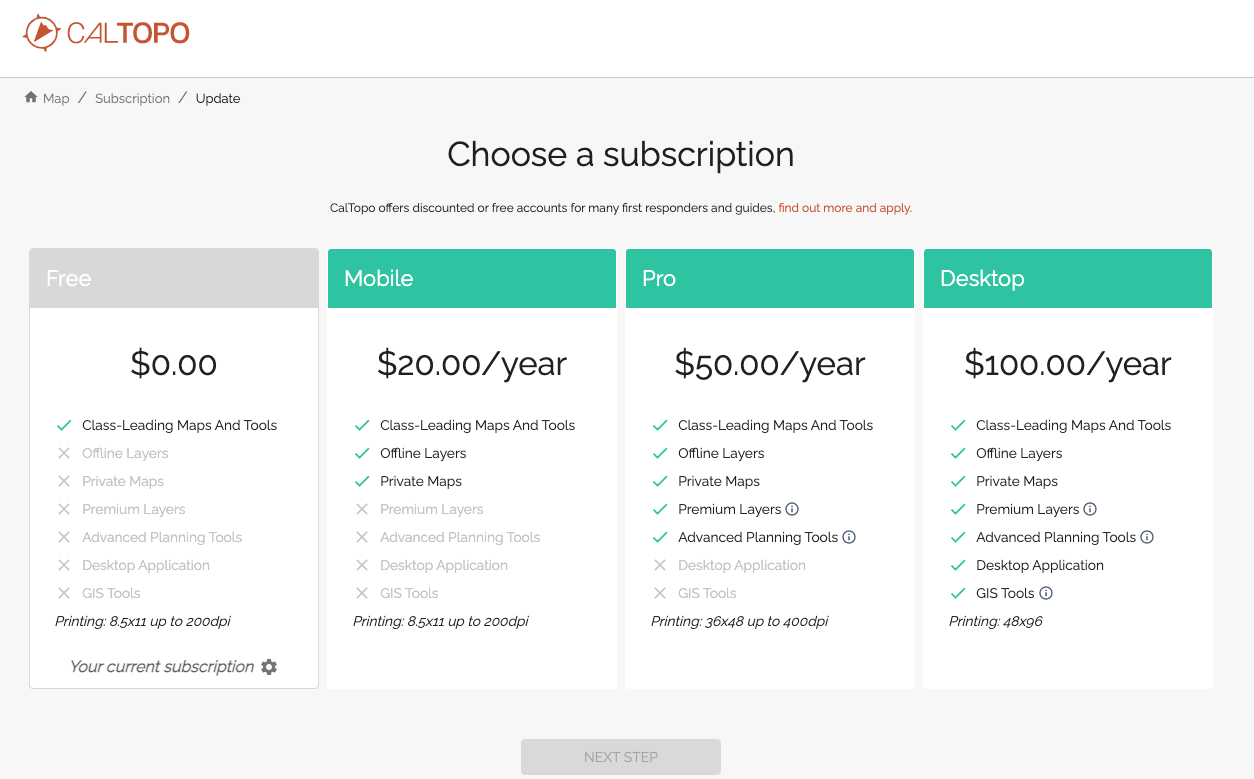
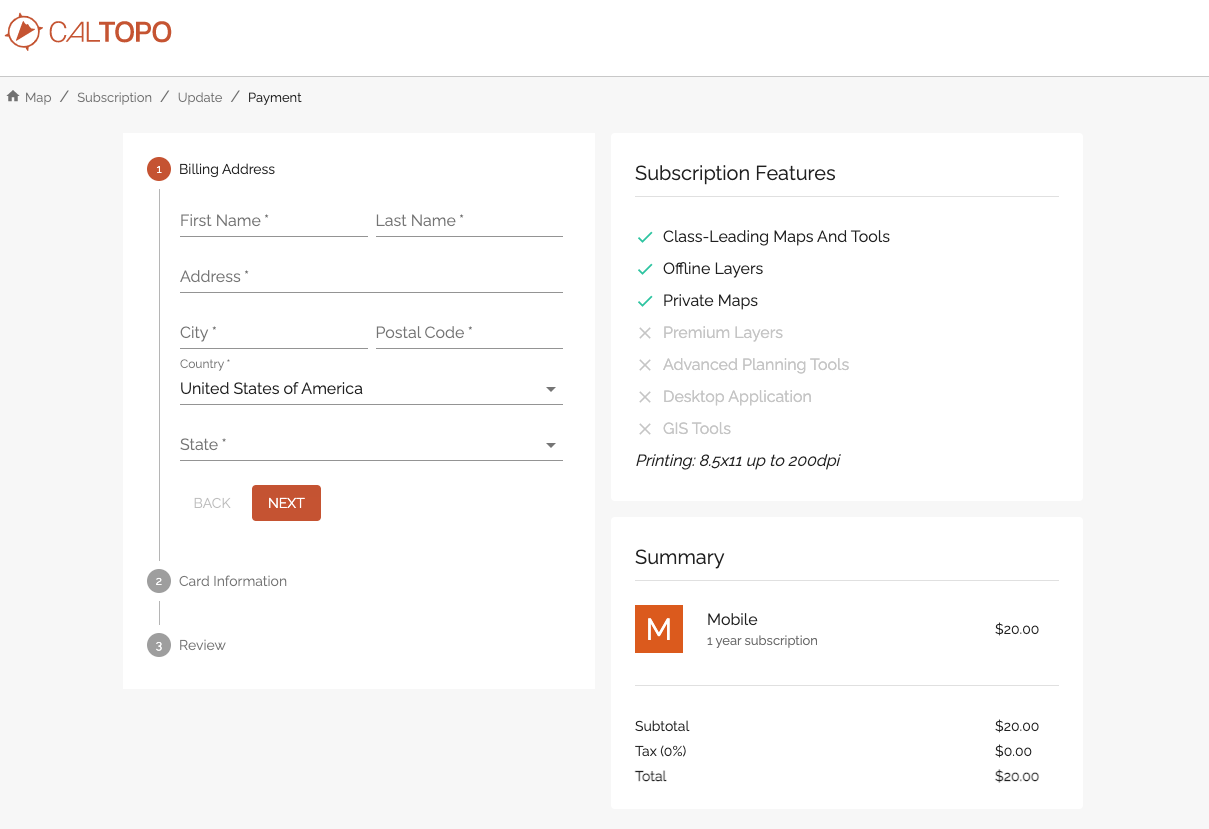
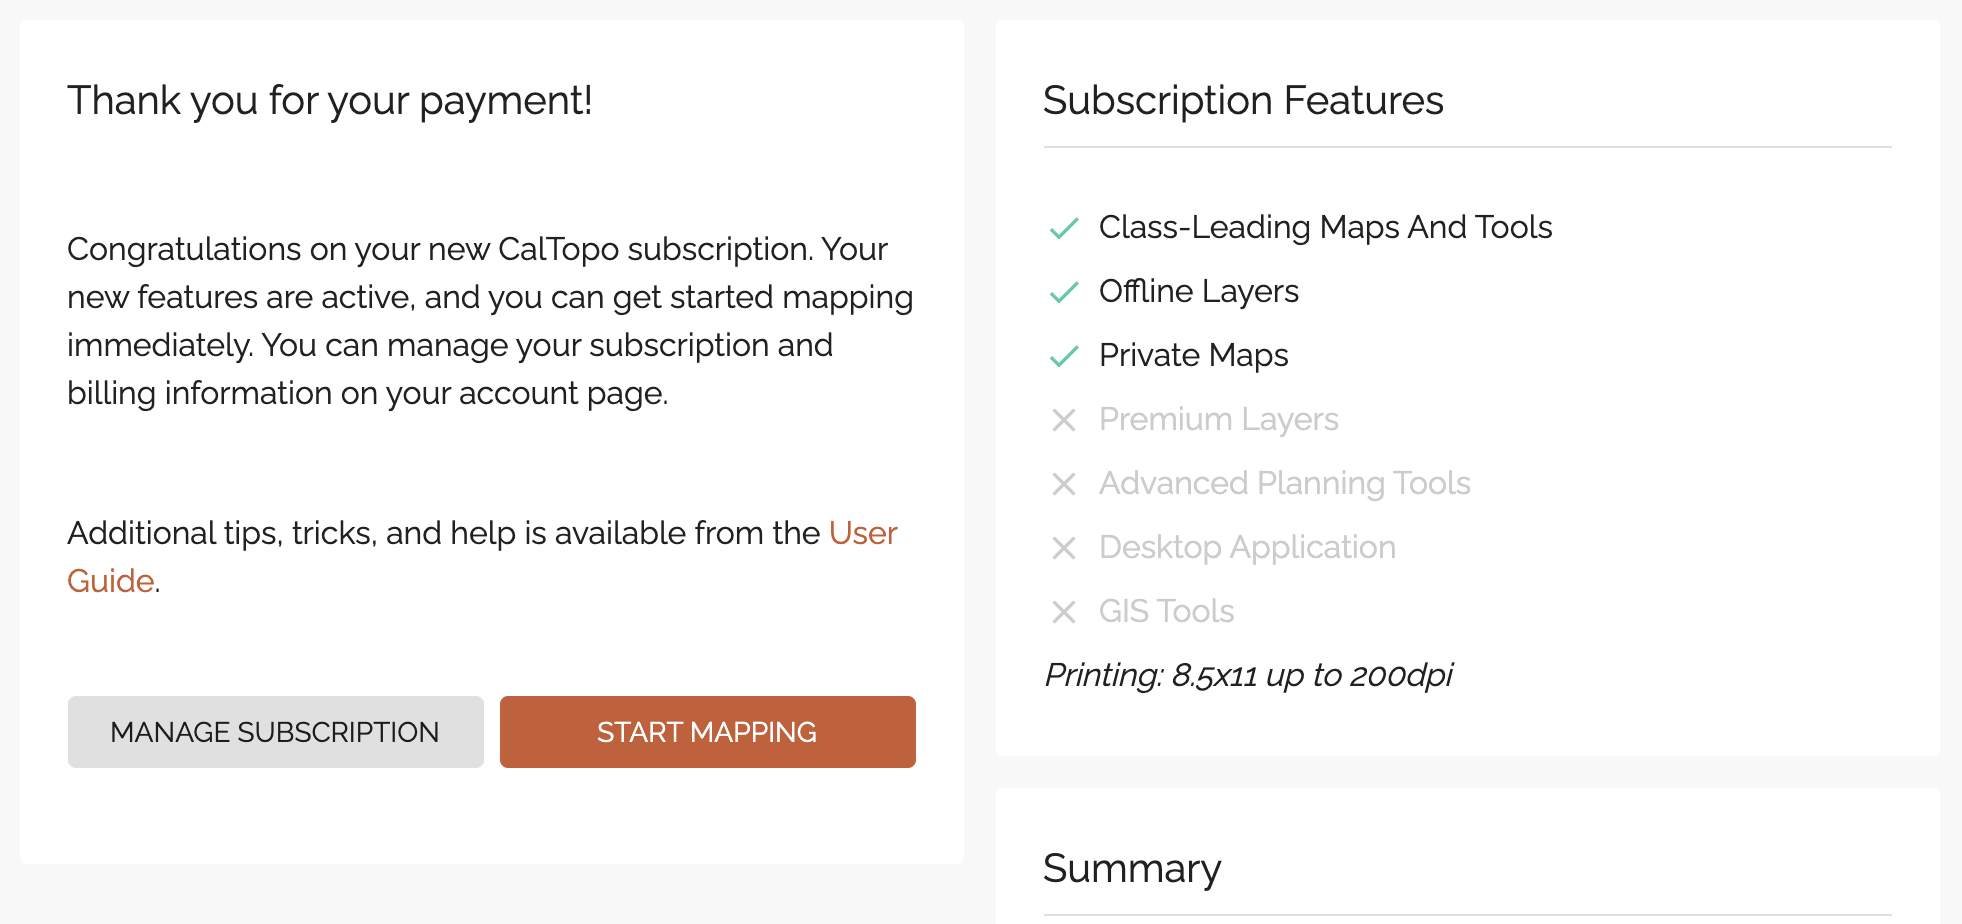
The signup process is straightforward. Here are some screenshots.
Managing Auto-Renewal and Card Updates
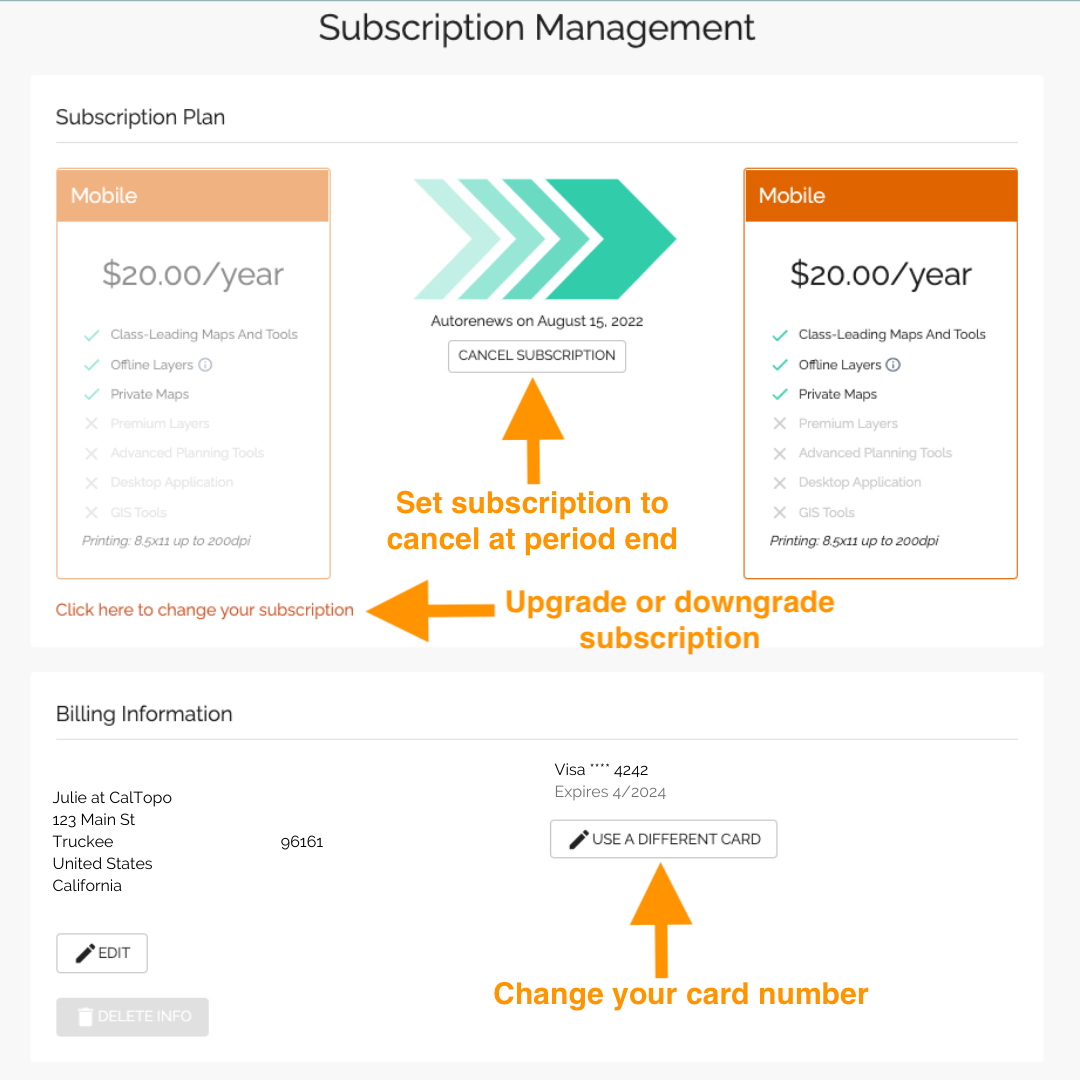
By default, all paid subscriptions renew annually. If you don’t want your subscription to renew automatically, you can set it to cancel at period end. To do this, go to Your Account, then click the Subscription Info button.
On the next page, you will see what subscription you have currently and a button to either renew your account cancel the subscription at period end. Please note: if you choose to cancel your subscription, you will not receive any notification prior to the cancellation.
Managing Your Login
If you want to log in with multiple OpenID accounts or add another email address to your CalTopo account, follow these steps carefully:
- Create a new Free CalTopo account using the new email address you want to add.
When you are logged out, go to caltopo.com/join to create the account. - Contact CalTopo support by emailing help@caltopo.com.
- Verify ownership:
- CalTopo will send a confirmation email to the email address that was not used to send the request.
- They will also reply to your original email.
- Respond to both emails to confirm ownership of both accounts.
- Specify your primary email:
- Indicate which email address you want to use as your primary account. The primary email is where we send all important account information.
Important: Only use email addresses that you own. This process ensures your accounts are linked and cannot be undone.