Working with Markers
in this lesson
Markers, waypoints, points, dots, flag, indicator: there are many names for these objects. A marker is simply a point object. It is a single point on the map, at a given location, elevation, and aspect. They are vector objects, and thus represented by coordinates in an X,Y system plotted onto the surface of the earth.
Topics on this Page:
Adding a Marker to a Map
There are several ways to add a marker, or most any object, to your map on the web app.
- Use the +Add button at the top of the objects side bar (if the sidebar is open).
- If the left side bar is closed, there is an orange + sign in a circle on the left side of the map
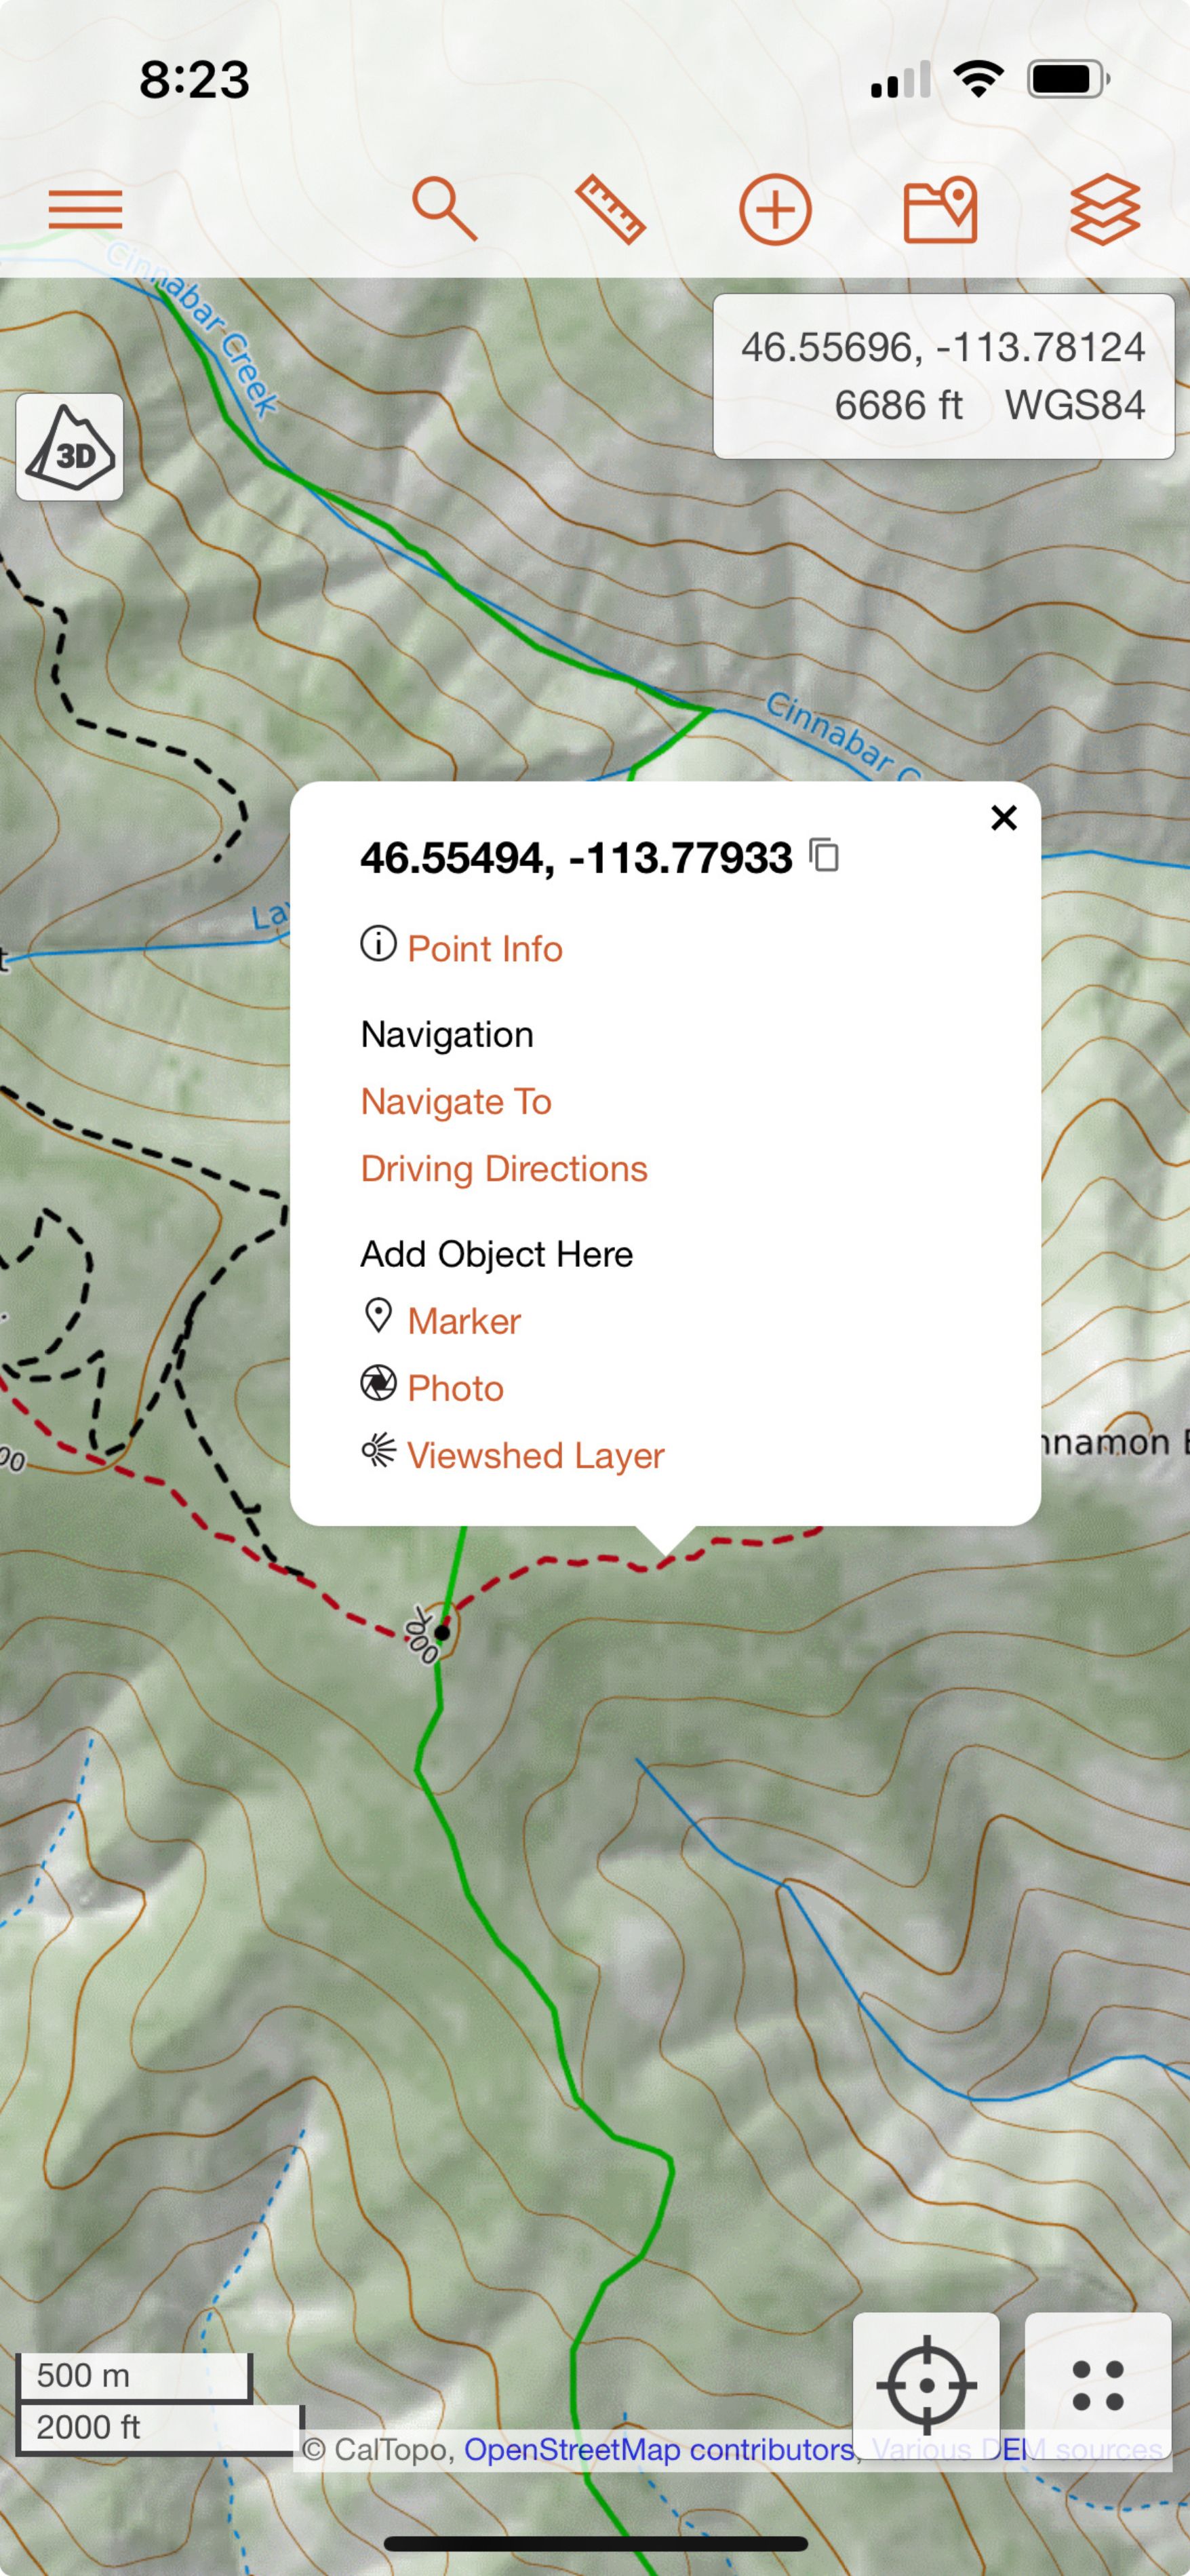
- Right click on the map at the point you want to add the marker, and choose "marker" under "add object here."
- Use the keyboard shortcut Shift-M to add a marker at the center of your current map view.
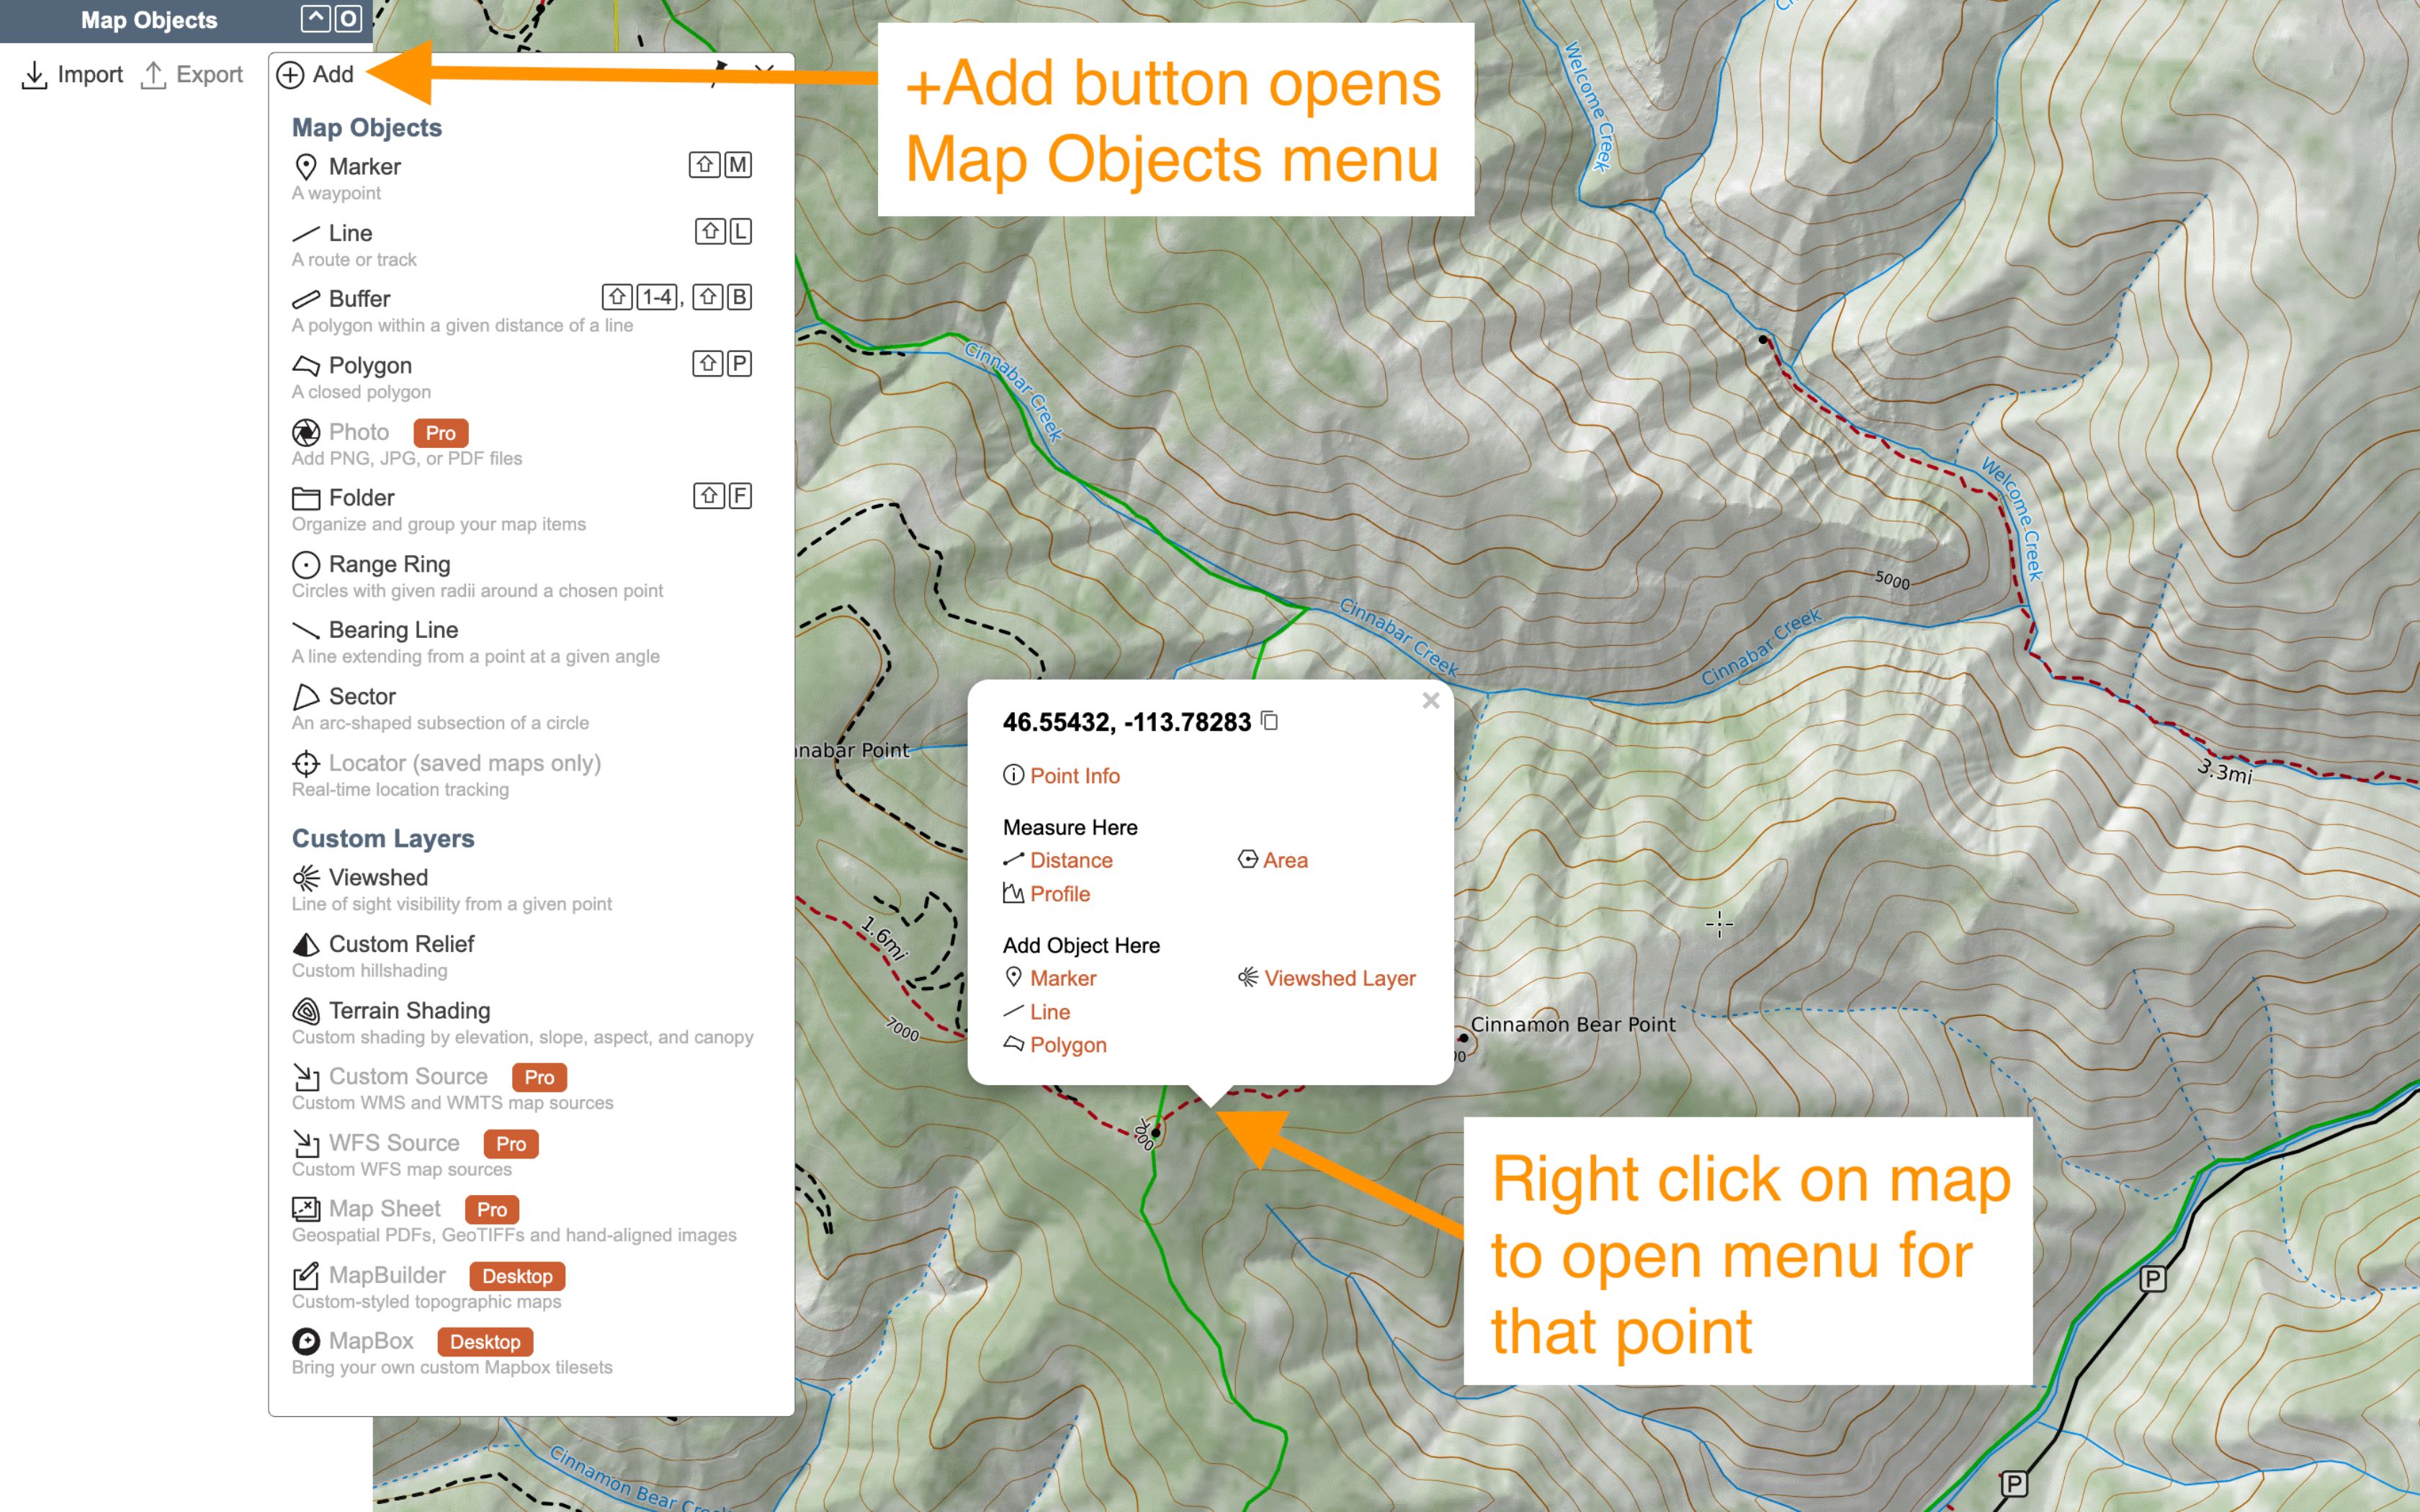
When you select any of the above options, you get a list of object choices. Select “Marker” from the choices. Two things will happen:
- You get a box in the left of the window that has some input fields. We’ll call this the edit box.
- A dot appears in the center of your map, or where you right clicked on the map.
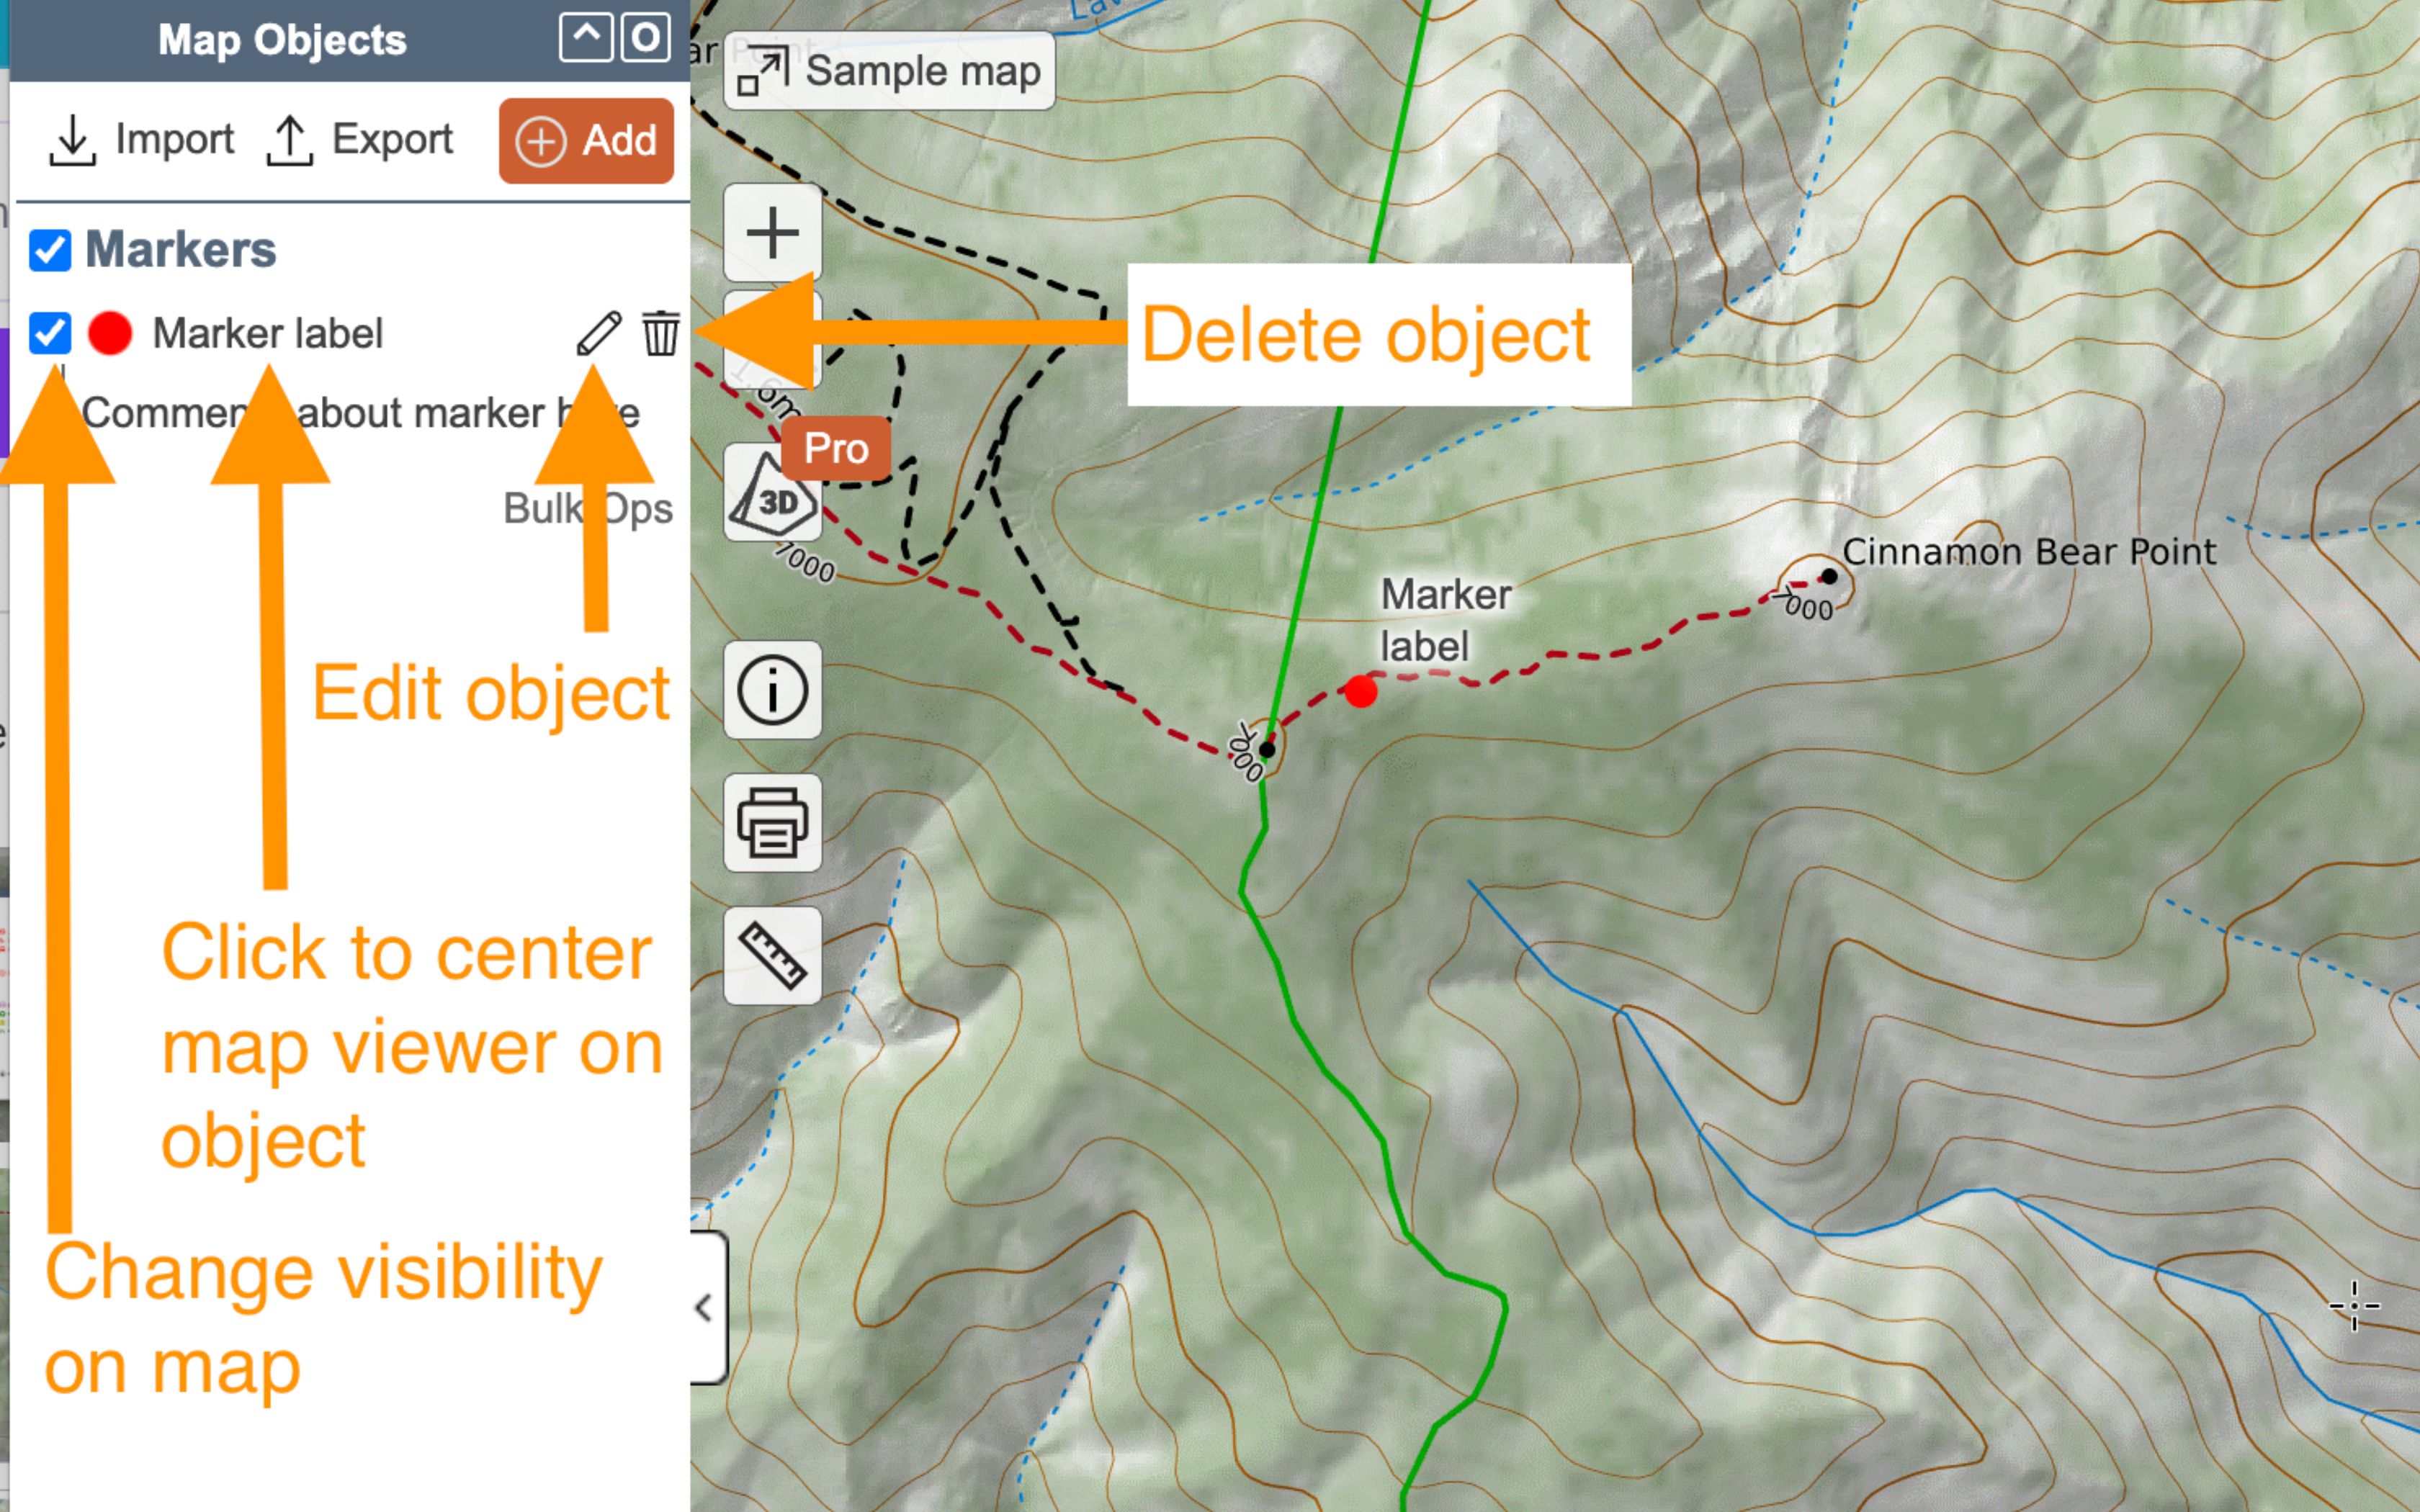
After you press OK, the marker gets listed in the left-hand Map Objects column. Continue below for more info.
Adding a Marker in the Mobile App
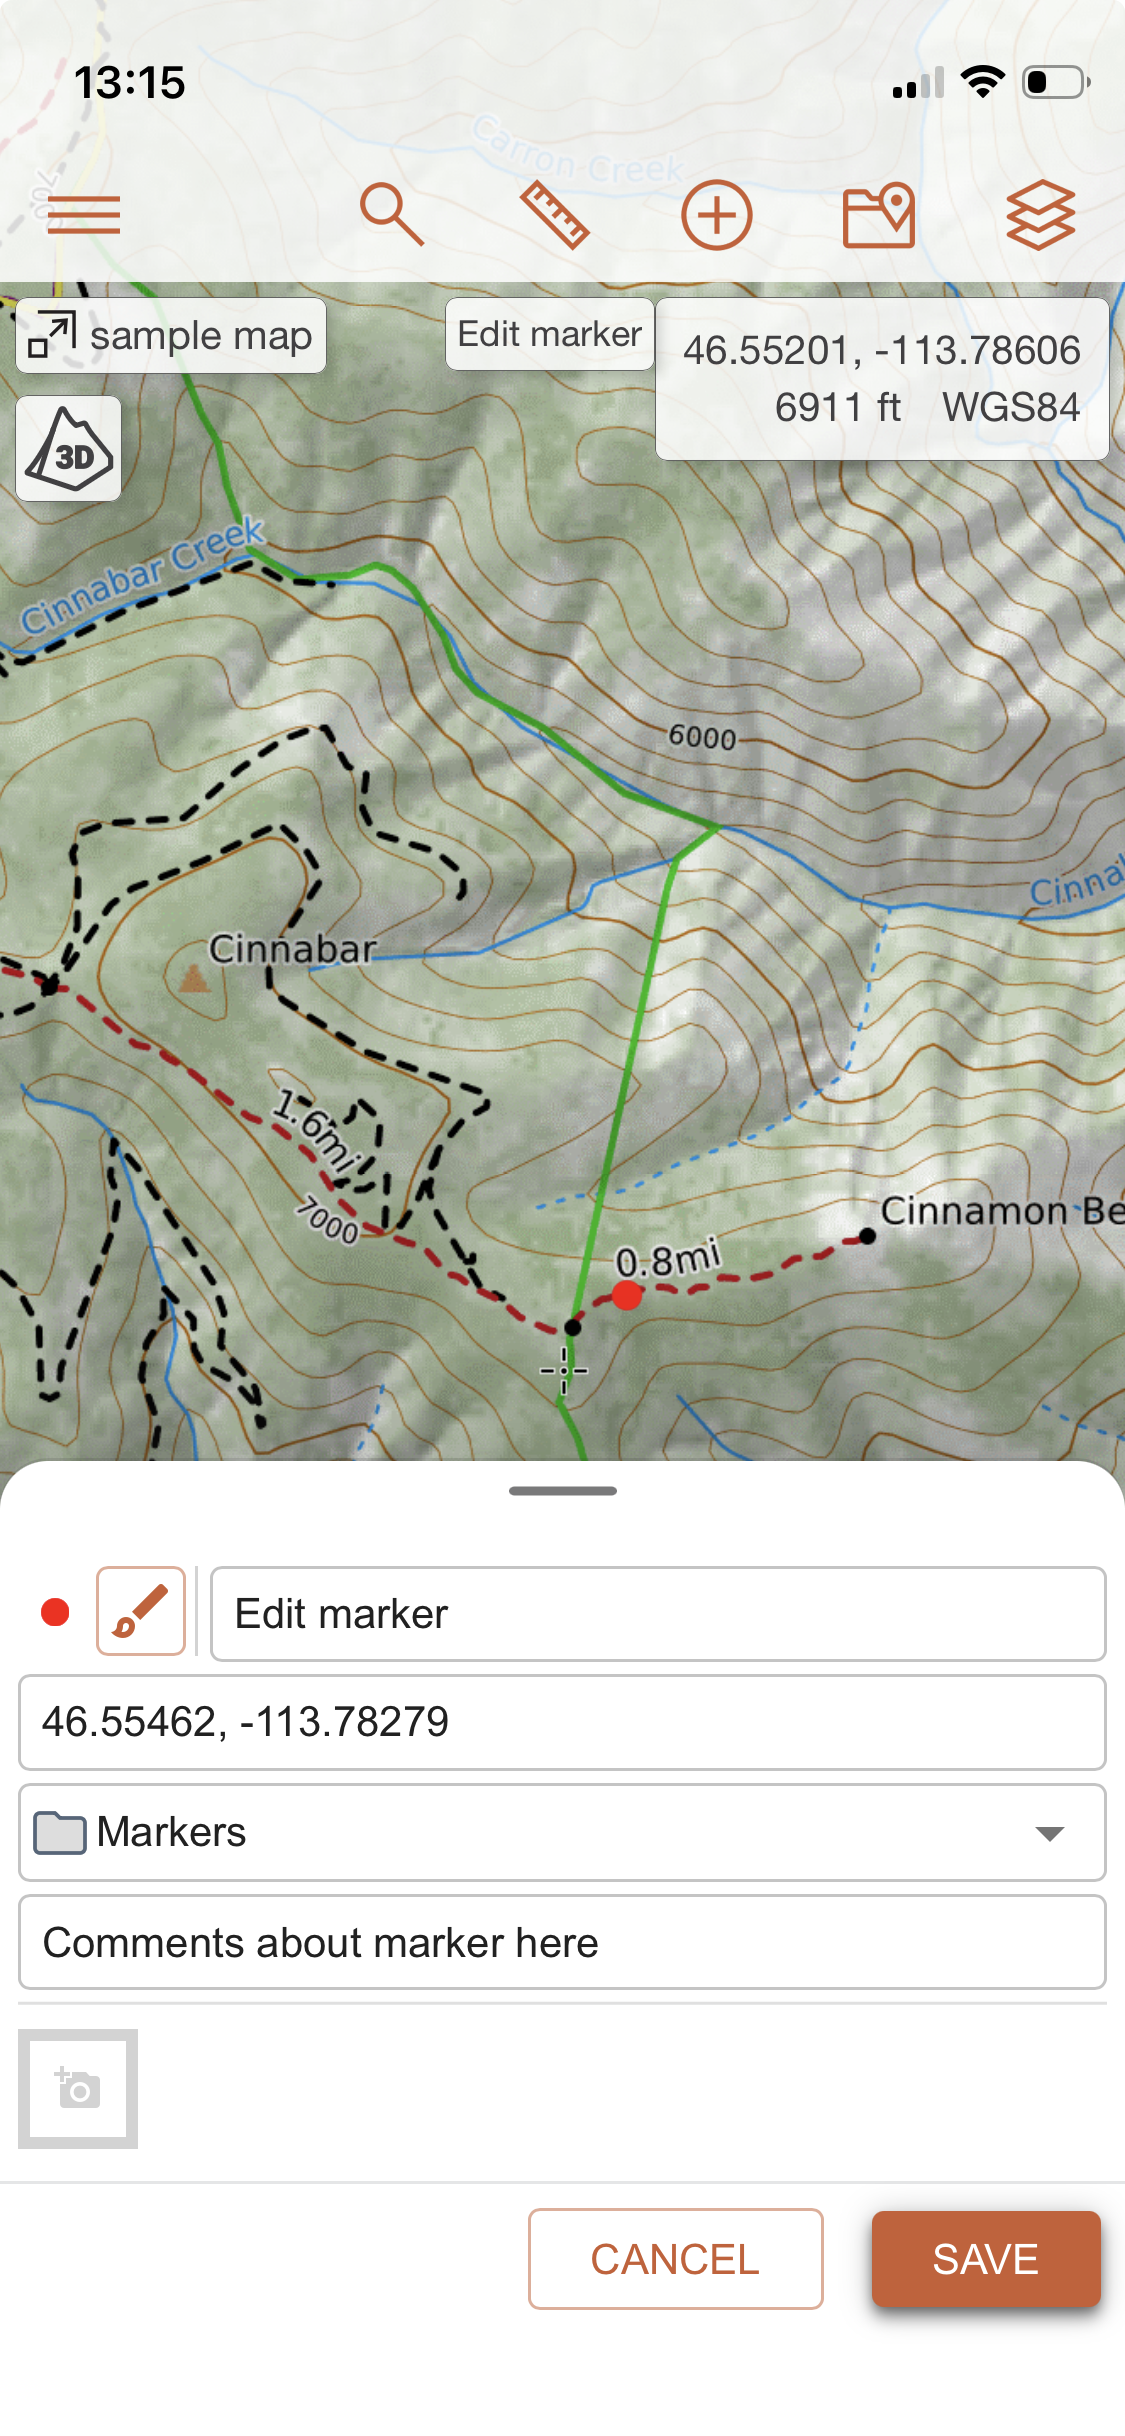
There are some slight differences to adding markers in the mobile app compared to in the web browser, but overall the process is the same. In the mobile app, you can add a marker using the Map Items Menu (center, top) or by long-pressing on the map.
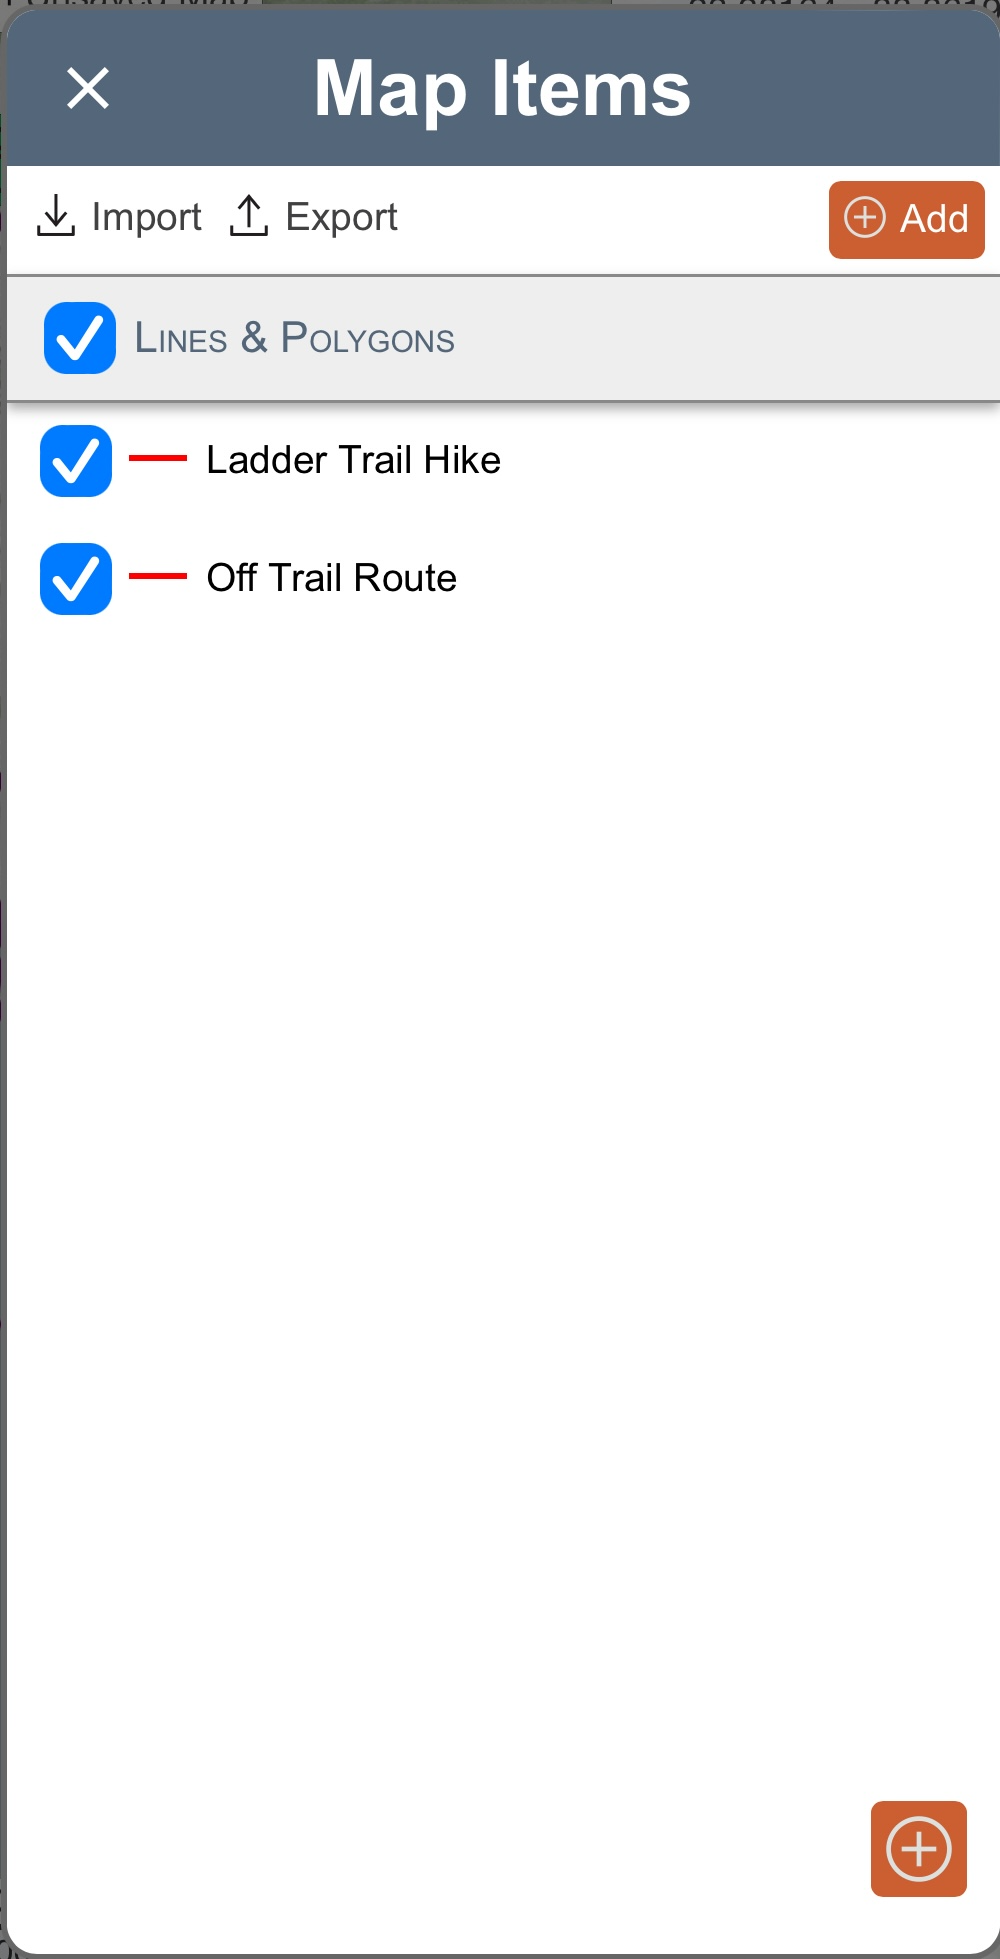
The map items page will list all of your existing map items and show folders and display choices. Use the checkbox next to each item to choose whether it displays on the map or not. To center the map on an item, click the title of that item in the list.
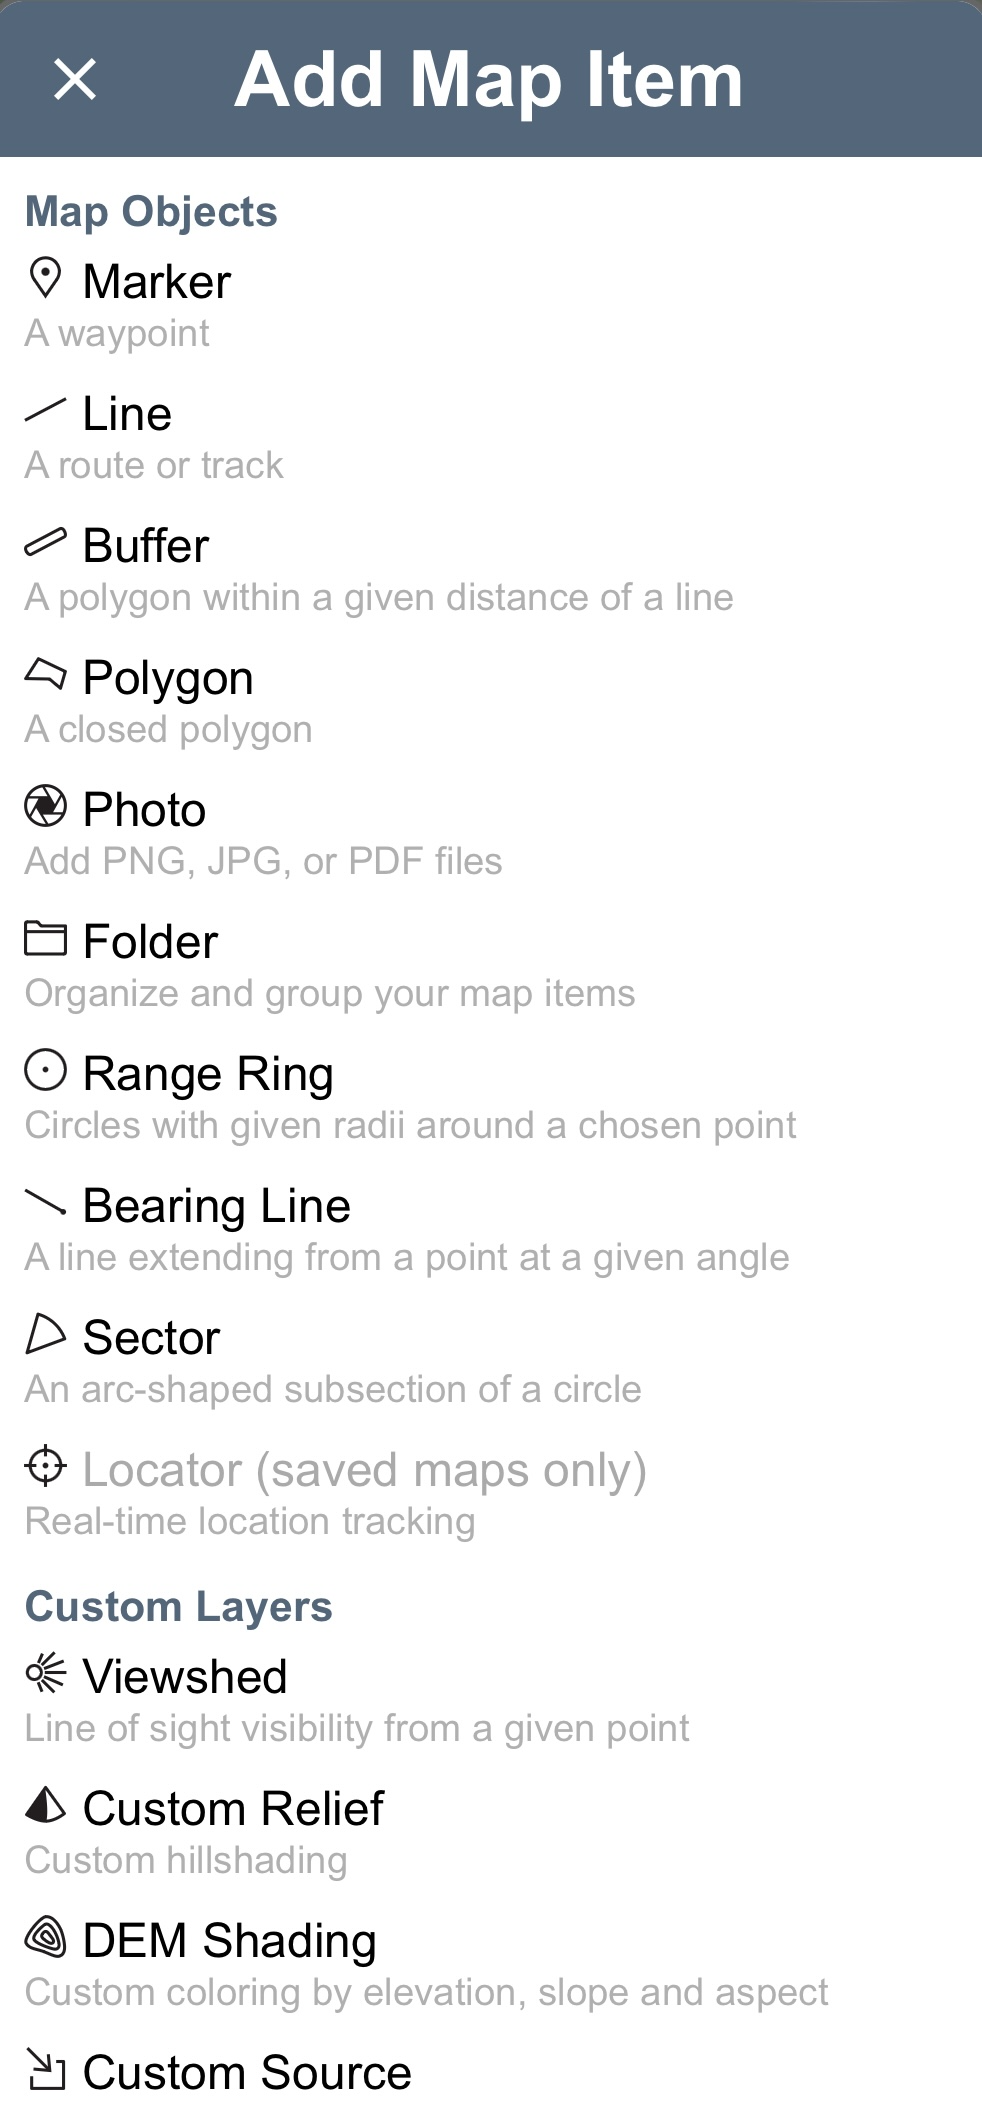
To add a new item, click on the button at the top of the screen for “+ Add Map Item.” This will open the menu in the next screen shot. Select the type of object you want to add, and this will take you back to the map viewer to edit and save that object. You can also add a marker to a particular place on the map by pressing and holding your finger on that location until the menu appears. Then choose “Add Marker” to create a point at that spot where you long-pressed.
You can also add a marker at your GPS location. See the mobile navigation page for more details.
The next steps can be completed in any order:
Moving the Marker
When you create a marker, it will either be at the center of your map view or at the point on the map that you right clicked on to add it.
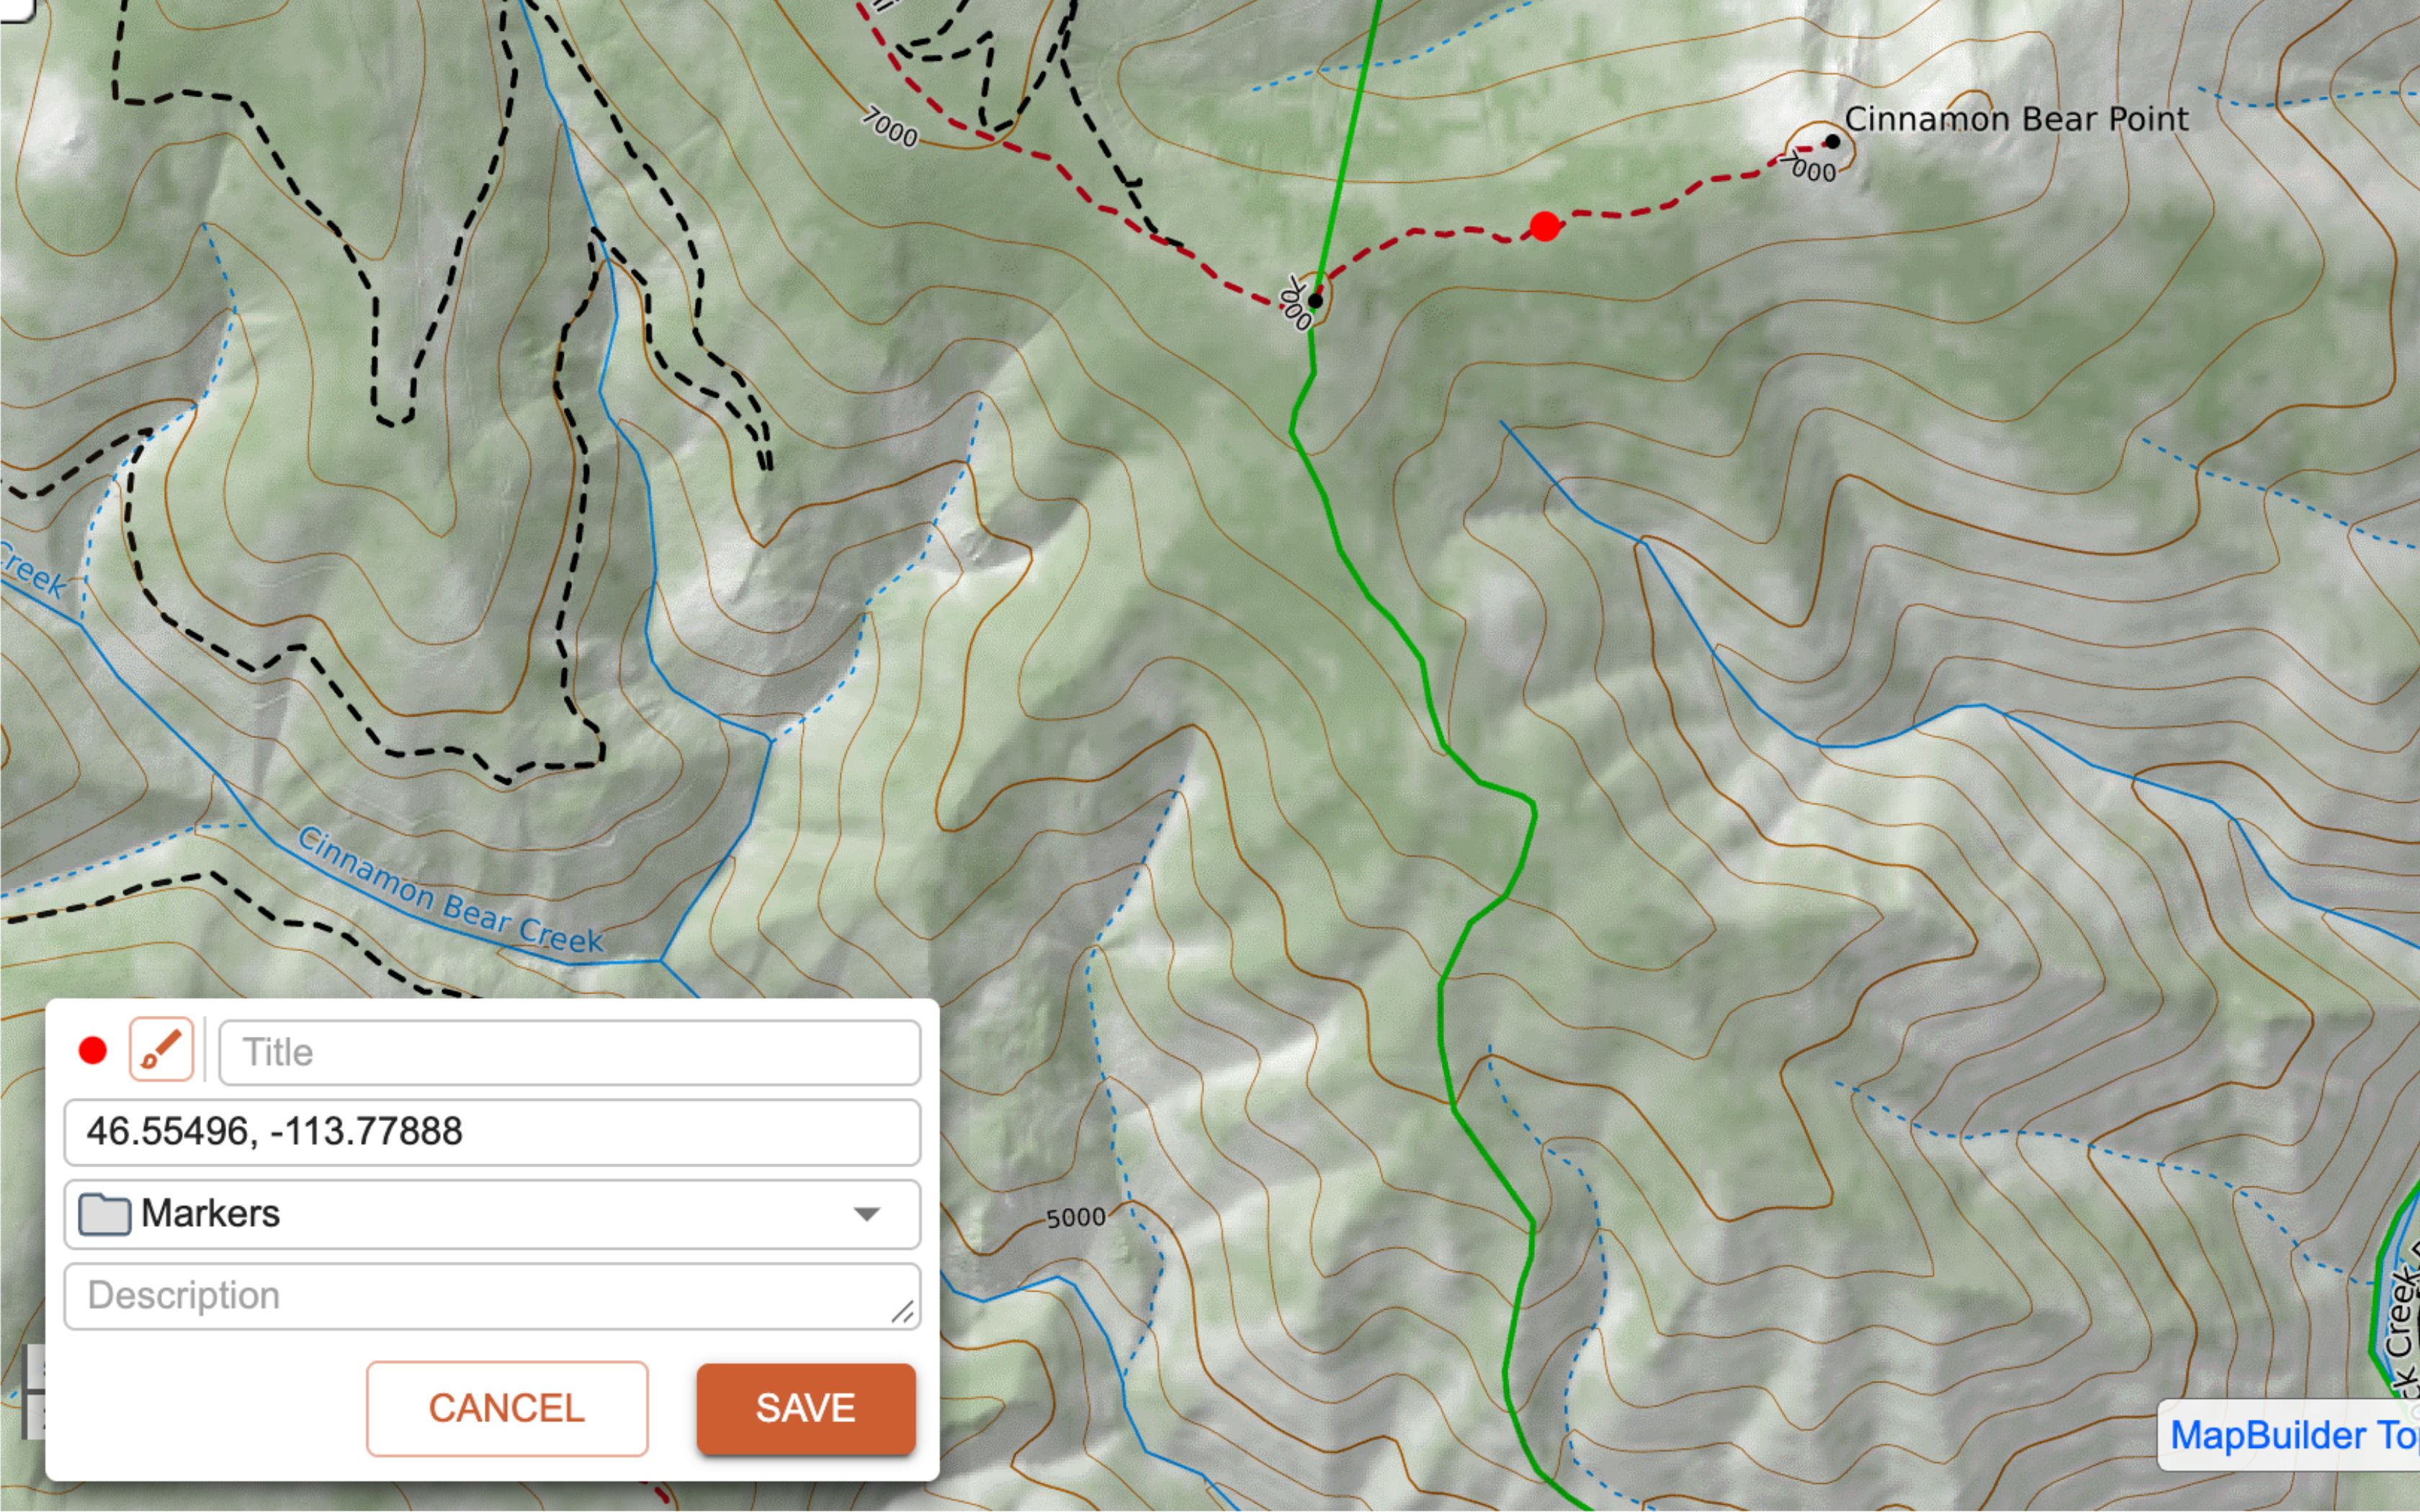
You can move the marker to a new location by either entering coordinates into the input field in the edit box, OR drag it to a new location using your mouse.
The Marker Edit Box:
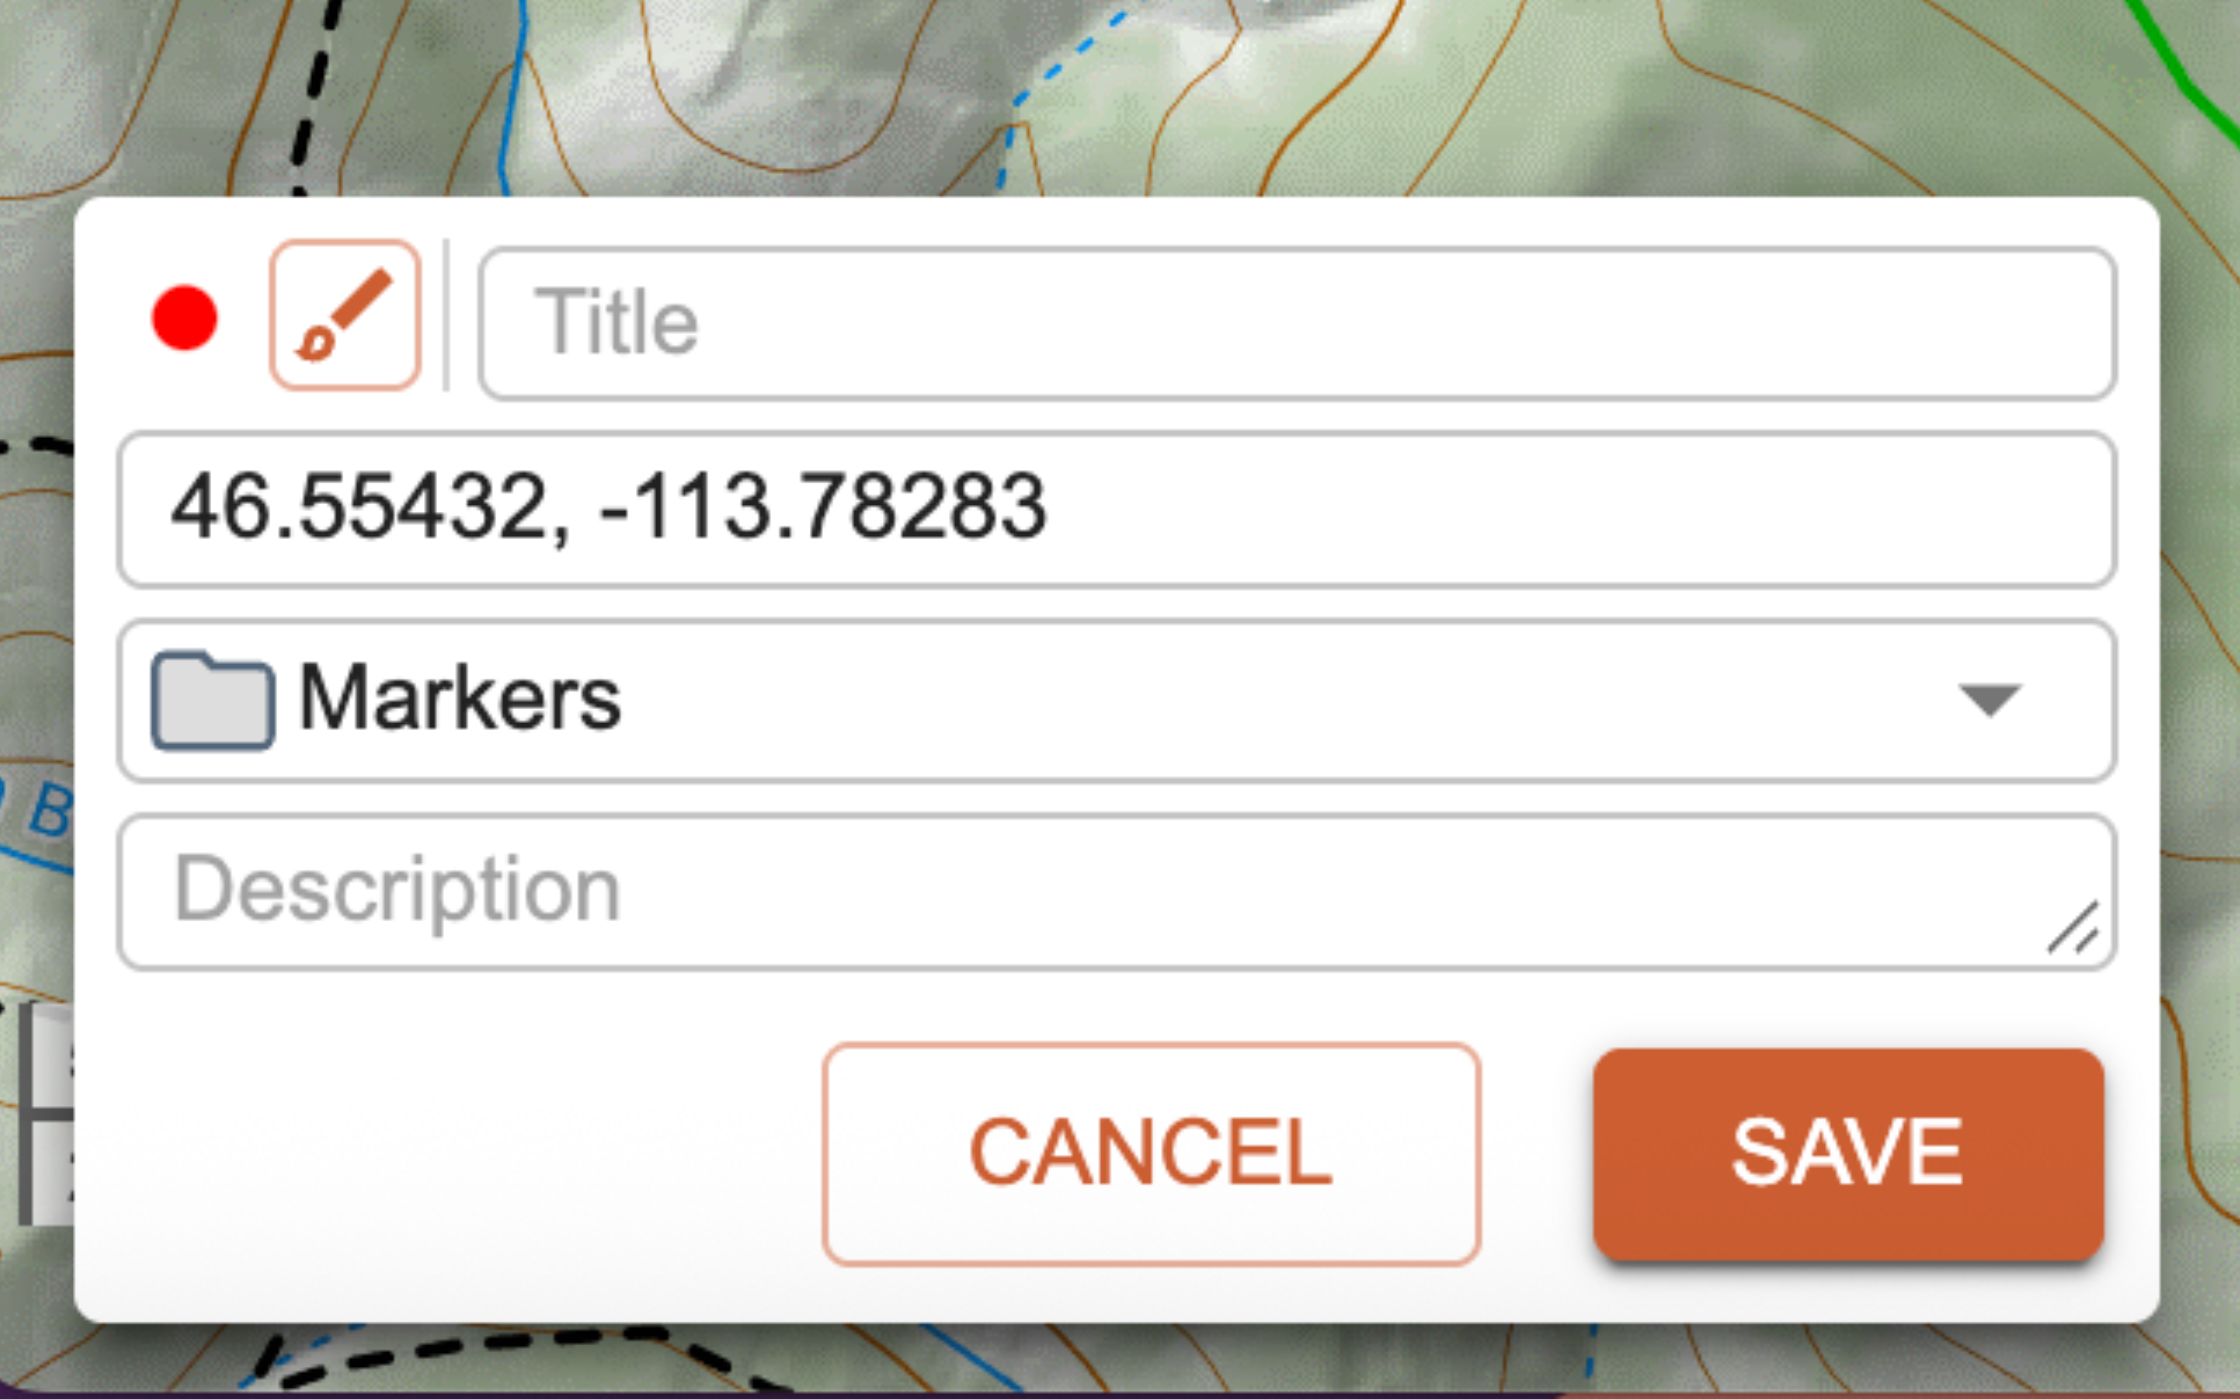
Options are as follows: marker style, title, coordinates, folder, and description. You can edit all, any, or none of the options before saving the marker. All the options can also be edited later, after creating the marker. Markers operate the same way on mobile as they do on the web or desktop program.
- Title: add a title or name to your marker. This helps identify the marker from others in the list, and allows you to display a label with the marker on the map.
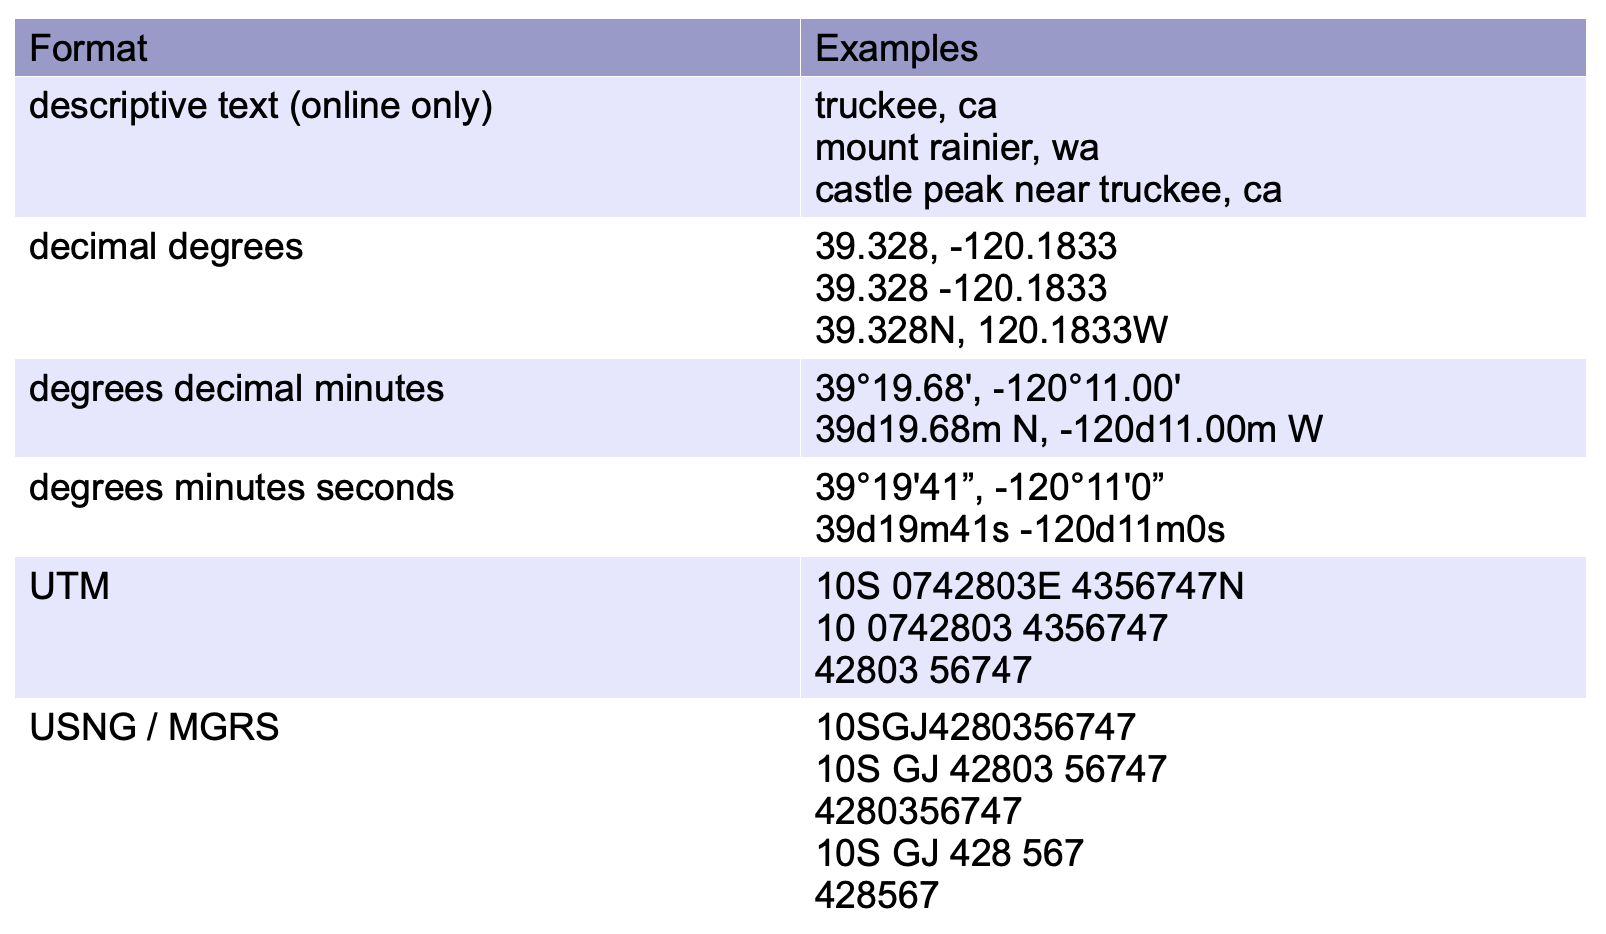
- Coordinates: display the current marker location. You can type or paste coordinates into this box to move the marker. Next to the coordinates field is gray text indicating the datum of the coordinates displayed. Coordinates will display in this box in the primary format that you have set in the config menu. However, you can enter any format of coordinates into this box to move the marker to that location. More information about coordinate formats can be found in the Config page.
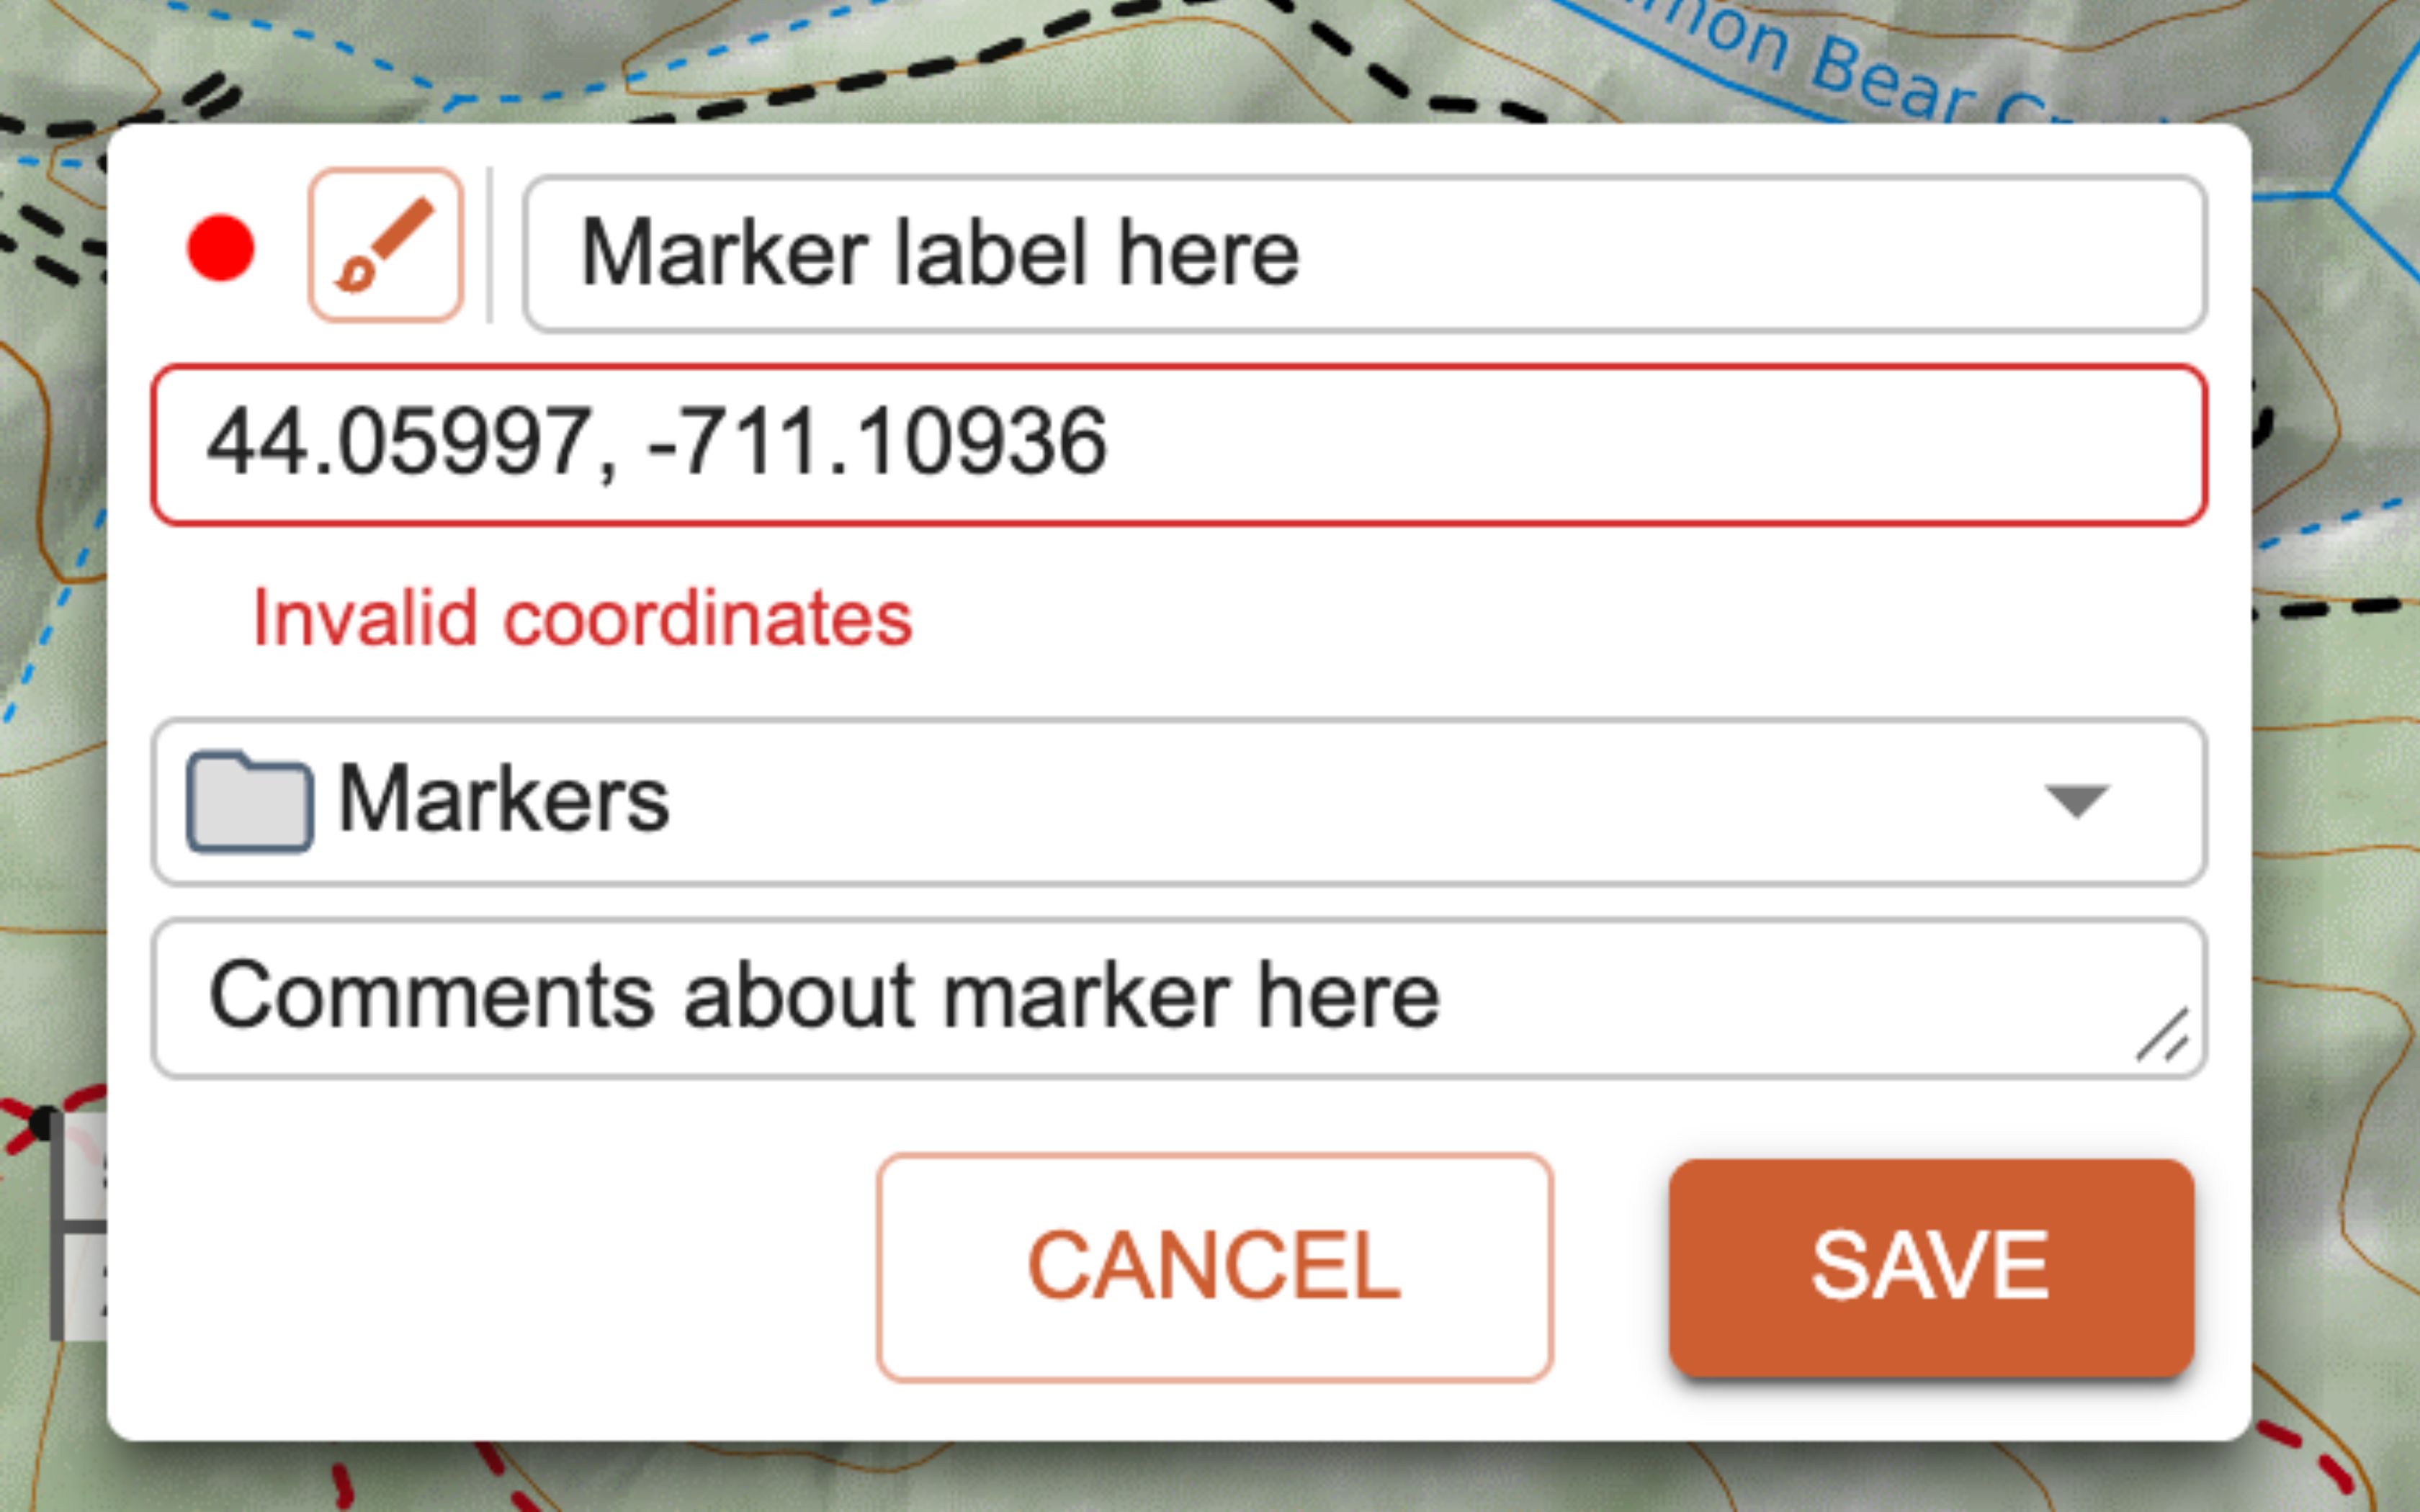
If you enter coordinates by hand (type or paste), CalTopo will confirm that the coordinates are in a valid format. f you receive an “Invalid coordinates” message,you need to fix the coordinates so that they are in a recognizable format.
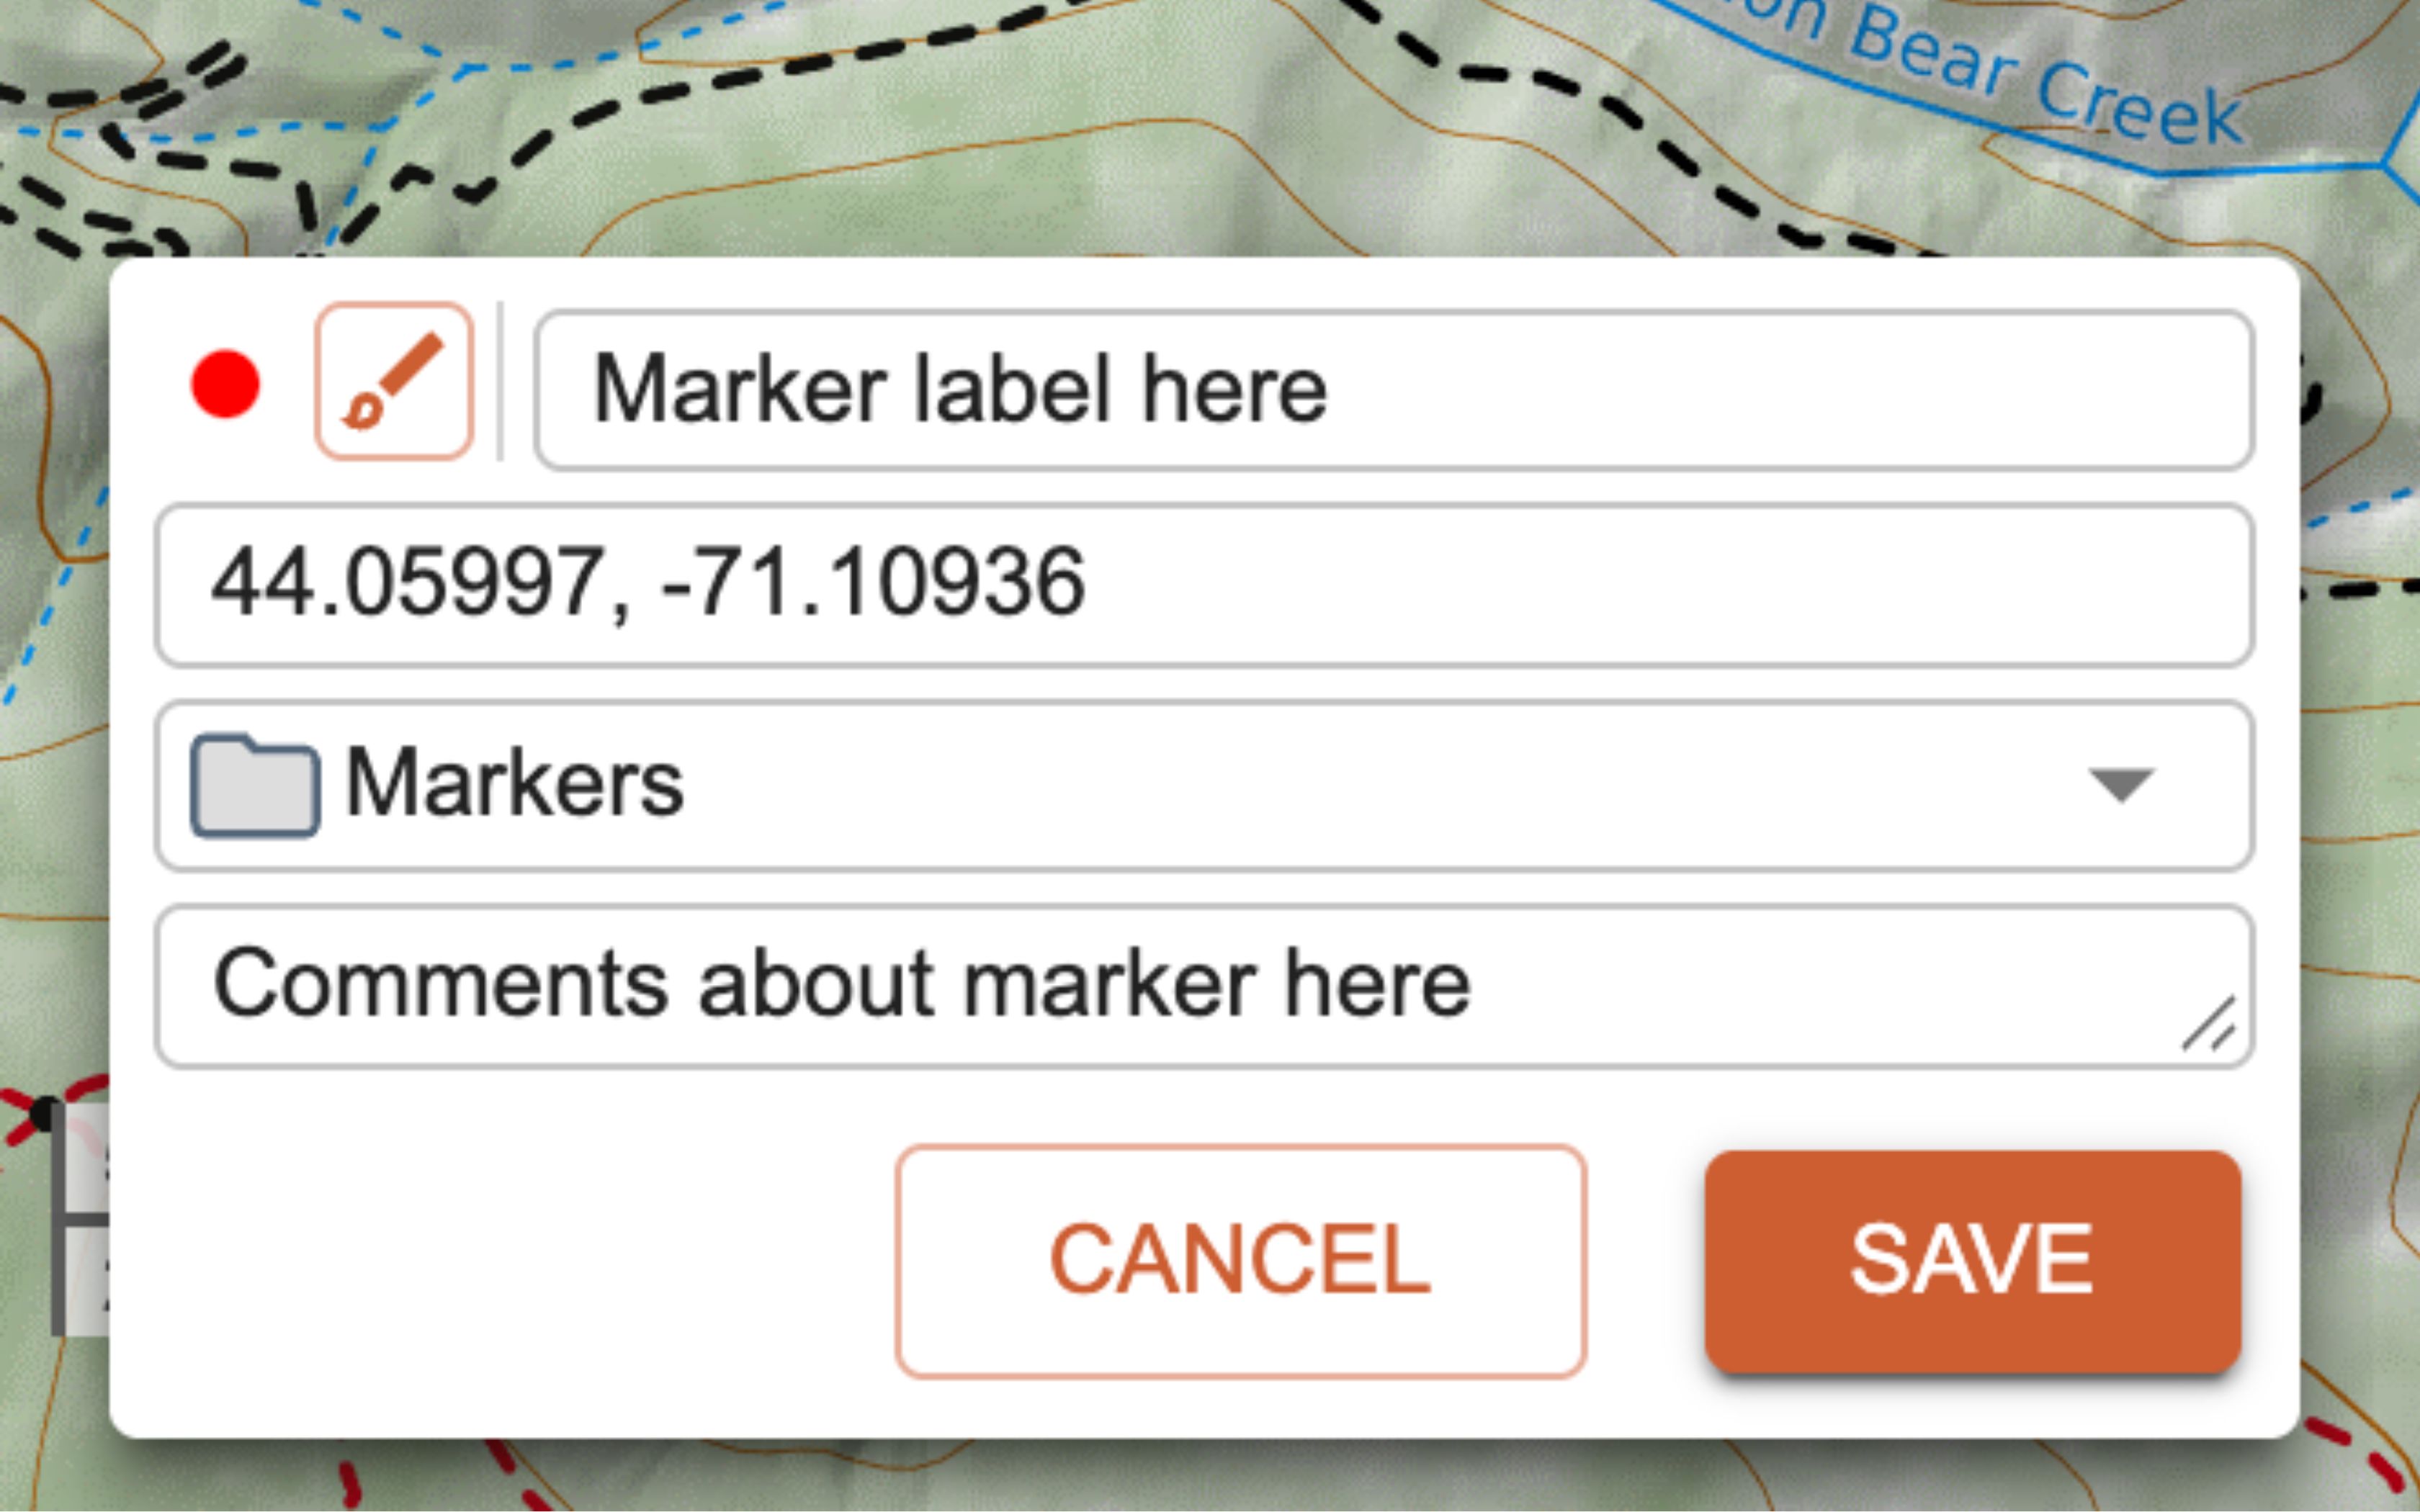
- Folder: New markers are automatically placed in a Markers folder, which is created when you create a marker. You can create your own folders and use this box to move the marker to that folder. For more information about folders, see the data management page. Style: click on the icon to change the display style/icon of your marker. A new box appears with a wide selection of available icons. The included icon selections are aimed primarily at outdoor recreation or incident management such as search and rescue or wildland fire.
- Description: add any notes about the marker or location. These show up below the marker in the left hand menu under the marker name.
- Marker style: To change the style of the icon, select the paintbrush icon next to the Title. This will open the Edit Style dialog (also called the Style Picker). A preview of the marker’s color, size and symbol appears in the upper right. Change the marker’s attributes in the relevant section as desired.
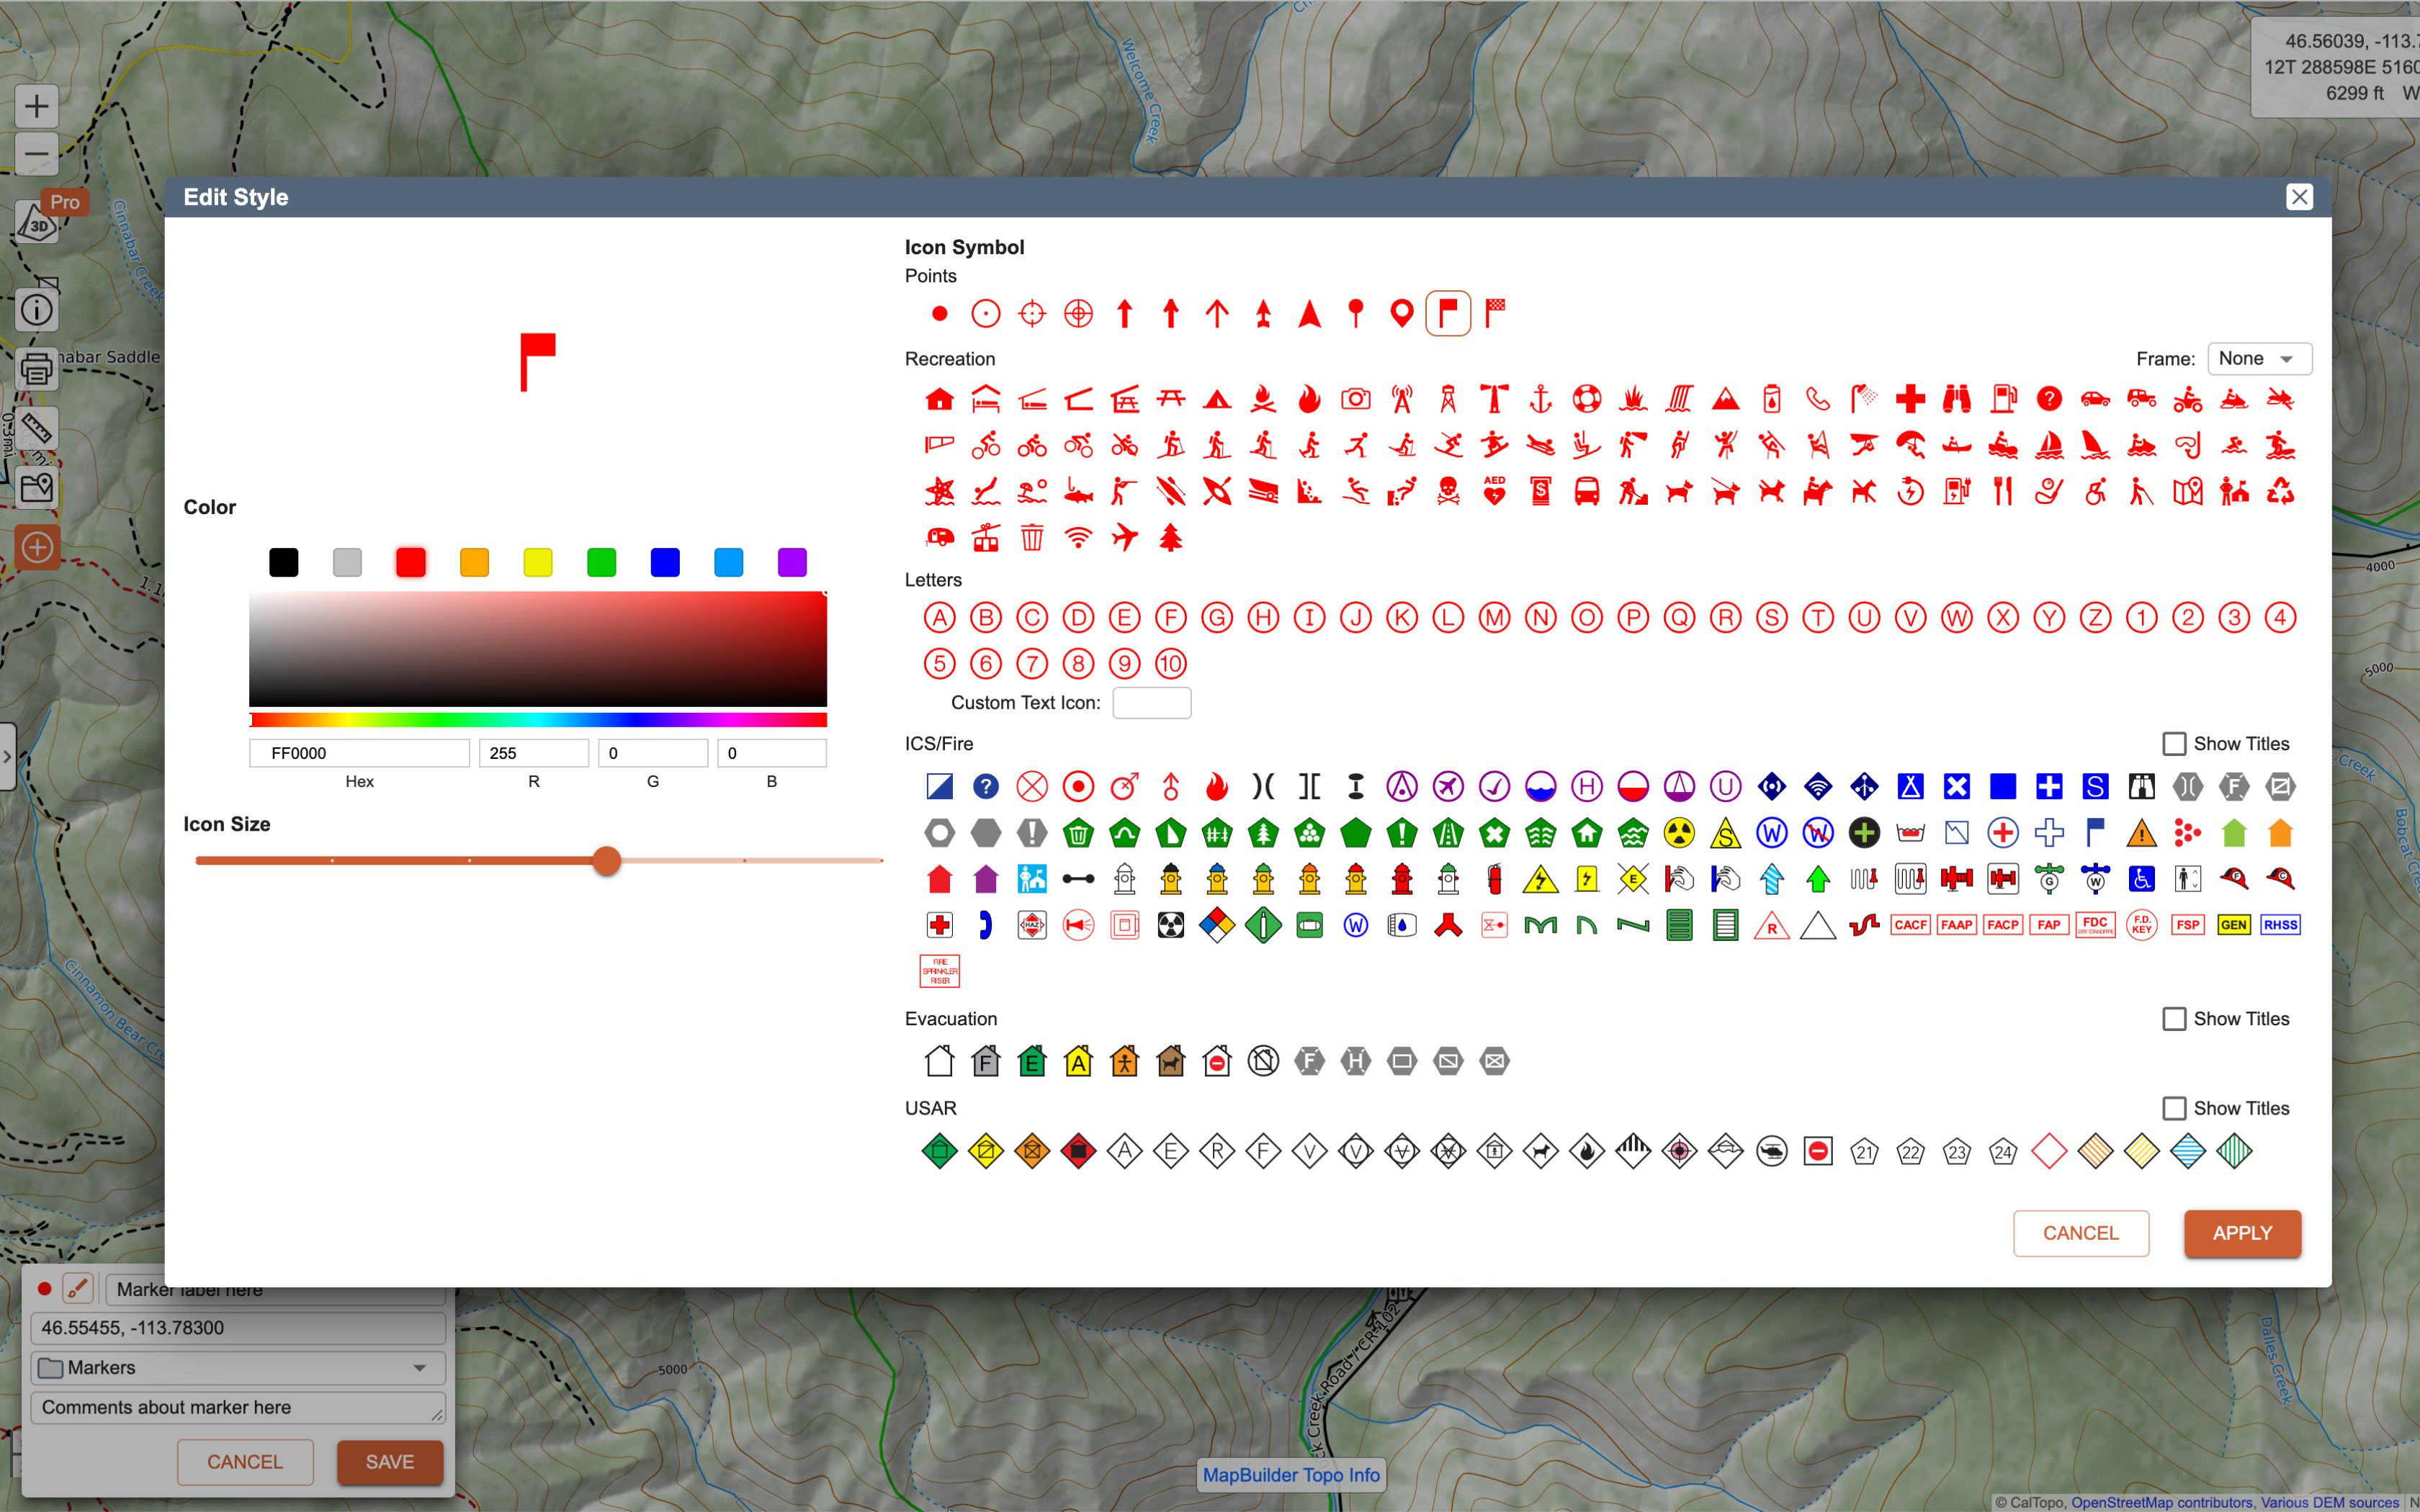
Pro level and higher subscribers can add their own custom icons to their accounts, and those will appear at the bottom of this window. See the accounts page for instructions.
- OK: will close the edit box and save your changes to the marker. Two things will happen on the page: If this is the first object you add to the map, a dialog will pop up with the map. The marker appears in a list on the left hand side of the window, in the objects side menu. It is in a new folder called Markers. If you are in the mobile app, the marker will show up in the Map Objects menu.
- Cancel: will close the edit box and not save your marker. Cancel also allows you to start editing your marker, then choose not to and revert your changes to the previous saved state.
Editing the Marker after creation:
Once you have added a marker and it appears in the left side menu, you have more options.
The pencil icon next to the marker name will open the edit box for that marker, and also center the marker in the map viewer.
The trash will delete the marker, after you confirm the action in a popup box.
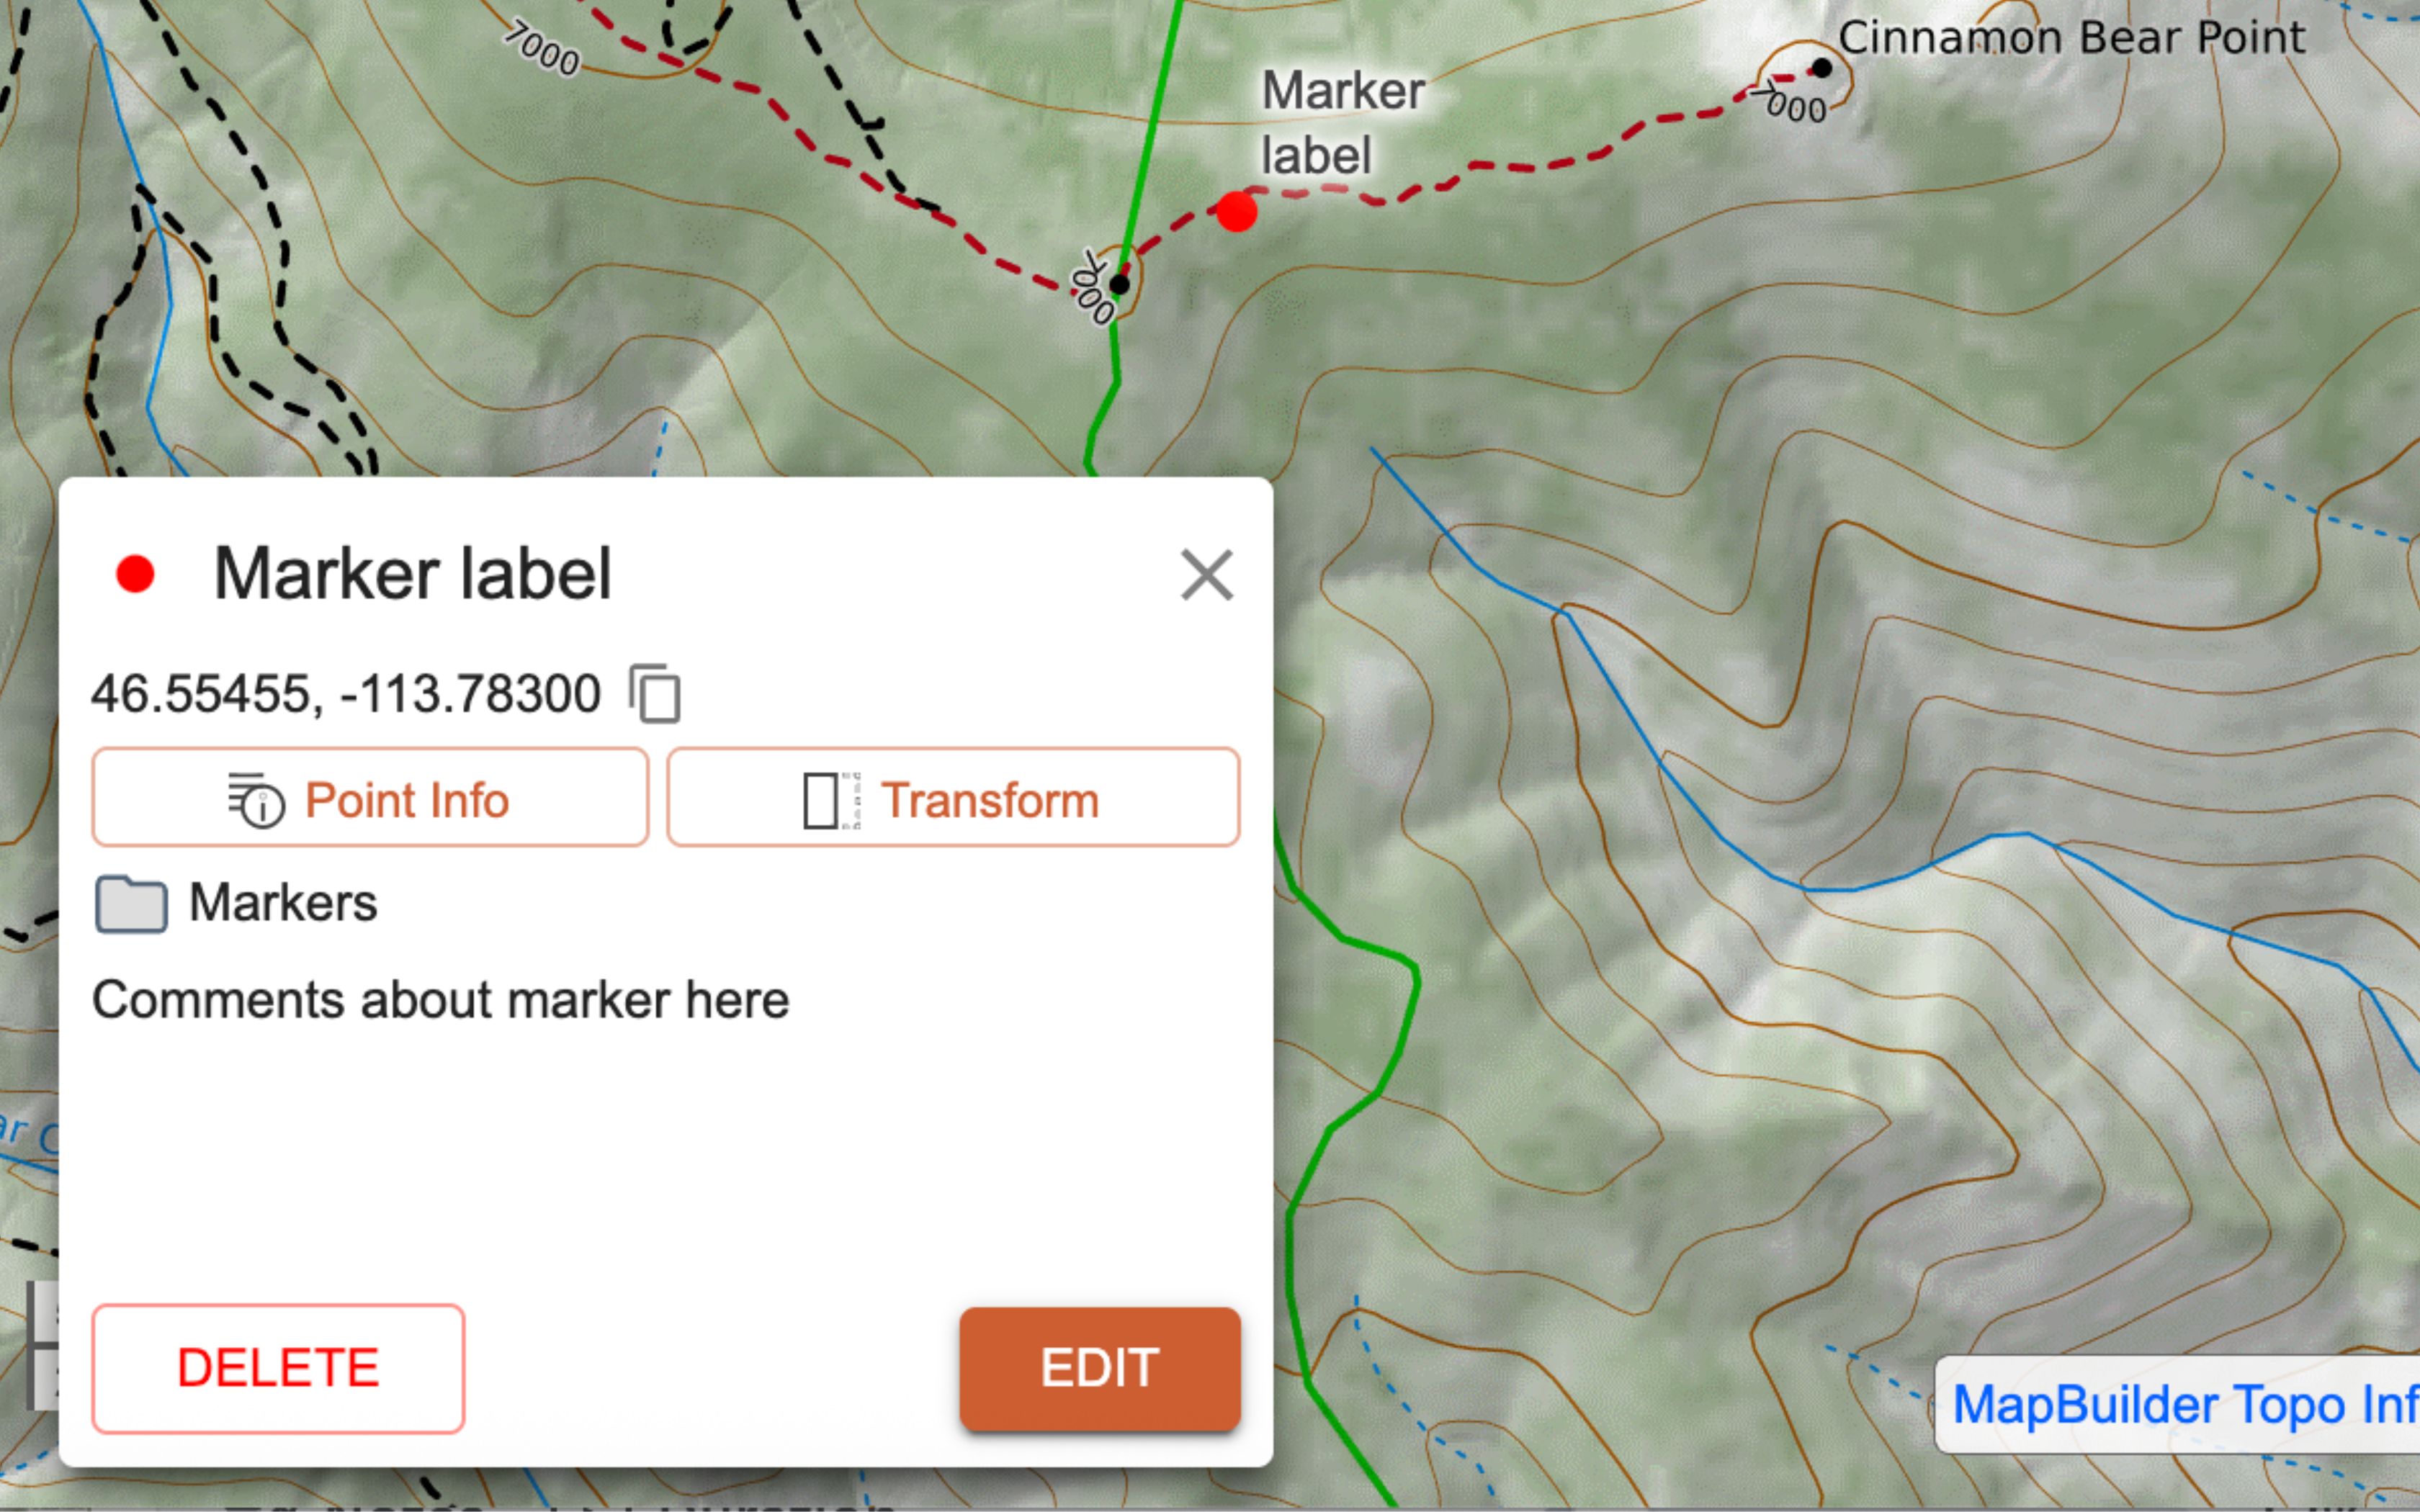
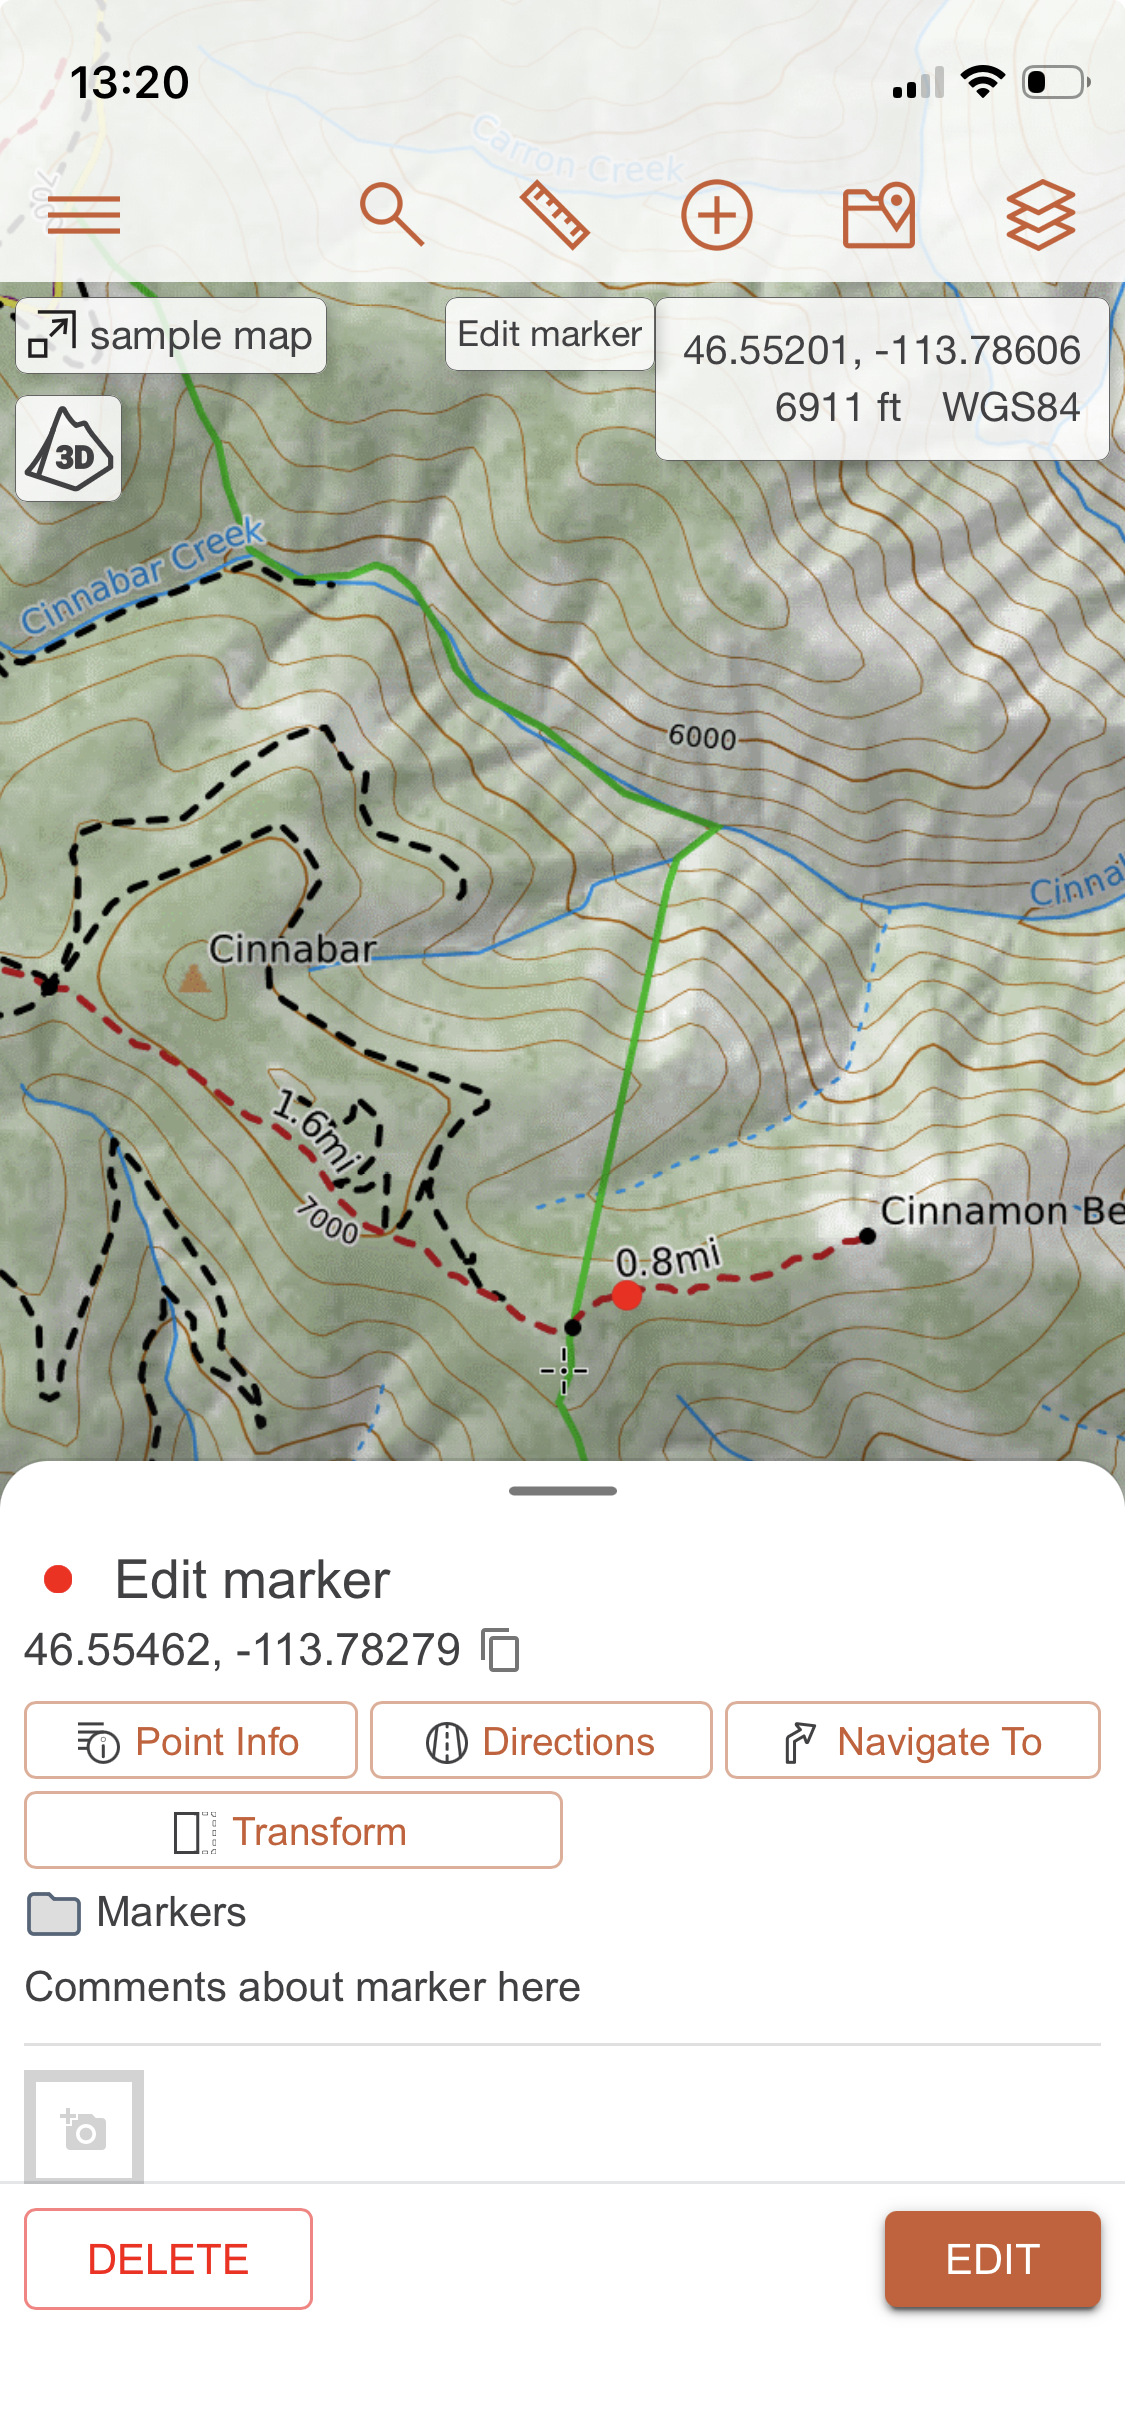
To view the object in the center of the map, click on the object name. This also opens a pop-up on the map for that object which shows:
- The object name,
- Coordinates in the primary format you have set in the config menu,
- Actions you can take on the marker (Point Info or Transform)
- The folder that the marker belongs to
- The notes you added to the marker,
- Edit link that will open the edit box,
-
And an option for deleting the marker.

Editing Markers in the Mobile App
To edit markers in the mobile app, you open the edit box by clicking on the marker on the map and selecting “edit” or by going to the Map Object Menu, and clicking on the name of the object you want to edit, which will center the object on the map and display the pop up box with the link to edit.
- When the edit box is open, you can manually move the marker by holding your finger on it and dragging it to a new location.
- In the map objects menu on mobile, you can turn each map item visibility on and off at any time. You do not need to set this function in a separate menu.
- Clicking on the marker on the map in mobile does not have as extensive a menu as it does in the web app. You can edit the marker, view the position and elevation info, navigate to the point, or delete the marker.