Team Maps and Tracks
in this lesson
Topics on this Page:
Working with Team Maps
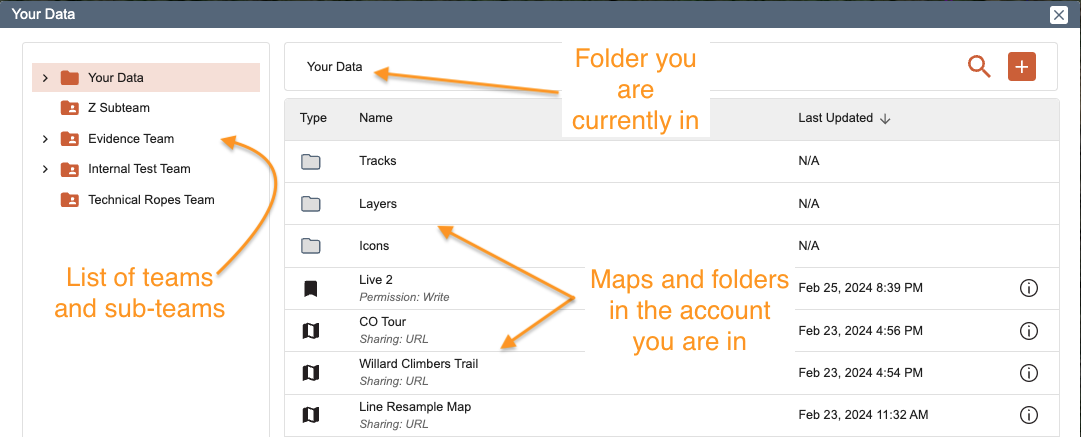
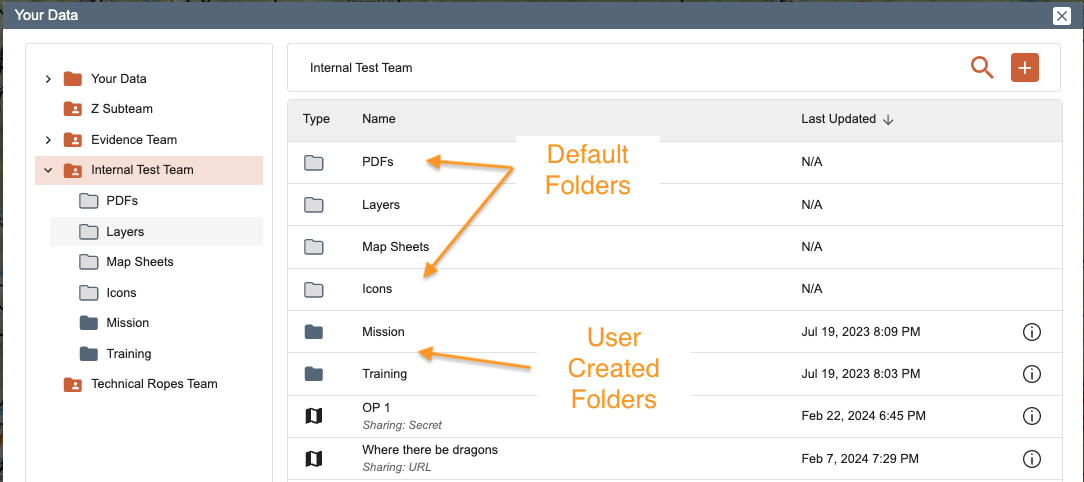
To access maps, login and click on the orange Your Data button on the upper right side of the map viewer, a dialog box will open with a number of folders in the left column, the default folder that is open is Your Data and your folders and maps are listed in the main part of the dialog box. To see the folders and maps that were associated with your team account click the team name in the folder list in the left column.
Accessing Team Maps
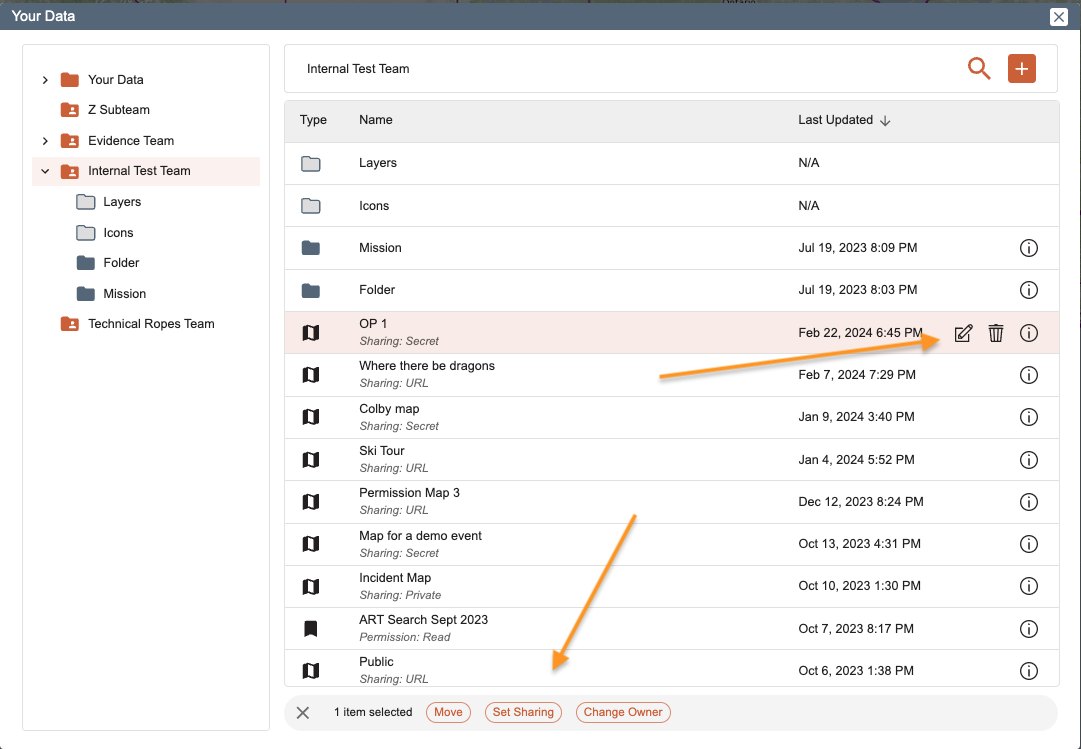
To view the map list for a particular team, click that team's folder. Once in the team you’ll see that team's folders and all the maps that team has in a list. For the maps you’ll see the map name, sharing (the base permission the map was saved at), and when it was last updated. If you single click the map you'll get some options to edit, delete, move, and set sharing. Only admin and manage level members will get those options. For write, update and read members these options will be greyed out and/or unavailable
For Manage and Admin members the Move button allows you to move the map from the default folder to a user generated folder within the same team or transfer a map from one team to another team or sub-team. Remember once a map is in another team or sub-team only someone with Manage or Admin level in that team can move or change the ownership.
Saving a Map to a Team Account
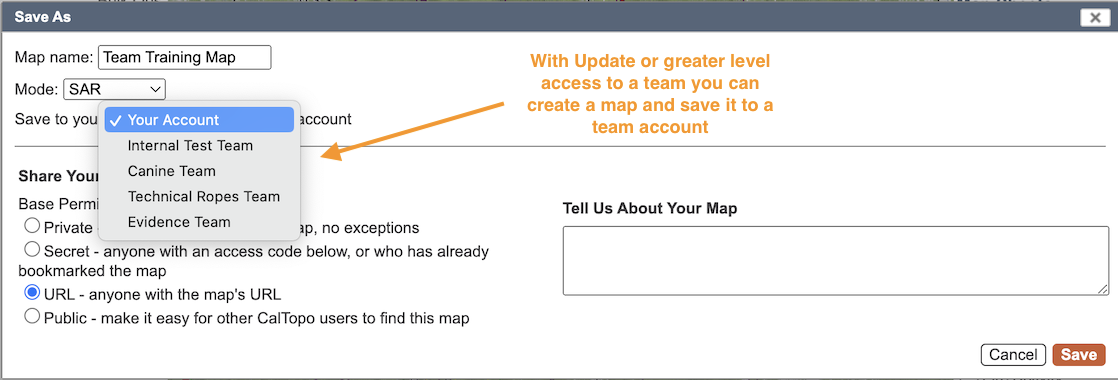
To save a map to the team account you must have Update or greater permission on the team. Follow the process for saving a map here. The mode you will likely want to use for a team map will be SAR, then choose the team you want to save it to. Finally set the base permission of the map for outside users. Check your settings because only those with admin or manage level can change which team it is in and the base permission once it is saved. Now click OK and your map is saved.
Base permission does not apply to team users. Team users can view any map saved to the team account, including private maps. For more information about map sharing settings, please check out the Sharing and Collaboration chapter. Now click Save to save your map.
Any team member with Update or greater permission can change the ownership of a map from their personal account to a team account, but only Managers and Admin level can change the ownership back to their account.
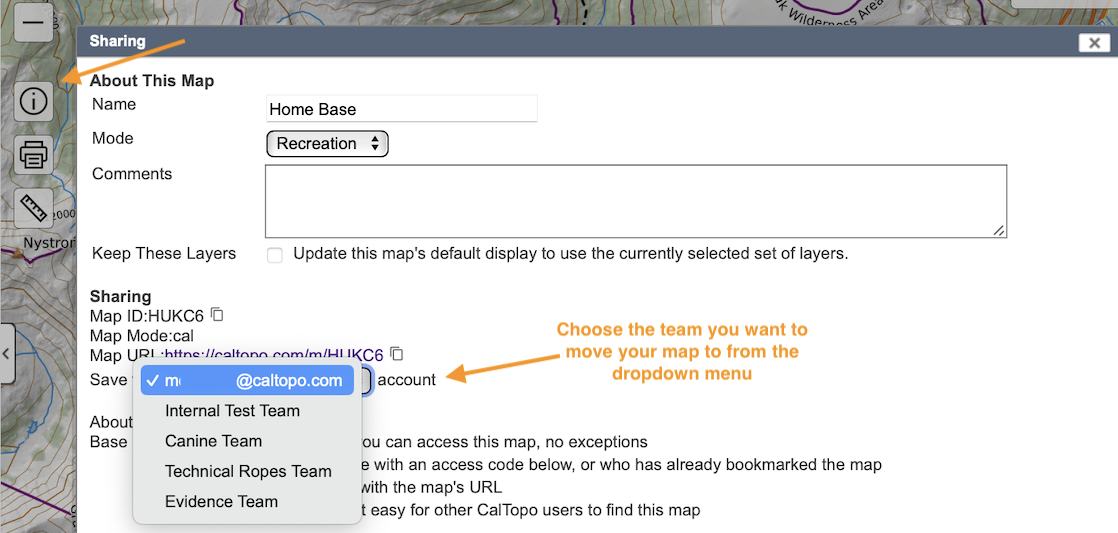
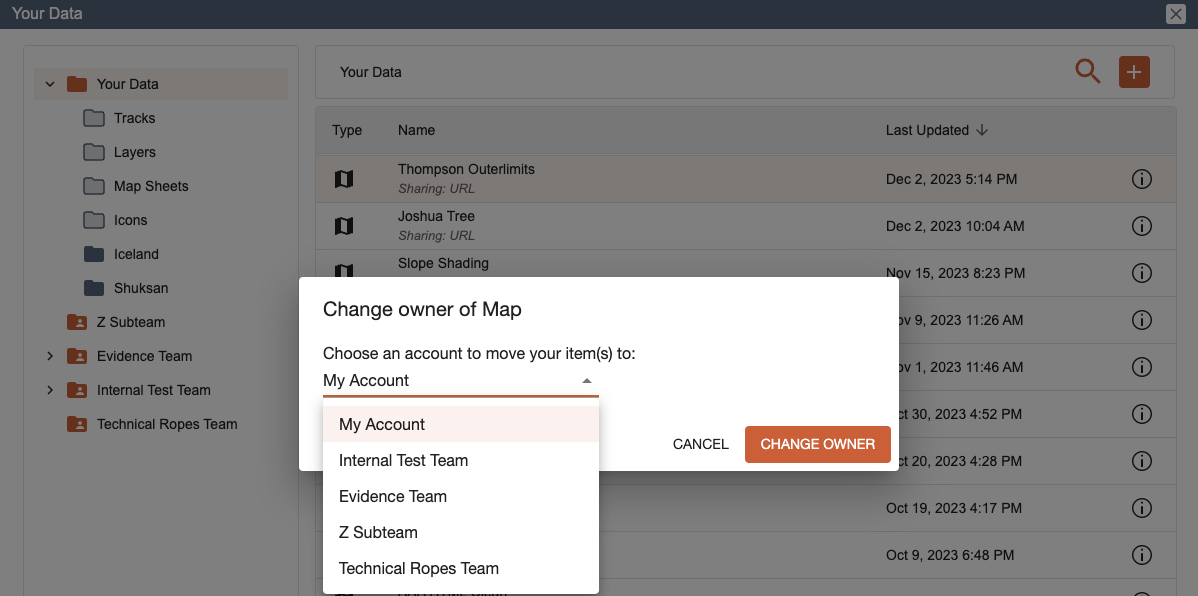
Changing the ownership of a map to a team account can be done in two ways; you can do it from your personal account to a team account, either by using the Info button on the map viewer, or using the Change Ownership in the Your Data dialog.
From Your Data single click the map you wish to have the team own. At the bottom of the dialog box click Change Owner and in the dropdown box that opens choose the team or sub-team you want to have own the map.
Map Object History (BETA)
Currently only available to active members of team accounts (this does not include members only added through a mutual aid incident)
Object history will show in the map object edit dialog. To show this, select the map object in question, select edit, then expand Object History at the bottom of the pop up dialogue by clicking or tapping the plus sign next to the Object History heading.
There will be several fields here (although not all will show on every object): originally created, created, and last updated. Each of these fields shows the following information about the object:
- Originally created is only shown in two instances:
- When a map object is imported from another map, this field will show the user that created the object on the original map.
- Objects that were created on mobile and not synced within 1 minute of creation (i.e. the object was created while the mobile device was offline/outside of a data connection).
- Created will show when the map object was created on this map and by whom:
- If a map object was imported from map A into map B, this field will show the user that imported the object into map B and when.
- If an object was created on the mobile device while offline, this field will show the time that the map object synced (i.e. when the device goes back online).
- Last Updated shows the person that last edited a map object and when.
The user’s name shown in each field will vary as well.
- If you are viewing object history for objects you created/updated, the dialog will read “Created by you
- If the user that created/updated the object is on the same team as the logged in user, the dialog will be the user’s name. If the user has not filled in a name for their individual CalTopo account, this may be blank.
- If the user that created/updated the object is not on the same team as the logged in user, but both the user in question and the logged in user are on a team, the dialog will be the Team name that the user belongs to.
- If none of the above rules are met, the dialog will read unavailable for the name, such as “Created by unavailable”
Team Account Map Sharing
Maps stored in the team account are shared with all team members, automatically. Any time that a map is added to the team account, all team members are able to view that map.
Each team member has an assigned access level that applies to all team maps. That level is set in the team admin page, and can be changed there also. See the chart in the previous lesson for more information on team access levels.
Team account maps can be shared outside the team account via the share settings for that specific map.
Tip: If a team member has update only permissions for team account maps, but needs full editing capabilities for a particular map, you can create a share link for them with write permission for that individual map only. Pretty neat!
Sharing Maps Outside the Team, or Giving Additional Permissions to Team Members on a Map-by-Map Basis
Let's dig a little deeper into sharing maps with users outside the team as well as giving additional permission to team members for a specific map. Before we begin, please visit the Map Sharing page if you want more information on base permissions and access types for individual maps.
Each time a team member creates a map, they will be able to select the outside share settings for that map. However, once they save the map to the team account, they may or may not be able to adjust those settings themselves if they aren't a Manage or Admin user. There are a lot of potential combinations, so let’s look at some examples:
- Team member has READ access to the team account:
This user cannot add maps to the team account or modify maps already in the account, so they have no control over team map sharing. If the map is set to share via URL, they will be able to share the link. If it is set to secret, they will not be able to access the share code unless someone gives it to them.
- Team member has UPDATE or WRITE access to the team account:
This user can create a map and save it to the team account. Once that person saves it to the team account, they can no longer remove it from the team account nor change the outside share settings. Thus, if they forgot to set it to secret and it’s set as URL, a Manage or Admin user would need to change that setting.
- Team member has MANAGE access to the team account:
This user can create a team map, change the sharing permissions for it, and remove it from the team account.
- Team member has READ access but needs to edit a map:
A team Manager or Admin must give this person a shareable link for the map that was created to give write access to that map. When the users opens the link, they will be able to edit the map and it will be in their bookmarks.
Locking a Team Map
Maps can be locked to prevent anyone from adding map-level objects, such as lines, markers, and polygons. However, account-level changes, such as renaming the map, moving it, or deleting it, can still be made while the map is locked.
Locking a map is intended for maps that are no longer in active use, such as those from completed missions or events. Locking a map that someone is still using can cause unexpected issues. If that user is without a data connection, it could even result in some data loss.
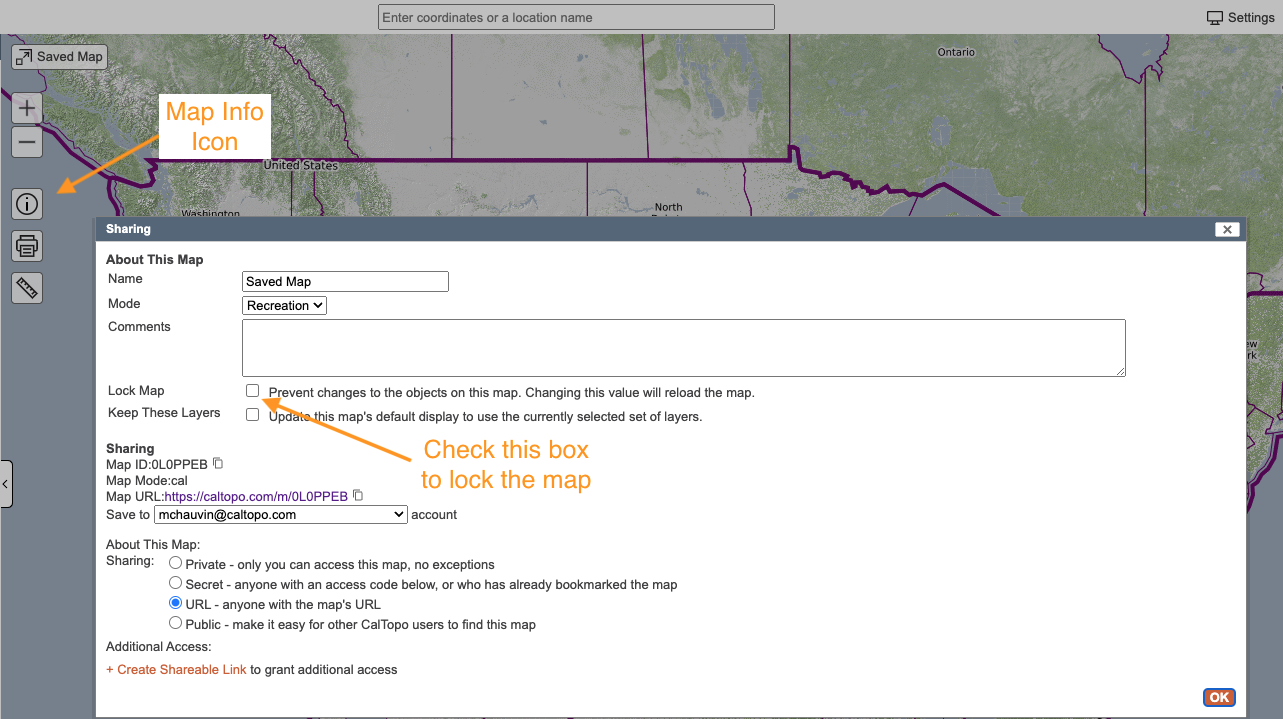
Map locking can be done both on the web and in the app, but it is restricted to admins or manager-level team members. On the web, there are two ways a team admin or manager can lock a map. The first way is they can click the map info icon and check the map lock box.
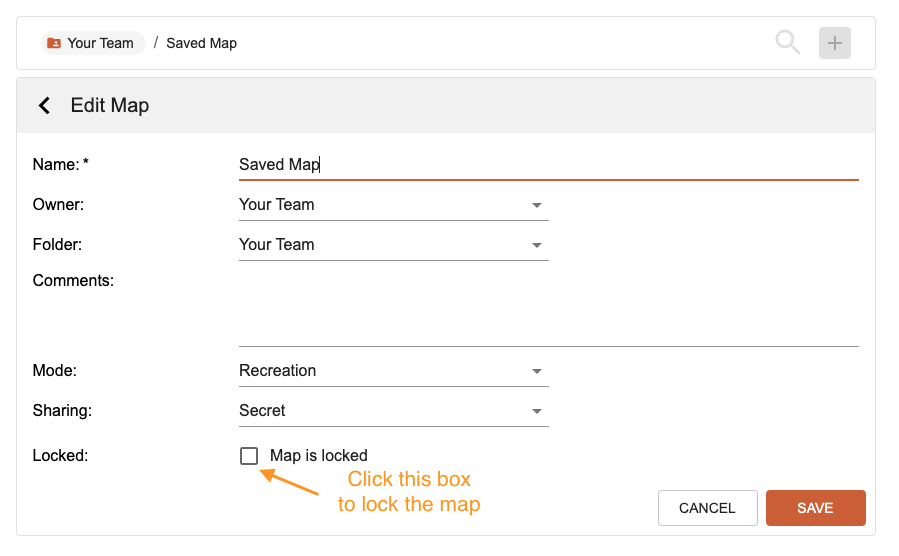
Another way to lock a map is to go to Your Data and access the map edit dialog and check the map lock box there.
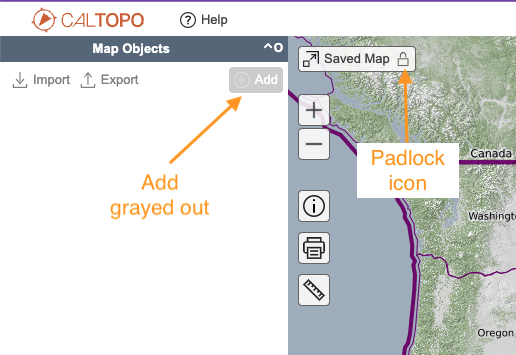
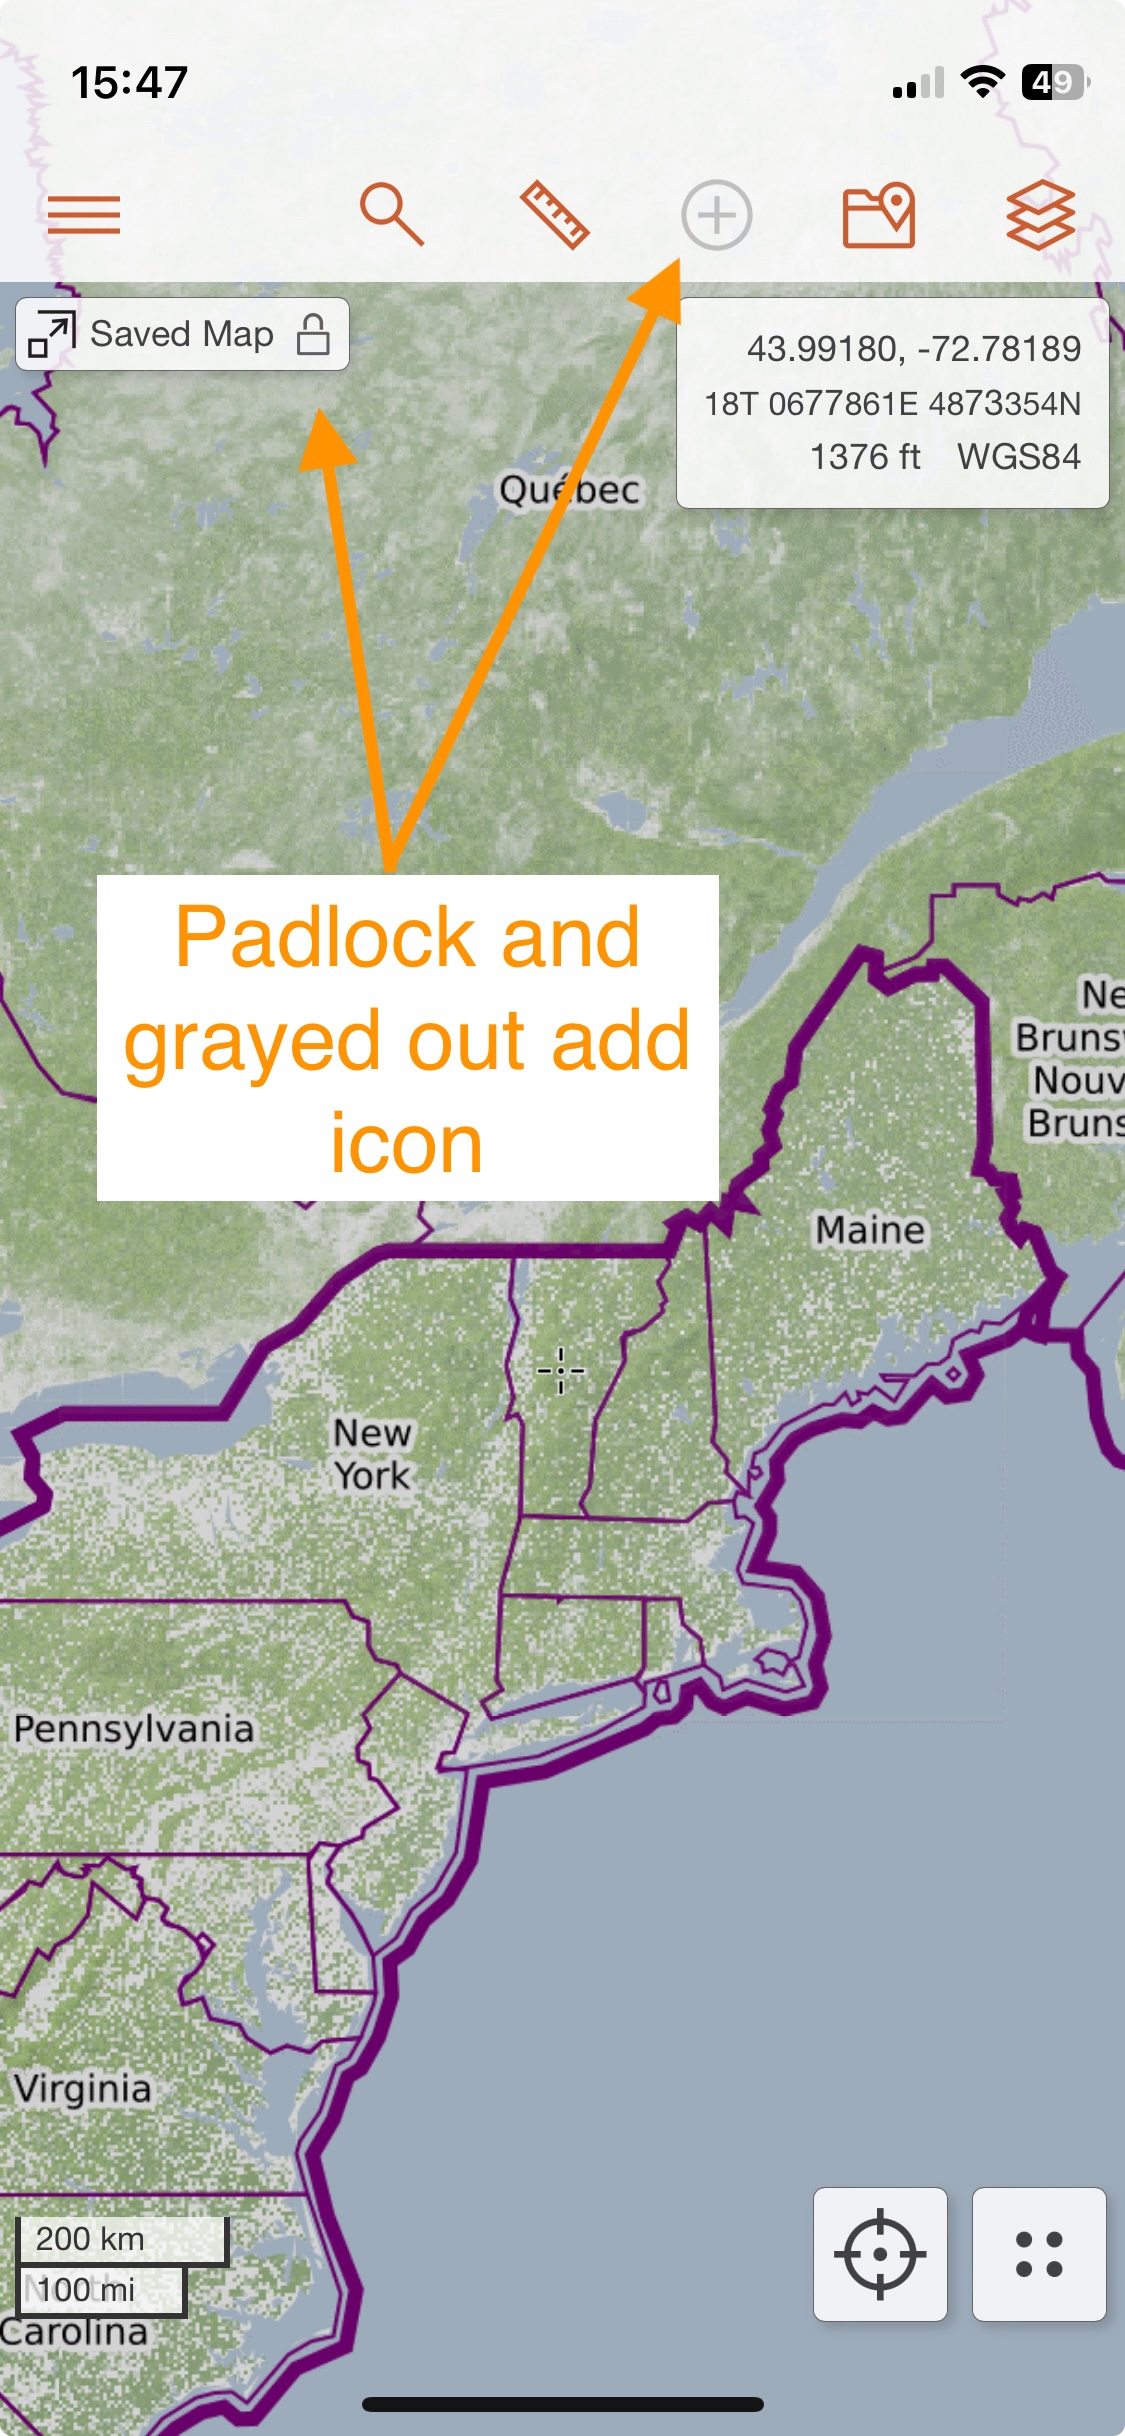
Once you check the box, the map will reload, and you’ll notice two changes: the "Add" option will be grayed out, and a padlock icon will appear in the title.

Locking a Map in the Mobile App
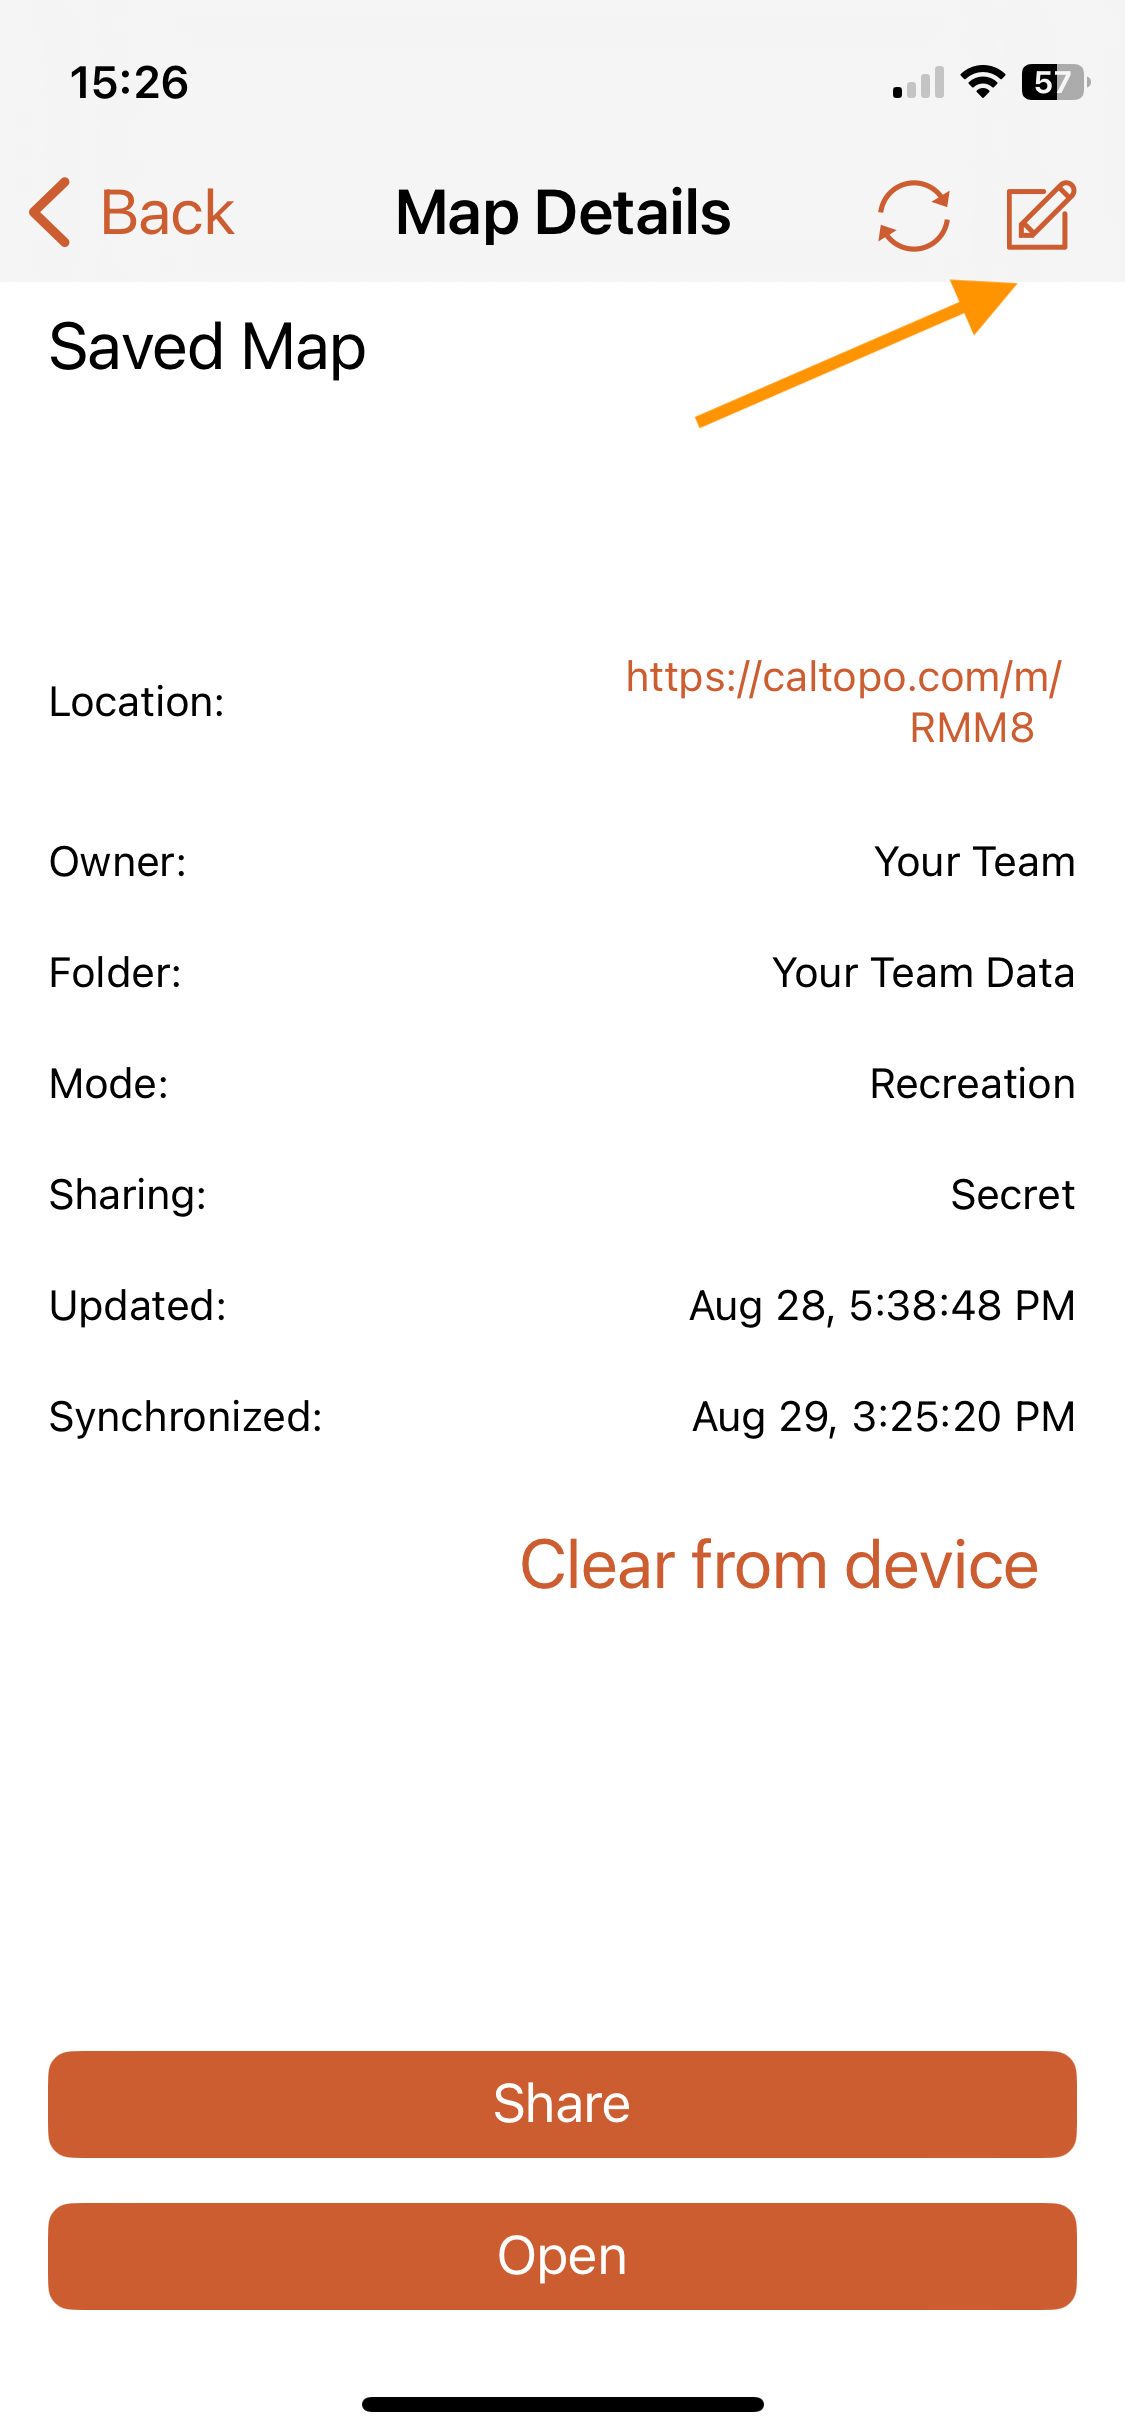
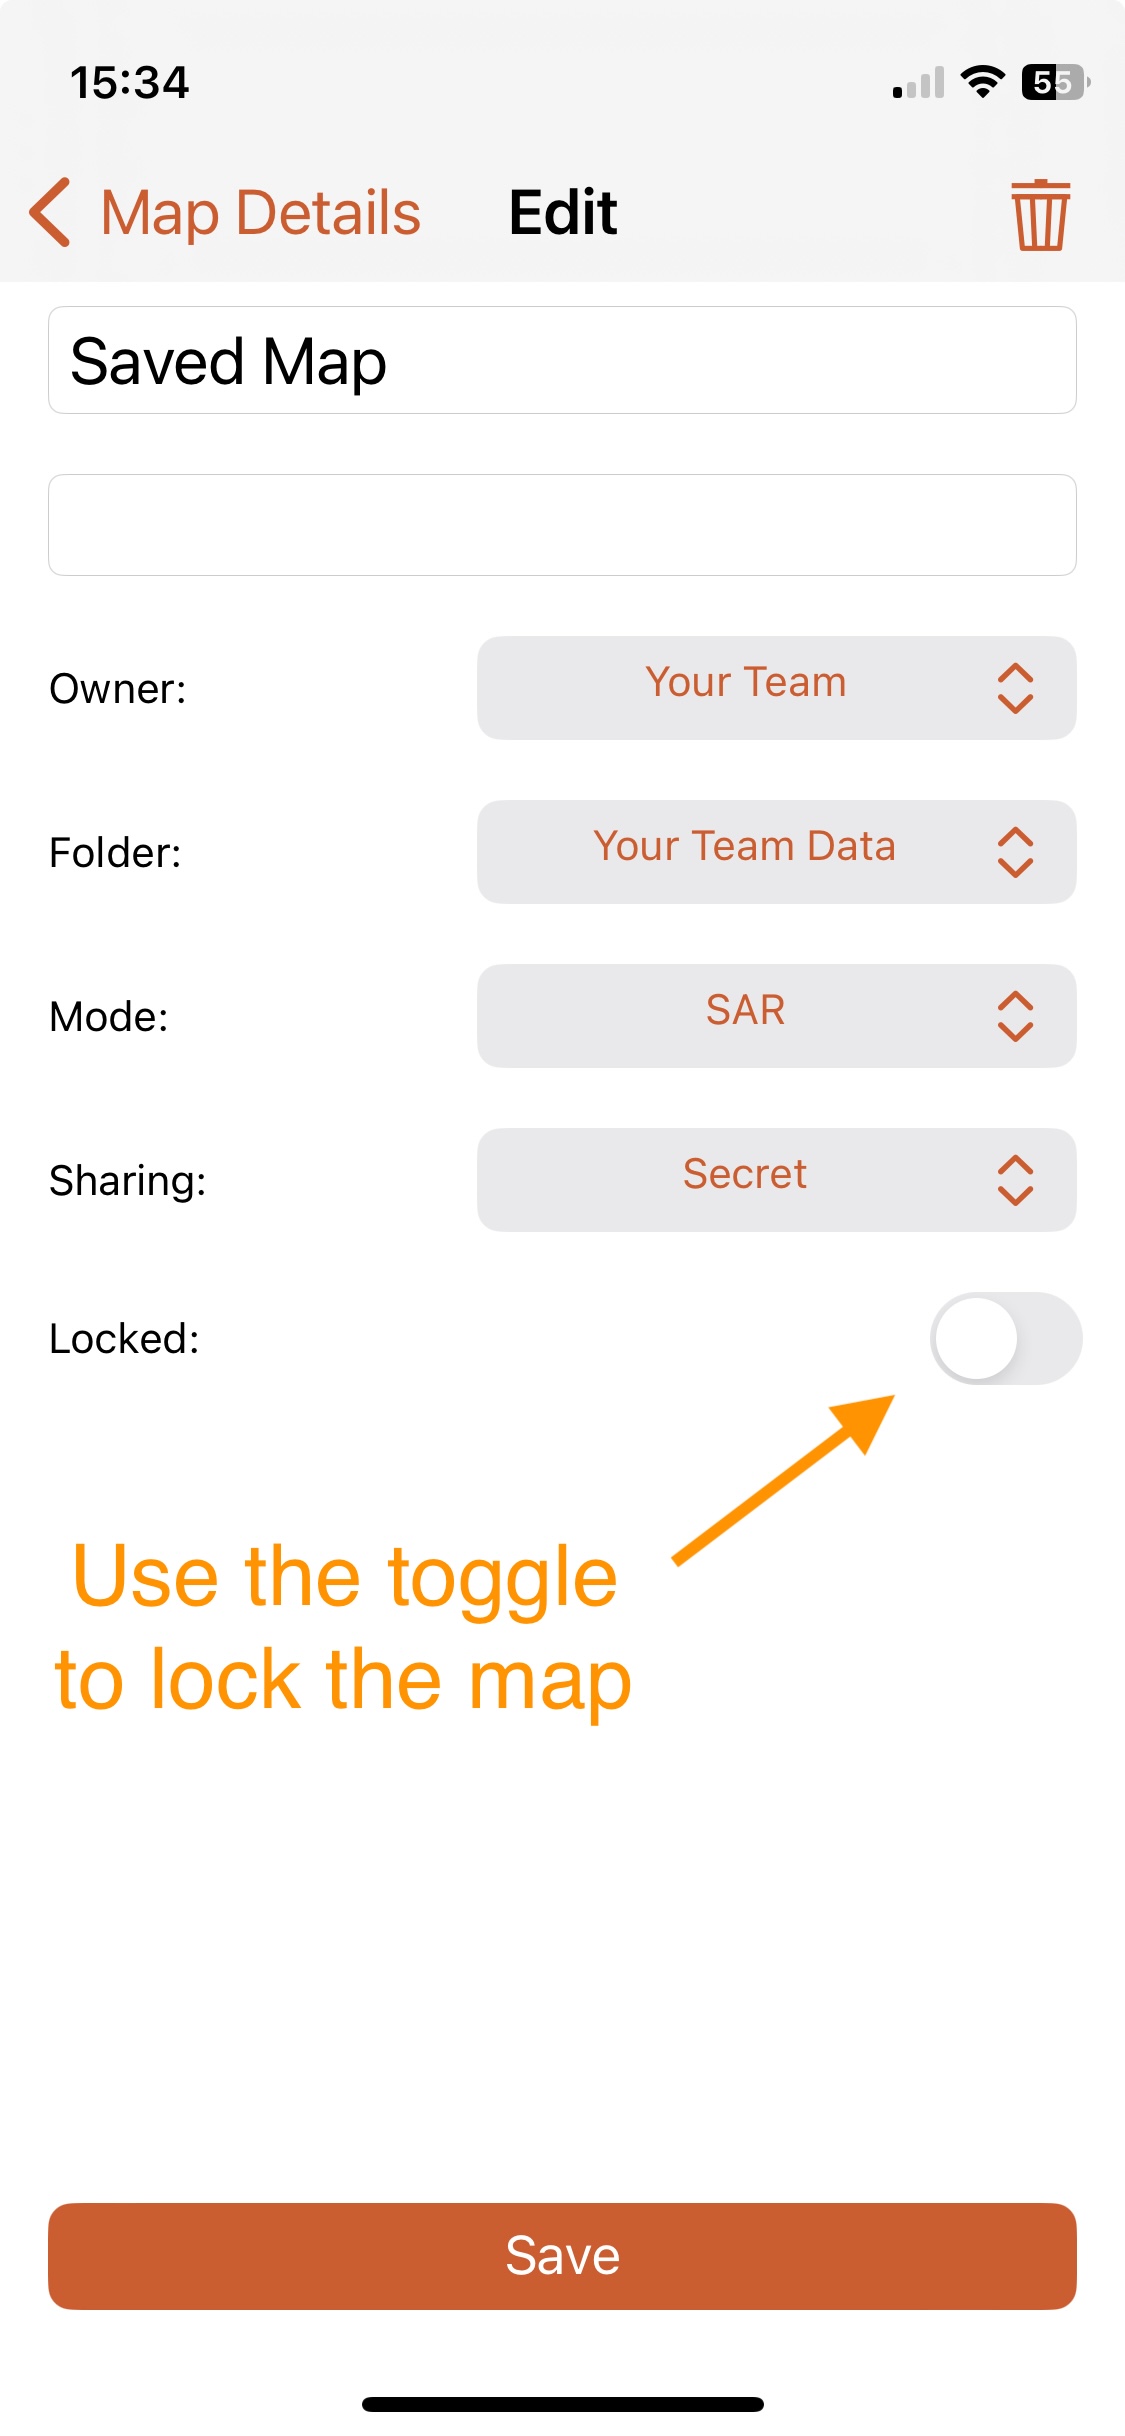
Team admins and managers can lock maps via the mobile app. To lock a map, access the function in the edit map dialog. To reach the edit dialog, tap the info icon next to the map name in your map list. This will open the Map Details screen where you’ll see an edit icon in the upper right corner.
If you have the map open when you lock or unlock it, you'll need to close and reopen the map to see the changes.
Other Features: Team Layers, Map Sheets, and Icons
Team accounts come with the ability to save custom layers, map sheets, and icons to the team account for all team members to access and use.
Some groups will have a need to store custom layers, map sheets, pdf's, and icons for the whole team to access. To do this, follow the steps to set up a custom layer, as described in the Base Layers chapter, or to add a Map Sheet or icon. Once the layer, map sheet, or icon is saved to your account, you can easily switch it to the team account. The same permission levels apply here as covered above regarding saving and sharing team maps.
The same method applies to map sheets and icons. Just find the appropriate folder in Your Data.

Using the Mobile App with a Team Account
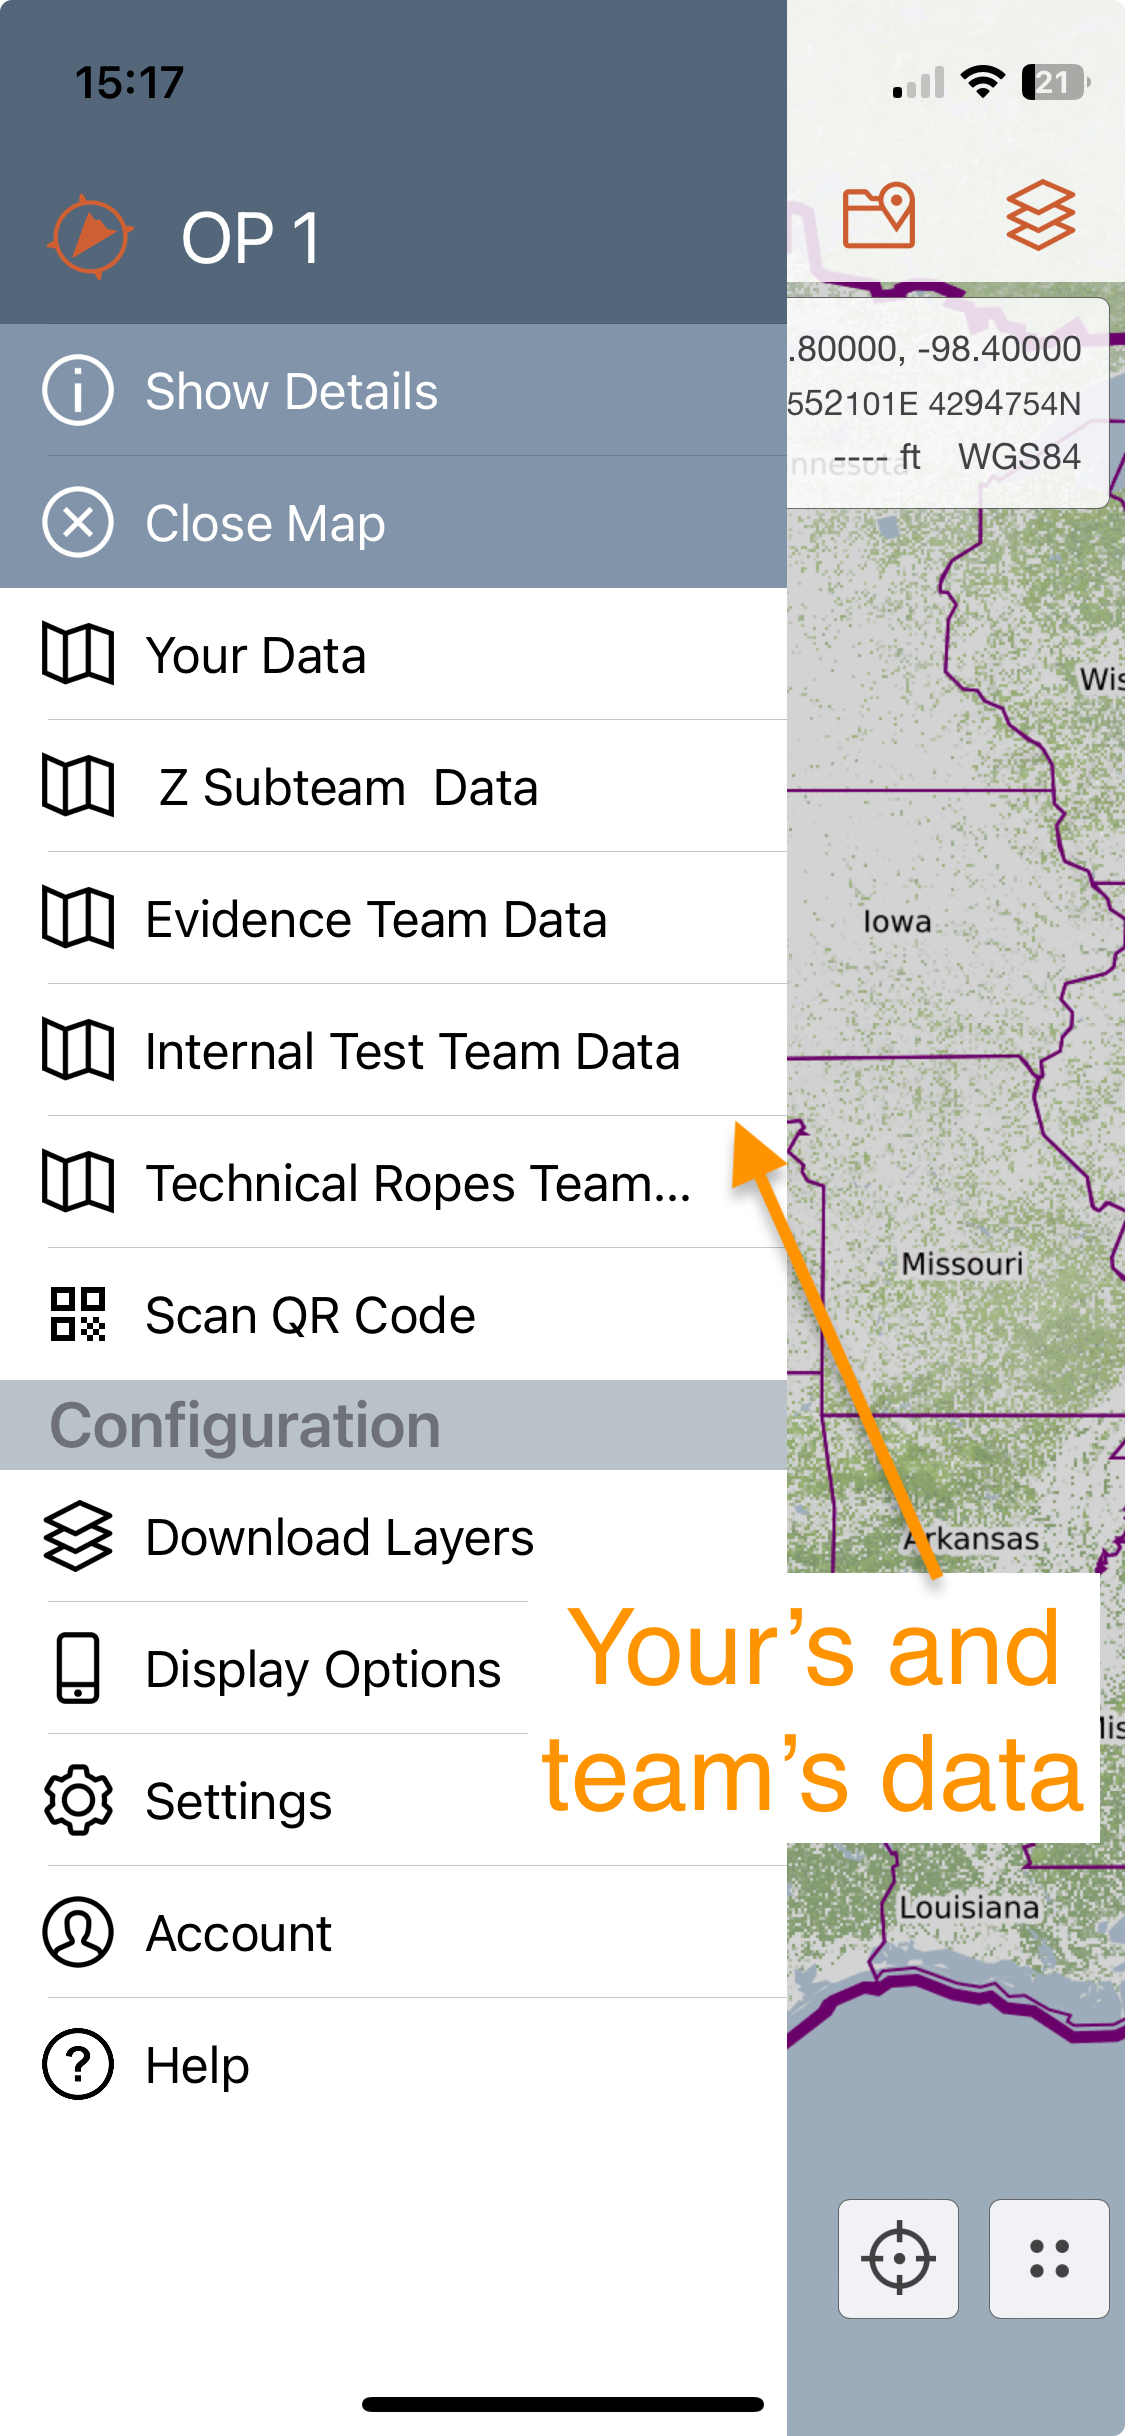
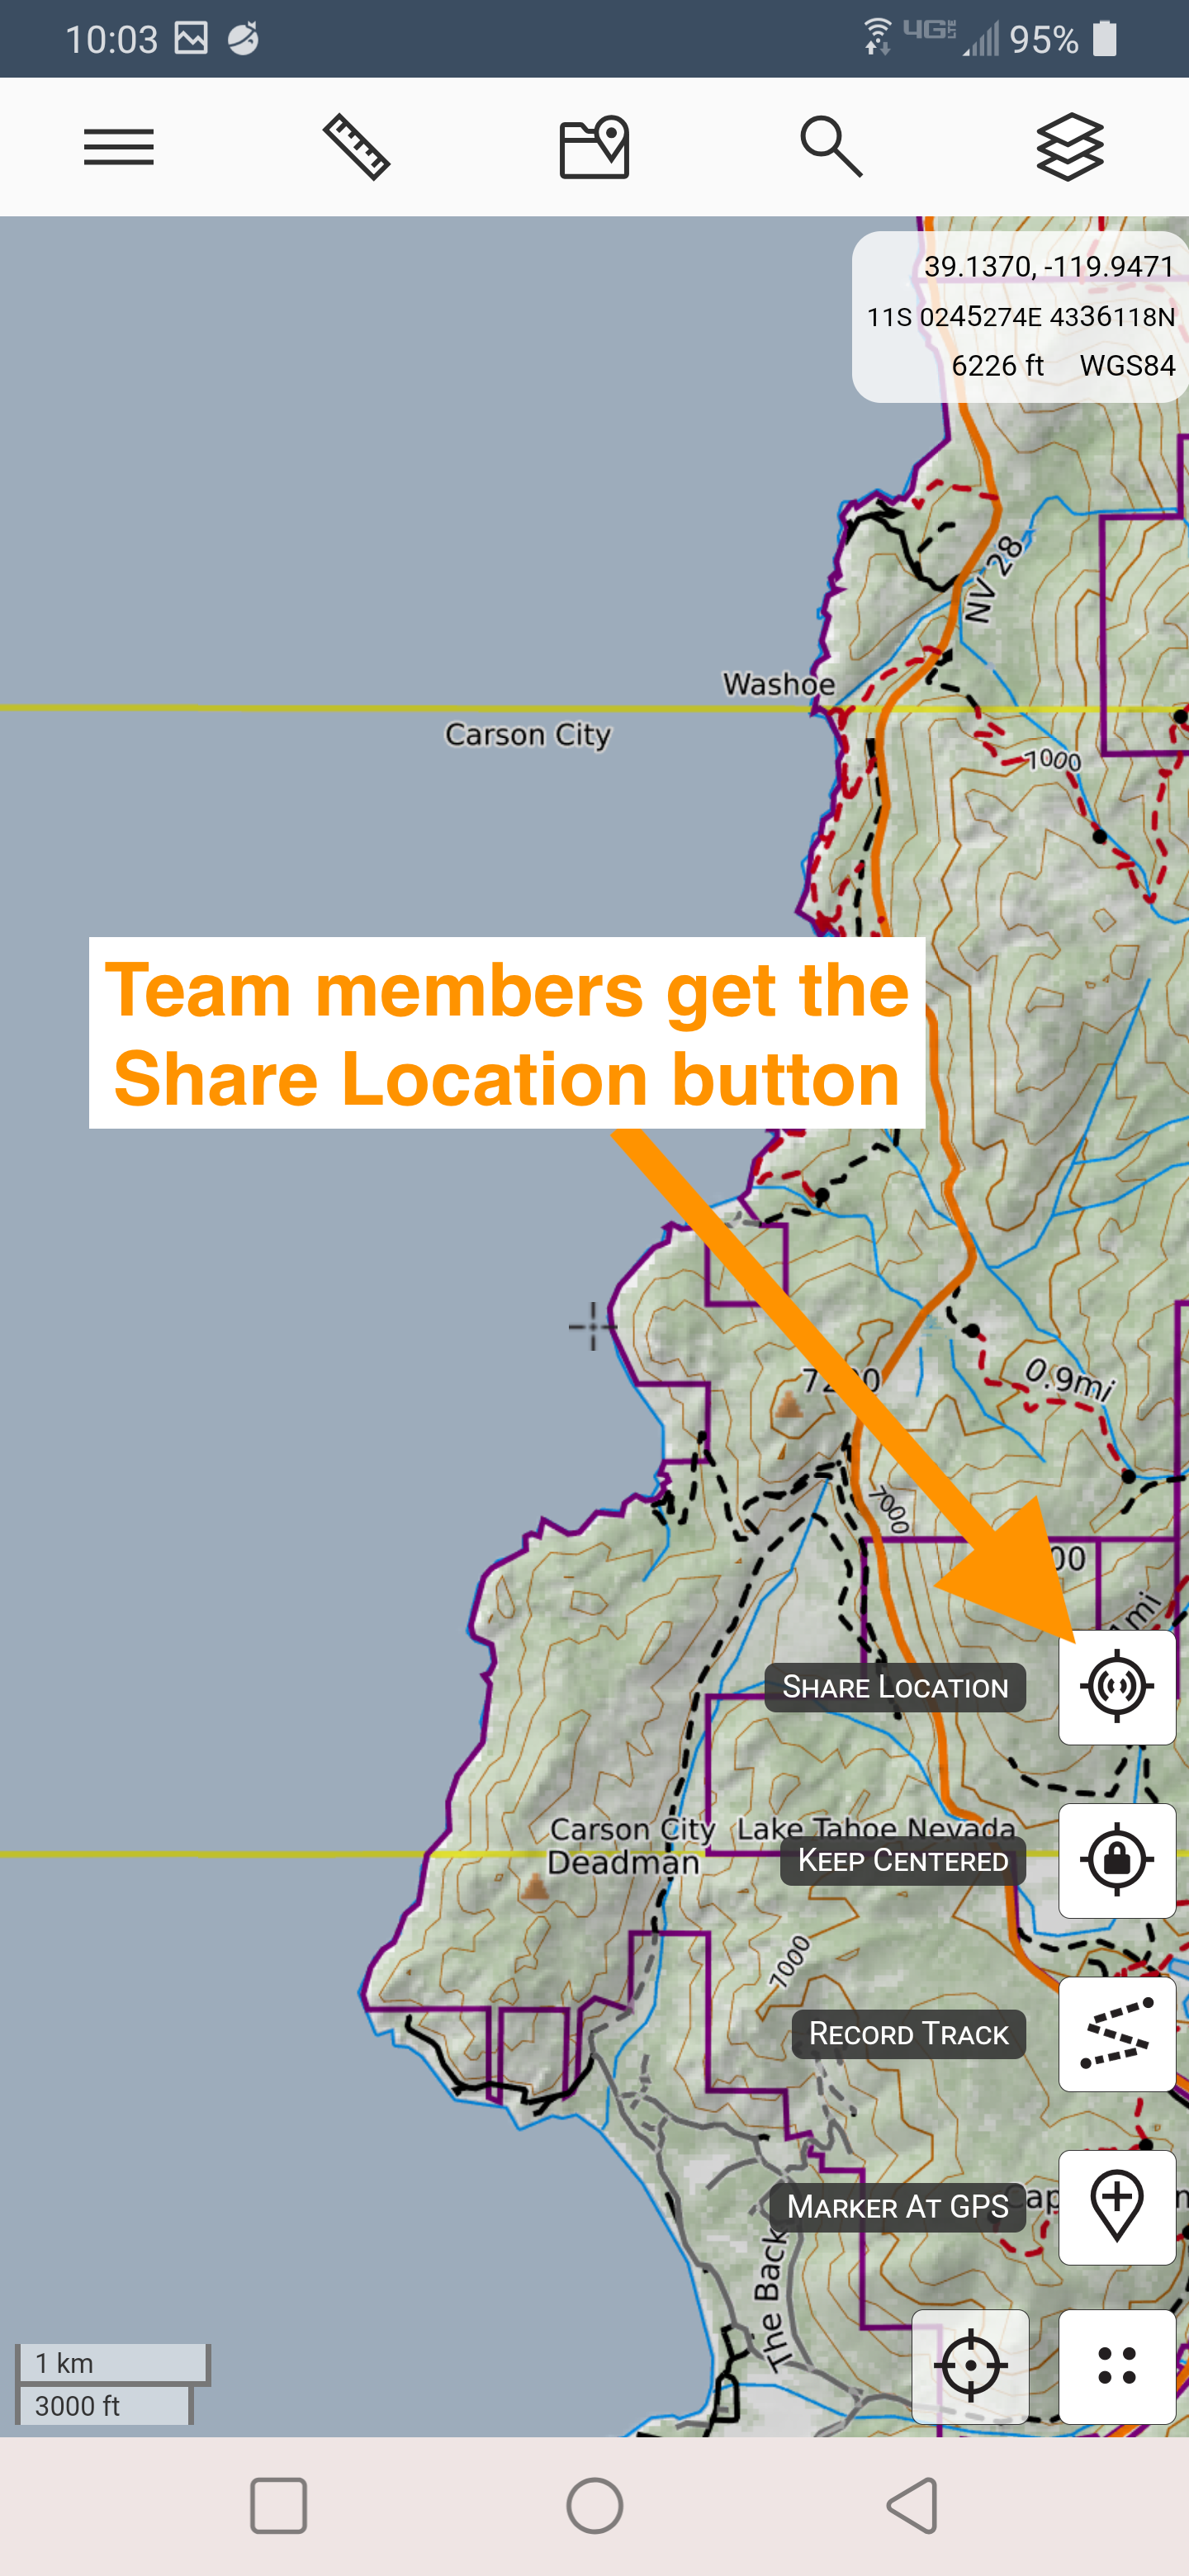
Team account members have access to team maps via the mobile app also. The two main differences in the mobile app for team members are the list of teams and the share location button.
Team members can tap on the three-bar menu in the upper left to open the main app menu. At the top of this menu, all teams, sub teams, and events are listed, in addition to Your Data. These will sync to the mobile device automatically.
The Share Location button allows team members to actively share their location with the team account. Anyone who turns on the shared locations overlay will see a dot representing each person who is sharing a location. Every person on the team can both share their own location and see other's locations, regardless of the map they have open.
Team Members and Track Recording
Team members with update access or higher can record a track straight onto a map, using the CalTopo mobile app. The tracks belong to the user's account and to the map, but are not saved to the team account as track objects.
The track will display on the team map in real time if cell service is available. Otherwise, it will show on the map when the user returns to cell service and the app is able to sync with the cloud.
For more about using tracks and location updates on team maps, check out the next lesson for live tracking.
