Navigation Functions
in this lesson
Not only can you access your maps in the field but you can also use the mobile app to navigate! By utilizing your mobile device’s internal GPS and compass, the mobile app’s navigation tools allow you to locate and orient yourself on the map as well as navigate your desired course.
This lesson will cover how to use the navigation functions on the mobile app. If you are looking for information on how to configure navigation options (such as how to set your north reference), please refer to the Compass and Heading Settings section of the Settings Menu chapter.
Topics on this Page:
The First Time You Use the Navigation Functions
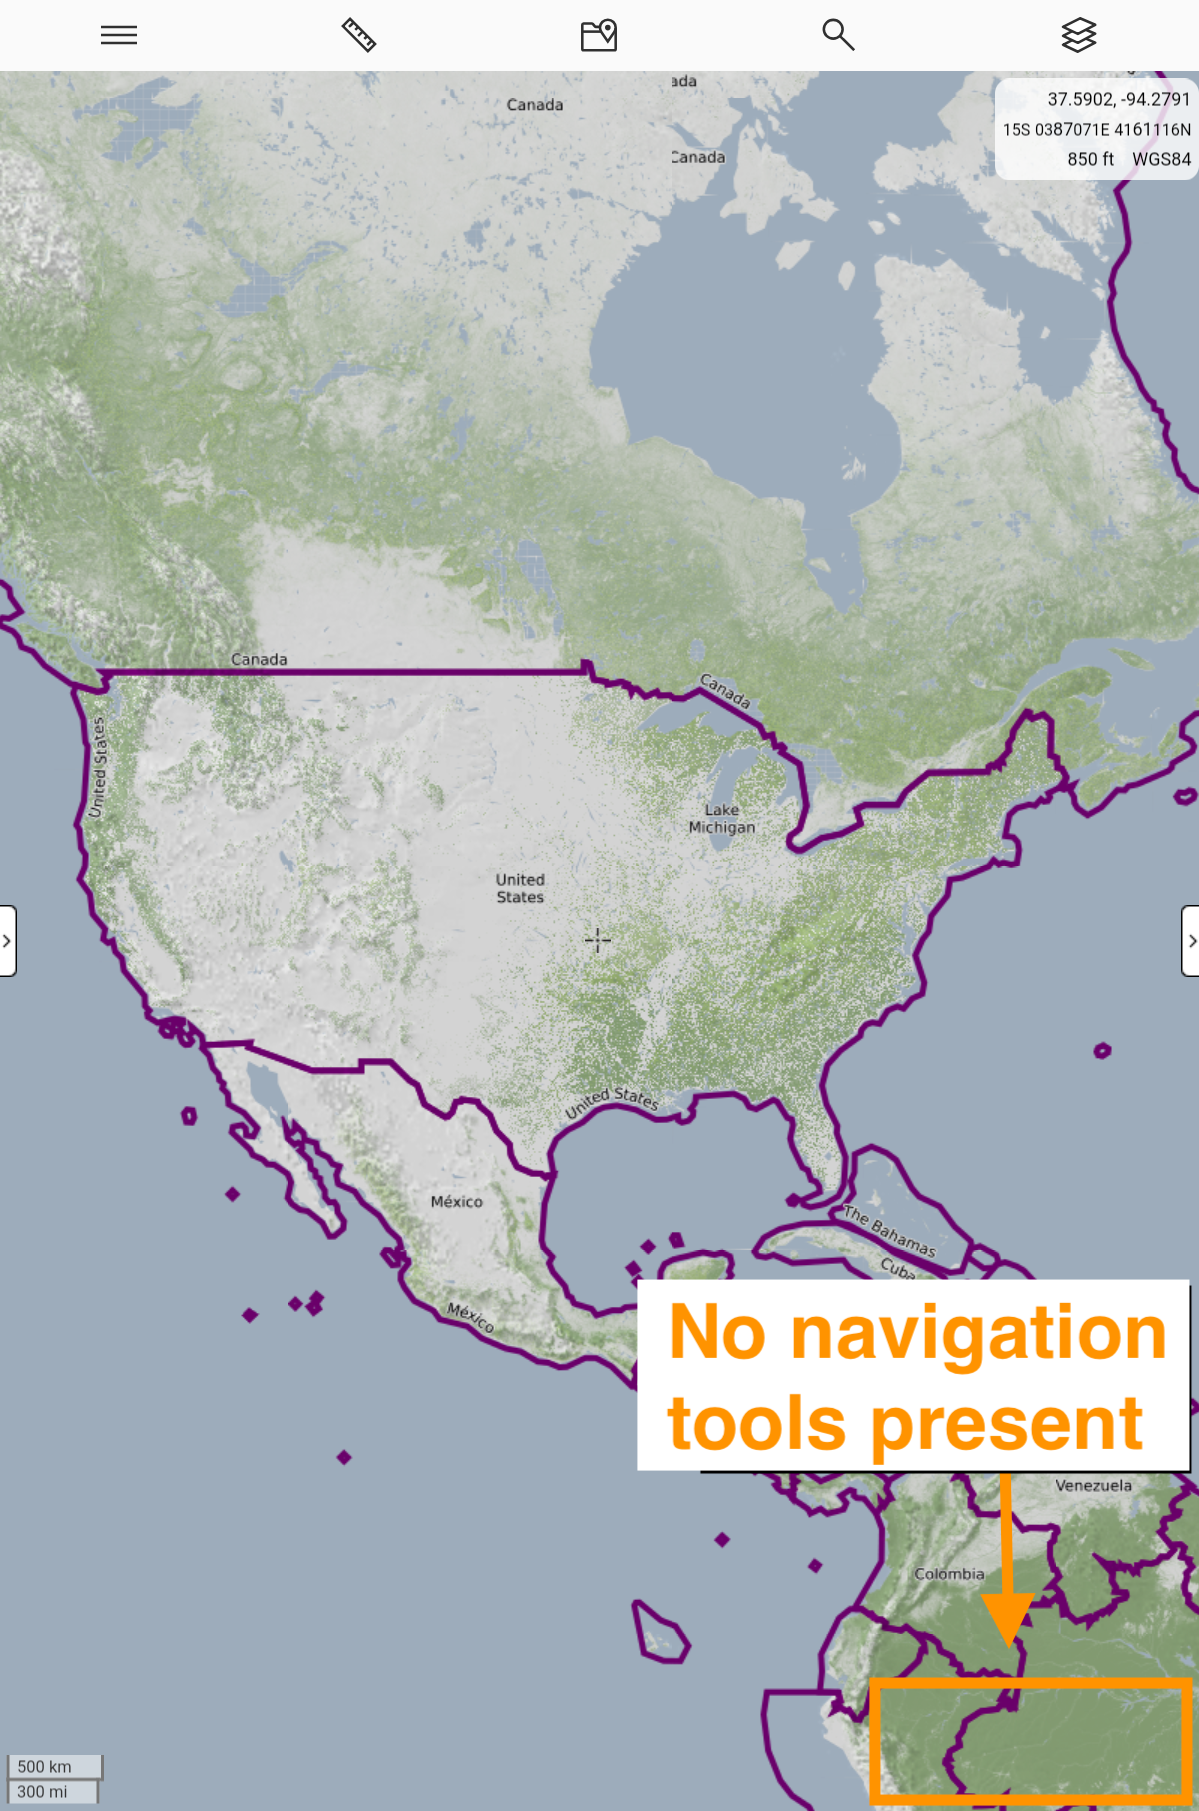
When you open the mobile app for the very first time after installing it, the app will automatically check your mobile device for an internal GPS. Your mobile device must have an internal GPS in order to use the navigation tools.
If an internal GPS is detected, then the navigation tools (crosshairs icon and Location menu) will be displayed. If an internal GPS is not detected, the navigation tools will not be displayed.

The first time you try to use the crosshairs icon or the Location menu, a dialog will appear asking if you want to allow CalTopo to use your current location. The mobile app will only use your location when explicitly requested to center the map or record a track. You must allow location sharing with the CalTopo mobile app if you wish to use any of the location or navigation tools.

Locating Yourself on the Map
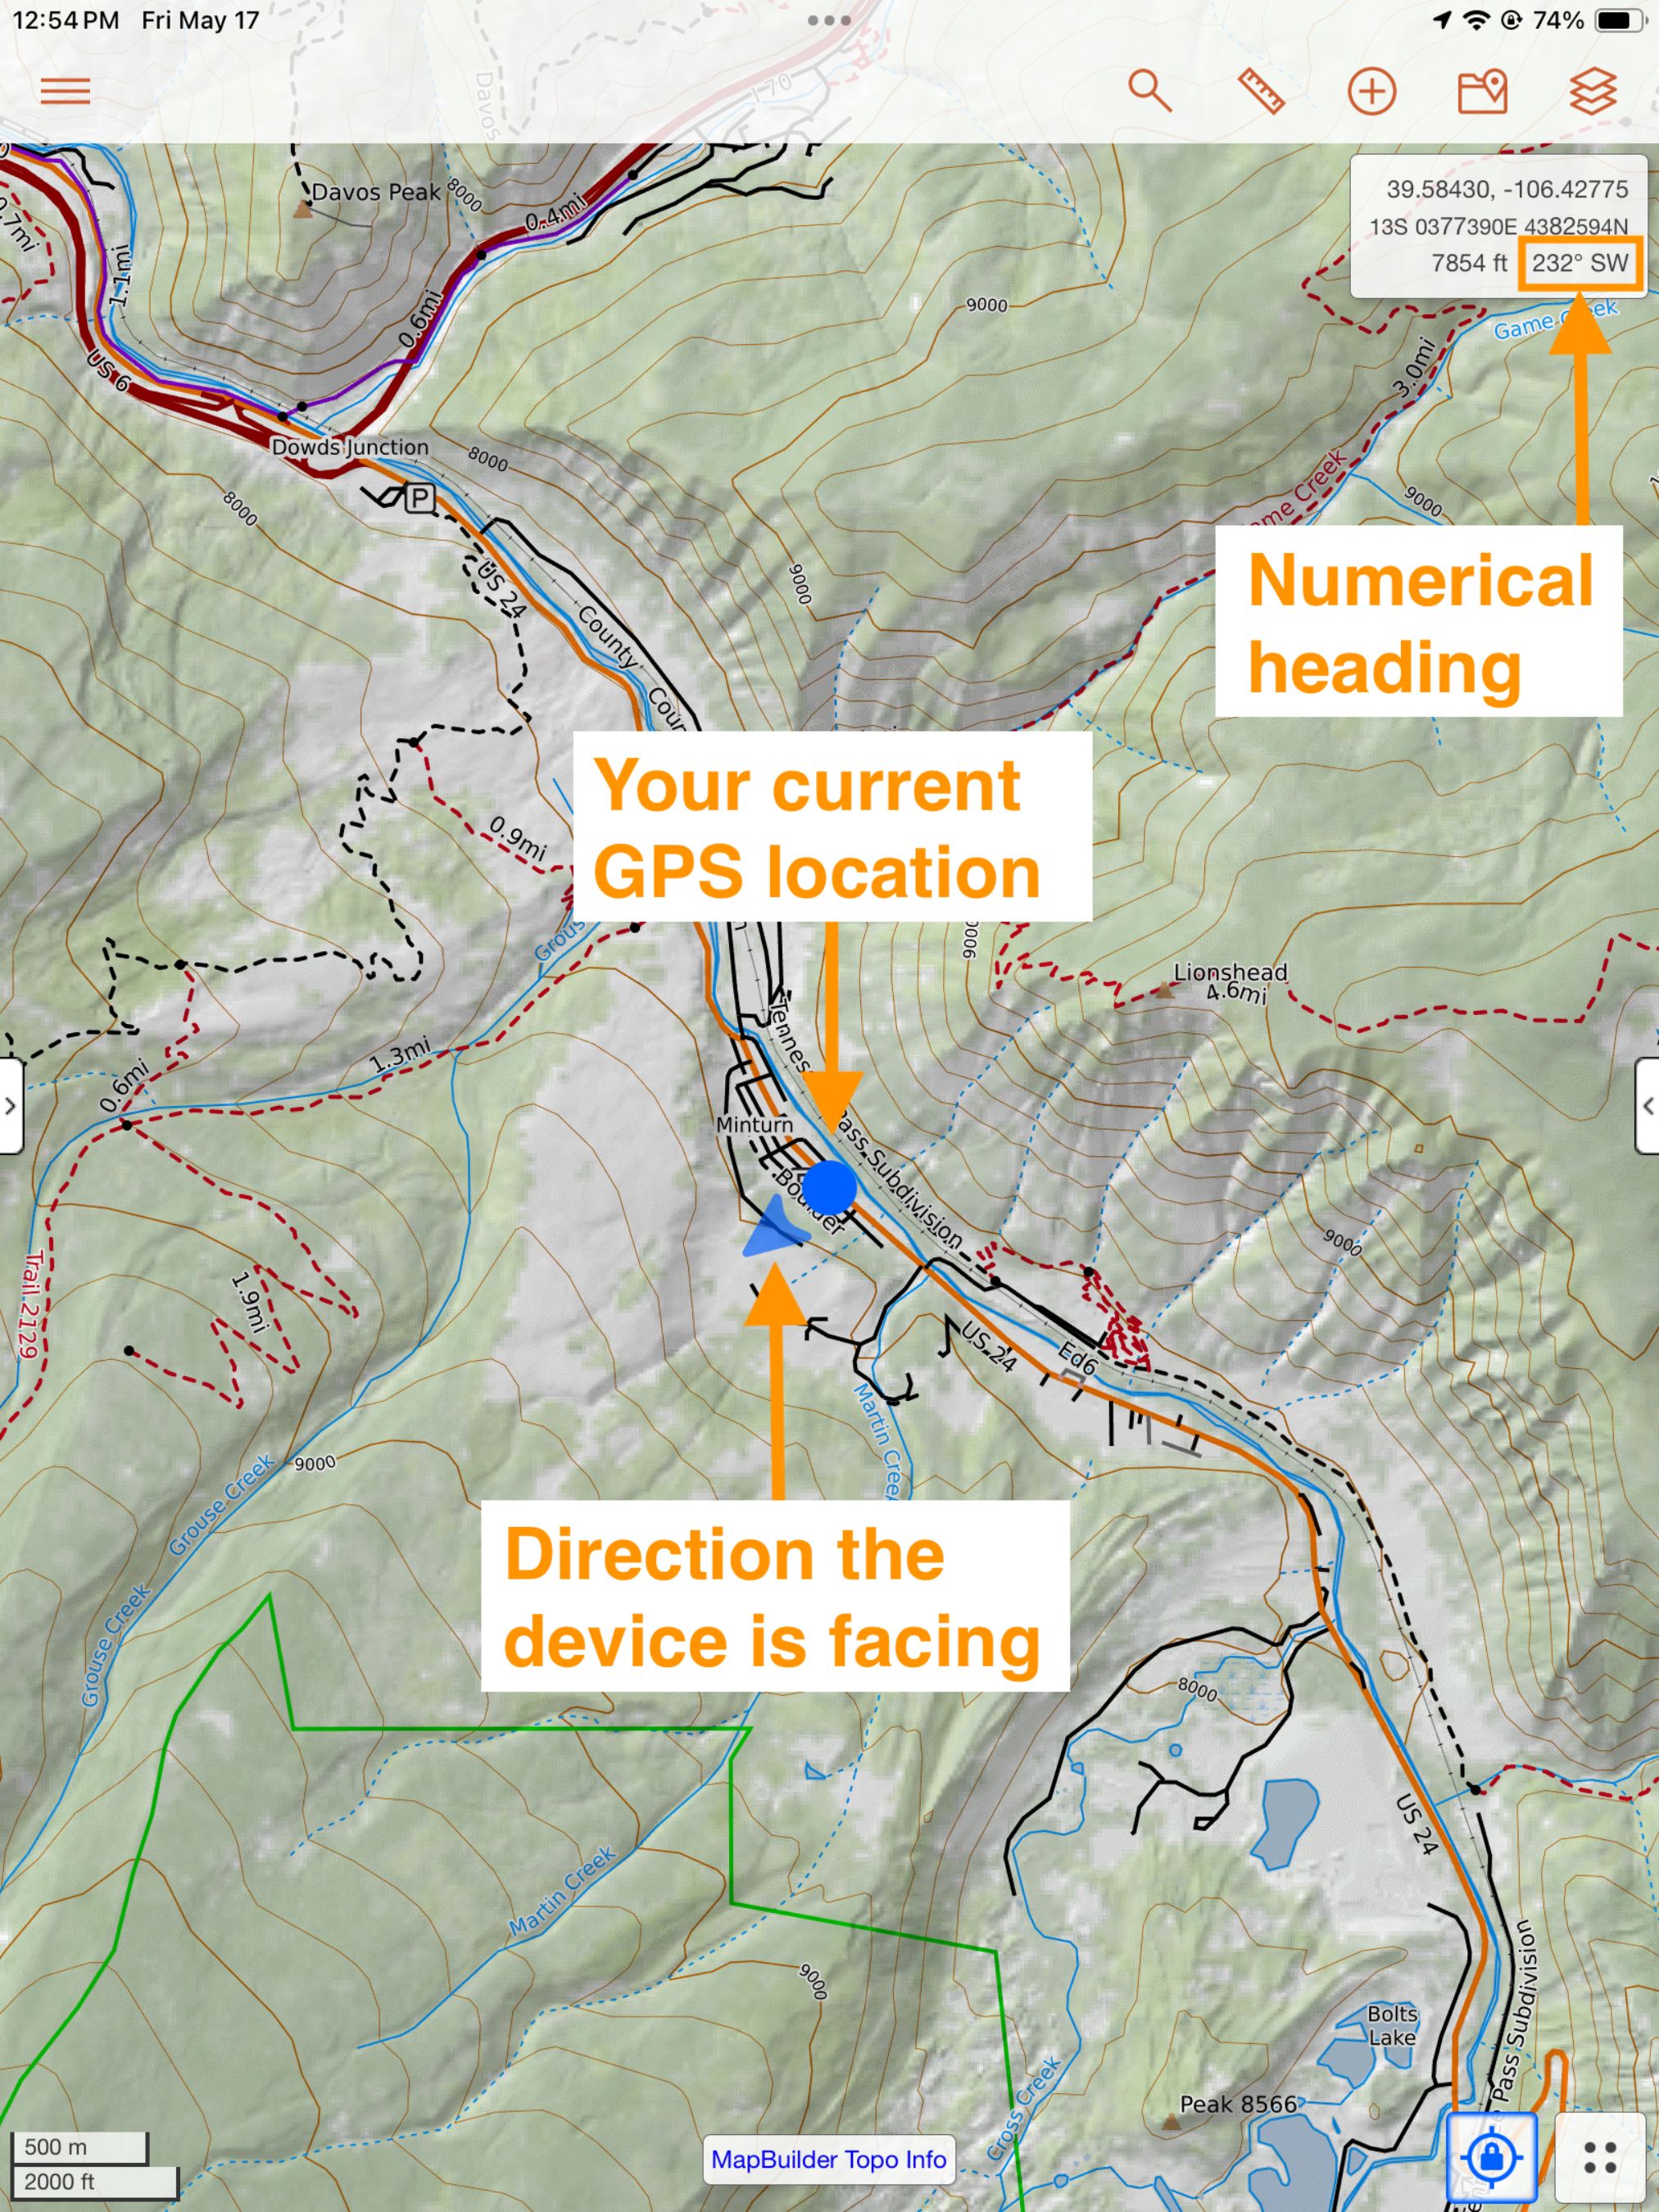
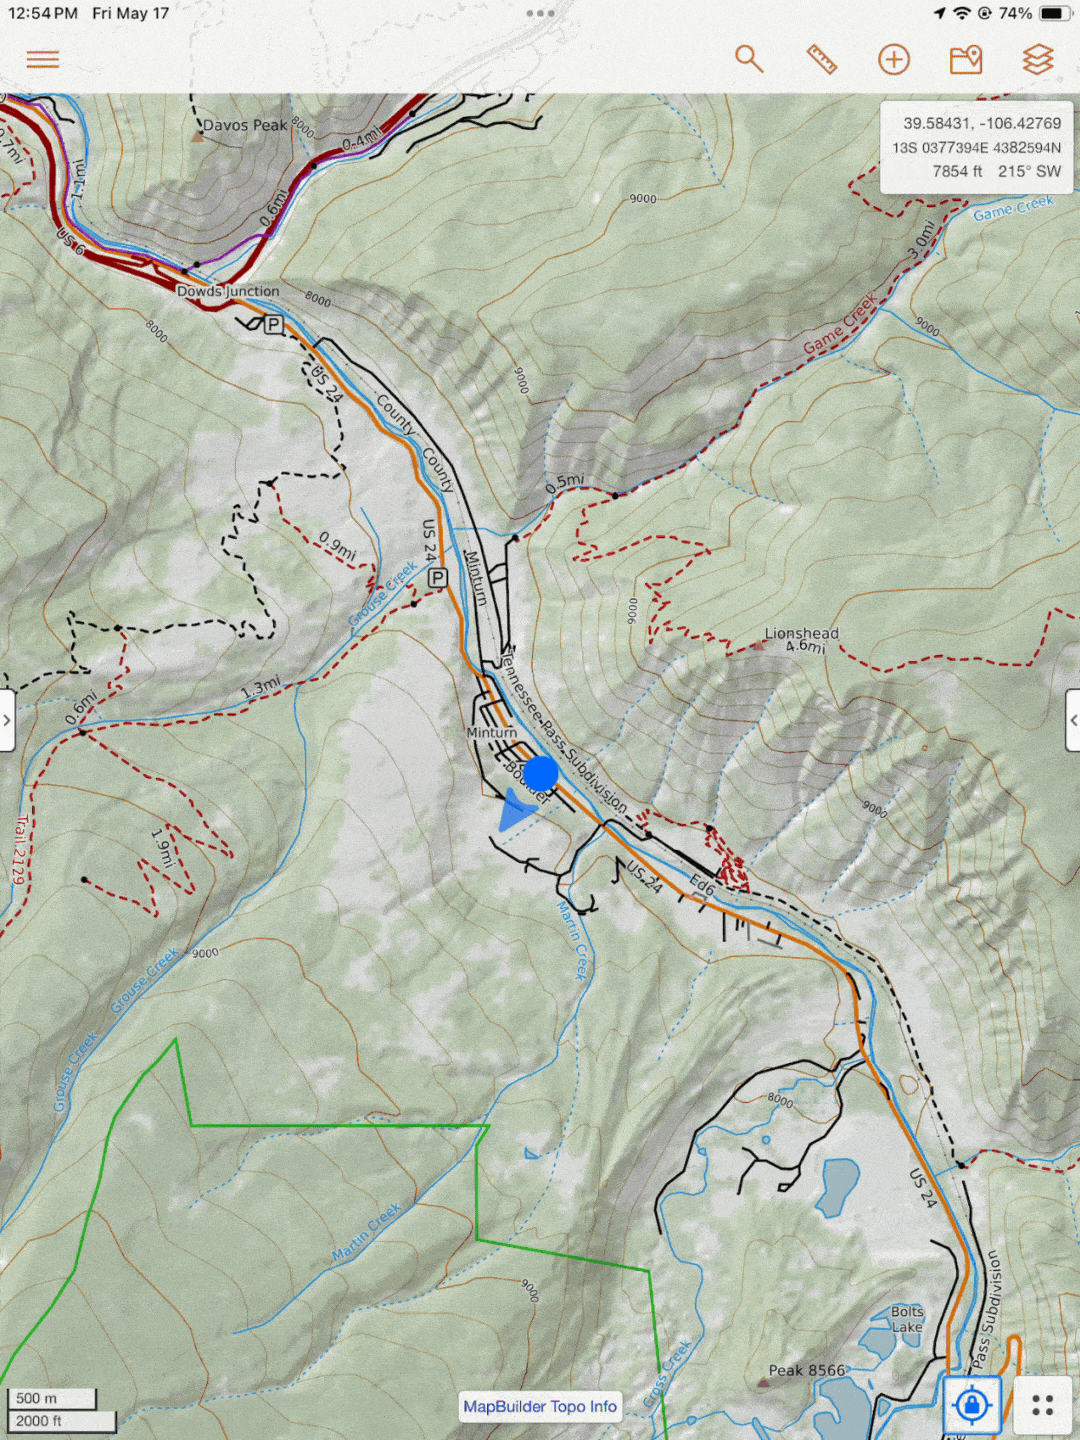
You can tap the crosshairs icon to use your mobile device’s GPS to locate yourself on the map.
Your GPS location is indicated on the map by a blue dot. If your mobile device has an enabled internal compass, the cardinal direction that the mobile device is facing is indicated by a blue heading arrow and your numerical heading is displayed in the coordinates box.
Keep in mind that GPS accuracy depends on a number of factors including the actual design and quality of the GPS receiver in the mobile device itself but is generally within ± 15 ft.
If the blue dot doesn’t show an arrow when you tap the "Locate Me" icon, there could be a few reasons, and potential fixes. The arrow on the blue dot indicates compass direction. If it's missing, your device may not support compass functionality or settings may need adjustment.
On Android Devices:
- Check if your device has a compass. Not all Android phones or tablets include a magnetic compass sensor. You'll need to verify whether your device supports this feature.
On iPhone or iPad:
- Step 1: Check CalTopo’s app permissions:
- Open your Phone Settings.
- Scroll down and tap Apps.
- Tap CalTopo.
- Tap Location.
- Make sure While Using the App is checked and "Precise Location" is turned on.
- Step 2: Enable compass calibration:
- Go back to your main Settings menu.
- Tap Privacy & Security.
- Tap Location Services.
- Scroll down and tap System Services (at the bottom).
- Turn Compass Calibration on. If already on, try toggling it off and back on to reset.
Other Things to Check:
- Magnetic case: A case with magnets can interfere with the compass. If you're using one, try removing it and see if that resolves the issue — this is a common cause of compass errors.
Orienting the Map
By default the map in the map viewer is north up- in other words the top of the map is north. Currently there are two modes for orienting the map when you are displaying your GPS location:
Locked Mode
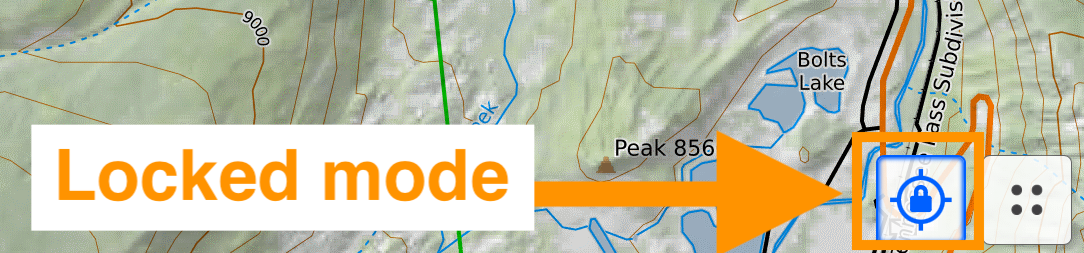
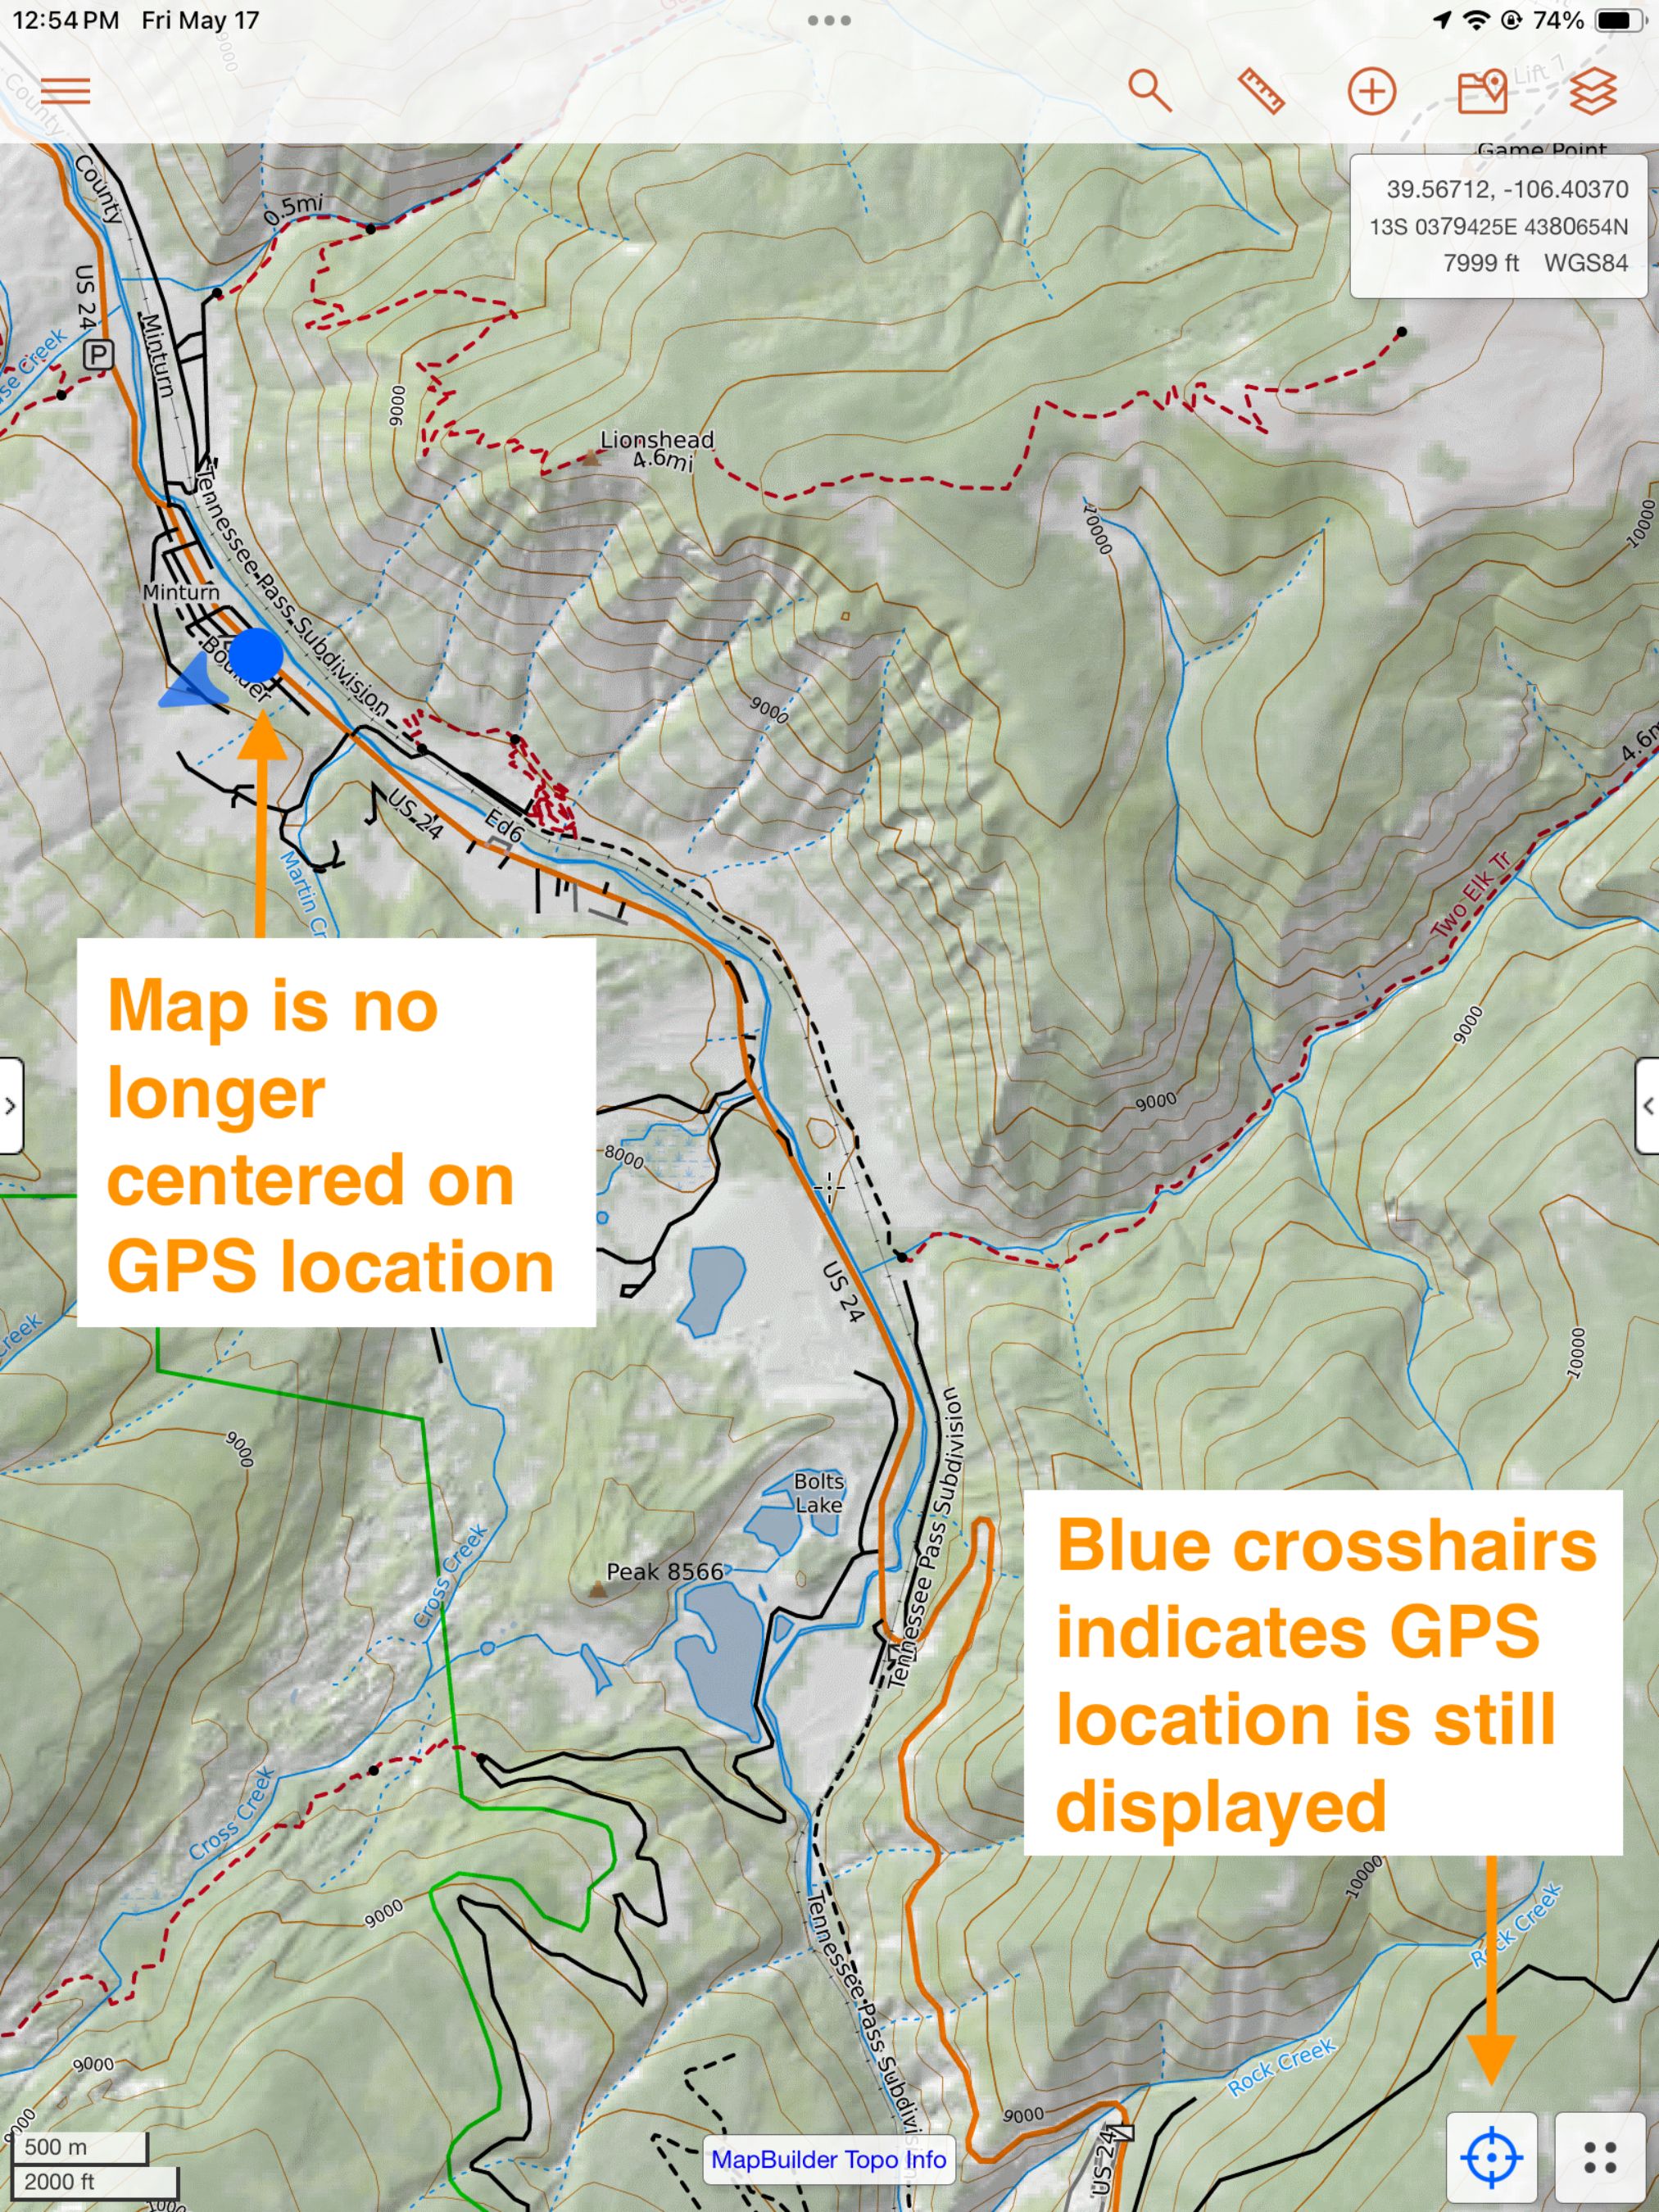
Tap the crosshairs once to “lock” the map on your current GPS location (previously this was “Keep Centered” in the 4-dot Location menu). “Locked” mode is indicated by a blue lock in the center of the crosshairs icon.
The map orientation is fixed when you are in Locked mode no matter which direction you are facing. The blue heading arrow will move to indicate the cardinal direction the top of the device is facing. To get the most accurate reading, make sure to hold the device flat in your hand with the screen up.
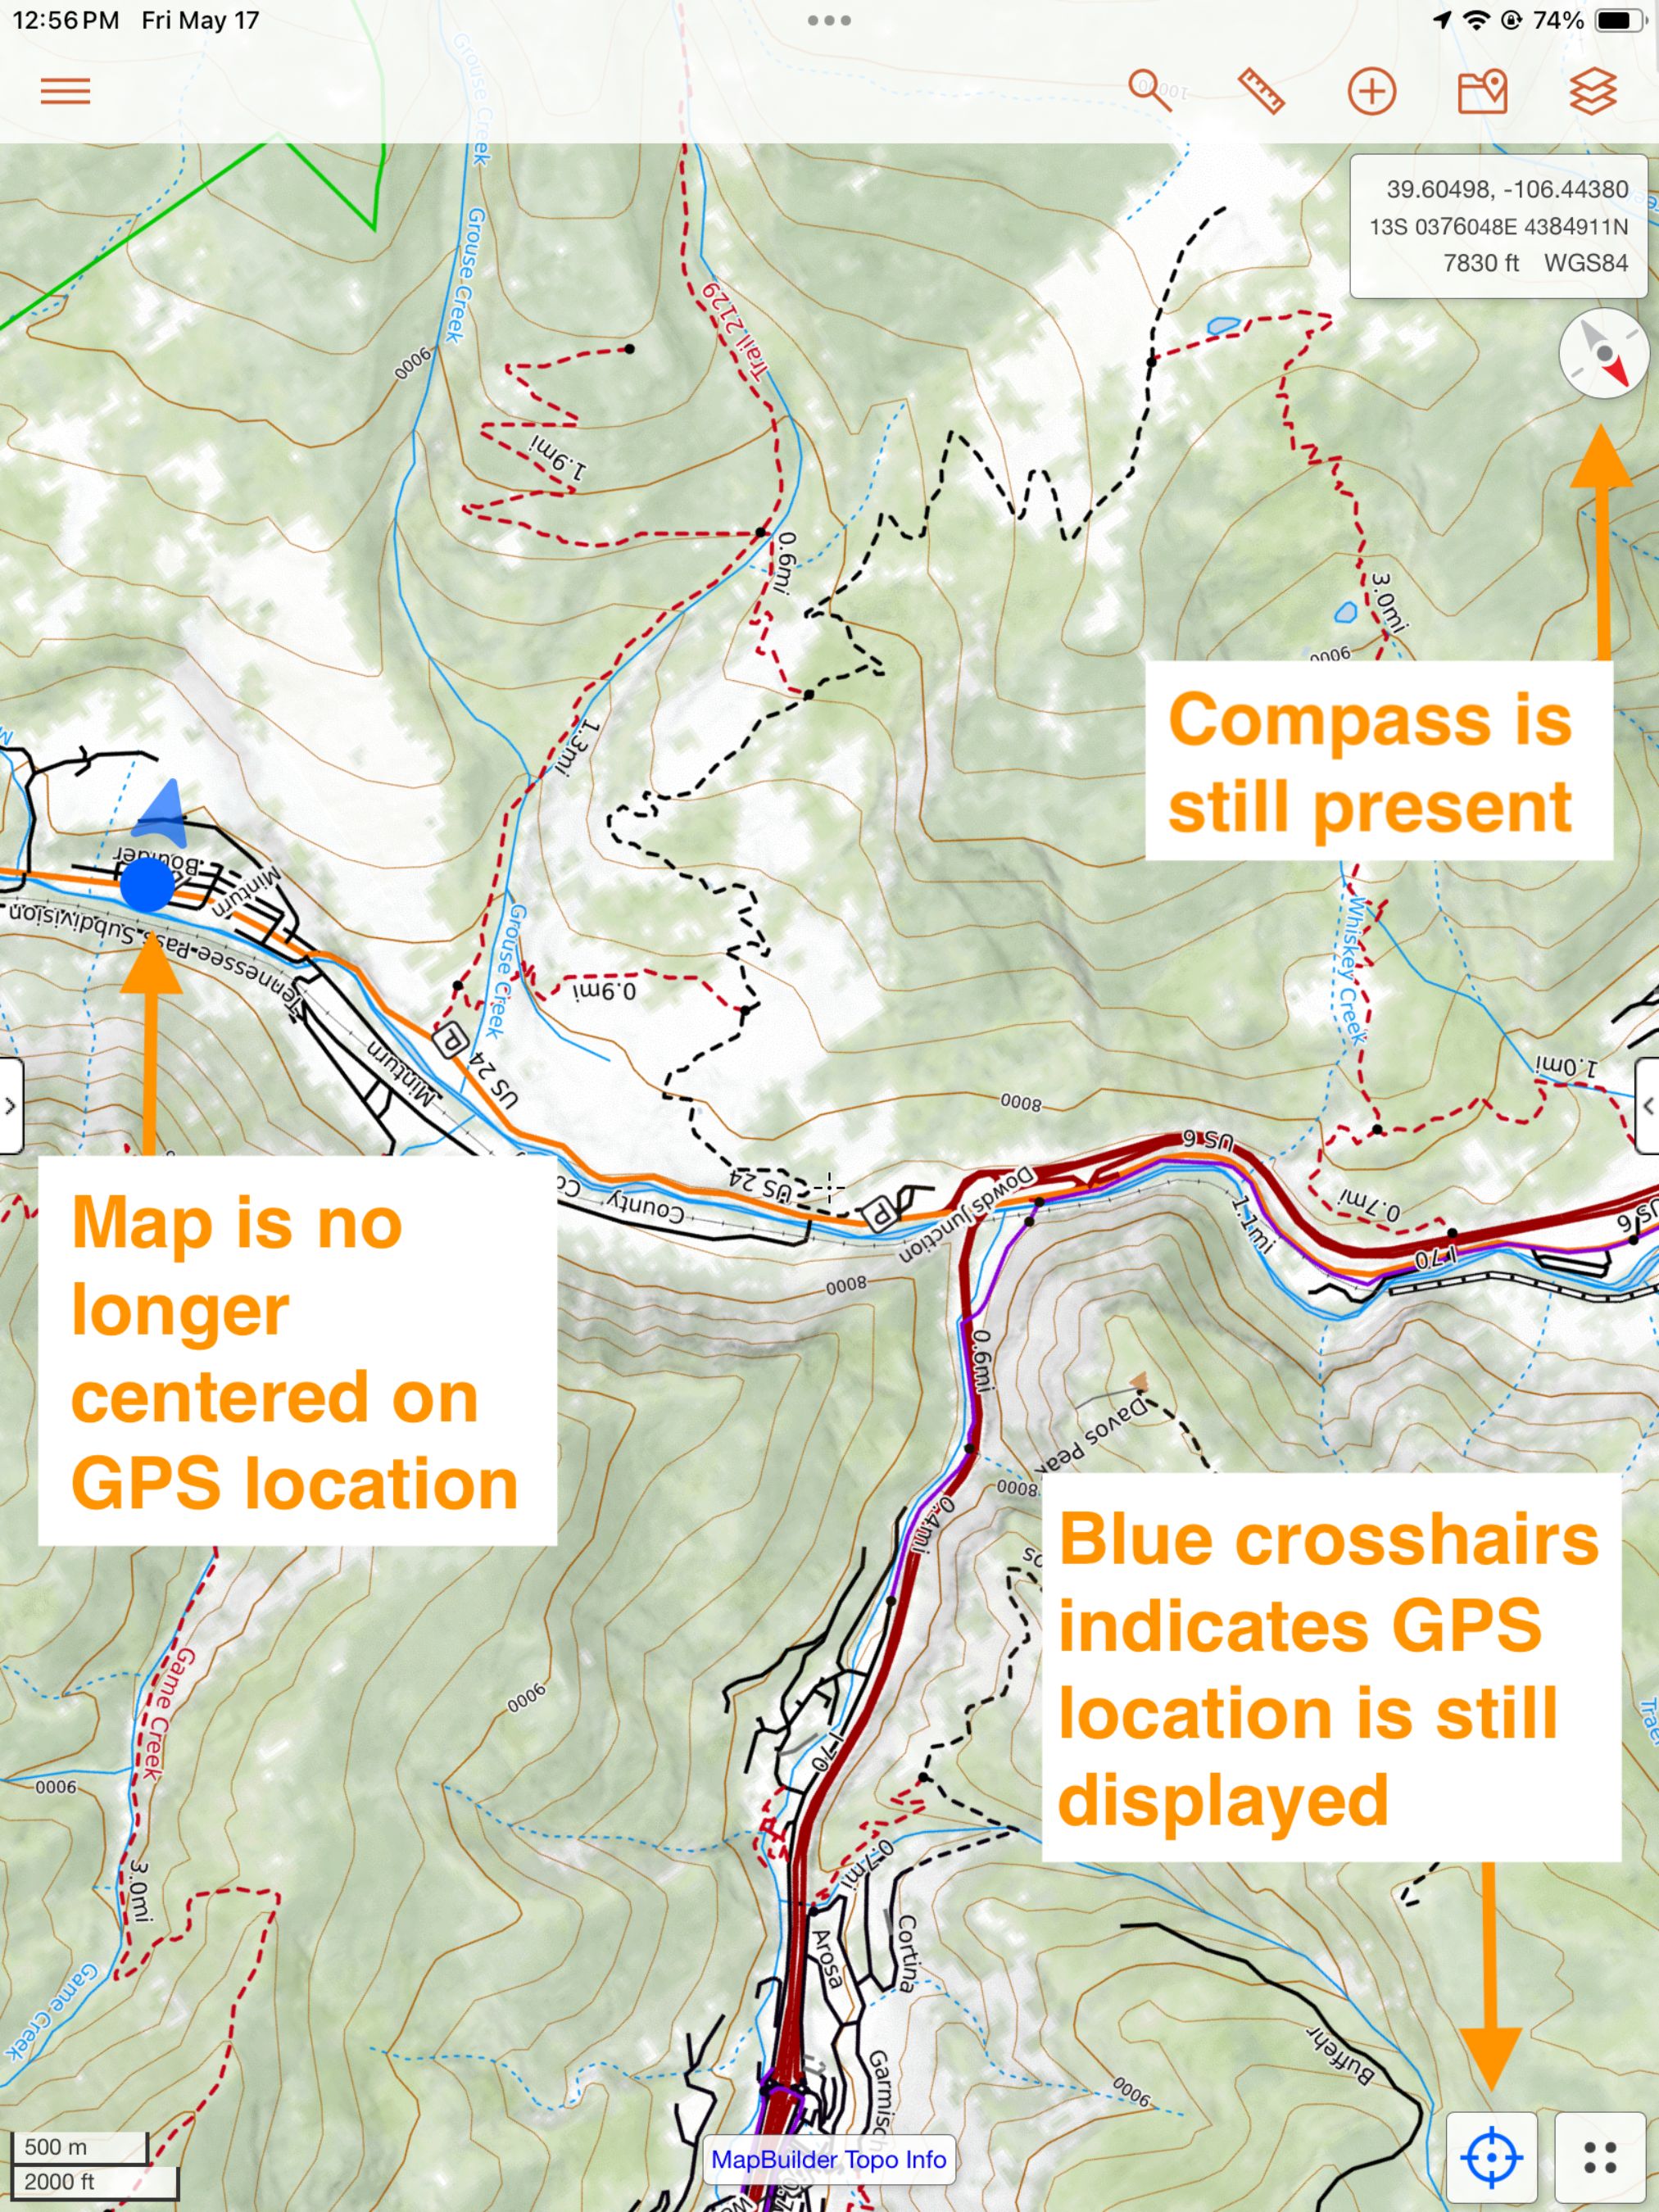
The map will stay centered on your position unless you manually pan away from your position on the map, at which point the lock will disappear from the crosshairs icon. However the crosshairs icon will remain blue, indicating that your GPS location is still reflected on the map. To return to your GPS location and Locked mode, tap on the blue crosshairs icon.
Heading Up Mode
Please note: it is recommended to lock screen rotation on your device when using Heading Up mode. This ensures that only the map rotates and not the entire screen.
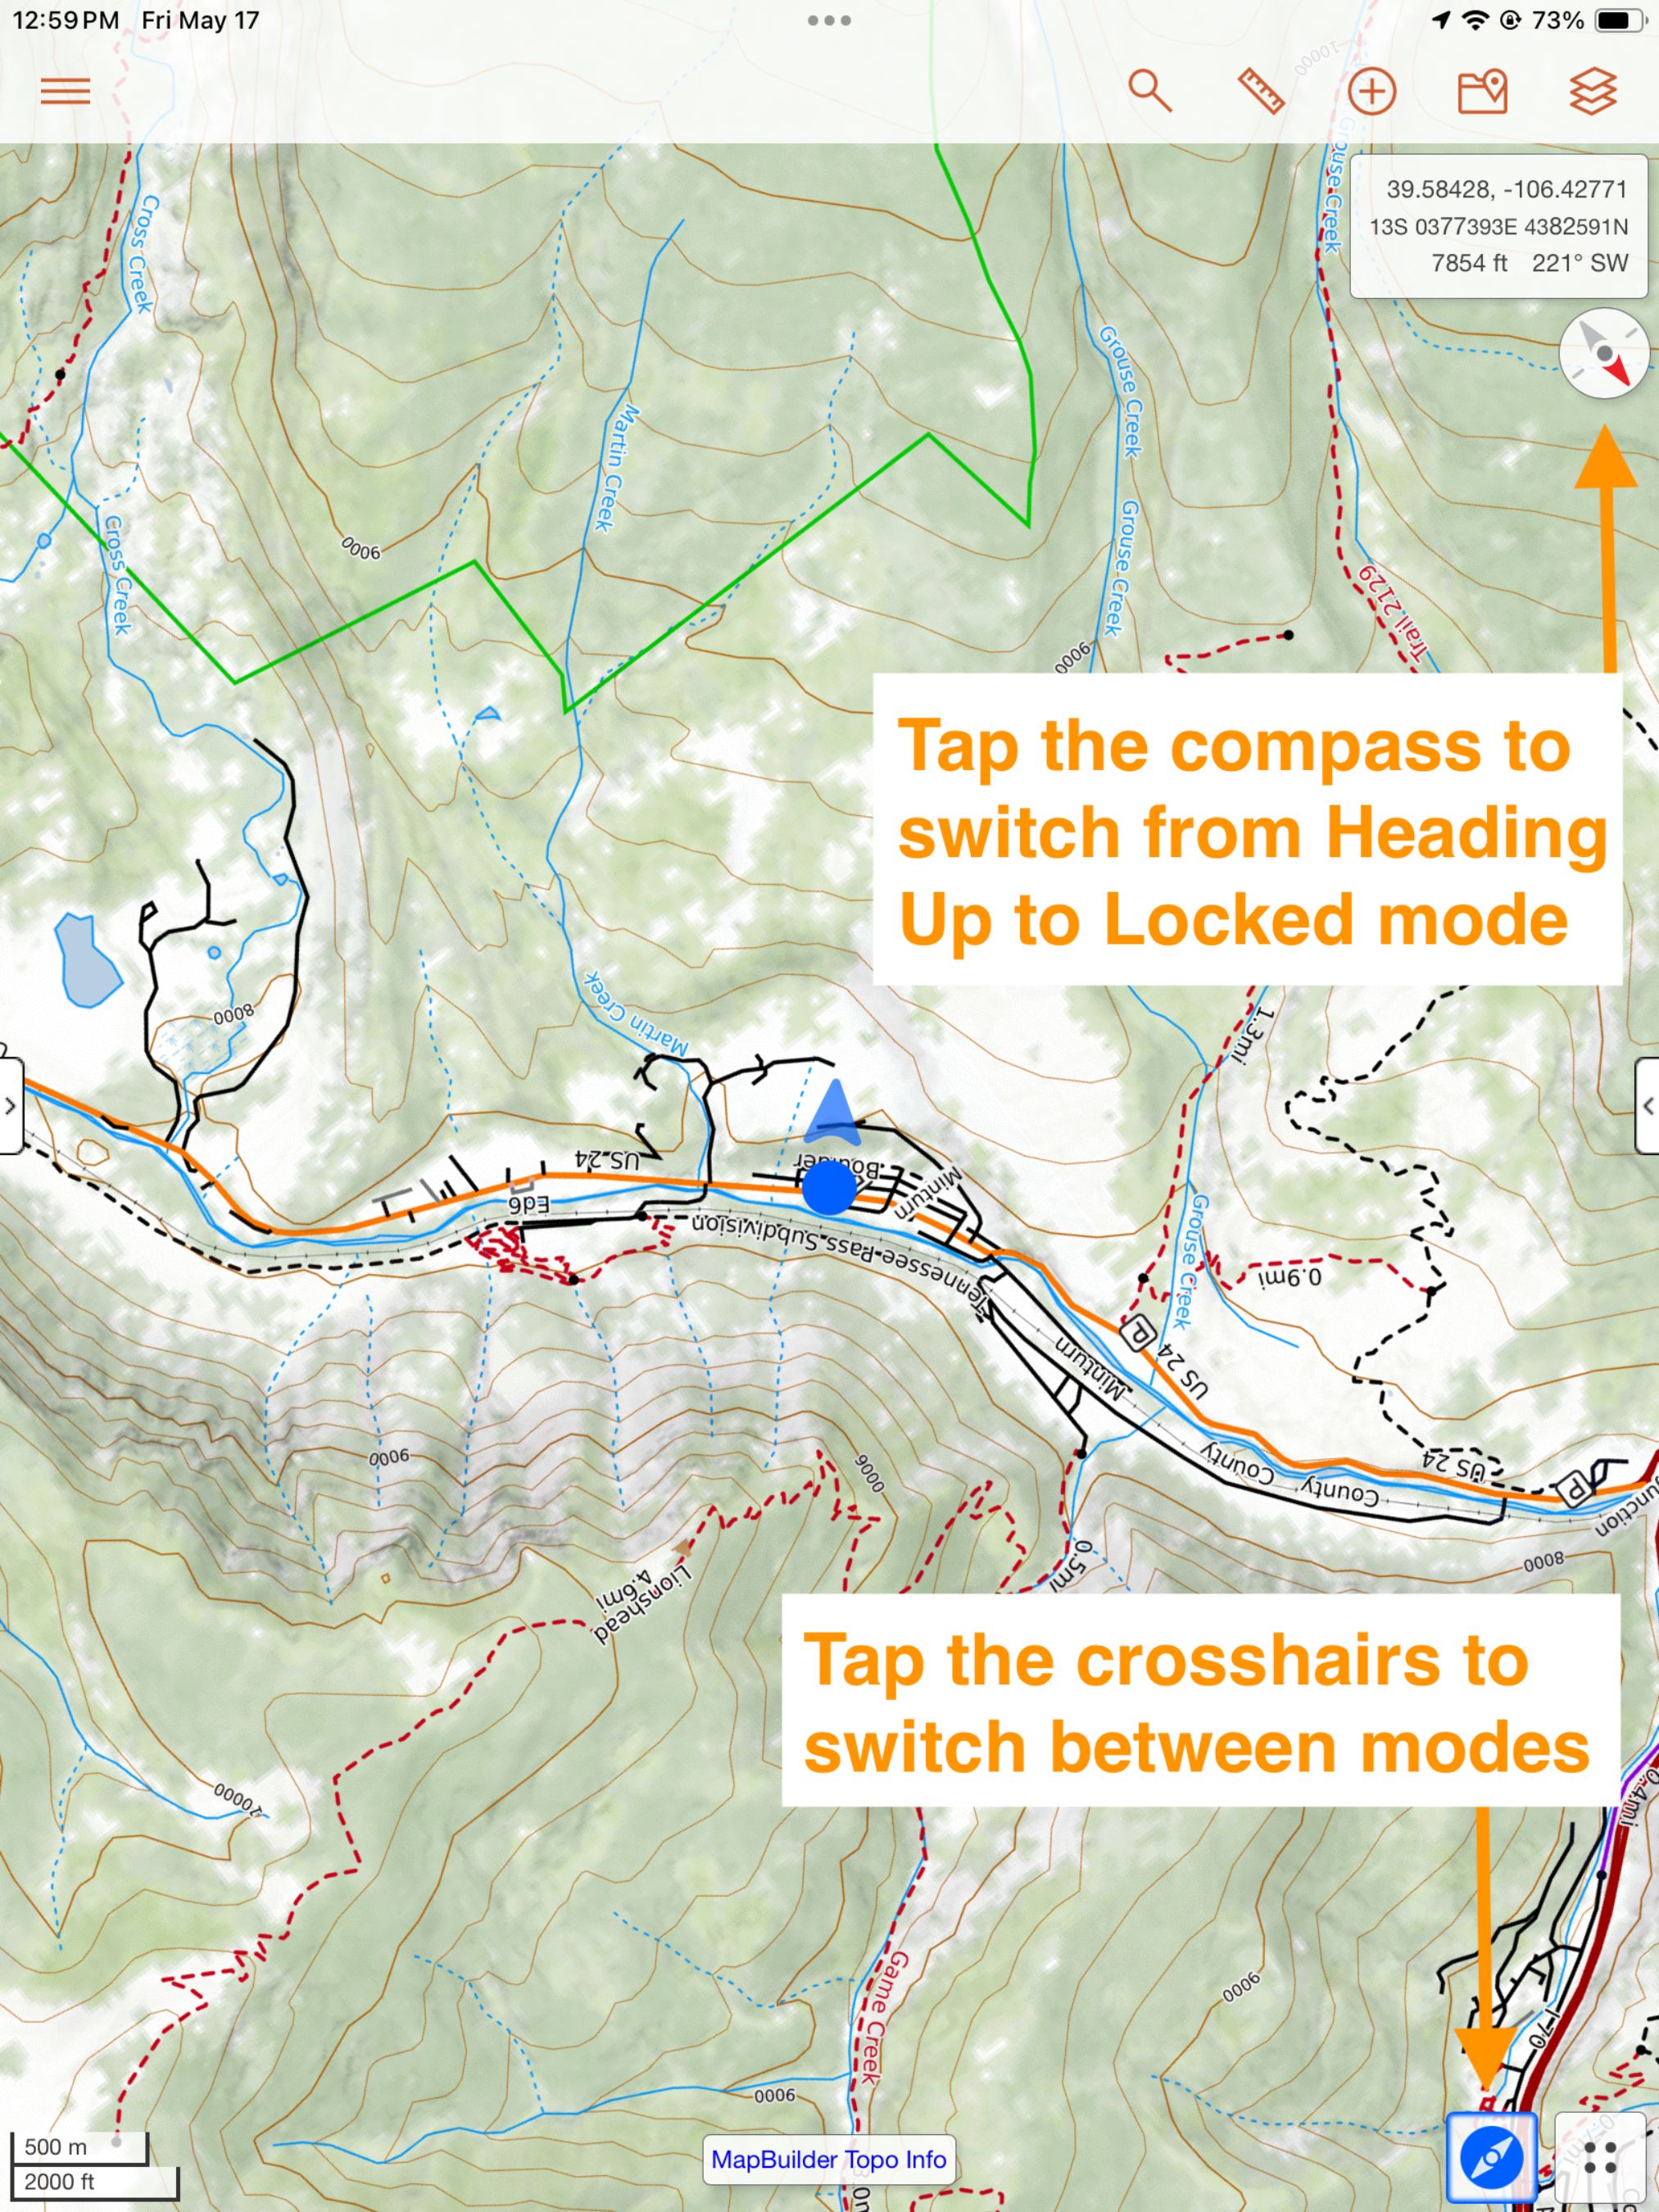
Tap the crosshairs icon twice to turn on “Heading Up” mode. Heading Up mode is indicated by a blue compass icon over the crosshairs icon at the bottom of the map viewer and a compass below the coordinates box.
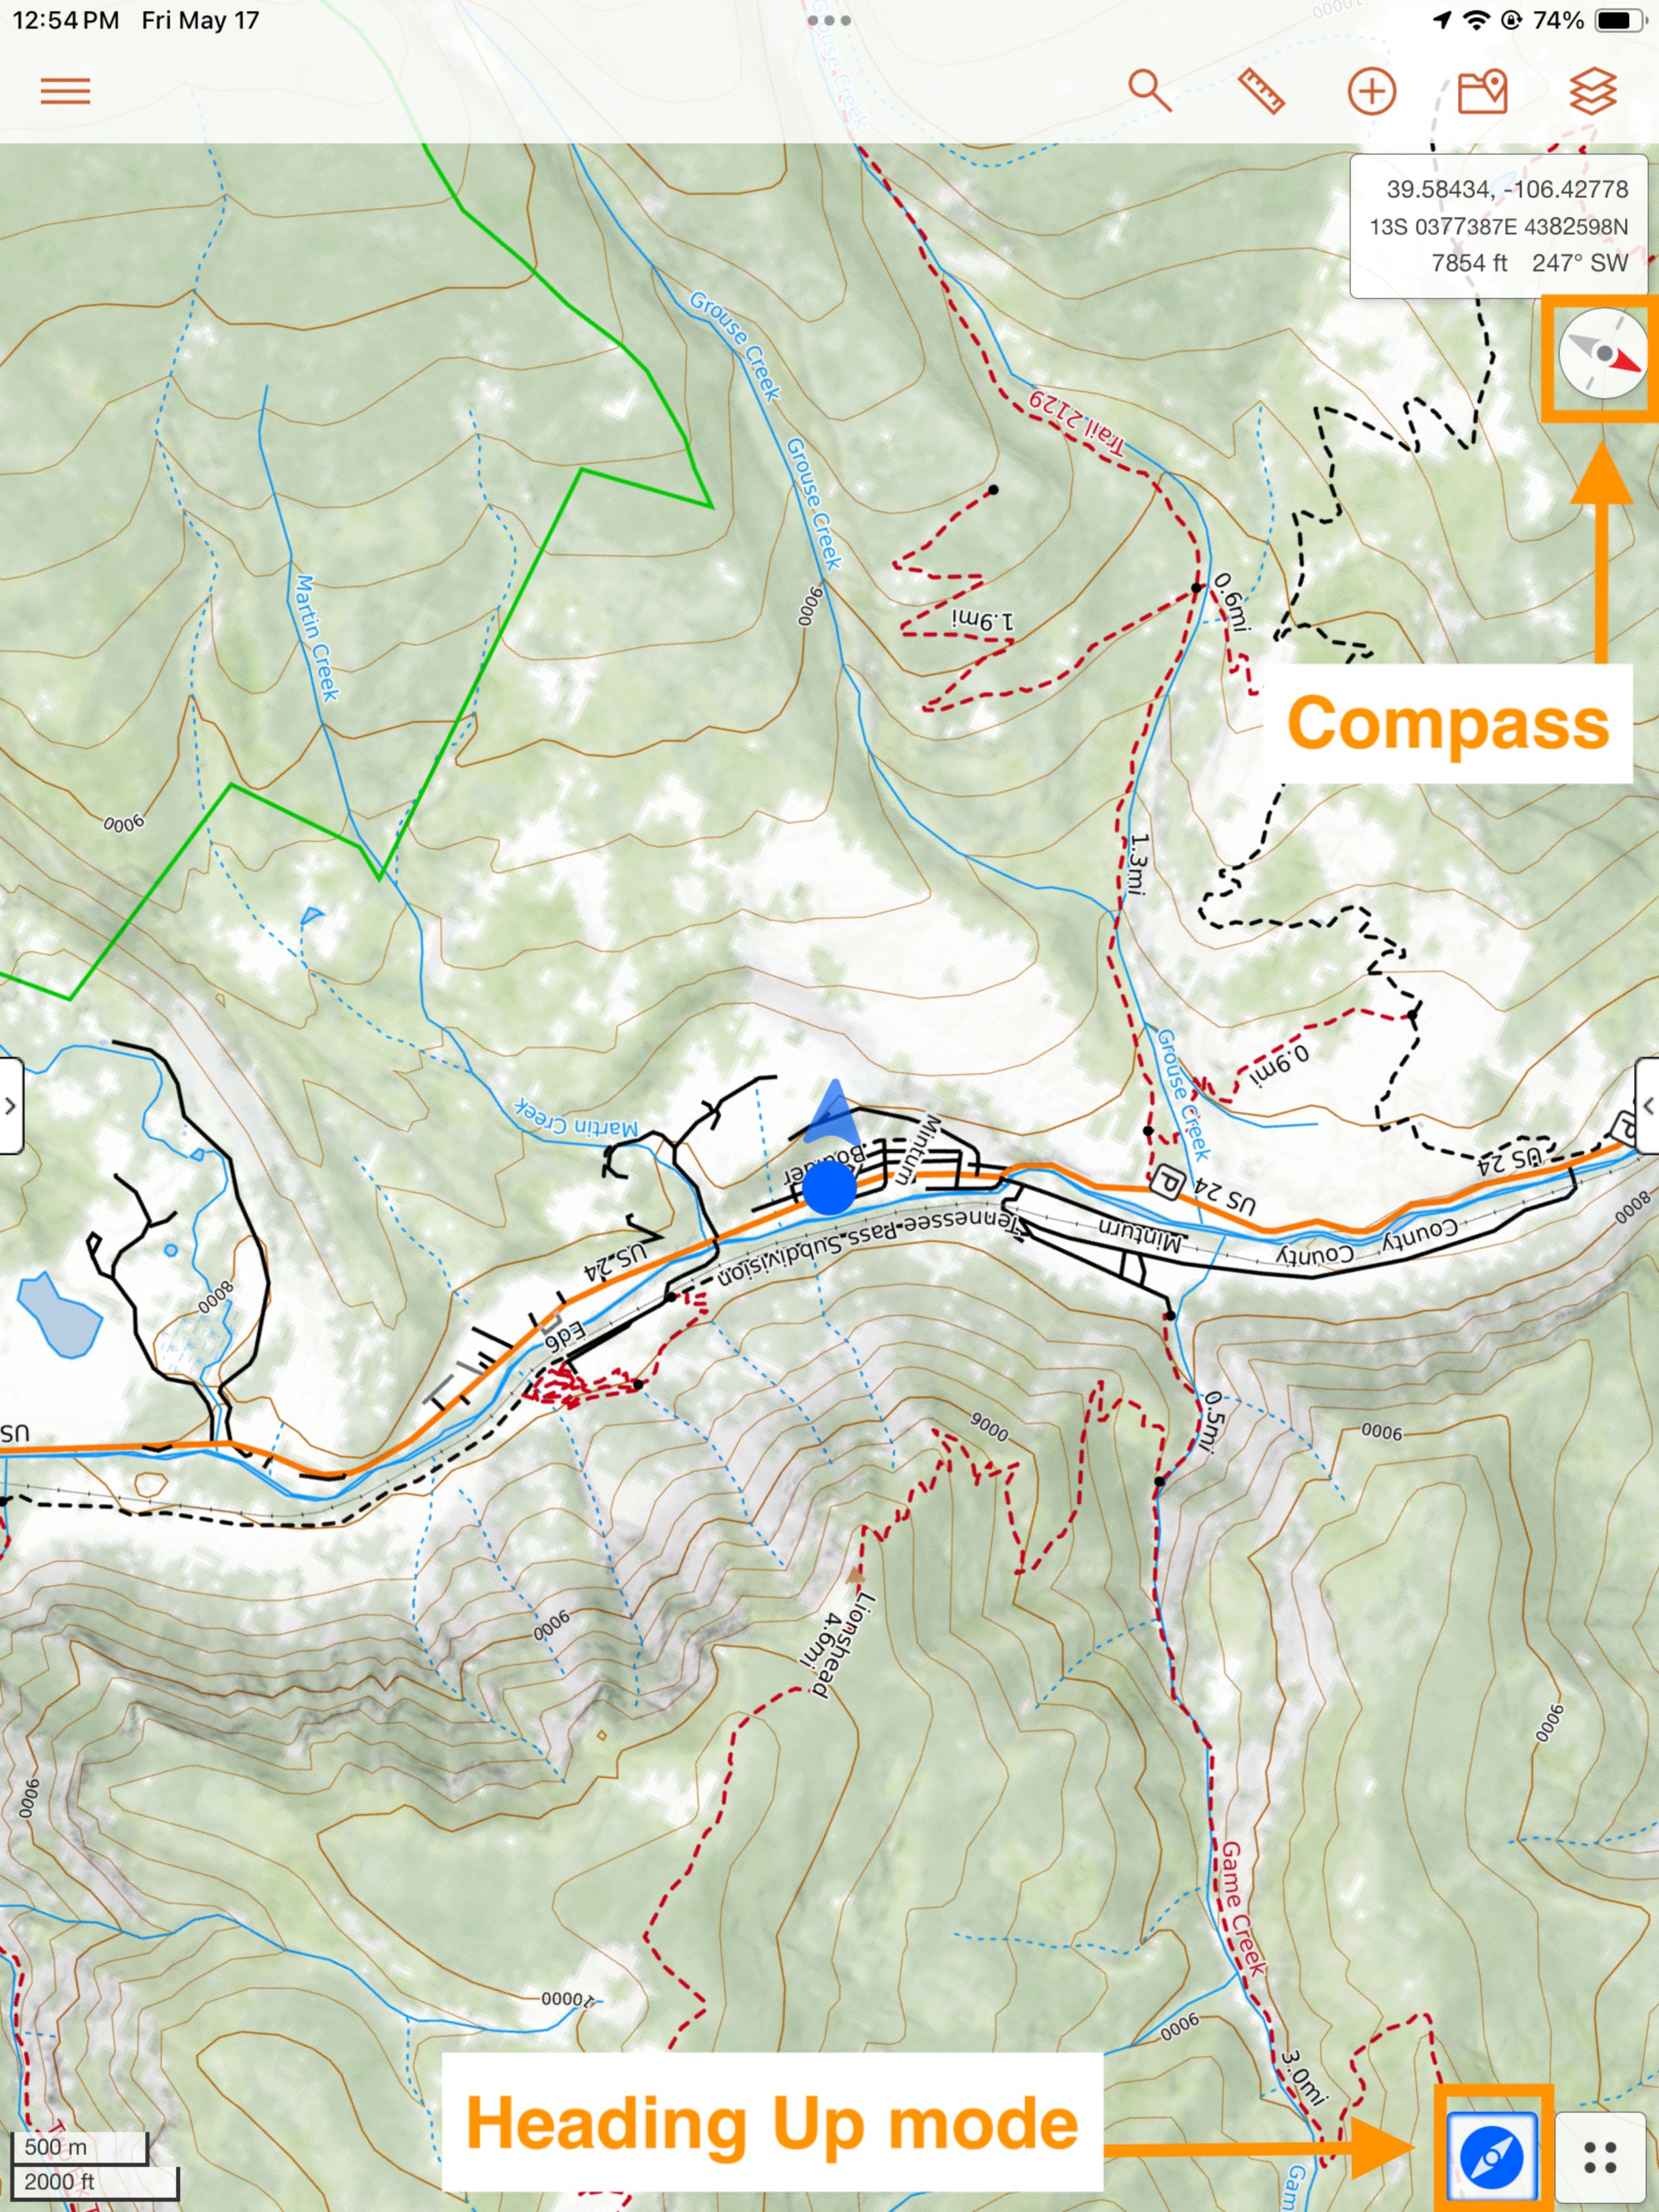
In Heading Up mode, the entire map will rotate based on the direction that the device is facing- in other words, the direction you are facing or traveling will be up on the map. Your current position is indicated by a blue dot and the blue heading arrow reflects the cardinal direction that the device is facing. Your current heading is reflected numerically in the coordinates box. The orientation of the map is visually reflected by the compass below the coordinates box.
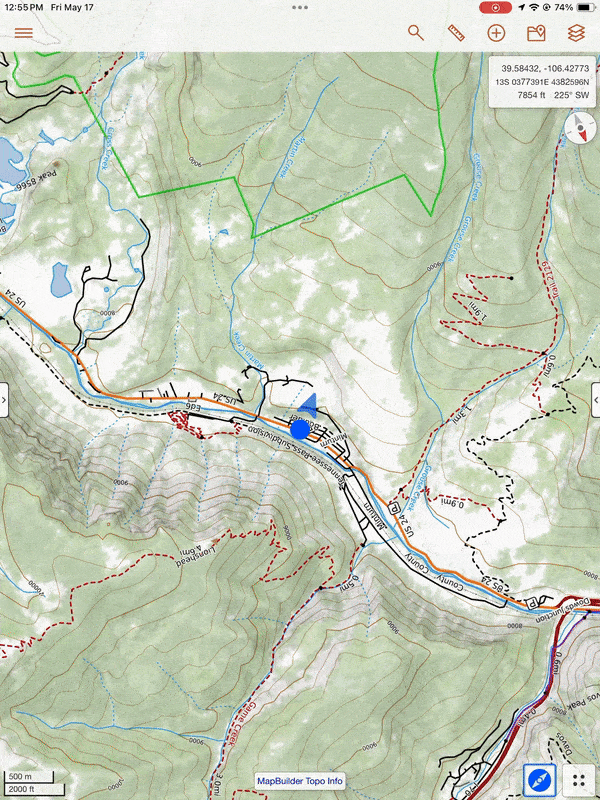
The map will stay centered on your position unless you manually pan away from your position on the map, at which point the compass needle will disappear from the crosshairs icon. However the crosshairs icon will remain blue, indicating that your GPS location is still reflected on the map and the compass will still be present below the coordinates box.
The top of the map will reflect the most recent cardinal direction that the device was facing- for example, if the device was facing southwest when you panned away from your location, the map will be oriented with southwest up in the map viewer.
To orient the map north up while panning around, tap the compass below the coordinates box. The map will orient with north up and the compass will disappear.
To return to your GPS location and Locked mode, tap on the blue crosshairs icon. Tapping once will turn on Locked mode and tapping twice will turn on Heading Up mode. You can switch between Locked mode and Heading Up mode at any time by tapping on the crosshairs icon. You can also switch from Heading Up mode to Locked mode by tapping on the compass below the coordinates box.
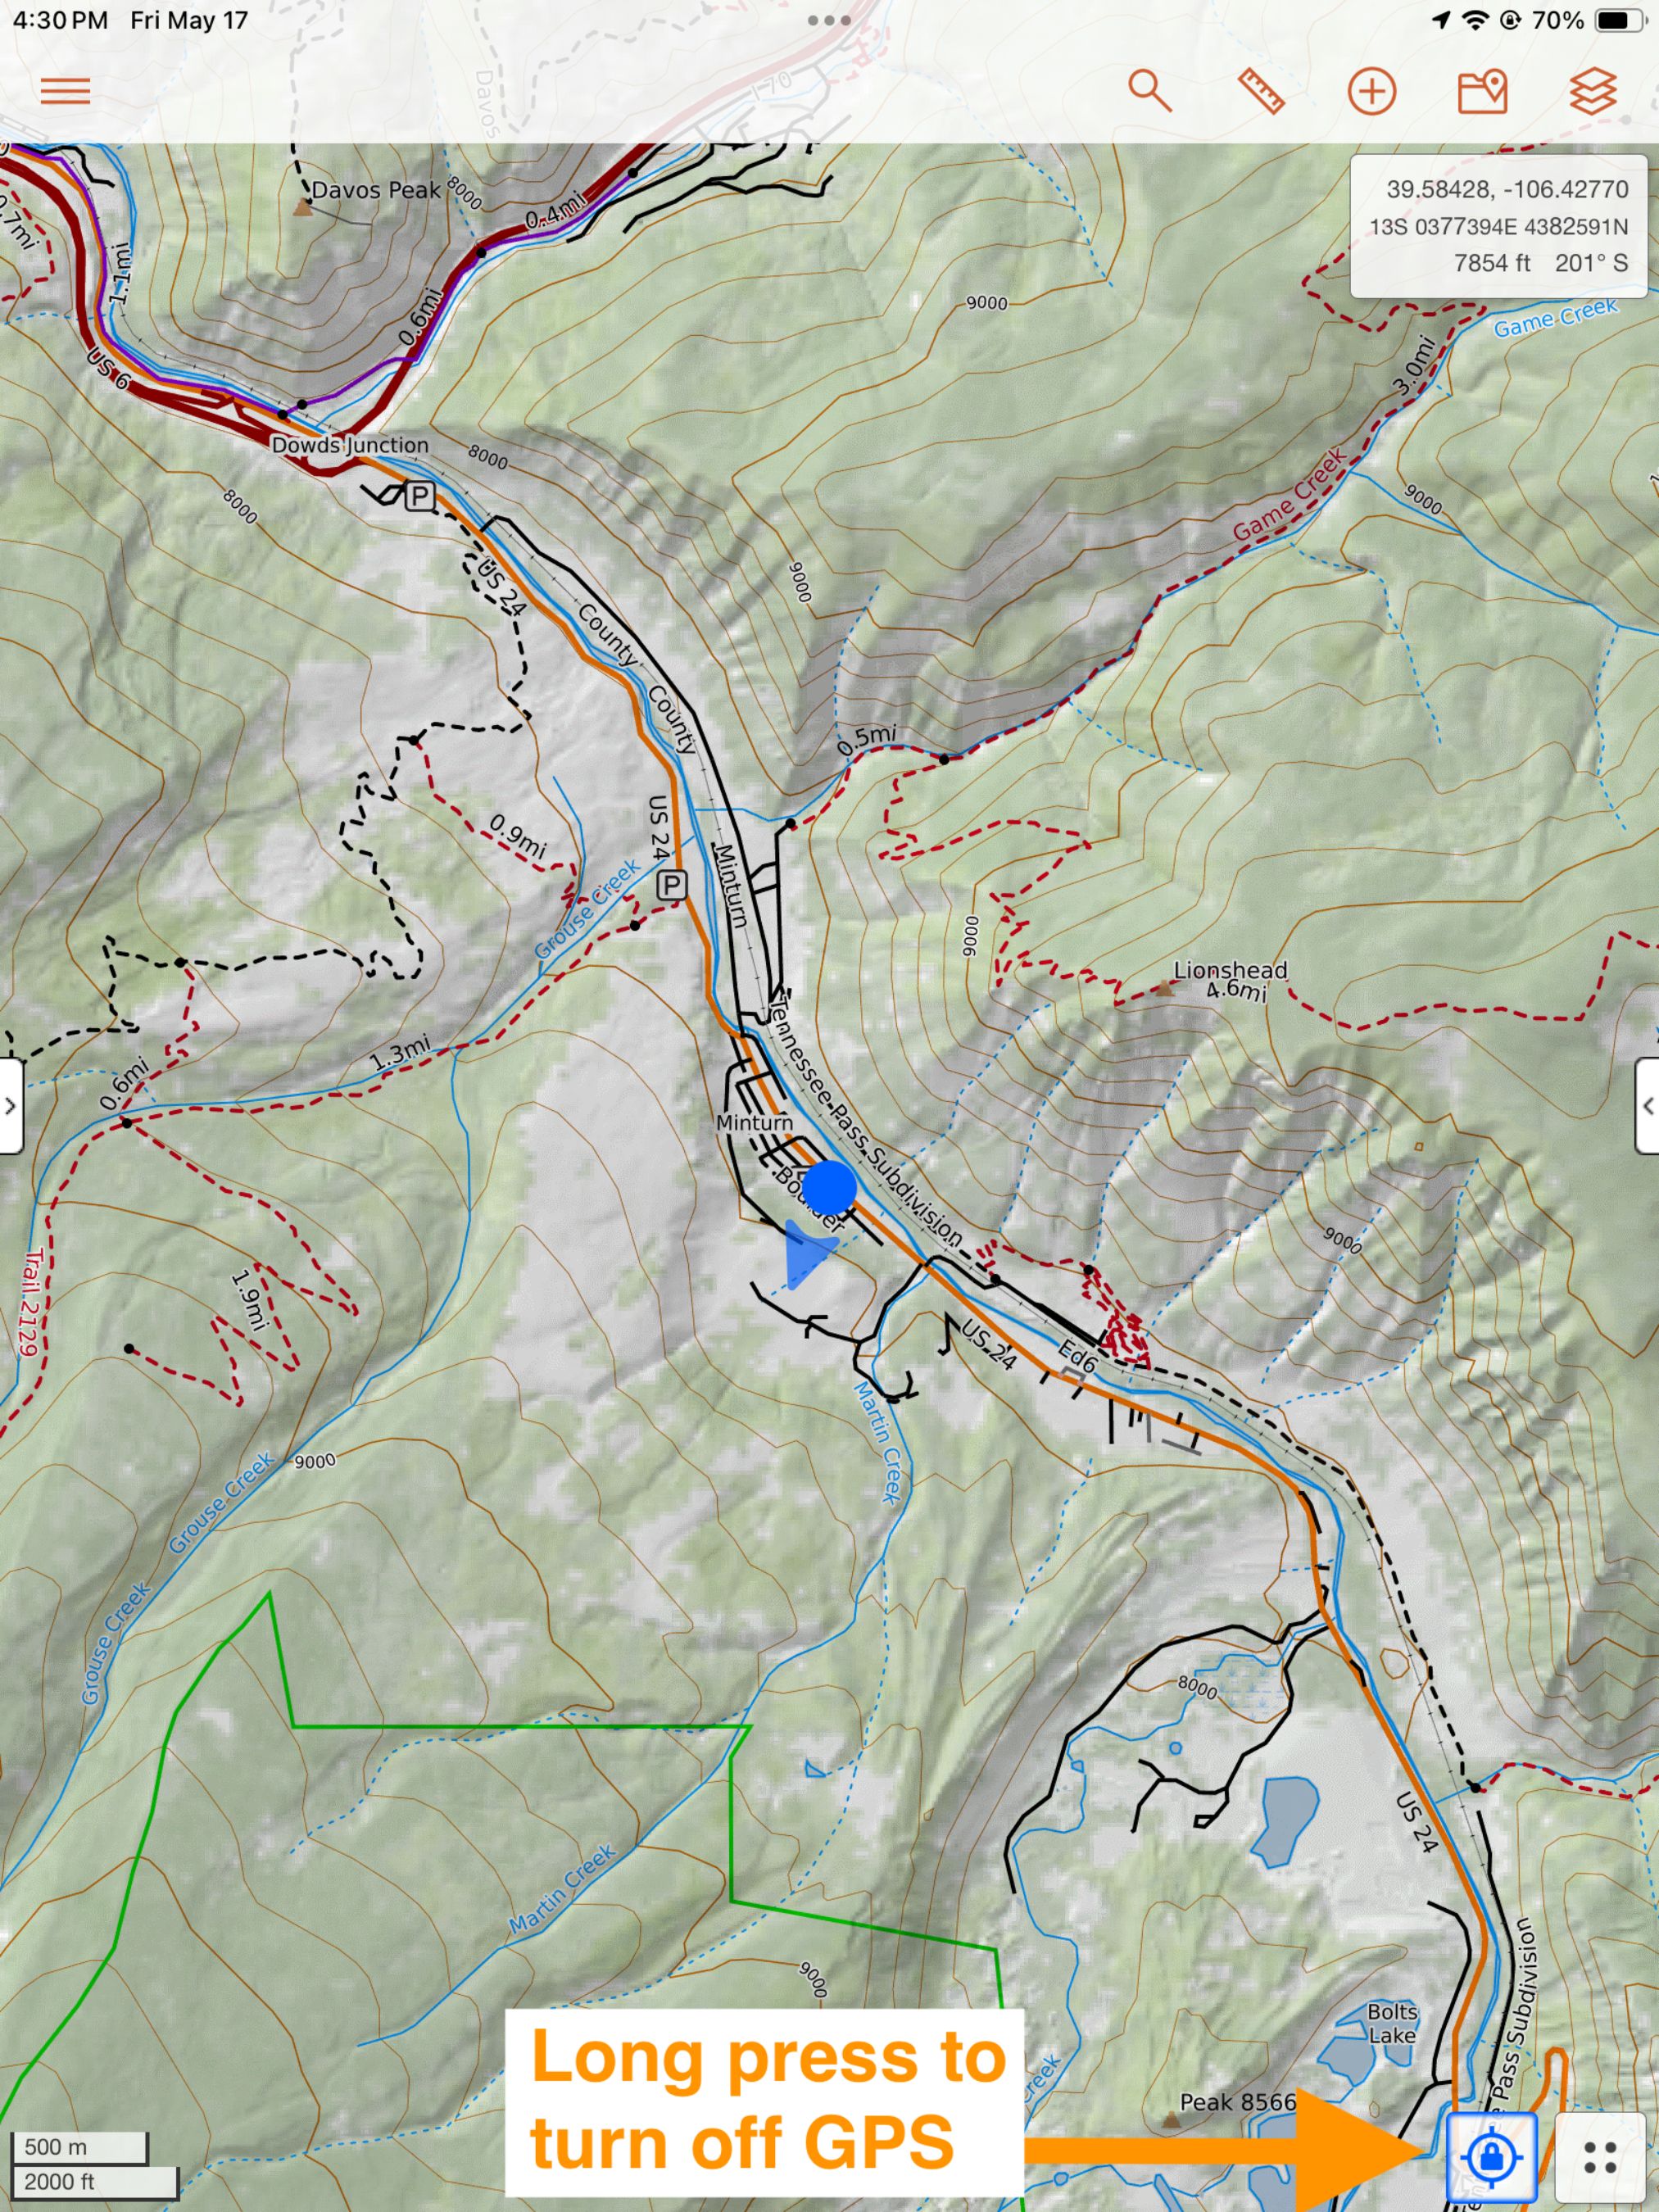
Turning Off GPS
GPS will remain on indefinitely when you are in either Locked or Heading Up mode. To turn off the GPS and exit Locked or Heading Up mode, long press on the crosshairs icon.
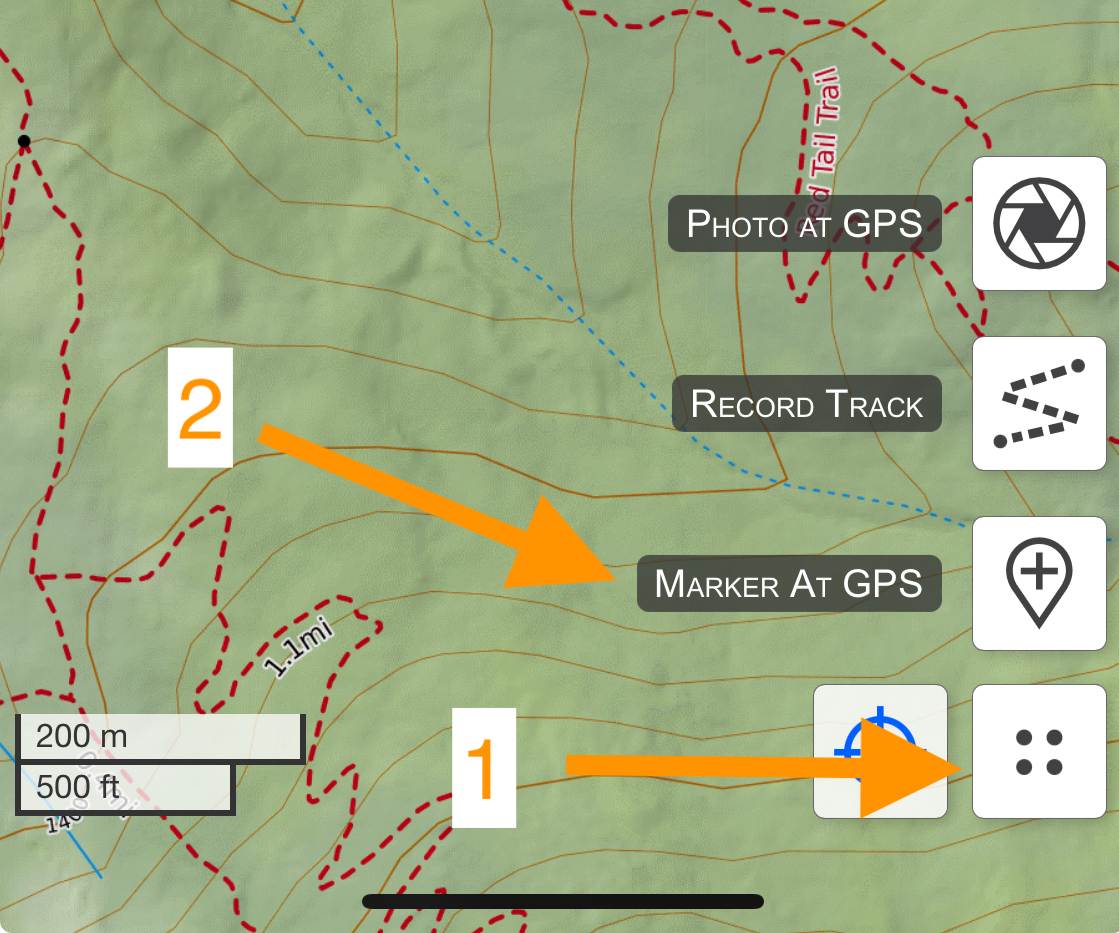
Adding a Marker at Your Location
Once location services are enabled, you can quickly add a marker at your location by tapping the 4-dot Location menu, then the "Marker at GPS" button. This will center the map on your location, and provide an edit box for the marker.
In the edit box, the name of the marker is pre-filled with the current date and time. You can keep or remove this text, or add your own to give it more context.
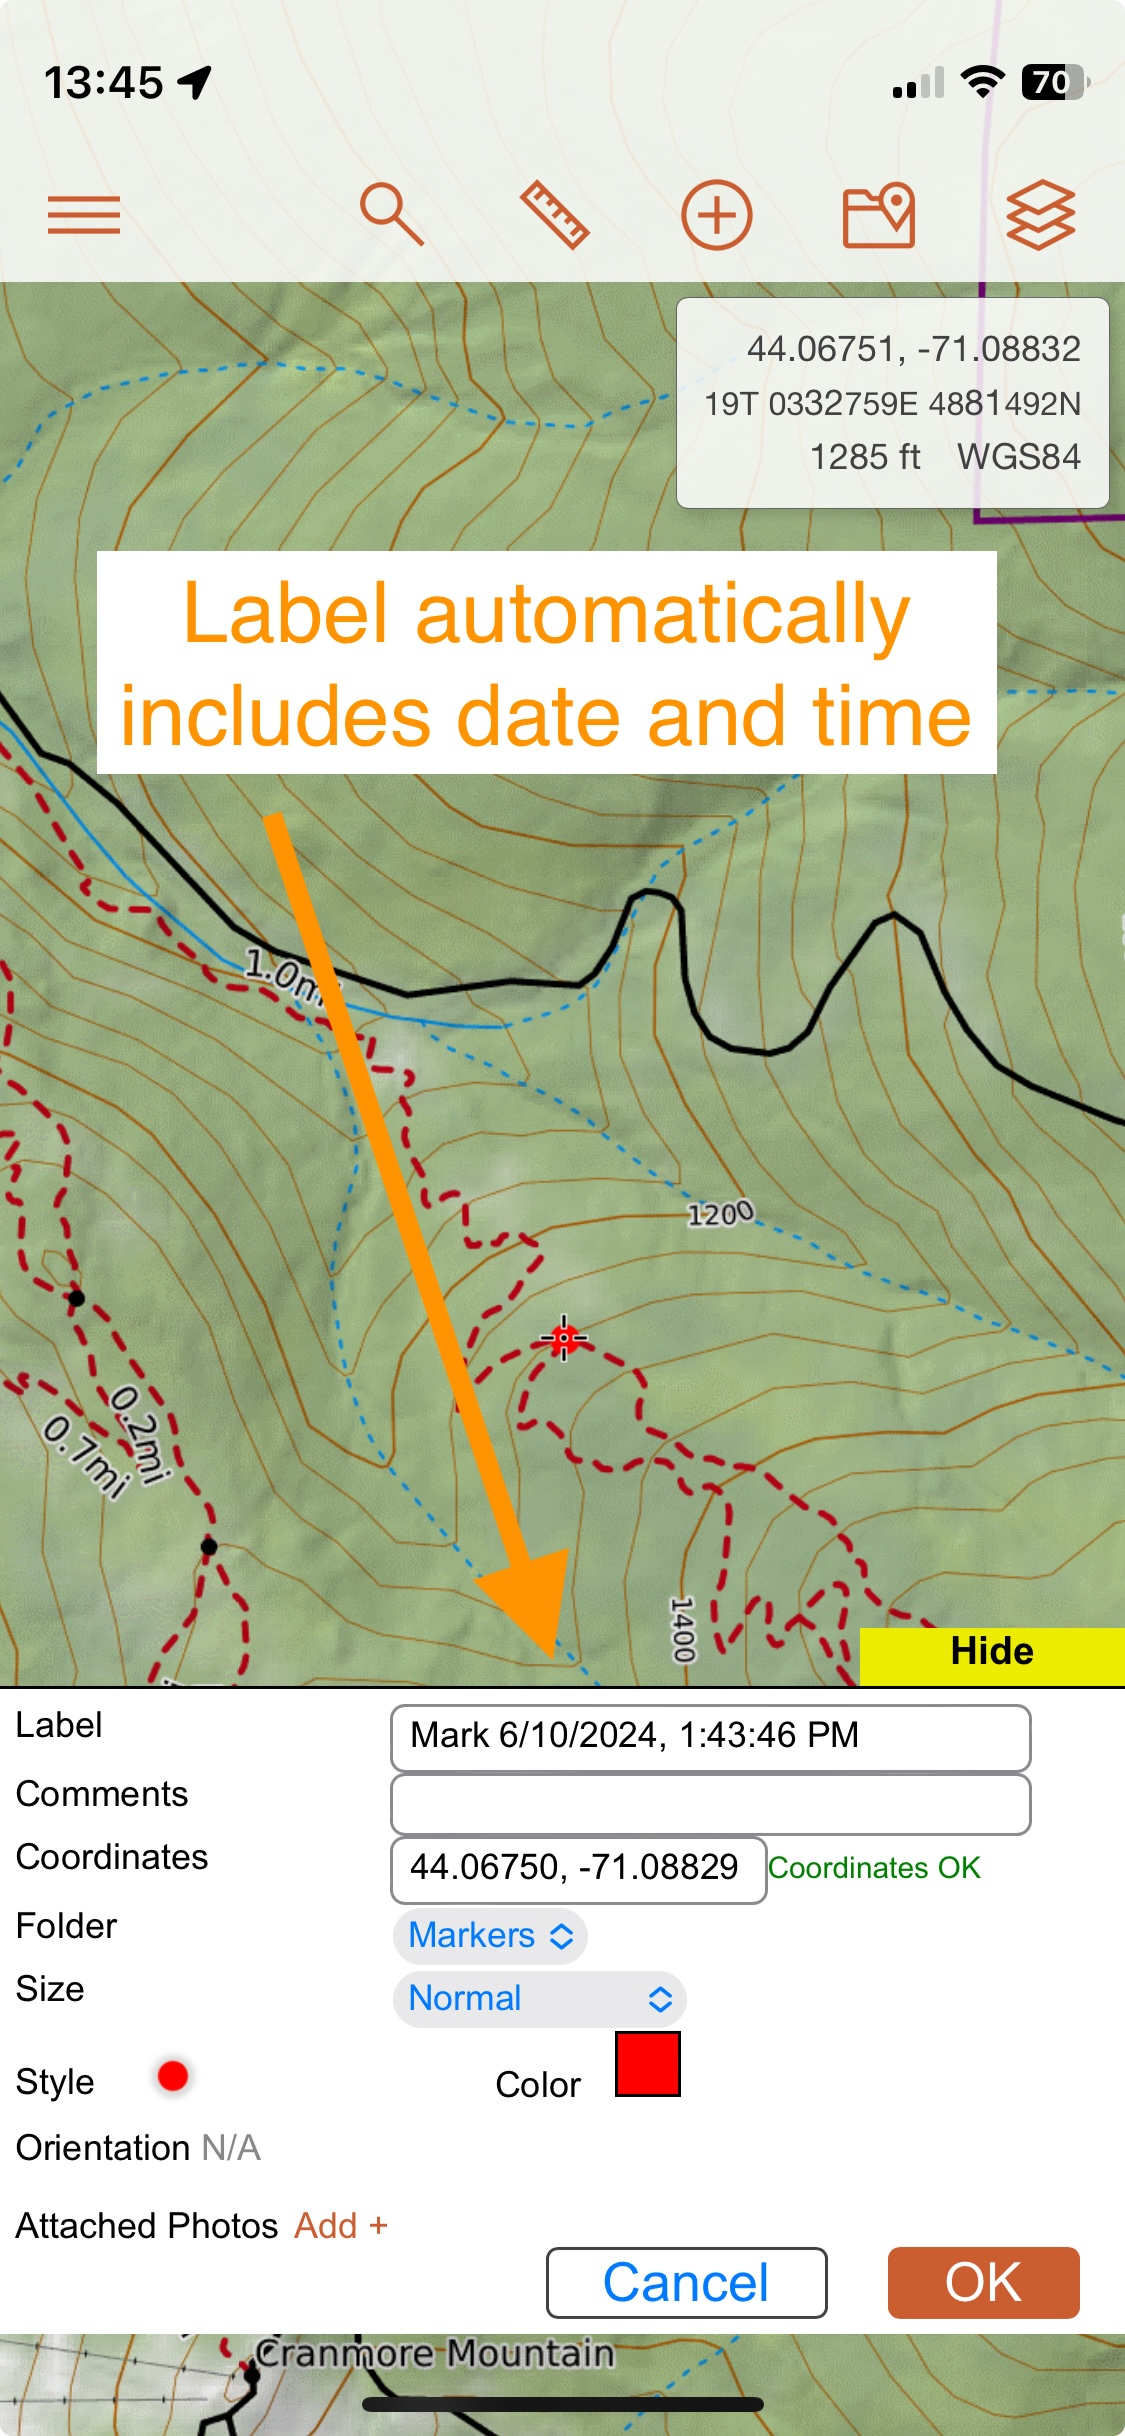
The marker can be edited just like any other marker. This means that it is possible to drag the marker to a new location before saving it, resulting in the marker no long representing the current GPS location.
Navigate Tool
If you are looking for more guidance, look no further than the Navigate tool. You can use the Navigate tool to:
- Provide straight line navigation from your current location to a particular point or marker
- Navigate along an existing map object, such as a line or the perimeter of a polygon, forward or in the reverse direction
Straight line navigation is a good choice for finding and navigating a bearing for a specific point, such as a trailhead, hut, or other point of interest. However, keep in mind that straight line navigation is shown as the crow flies. It does not provide specific details such as the presence of switchbacks in the trail that may deviate from the straight line path and add to the actual distance. If you are looking for more precise navigation, then navigating along a map object, such as a line snapped to an already existing trail or a previously recorded track, may be a better choice for you.
Let’s take a closer look at each of these types of navigation.
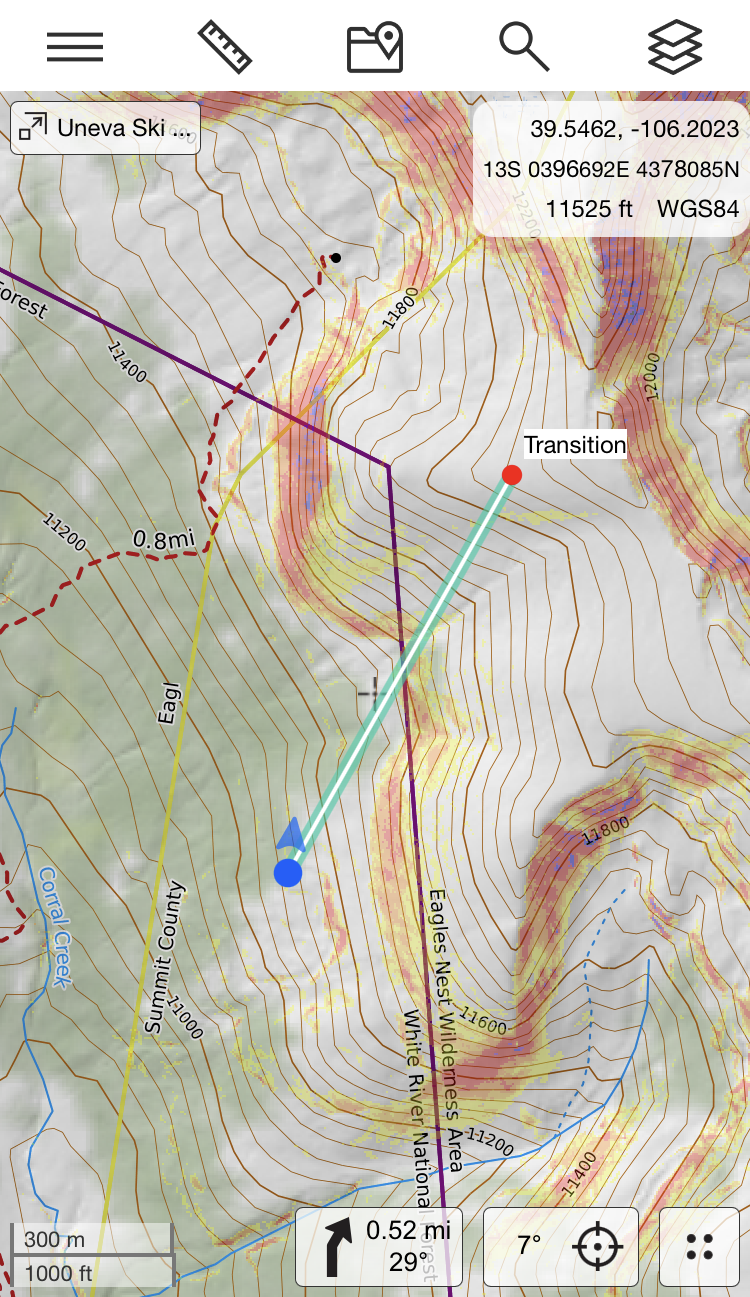
Straight Line Navigation
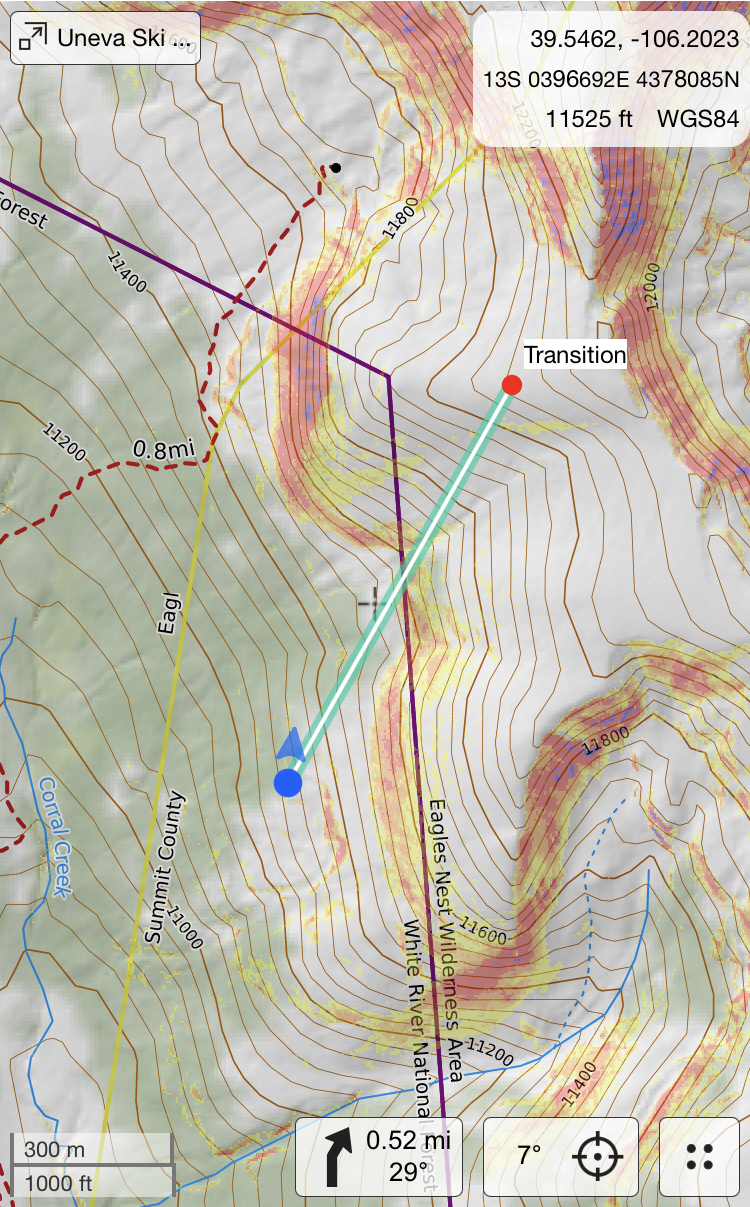
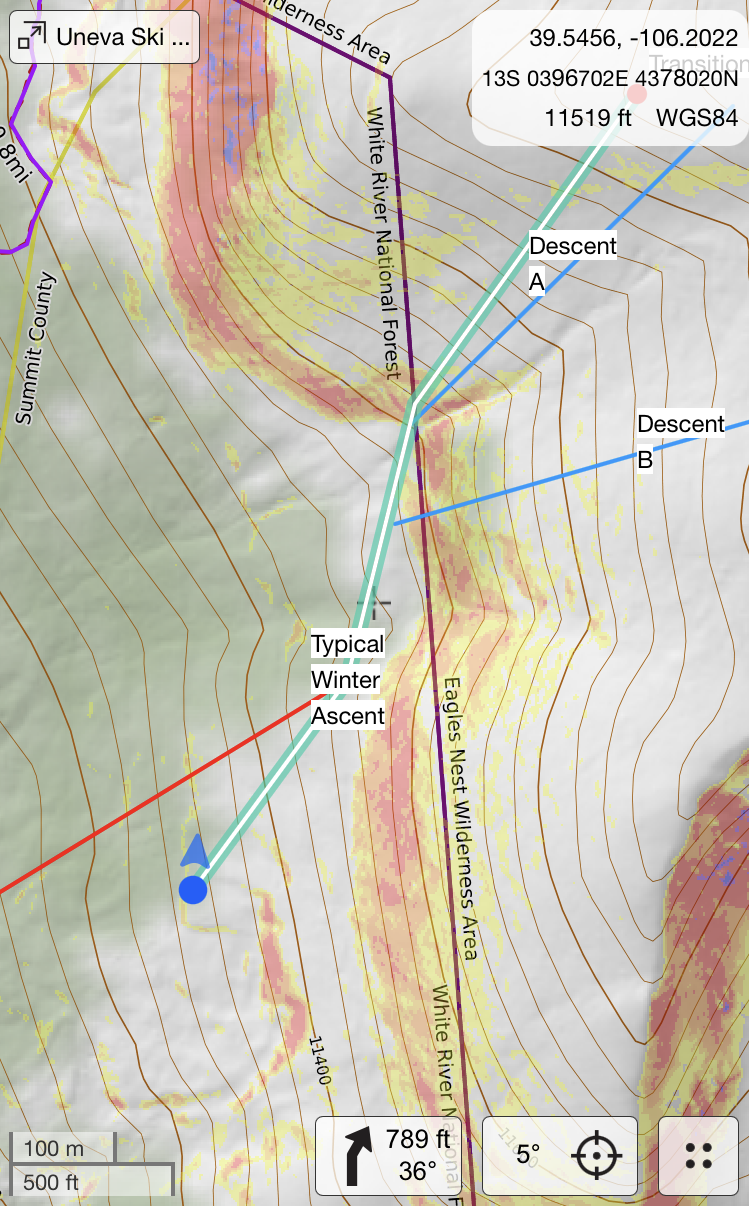
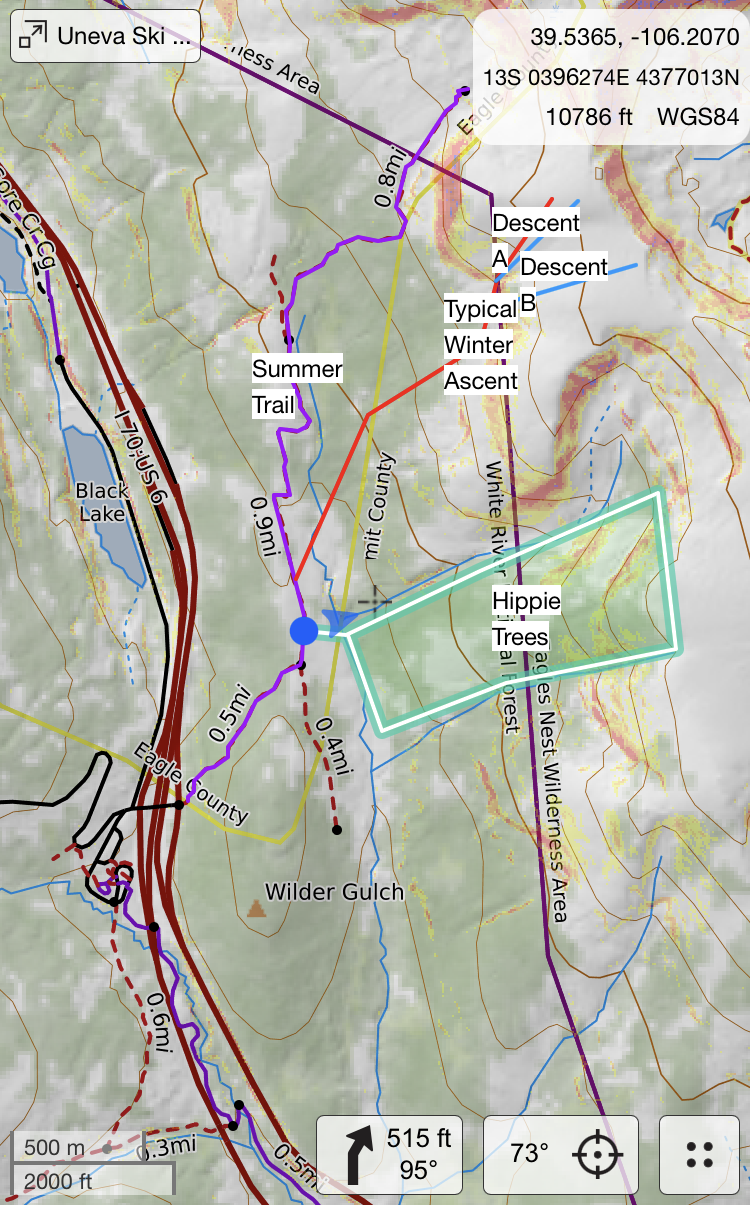
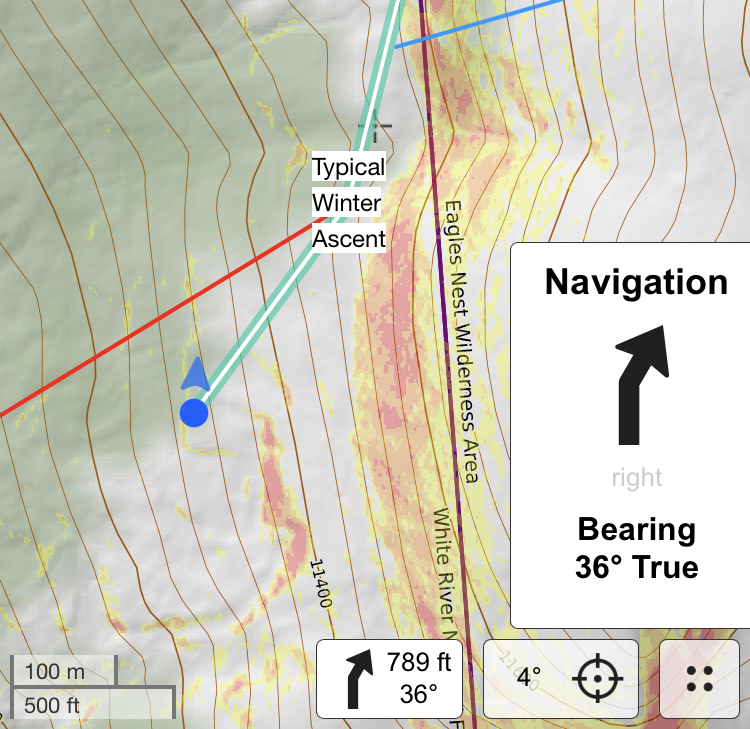
To get straight line navigation to a specific point, long press on that point in the map viewer and select Navigate To from the dialog that appears. A straight as-the-crow-flies green and white line will appear from your current location to the point you long pressed on. In addition, a navigation dialog will appear on the bottom of the map viewer with a heading arrow indicating the direction you need to travel if necessary, the remaining distance and the bearing of your course.
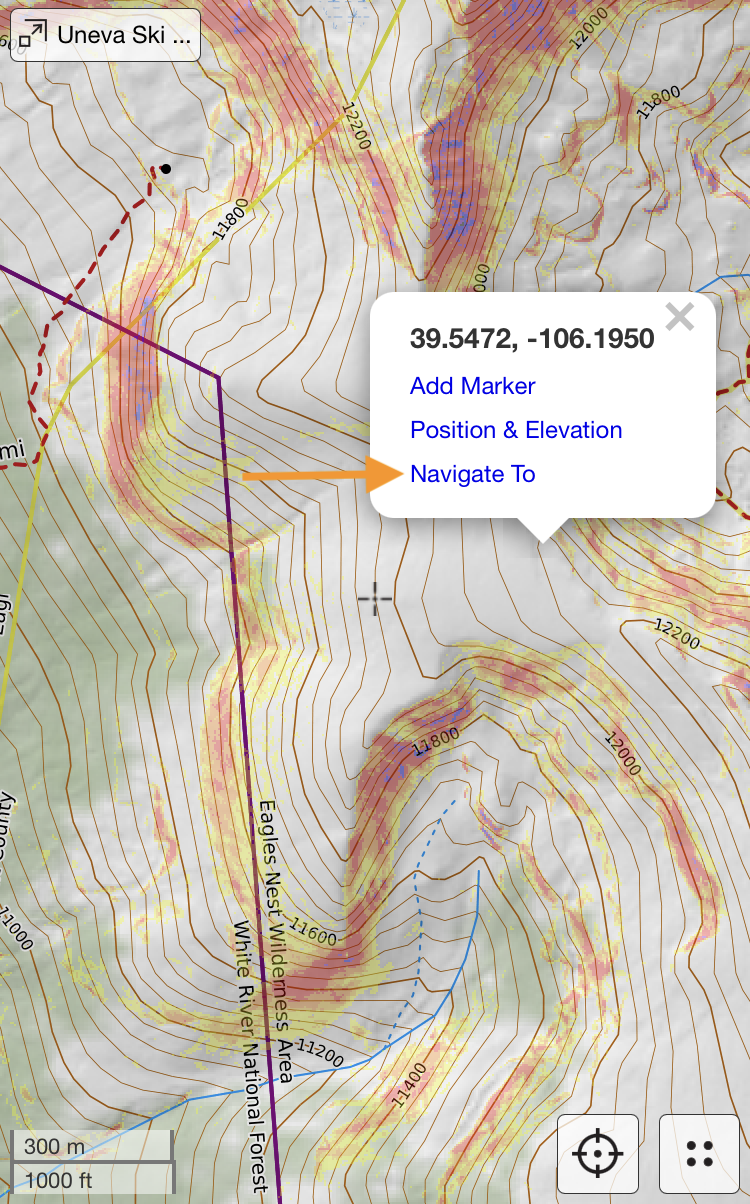
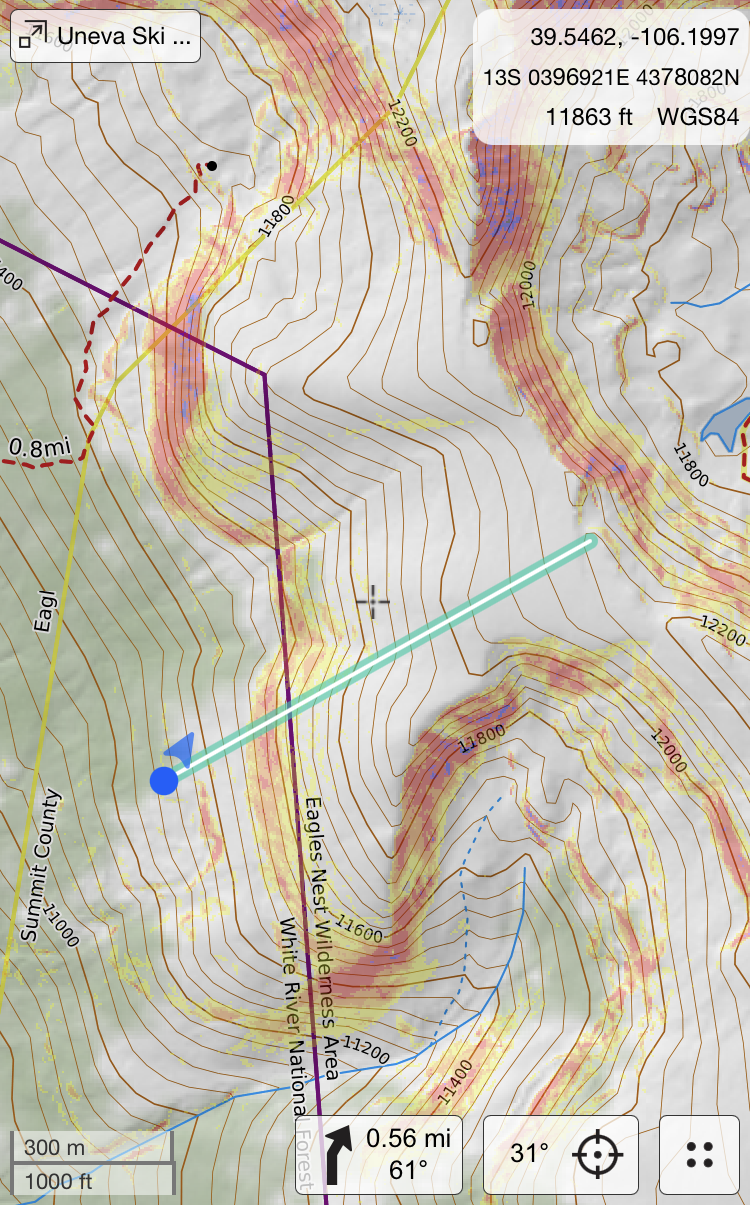
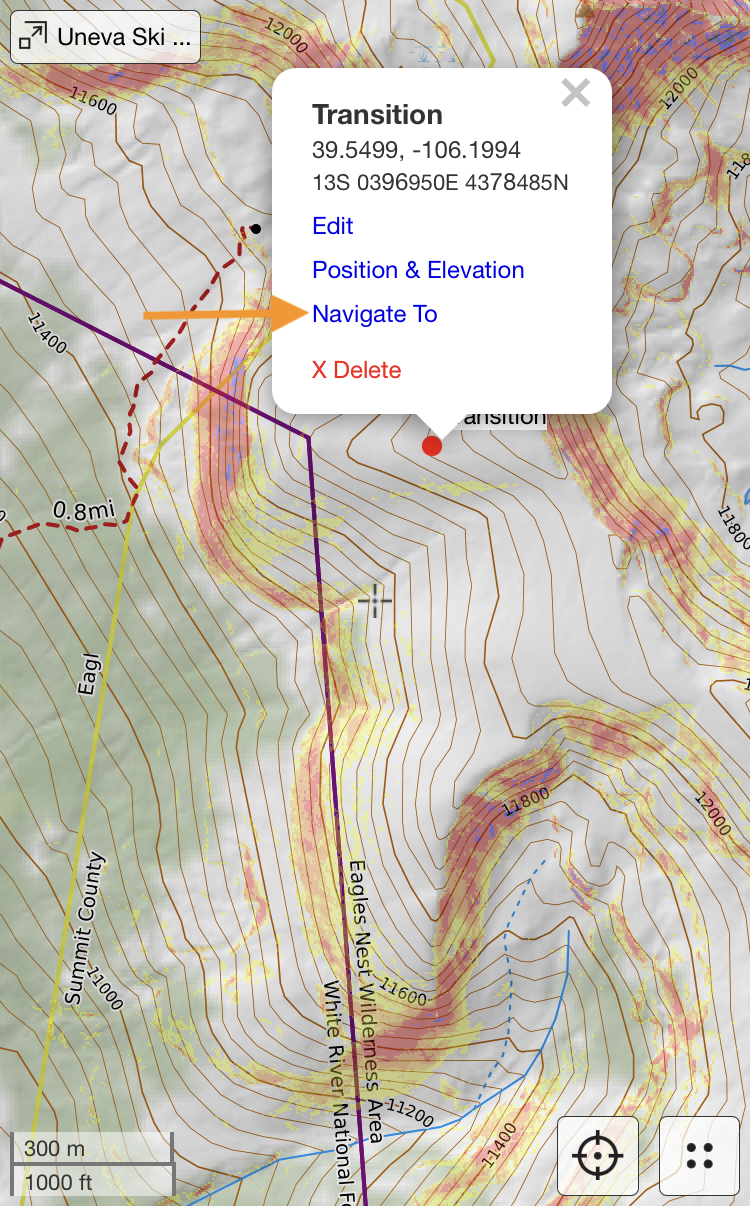
You can also get straight line navigation to a marker that is already on the map. Tap on the marker and then select Navigate To in the dialog that appears. As with long pressing, a straight green and white line will appear from your current location to the marker and a navigation dialog will appear at the bottom of the map viewer.
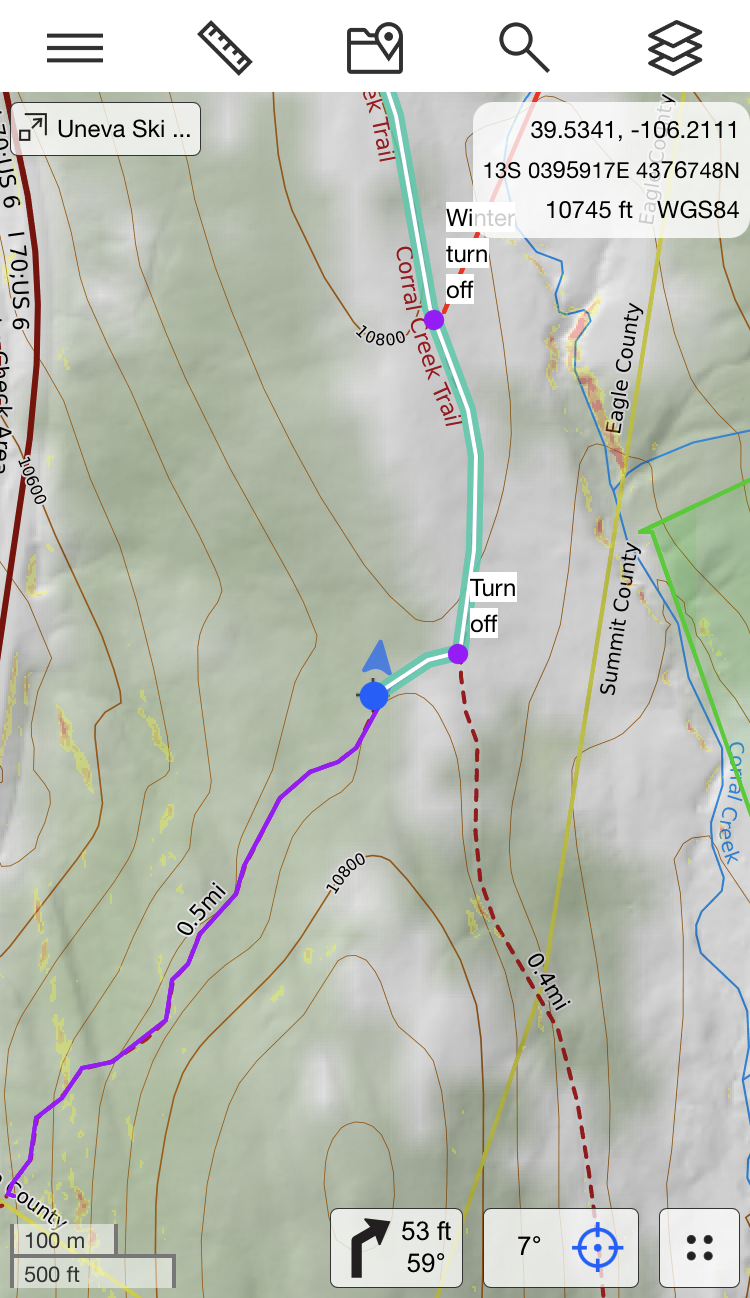
Navigate Along an Existing Map Object
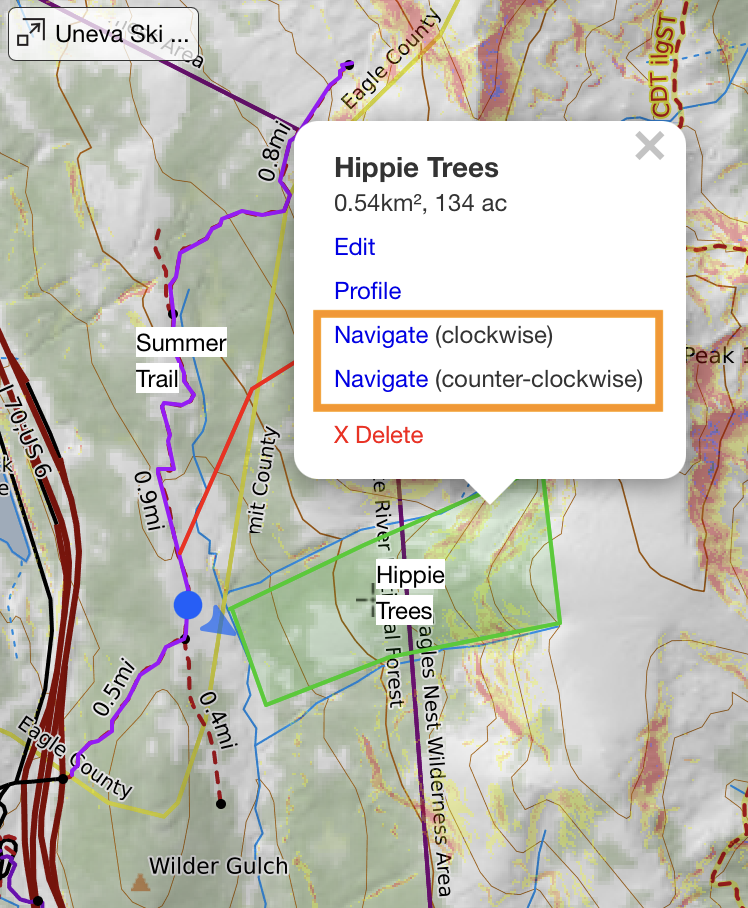
You can also navigate along an existing line (including lines, range rings and bearing lines) or polygon object (including polygons, buffers and sectors).
To navigate along a line object, tap on the object and select either Navigate (forward) to navigate the line in the direction it was drawn or recorded or Navigate (reverse) to navigate the line in the opposite direction.

Navigating a polygon is similar to a line object. To navigate a polygon, tap on the object and select either Navigate (clockwise) to navigate the perimeter of the object in a clockwise direction or Navigate (counterclockwise) to navigate the perimeter of the object in a counterclockwise direction.
Whether you are navigating a line or polygon object, the green and white line will appear from your current location along the length of the line object or the perimeter of the polygon object. If you are not on the line or polygon already, a straight line will extend from the object to your current location. Similar to straight line navigation, a navigation dialog will appear on the bottom of the map viewer with a heading arrow indicating the direction you need to travel if necessary, the remaining distance and the bearing of your course.
Navigation Dialog and Stopping Navigation
Whether you are performing straight line navigation or navigating along an existing map object, the navigation dialog provides the same information and functions in the same way. Tapping the navigation dialog that appears will expand the dialog to include the direction you need to travel (straight, right, u-turn or left) as well as your bearing and north reference. Tapping the expanded dialog will further expand the dialog to include the coordinates of the point you are traveling to, your next waypoint if applicable and the remaining distance.
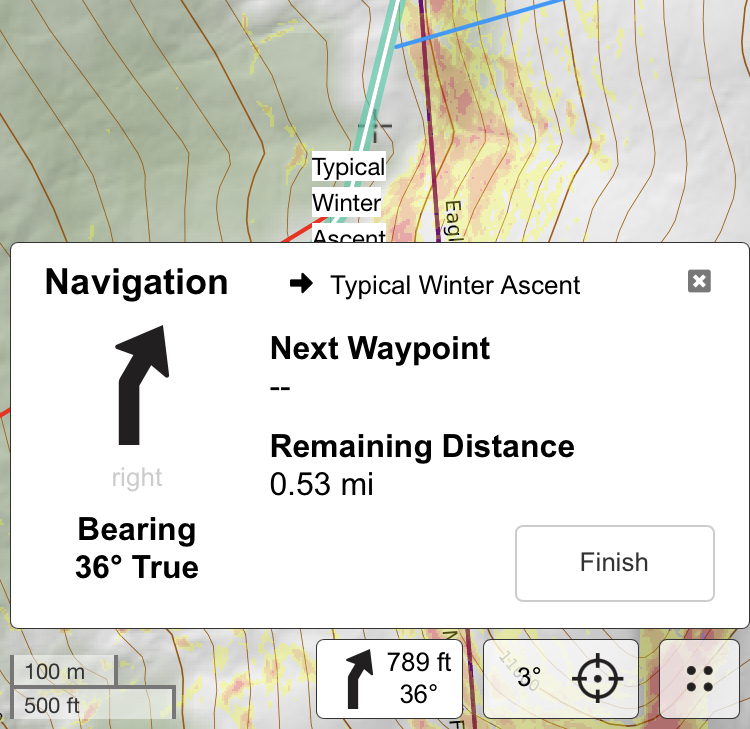
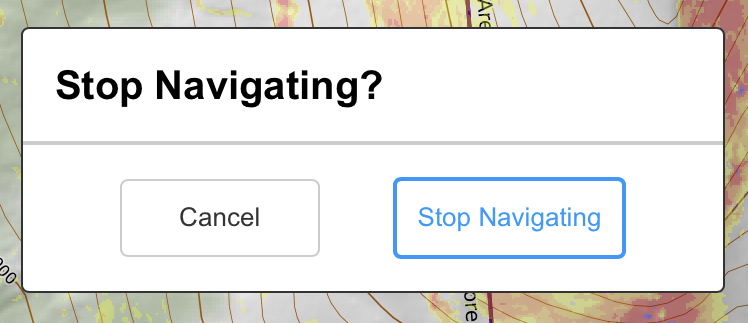
Navigation will continue until you have arrived at your destination or you manually stop it. To manually stop navigation, tap on Finish in the most expanded navigation dialog and then confirm that you want to Stop Navigating in the dialog that appears.