PDF Printing
in this lesson
First, please note that this process prepares a FILE that you can then save, download, share, or print from your computer. CalTopo will not send the file directly to your printer.
This lesson will cover creating the PDF or JPG file, which you can later print to paper if you choose. This is also a great way to share static maps, or lock in a certain view of an area.
Topics on this Page:
Print to PDF or JPEG aka a Traditional Map
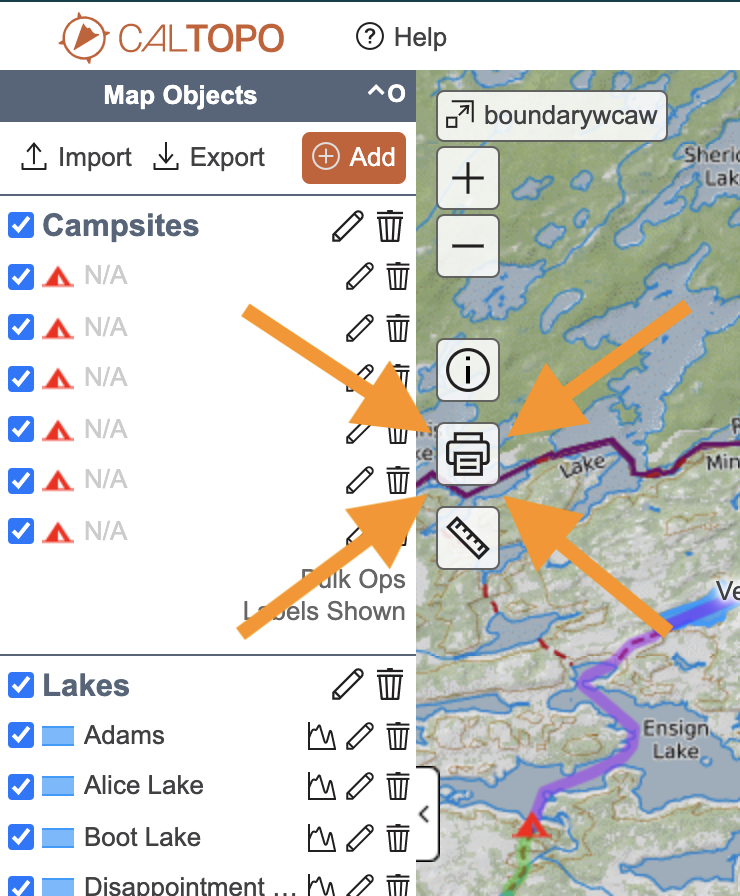
To start, click the print icon on the left side of the map viewer. This will open a print page in a new browser tab.
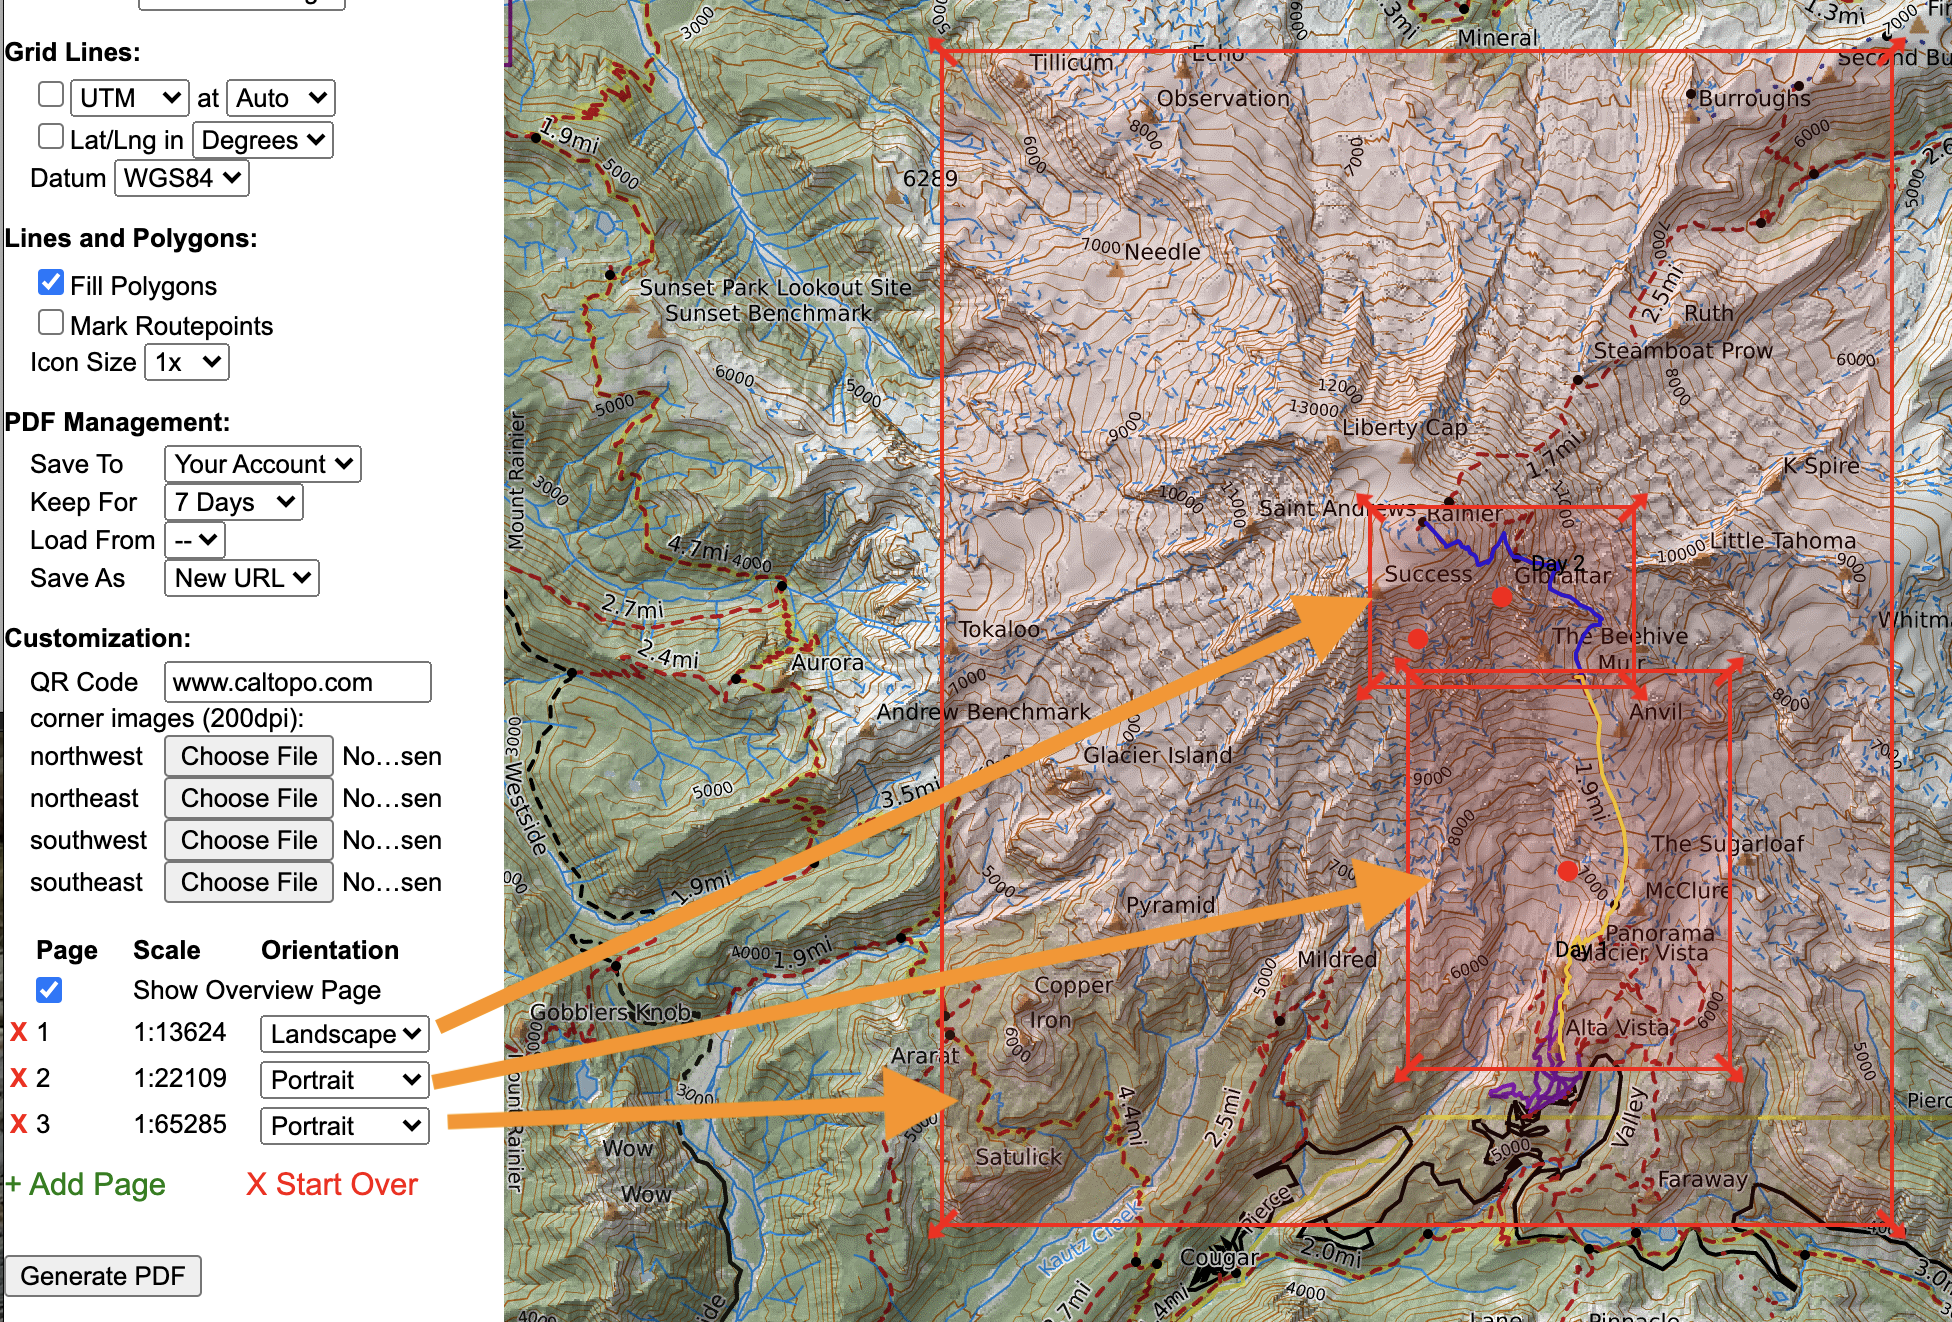
A new browser tab opens with a list of print settings on the left, and layers on the right. The red rectangle in the map viewer is the page boundary; you can drag it using the center dot to change the position of the print area or the arrow on each corner (as long as custom scale is enabled) to change the size of the print area. At the bottom of the left side menu are the controls to add and remove pages, or change each page's orientation.
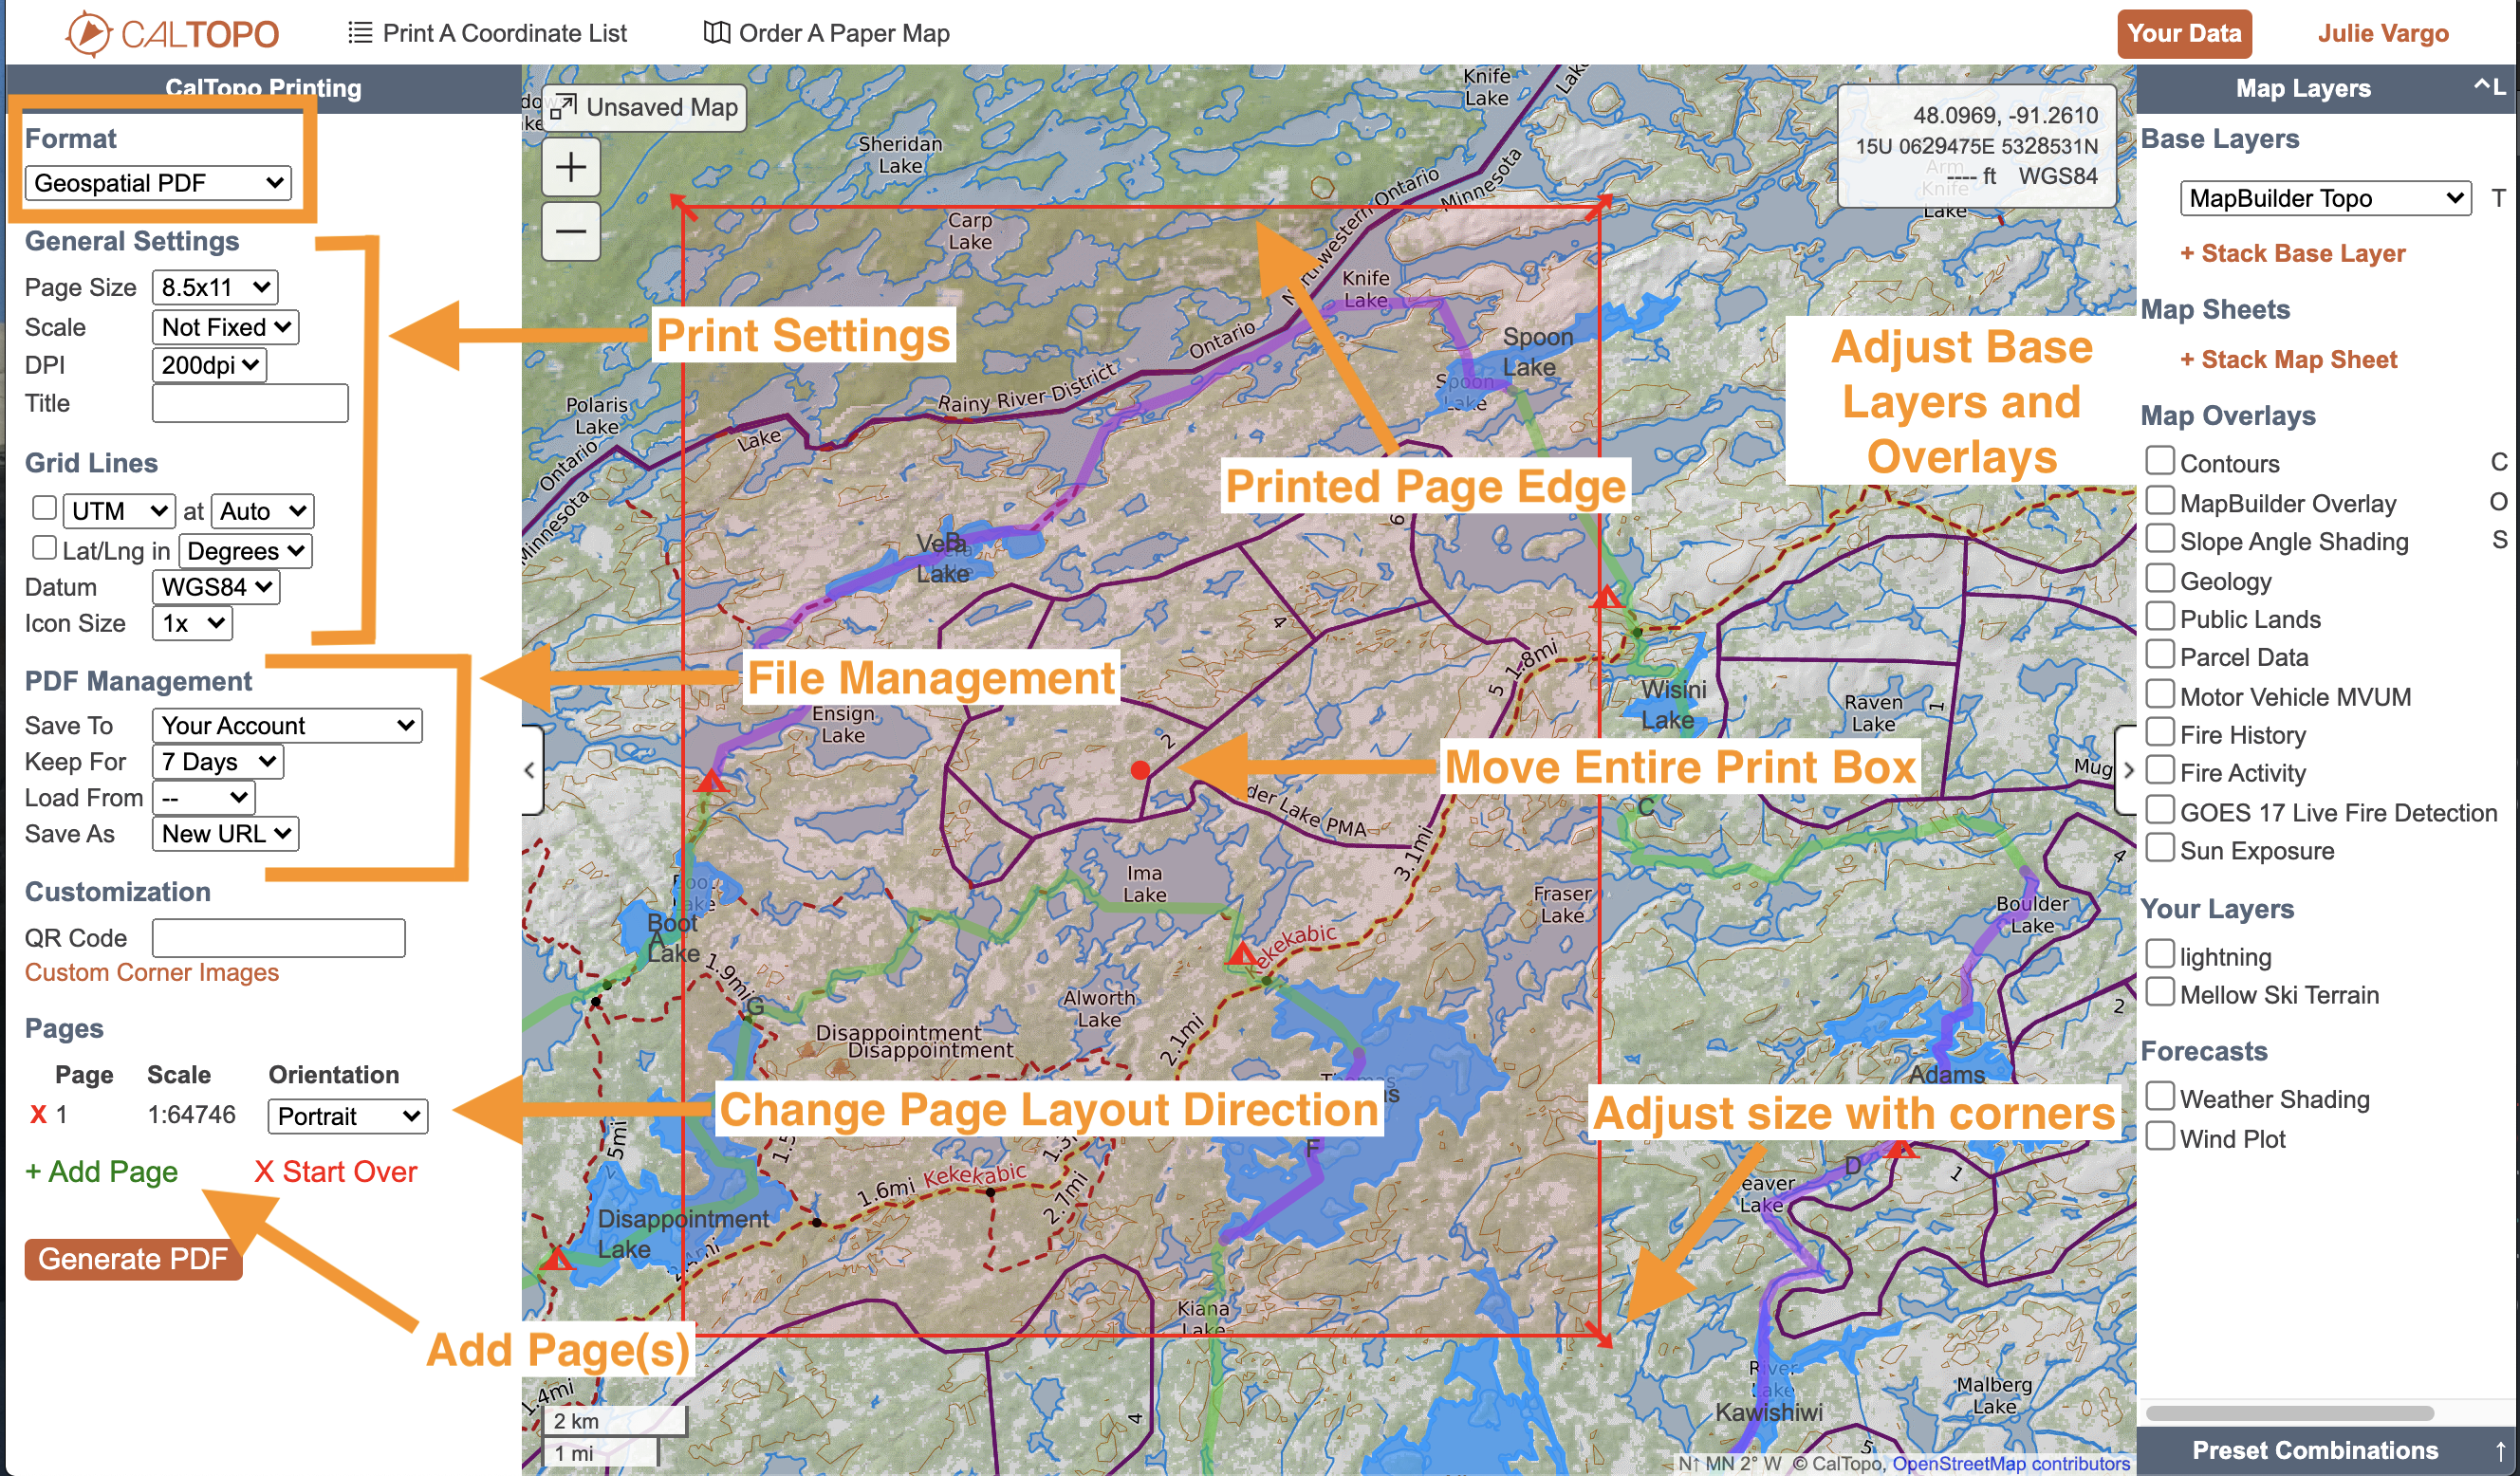
You can change the print settings in the Printing menu on the left. You set specifications for as few or as many of the available settings as you would like. On the right side of the page is the layers and overlays menu. You can collapse this menu with the x at the top or with the arrow tab on the side of the menu to give yourself more map viewing space while designing your print.
PDF Settings
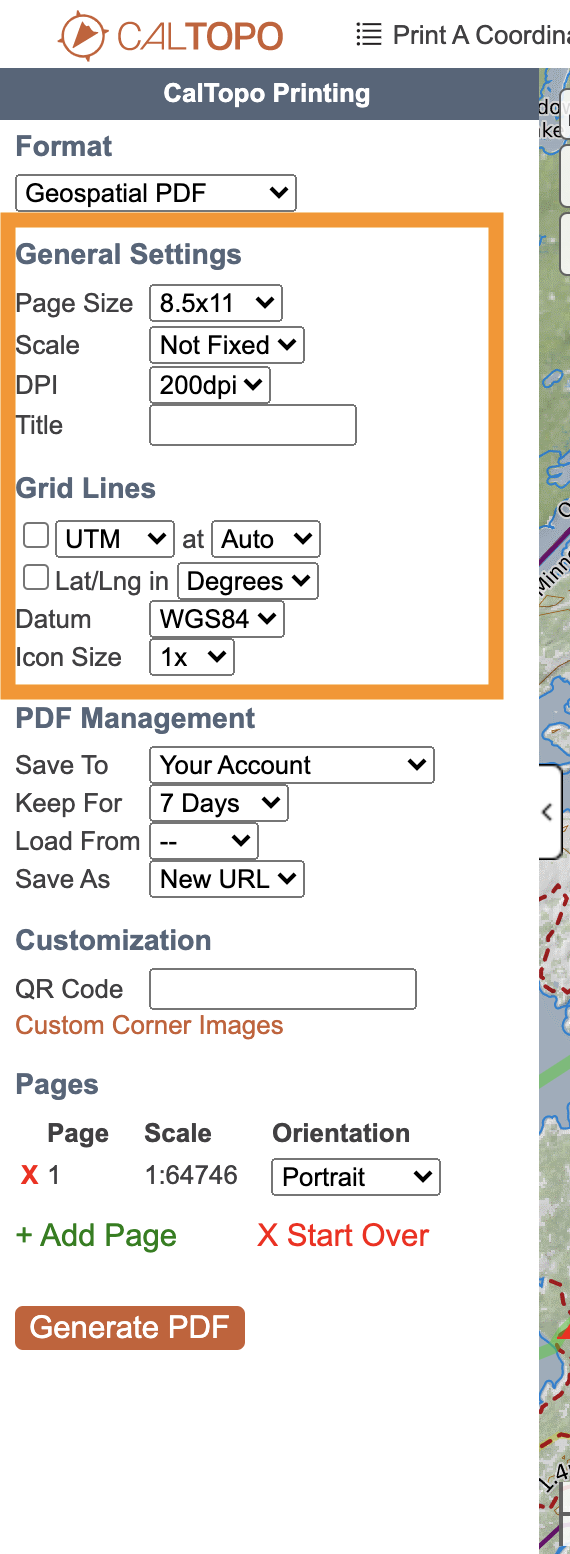
These settings affect how the print is displayed when the PDF is generated.
Page Size
Free and Basic accounts have a maximum print size of 8.5x11 at 200dpi. Other subscription levels get extended sizes up to 48x96 at 200dpi, or 36x48 at 400dpi. File sizes for higher dpi levels are much larger and can take a long time to generate. Custom sizes are available up to the maximum dimensions that your subscription allows.
Map Scale
Including custom scales. Casual users probably just care about the page boundaries and not the scale, but often advanced users benefit from being able to print maps that are exactly 1:24k or 1:50k. Custom scale allows you to drag the box edges to cover exactly the amount of area you want on the print.
PDF vs JPEG
Choose between creating a PDF (useful for printing) or a JPEG (for loading into an image editor).
Title
The map title shows up at the bottom of the PDF, and also serves as a way to identify each PDF within CalTopo.
UTM or USNG Gridlines, Lat/Long Tick Marks
As with map scale, this is probably meaningless to casual users but super important for off-trail navigation without a GPS unit.
- The first checkbox can be set at UTM or USNG.
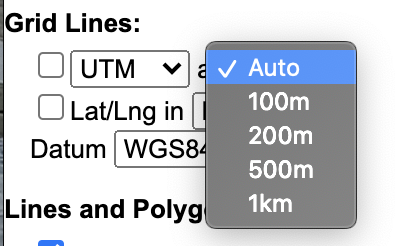
- UTM and USNG line spacing choices are auto, 100m, 200m, 500m, or 1km.
- Selecting UTM and USNG will also display Grid North on the declination diagram in addition to the gridlines on the PDF.
- Lat/Lng lines can be set in Degrees or Degrees-Minutes-Seconds.

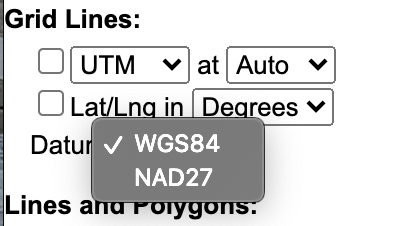
Map Datum
This setting only affects the UTM gridlines and Lat/Long tick marks, above. It will not change the datum of your map objects. Almost all users will leave this set to WGS84 and not NAD27.
Icon Size
The ability to print extra-large icons for large-format briefing maps commonly used in search and rescue that are meant to be viewed at a distance.
PDF Management Options
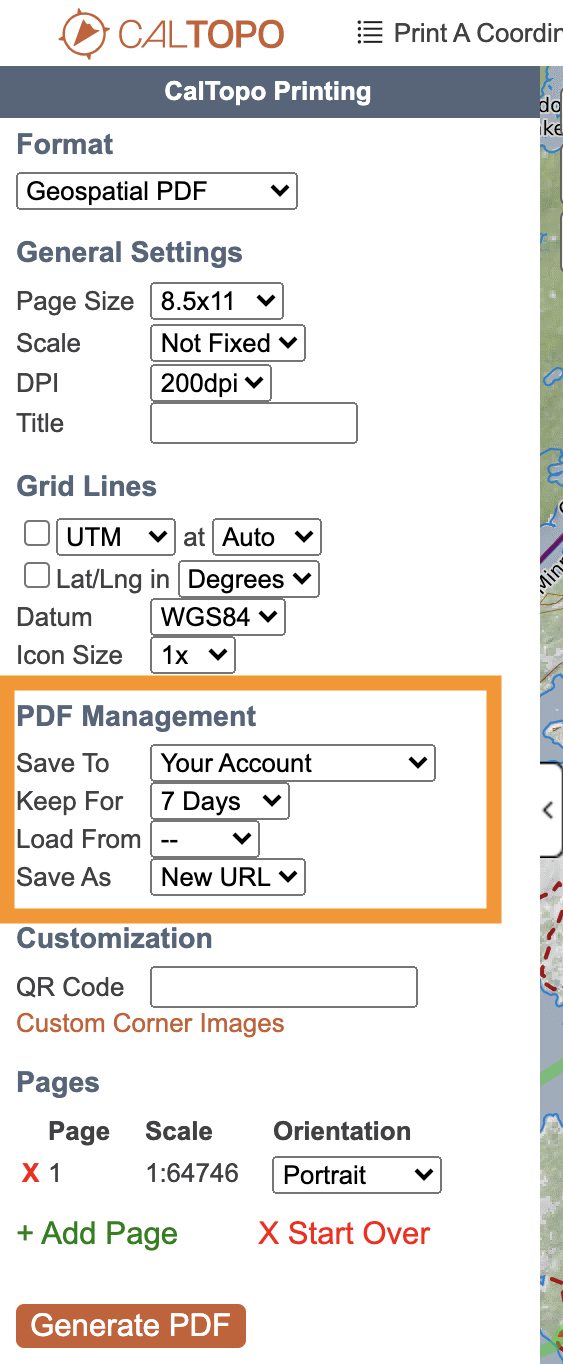
There are also a handful of PDF management options, which don't affect the PDF itself but control how it is stored in CalTopo.
Keep For
This option controls how long a PDF's URL will stay around before expiring. You can always download a PDF and keep it forever, but the URL is an easy mechanism for sharing it with others or downloading it to your phone. You can find your PDFs that are currently available in the Your PDFs tab of the Your Account panel, and adjust the length of remaining storage time for the PDF there as well.
Load From and Save As
This allows you to load page boundaries from a previously created PDF, making it easy to produce a new map with the same dimensions and borders, but updated data or base layers.
The Save As setting lets you replace an existing map that you've already printed. If you want to seamlessly update a PDF URL you've already shared with someone, set both the Load From and Save As options to that PDF.
Example: You print a map and the URL/Map ID is 424L. You went back to the map and decided to add another marker that you want on the print. You open the print page, and enter 424L into the Load From field. Now the map will draw with the same boundaries and scale as before. Then you enter 424L into the Save As field, and the print will update using the same link as before. This way if you already sent the link to your friend or posted it on a website, it will load with the extra marker next time the friends access it.
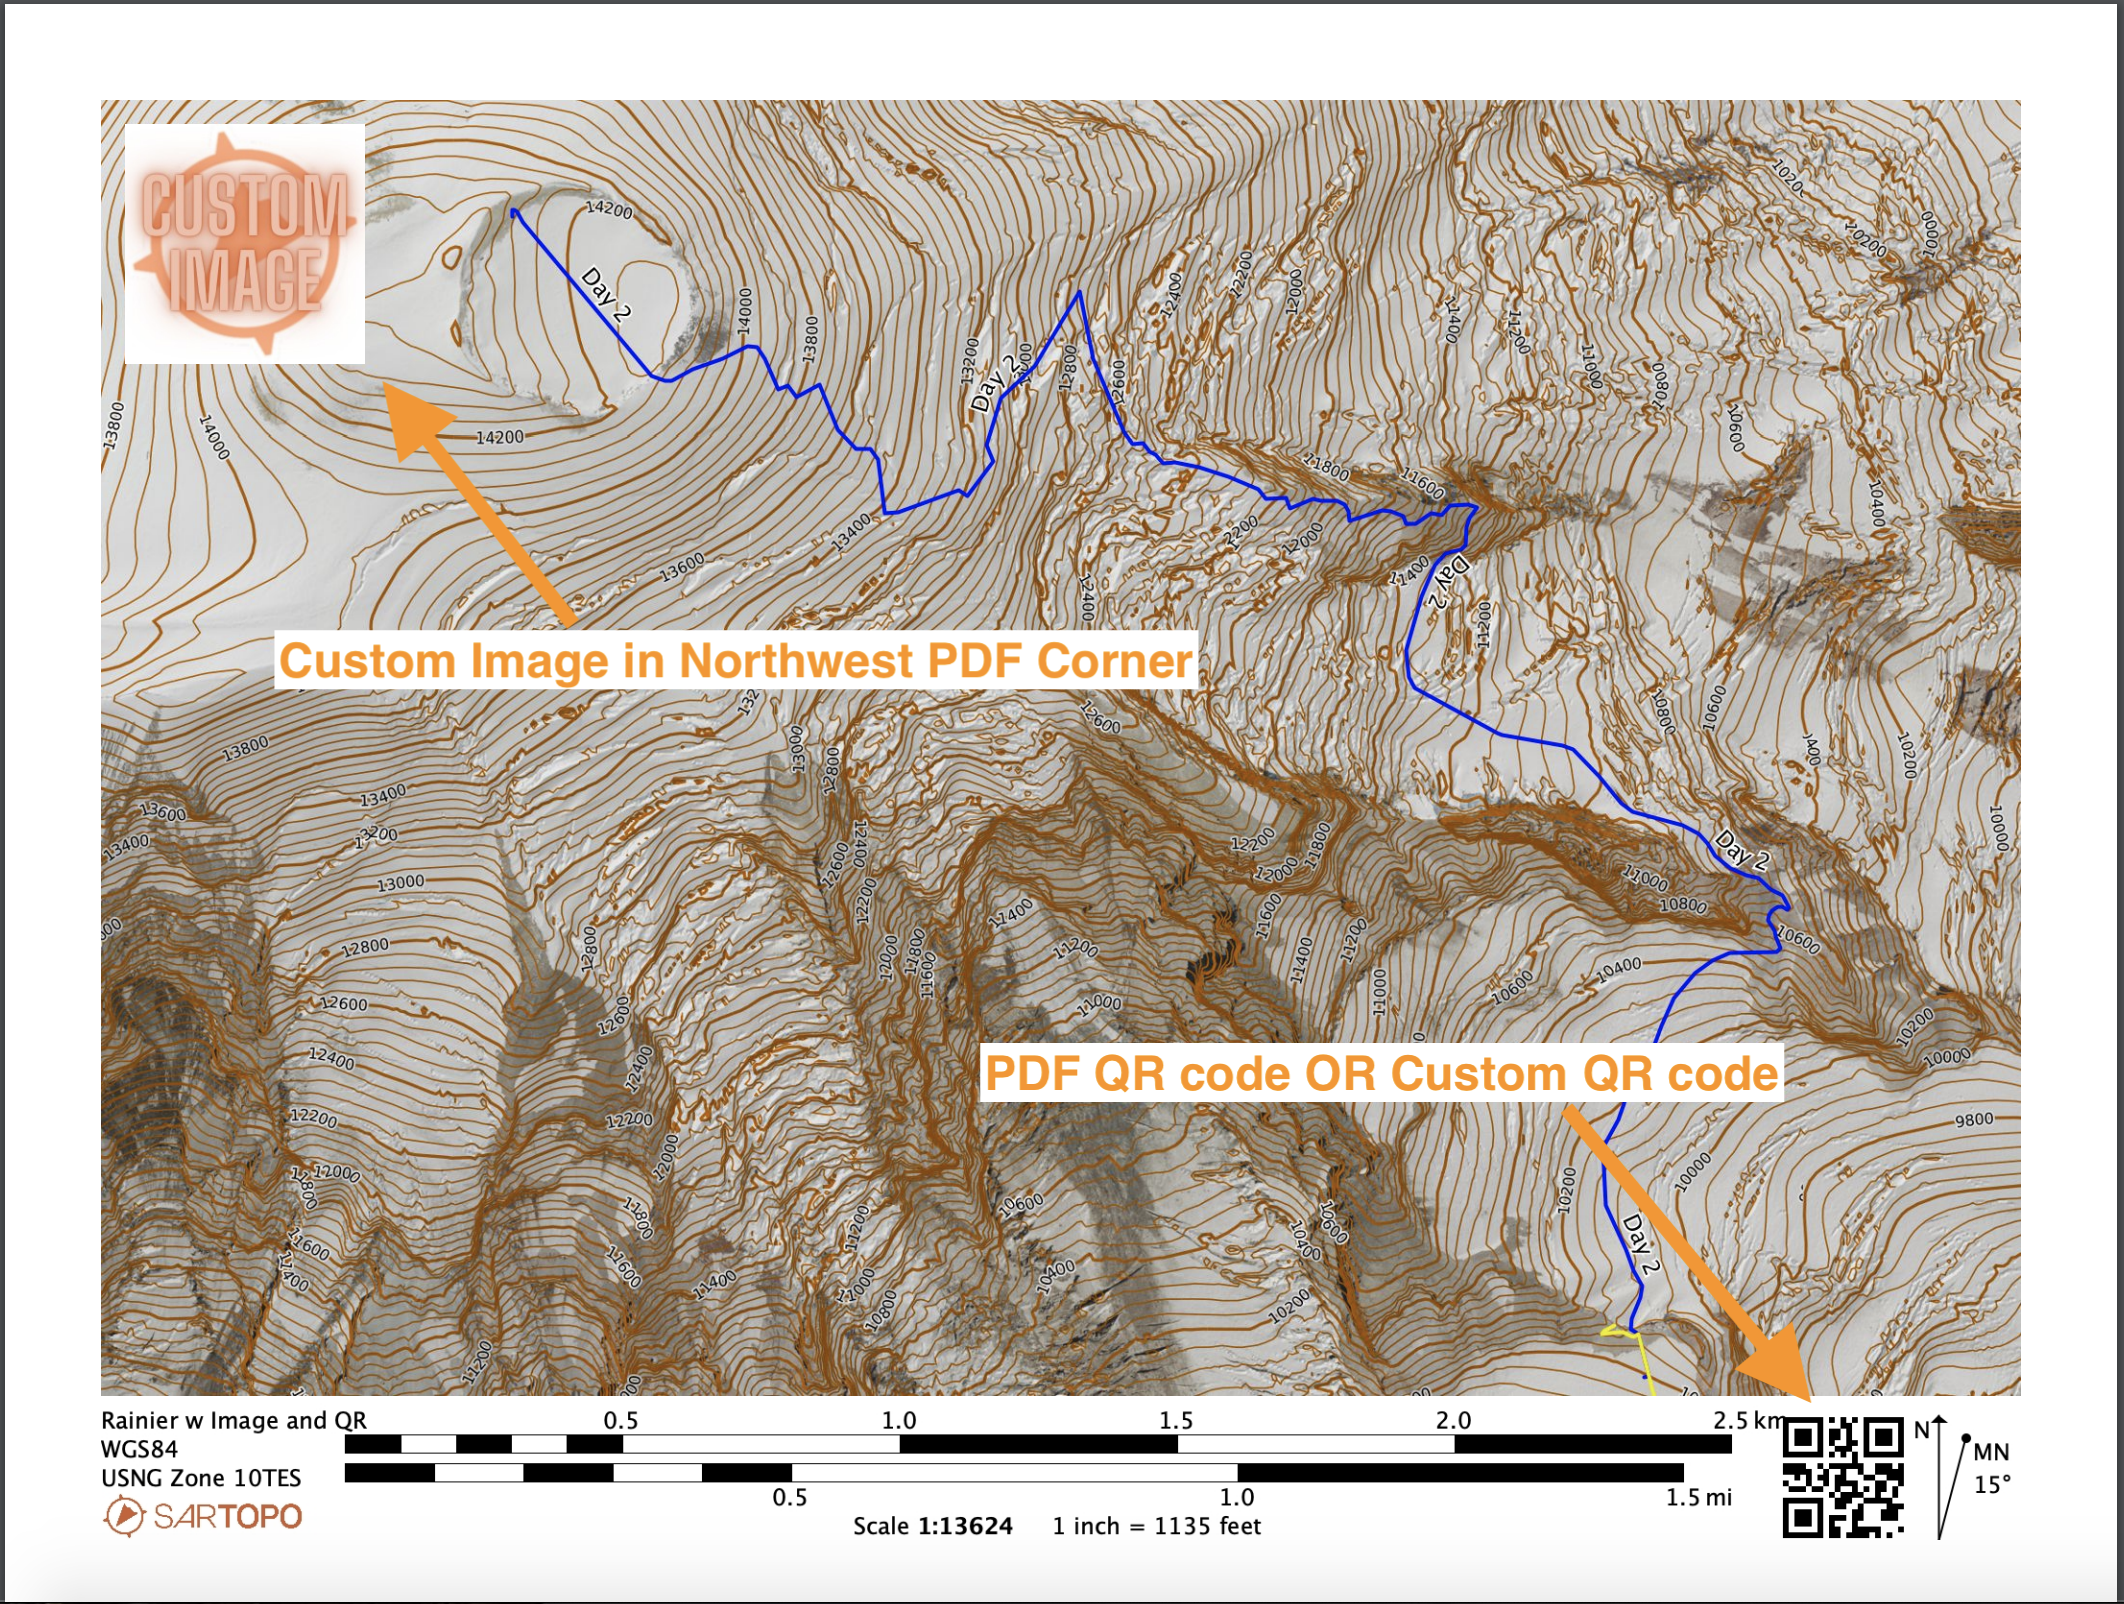
QR Code and Custom Images
Pro-level subscribers also have a few additional PDF features under the Customization section. You can specify custom text for the PDF's QR code, such as a specific website link. You can also add up to four custom images that will appear on each corner of the map. Note that these will cover up the map image itself, especially if it is a large image.
Below is an example of a map with a custom image in the NW corner, and a QR code set to open to caltopo.com. The second image shows scanning that QR code with a mobile device that is telling us what the link goes to.
To complete the process, select Generate PDF at the bottom of the Print menu and a new tab will open. Your PDF or JPEG will generate and be displayed shortly. As previously stated, larger files will take longer so be patient.
Adding Pages
You can print a PDF file with multiple map images in it. With the free and Mobile subscription you can print up to 5 pages. To print more than 5 pages you need to be at the Pro or Desktop subscription level. Use the add page button near the bottom of the menu, and a new red-outline box will appear in your map area. Drag and resize the second box to cover the area you want to print. Boxes can overlap and be at different scales.
The checkbox at the top of the list of pages, if checked, will include an additional page in your file that will show the relative layout of the other pages as they relate to each other.
Adding pages can only be done for pages that are no more than 17" on one side. Up to 40 pages may be added for PDFs that are 8.5x11 or 11x17.
Understanding the PDF
All CalTopo PDFs include a footer with some basic information. The first line on the left is the page number for multi-page PDFs, the title, or if no title is specified, the map projection. The next two lines are the datum and UTM or USNG zone, which are always displayed but only meaningful if you've chosen to print a coordinate grid.

The center is a bar showing the map scale in both miles and kilometers, with the exact scale and a real-world inch:feet representation printed below.
At the far right is a declination arrow, which shows the magnetic declination at the center of the map. This is the present-day declination, computed when the PDF is generated and rounded to the nearest degree. If you selected to display UTM or USNG gridlines, you will also see the grid north declination indicated by a blue arrow and blue text as well.
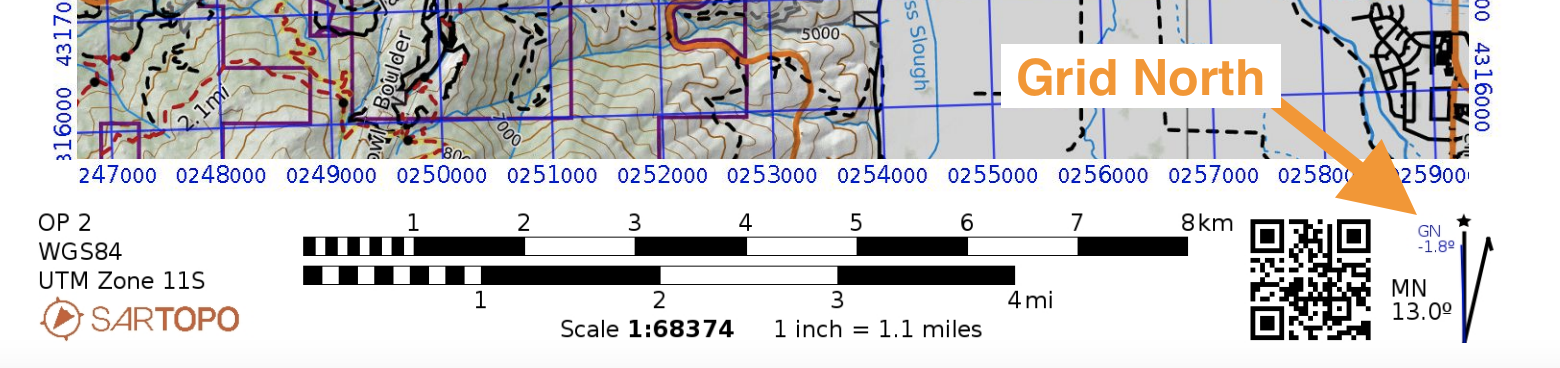
Single-page geospatial PDFs (as shown in the screenshot above) have a QR code to the immediate left of the declination arrow so that printed maps can easily be imported into a phone. By default this will be a link to the stored PDF (https://www.caltopo.com/p/XXXX where XXXX is the 4-digit ID of the PDF). However, if you have entered some other information in the text box for the QR code, the code will provide that information instead.
Multi-page PDFs will have a cover page that shows the relationship between the following pages by outlining the spaces covered by the following maps. The PDFs will not have QR codes unless specifically added as a custom input.

GeoSpatial PDFs
All single-page PDFs printed on CalTopo are geospatial PDFs, which means that they contain extra information relating positions on the PDF to real-world coordinates. While there are a number of programs that can read this information, the most common use is to pull CalTopo maps into the Avenza PDF Maps application. You can view your location on the PDF, as well as record tracks and import or export data.
Managing Your PDFs
Any PDF you create while signed into CalTopo is automatically saved to your account. You can access them via the Your PDFs tab of your account dialog.
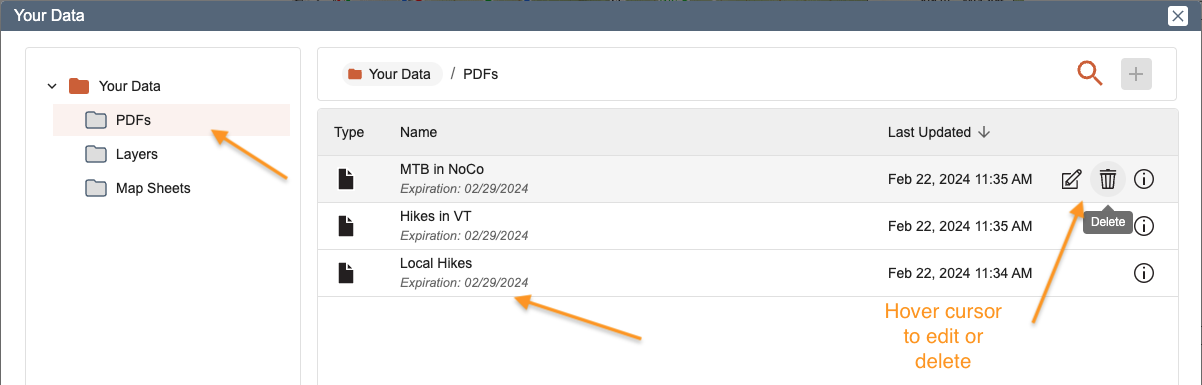
The dropdown at the far right shows the number of days until the PDF will expire, and allows you to change its expiration date, including bumping it out to whatever your account is limited to. Keeping a PDF stored in CalTopo for more than 7 days is a subscription feature for Pro and higher subscription levels.
There is no limit to the number of PDFs you can have active at once, but you can delete a PDF using the red X in the first column.