Settings Menu
let's begin
The Settings menu is your go-to place to customize settings for the map viewer and tools. You can change your settings on both the web and mobile app although some settings are specific to one platform or may differ in the degree of customization possible between the web and mobile app. The settings below are available on both platforms with the same amount of customization possible unless otherwise indicated.
Keep reading to learn about how to use the Settings menu or click on any of the names of the settings below to jump ahead to that particular section.
Topics on this Page:
Accessing the Settings Menu
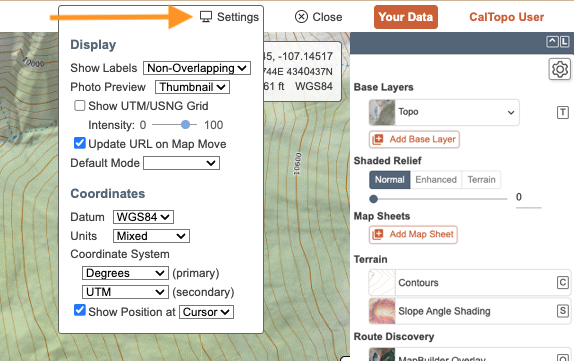
Click on the computer monitor icon in the upper right of the map viewer to open the Settings menu. You can view and edit your current settings here.
Accessing the Settings Menu in the Mobile App
To access the Settings menu, tap on the 3 bar menu in the upper lefthand corner of the map viewer and then select Settings to view and edit your current settings.
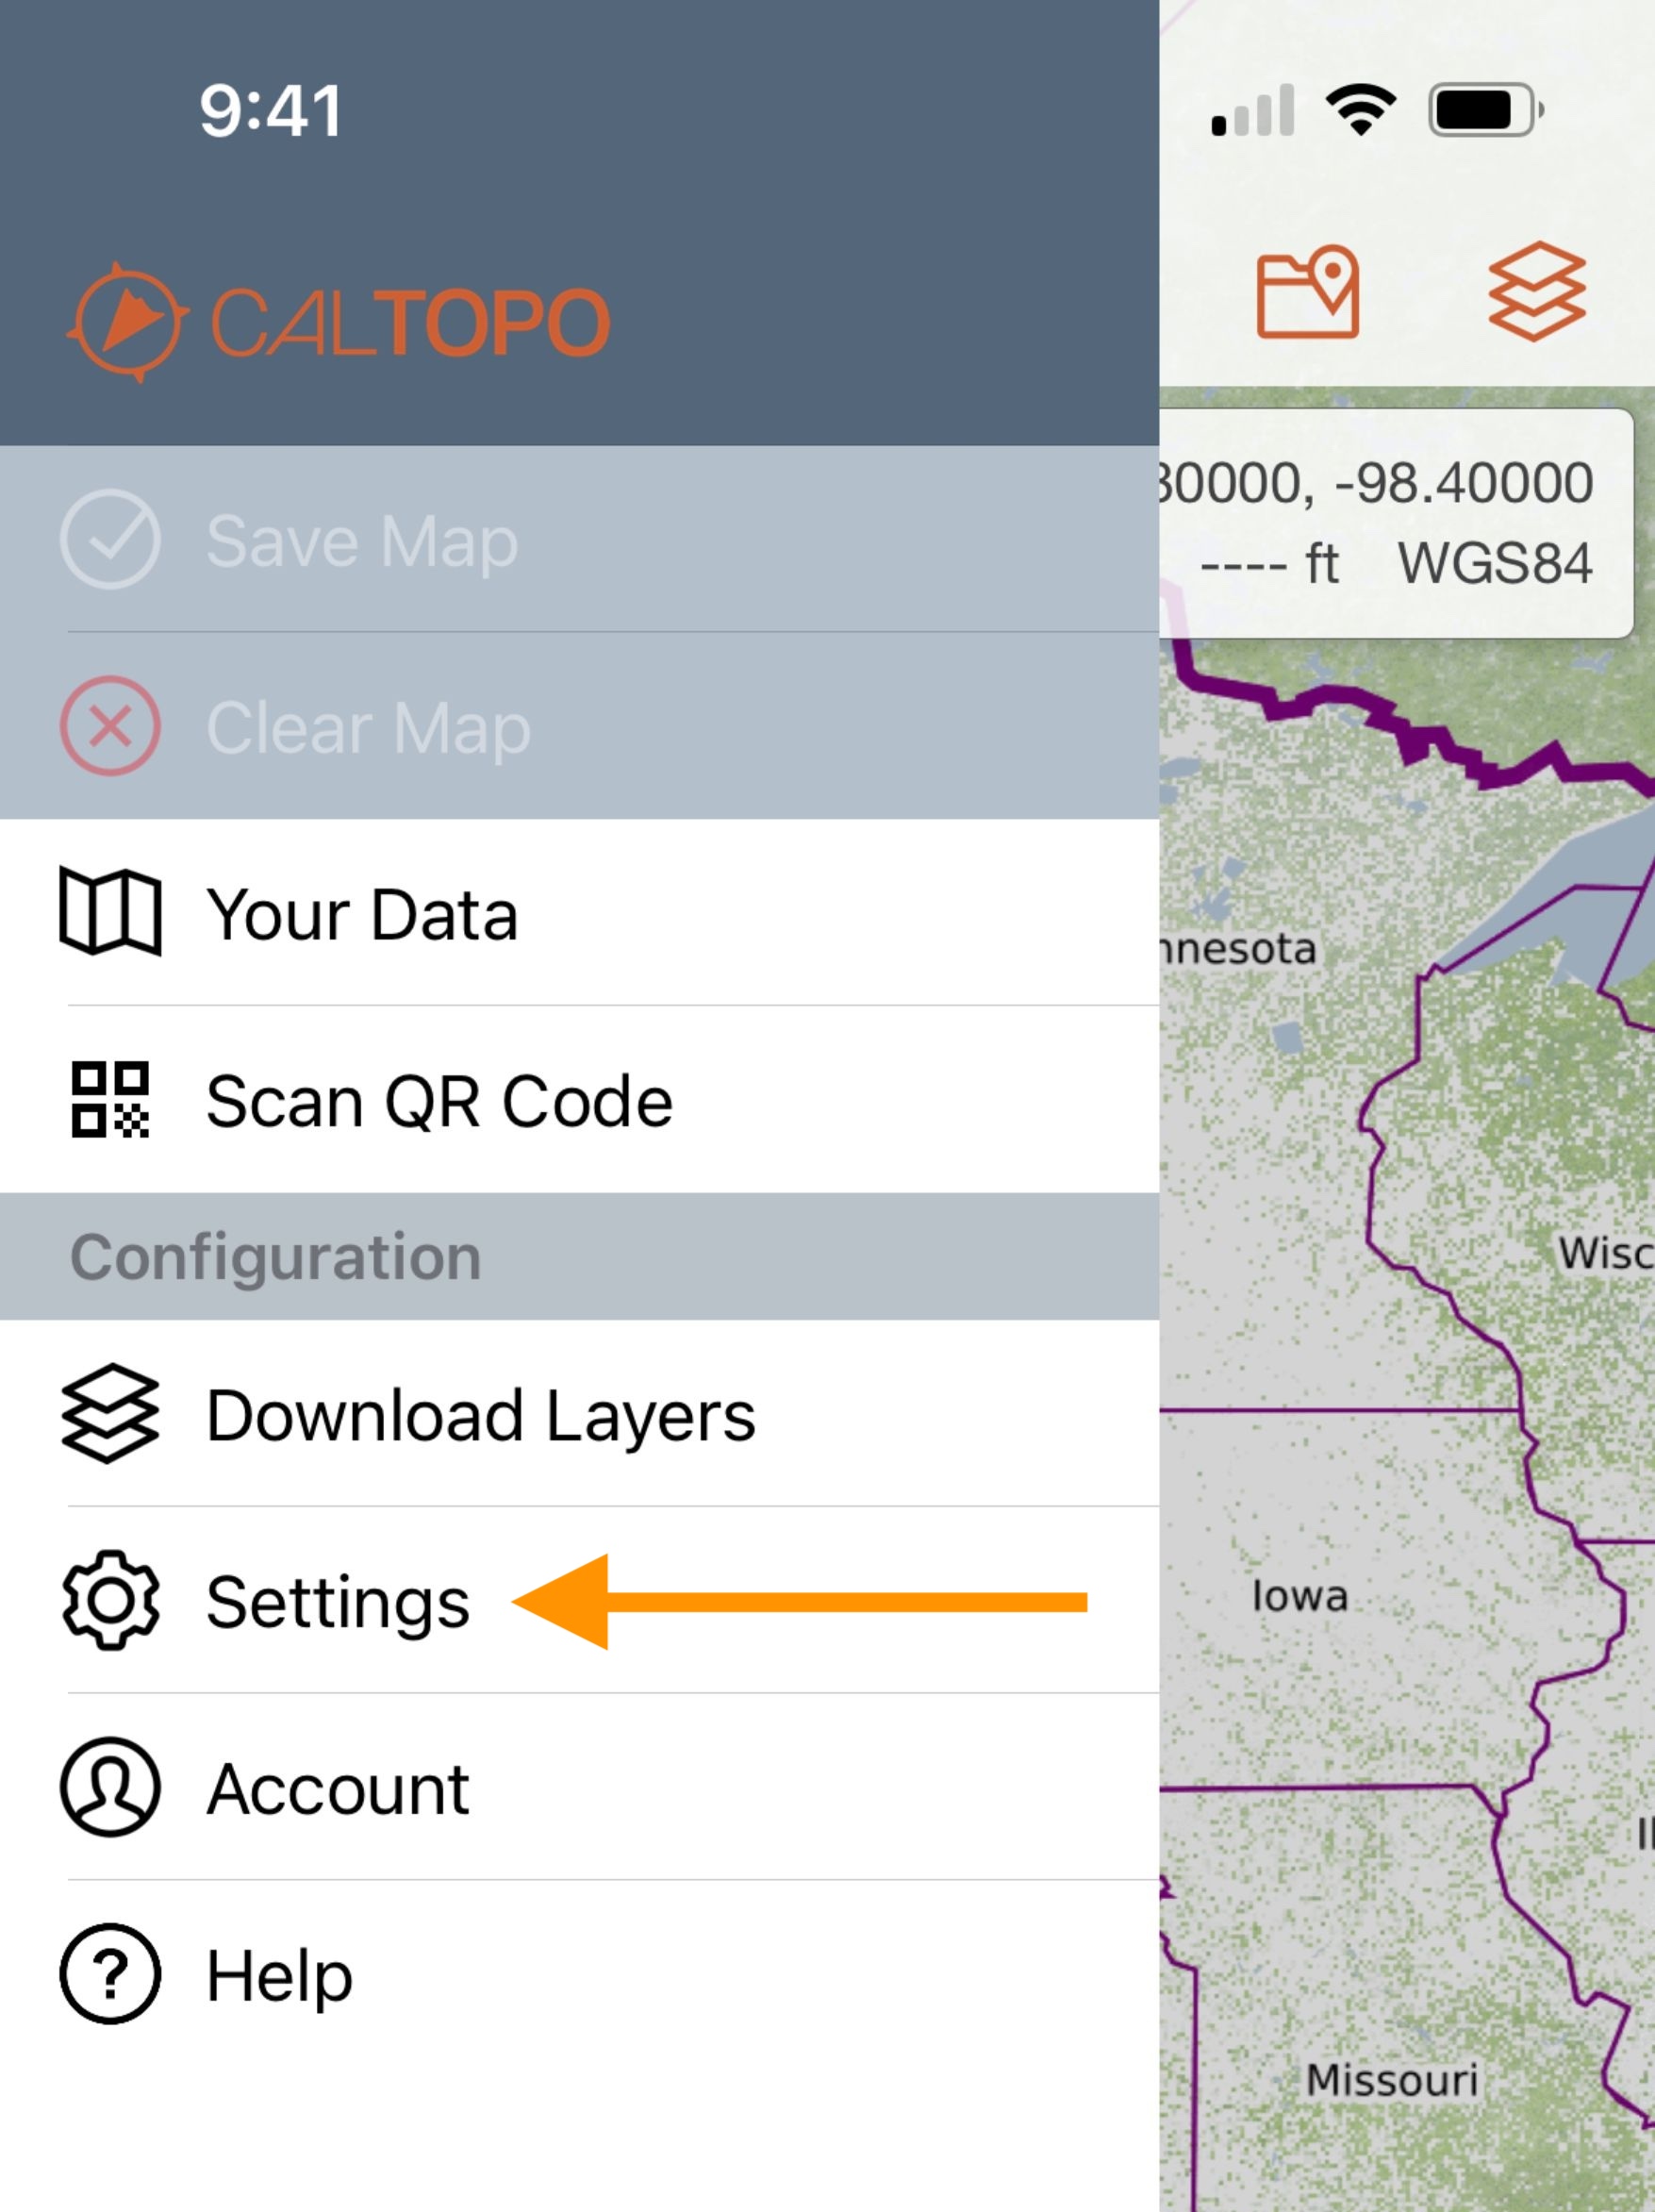
There are some settings that are only available on the mobile app (such as Enable Dark Layers) and these are covered in the Mobile App Only Settings section at the end of this page.
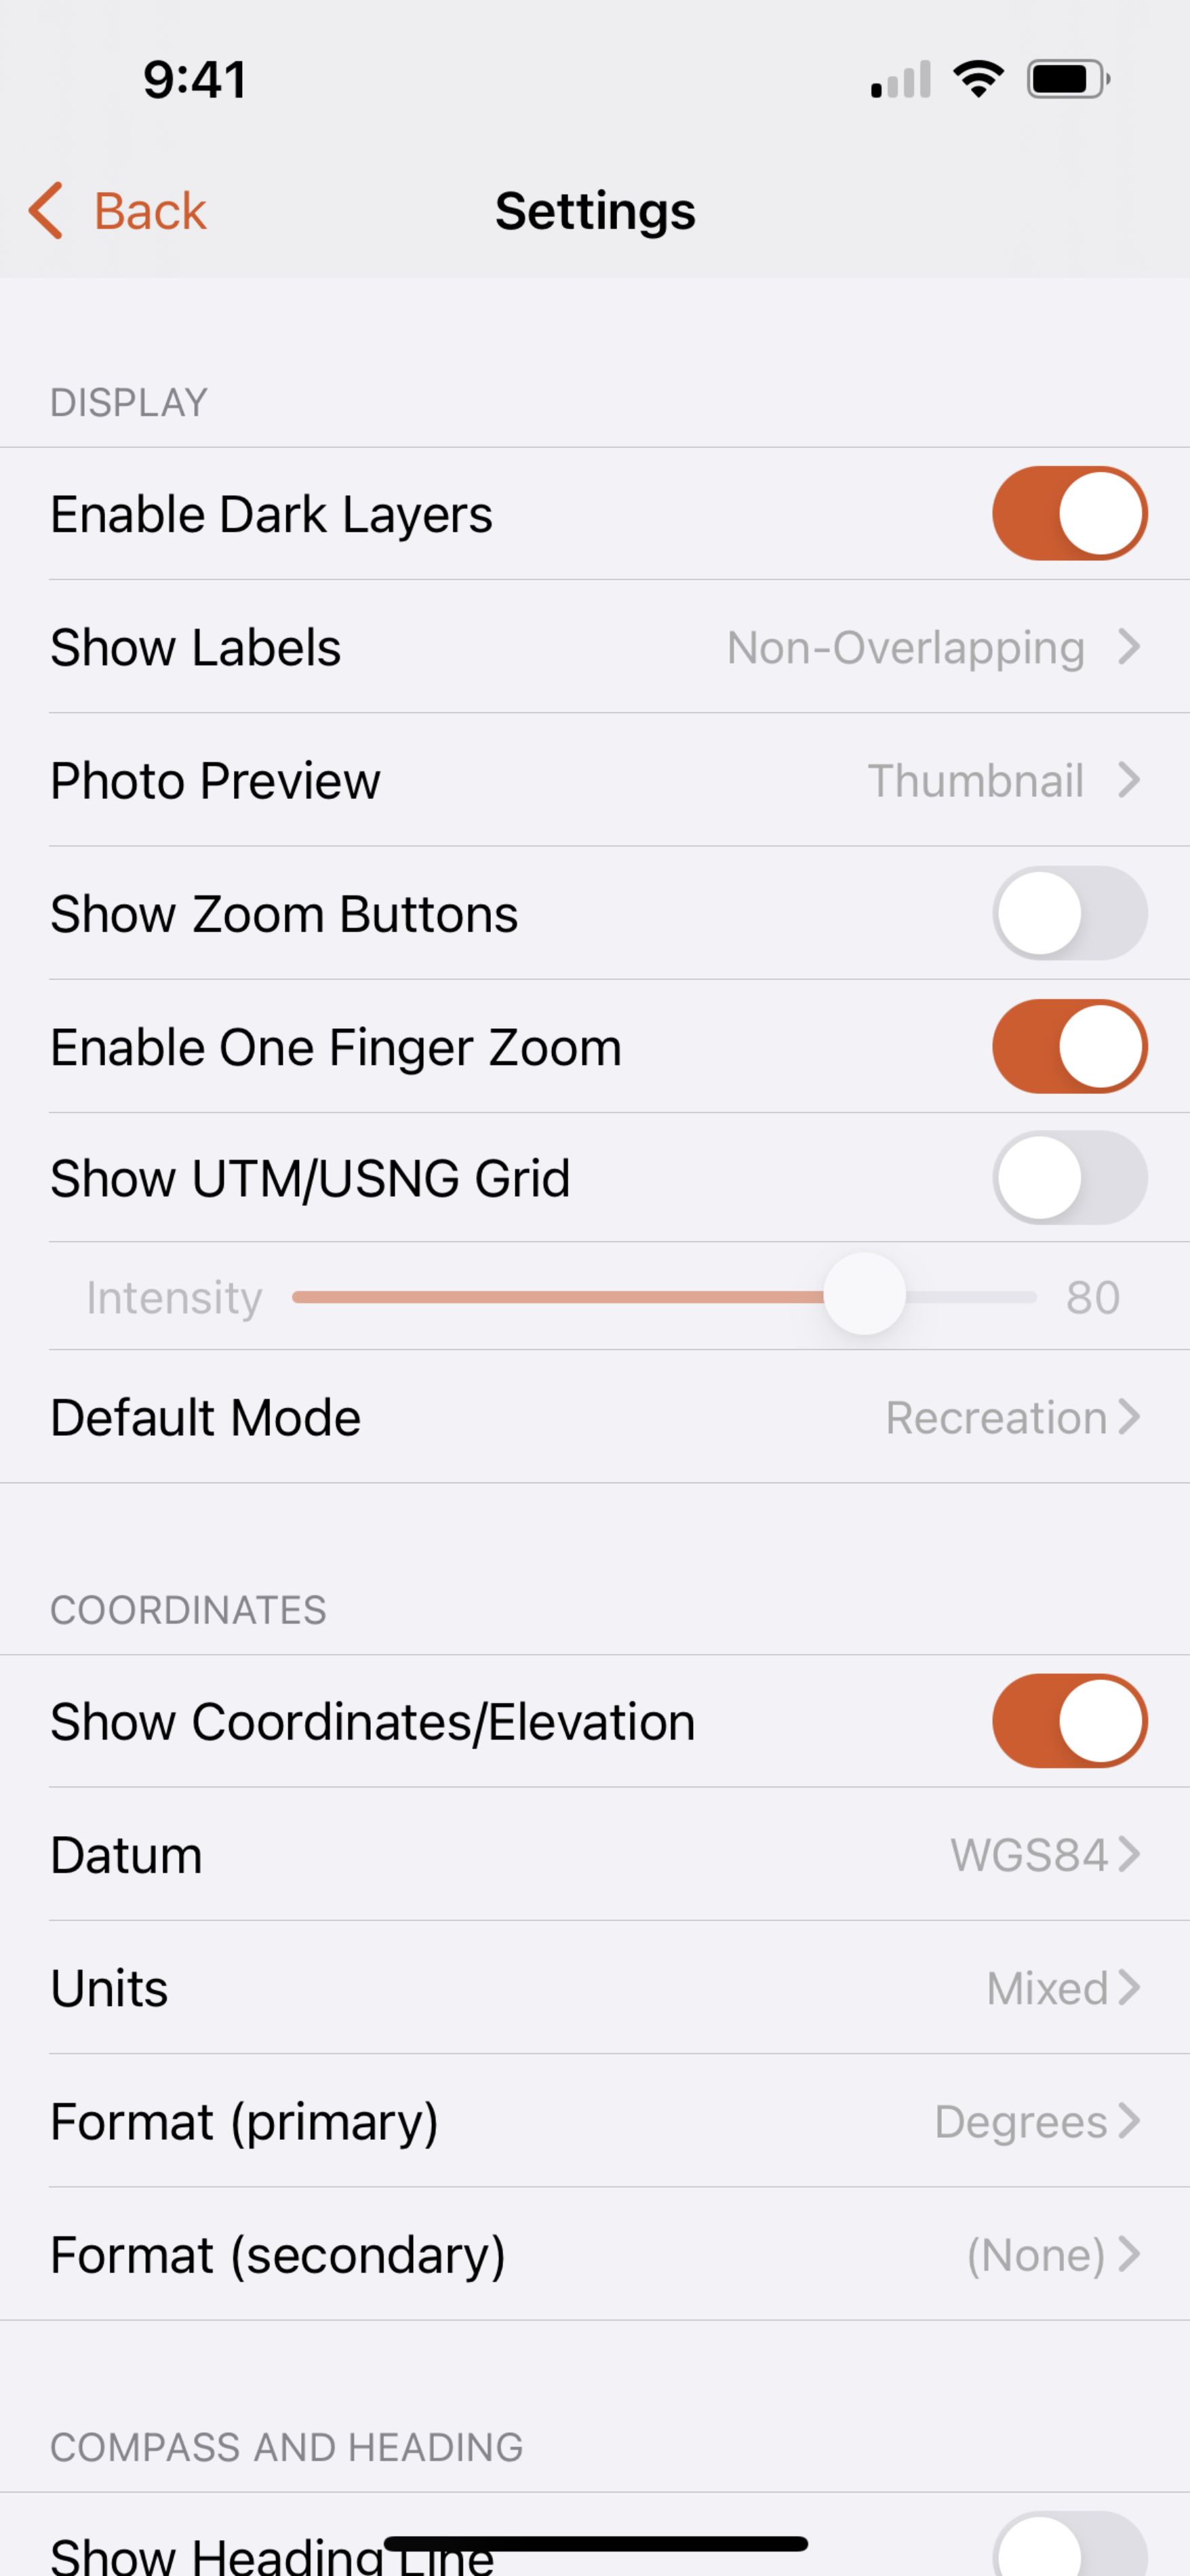
Display
Show Labels
This setting allows you to change how labels on map objects are displayed in the map viewer. You have the option to show All, Non-Overlapping, or None.
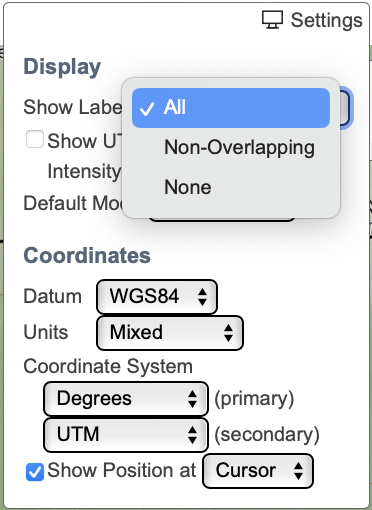
- All: labels are shown for every map object unless labels are turned off at the folder level
- Non-Overlapping: when labels overlap only one label will show. As you zoom in you’ll see more of your labels.
- None: no labels are shown regardless of the folder setting
You can override the label setting for individual folders by checking or unchecking the “Show Labels” check box in the edit folder dialog. For more information on folder visibility, refer to the Folder and Label Visibility section.
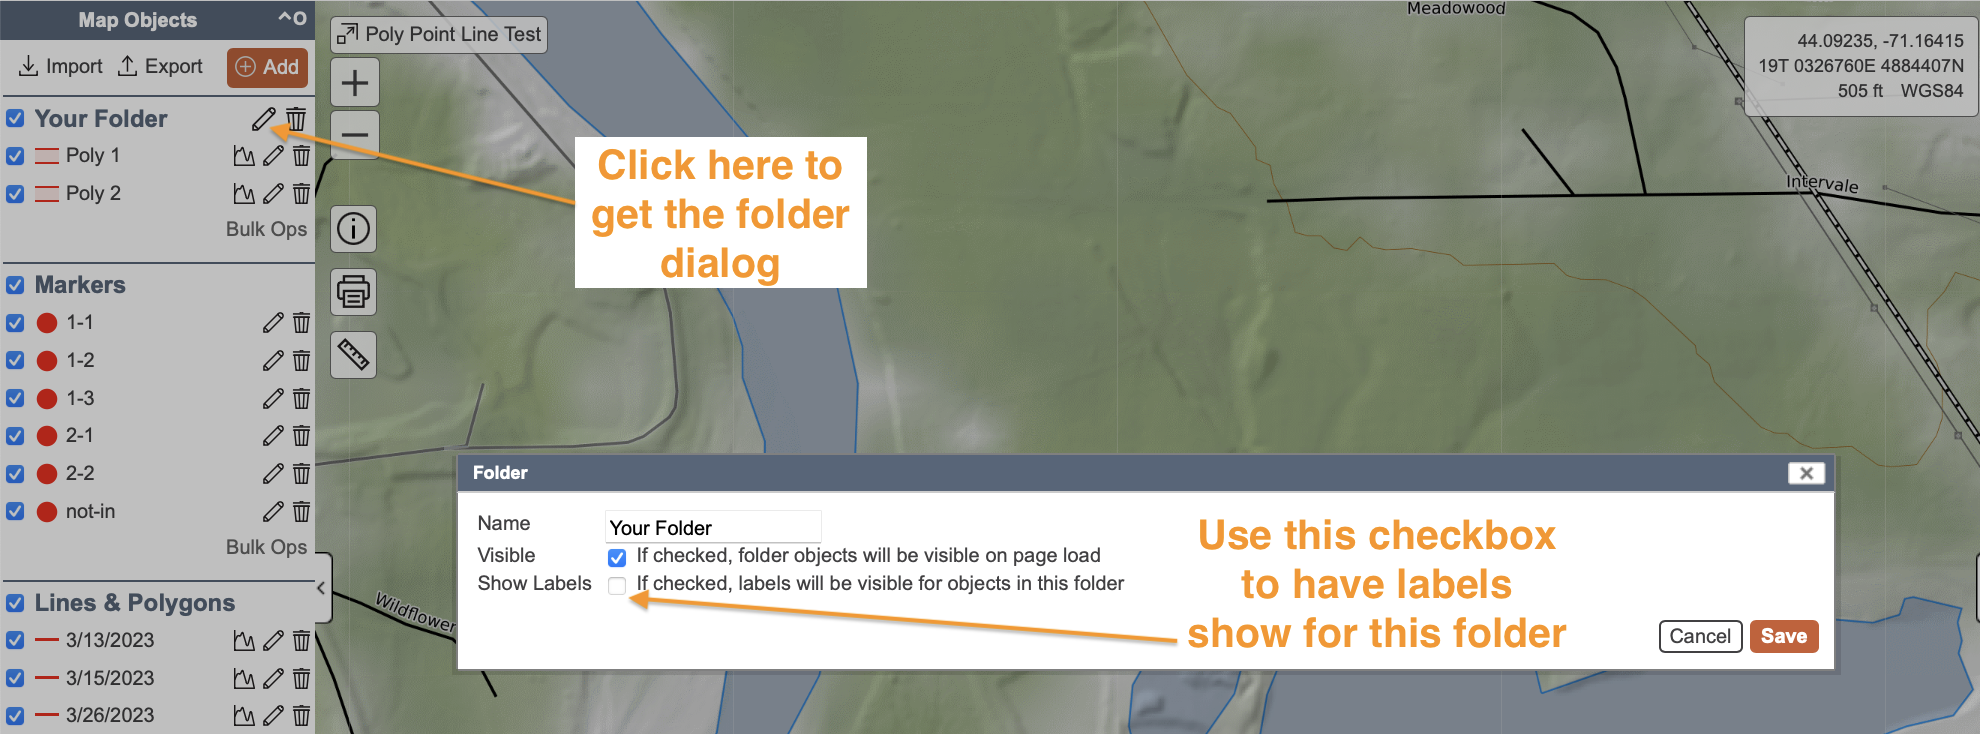
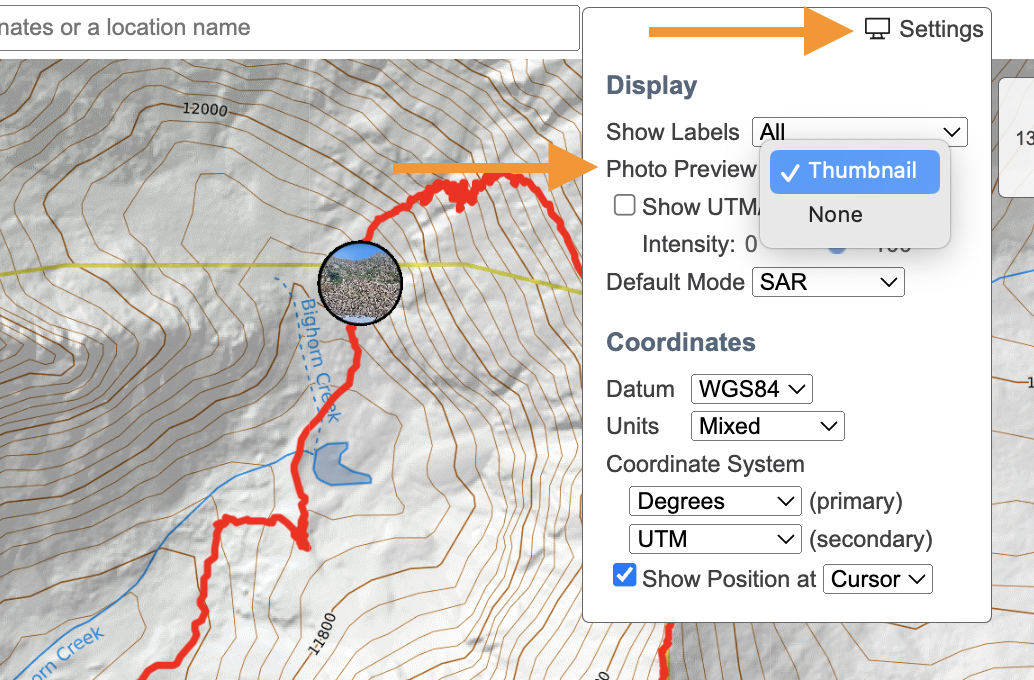
Photo Preview
Use the Photo Preview drop down menu in the Settings menu to control how photos appear on a map:
- Thumbnail: displays a circular thumbnail preview of any photos with associated GPS data on the map.
- None: hides photo previews from the map. All photos will still appear in the Map Objects menu.
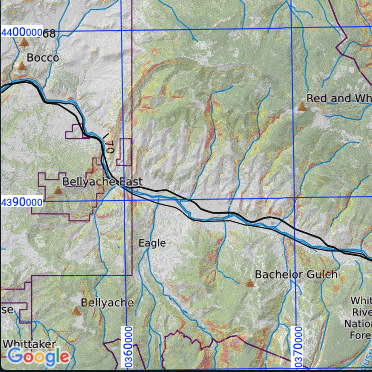
Show UTM/USNG Grid
This setting allows you to add gridlines to the map viewer. Selecting it will display the UTM/USNG grid in the specified datum. You can adjust the intensity in order to lighten or darken the appearance of the grid lines.
Please note that if you wish to include gridlines on a generated PDF or JPEG, you must select to display these in the Print Options menu. To learn more about printing options, go to the PDF Printing page.
Update URL on Map Move (web only)
This setting is only available on the web on an unsaved map. Selecting this option displays additional information in the map URL such as the coordinates for the center of the map, zoom level and base layers and overlays selected. Changes to any of these will be reflected and displayed in the map URL.

Default Mode
Please note: since we merged the CalTopo and SARTopo servers, all users (including first responders) now use CalTopo. Map mode (described here) is how you select the tools that are available in the map viewer.
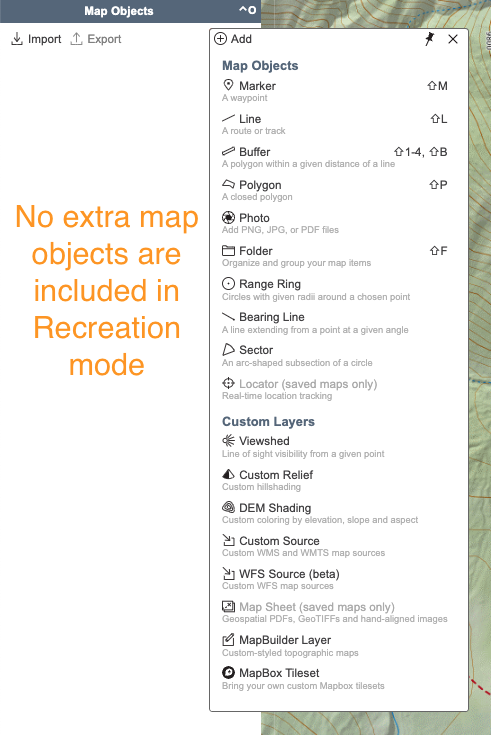
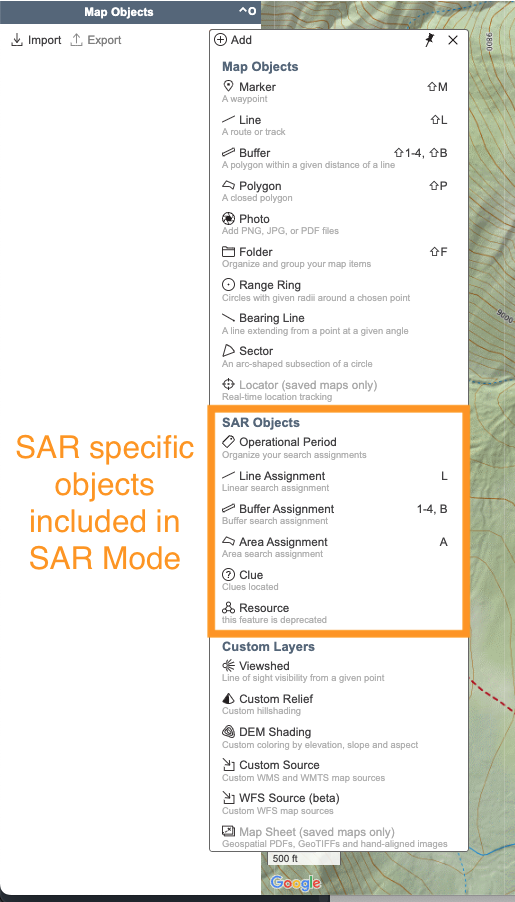
This setting allows you to select your default map mode for the map viewer and any new maps that you create. Most users should select "Recreation" as their default mode, which will give you everything you need and nothing extra. However, you may want to choose "SAR" mode if you are a first responder. SAR mode includes additional first responder specific tools (like assignments and clues) in the Add menu and elsewhere on the platform. For more information on SAR map objects, visit the Creating SAR Objects page.
When you save a map, you'll be prompted to select a mode for the map. The default mode that you have set in the Settings menu will automatically be selected, although you can change it using the dropdown menu. Setting the mode for a saved map ensures that anyone who views the map will view it in the selected mode. For more information on saving a map (including setting the mode), visit the Making Your First Map page.
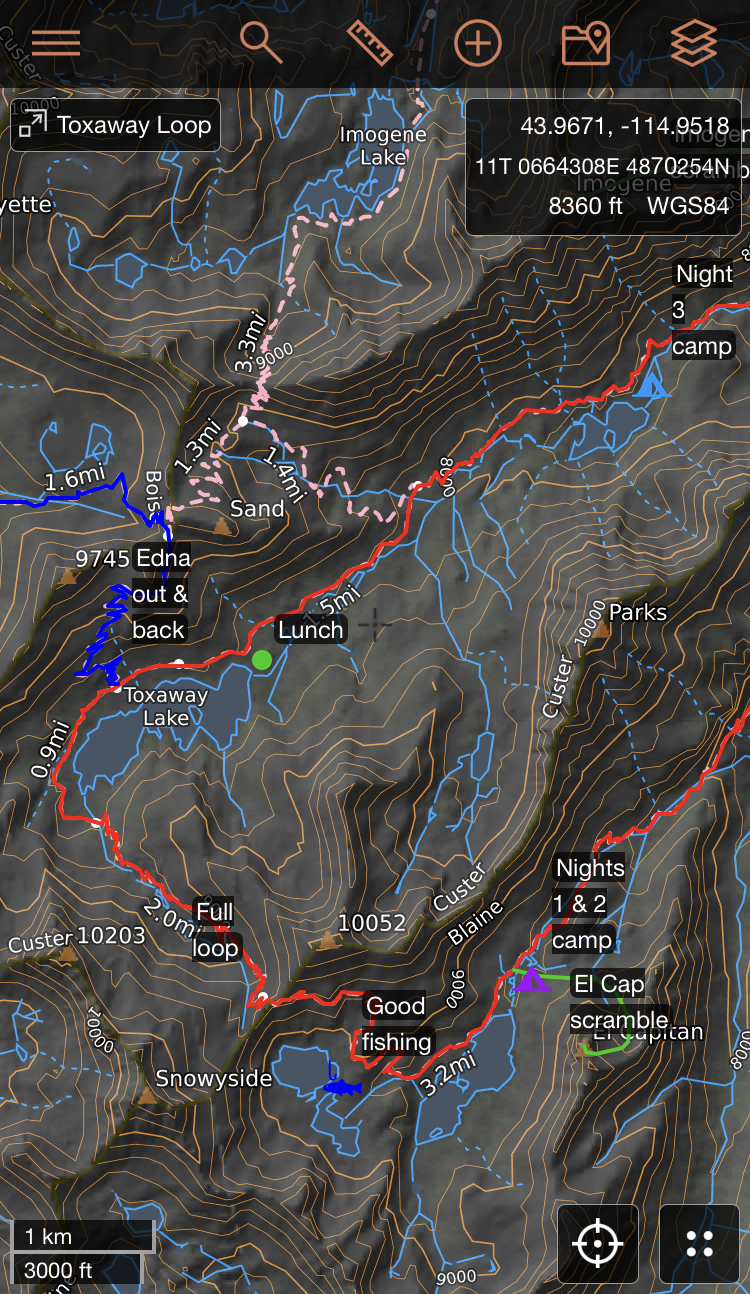
Coordinates
You can configure how datum, units and coordinates are displayed on the web and mobile app. The settings you select will be reflected in the position display in the upper right hand corner of the map viewer as well as for any tools.
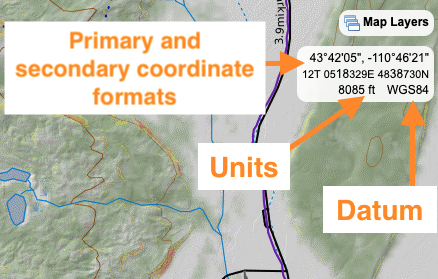
Datum
A datum is the chosen model used to measure positions on the Earth. A specific point on Earth can have significantly different coordinates depending on what datum is used to make the measurements.
For example, a point with a given latitude and longitude in WGS84 can be many meters off from another point having the identical latitude and longitude in NAD27.
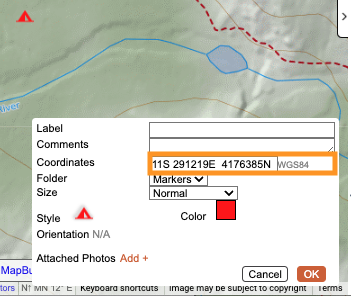
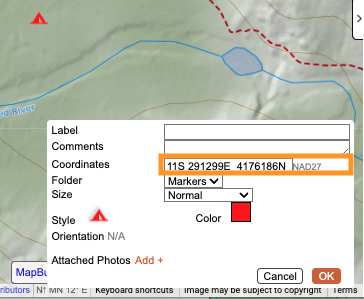
You can choose between WGS84 and NAD27 for coordinate display and entry (NAD83 is not offered as a separate setting because it is essentially the same as WGS84 in this context). The current datum selected will appear in the position display (as shown above) and any Marker or Point dialogs.
If you change datums, the coordinates of any map objects already on the map will automatically change to reflect the datum but the objects will remain in the same position on the map.
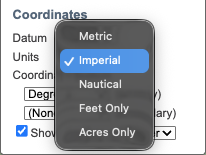
Units
This setting configures which units to display for elevation, distance and area. You can choose between metric, imperial, nautical, feet only and acres only. Please note that changing the units in the Settings menu does not change how data is displayed in base layers. The units used in base layers for measurements such as contour line elevation depends on the underlying data source.
Coordinate System (Primary and Secondary Formats)
This setting specifies the primary and secondary coordinate system format displayed. You can choose between UTM, USNG, Degrees, Degrees Minutes and Degrees Minutes Seconds.
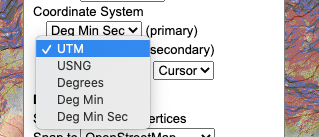
Unlike other GPS apps and devices, you can still enter coordinates in any system format (for example when searching for a new location or adding a marker) regardless of this setting.
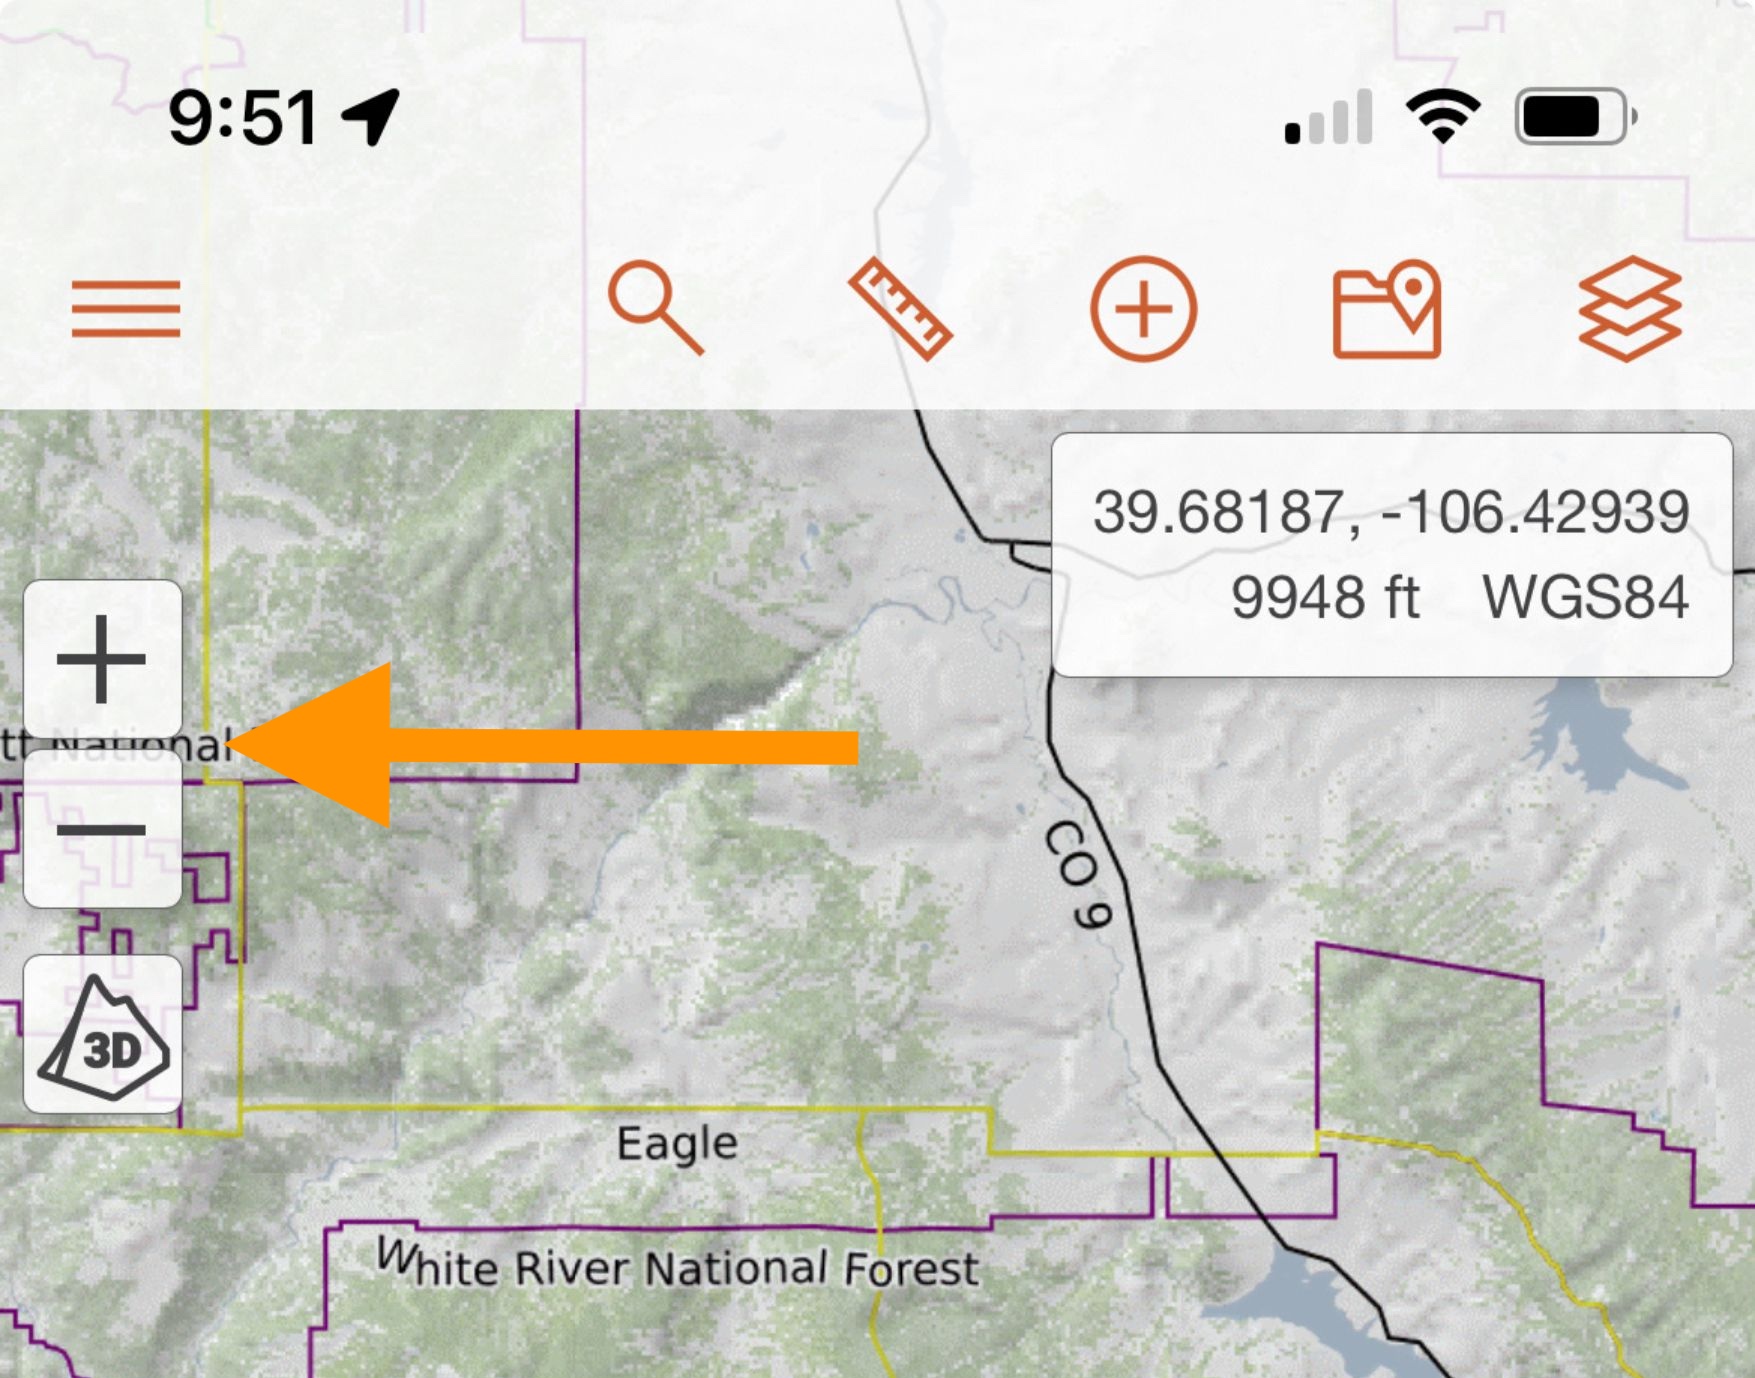
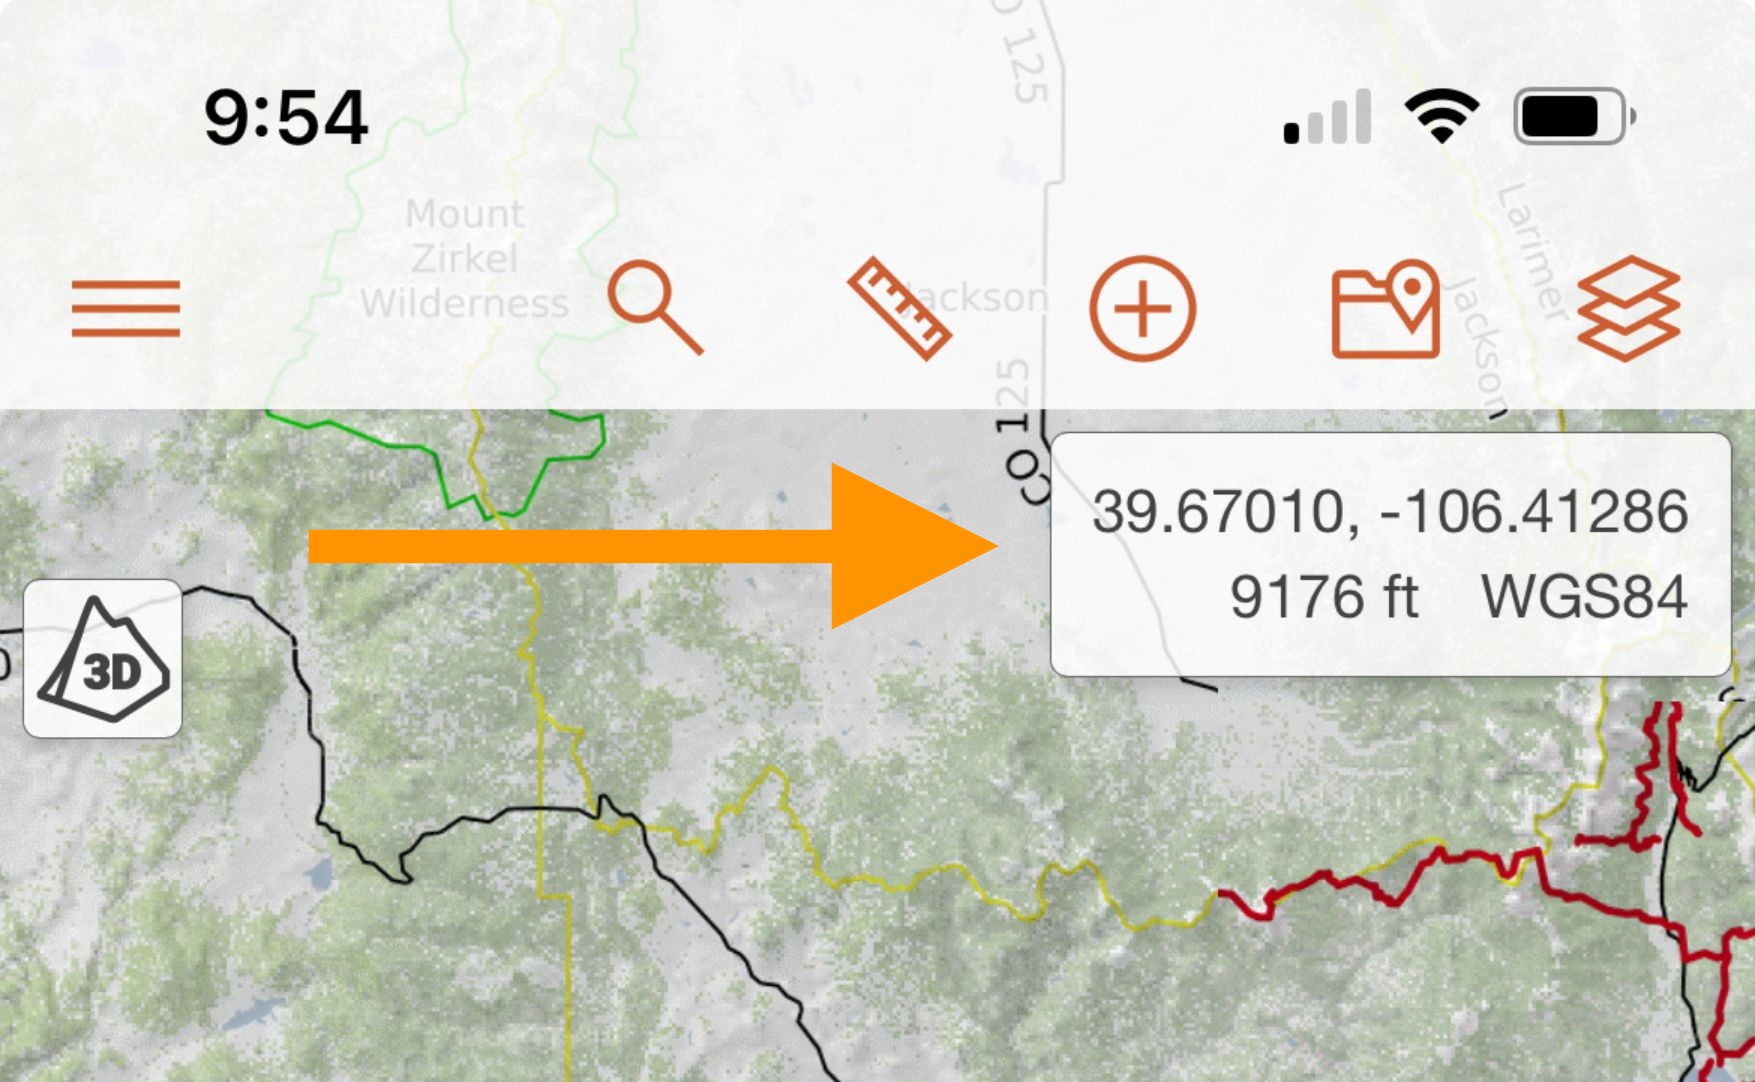
Show Position (web only)
The Show Position at setting determines whether or not the position display is visible on the map and what position it reports. If selected, the position display will be visible. You can configure the position display to show information for the current position of the cursor or the center of the map viewer using the dropdown menu.
Mobile App Only Settings
While the web and mobile app offer many of the same settings, some settings are less configurable in mobile than on the web while other settings are unique to mobile. This section covers differences between the web and mobile app as well as mobile-specific settings.
Display Differences
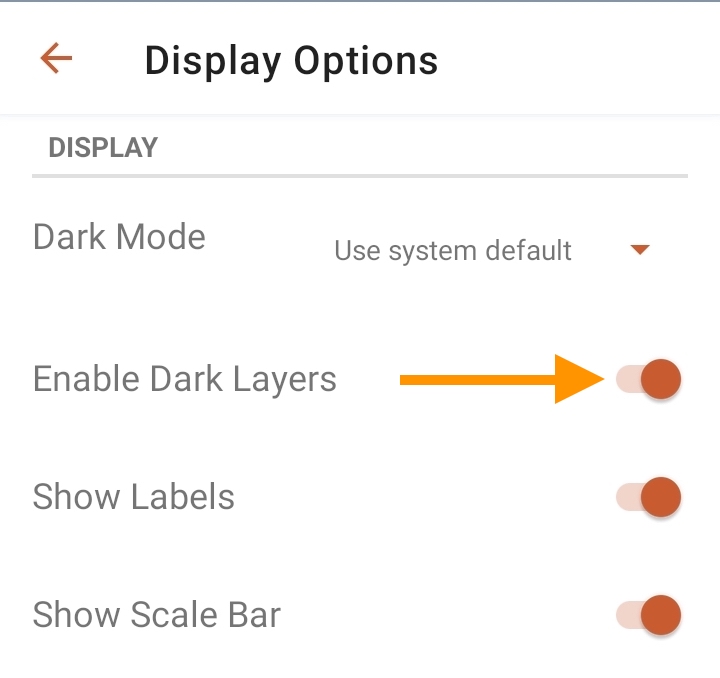
Enable Dark Layers
The mobile app allows you to enable dark layers for several popular base maps, including MapBuilder Topo and Scanned Topos. Dark layers display map features against a darker version of the base map, reducing screen brightness while maintaining contrast for readability—ideal for use in low-light conditions.

Enabling Dark Layers on Android:
To use Dark Layers in the Android app, follow these two steps:
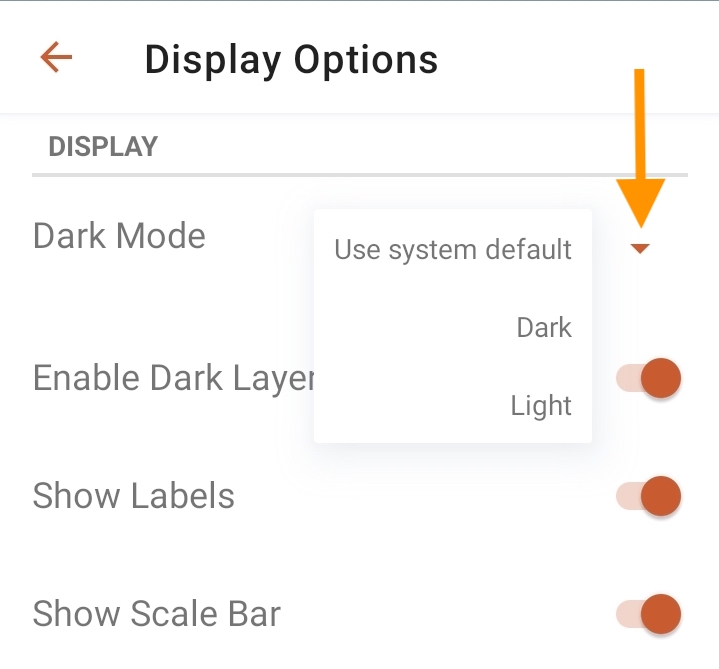
- Set Dark Mode preference: In the app’s settings, choose your appearance mode: System Default, Dark, or Light. Dark Layers will only display if this is set to Dark or if your system is currently using Dark Mode.
- Enable Dark Layers: Also in the settings, toggle Enable Dark Layers to turn dark layers on or off.
- Quick toggle: You can also use the Dark Mode icon in the Layers menu to toggle dark layers without opening the settings.
Enabling Dark Layers on iOS:
On iOS, the app follows your device’s system-wide Dark Mode setting, which may be configured to switch automatically at sunrise and sunset. You can customize this behavior in your device's display settings.
As on Android, there are two ways to enable dark layers:
- Settings menu: Use the Enable Dark Layers toggle in the app’s settings.
- Layers menu: Tap the Dark Mode icon on the map screen for a quick toggle.
Show Zoom Buttons
Use the toggle to display or hide zoom buttons on the mobile app. When toggled on, zoom buttons will be displayed in the upper right corner of the mobile map viewer.
Enable One Finger Zoom
Use the toggle to enable or disable one finger zoom. When toggled on, you can quickly double tap and then drag up and down with one finger to zoom out and in on the mobile map viewer.
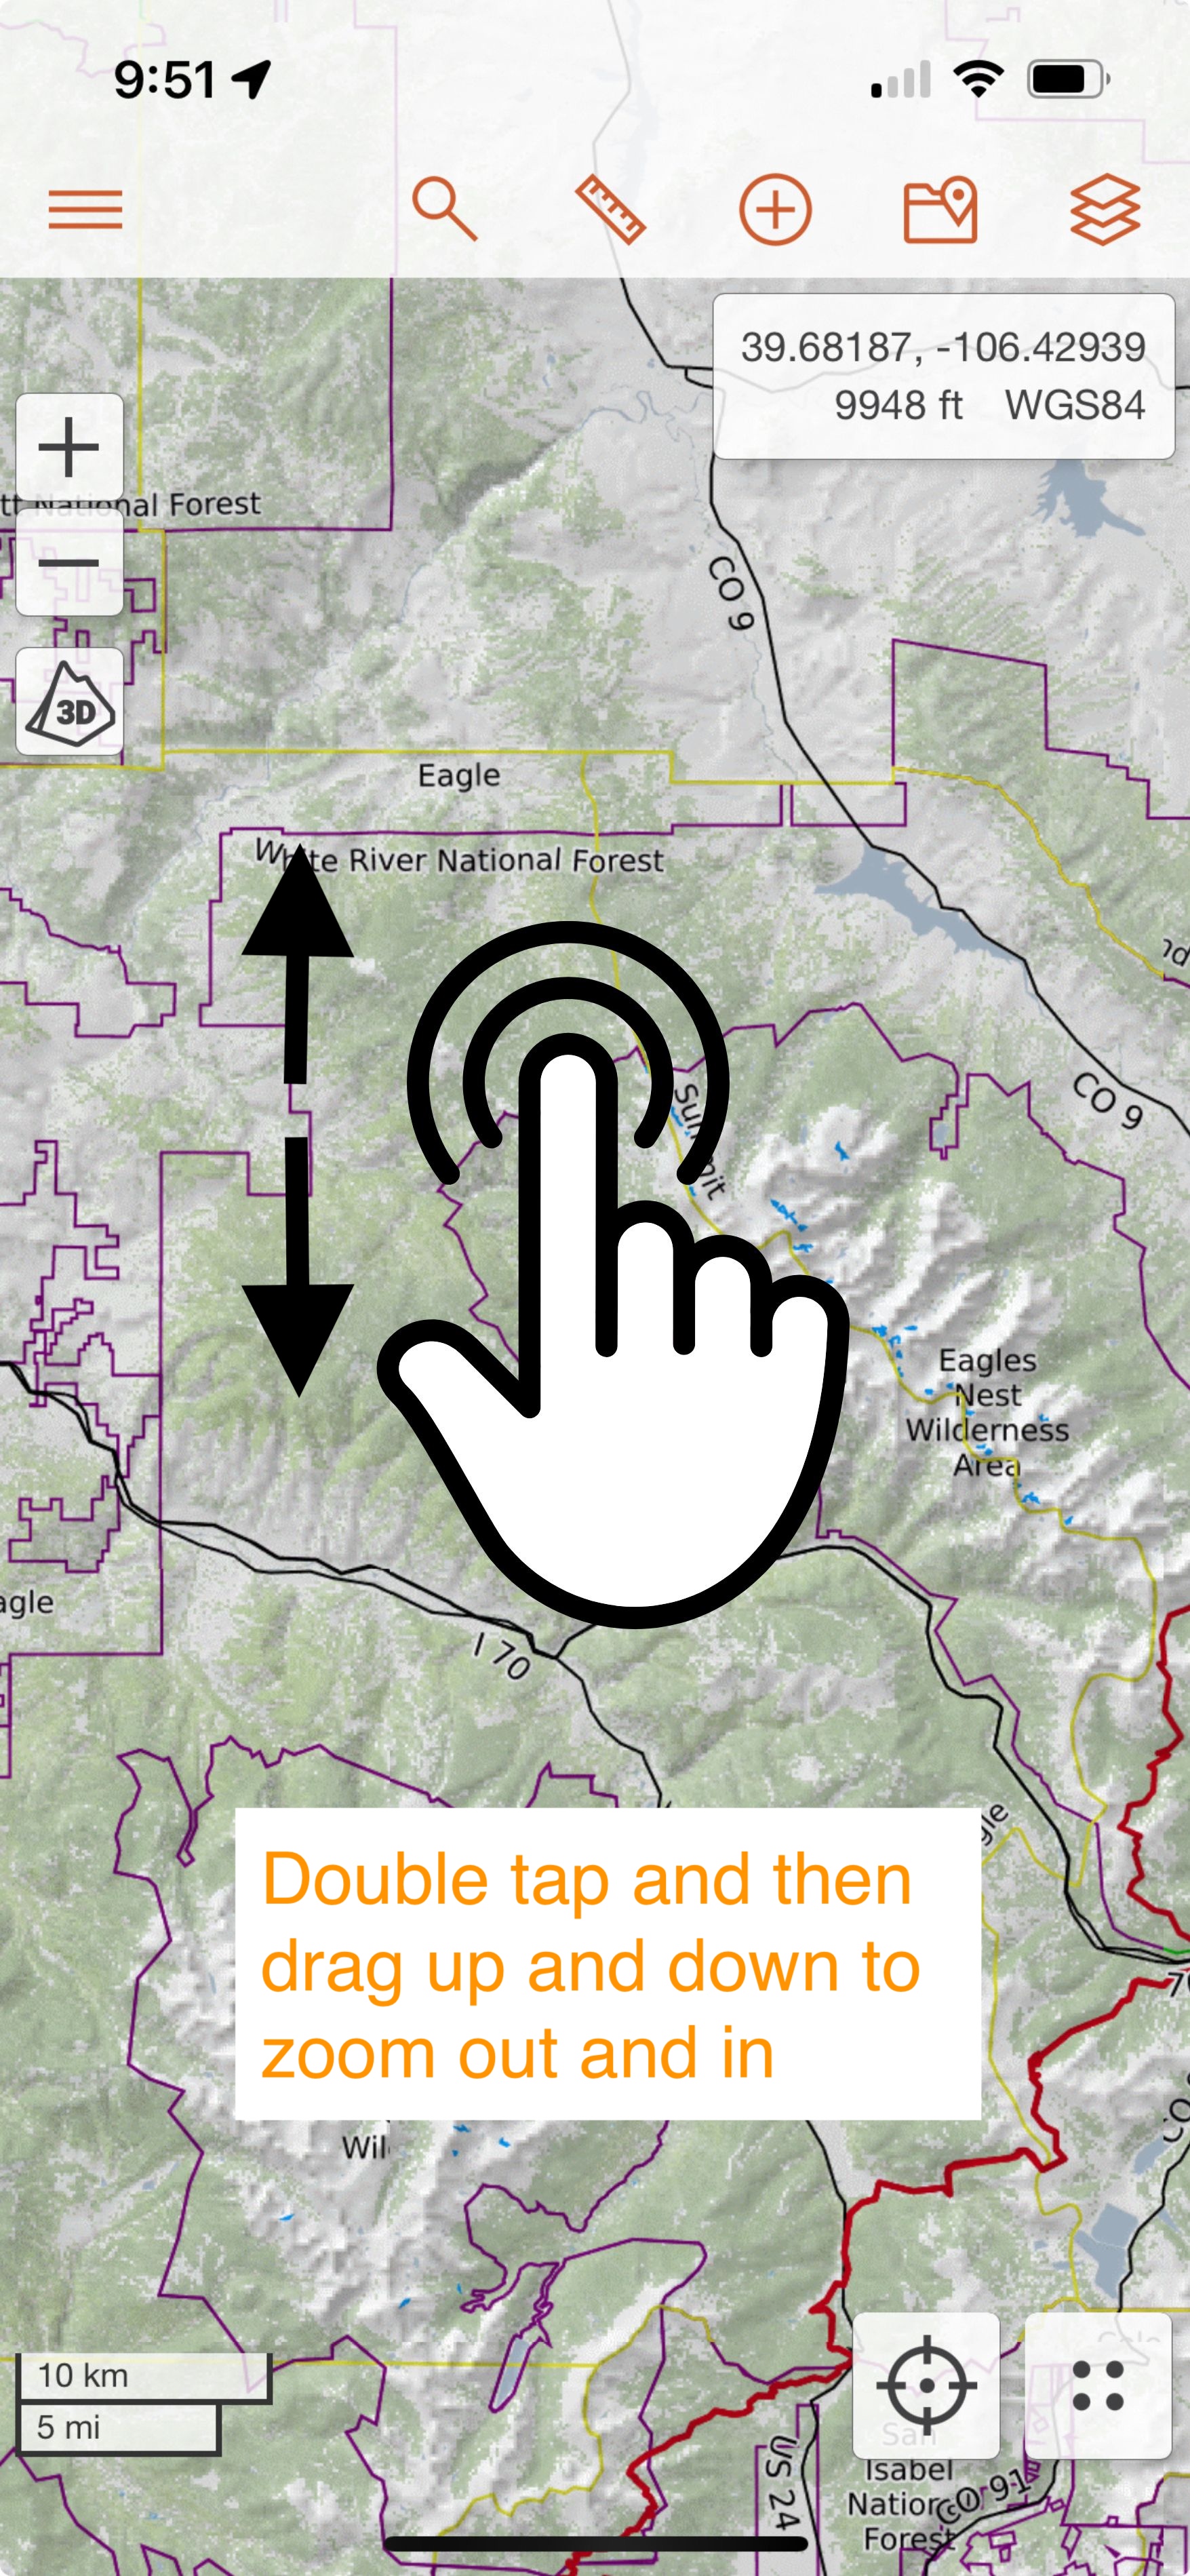
When one finger zoom is enabled, you can use one finger to zoom in and out on the mobile map viewer.
Coordinate Differences
Other than the Show Coordinates/Elevation settings, the other settings in this section (Datum, Units, and primary and secondary formats) function the same way as they do on the web.
Show Coordinates/Elevation
Toggle Show Coordinates/Elevation on and off to show or hide the position display. The position and elevation information shown is always for the center of the map viewer.
Compass and Heading
This part of the Settings menu allows you to change how compass and heading data is displayed. Since this is part of navigating with the mobile app, these settings are only available on the mobile app. For more information on navigating with the mobile app, please see the mobile Navigation lesson.
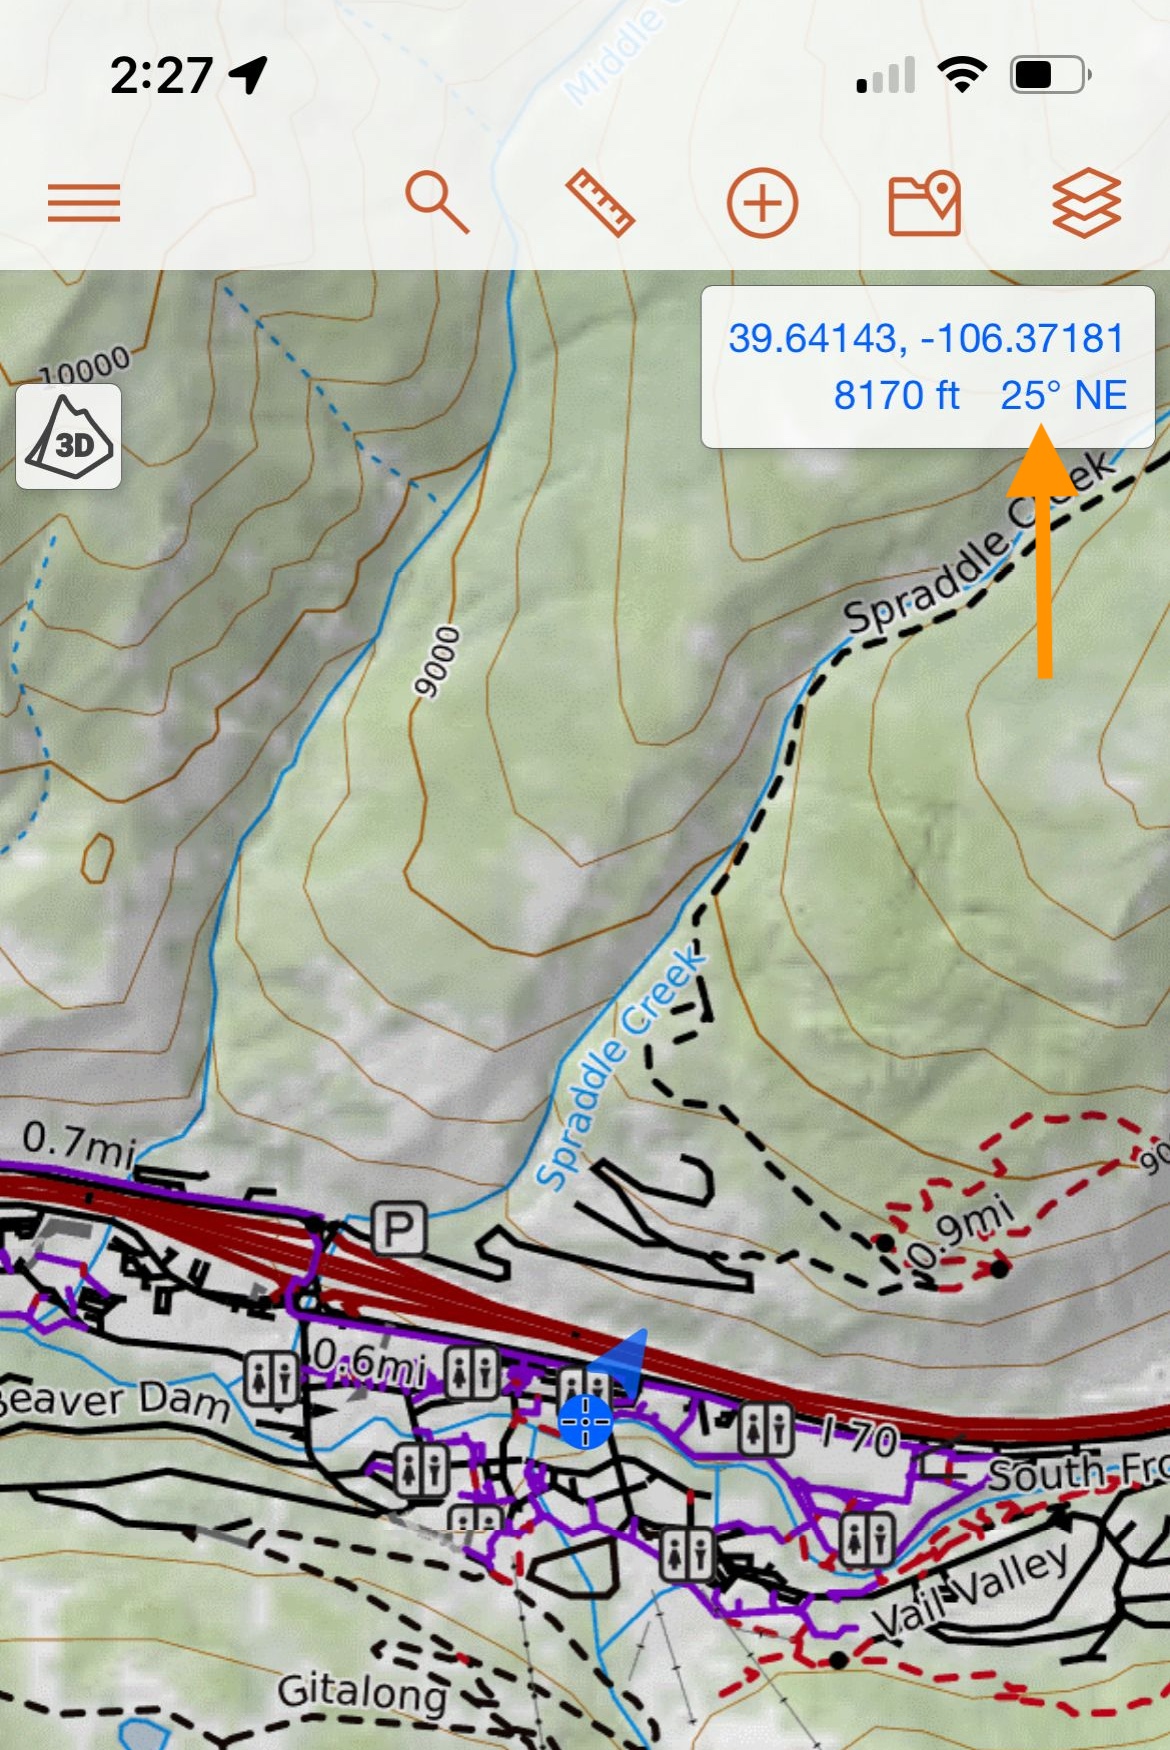
Show Heading Line
This setting controls whether a heading line is shown to indicate the direction you are facing when your location is turned on. Simply toggle "Show Heading Line" on to display a heading line in place of the blue compass arrow.
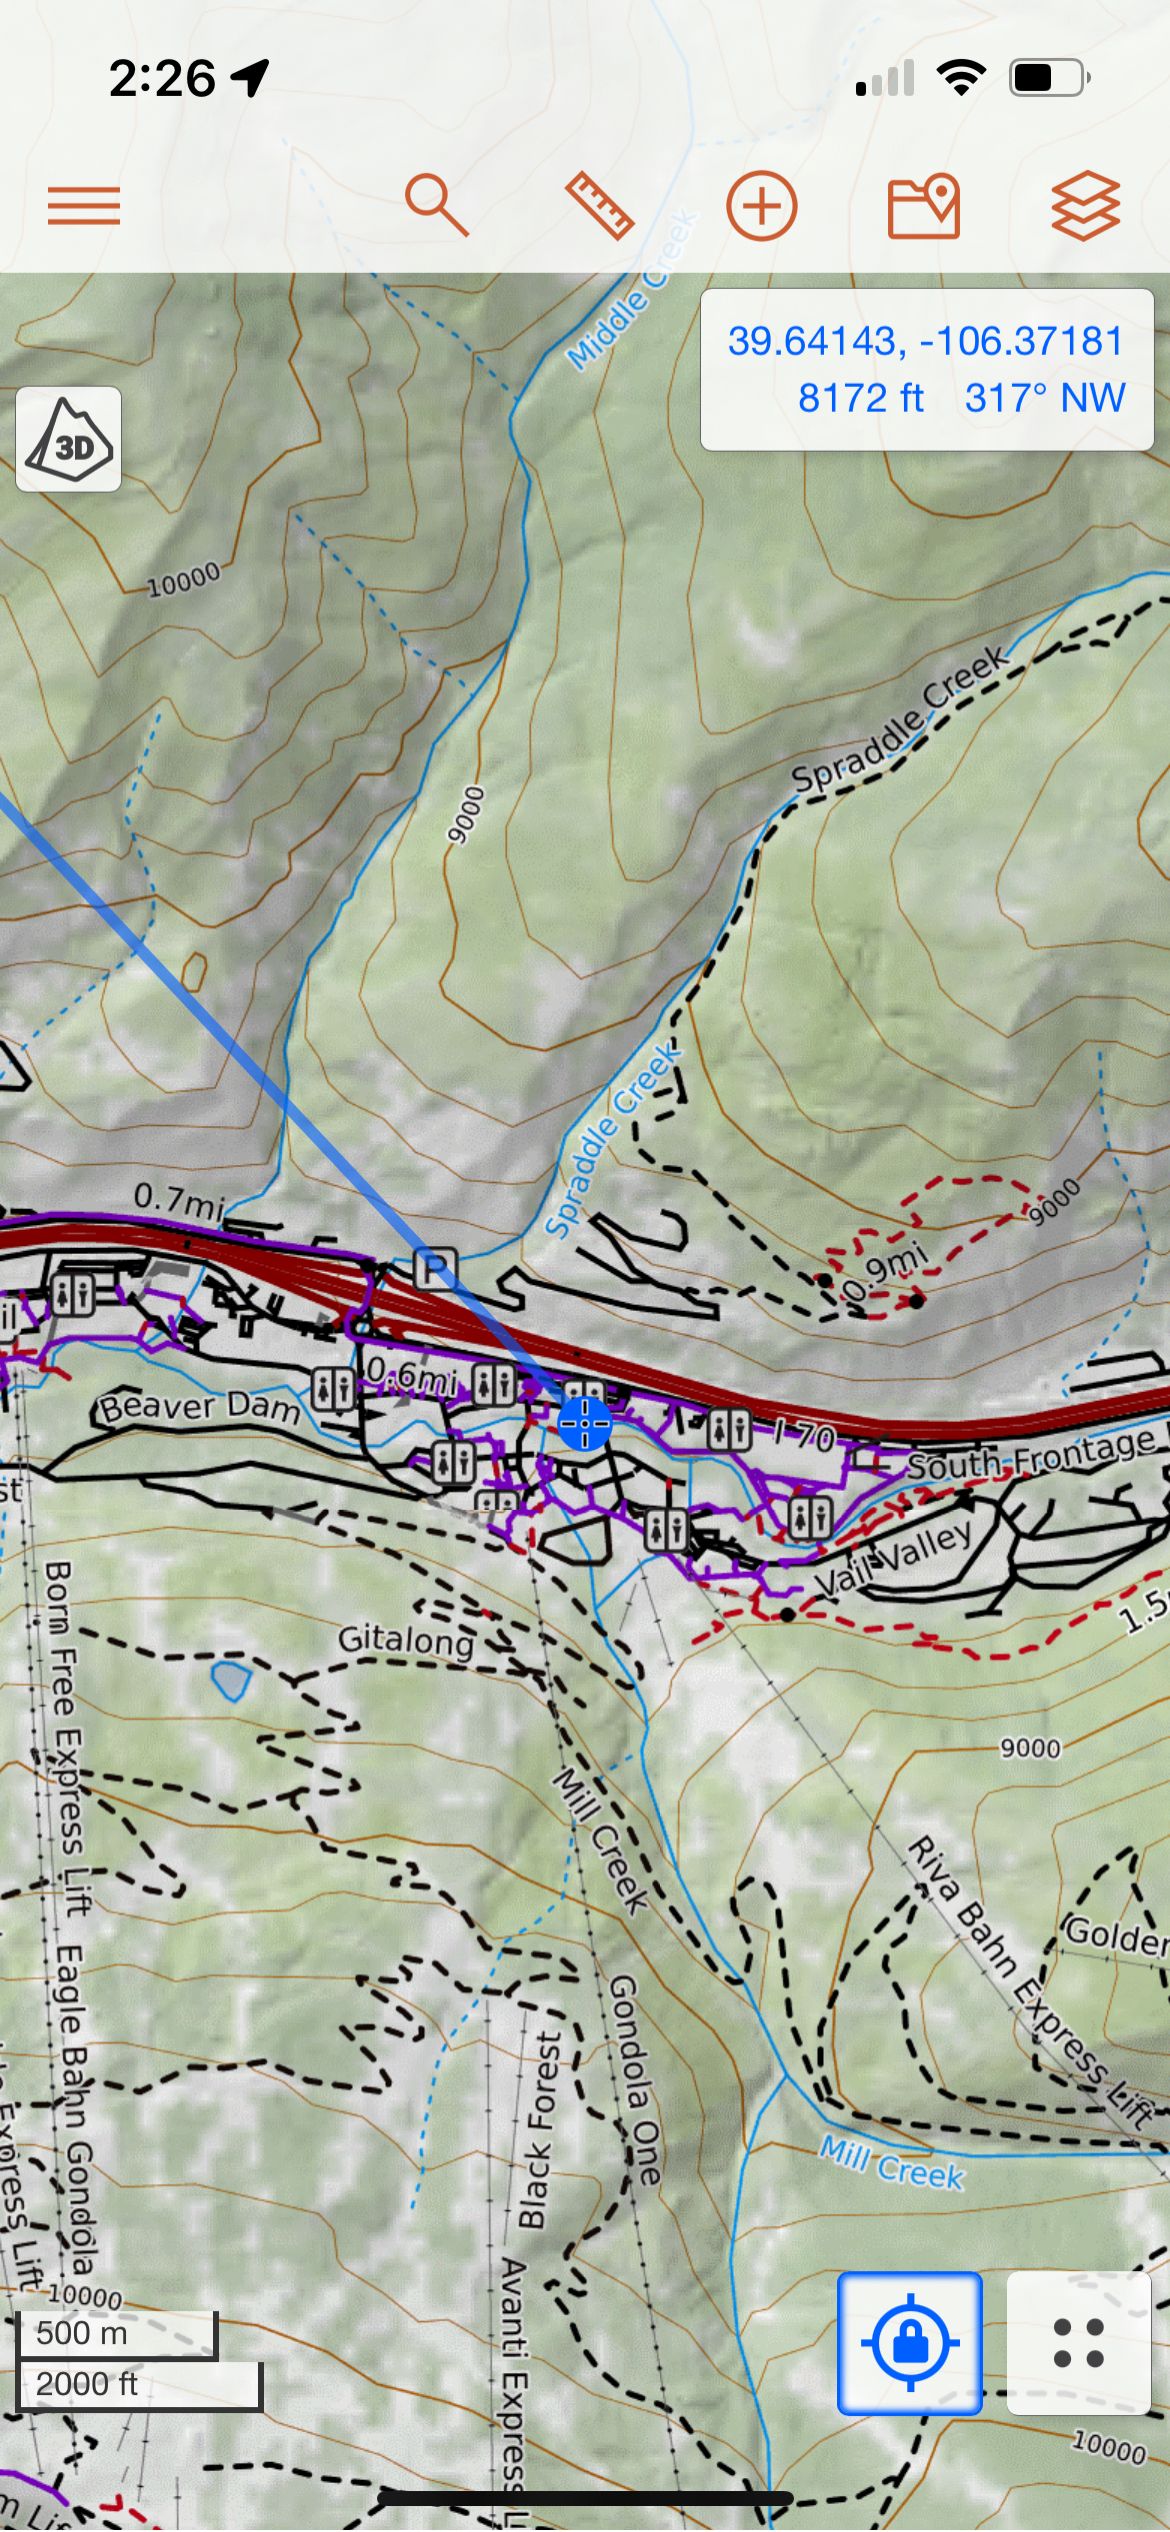
North Reference
Choose between true or magnetic north for your north reference. This will be reflected in the numerical heading displayed in the lower right corner of the position display.

GPS/Location
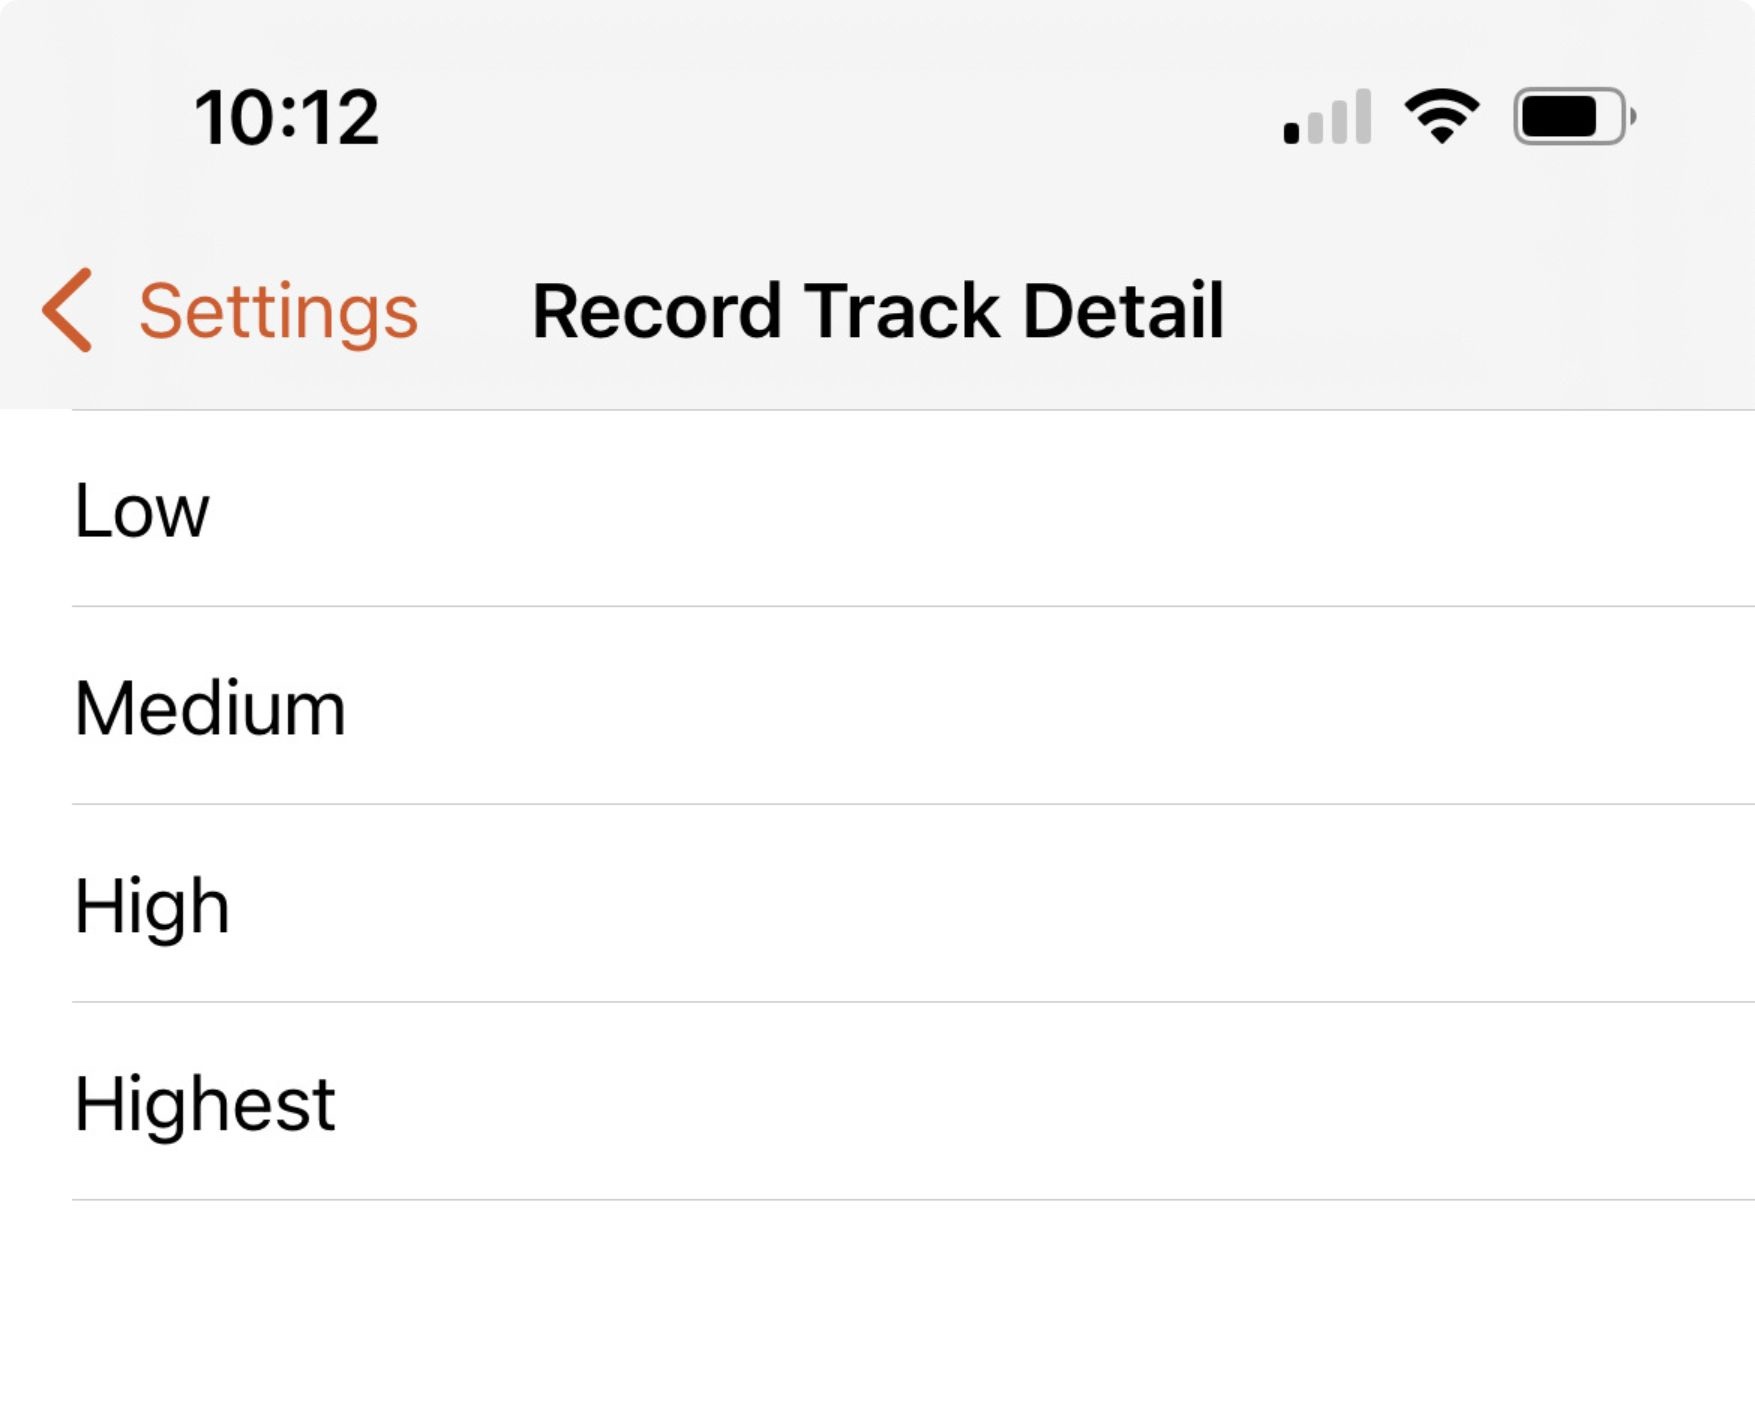
Record Track Detail
Use this setting to adjust how often your GPS records a data point along a recorded track:
- Low: Every 30 seconds
- Medium: Every 10 seconds
- High: Every 5 seconds
- Highest: Every 2.5 seconds
For more information on recording tracks, visit the Recording Tracks page.
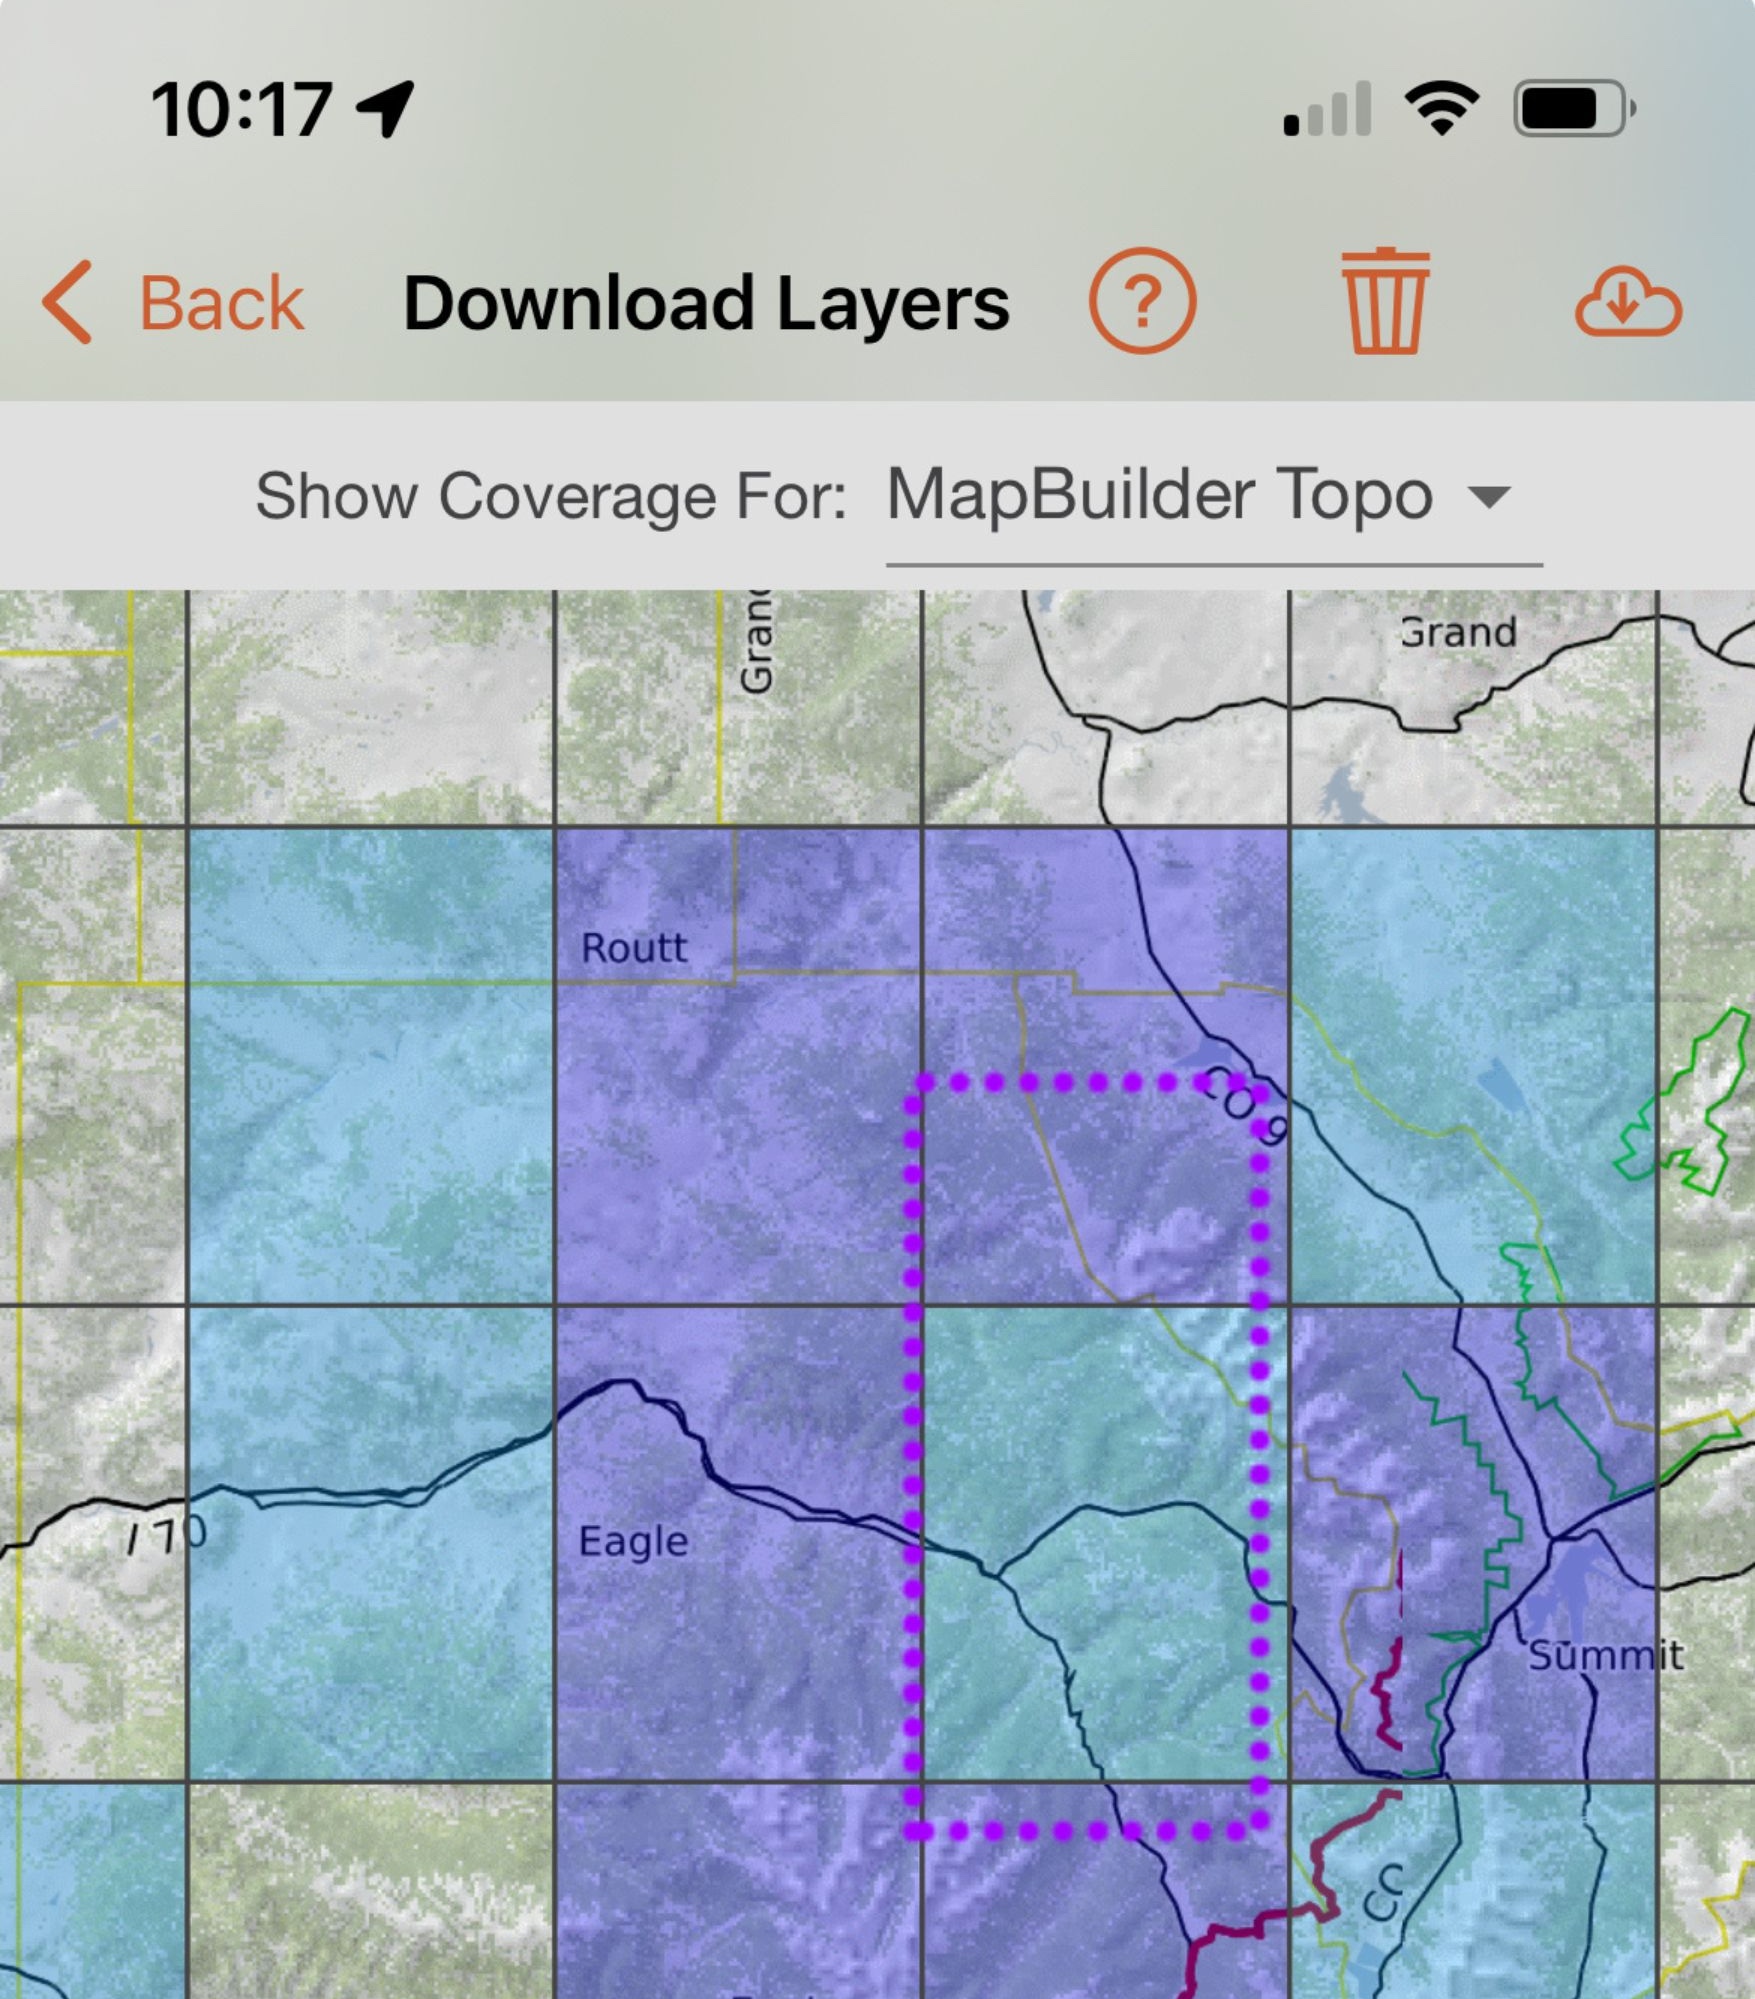
Network Settings
Use these settings to control what you allow to be downloaded over cellular data in addition to WiFi.
Allow Cellular Tile Downloads
Use the “Allow Cellular Tile Downloads” toggle to control your offline layers download settings. Toggling this setting on allows you to use cellular data or WiFi to download offline layers to your mobile device. If it is toggled off, you can only download offline layers when you are connected to WiFi.
Please note: using cellular networks for downloading offline layers may consume a large amount of data.
Allow Cellular Photo Downloads
Use the “Allow Cellular Photo Downloads” toggle to control your photo download settings. Toggling this setting on allows you to automatically sync Media Viewer photos using cellular data or WiFi. If this is toggled off, Media Viewer photos will only automatically sync when you are connected to WiFi.
Please note: using cellular networks for downloading and uploading photos may consume a large amount of data.
For more information on photos in the mobile app, visit the Photo Waypoints page.
Tile Cache
Clear Cache
Cached tiles are tiles that are temporarily stored in CalTopo’s cache so that they can be quickly retrieved as you zoom in and out and pan around the map while online. Tap this option to clear the currently cached tiles.
Analytics and Diagnostics
Share Crash and Usage Data
Toggle this setting on to share your crash and usage data with CalTopo. This data can be extremely helpful to us for diagnosing and troubleshooting individual issues as well as informing app improvement and development. As a reminder, CalTopo does not sell user data- this data is only used for internal analytics and diagnostics.
About
App Version
This is where you can view your current app version. Make sure you have the latest version of the app to ensure optimal app performance. If needed, you can upgrade to the latest version in the app store.