Map Sheets
let's begin
A Map Sheet is a layer that covers a limited area. It can be created from image files, pdfs, MBTiles, or other CalTopo maps via the "print" function.
Supported file types include JPG, TIFF, or PDF files. Please be aware that if you are uploading a map sheet, the max file size is approximately 40 MB.
Map sheets act like layers, and can be viewed and stacked just like base layers in the map viewer. However, map sheets are more limited in geographical scope - think of them as 'local' layers.
Lessons in this Chapter:
Topics on this Page:
- Finding and Displaying Map Sheets
- Save Map Sheet to Your Account
- Submit a Map Sheet for inclusion in the shared map sheets database.
- Using Map Sheets on Mobile
- Map Sheets Offline in the mobile app
Displaying Map Sheets in the Map Viewer
Shared Map Sheets are available to all users. These are part of CalTopo's database and available for all users to access.
Pro, Desktop, and Team Account users can upload and save their own map sheet data to their accounts.
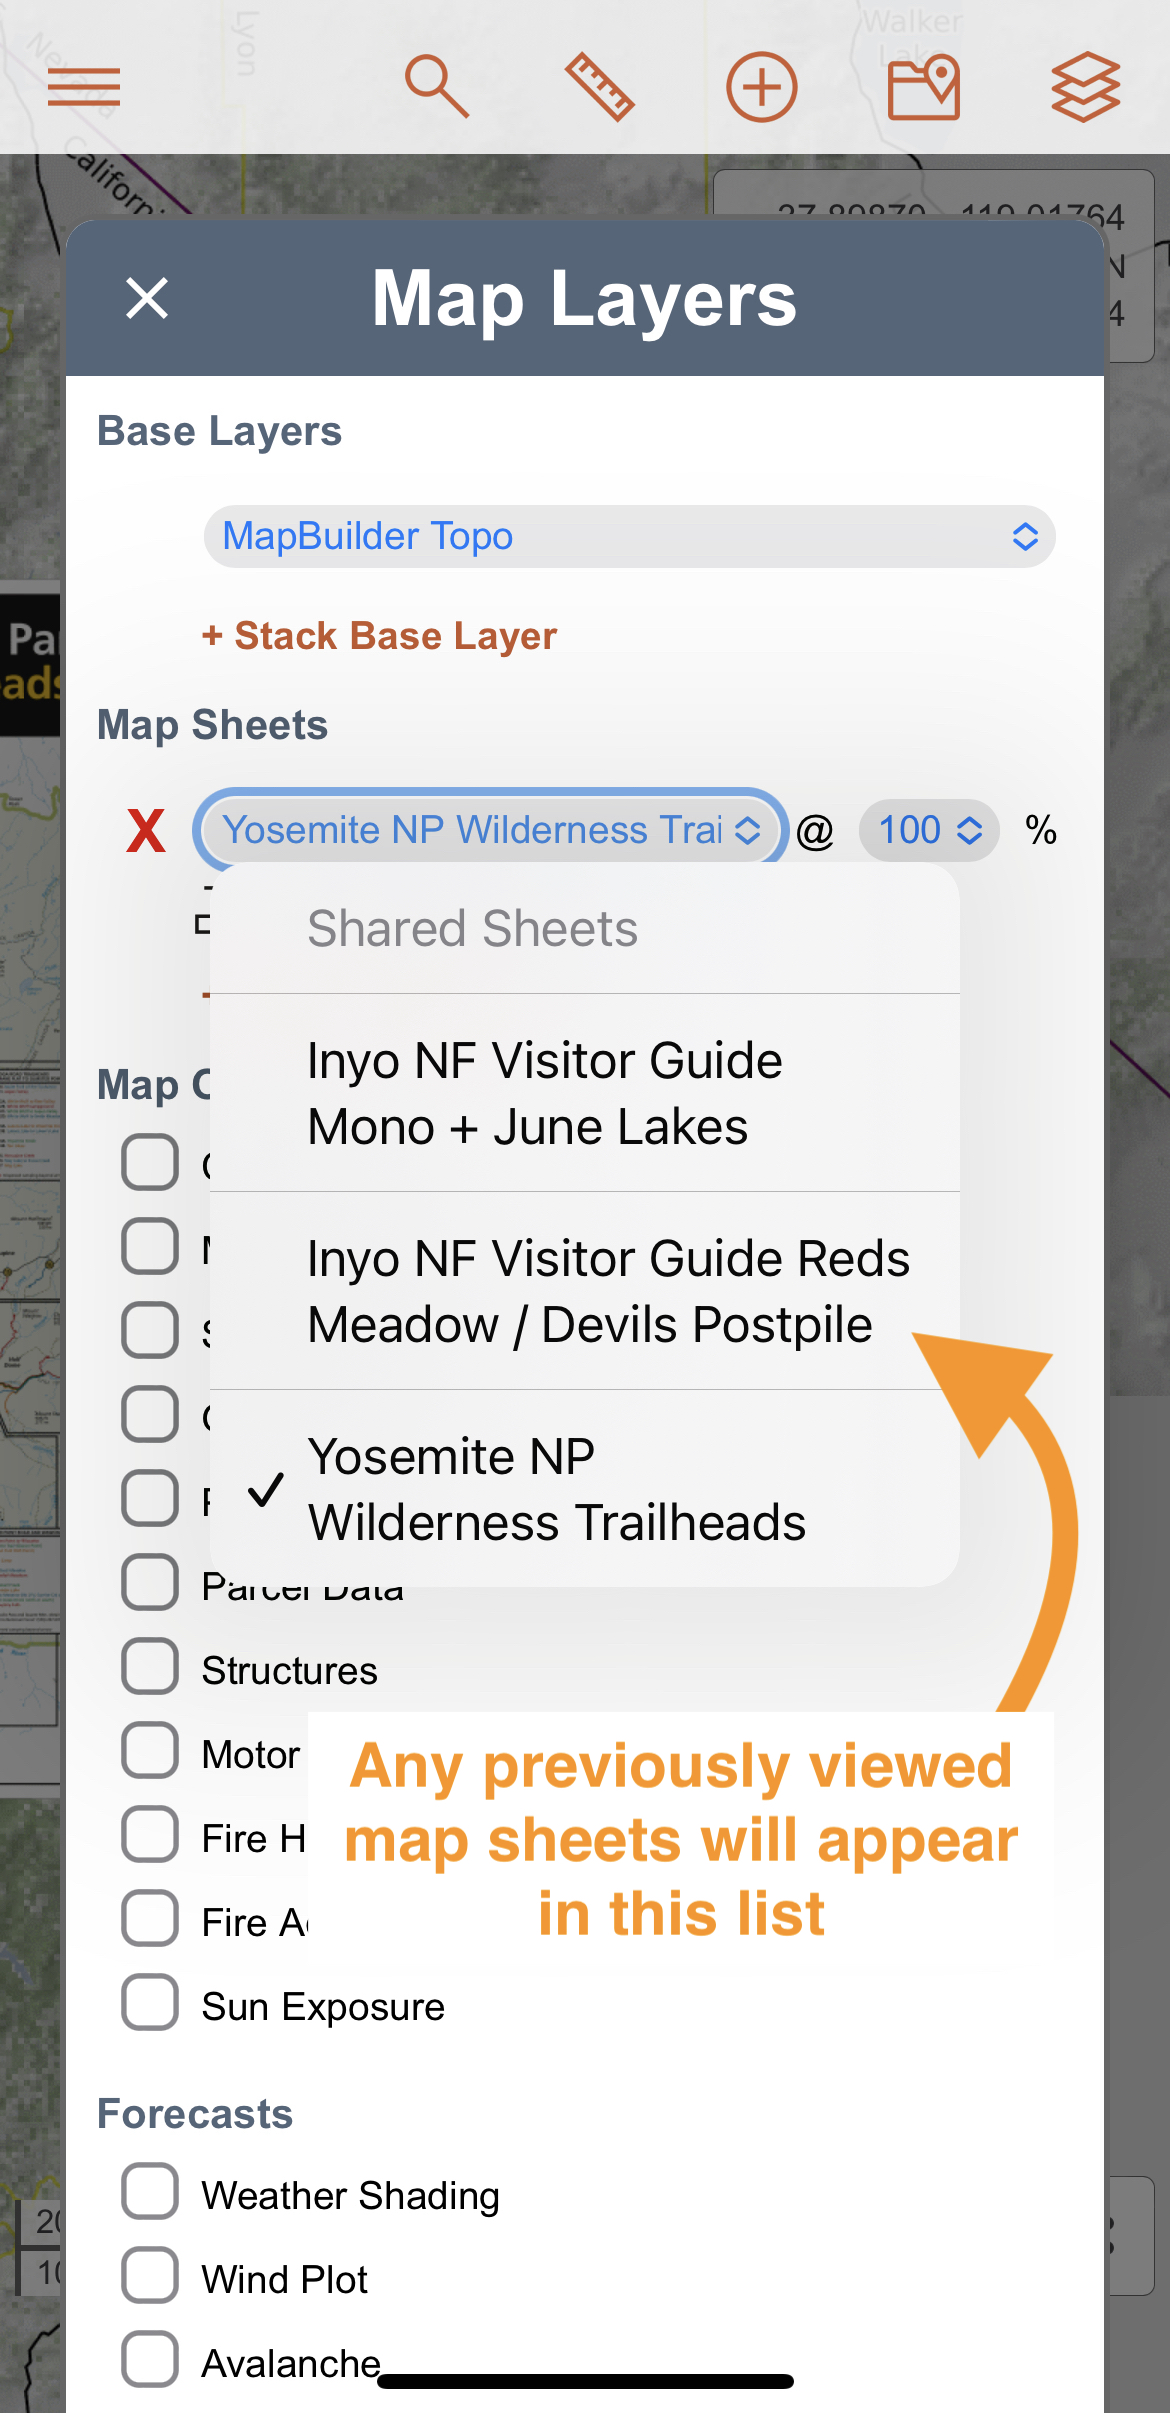
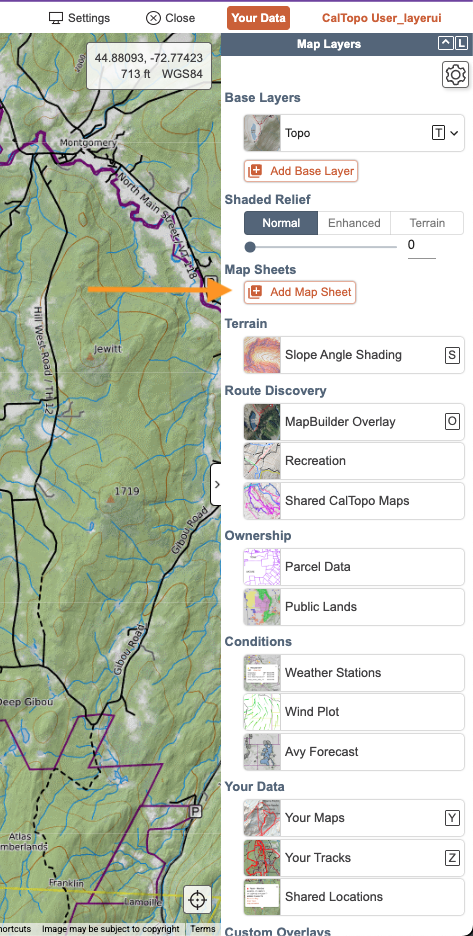
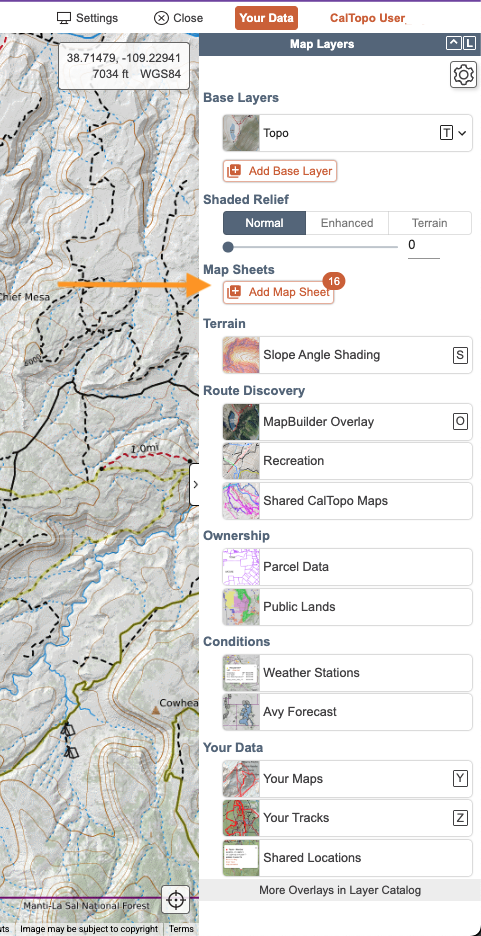
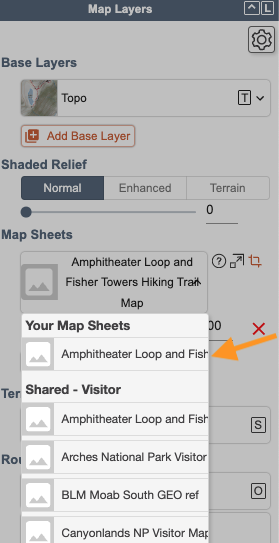
All map sheets, regardless if they are shared or private, will be in the layers menu below the main base layer drop down menu. Clicking the + Stack Map Sheet link will activate a new drop down menu where you can select from available map sheets.
Only map sheets that cover the current map viewer screen will show up in the drop down menu. If no map sheets appear in the list, you may need to zoom in, or move the map viewer to a new area. Publicly available map sheets will be grouped by type (Visitor, Bike, Water, etc).
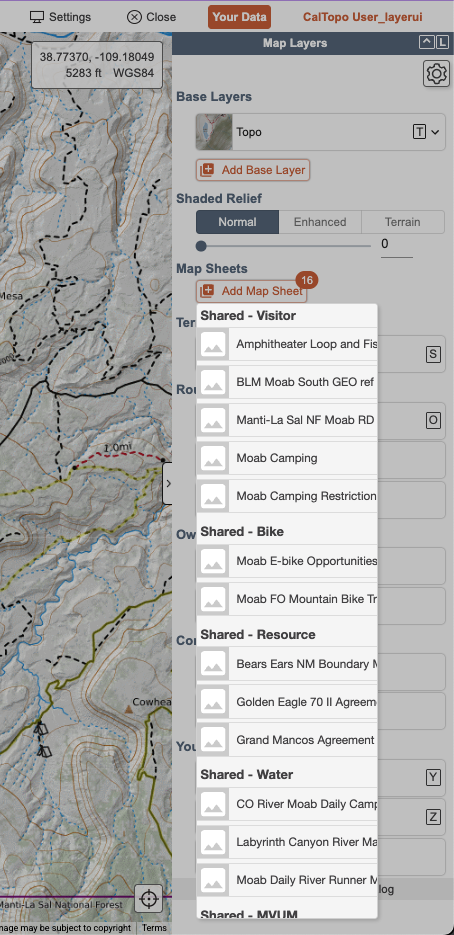
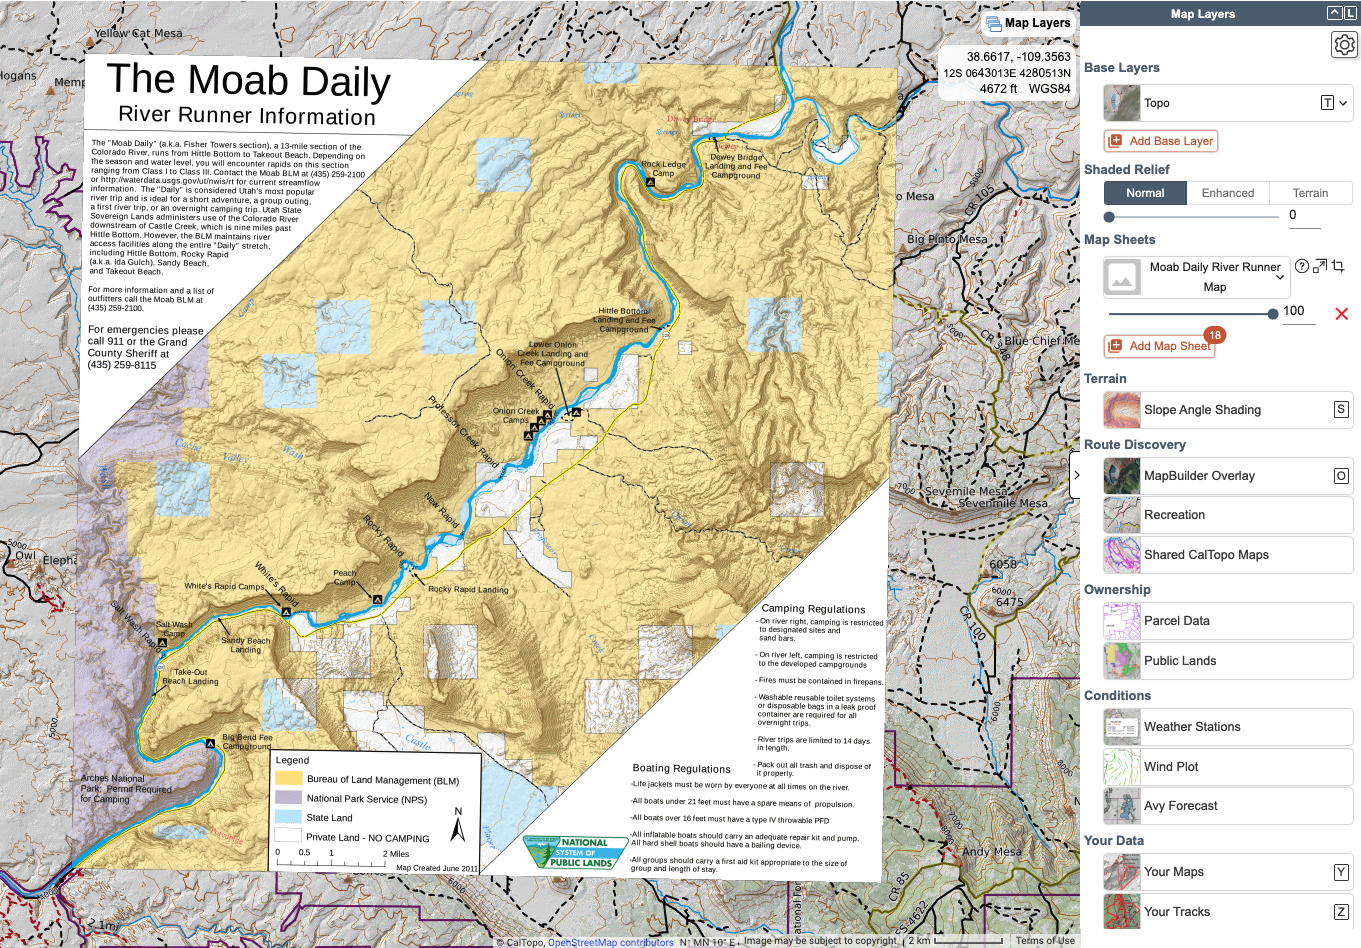
Select a map sheet from the list. Next you will need to change the opacity. Map sheet opacity defaults to 0, so you will not see anything until you change the opacity to a larger number.
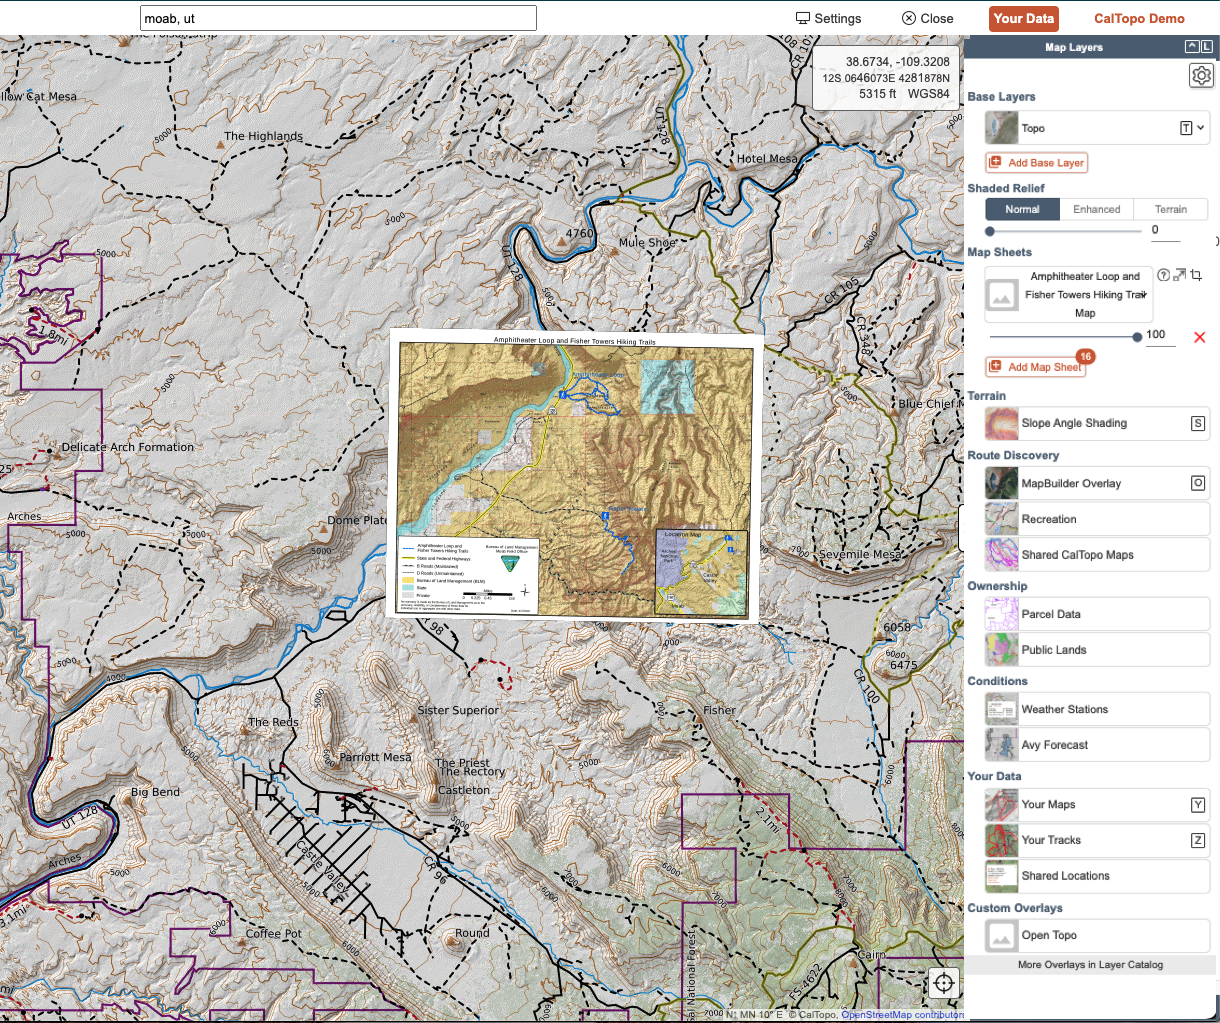
Map sheets work in a similar way to base layers: you can change the opacity and stack multiple map sheets on the same map.
Map sheets include additional options next to the map sheet’s name. Click the Zoom to Extent icon to zoom the map view to fit that map sheet. Click the Crop icon to hide any extra blank area or text outside the map’s border.
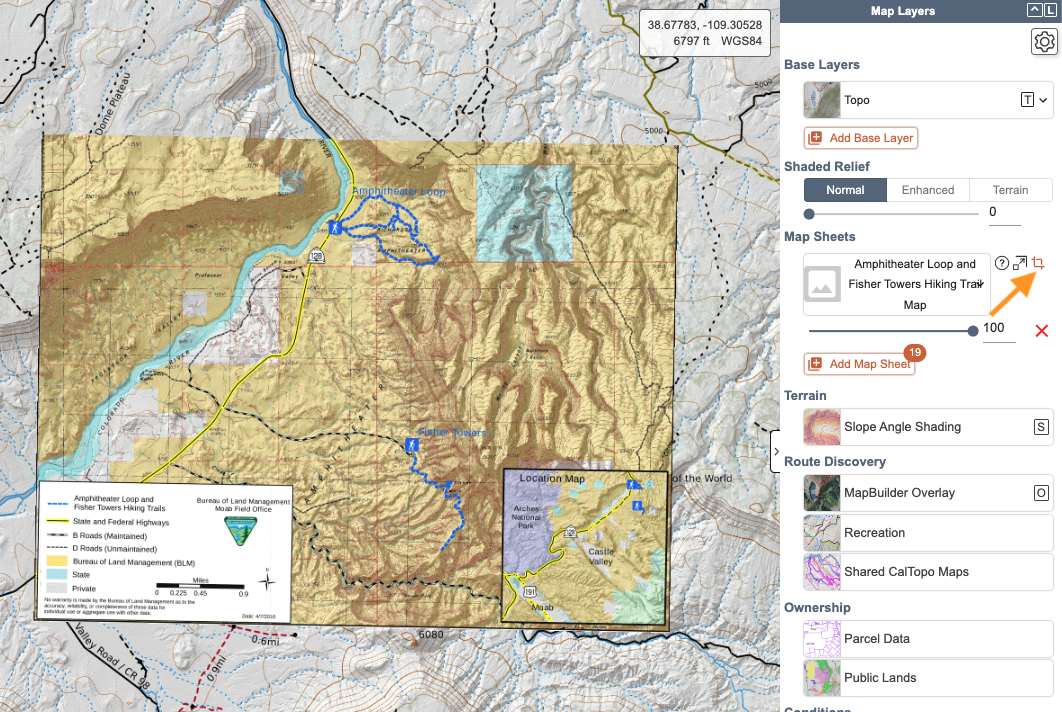
To remove a map sheet from the map viewer, click the X next to the name of the map sheet in the Map Sheets menu.
Saving Map Sheets to Your Account
Clicking the Info icon (represented with a question mark) will display a dialog with basic background information about the map sheet. If you are logged in, clicking Add to Account will save the map sheet to your account in the Map Sheets folder.
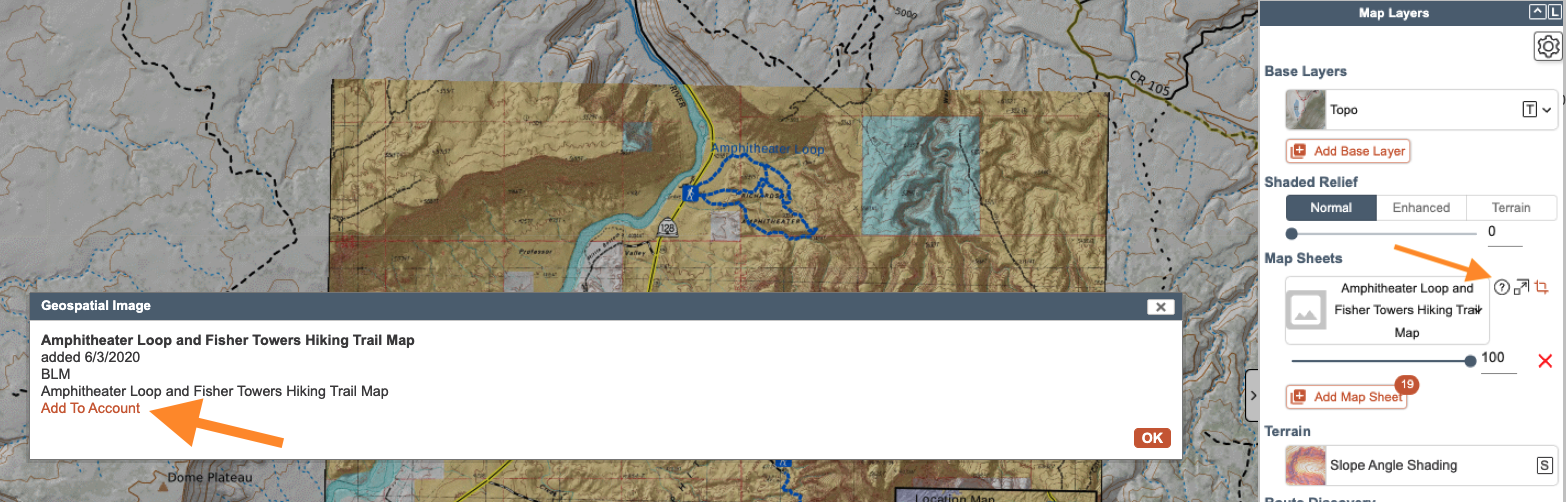
Any map sheets that are saved to your account will appear at the top of the map sheet list under Your Sheets the next time you view the area. You also have to save map sheets to your account on the web if you want to view and download them for offline use on the mobile app. Manage your account map sheets in Your Data.
Submit a New Shared Map Sheet for Review
Any user can submit a map sheet file to be reviewed for inclusion in the shared map sheets database at https://caltopo.com/submitmap. CalTopo will assess all maps for quality as well as copyright issues.

Mobile Map Sheets
Which map sheets can you view on mobile?
Available on Mobile
- Sheet saved to your account;
- Sheet saved to a team account that you are a member of;
- A map sheet that belongs to a specific map (it is a map object on that map.)
Not Available on Mobile
- Shared (public) map sheets that are not saved to your account;
- An account map sheet saved in another user's account, even if displayed on a map that you have bookmarked.
- A sheet saved to a team account that you are not a member of.
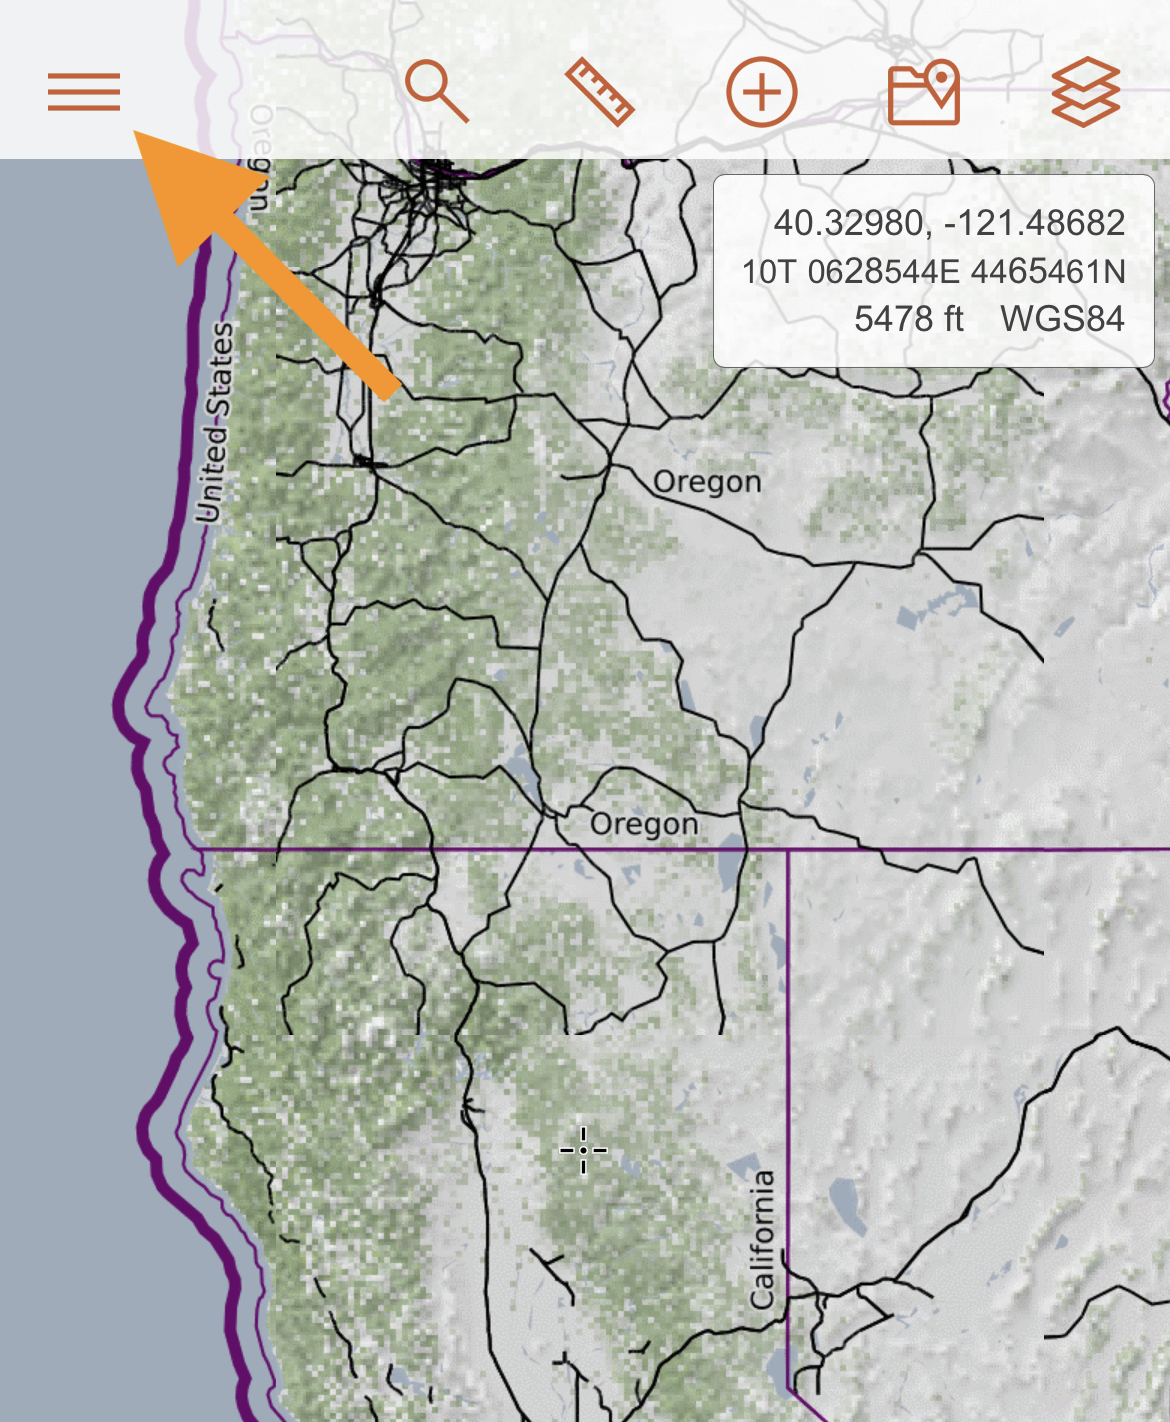
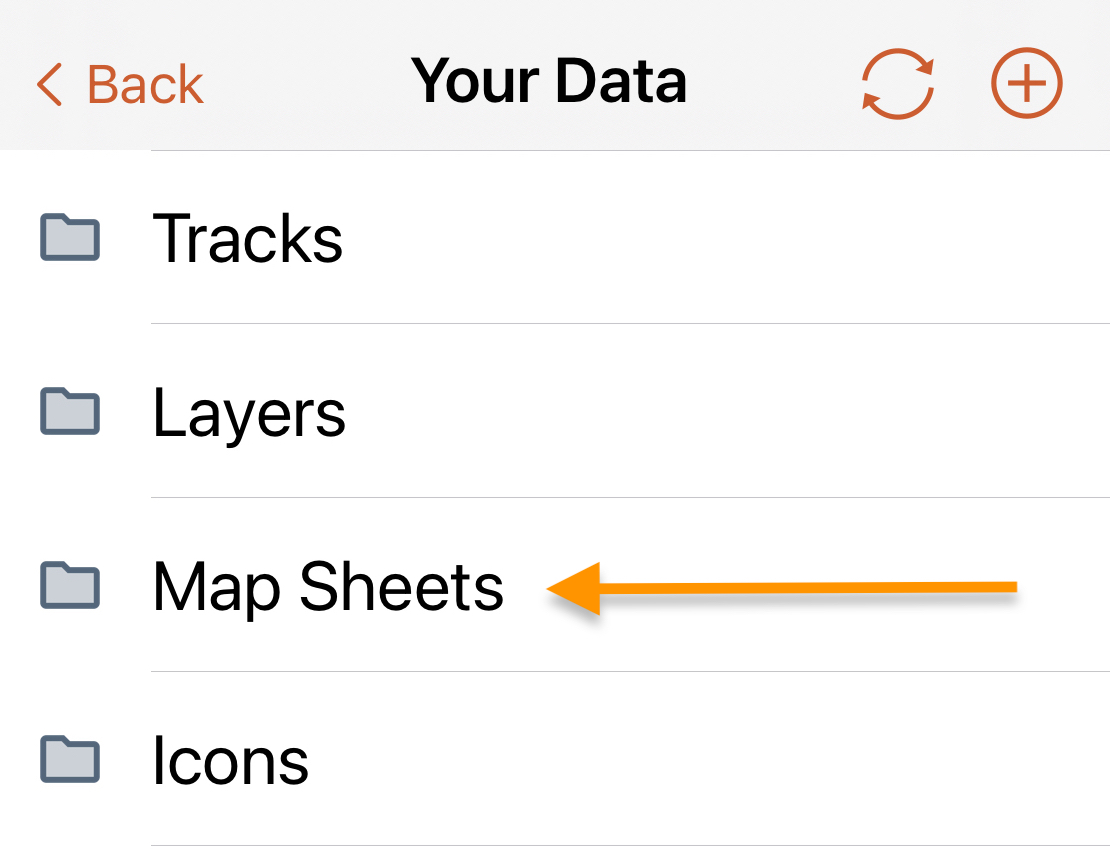
To use a map sheet in the CalTopo mobile app, you must first add it to your account using CalTopo on the web (via a browser). To view map sheets saved to your account on the mobile app, tap the 3 bar main menu in the upper left hand corner of the map viewer and then select Map Sheets.
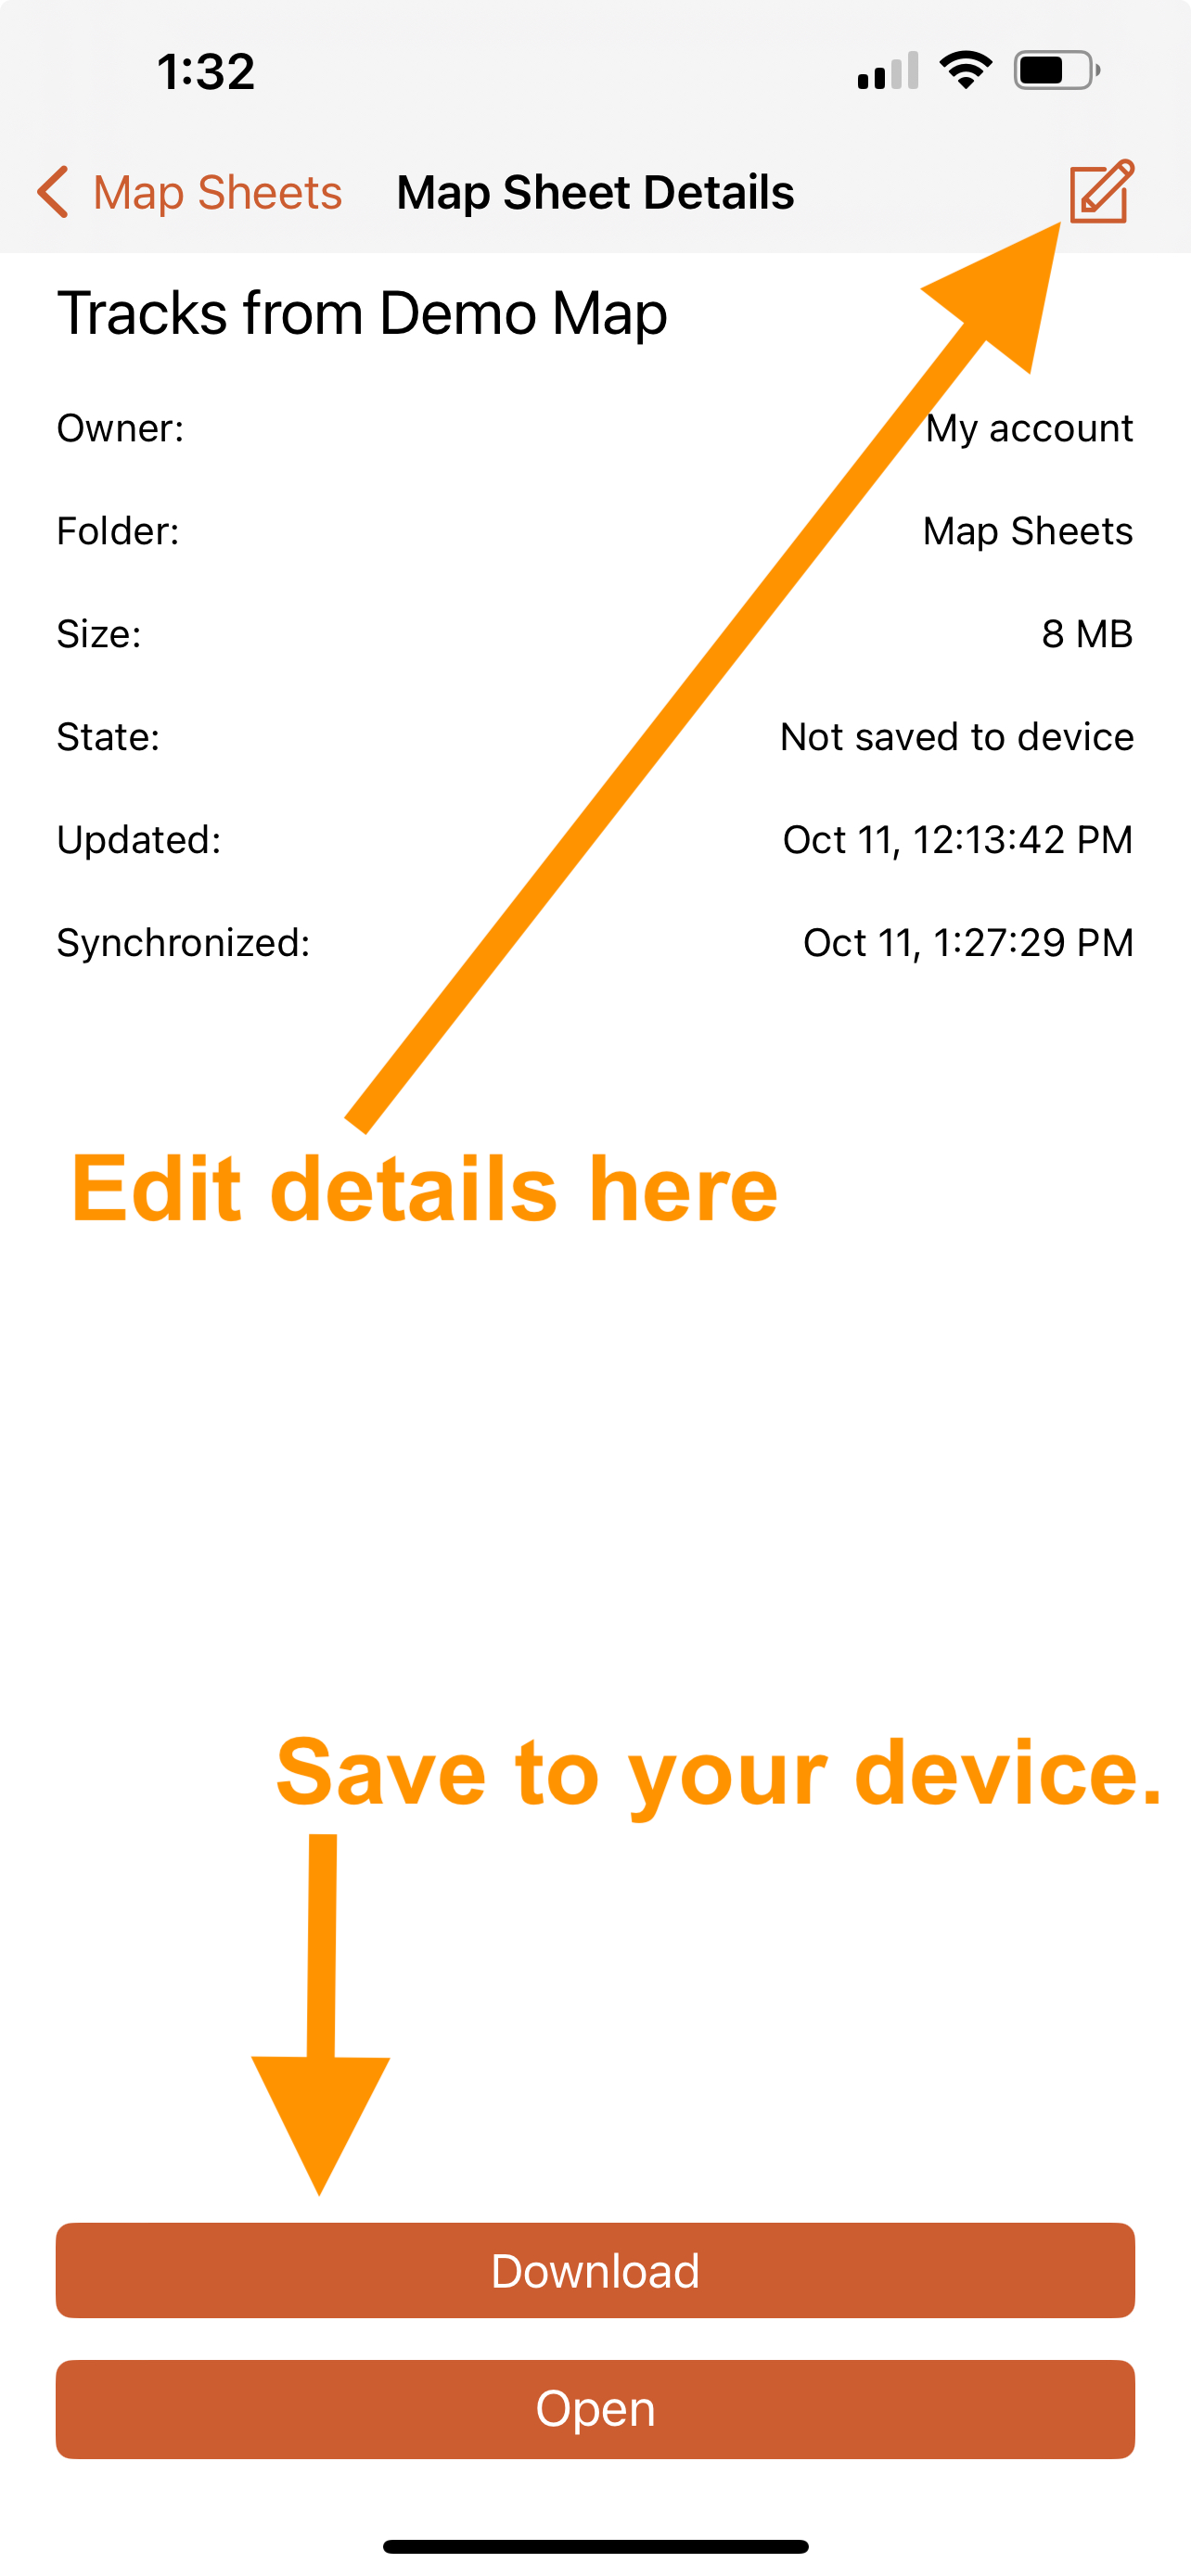
The next screen is a list of the map sheets saved to your account. However, these map sheets do not automatically download to your device. You will need to download each individually as needed.
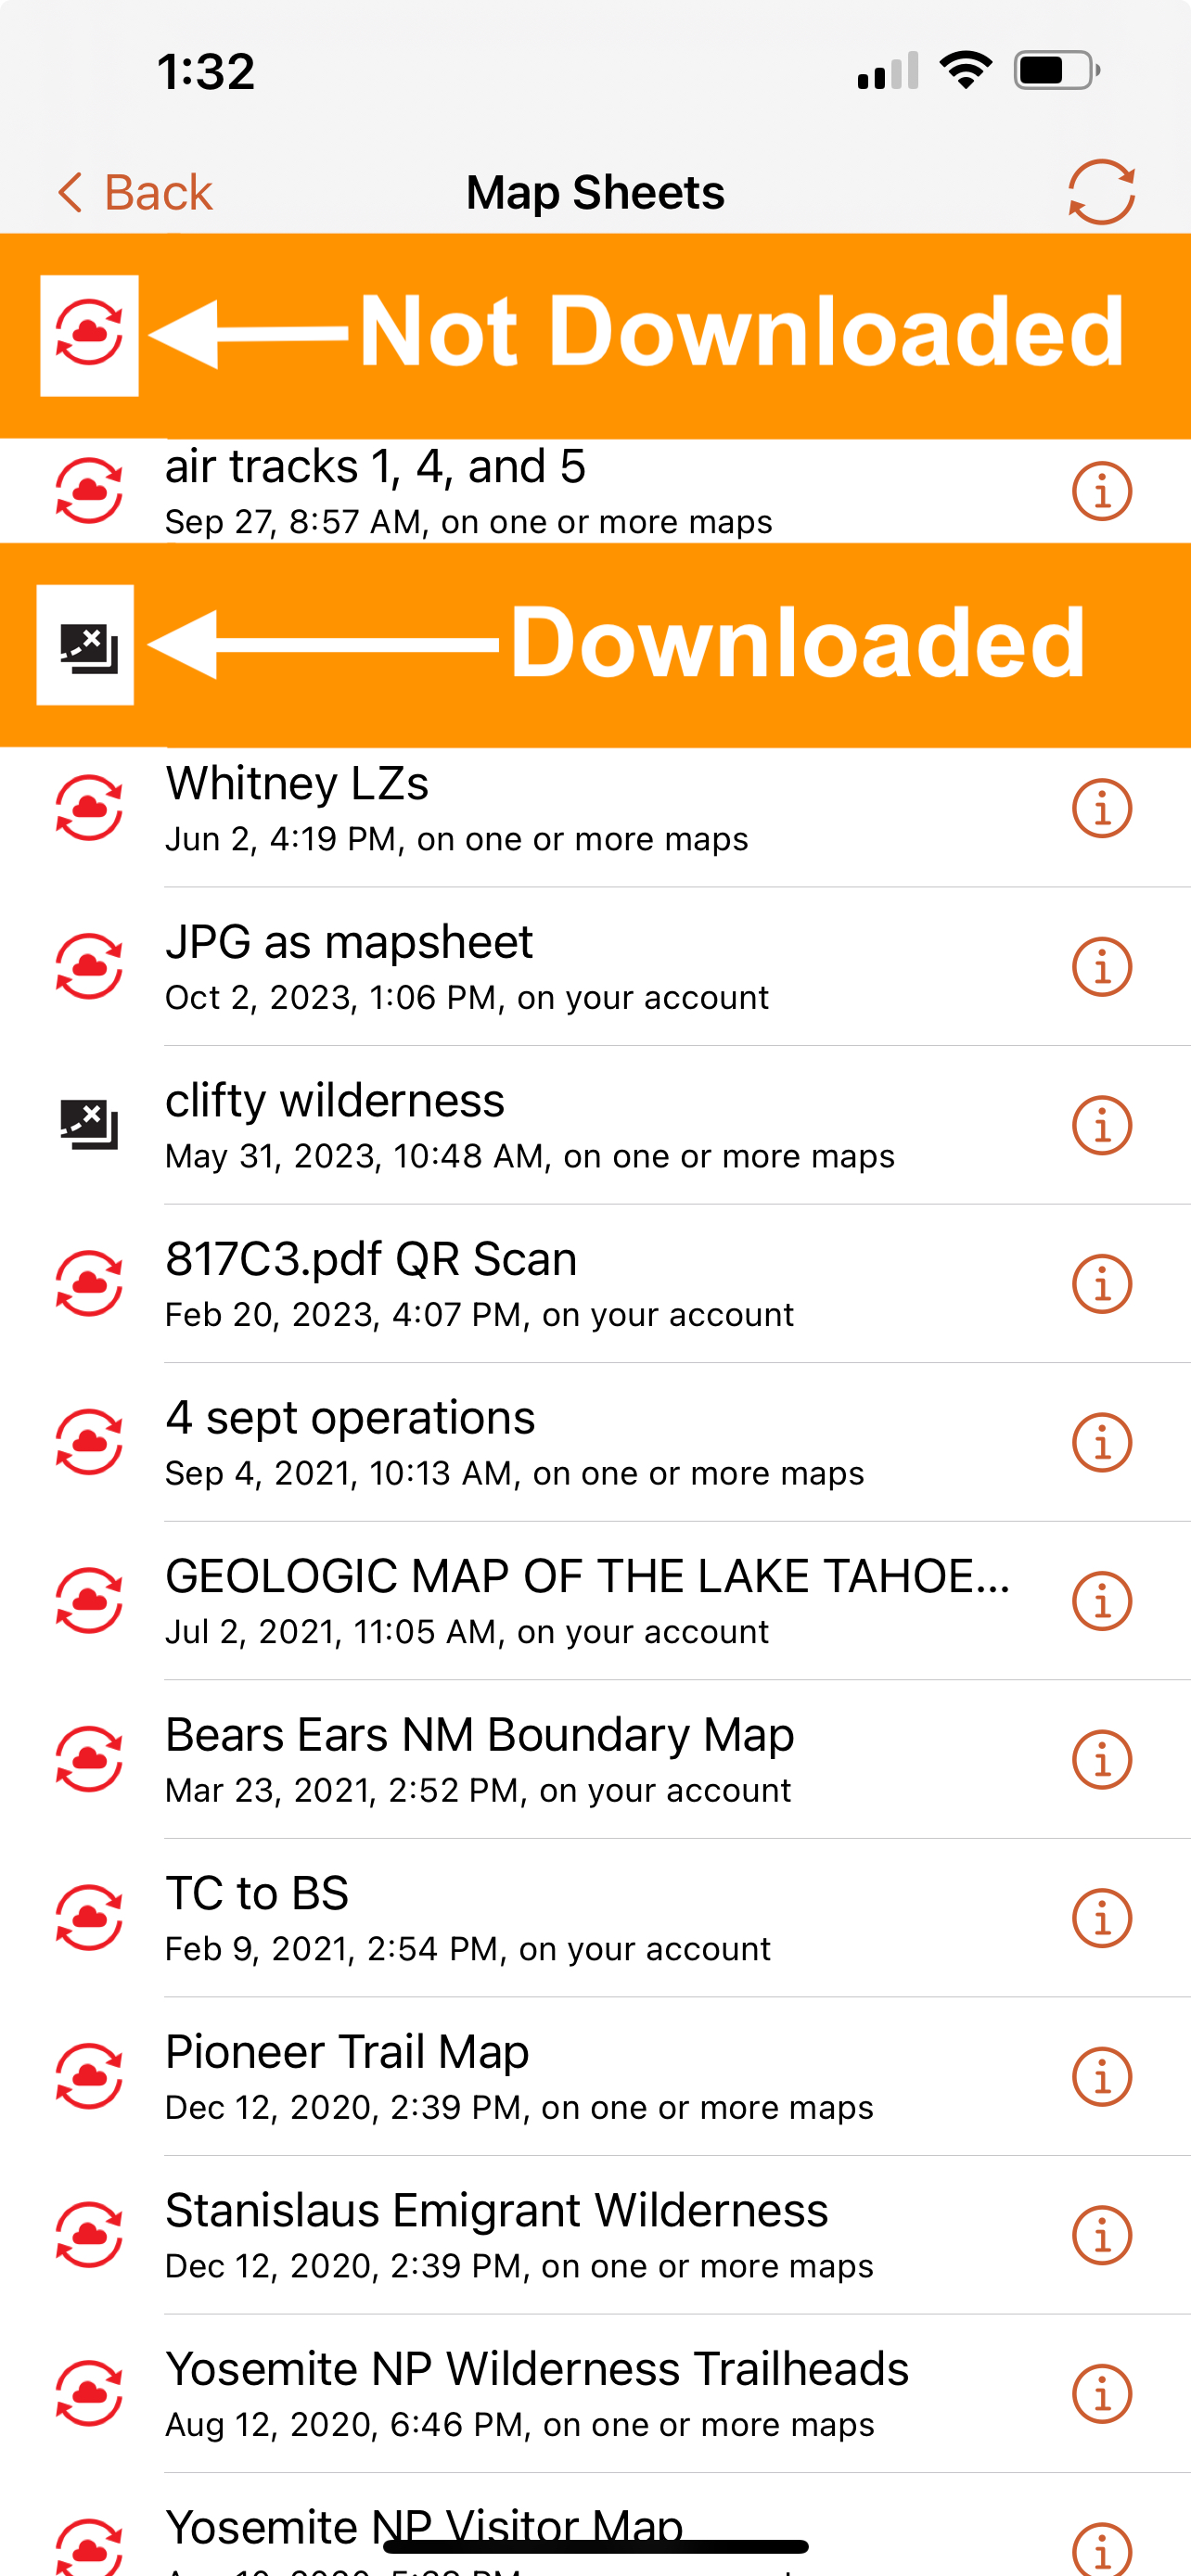
To the left of each map sheet name in the list is an icon that indicates if the map sheet is saved to your device. You must save a map sheet to your device in order to use it without a data connection.
To the right of each map sheet name is an information icon. Tapping that icon will open up a new screen with that map sheet’s details, including its name, size and whether or not it is saved to your device.
Download Map Sheets for Offline Use
To download a map sheet to your device, tap the download icon in the upper right hand corner and the map sheet will be saved to your device. If a map sheet is saved to your device and you want to remove the downloaded data, tap the garbage can icon in the upper right hand corner.

Display a Map Sheet in the Map Viewer
To view the map sheet in the mobile map viewer, select Open at the bottom of the screen. You will be redirected to the map viewer and your map sheet will be displayed.
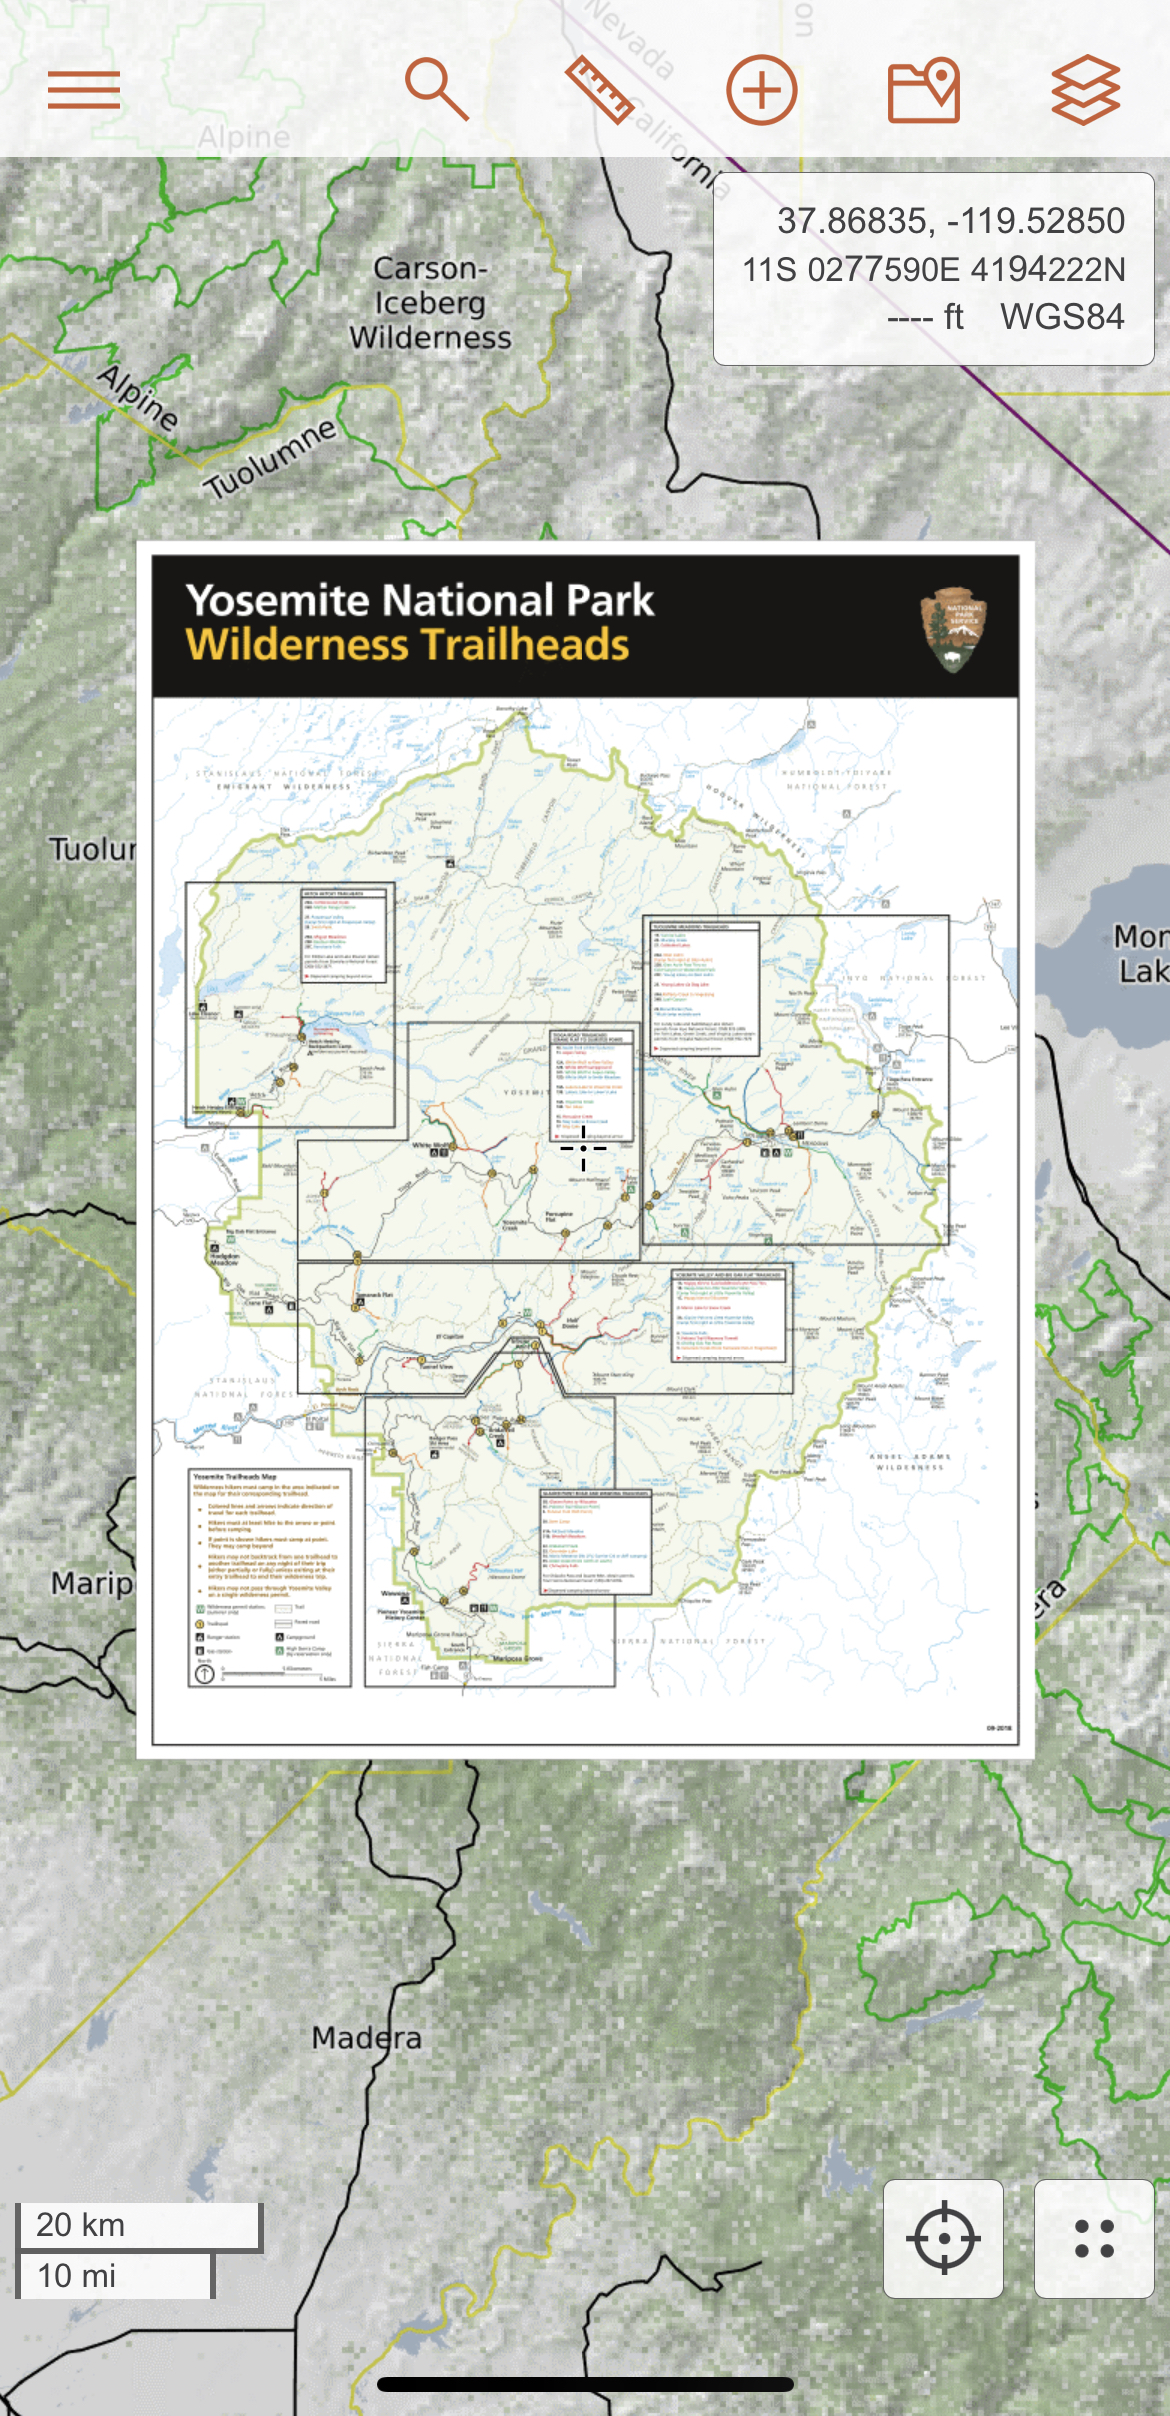
The added map sheet will also appear in the Map Sheets dropdown menu on the Map Layers page. Tap the layers icon in the upper right hand corner of the map viewer to open the Map Layers page.
Your map sheet will be visible in the Map Sheets dropdown menu.

The map sheet will be displayed at 100% opacity by default and you can adjust the opacity using the dropdown menu. You can also select "crop to neatline" in order to hide excess information or space outside the map data border. To remove the map sheet from the map viewer, click the X to the left of the map sheet name.
You can also add any map sheets you have already viewed in the map viewer from the Map Layers page. Simply click + Stack Map Sheet and then select the map sheet you wish to display from the drop down menu.