Team Accounts
let's begin
Team accounts are designed to make the sharing of maps and custom data seamless across a team or organization. Each team member has access to all CalTopo features plus a designated level of access to team account data. Team accounts have a number of features that set them apart from individual accounts, such as instant access to all team maps, live team tracking, and more.
Team Account Training Video Series
Topics on this Page:
- How to Purchase a CalTopo Teams Subscription
- Managing Your Team Subscription
- Inviting Team Members
- Permission Levels for Team Members
- Managing Existing Team Members
- Other Functions on the Team Admin Page
- Joining or Leaving a Team Account as a member
Lessons In this Chapter:
Important: Team Account Training Video Series
The video series at the link above contains 7 videos to guide you through getting started with your CalTopo Teams account.

How to Purchase a CalTopo Teams Subscription
If you are interested in purchasing a CalTopo Teams account, please contact us at help@caltopo.com for pricing information. Pricing is based on a number of factors, including organizational size and structure. Subscriptions to CalTopo Teams start at $2000/year for single organizations with personnel numbering 50 or fewer.
For first response organizations that are composed entirely of volunteers with no paid employees (such as volunteer SAR teams or volunteer fire departments) and who are paying with their own funds, we offer a significant discount on the cost of team subscriptions.
Managing Your Team Subscription
Any team member with admin access to the team account can manage your team subscription. To access the team admin page, first login to CalTopo. Then click on your login name in the upper left corner of the map viewer to access your account information. Here you will find a button to administer your team. Clicking the Administer button will open the team admin page in a new browser tab.

The admin page has different tabs that let you manage different aspects of the team. Clicking on a tab will display that tab. The Details tab on the left side allows you to control how the team is identified in CalTopo as well as manage your subscription and payment information.
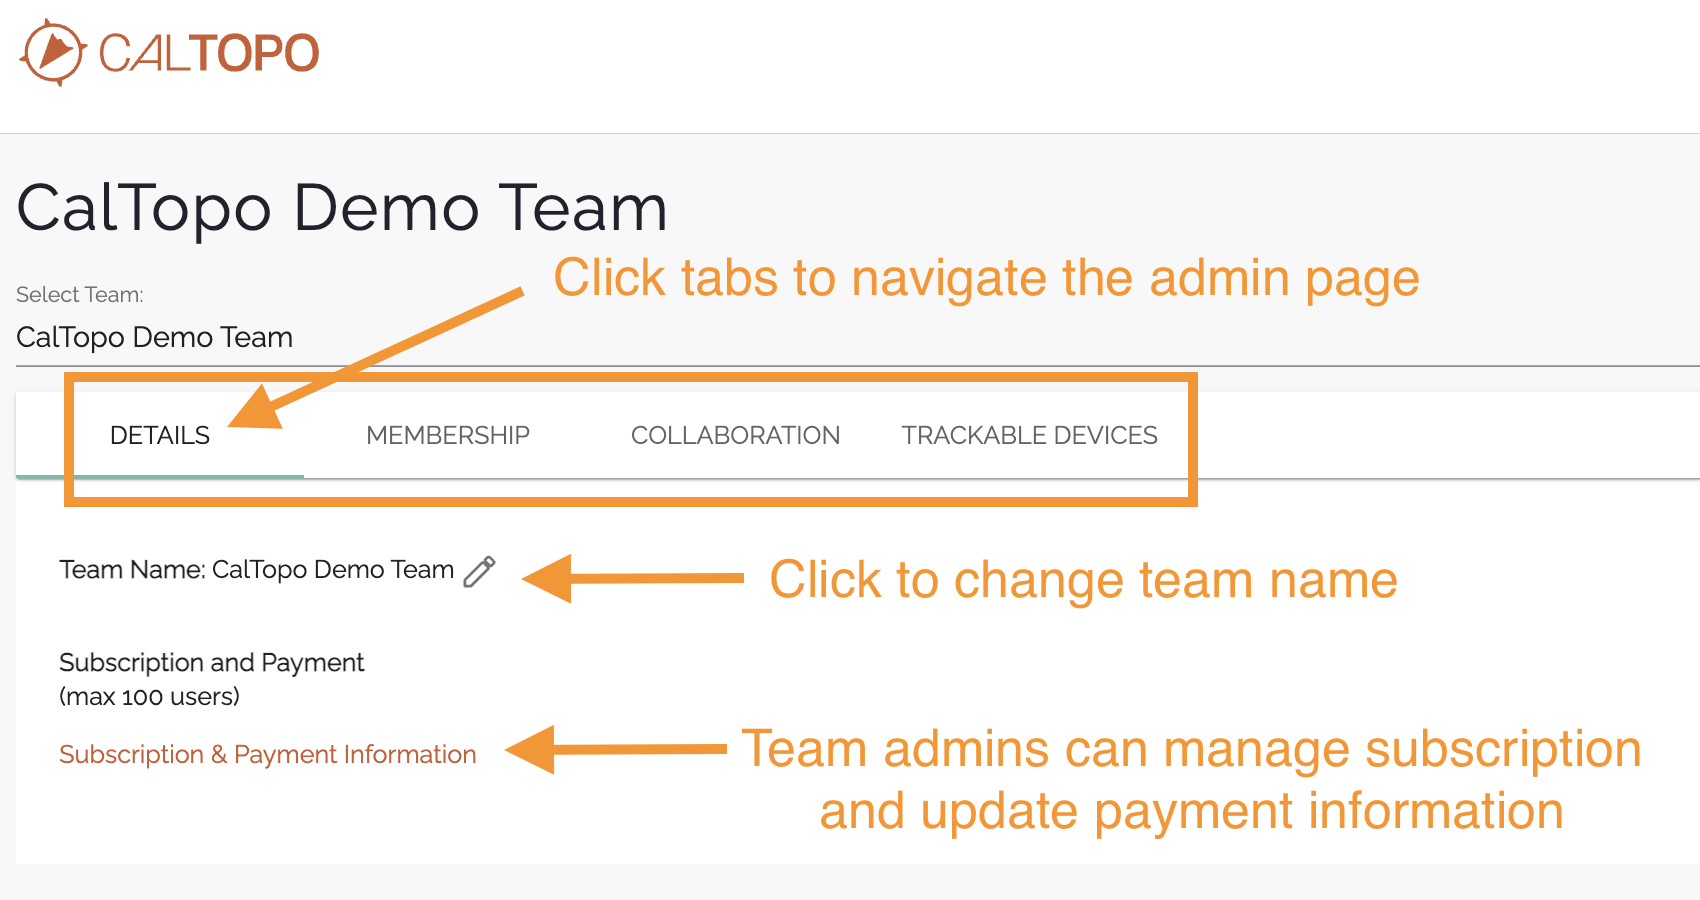
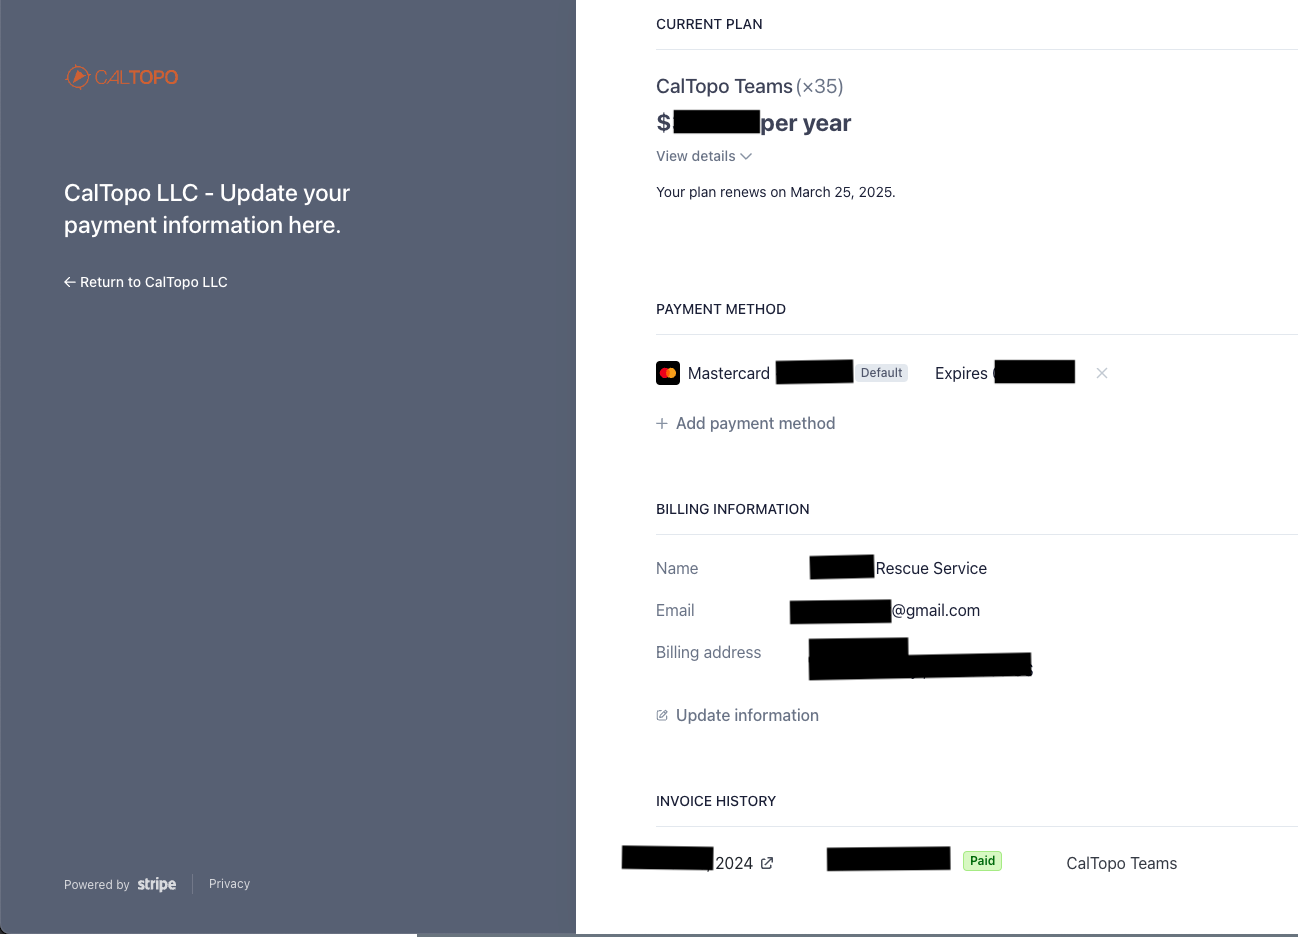
A team admin can click the Details tab and change the team credit card, billing address, contact email, and see the invoice history.
Inviting Team Members
The following actions are done in the Membership tab. Here you can create signup codes to invite team members to join the team account, and manage existing team account users.
Signup codes allow people to join the team account. To invite team members to join, you create signup code links that you can copy and paste to an email, or open as a QR code that team members can scan with their mobile device.
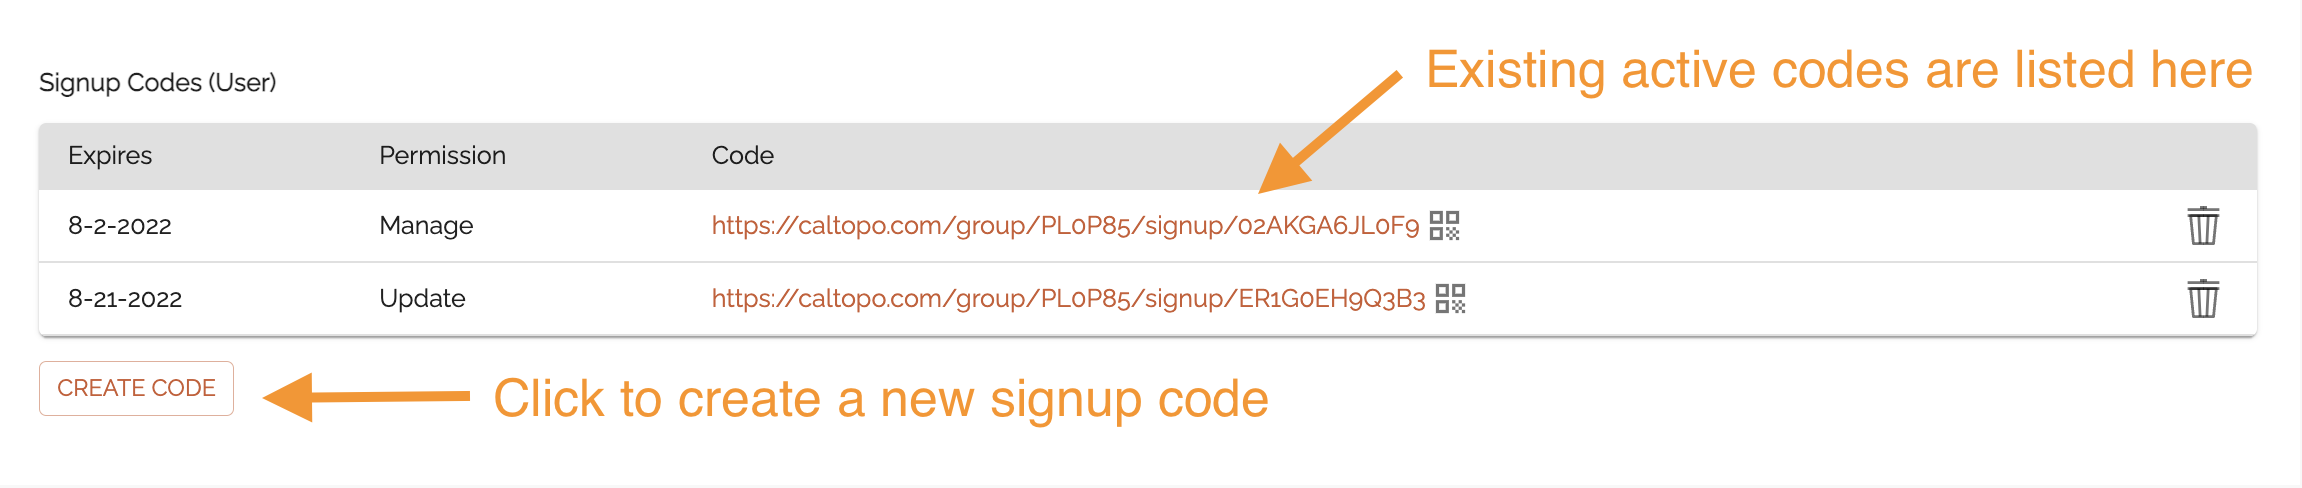
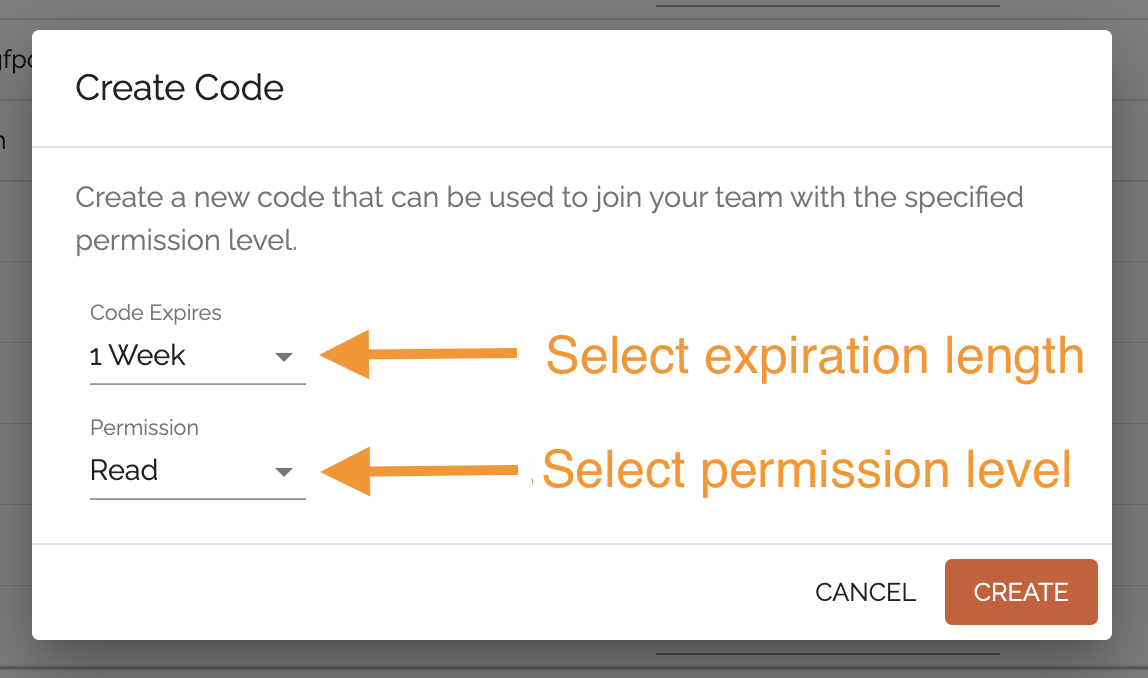
To create the signup code, scroll to the bottom of the Membership tab and click the Create Code button. Next choose an expiration date and a team account permission level for that code. It is important to note that once a code expires, it only prevents future sign ups with that code. Any user who previously used the signup code to join the team account will be unaffected.
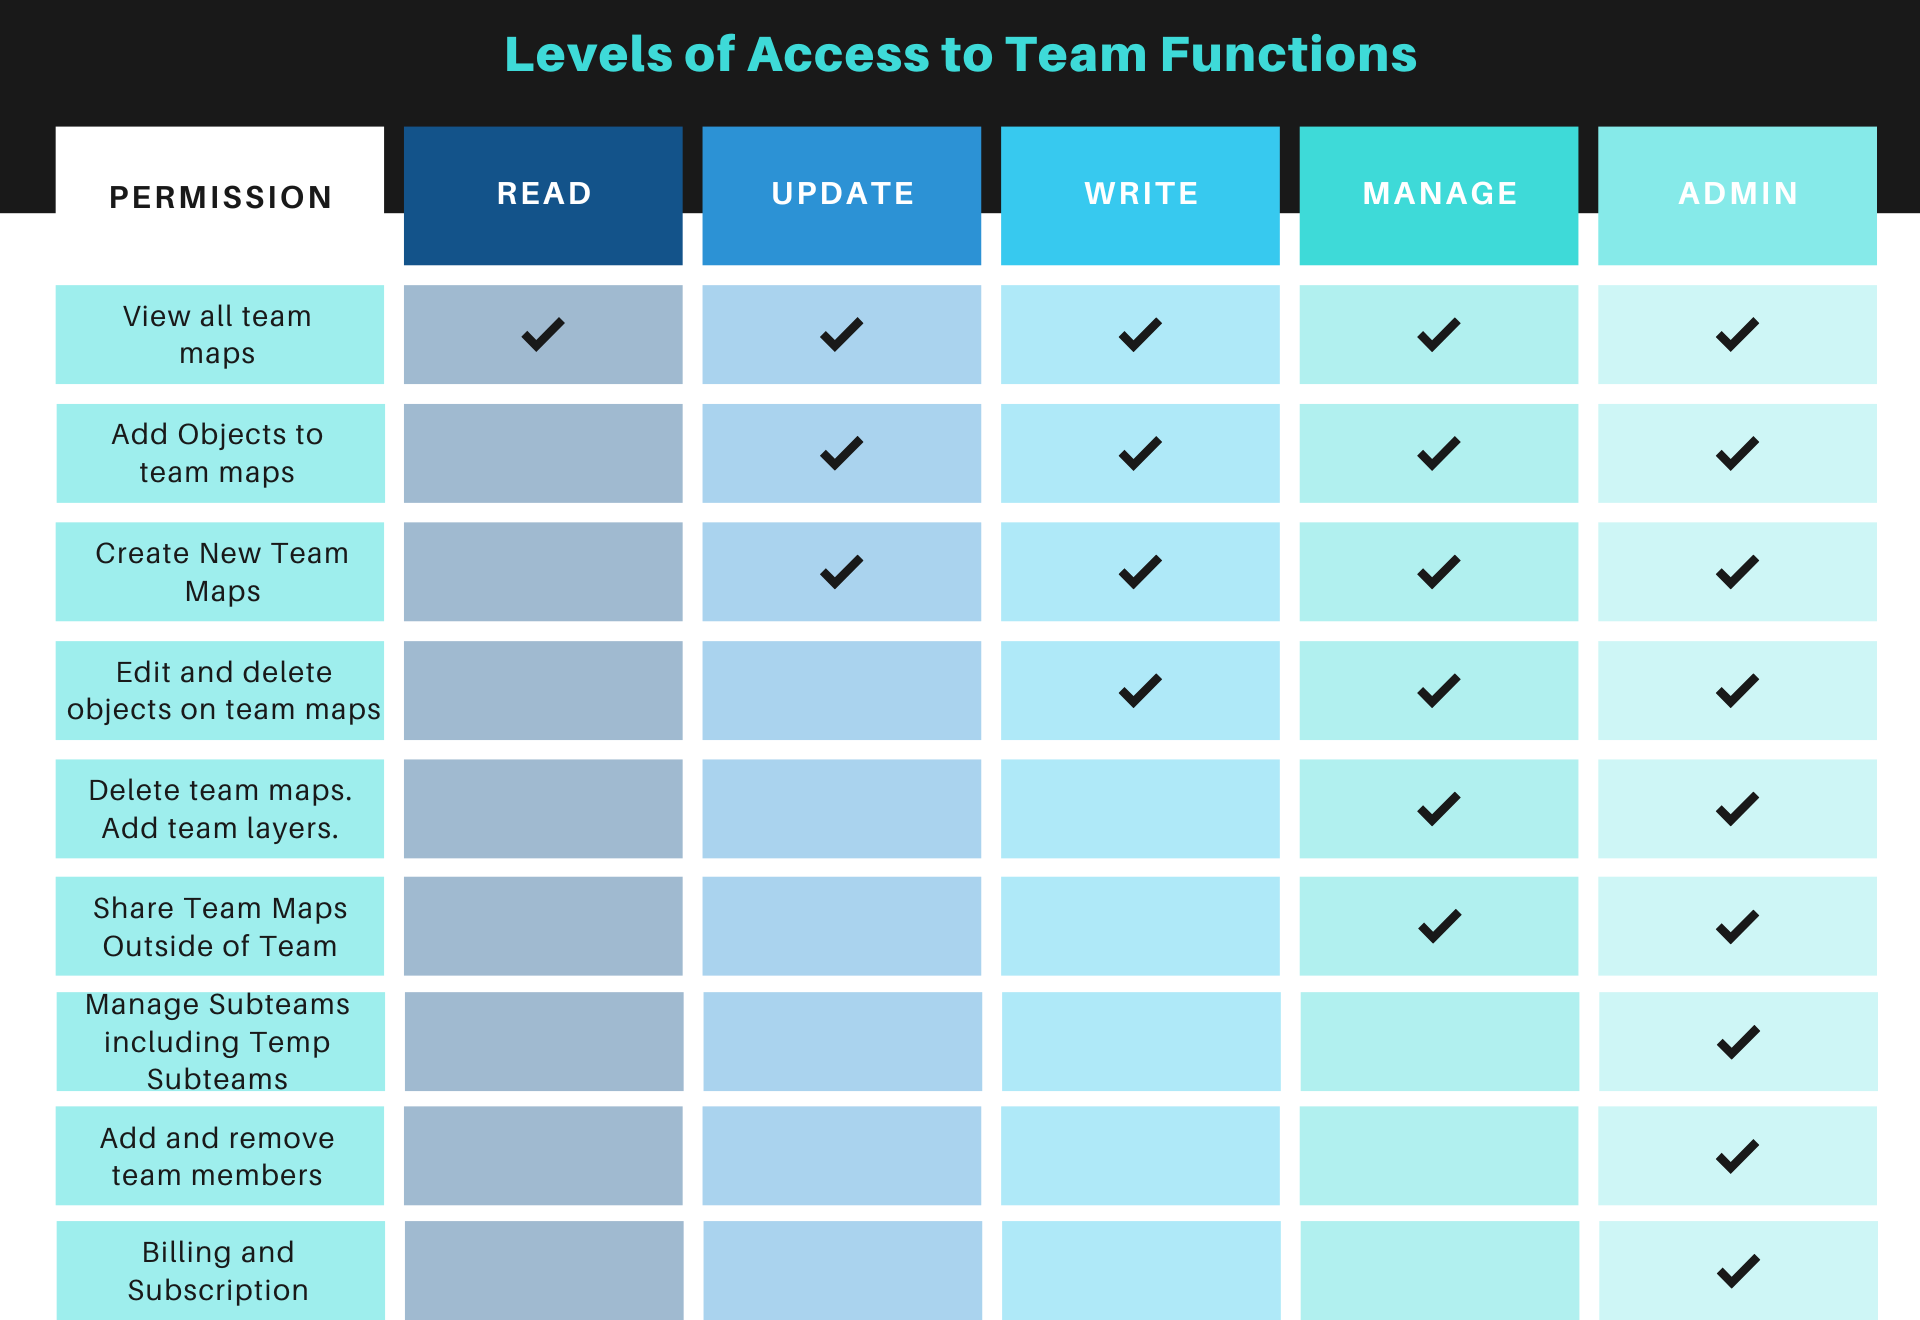
There are 5 different team account permission levels you can assign to a code. Each of these permission levels is described in the chart and graphic below:
Permission Levels for Team Members
Permission Level
Access Description
Read
Read Only members can view team maps but not modify any data. This can be good option for someone who needs to be aware of what is going on but won't be interacting with the maps themselves, since it lets you automatically share data but prevents them from modifying your maps.
Update
Update is a good level for most users since it allows them to still add information, such as mobile tracks or clues, to the map, but prevents them from accidentally deleting data. They can add new maps to the team account, but will lose write access to that map when they do so.
Write
Write members can modify team maps, adding or deleting objects from those maps. They can save new maps to the team account, but can not pull team maps out of the team account. They can not edit sharing settings.
Manage
Managers can create shareable links for people outside the team account, set up team-wide custom layers and icons, and delete maps or PDFs saved to the team account. This is a good level for mission coordinators and mission leaders so they can share maps outside the team. Managers no longer have the ability to create temporary subteams (formerly Events), but they can create links for others to join the temporary subteam.
Administer
Administrators can modify subscription and payment information, and invite or remove team members. They also control subteams, temporary subteams, and collaboration. Team accounts are required to have at least two administrators for redundancy.
Press the Create button to make the code. It appears in a list of signup codes below the list of existing team members. To share the links, highlight them and copy the code via command-c (Mac) or control-c (Windows). Then paste the code into an email to the appropriate team members. Alternatively, you can click the QR code button to the right of the link, and print or show the code to a person who has the CalTopo mobile app. This person can scan the QR code with their app, then follow the instructions to join the team.
You can use the same signup code for as many members as you would like to join the team account at a designated permission level. Since each member joins the team account with their own individual account, the code only specifies what level of access they are signing up with. There is no limit to how many people you can have at each permission level. They could all be admins if you wanted, though we request that you have at least two admins.
If someone tries to use a signup code after it expires, they will be unable to join the team account. To grant them access, simply generate a new signup code to allow them to join.
Managing Existing Team Members
Above the signup codes on the Membership tab, there is a list of all current team members on the account, along with their access level. If they have a name designated for their account, it will also be listed here. At this time, there is no way to edit how a user’s name appears in this list; the individual user must change it on their own individual account.
You can, however, change their access level to the account using the drop down menu. So if you accidentally provided a Manager link and you need the person to have write-access, you can change that here. If a team member leaves your organization, you can use the trash can icon to remove team members from the team account.

Other Functions on the Team Admin Page
There are a couple other functions that you can perform on the team admin page: you can link trackable devices (such as Garmin inReaches) to your team account, create permanent sub-teams to organize your membership, create temporary sub-teams (formerly called events) to manage large mutual aid incidents, and collaborate with other organizations.
Trackable Devices, Sub-Teams, Temporary Sub-Teams, and Collaboration will each be covered on their own separate page in this chapter. Please refer to the relevant page for more information.
Joining or Leaving a Team as a Member
To join a team account, open the signup code link by clicking on it or scanning the QR code. If you are already signed into your account, a new tab will open confirming that you want to join the team with your individual account you are signed in with. Make sure you are signed into the account that you want to use to access the team account. For example, if you share a computer with your spouse, make sure you are signed in as yourself, and not as your spouse. Your individual account data will be kept separate from the team account data.
If you are not already signed in, you will be prompted to do so before joining the team account. If you don’t have a CalTopo account, you can create a free account. Please see the Account Creation and Login section for more information. Follow the instructions to complete the joining process. When complete, you will be returned to the map viewer and you will now be able to access team maps and data.
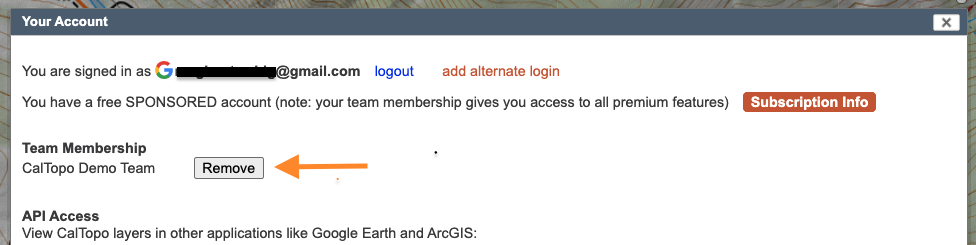
To check your team status or to leave the team, go to Your Account and look for the team section. Any teams you are on are listed here, and you have a button to leave the team if you wish.