Download and Sync
in this lesson
Using CalTopo desktop is much the same as the online program, but requires a few additional steps for operating offline.
Here we will cover how to download base layers for offline use and how to manage syncing (or not syncing) the maps that you create.
Topics on this Page:
Please note: As explained on the previous page, the desktop app is different than the mobile app. This page describes how to download base layers for the desktop app so that you can use it offline on your computer. If you are looking for instructions on how to download base layers for the mobile app so that you can use it offline on your mobile device, please go to the Offline Use lesson.
Download Base Layers
To use the desktop app offline, you will need to download the background base layers to your hard drive.
The files do take up a significant amount of space as you add layers and extra data such as MVUM. There is a limit to how much you can download per month, and per year, so we recommend you download local data but be careful with regional data and certainly not nationwide. The download limit is 200GB per month and 300GB per year per account. Teams get 2TB per year spread between all users.
To begin, launch the desktop app by clicking on the CalTopo Desktop icon on your computer and then opening your web browser to http://localhost:8080/.The steps for launching the desktop program are described in more detail in the previous lesson.
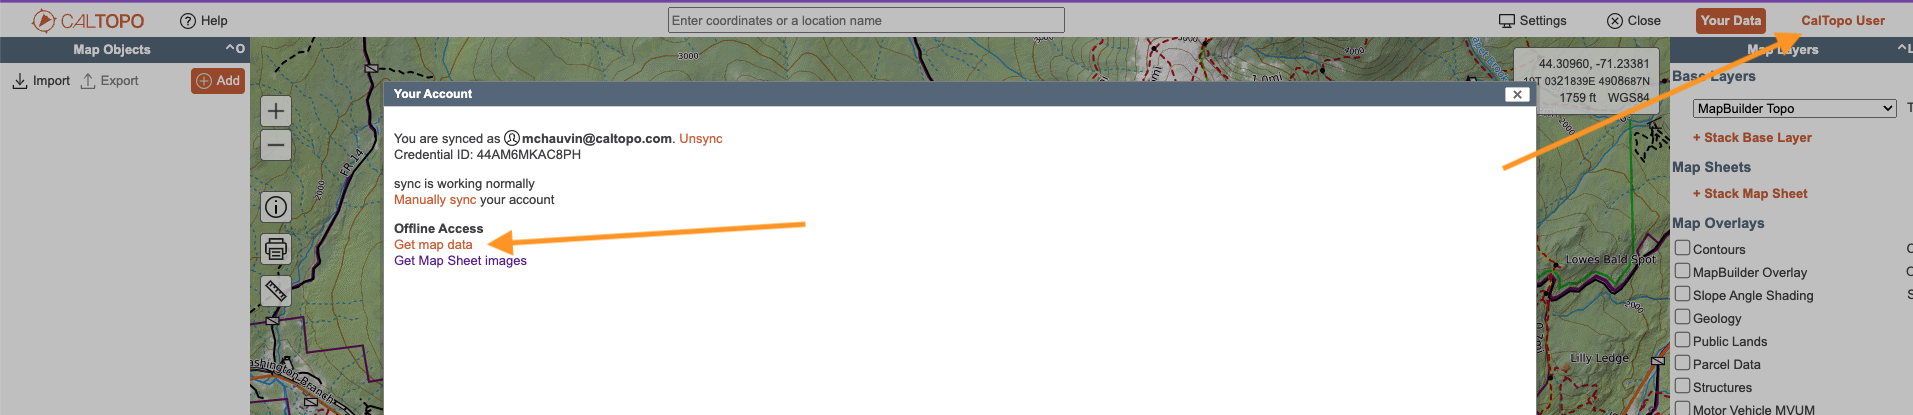
The desktop program will open in your browser. To access the download layers page, click on your account name in the upper right. Then select and click the Get map data link.
When you click the link, a new tab opens, very similar to the map viewer on the web app. The page loads to cover the extent of space you were viewing in the map viewer page. If you zoom out a little, a box outlined with purple dashes will show you the area you were viewing in the map viewer before opening this new tab.
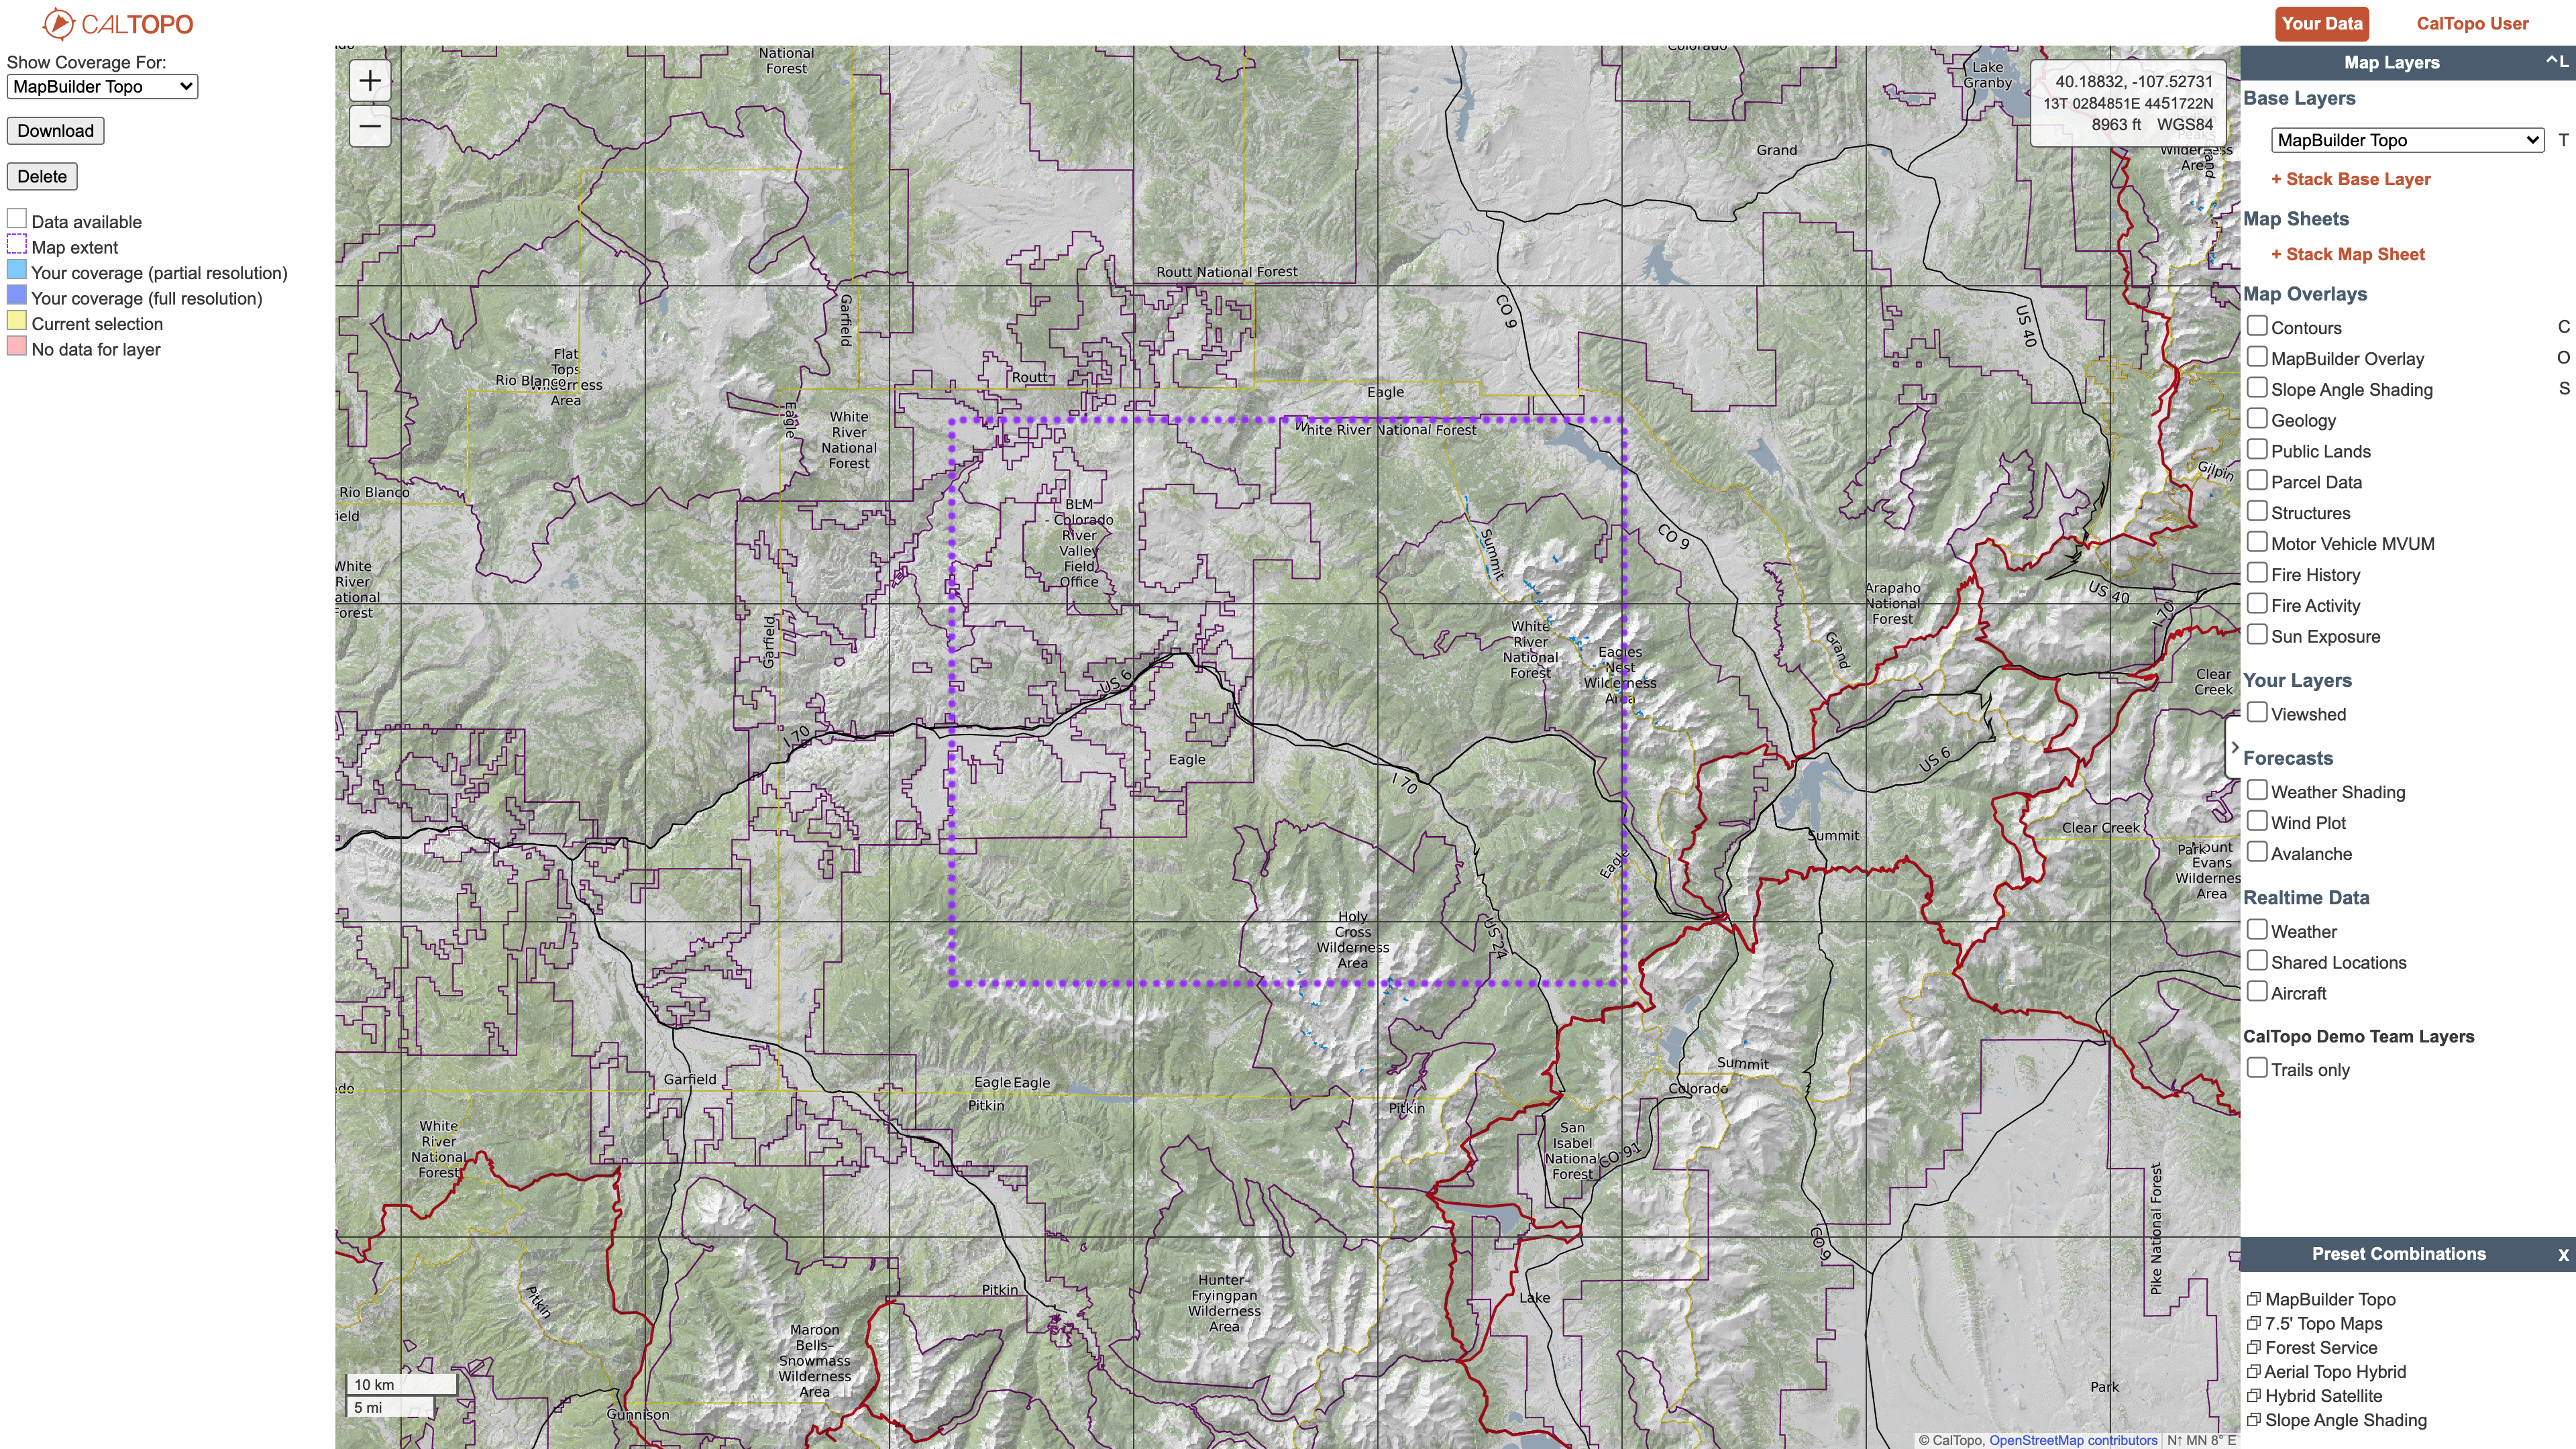
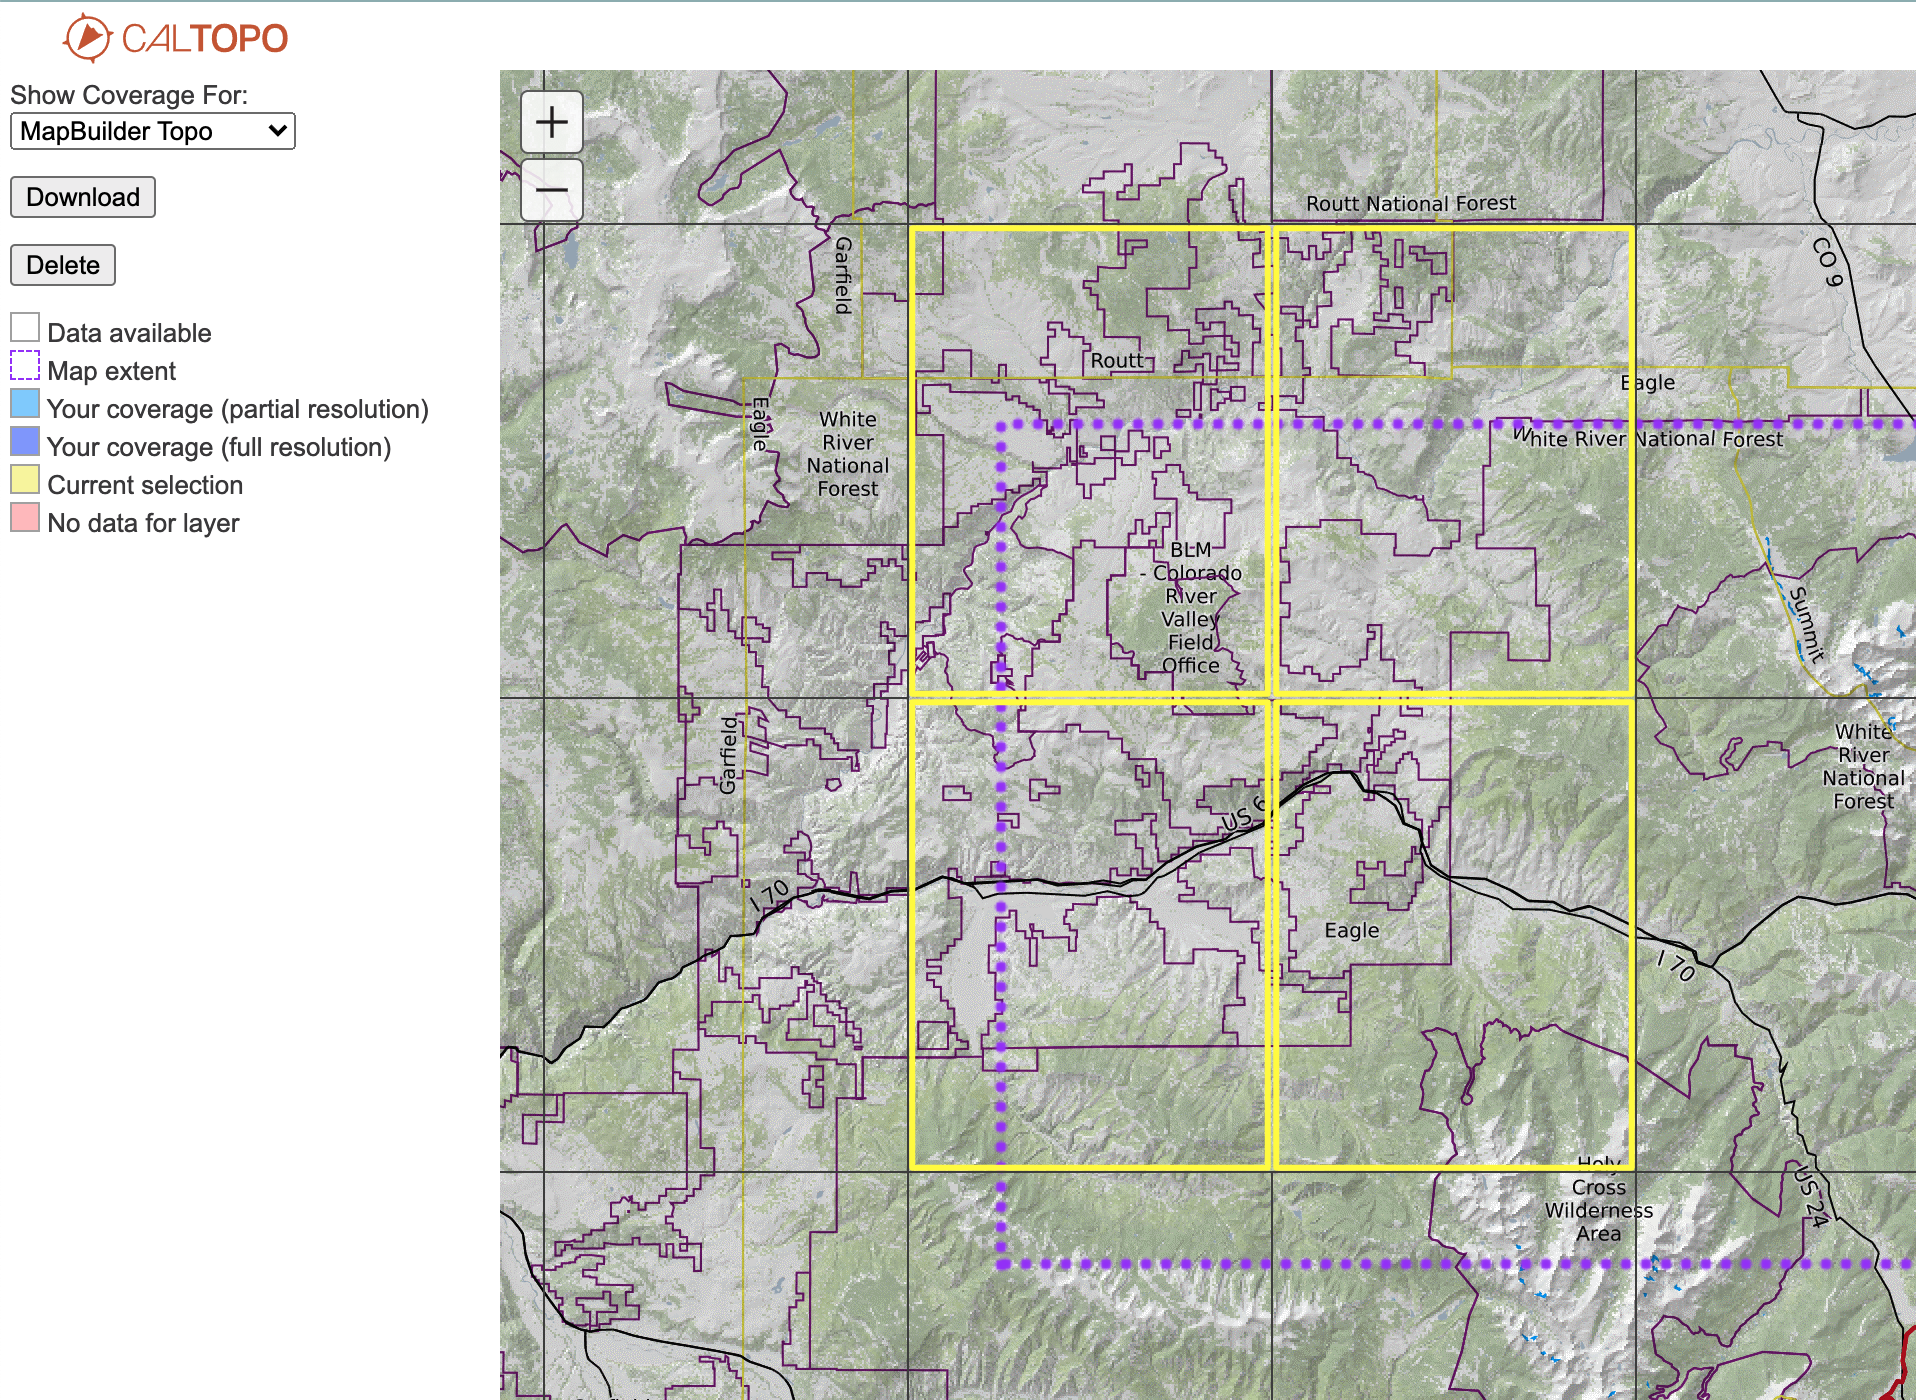
First, in the map viewer in this tab you see a grid of "tiles." Click on a tile to highlight it with a yellow outline. This is your selection for the area to download. Click again to de-select it. You can select as many tiles as you would like.
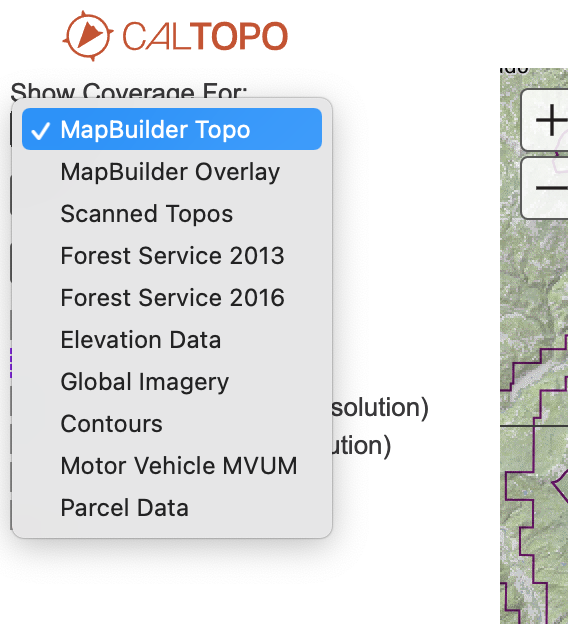
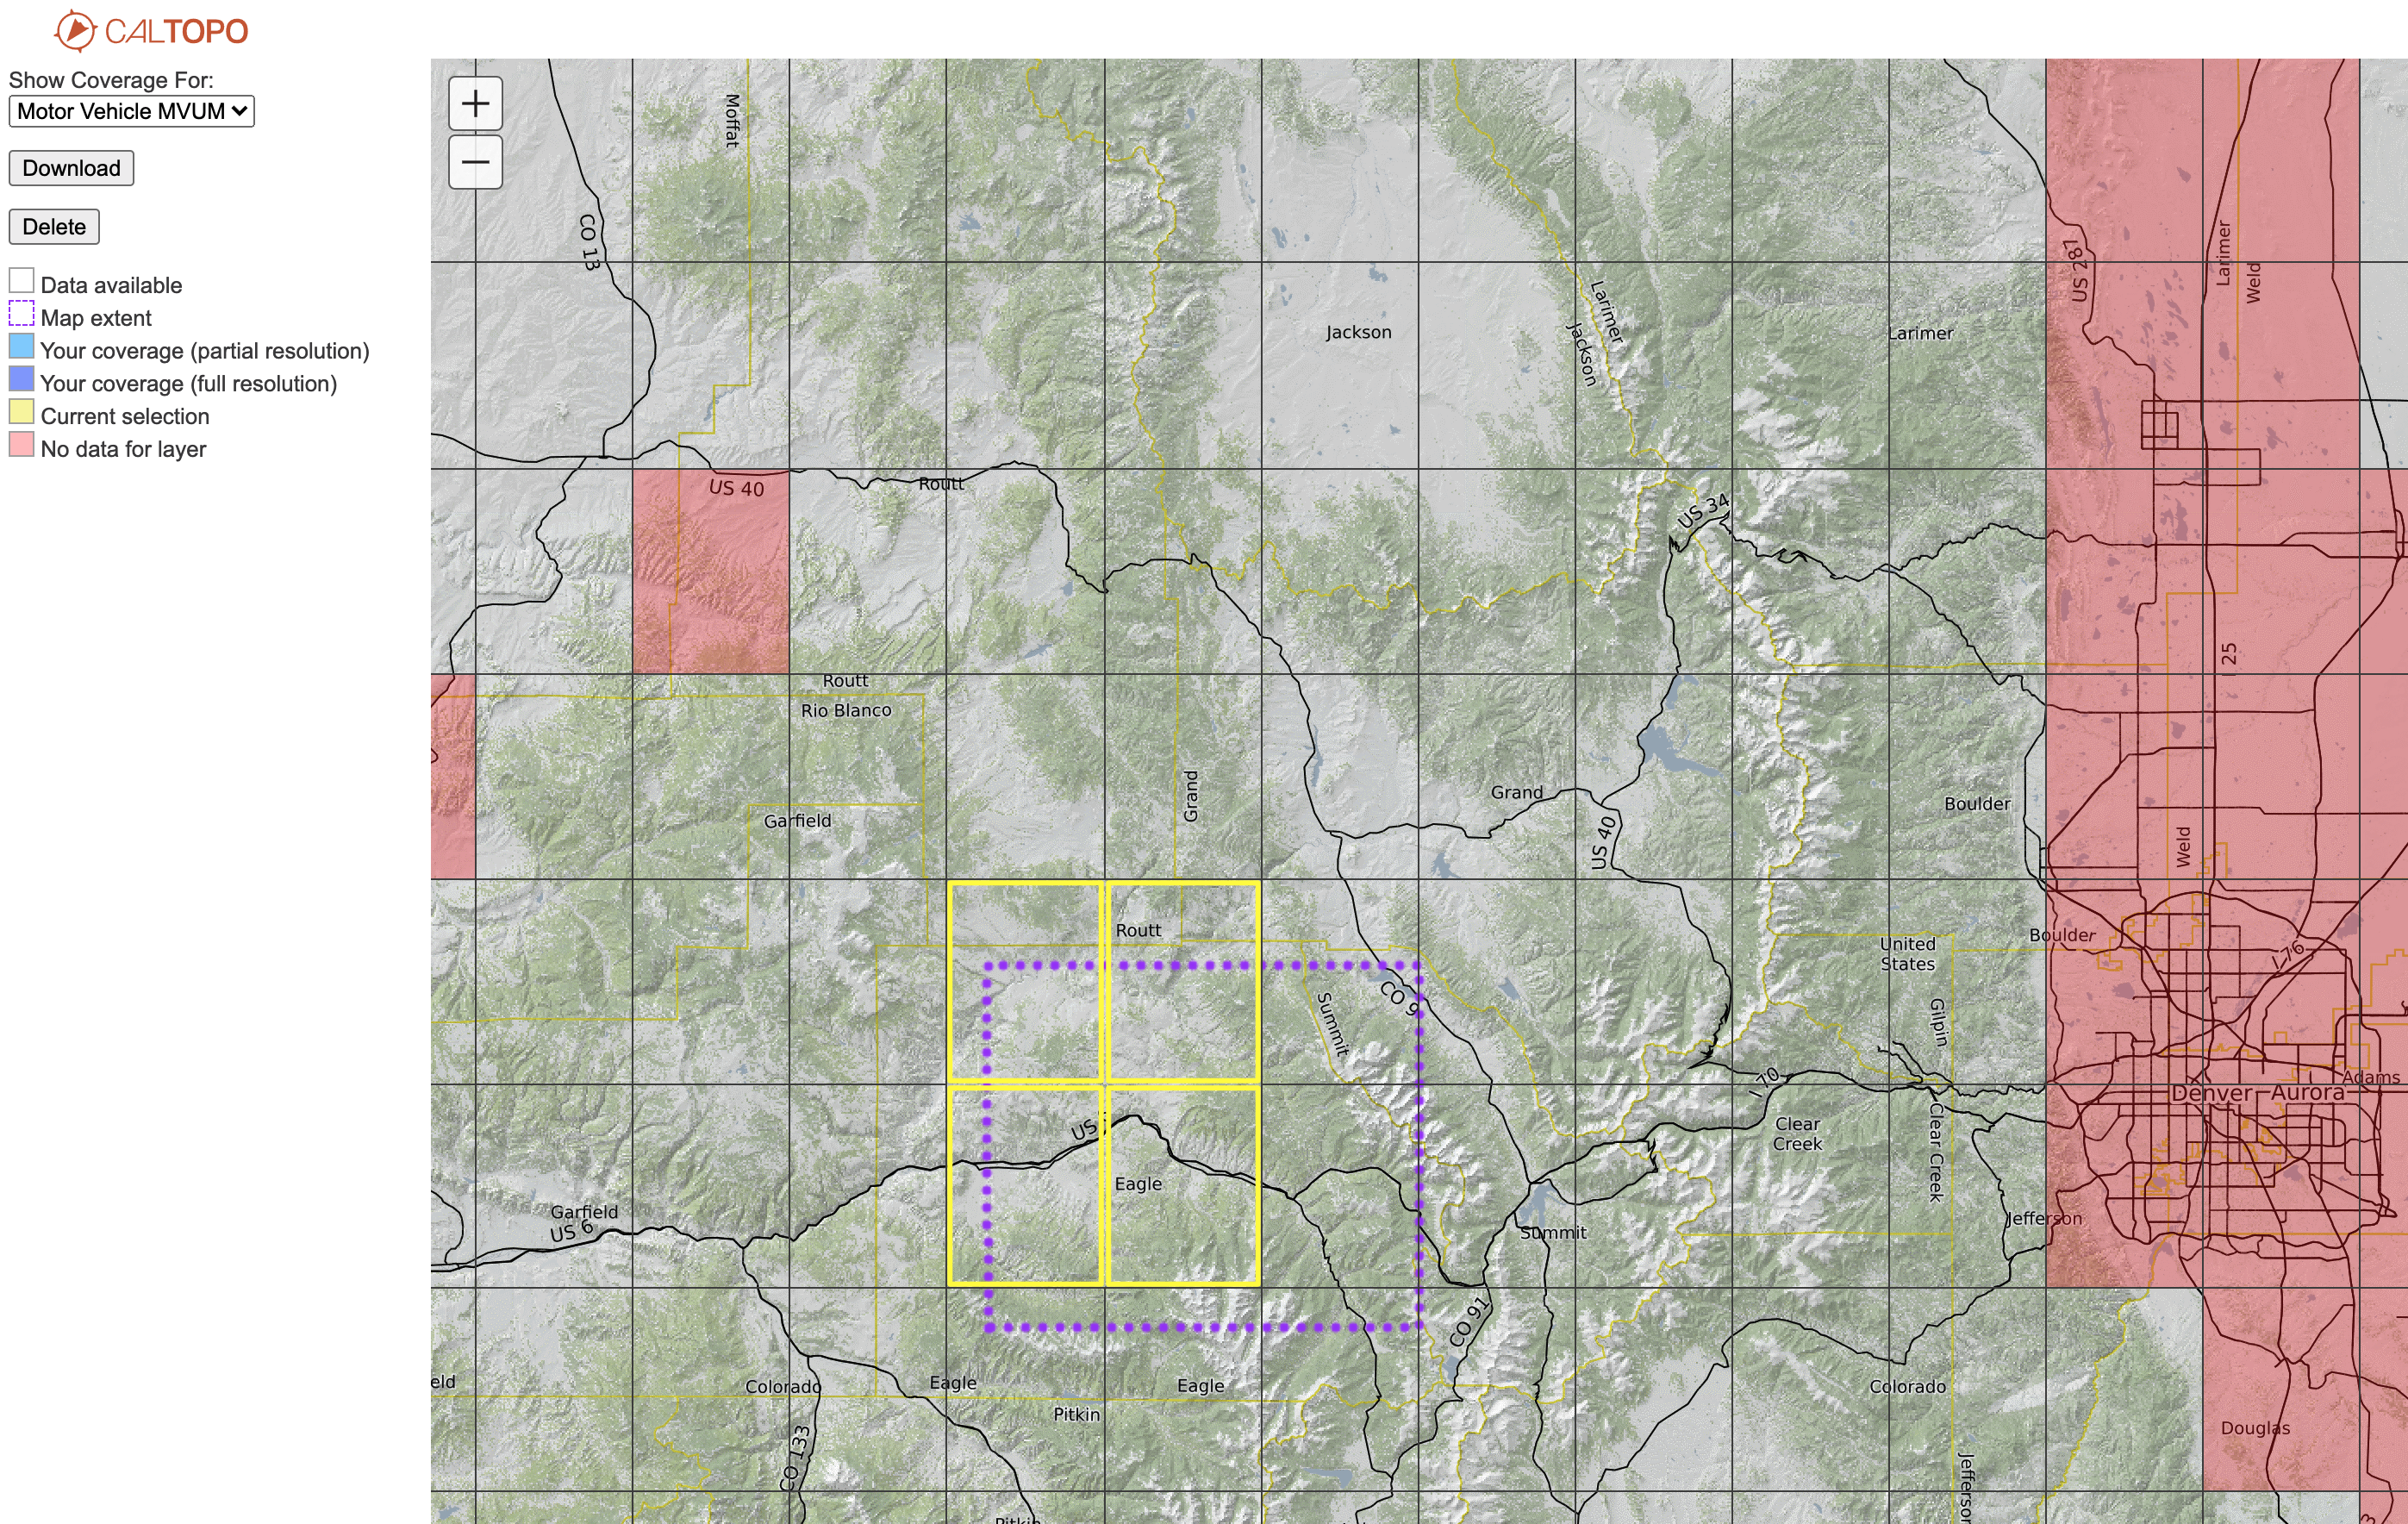
On the left side of the page is a column with download related information. At the top of this you see a dropdown box below the words "Show Coverage For." Selecting from this menu shows you if data is available to download for any of the tiles on the map for that specific data source. Tiles with no shading over them indicates that the tile is available to download for that layer. At this location in the example image, changing from MapBuilder Topo to MVUM, some of the tiles are now shaded red because no MVUM data is available there. The selection in this menu has no relation to what you choose to download; it is purely informational to tell you what is available to download.
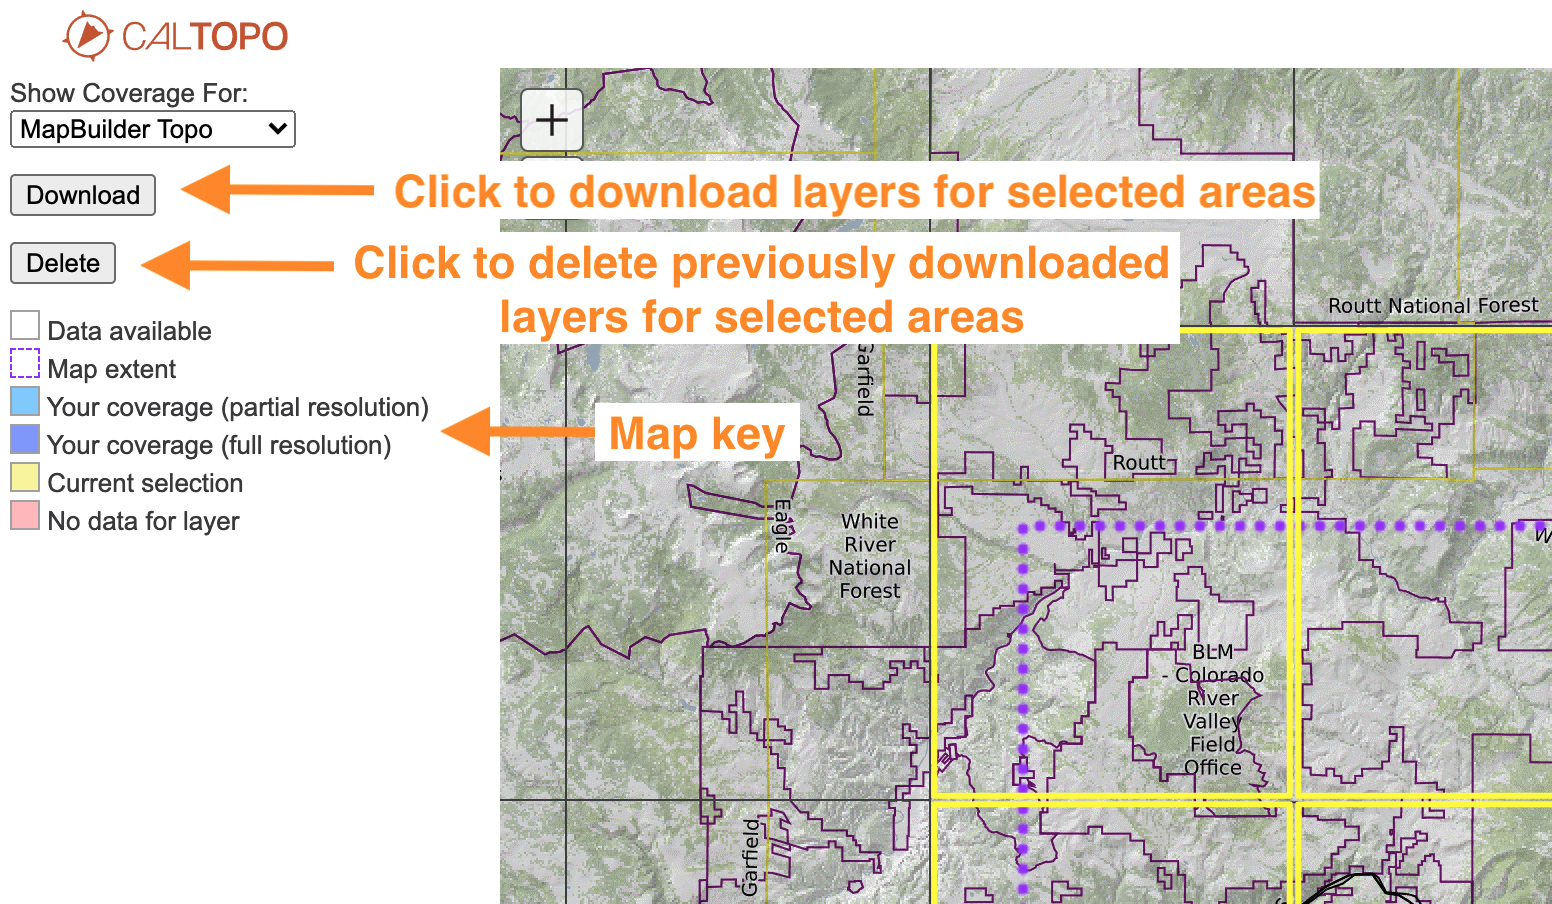
Below that are the download and delete buttons. Download will open a menu to select which layers to download for the tiles you have selected. Delete does the same.
Finally, the left column contains a key for the different selections on this page.
To download layers for the selected areas, click the download button to open the Download Layers dialog. Select which layer(s) to download for your selected tile areas by checking the box next to each layer. Selecting any base layer to download will automatically download elevation data as well.

At the top you can select the resolution of the download. For most recreational uses, standard resolution will be fine and will save a significant amount of space. For detailed route planning, choose high or for imagery, max.
Then select the checkboxes next to the layer data source to download. As you select boxes, watch at the bottom of the box where the text updates to tell you the size of the download. The line below that shows how much free space you have on your device.
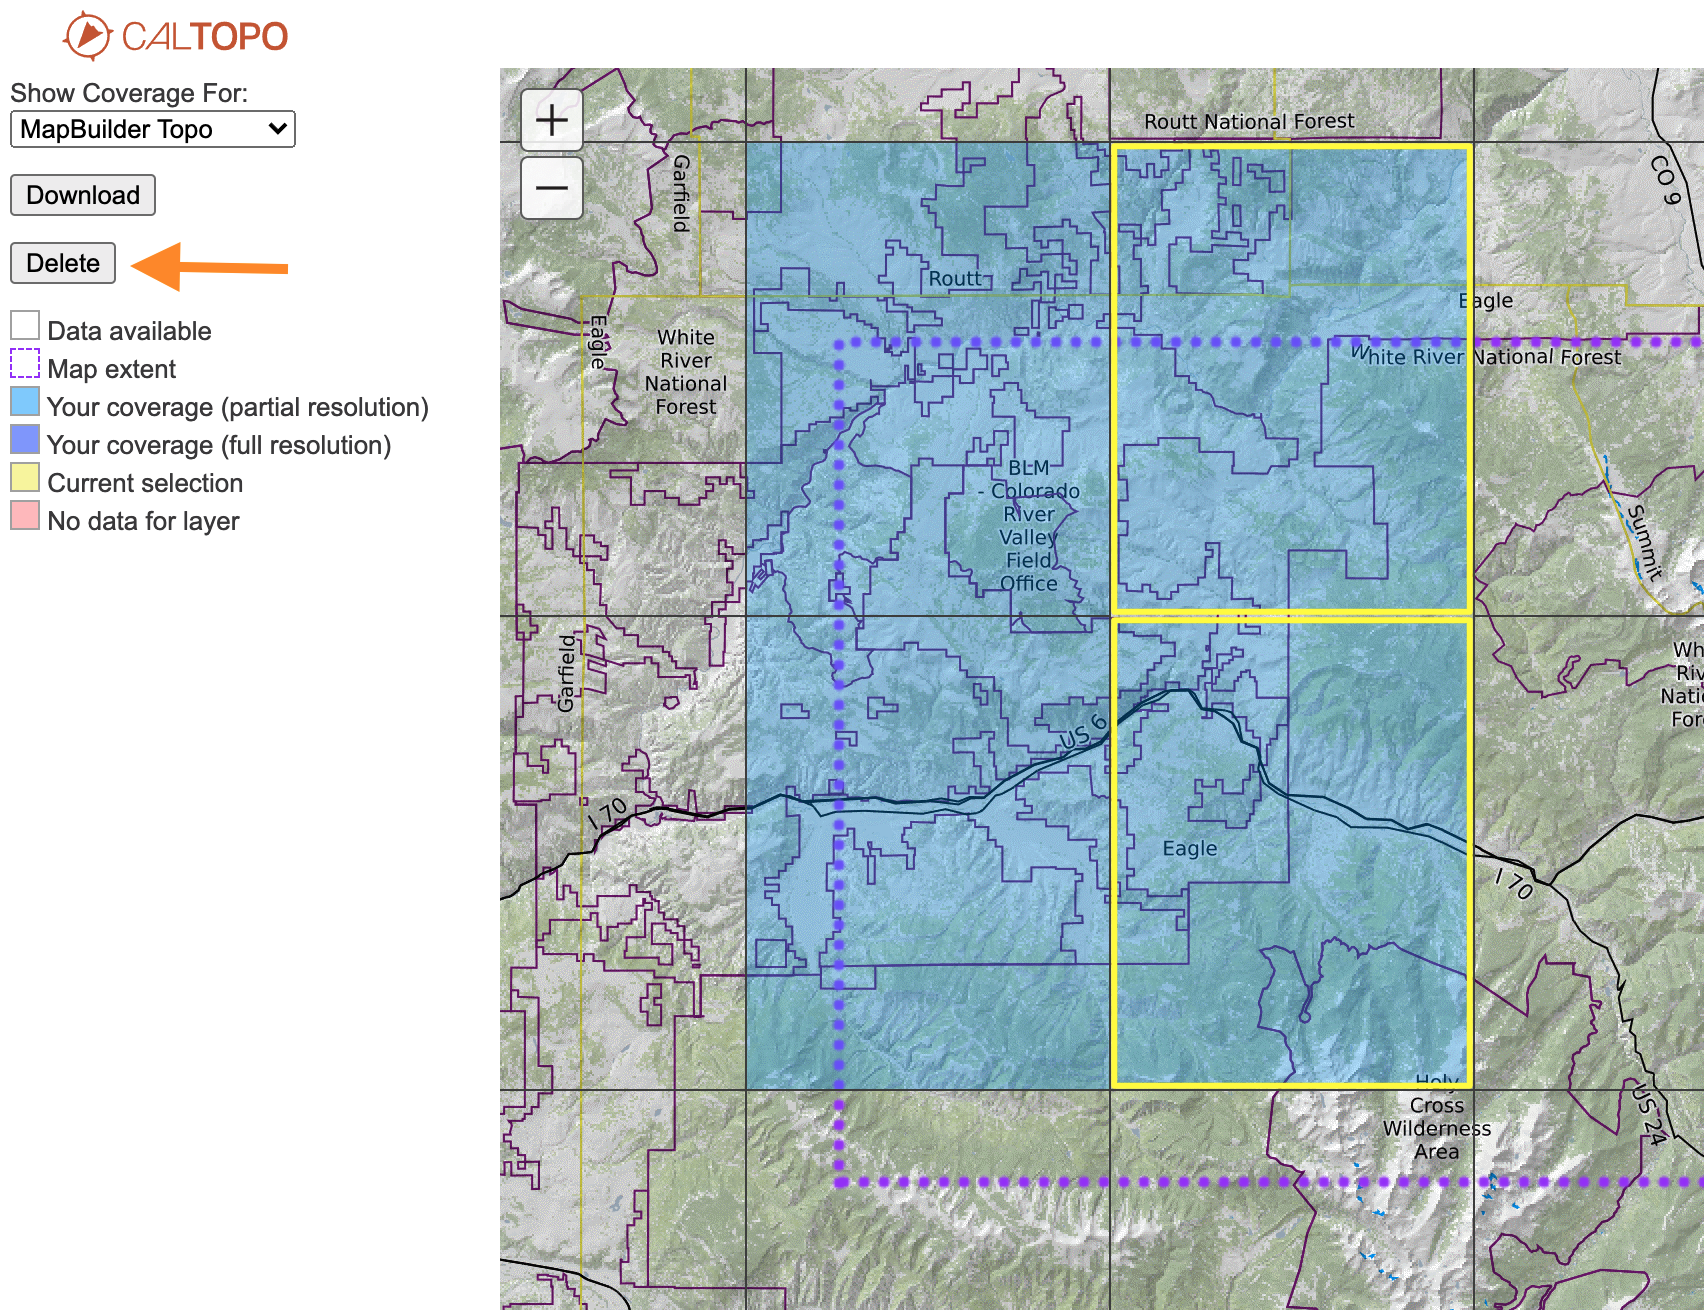
After downloading, tiles where you have data for the selected layer (in the Show Coverage For downdown menu) are highlighted in light blue (for standard resolution) or purple (for high resolution.)

To delete data, select the tiles again first. Then use the delete button.
Next select the layers to delete within the tile areas you chose.
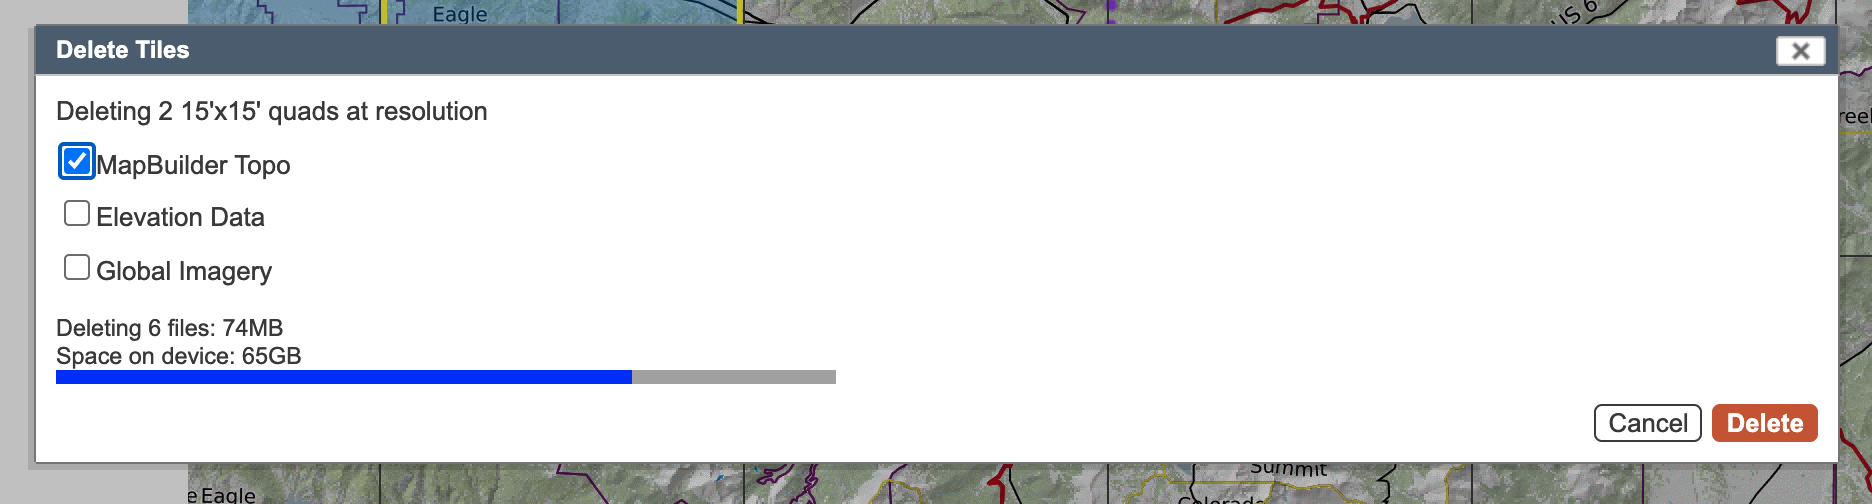
The bottom text tells you how much space you will free up by deleting the selection.
After confirming that you want to delete the tiles, the map coverage updates to show the change.

Using External Drives for Data Storage
Because map data files can be quite large, some users prefer to store the files on an external hard drive. To do this, you will need to edit your topo.properties file. Add the code sarsoft.map.localTileStore=/some/other/path/tiles where you replace everything after the = sign with the path on your computer to find the tiles.
Macbook: sarsoft.map.localTileStore=/some/other/path/tiles
Windows requires that you escape the \: sarsoft.map.localTileStore=\\some\\other\\path\\tiles or use sarsoft.map.localTileStore=/some/other/path/tiles
Syncing Maps Between Your Computer and the Cloud
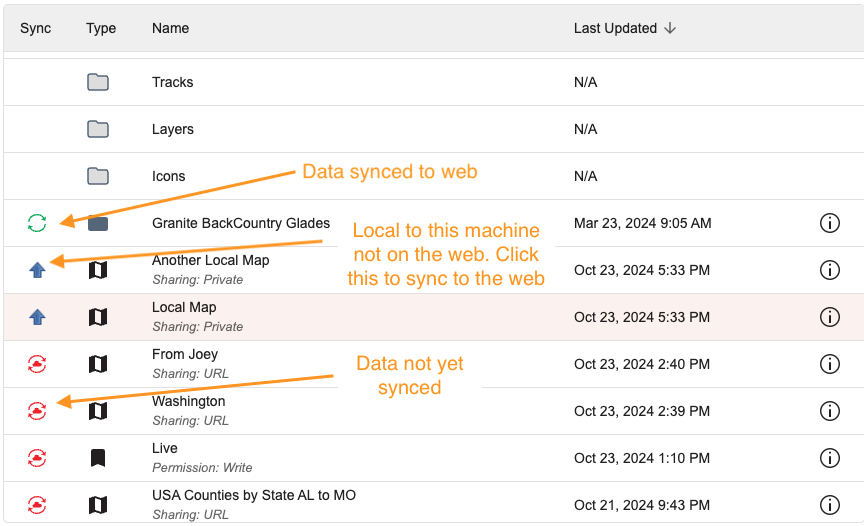
Maps that you create and save locally are not automatically synced to the cloud. However, maps that you create online will sync when you sync your account.
When you open your maps list, you will see icons next to each map name indicating the sync status.