Other Print Functions
in this lesson
Besides printing to a PDF, CalTopo has several other functions in the print page. You can print a list of all the markers on a map, export files to use in GPS devices, or order a paper map from our partners at Mountyn.co.
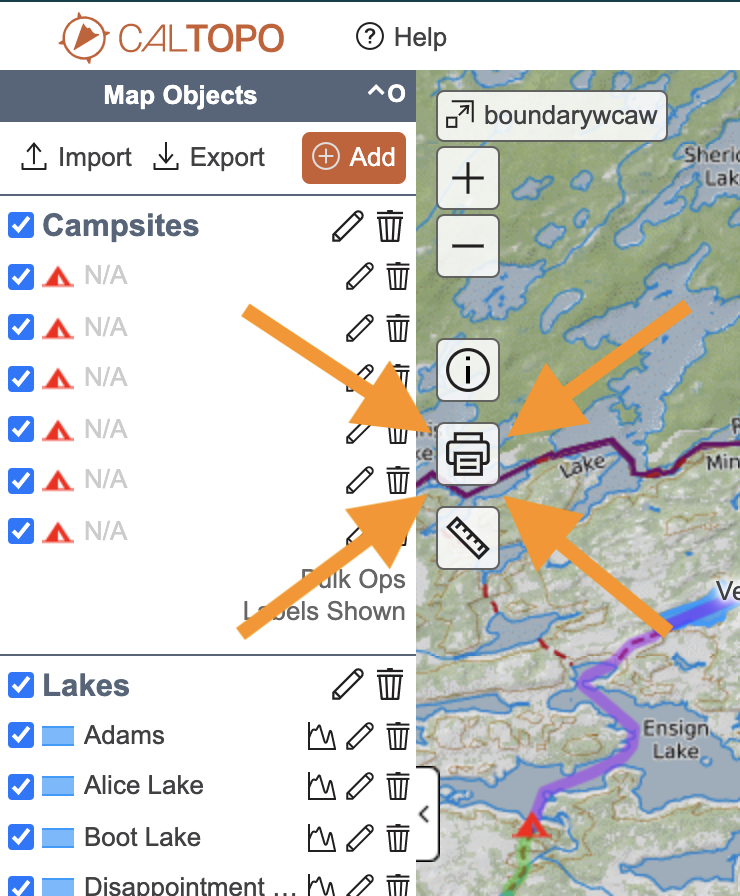
All of these functions start from the print page. To get there, first click the print button from the map viewer.
Topics on this Page:
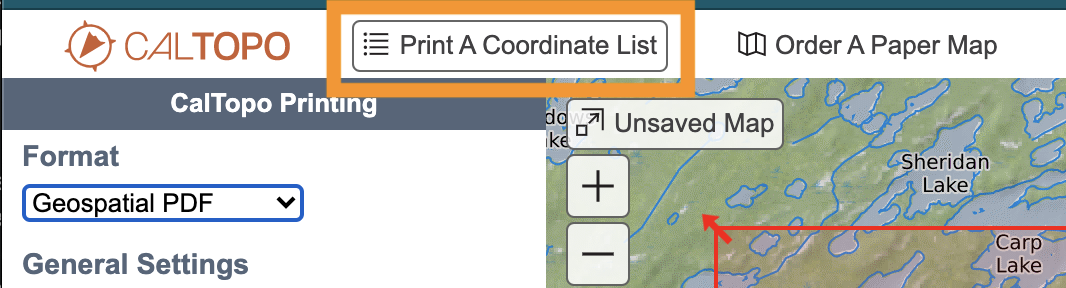
Print a Coordinate List
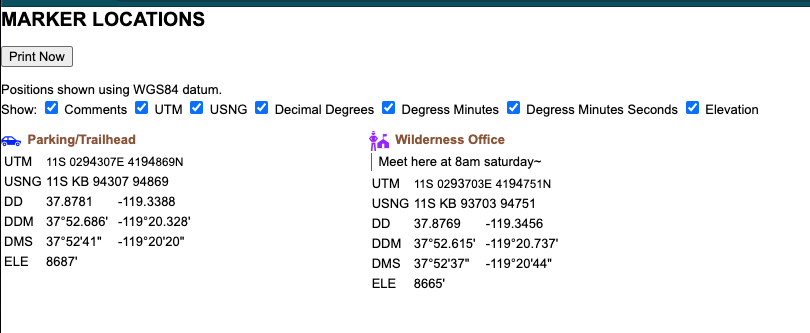
The Print a Coordinate List print option opens a new tab with a list of your map markers and the coordinates, comments, and elevation for each. For this to work, you must have markers on the map and they must be visible. By visible, we mean that they are checked in the object menu. You do not need to have the map viewer set in such a way that all the markers are visible there. If the marker is checked in the objects menu, it will be included in the coordinate list.
The coordinate list opens in a new tab where you can choose how much information to display for each marker. All the data types are initially active, but if you don’t need all the information you can turn them off as necessary. For example, if you only want to show comments and elevation, you can turn off all of the coordinate checkboxes.
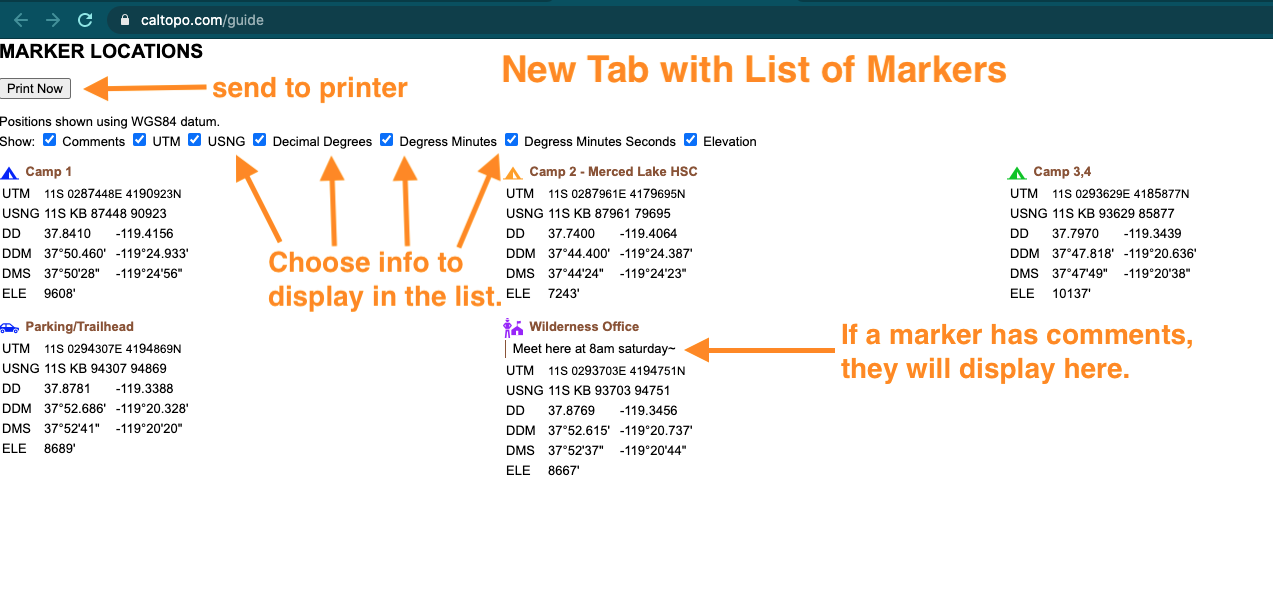
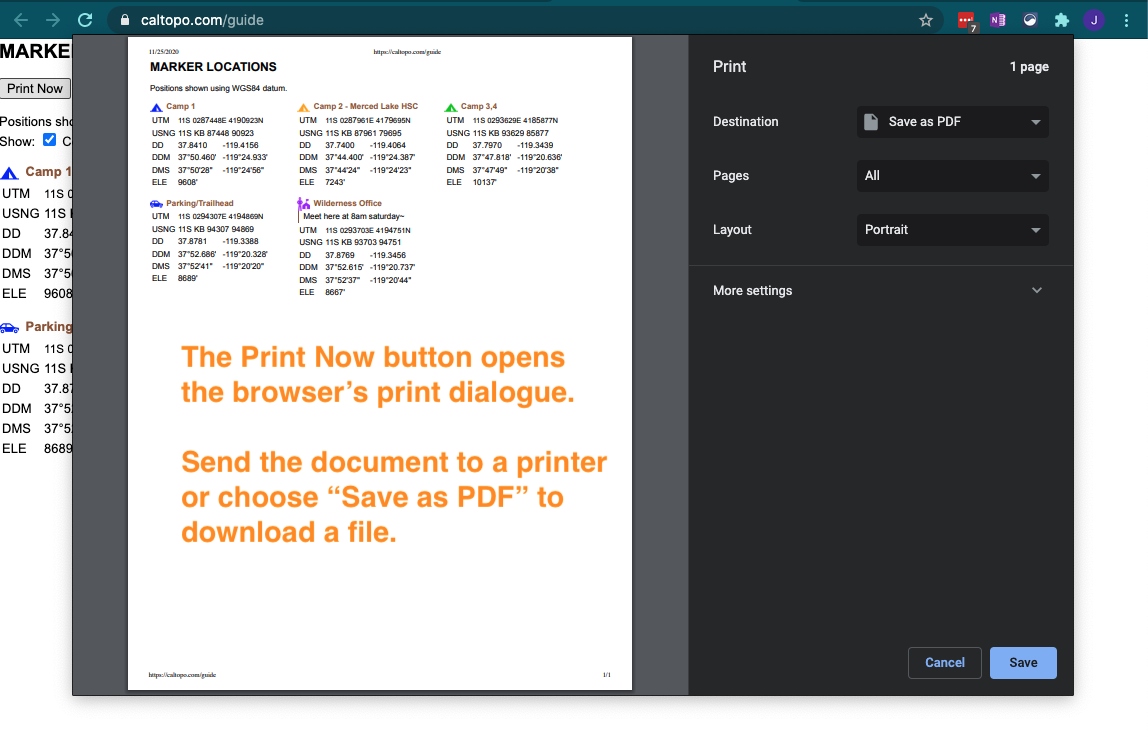
Use the Print Now button at the top of the page to send the page to your browser’s print function. Unlike printing a map to PDF, this does go directly to the print function, and from there you can choose to download a PDF file or physically print the document.
Remember: to only print a list of some markers, turn off all the extra markers from the list in the objects menu. 2 images

MBTiles and Garmin Custom Map Files
Pro or higher subscription required.
For use in Garmin GPS devices, you can download a KMZ file of your map that will include the background layers and your map objects. This file can then be loaded into your GPS device and viewed there.
MBTiles are used on some other devices, such as the Trail Tech Voyager Pro.
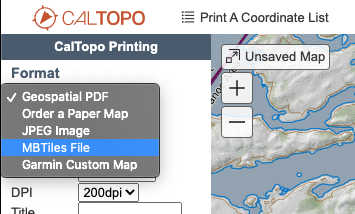
To export the files, first click Print icon on the left side of the map viewer so that the tile print page will open in a new tab. This tab will show the map area you were just viewing and will have a red box that looks very similar to the print box. At the top left of the page is a drop-down menu to choose why type of print function you want to use.
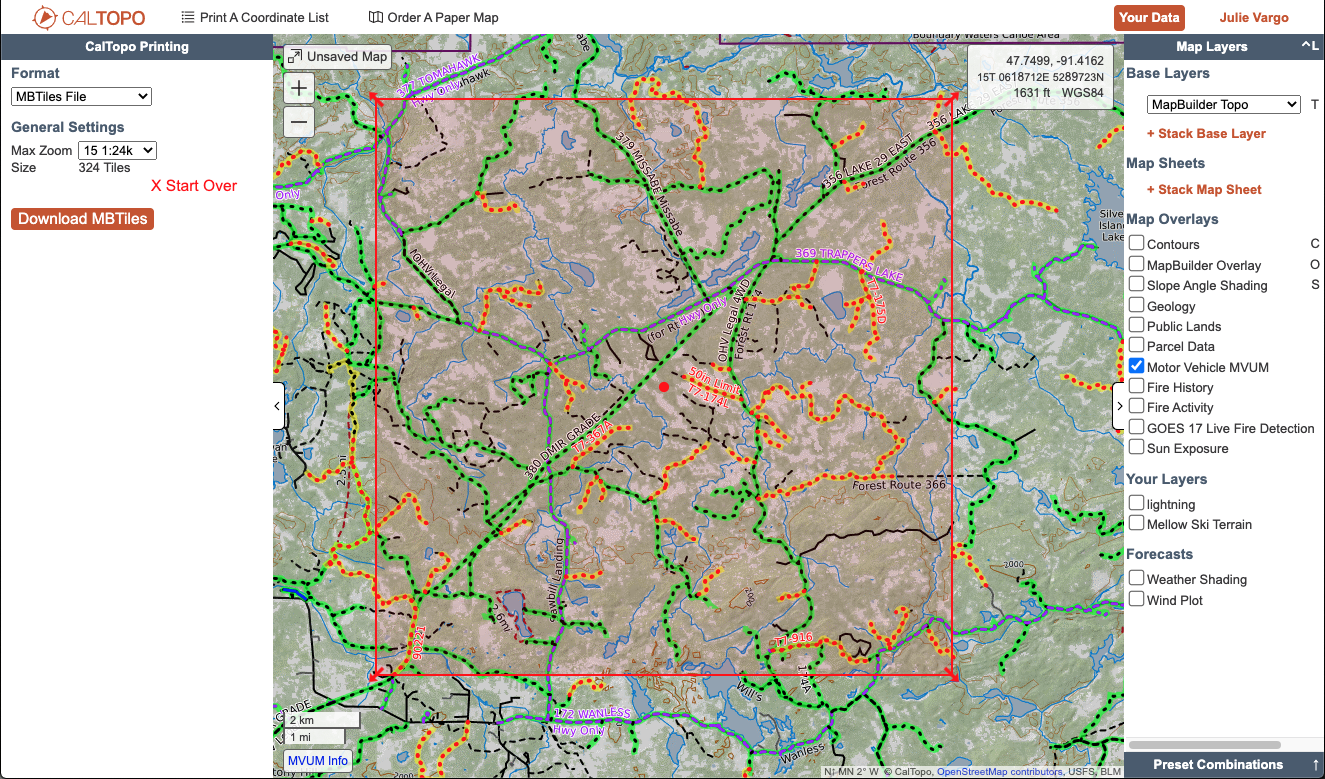
Adjust the size of the red box to designate the area of the map that you would like to download tiles to cover. The box will only adjust to set ratios because the tile sizes are fixed.
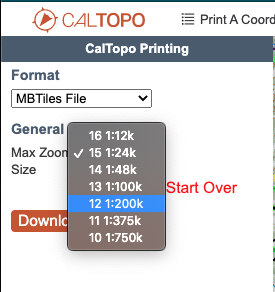
In the upper left corner of the selection screen, you can choose a target zoom level. Each zoom level is an additional set of tiles, and as you increase zoom level, you will increase the resolution - and thus file size - of each tile. Thus, as you select a higher and higher zoom level, your file size to download will increase significantly.
Just below the target zoom selection is a line that will indicate how many images and tiles you have selected to include in your download.
Finally, click either the Download KMZ link or the Download MBTiles link to intiate the download process. Because the tiles must first be packaged for download, it can take some time before your download actually starts. Hang tight; it will get there.
Mountyn.Co
CalTopo has partnered with Mountyn.co to offer an option to have your map printed and mailed to you. Mountyn.co offers one size of printed map, on special waterproof and very tough paper. The maps are two pages, printed front and back on a single sheet of paper and run $10, mailed.
Creating a map to print via Mountyn.Co
This video walks you through the entire process from building a map to sending it to Mountyn.co for printing.
Part One: Create a Map
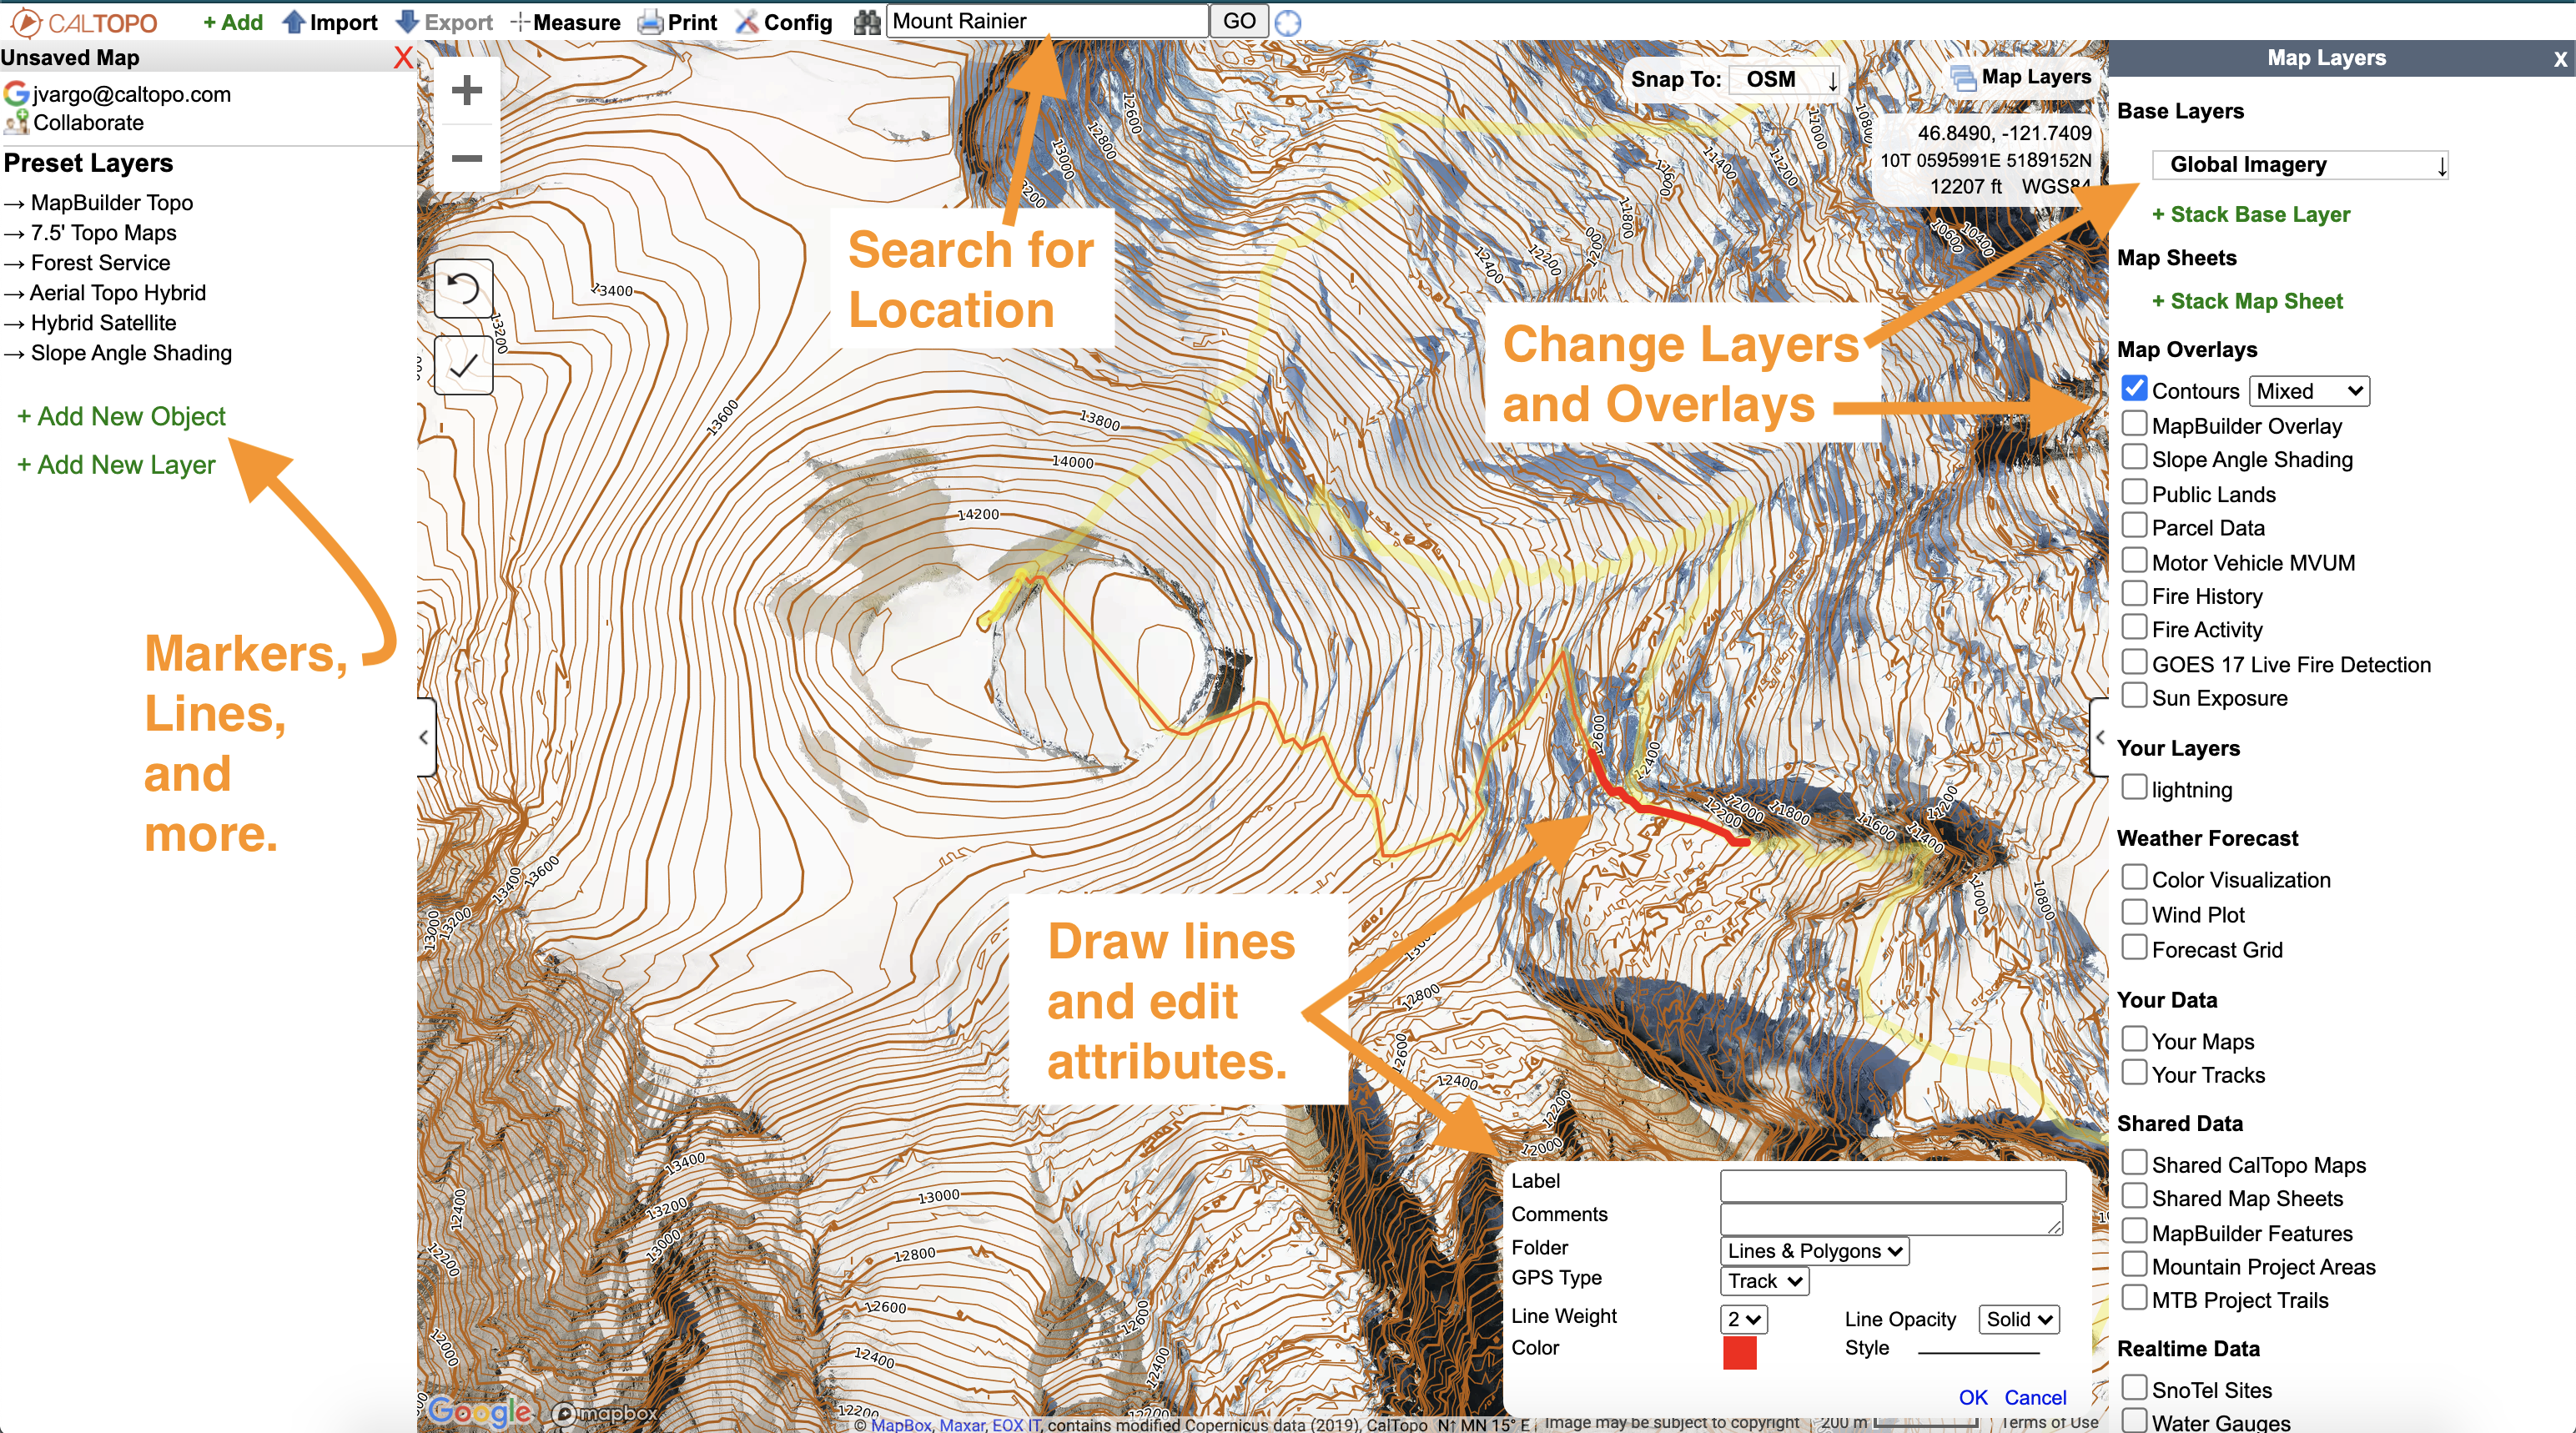
CalTopo provides lots of options for the background image, or base layer, for your map. On top of this, you can add markers (waypoints), draw lines that follow trails or go cross-country, designate planned campsites, and much more.
You do not have to add any objects to your map in order to print. We encourage you to plan your route and share your digital map with someone before your trip so there is a reference in case of emergency. This is not required for printing.
Use the search bar to find the area to build your map. If you have specific coordinates for a place, you can enter those, but it also works with plain English, such as the name of a trail or lake, a town, a wilderness area, or a park. For example, you can search Yosemite National Park or Half Dome or Vernal Falls. If you aren’t sure
Once you find the location that you want to print a map for, you can add objects with names (labels) and comments. Please see the Getting Started Guide for more details.
After you have found the area for your map adjusted layers and added any objects you want, you can go to print. This opens in a separate browser tab, where you will be able to move the map around and zoom in and out more to get the view just right.
Part Two: Selecting the print area and Sending it to Mountyn.co
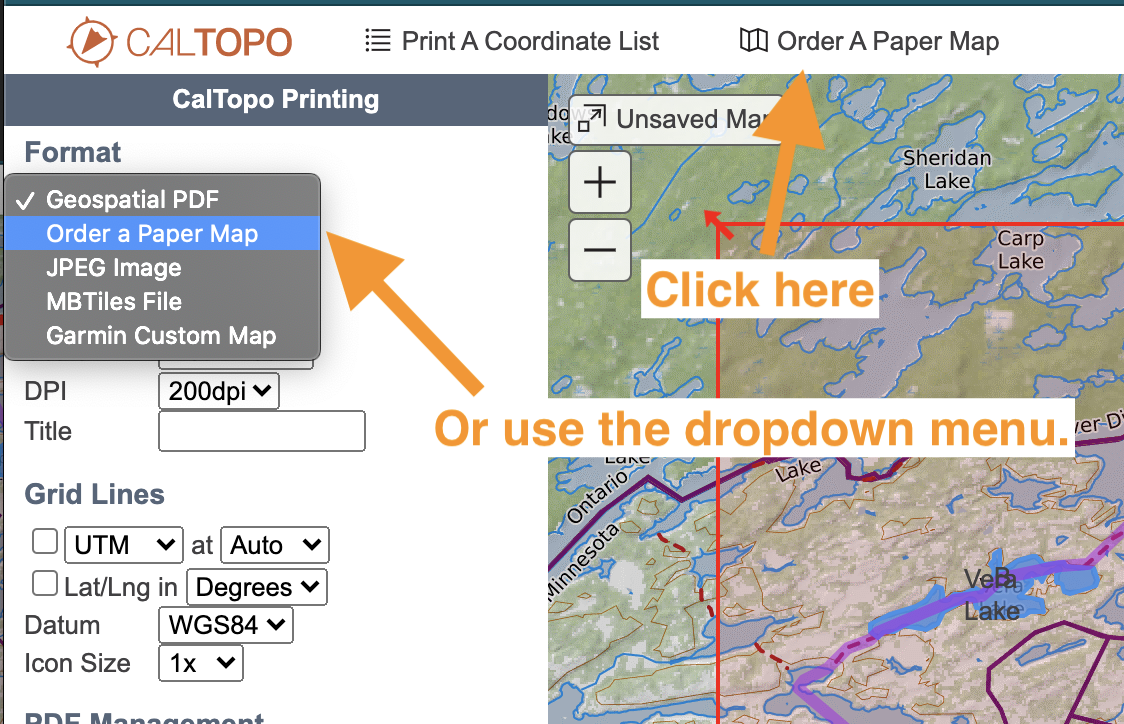
To open the print page, use the Print menu at the top of the map viewer screen. Select Print to Mountyn.co.
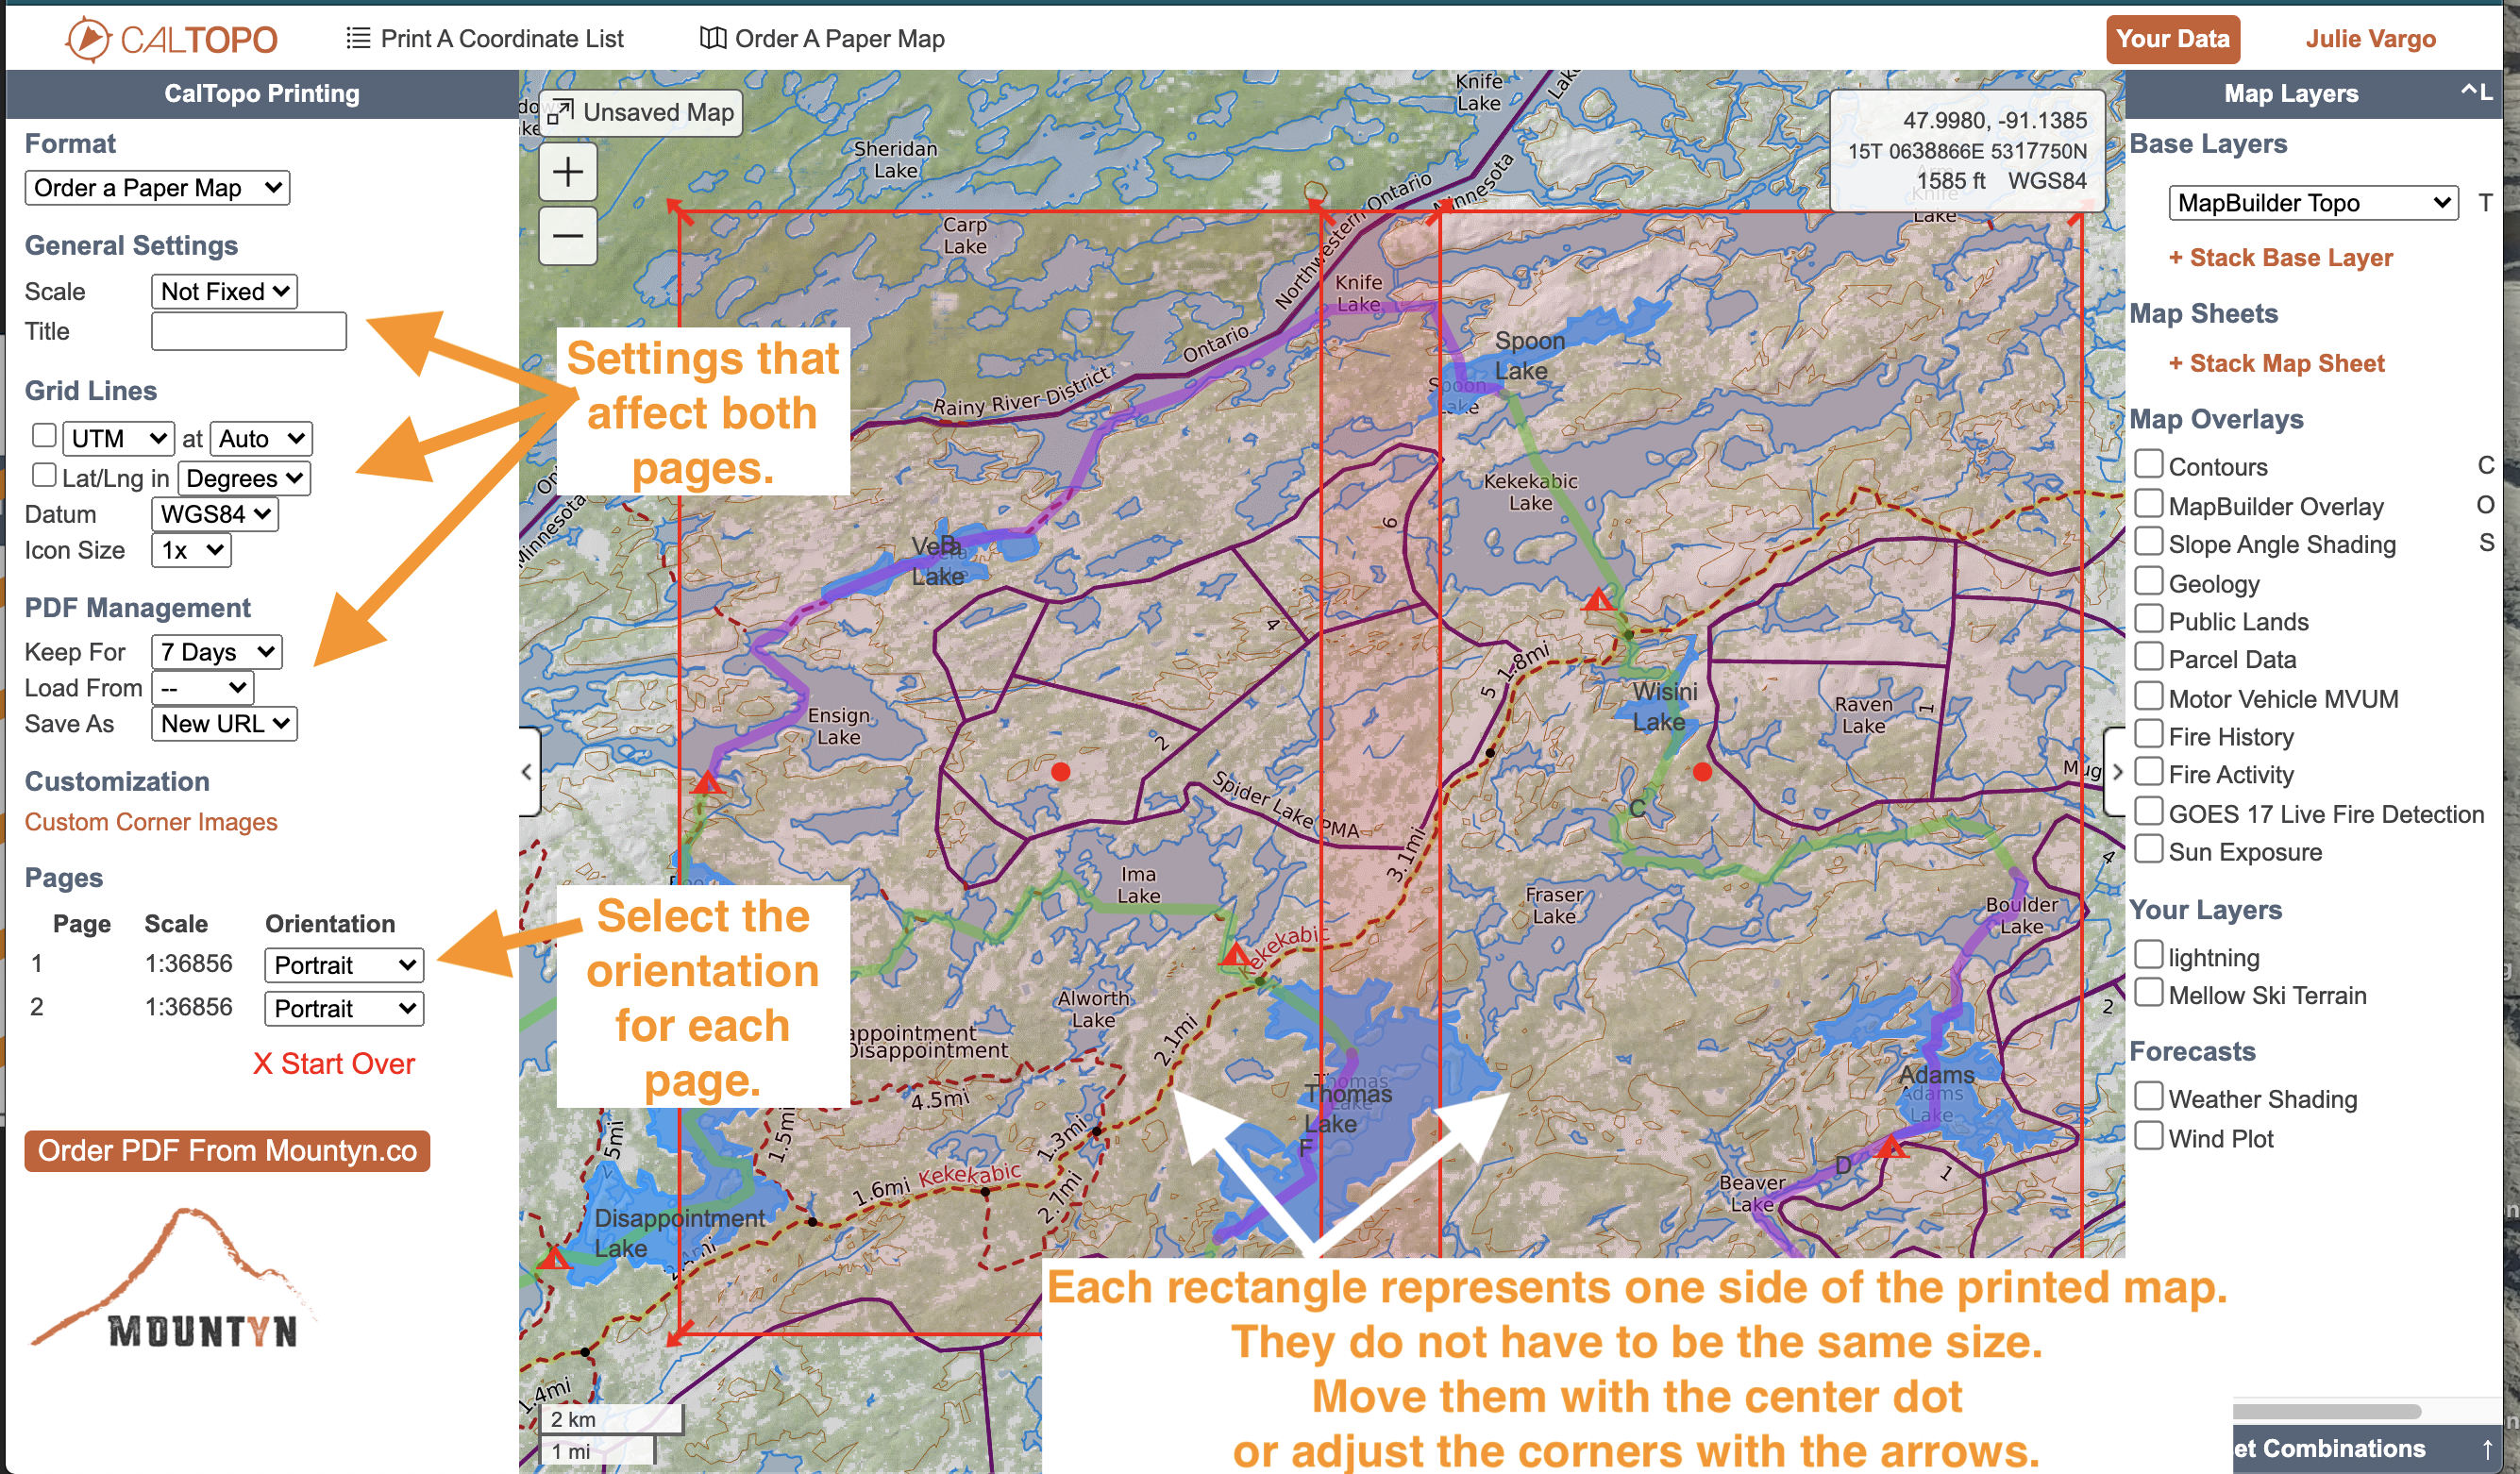
A new browser tab will open. In that tab, on the left side of the window is a section with several options and on the right side is the map viewer with two red rectangles that are slightly overlapping. These rectangles represent the two different sides of the printed map. Each rectangle is moveable and can be resized. They do not have to overlap, but doing so will add some continuity between the two sides of your map.
Each rectangle can be oriented either to Portrait or Landscape, and have it’s own scale. For ease of reading, you may want the same scale on both sides of the map. You can also choose from a fixed, common scale at the top of the options list. Mountyn.co has an excellent description of how scale affects the readability of the map as you are using it.
Size and center the red rectangles in the map viewer to cover the area to print. Drag the corners of the rectangles to resize. Grab the red dot at the center of each rectangle to move the entire box at once.
Once you have everything lined up as you want it for printing, click the button to send it to the next step at Mountyn.Co. After your map preview loads, review it before completing your purchase.