Live Tracking and Locators
let's begin
CalTopo offers a few options to integrate live tracking into your map. The instructions on this page are for individual accounts. Team accounts have additional options. All team tracking options are covered in the Live Team Tracking lesson.
Topics on this Page:
Location Sharing Overview
Sharing your location in a CalTopo individual account falls into two main categories:
- Recording a mobile track to a map
- Recording live tracks for a locator (Garmin inReach, APRS, ADS-B aircraft or other types of devices) to a map.
There are more options in CalTopo team accounts.
The first option (recording a track to a shared map) is covered in detail in the Recording Tracks lesson in the Mobile Specific Tools and Functions chapter. Any mobile tracks that are saved to a map will upload in near real time with a data connection or as soon as a data connection is reestablished. This function does allow for real time tracking for anyone viewing the map if the user(s) in the field have a reliable data connection.
Recording for locators takes a little to a lot more setup than recording tracks with the mobile app. However this function can allow you to record locations to a map when the person being tracked does not have a cellular connection. It can also allow you to track things that are not using the CalTopo app like Aircraft.
Live Tracks
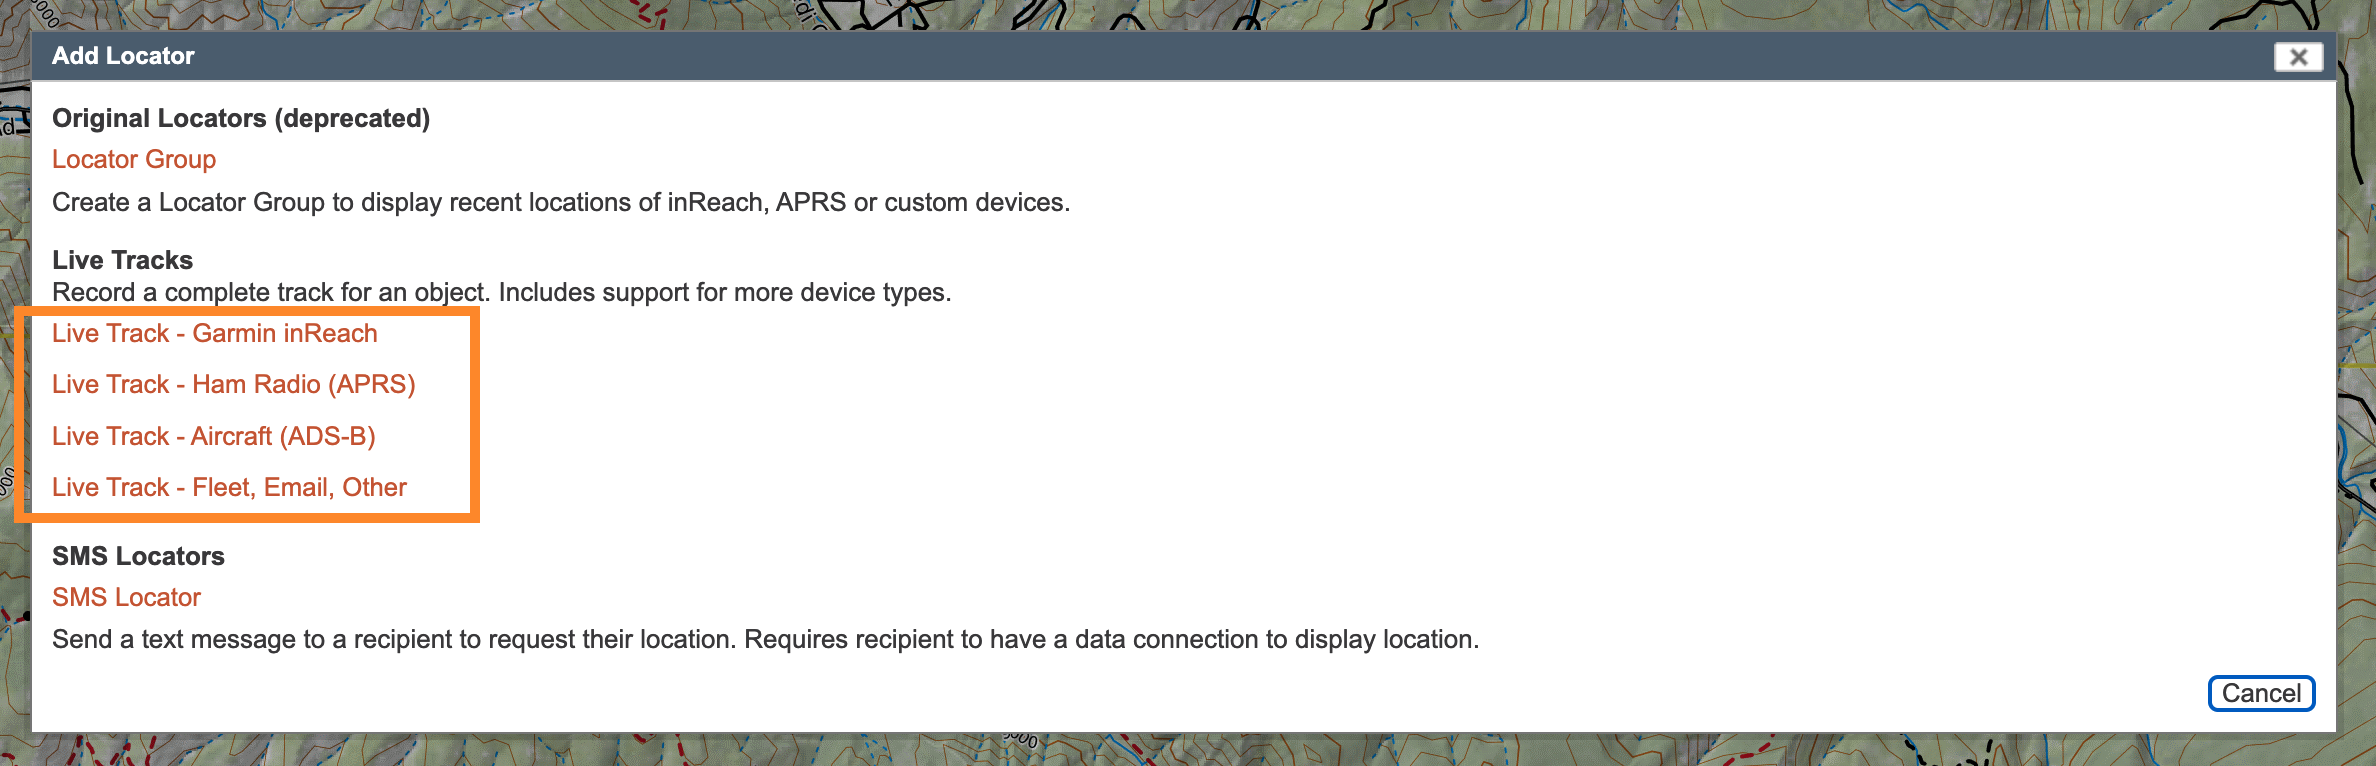
There are 4 things you can live track:
- Garmin inReach
- Automated Packet Reporting System (APRS) used by Amateur Radio Operators
- Automatic Dependent Surveillance - Broadcast (ADS-B) used by aircraft
- A Custom API that can be used by people with some technical knowledge
All these things report a location to a server that then sends that location via the internet to CalTopo.
Garmin inReach
For a Garmin inReach to work with this system you need a Garmin Professional Account. You will also need each inReach’s IMEI number. The IMEI is assigned by Garmin, you can usually find it on the device itself, in the device settings, or on the Garmin Portal Connect page of your Garmin Professional Account. We have information on the Garmin inReach Setup on the Garmin website in the Locations Integration chapter of the User Guide.
APRS
The APRS system is for radios that have gotten their location onto the internet via an iGate. You can check to make sure the radio has reached an iGate by going to APRS.fi to see if it is visible there. CalTopo does have a way to cable a radio to your computer and get the data directly from the field radio. That system of getting a location from local traffic (not through the internet) requires the use of the Desktop program and is covered in the Local APRS with Desktop chapter of the User Guide.
Amateur radio callsigns will look something like this: KA1QP. However with APRS one Amateur Radio Operator can have multiple stations so an SSID is often used. If that is the case it needs to be included in the Call Sign box of the dialog. An SSID is appended to the end so it will look like: KA1QP-7.
ADS-B
Please note that starting a live track for ADS-B aircraft requires a pro, desktop or team account; live tracks for all other devices are available to all users. Alternatively you can start recording a live track directly from the CalTopo Aircraft Overlay.
Setting Up the Live Track
A locator must be added for each device, radio, or aircraft to each saved map you want to track those objects on. If you find yourself adding a substantial number of these to maps you should consider a Team Account. If you have a Team Account, this system of setting up live tracks should be used for one off situations. Live Team Tracking is far more efficient for commonly used devices, radios, or aircraft.
On a Saved Map open the +Add menu at the top of the Map Objects menu on the left side of the map viewer and select “Locator”.
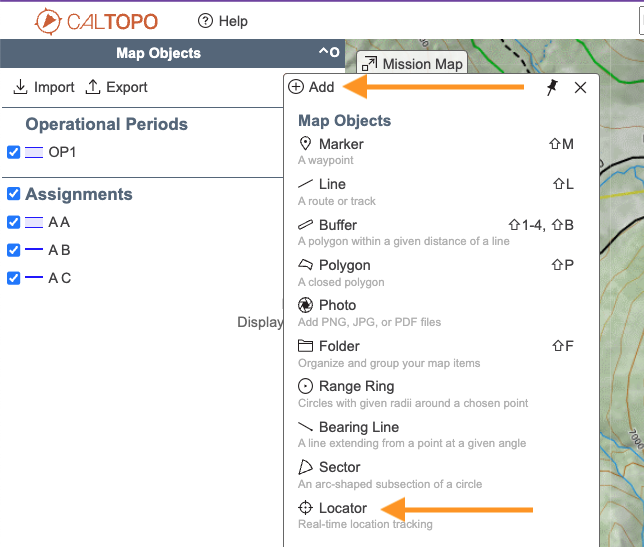
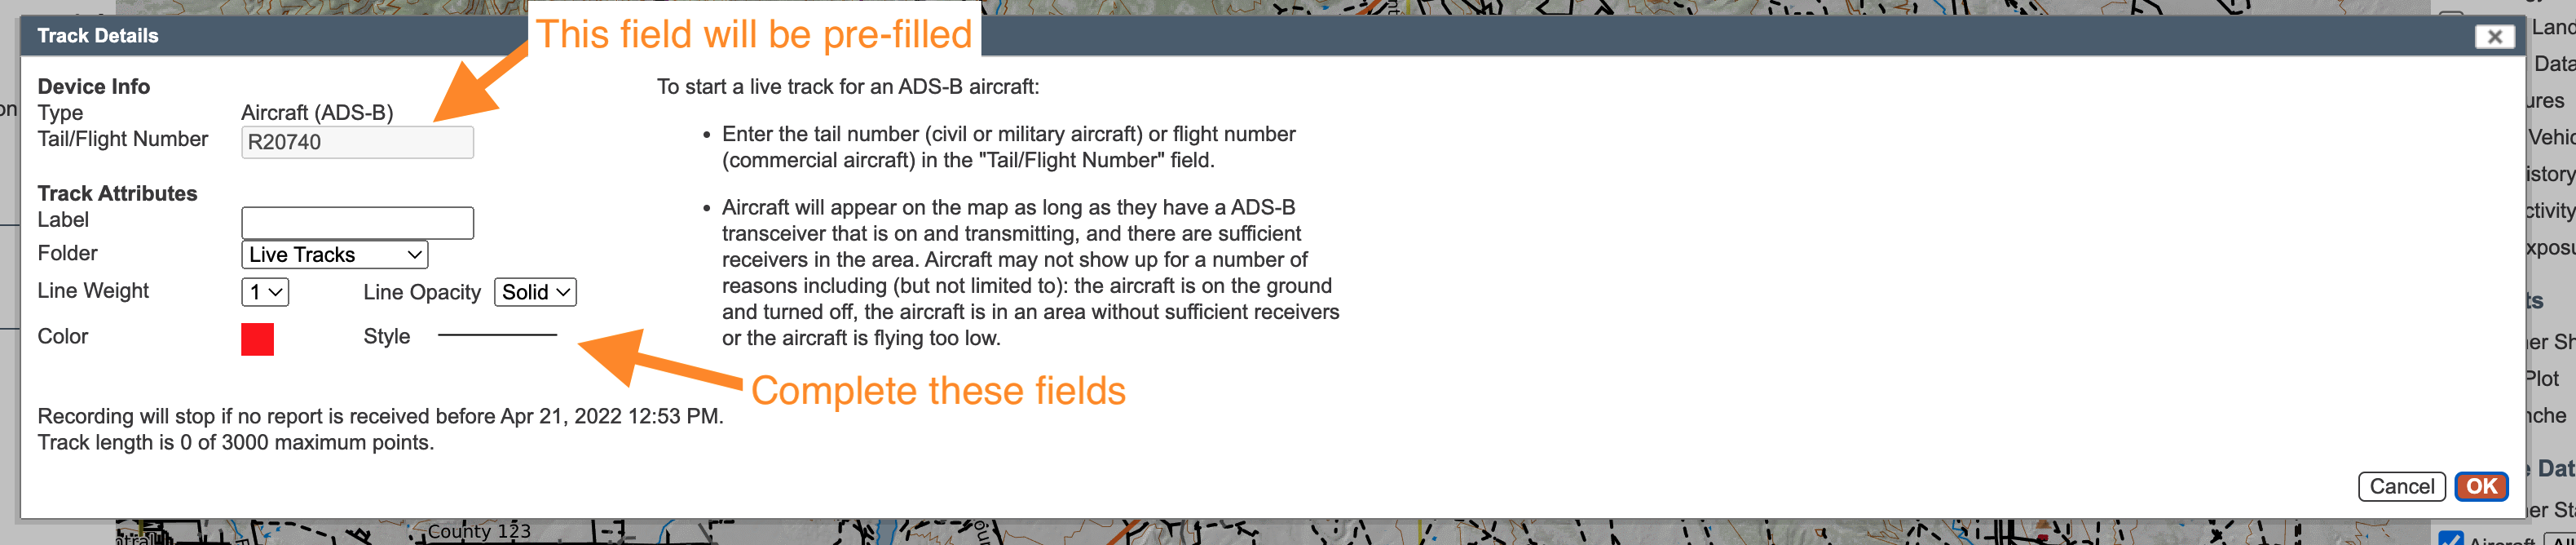
Select the type of device that you wish to record a live track for and the “Track Details” dialog will appear.
Complete the form with your device information, label, color, etc. Device specific instructions for how to complete the form are shown in each Live Track dialog.
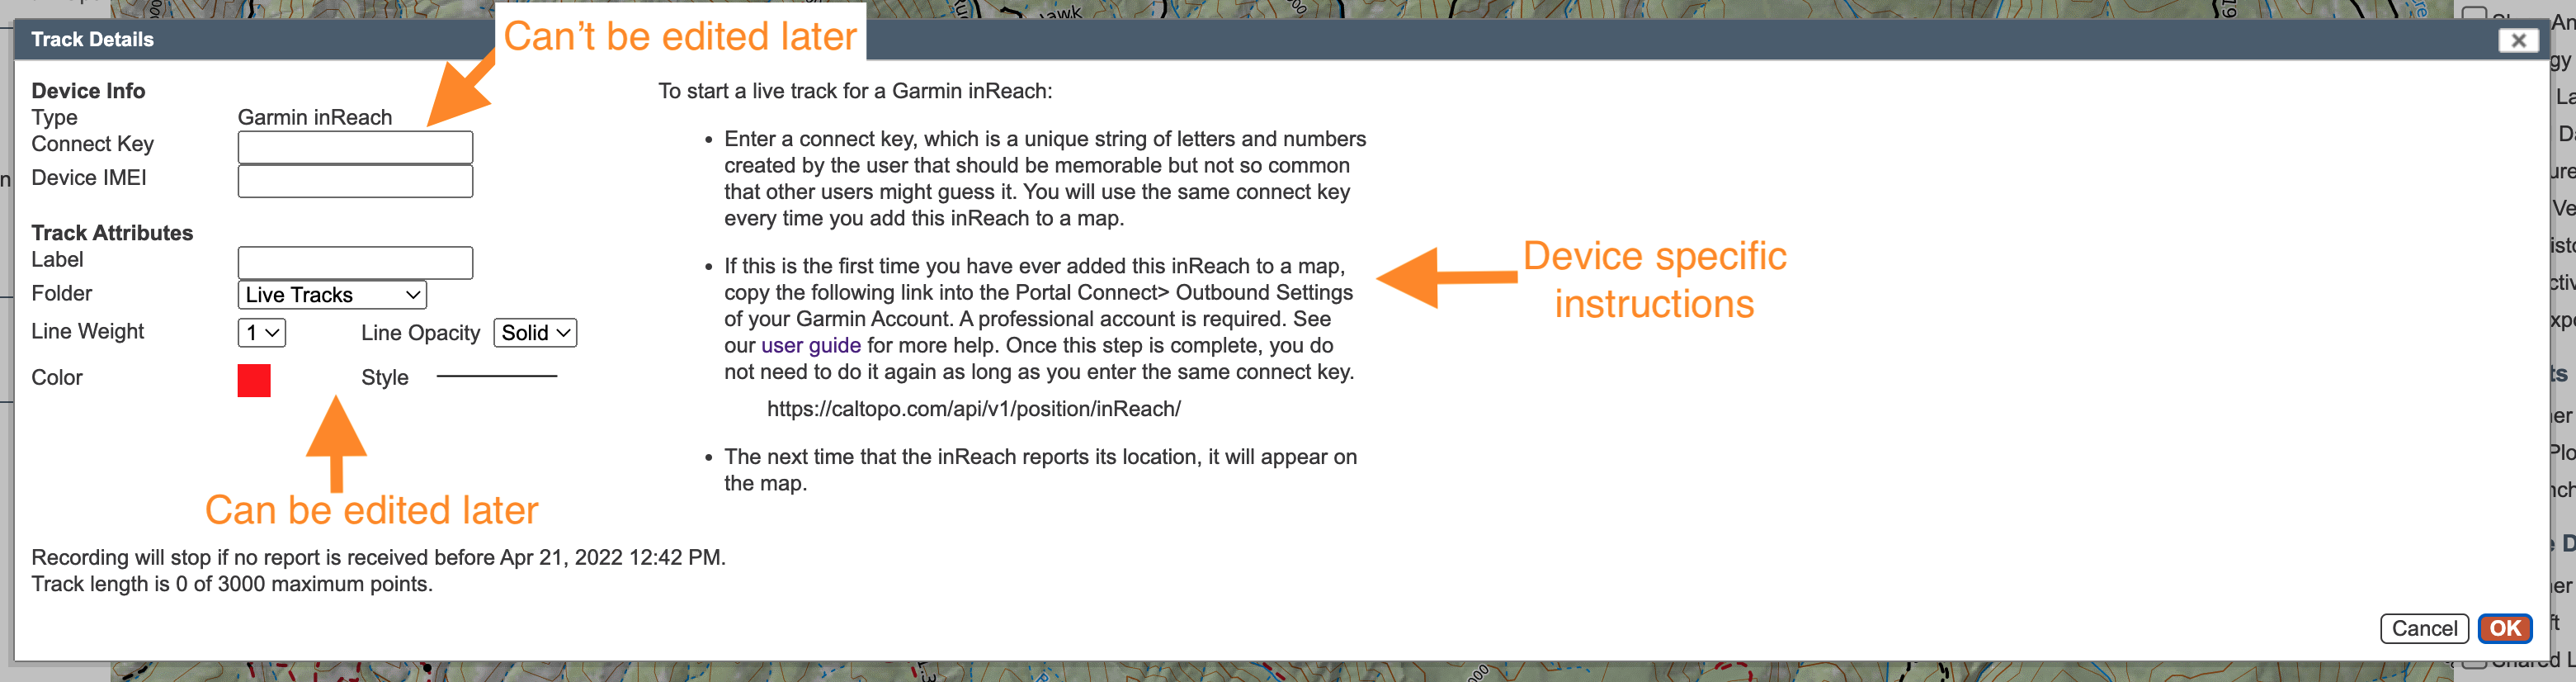
Device info fields cannot be edited once you complete the form, so double check that these fields are accurate. Track attributes can be edited as needed later on. Once you are happy with the form, click “Ok".
The next time that a device or aircraft reports its location, it will appear on the map as a map object and in the Map Objects menu in the Live Tracks folder, unless you designate a different folder.
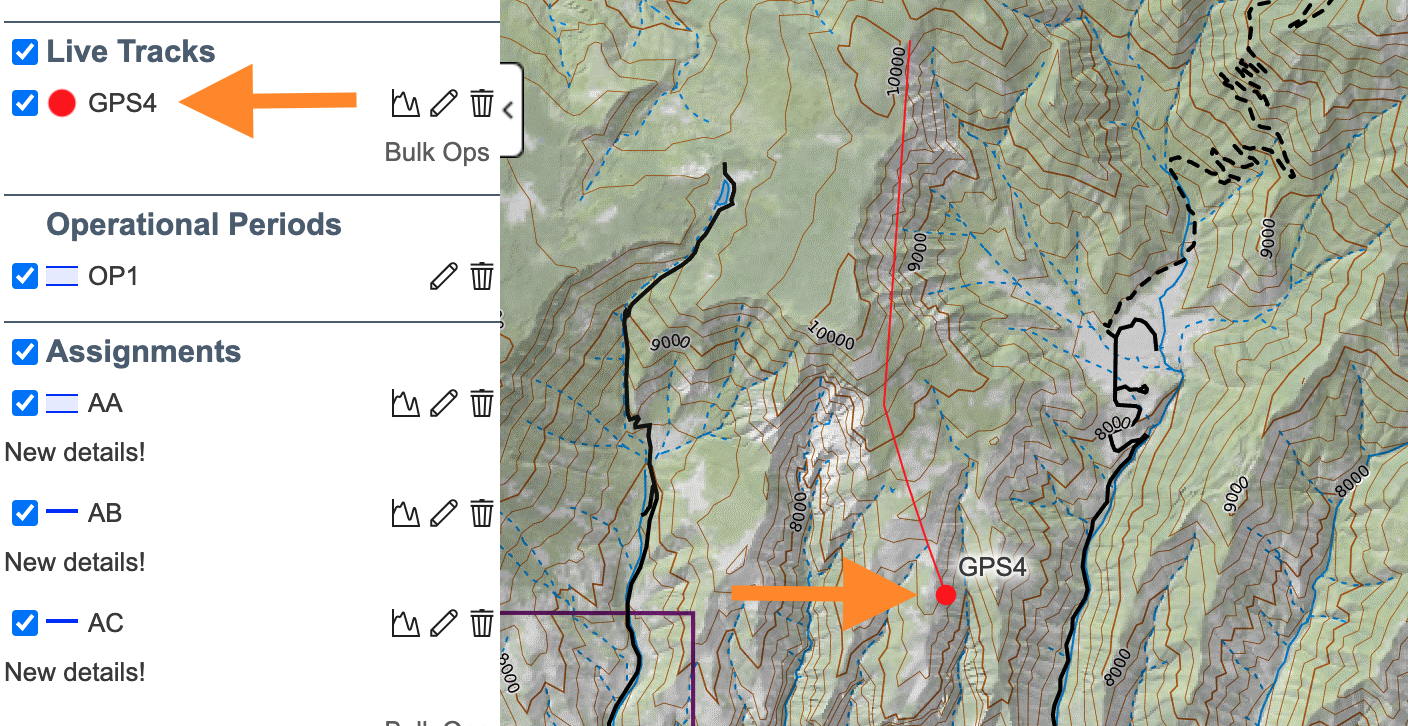
If you want to edit the color, label or line style you can open the track details dialog by clicking on the pencil icon. The call sign/device ID field will not be editable but you can edit label, color, etc and then click “Ok”.
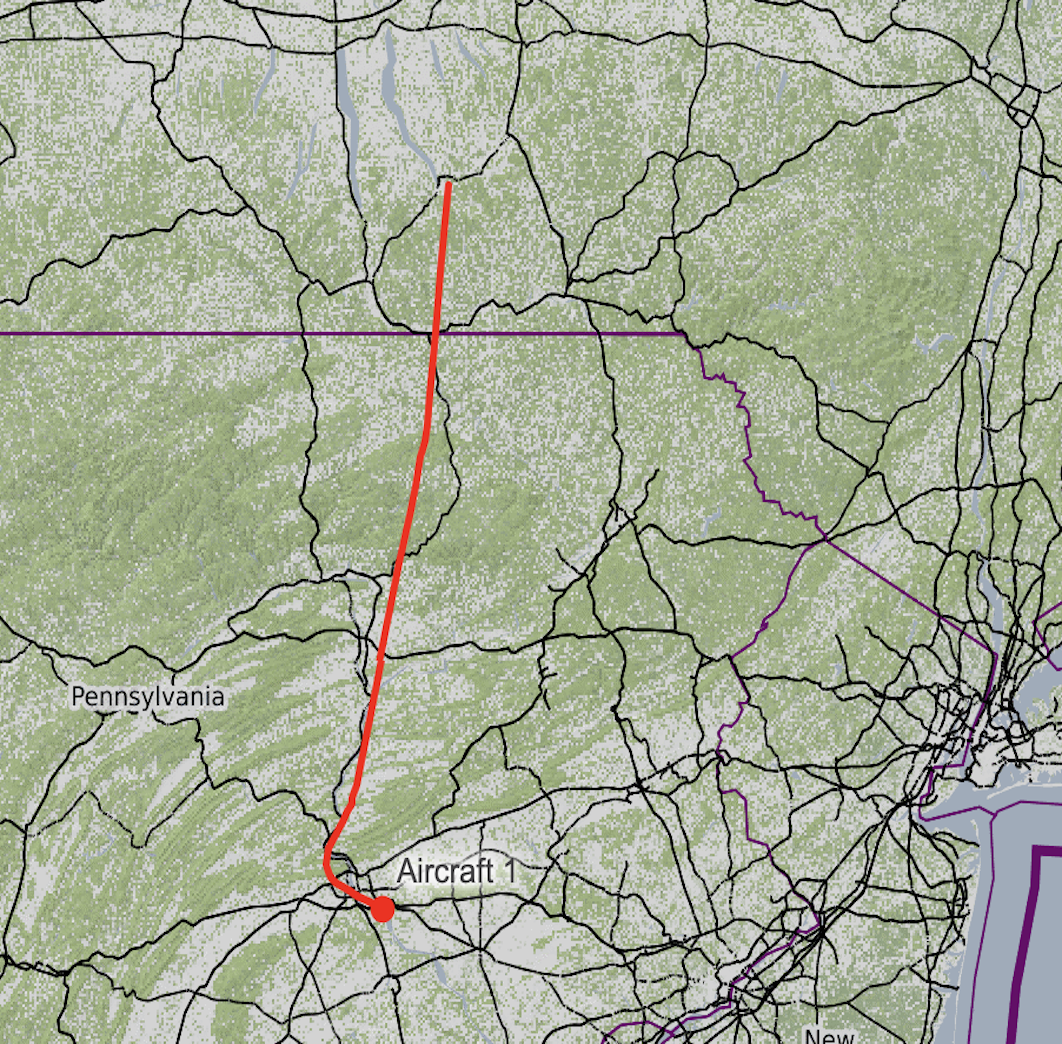
Truncating
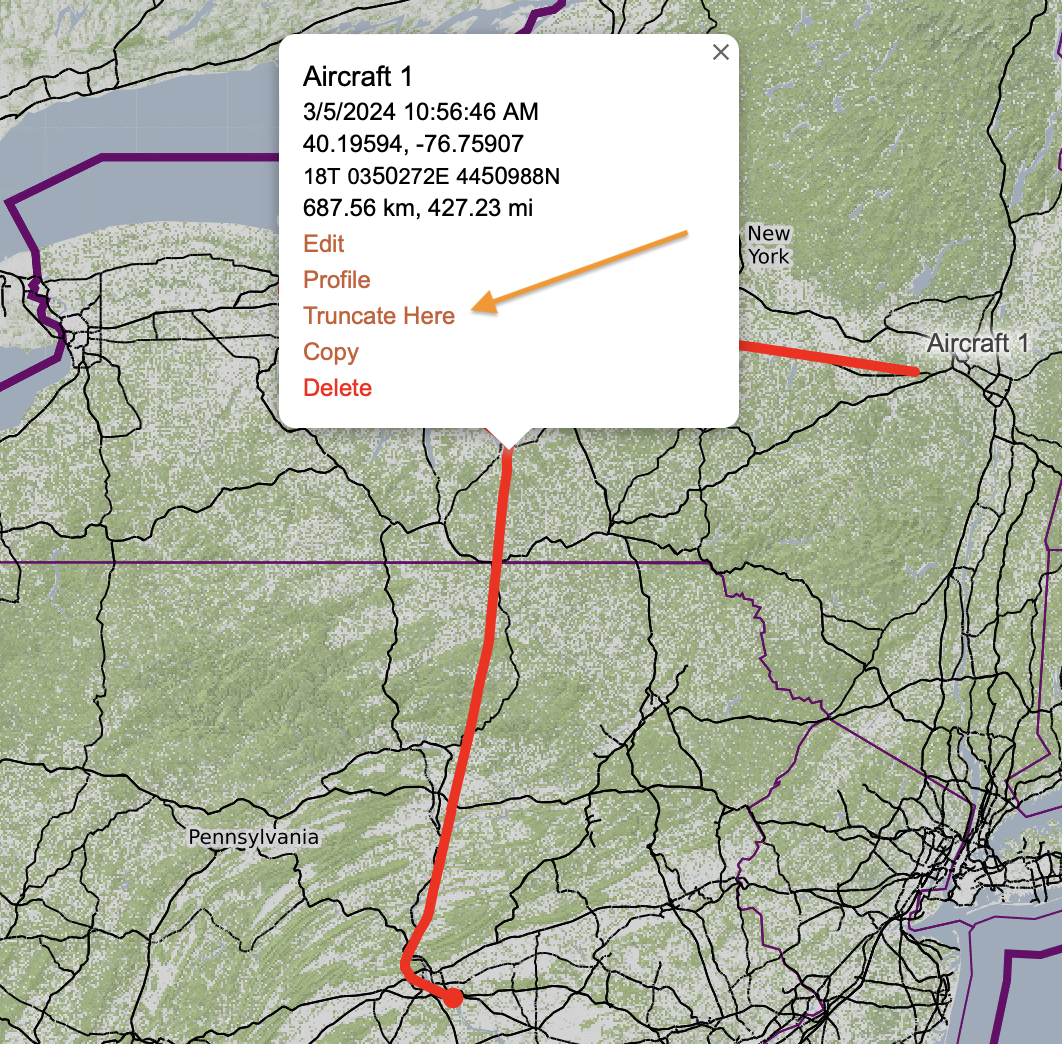
Often people will start recording a live track before leaving home or will start tracking aircraft soon after take off. In many cases people only want the recorded line on the map starting at the trailhead or only need the aircraft track when it reaches the area of interest. The beginning of that track can be distracting on the map- that is where truncating comes in handy.
To truncate, click a live track line and you'll have the the option to Truncate Here. By clicking that you will delete the line from that point to the start of the line. Anyone with the appropriate access can truncate a recorded line.
Stop Recording a Track
To end a Live Track recording, click on the pencil icon to the left of the object in the Map Objects menu and select “Stop Recording” in the Track Details dialog.
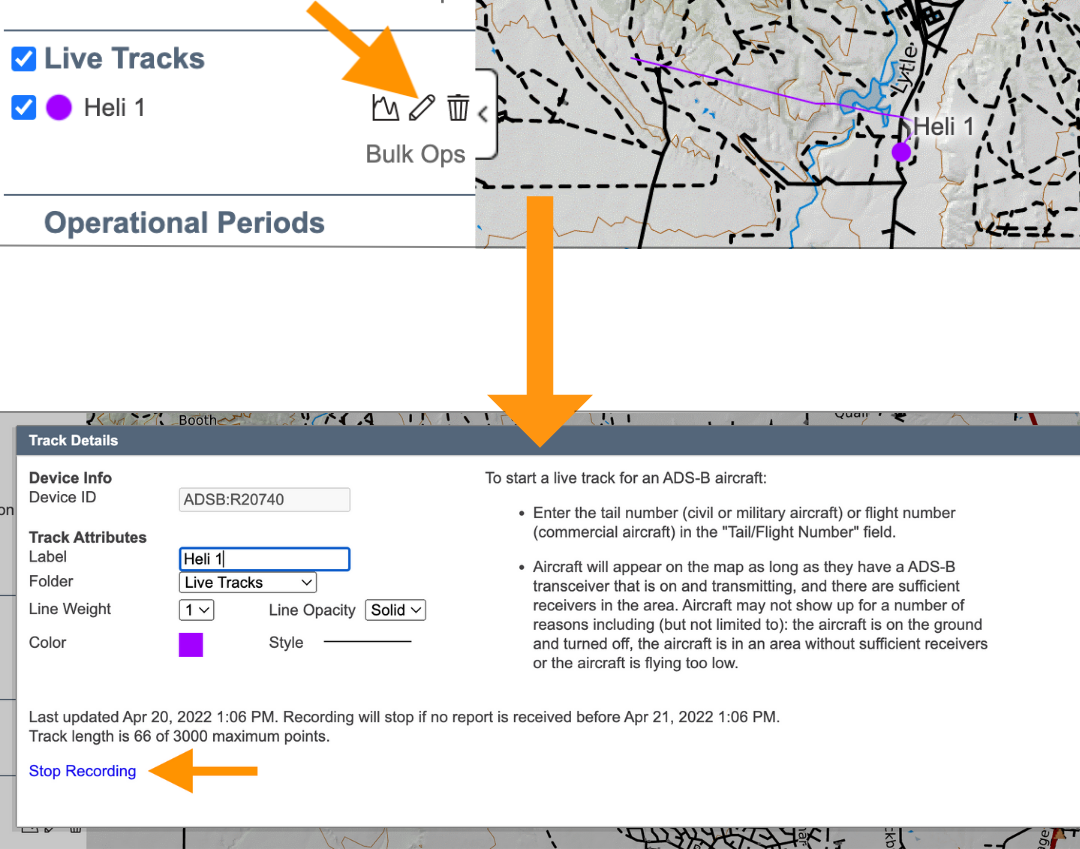
To stop tracks for multiple devices at once, click on Bulk Ops at the bottom of the folder with the object. Select the object(s) that you wish to stop recording and then select “Stop Recording”.

If you don’t manually stop a recording, the recording will automatically stop 24 hours after the last location update is received or once the track consists of more than 3000 points. Once a recording ends, the live track will be converted to a line object on your map and automatically moved to the Lines & Polygons folder in the Map Objects menu.