Working with Base Layers
in this lesson
In CalTopo, you aren't limited to just one base layer. You can switch between base layers as often as you would like or stack them together in almost any combination imagineable! The ability to compare base layers is an incredibly powerful feature that allows you to learn what you want and as much as you want about the area you are viewing!
Topics on this Page:
Selecting A Base Layer
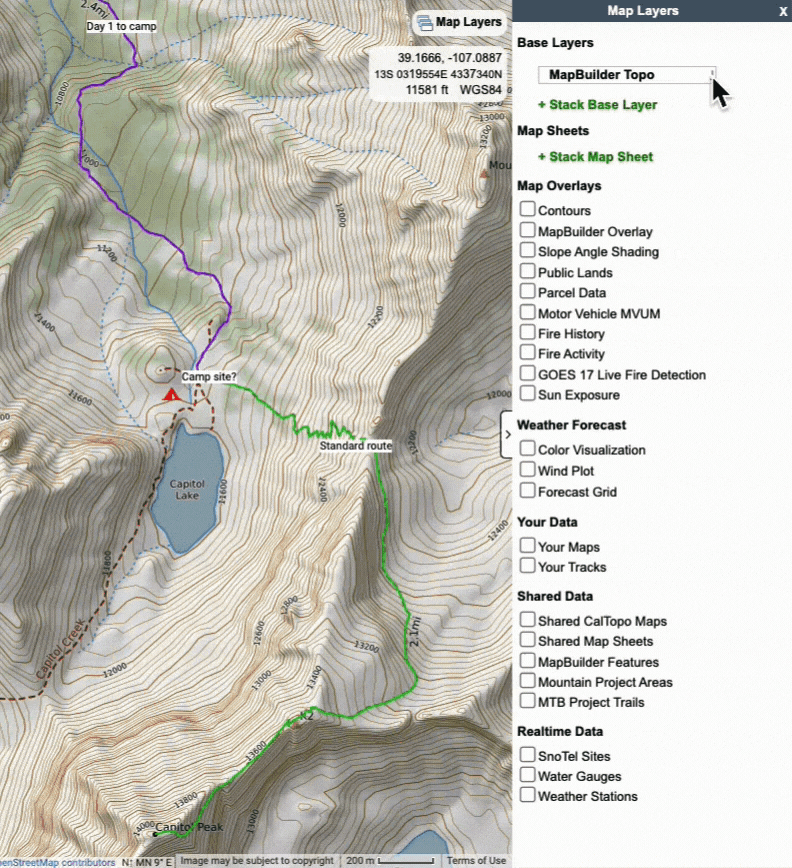
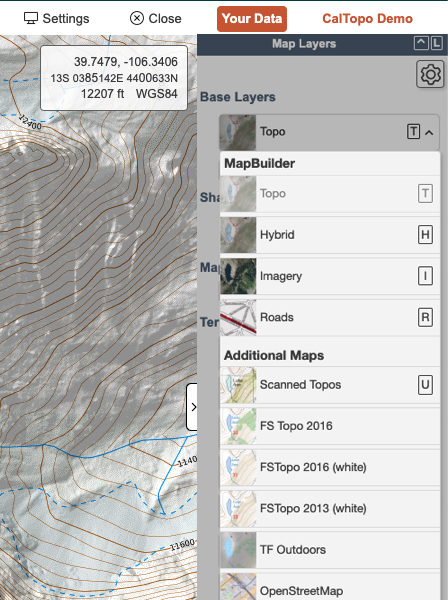
Base layers can be found in the Map Layers side bar on the right hand side of the map viewer. Click the drop down menu under Base Layers to see all available base layers. Choose a layer and it will appear in the map viewer.

Select A Base Layer
You can change the base layer you are currently viewing at any time in the drop down Base Layers menu. Simply select the new base layer you would like to view and it will now appear in the map viewer.
The ability to switch between base layers is incredibly helpful for learning more about a particular area. Maps are representations of the world. Each mapmaker makes decisions about what to include in the maps they create based on where they are getting their information and what they want to communicate. Different base layers will draw from different data sources and prioritize different information to display.
Comparing different base layers can help you to gain a more complete and accurate understanding of an area. To better illustrate this point, let's look at an example. First, let's compare two different base layers for the same area.
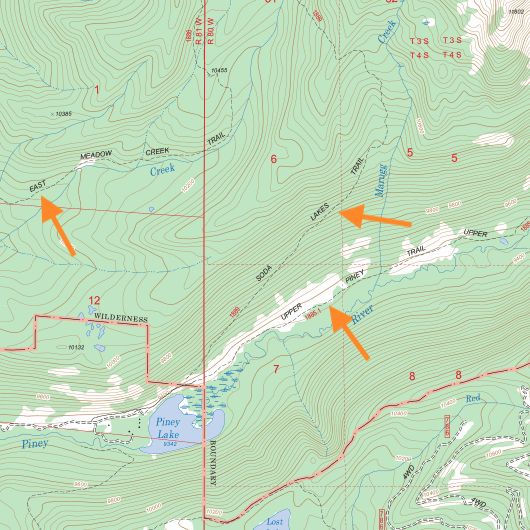

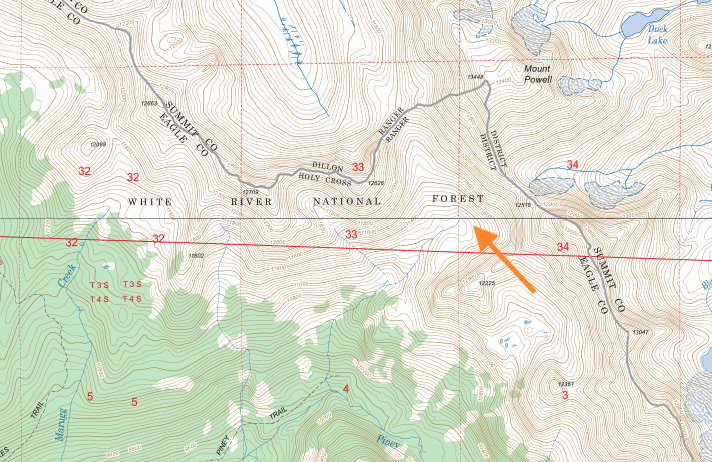
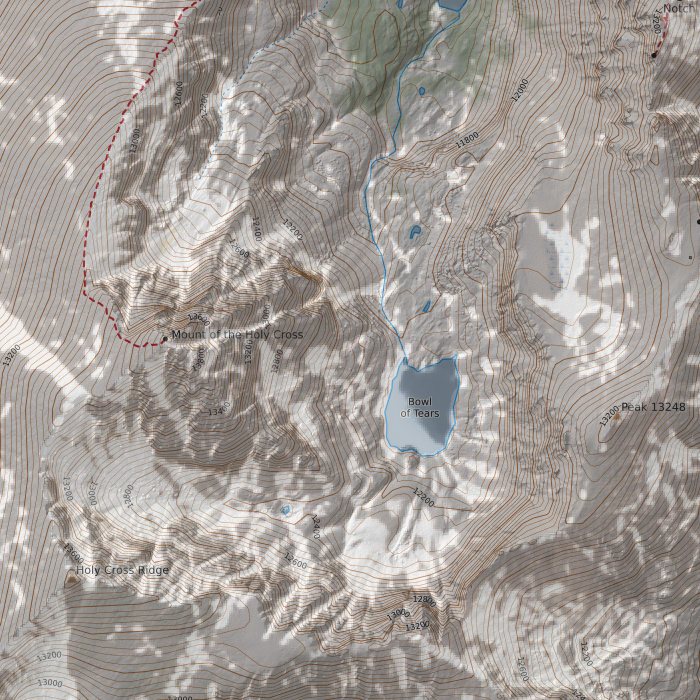
You may be tempted to think "Hey! The MapBuilder Topo base layer is wrong! I should always use the Forest Service base layer." However this conclusion would be based on a false assumption. It's not that MapBuilder Topo is wrong; rather it's because MapBuilder Topo draws and displays trail data from different data sources than the Forest Service layer. Based on where the underlying data comes from, trails and other features may be present, missing or in a different location depending on the base layer you are viewing. In the above example, if you were planning to hike the East Meadow Creek or Soda Lake Trails, then MapBuilder Topo would not be very helpful to you.
However let’s take a look a little to the northeast in the same area. While not labeled on MapBuilder Topo, the Upper Piney Trail is present as a red dashed line that runs northeast past Piney Lake and along the Piney River. Unlike the Forest Service layer, it extends further as a dotted red line as it heads up the saddle between Mount Powell and Peak C. In addition Peak C, as well as the other peaks along the same ridgeline, are labeled on the MapBuilder Topo layer but not on the Forest Service layer.
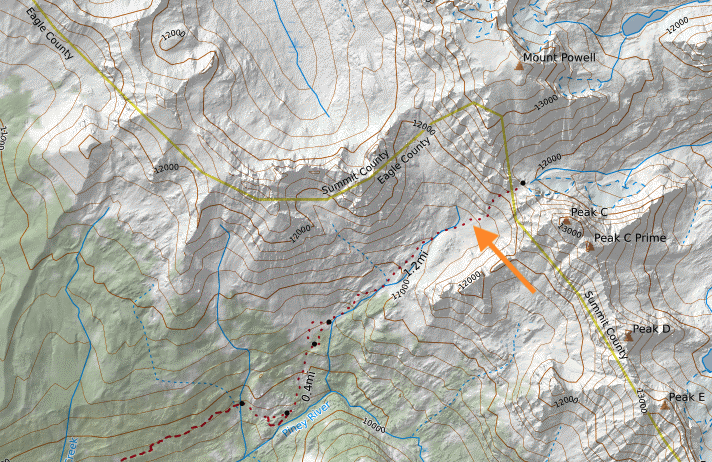
If you were planning to climb either Mount Powell or Peak C, the MapBuilder Topo layer could potentially be more helpful to you than the Forest Service layer as you plan your possible approach.
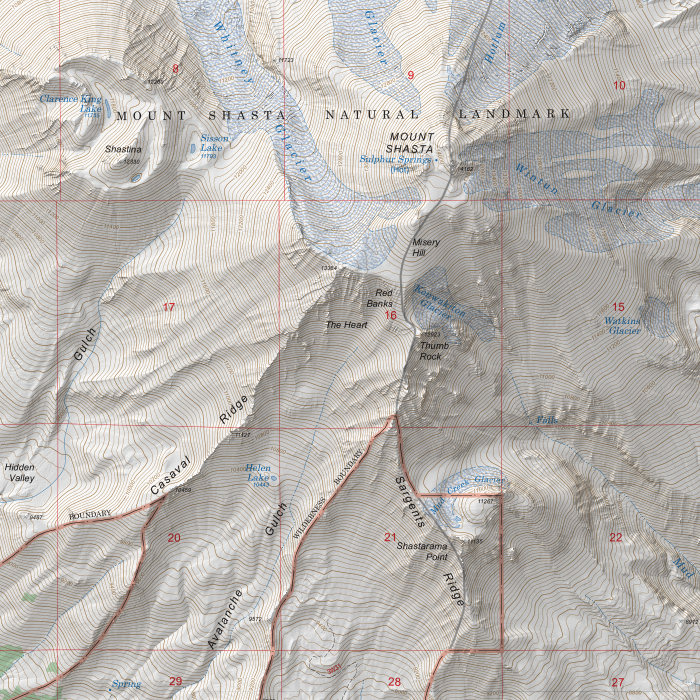
And what if you wanted to know what the terrain is like at the saddle? Topographic maps can only tell you so much. However consulting aerial imagery can give you a much better idea of what you might encounter. Let's take a look at Global Imagery for the saddle between Mount Powell and Peak C.
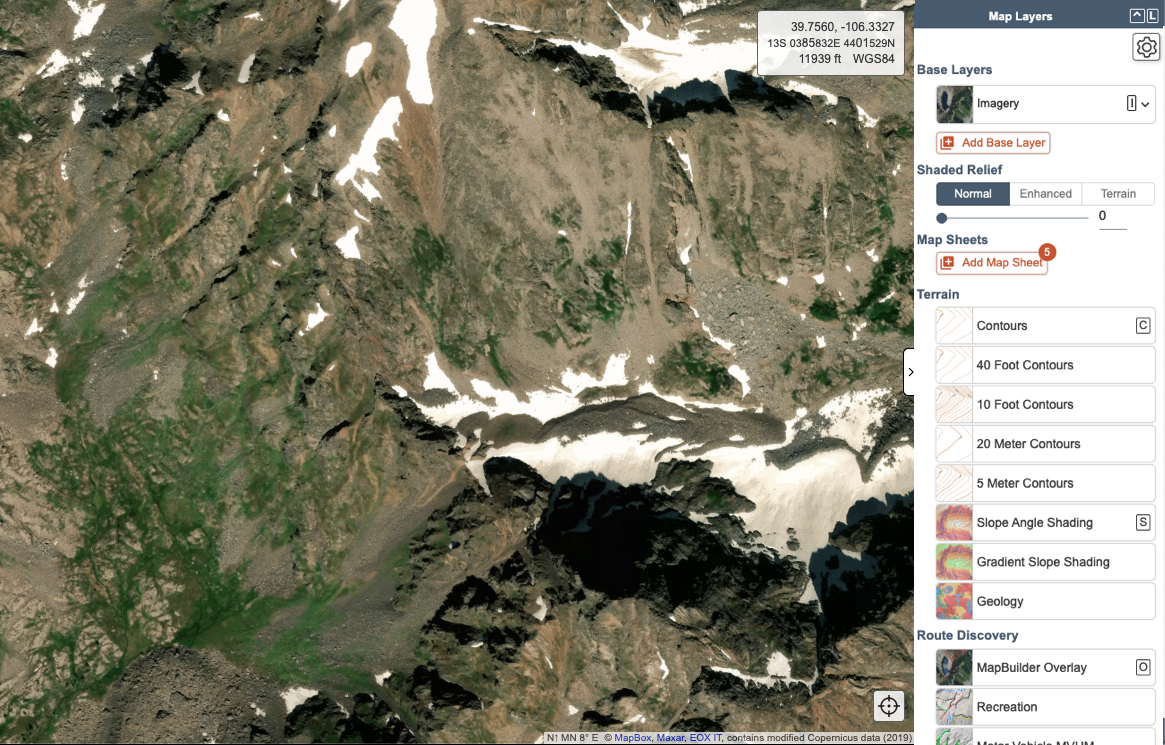
Looking at this imagery, you would know that you need to prepare for rocky and loose terrain on the climb up to the saddle. While the MapBuilder Topo layer shows a climber's trail, you would want to be ready for scree and probably some scrambling.
Don't be afraid to switch between base layers early and often. Checking out what other base layers have to offer can allow you to gain a more thorough understanding of the area that you are exploring. It can also help increase your chances of success on your next adventure or mission.

Changing Base Layers in the Mobile App
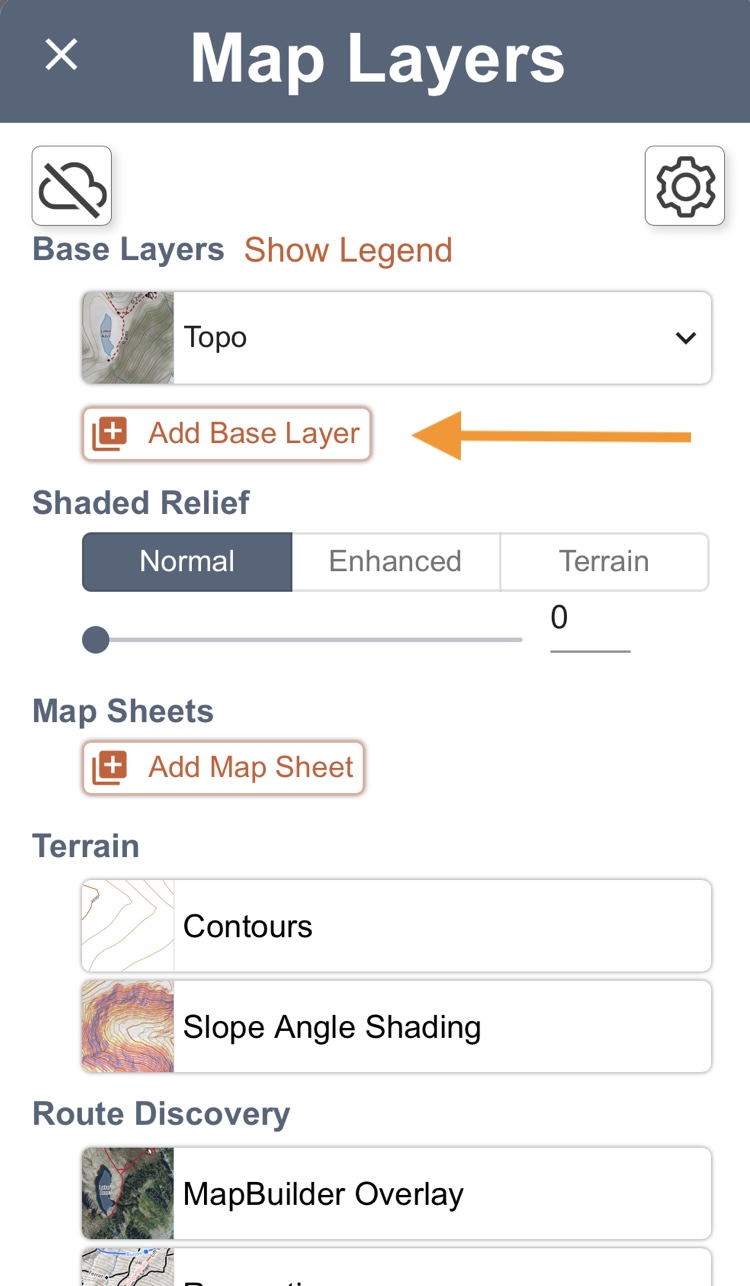
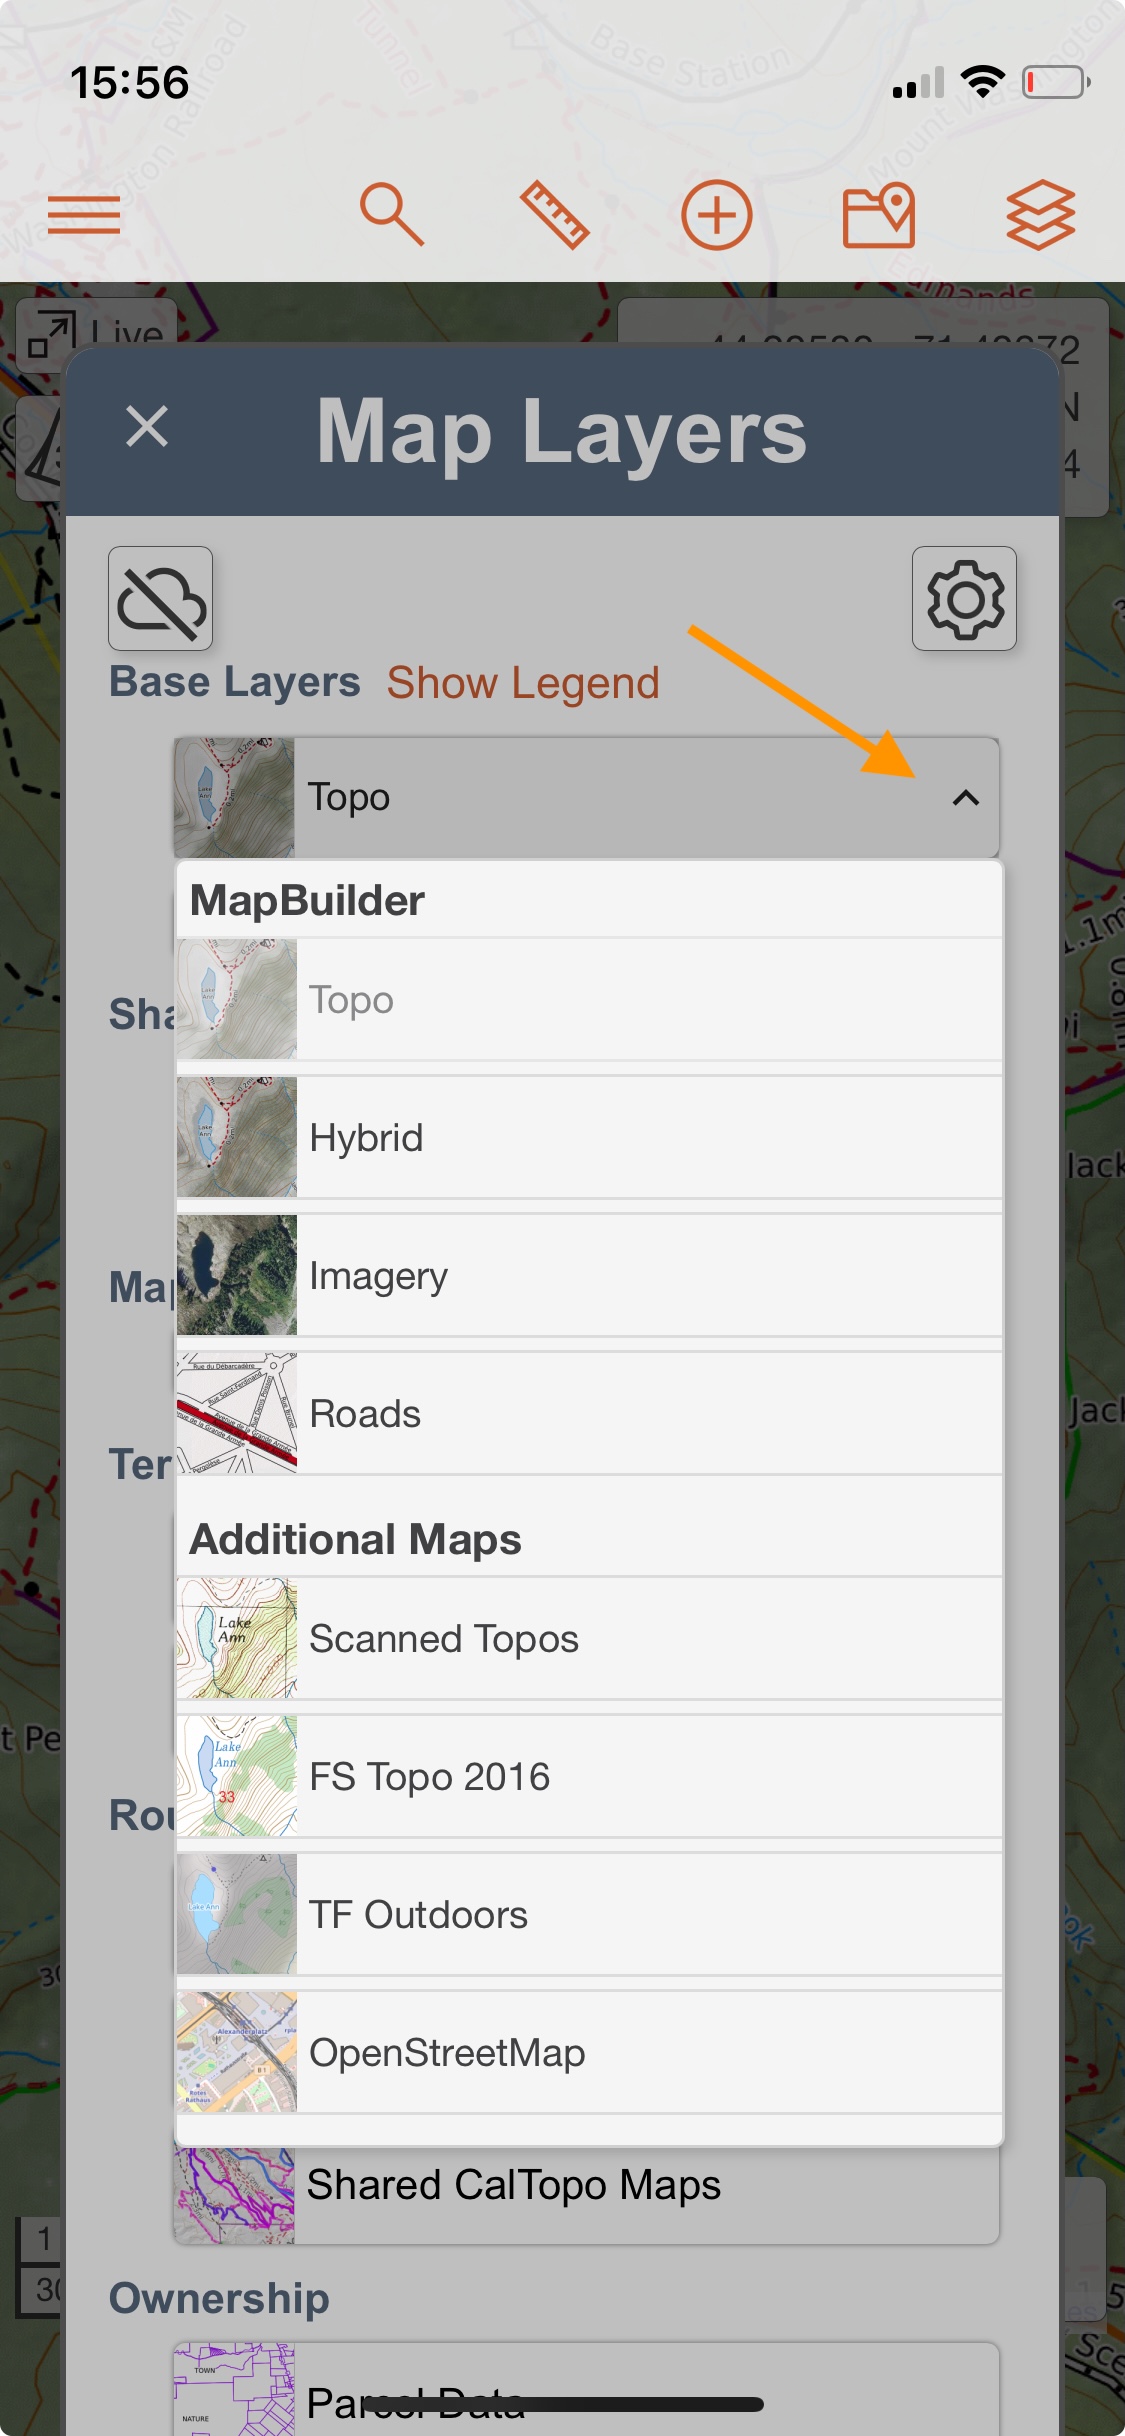
Click the map layers icon in the upper right hand corner of the map viewer. Then click the drop down menu under Base Layers to see all available base layers for mobile (keep in mind that not all base layers are available on mobile). Click the one you wish to display and then return to the map viewer to view it.
Stacking Layers
Oftentimes one base layer just doesn't cut it. You may want to use more than one layer to compare data or enhance a particular layer. In this lesson we will cover how you can stack your own combinations of layers for an even more customized experience!
Stacking your own combinations of layers
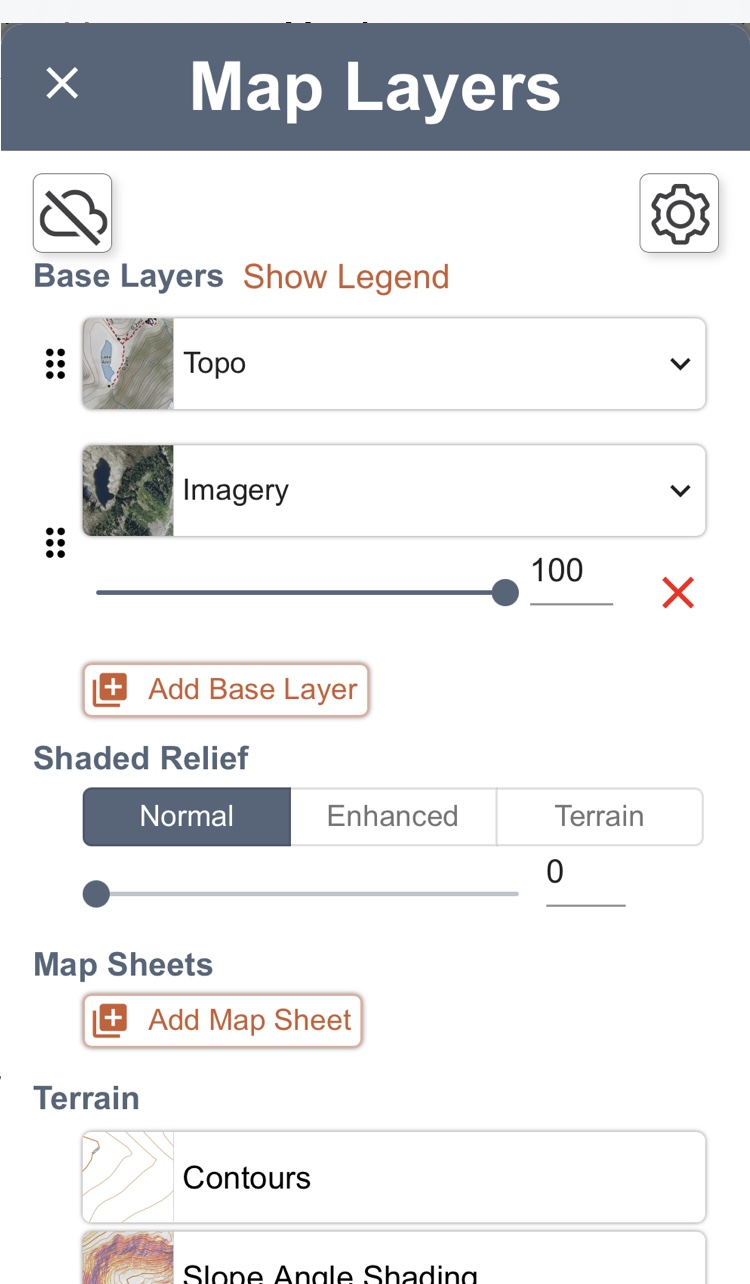
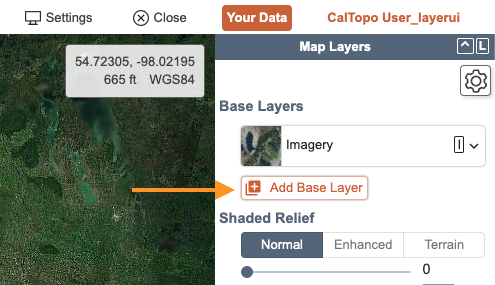
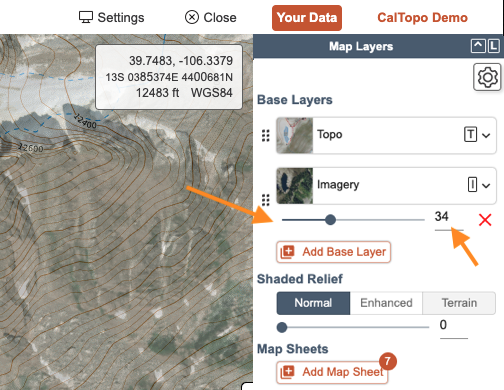
You can stack additional layers on top of the base layer you selected by clicking on + Stack Base Layer in the Map Layers side bar on the right hand side of the map viewer. Click the down arrow to open the drop down layer menu and then select the base layer you wish to stack.
The selected layer will now appear below the previous layer in the Map Layers menu and the opacity will be set to 100% by default. Either manually enter or toggle the slider to the desired opacity.
Why stack base layers?
There are a number of reasons you may want to stack base layers. Let's take a look at a couple of these reasons:
You may want to stack base layers in order to compare different base layers. For example, you could stack Sentinel satellite imagery on top of MapBuilder Topo and set the opacity to 35% in order to see where the snow line is with a topographic map as reference. This would be very helpful if you wanted an idea of snow coverage in the mountains during the spring or fall.
You might want to add something to a layer that it did not previously have. For example, you can add shaded relief to any topographic map. You could stack Enhanced Shaded Relief at 30% on top of the Forest Service 2016 layer to make it easier to distinguish terrain features such as ridges, valleys and plateaus.
It can also be helpful to keep layers in the "queue" so you can reference them as needed. For example, you may plan your route on a USGS map but intermittently reference aerial imagery, such as NAIP, to learn about the terrain you are going to be moving through. You could stack NAIP on top of the USGS layer and set the opacity at 0%- essentially turning it off- and then increase the opacity when you need to reference it.
Those are just some of the reasons you might want to stack base layers. Don't be afraid to stack as many or as few base layers as you want to learn as much as you can about the area you are exploring!
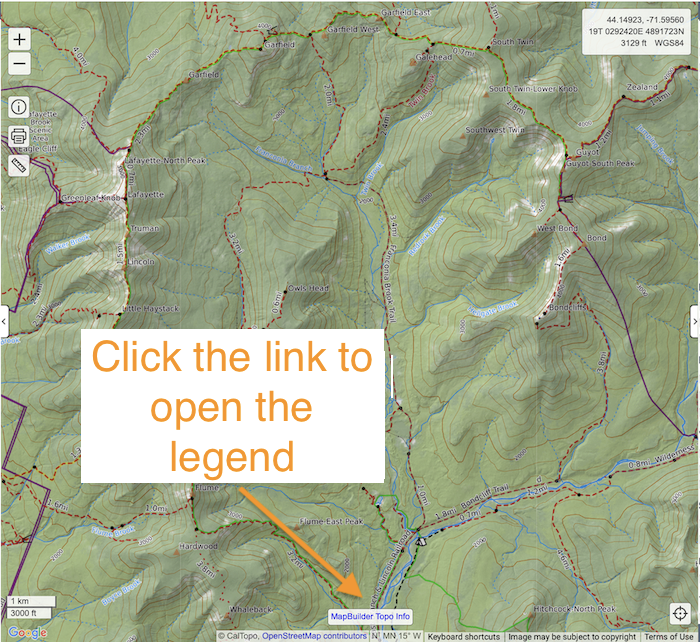
Legends
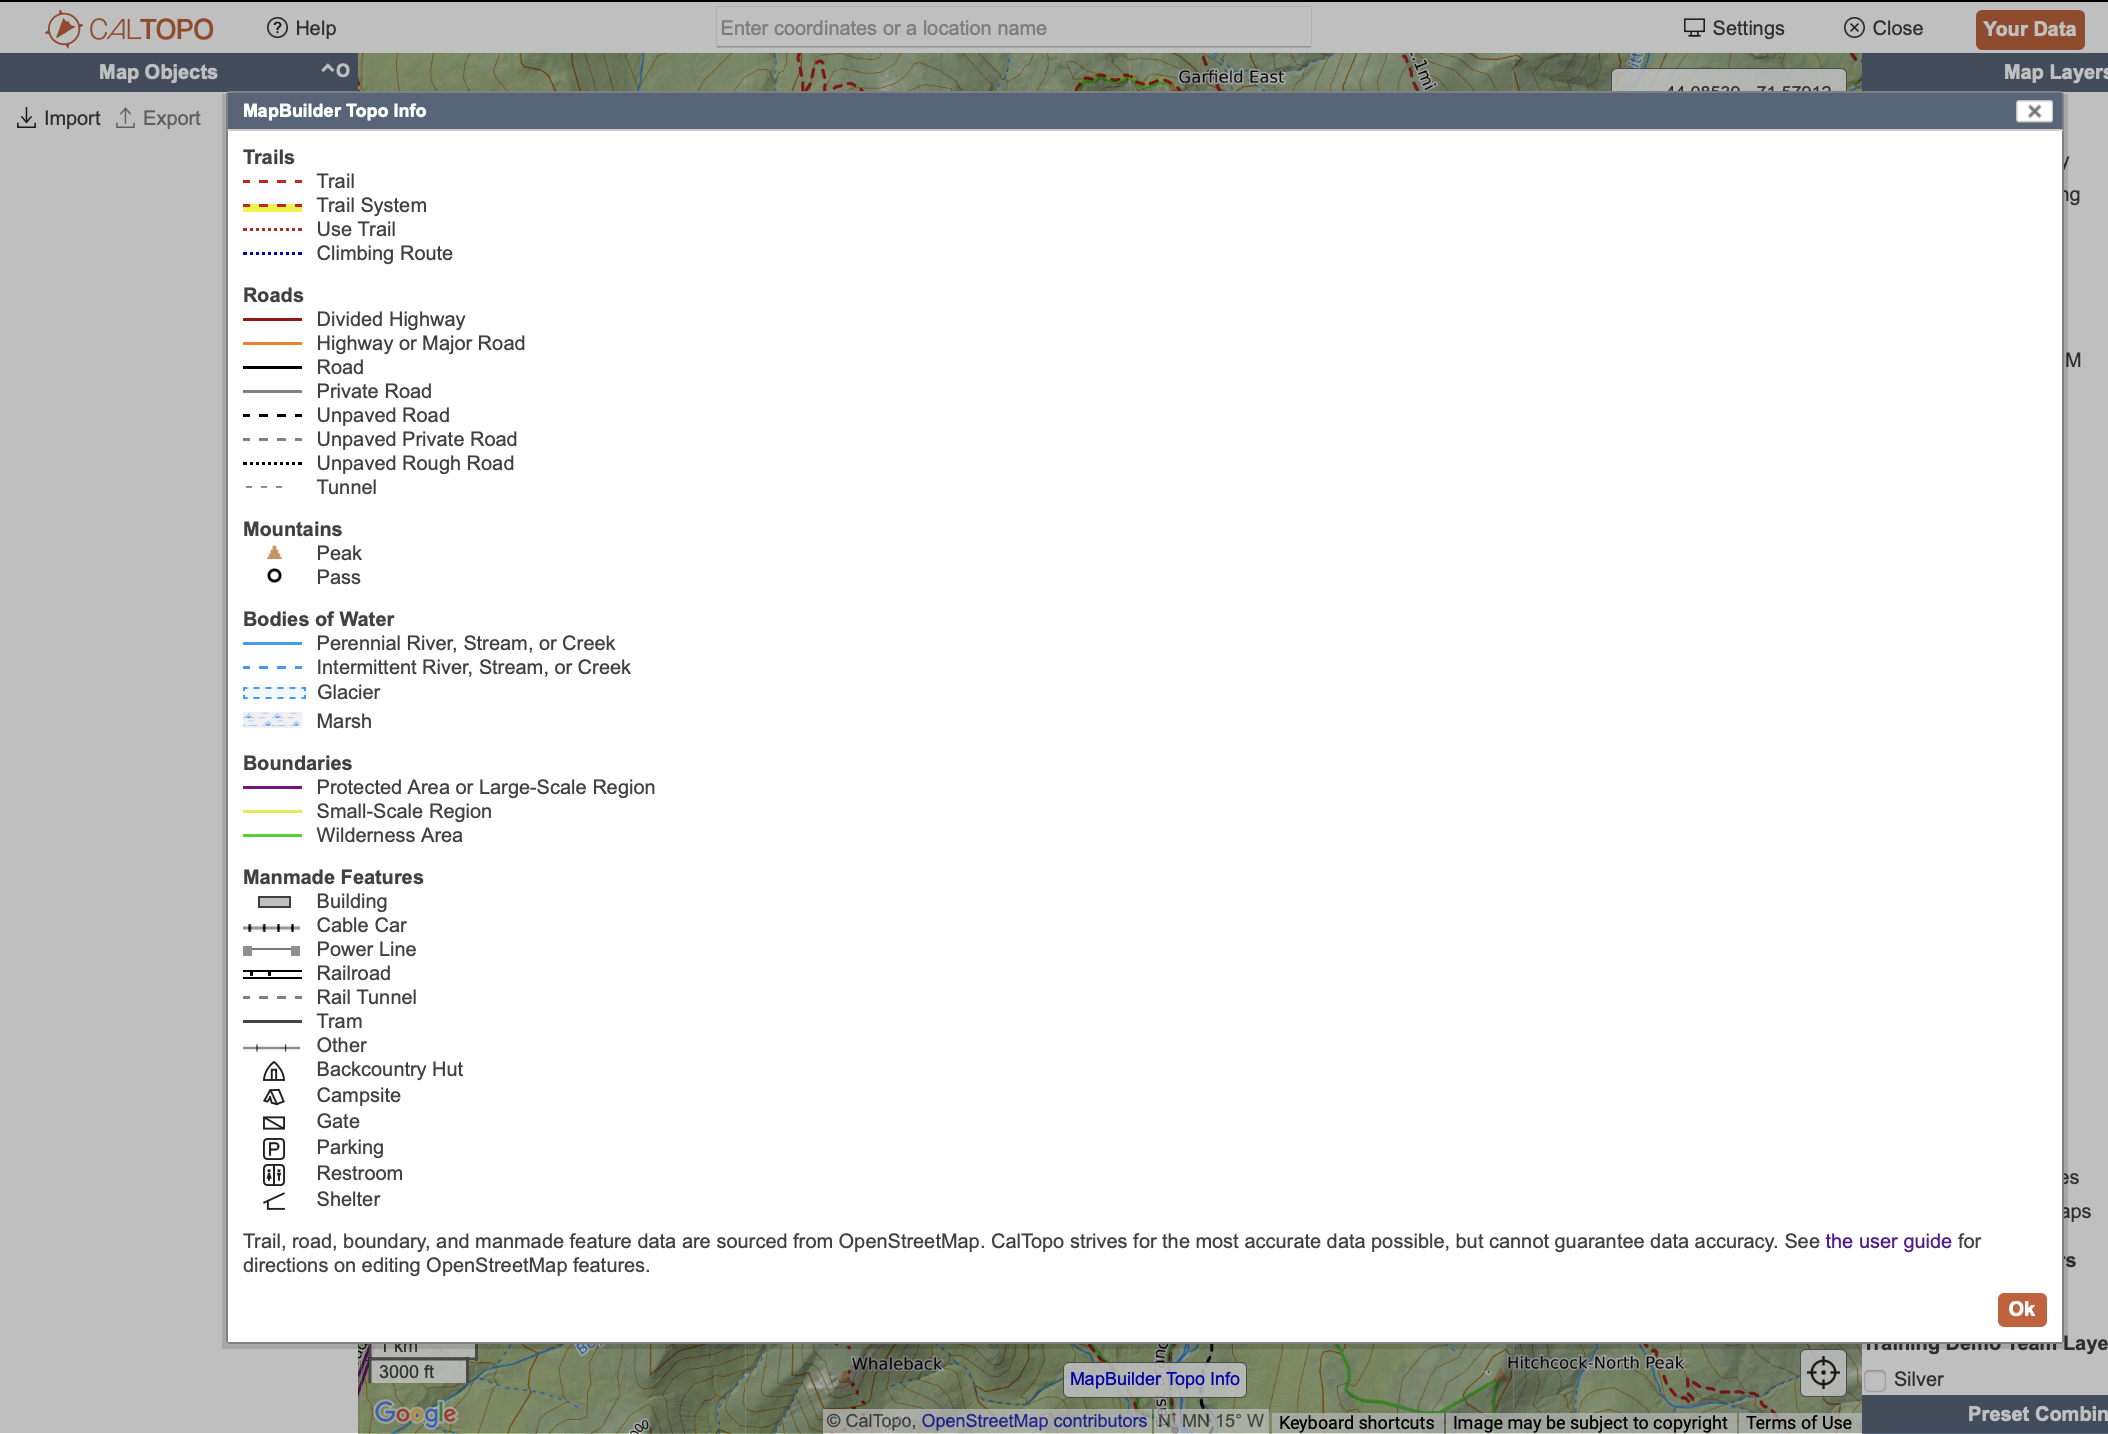
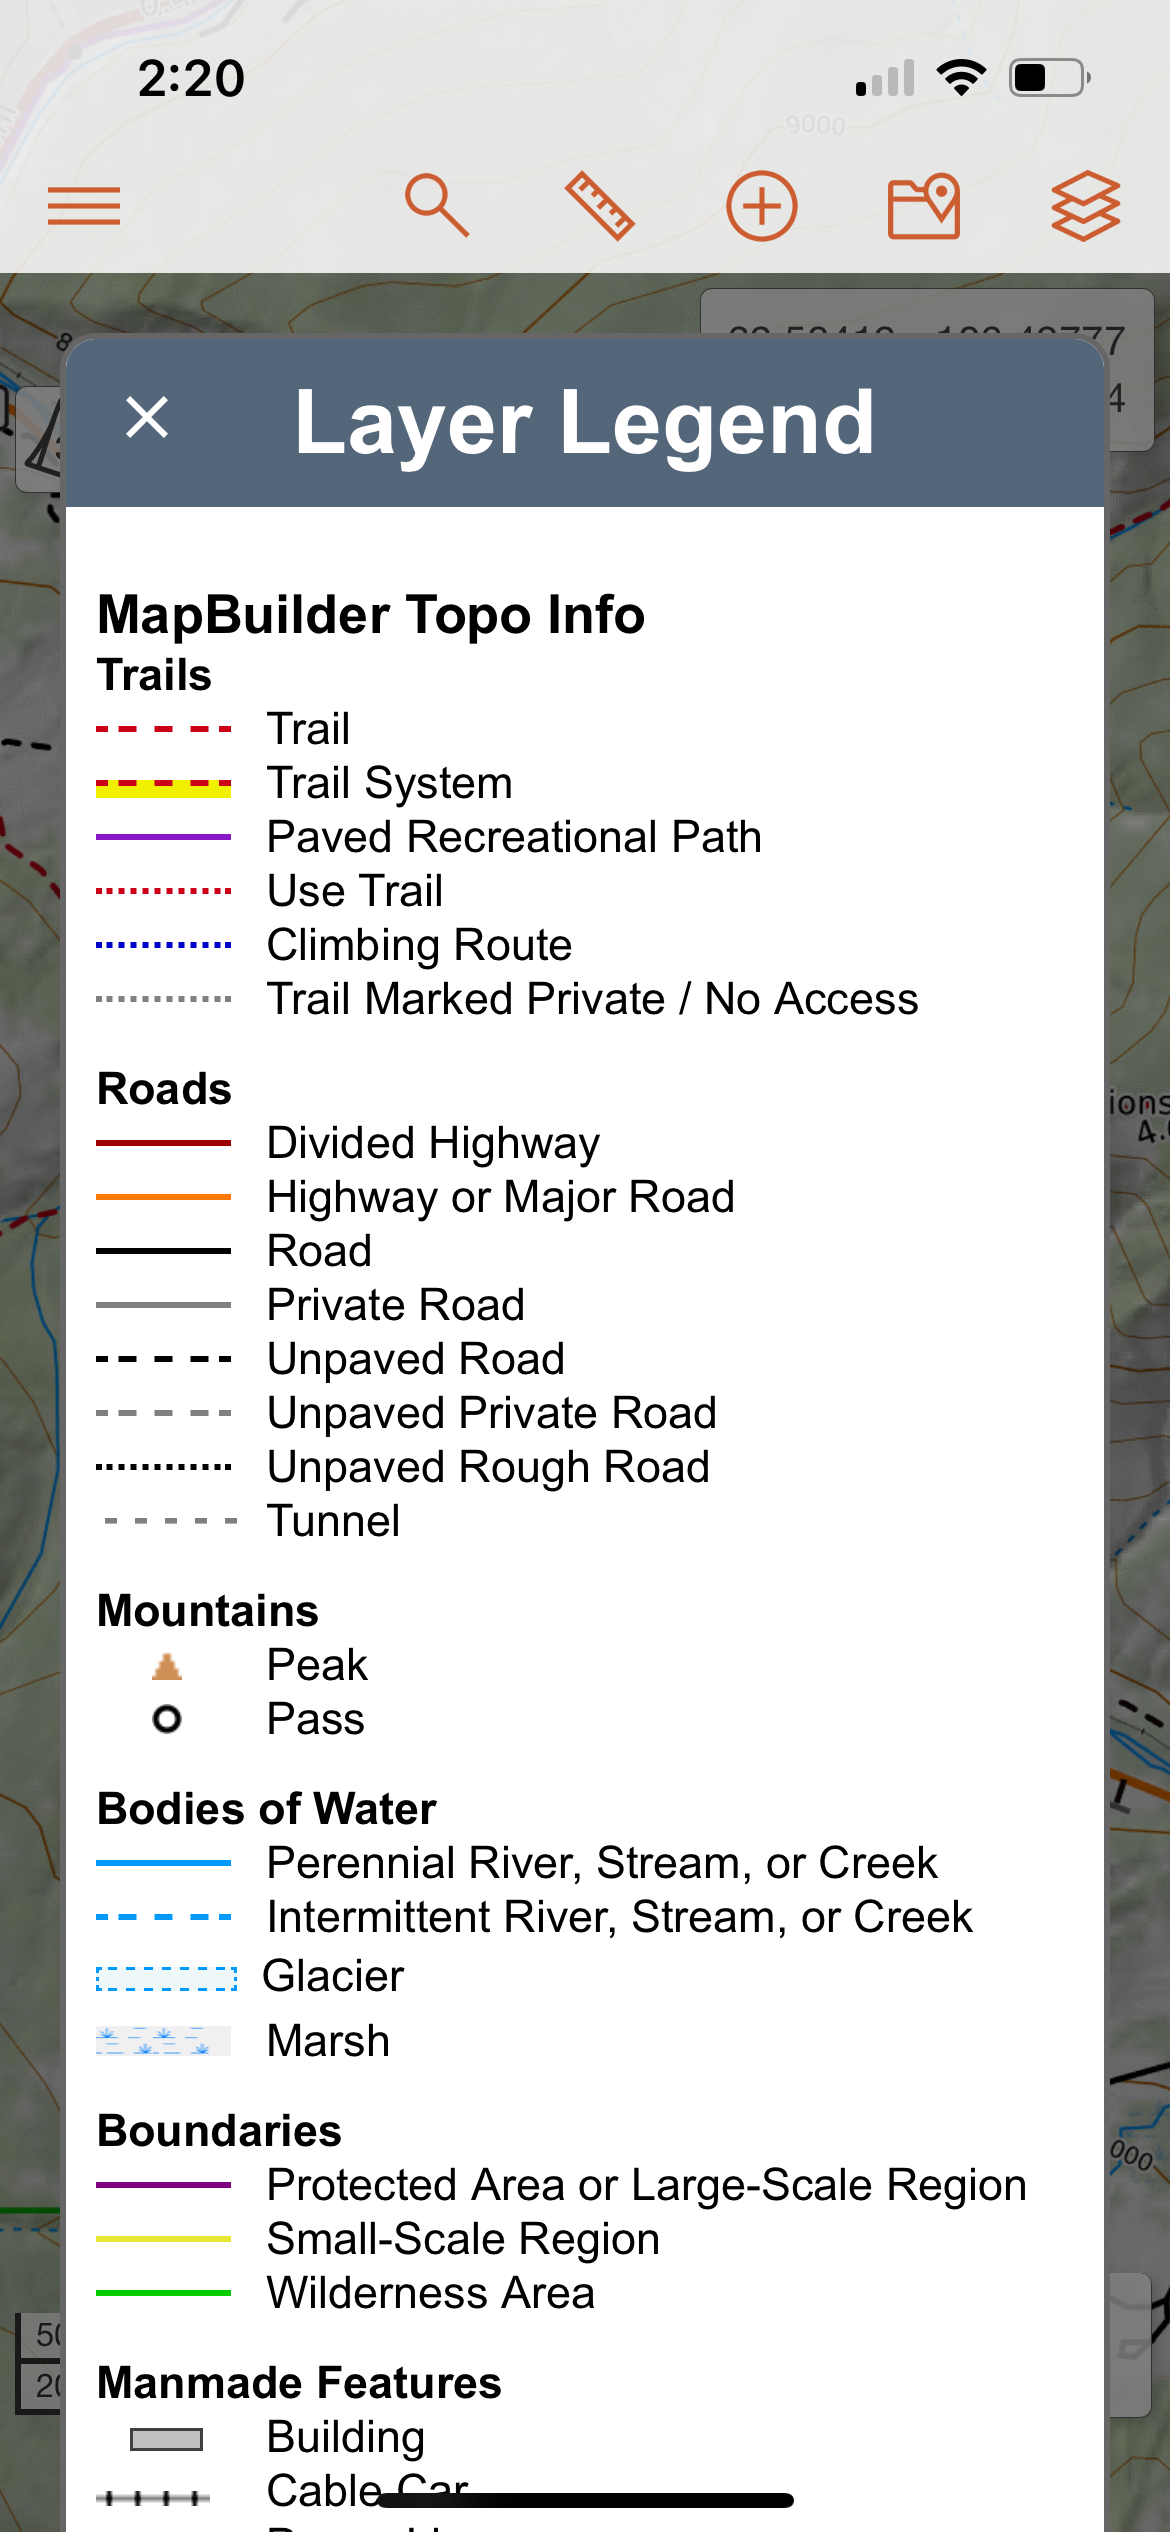
Map legends can be opened for the MapBuilder Topo and MapBuilder Hybrid base layers. The legend link can be found on the web at the bottom of the map viewer. When you click the link, a box will open with the legend. If you have a number of stacked base layers with legends or map overlays with legends checked, you will see all the legends listed at the base of the map viewer.
Currently there are only legends available for MapBuilder Topo and MapBuilder Hybrid at this time. However some legends are available outside CalTopo. For example Scanned Topos in the USA and the Forest Service layers have the USGS/USFS Legend that you can refer to.
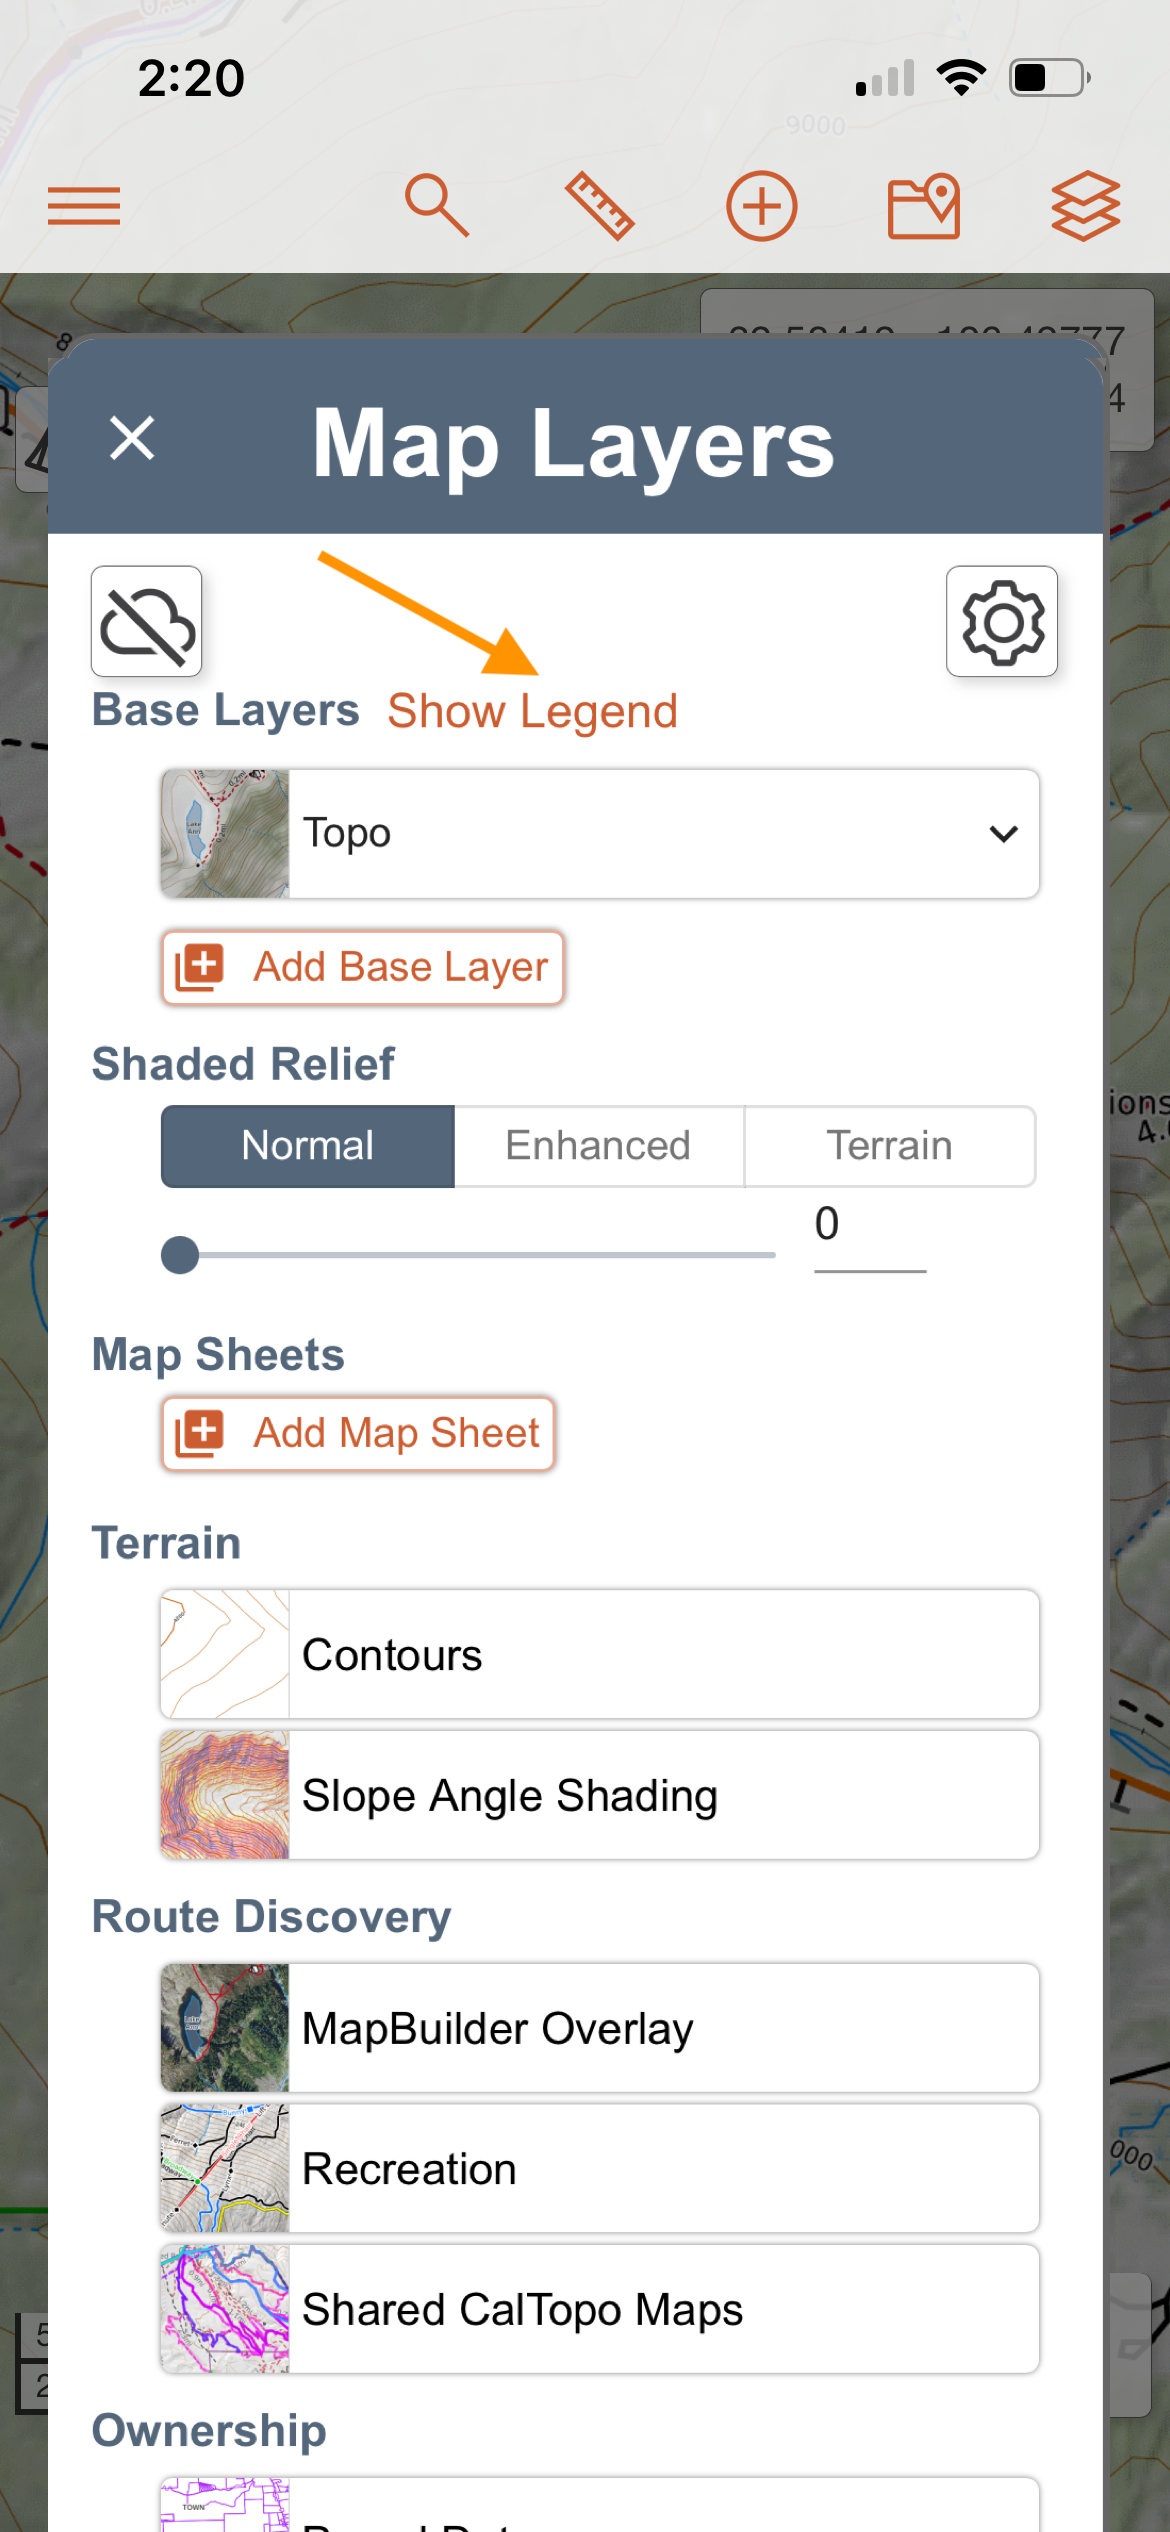
Opening Legends in the Mobile App
You will see a "Show Legend" link on the top right of the map layers dialog whenever there is a base layer or overlay selected that has a legend. Tap that link to open the Layer Legend dialog.
If there are multiple base layers or overlays selected that have legends, they will be listed in the Layer Legend dialog. Scroll to find the legend that you need.
Setting Default Layers on a Saved Map
You can control what layers and overlays are displayed when you open a saved map. Once you have chosen the base layers, opacity, and overlays you like, you can set those layer to be the default when the map opens. This default will be how you and others you have shared the map with will see the map when it opens. Even though you have set a default you and anyone you have shared the map with can still adjust or change the layers to work on the map. However, the next time you open the map it will open with the default.
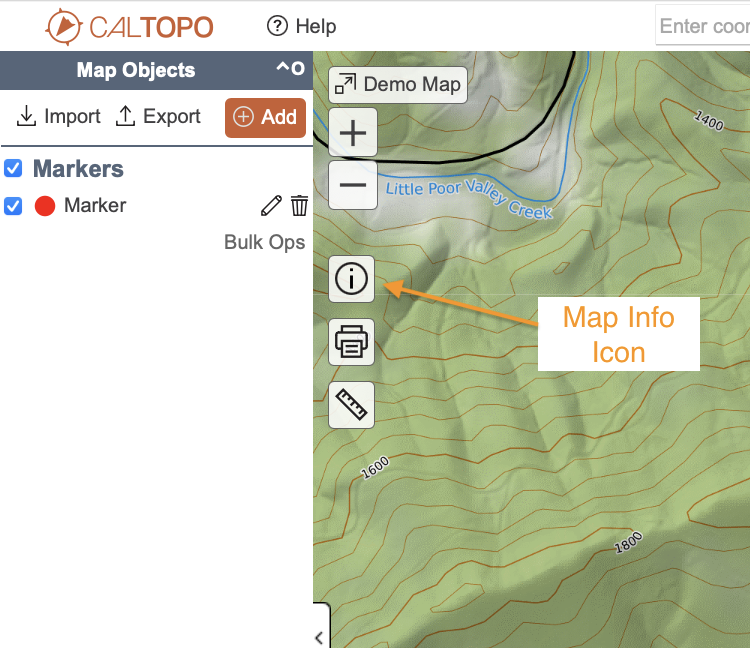
If in the future you wish to change the default you can do that using the same process you used to set the default originally. Before you set or re-set the default you have to have the layers chosen so the map is looking the way you want it to open. Once you have it the way you want it click the map information icon, that will open a dialog and in that dialog you will see a checkbox with the sentence "Update this map's default display to use the currently selected set of layers". That box will always appear unchecked, if you check that box and then click OK the layers that are currently on will be the default.

Limitations of layers
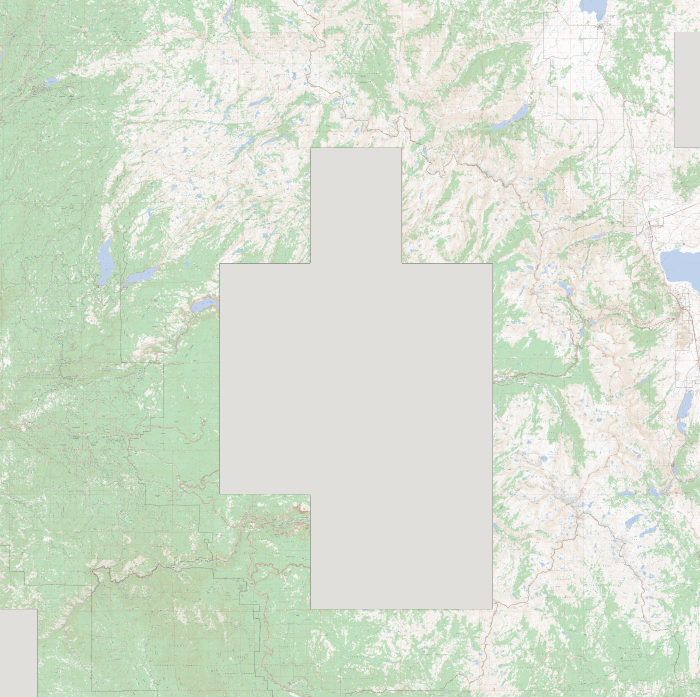
It is important to remember that there are limitations for some layers. First, not all layers cover all areas. For example, the Forest Service layers don't cover areas that aren't managed by the US Forest Service. The image below shows Yosemite National Park, which is managed by the National Park Service, as seen on the Forest Service layer.
Some layers can't be printed due to licensing restrictions. For example, Google's satellite layer can't be printed for these reasons. However there is usually a good substitute; in this case, NAIP or Global Imagery are your best options if you want to print aerial imagery.
And finally, not all layers are available to download for offline use. For example, you can't download OpenStreetMap or TF Outdoors for offline use.
While there are limitations to some layers, the base layers available on CalTopo have been carefully selected to complement and contrast each other to provide a wide breadth of information.
Stacking Layers in the Mobile App
You can easily stack base layers on the mobile app as well. Click the map layers icon in the upper right hand corner of the map viewer. Click + Stack Base Layer and a new base layers field will be added.
Use the base layer dropdown menu to select the base layer you wish to stack and adjust the opacity to your desired value using the opacity dropdown menu.