Folders, Bulk Ops, and Data Management in CalTopo
in this lesson
When working with large maps with lots of data added to them, it quickly becomes necessary to organize your map objects and change attributes of many objects at once. Here we will look at strategies available to help you manage your map data.
Topics on this Page:
- Why Use Folders
- Moving Objects Between Folders
- Folder and Label Visibility
- Bulk-Editing and Moving Objects, aka Bulk Ops
- Other Actions Using Bulk Ops: print maps, compare profiles, delete objects.
Why Use Folders
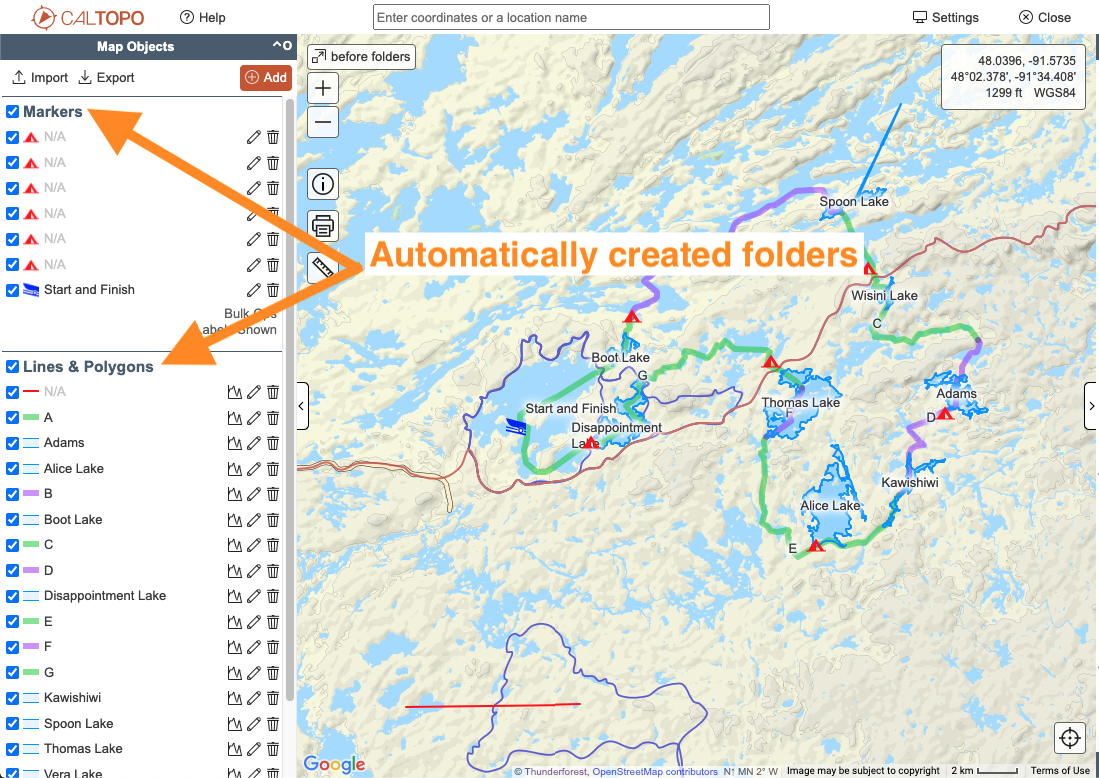
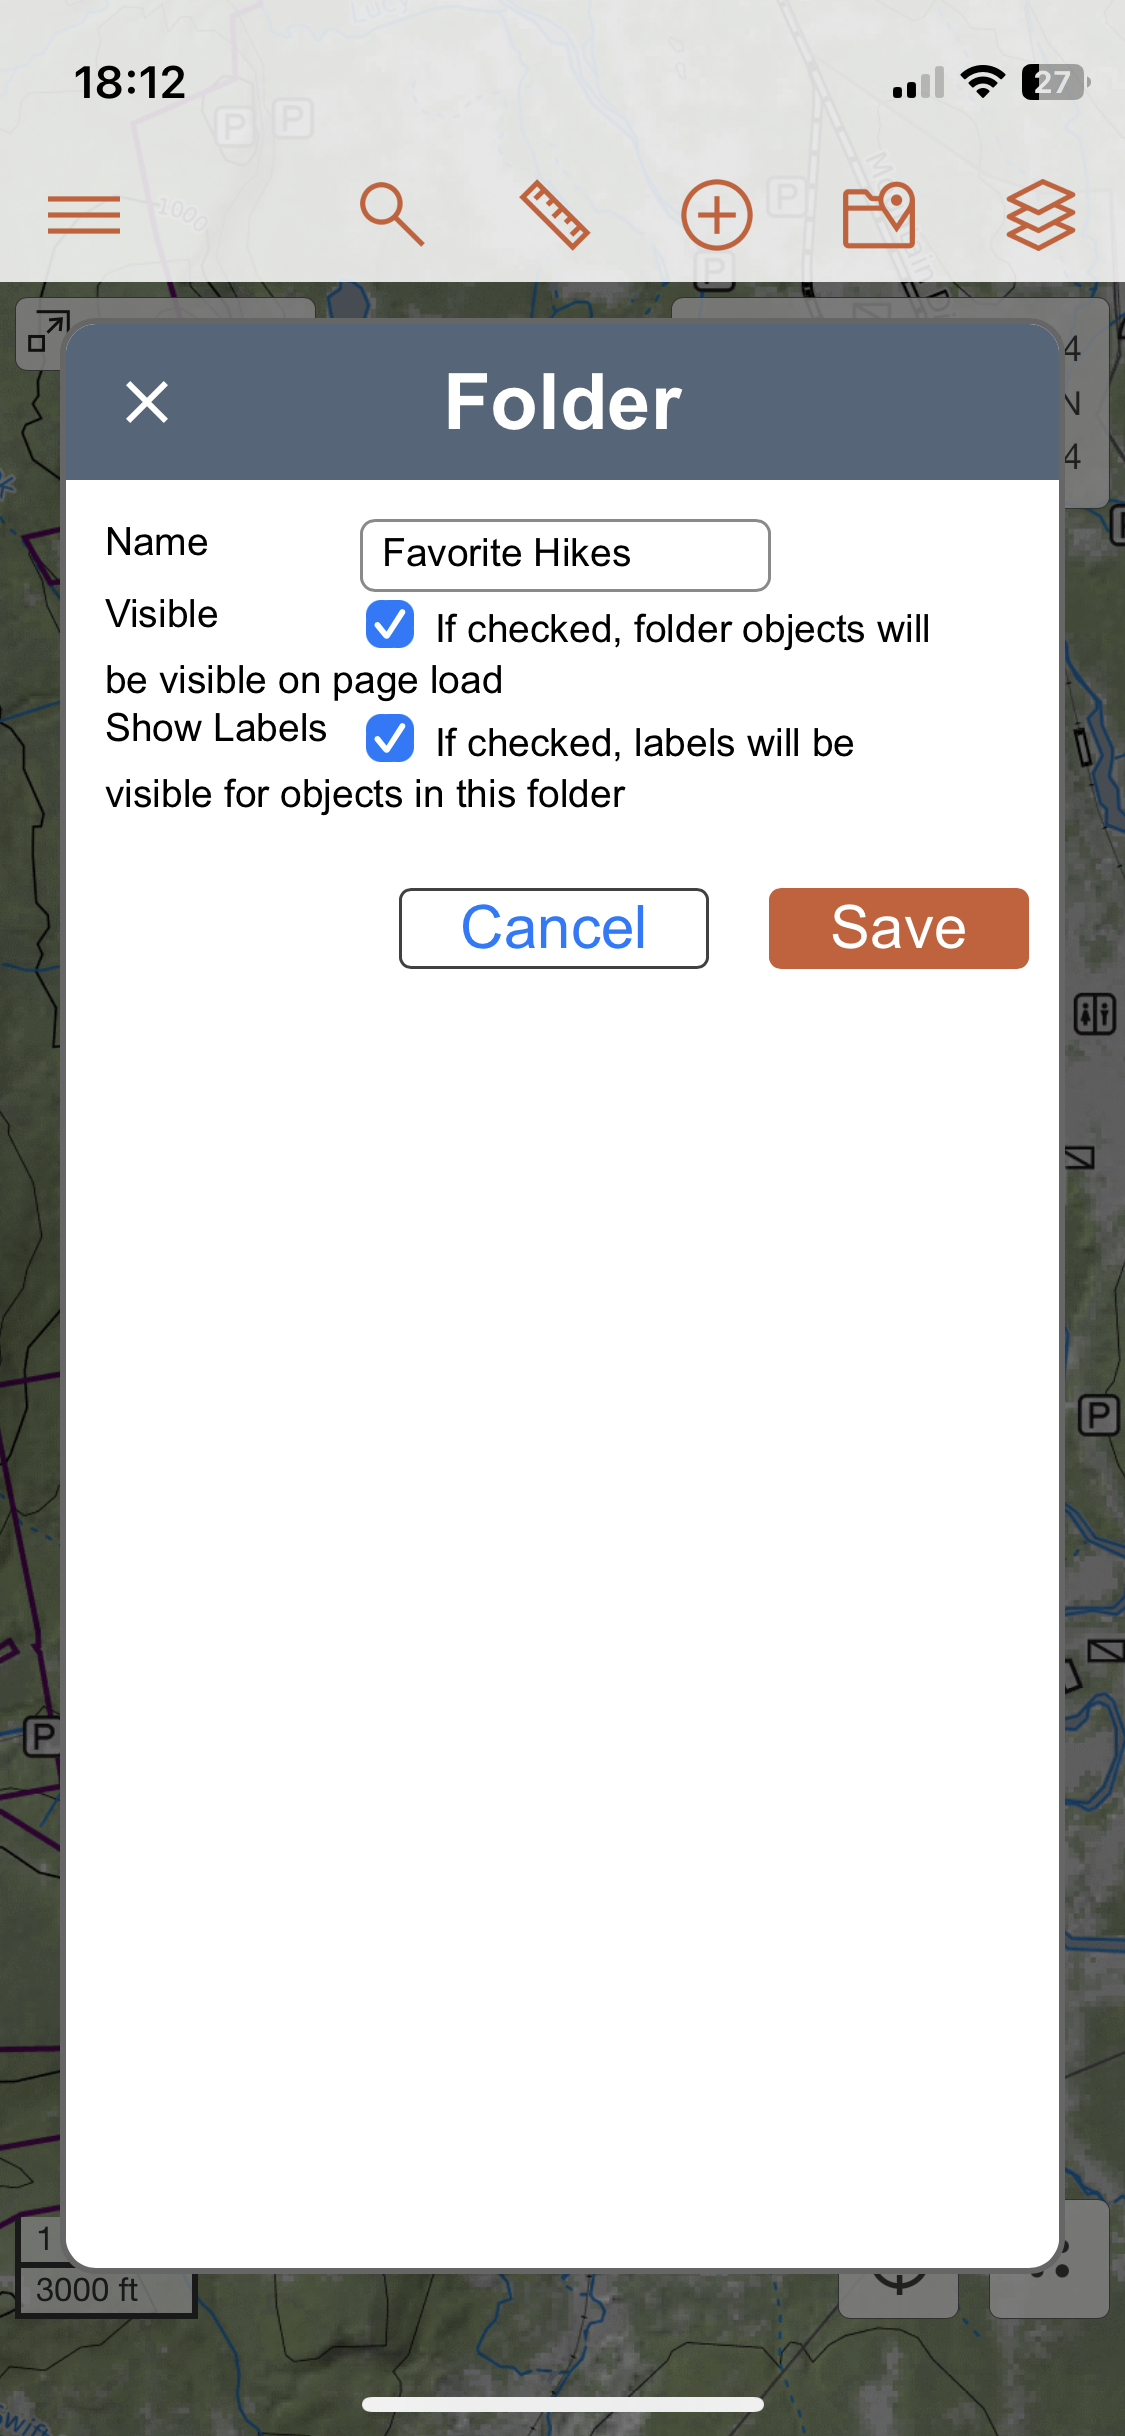
Folders are the primary organizing tool in CalTopo. When you add objects to the map, they initially appear in one of two folders: Markers, or Lines and Polygons. To add a new folder, use any of the Add Object menus and select Folder. Enter a title for the folder. In CalTopo, the box for loading on the map load is automatically checked. Leave it that way for now, and press OK to create the new folder. This folder will show up in the left hand side bar and will not have any objects inside it yet.
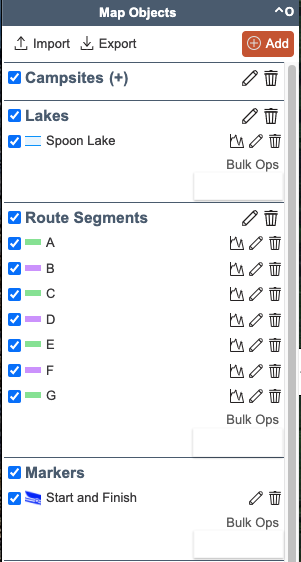
Here is an image of markers and lines and polygons organized in their native folders.

Moving Objects Between Folders
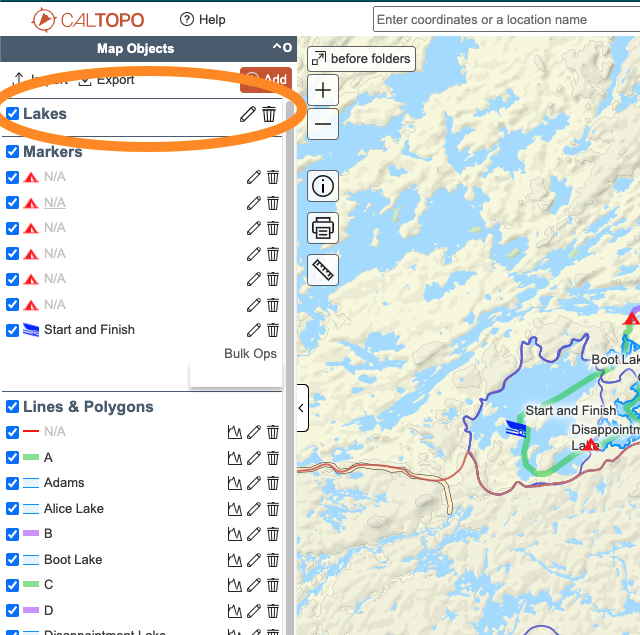
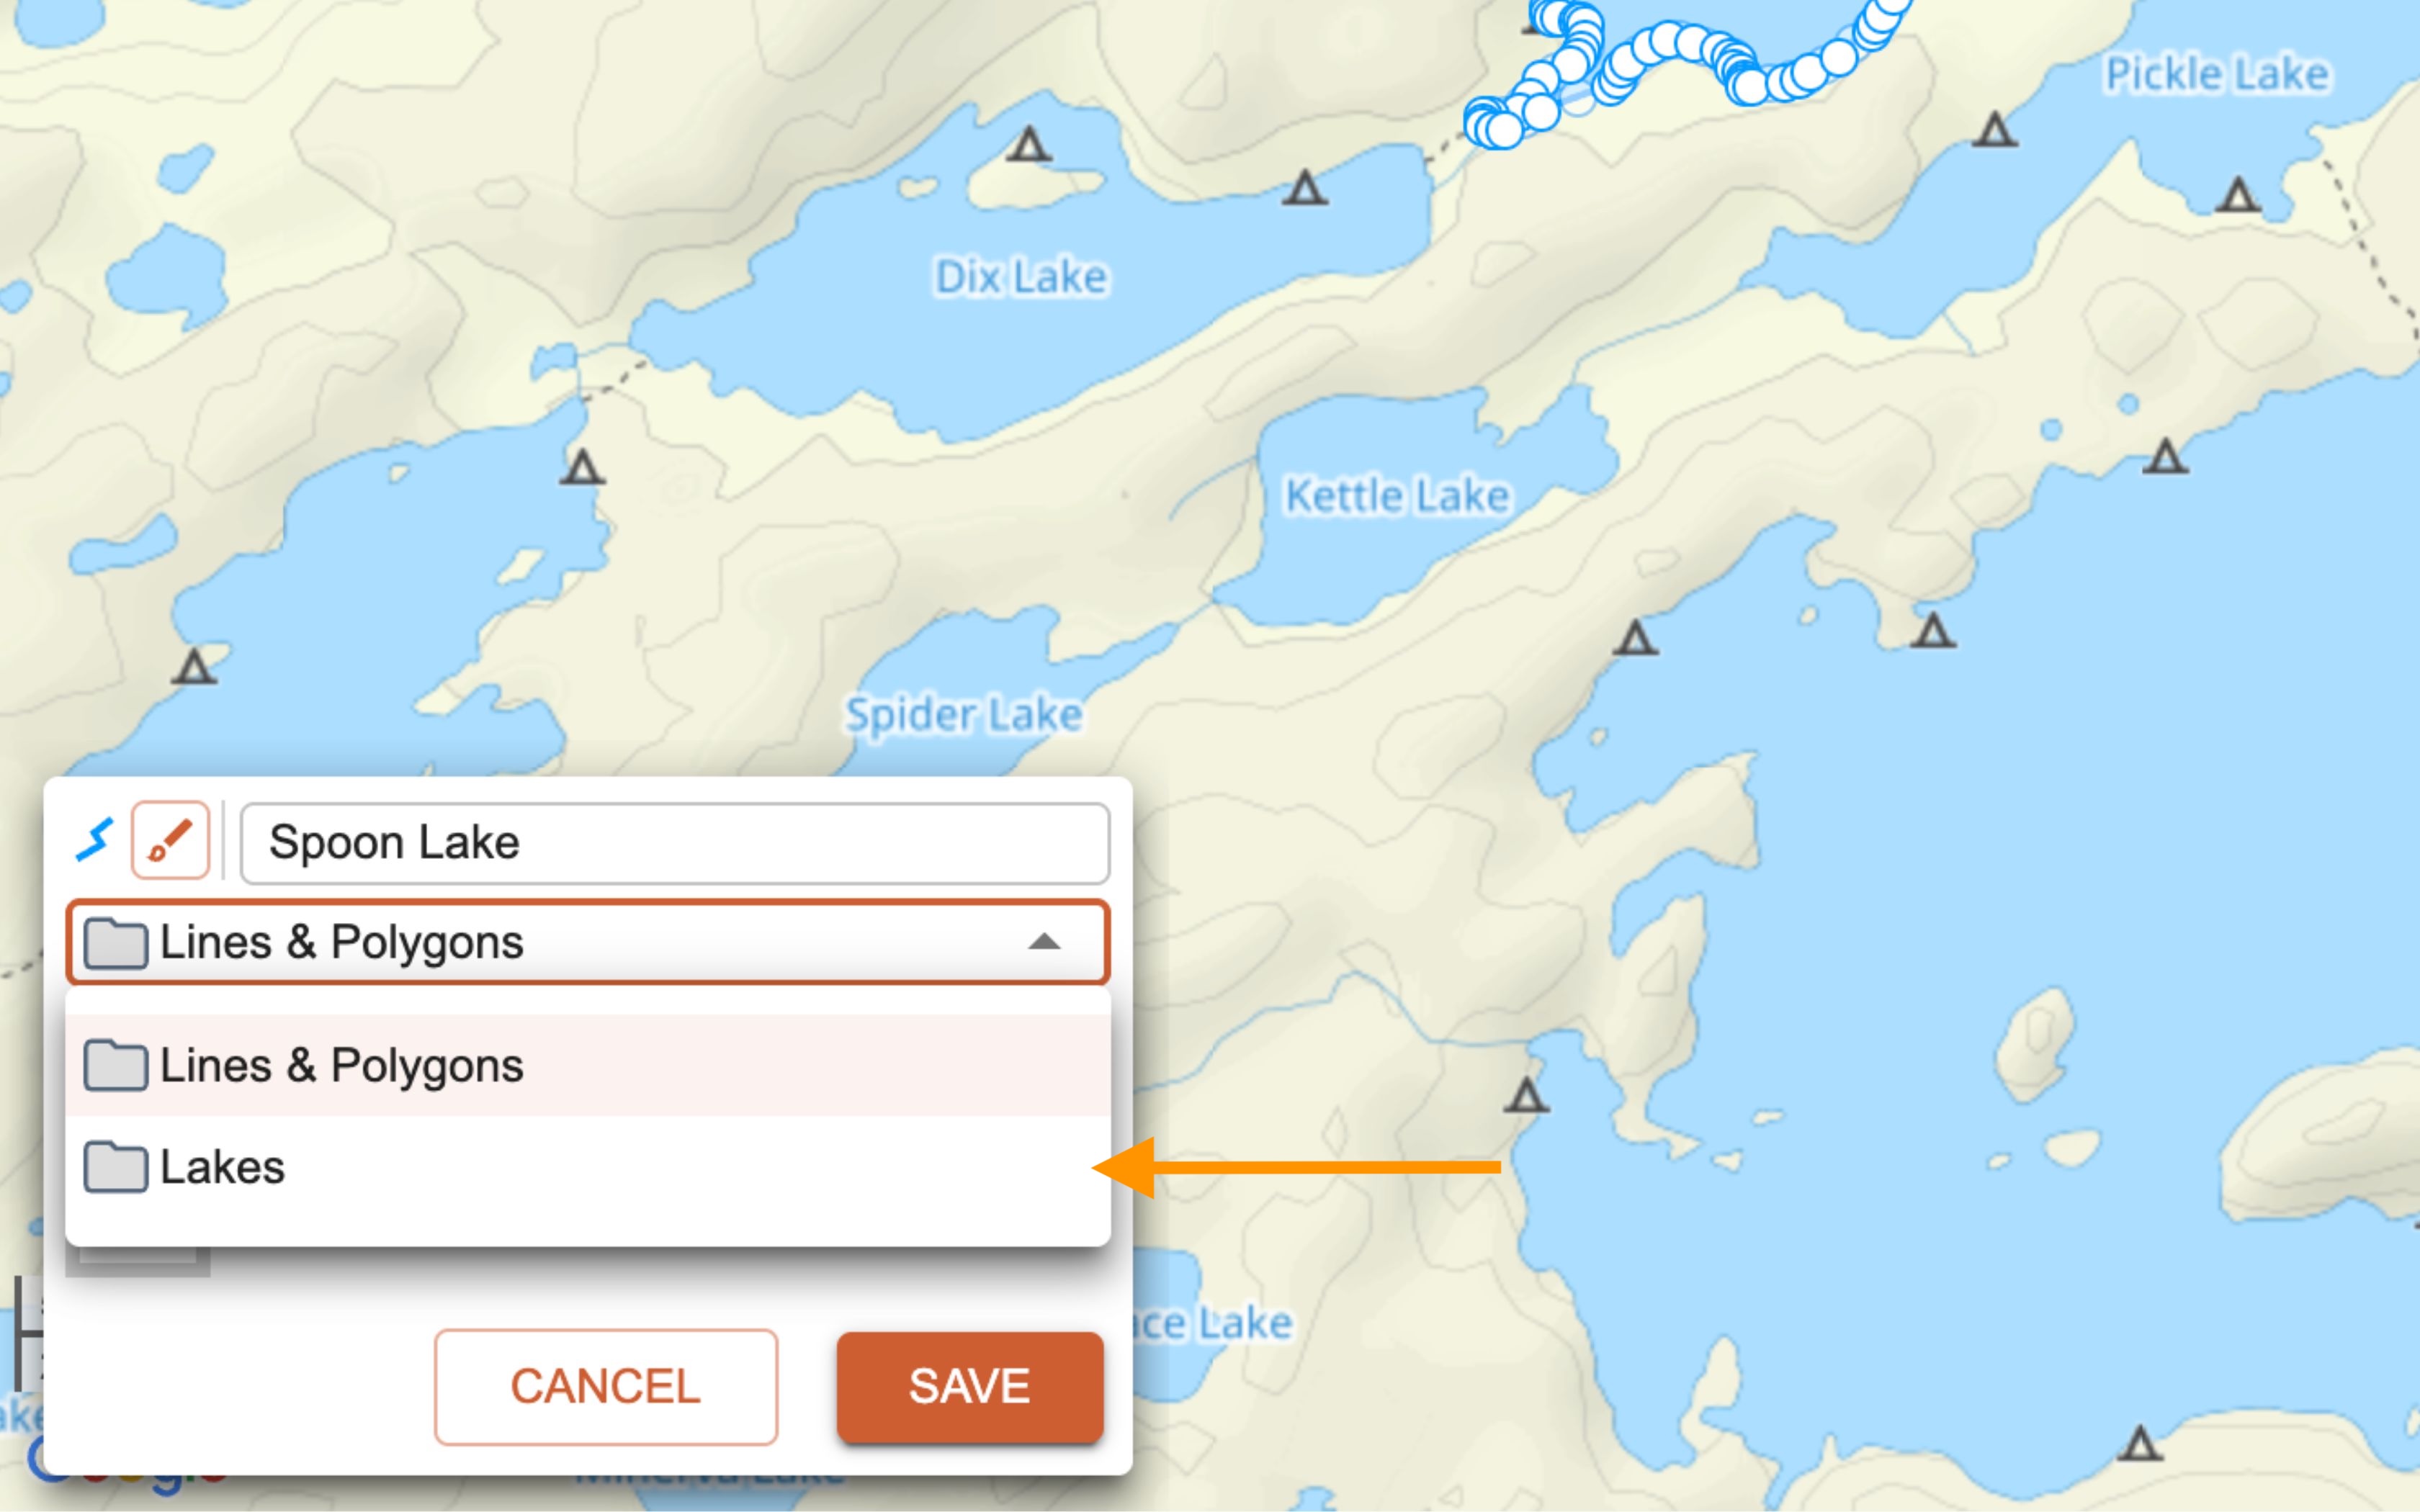
To move objects to a folder, you can edit objects individually or use Bulk Ops. While the initial Marker folder or Lines and Polygons folder only contain the type of object that is in the title, custom folders that you create can hold both markers and lines or polygons in the same folder. Open an existing object and look for the drop down “folder” menu. Your new folder is listed there. Select the new folder to move the item to, then hit OK to save the object. Now the object is listed in the new folder and no longer in its original folder. You can see the Lakes folder now displays in the folder drop down menu in the edit box for this object.
In this example, we want to move the campsite from the Lines and Polygons folder it was created into a new folder that I made called Lakes. We select Lakes from the folder menu in the object edit box, then hit Save and the object changes folders.
To move a lot of objects between folders at once, use Bulk Ops, covered below.
Folder and Label Visibility
Folder visibility can refer to the objects on the map or the list of map objects in the folder. You can collapse the folder and hide its contents in the map objects sidebar by clicking on the name of the folder. Repeating this for multiple folders will make it easier to see your folders list without all of the objects listed within the folders.
To change whether all the objects in a folder are displayed in the mapviewer, use the check box next to the folder title. This will quickly hide or unhide all the objects within that folder on the map.
You can create two defaults for your folder for when you open the map:
- You can choose whether the folder contents are visible on map open
- You can choose if the labels are displayed when the folder contents are visible.

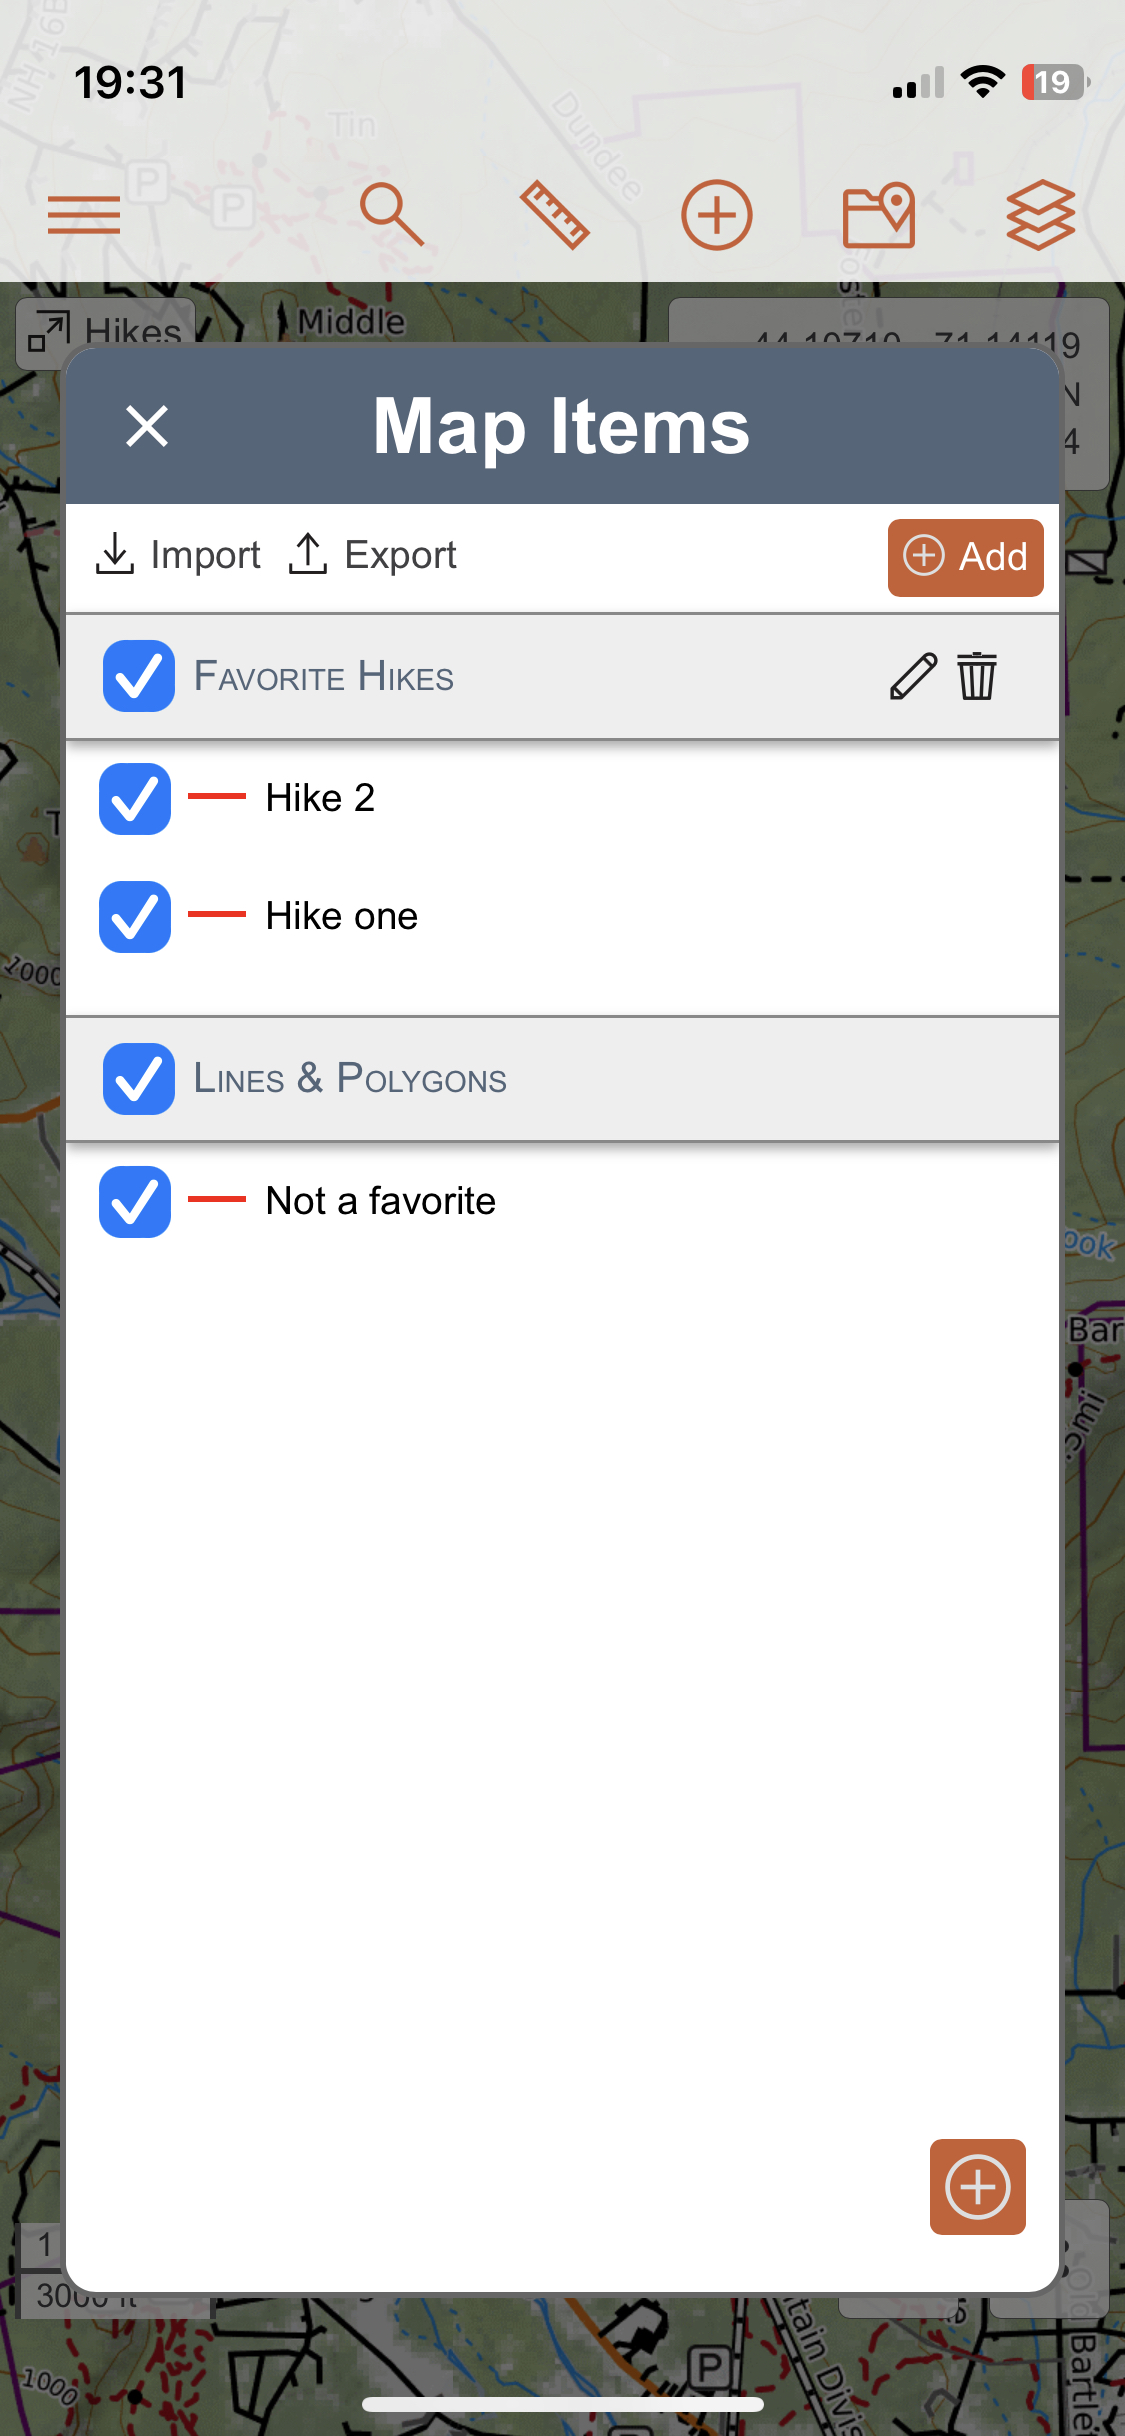
Folders in the Mobile App
In the mobile app, you create folder the same way as in the web program. Go to the objects menu, click the + Add Item button at the bottom of the screen, and choose Folder. Name your folder, then tap save.
You can now save objects to this folder, or move them to the folder one at a time by editing the object and changing the folder selection for that object. You can tap the pencil icon next to the folder to set the visibility when you open the map and set label visibility.
Bulk Ops
Bulk Operations (Bulk Ops) allows you to quickly change the attributes of many objects with one step instead of opening the edit dialogue for each object.
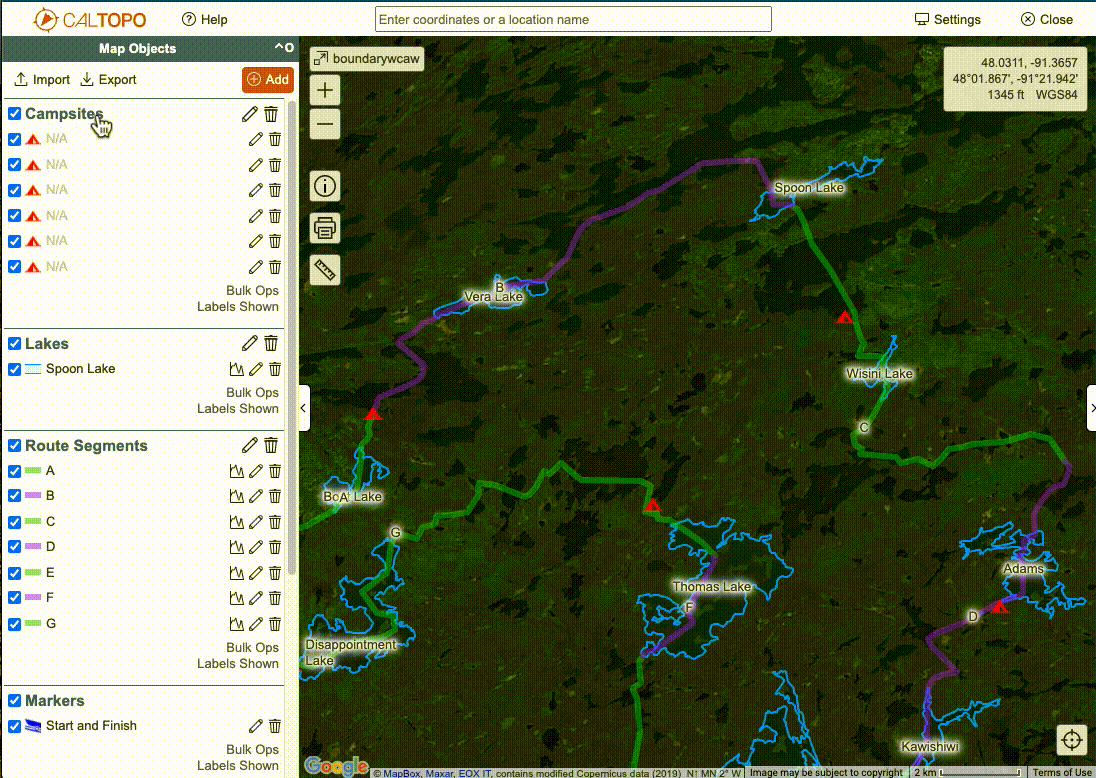
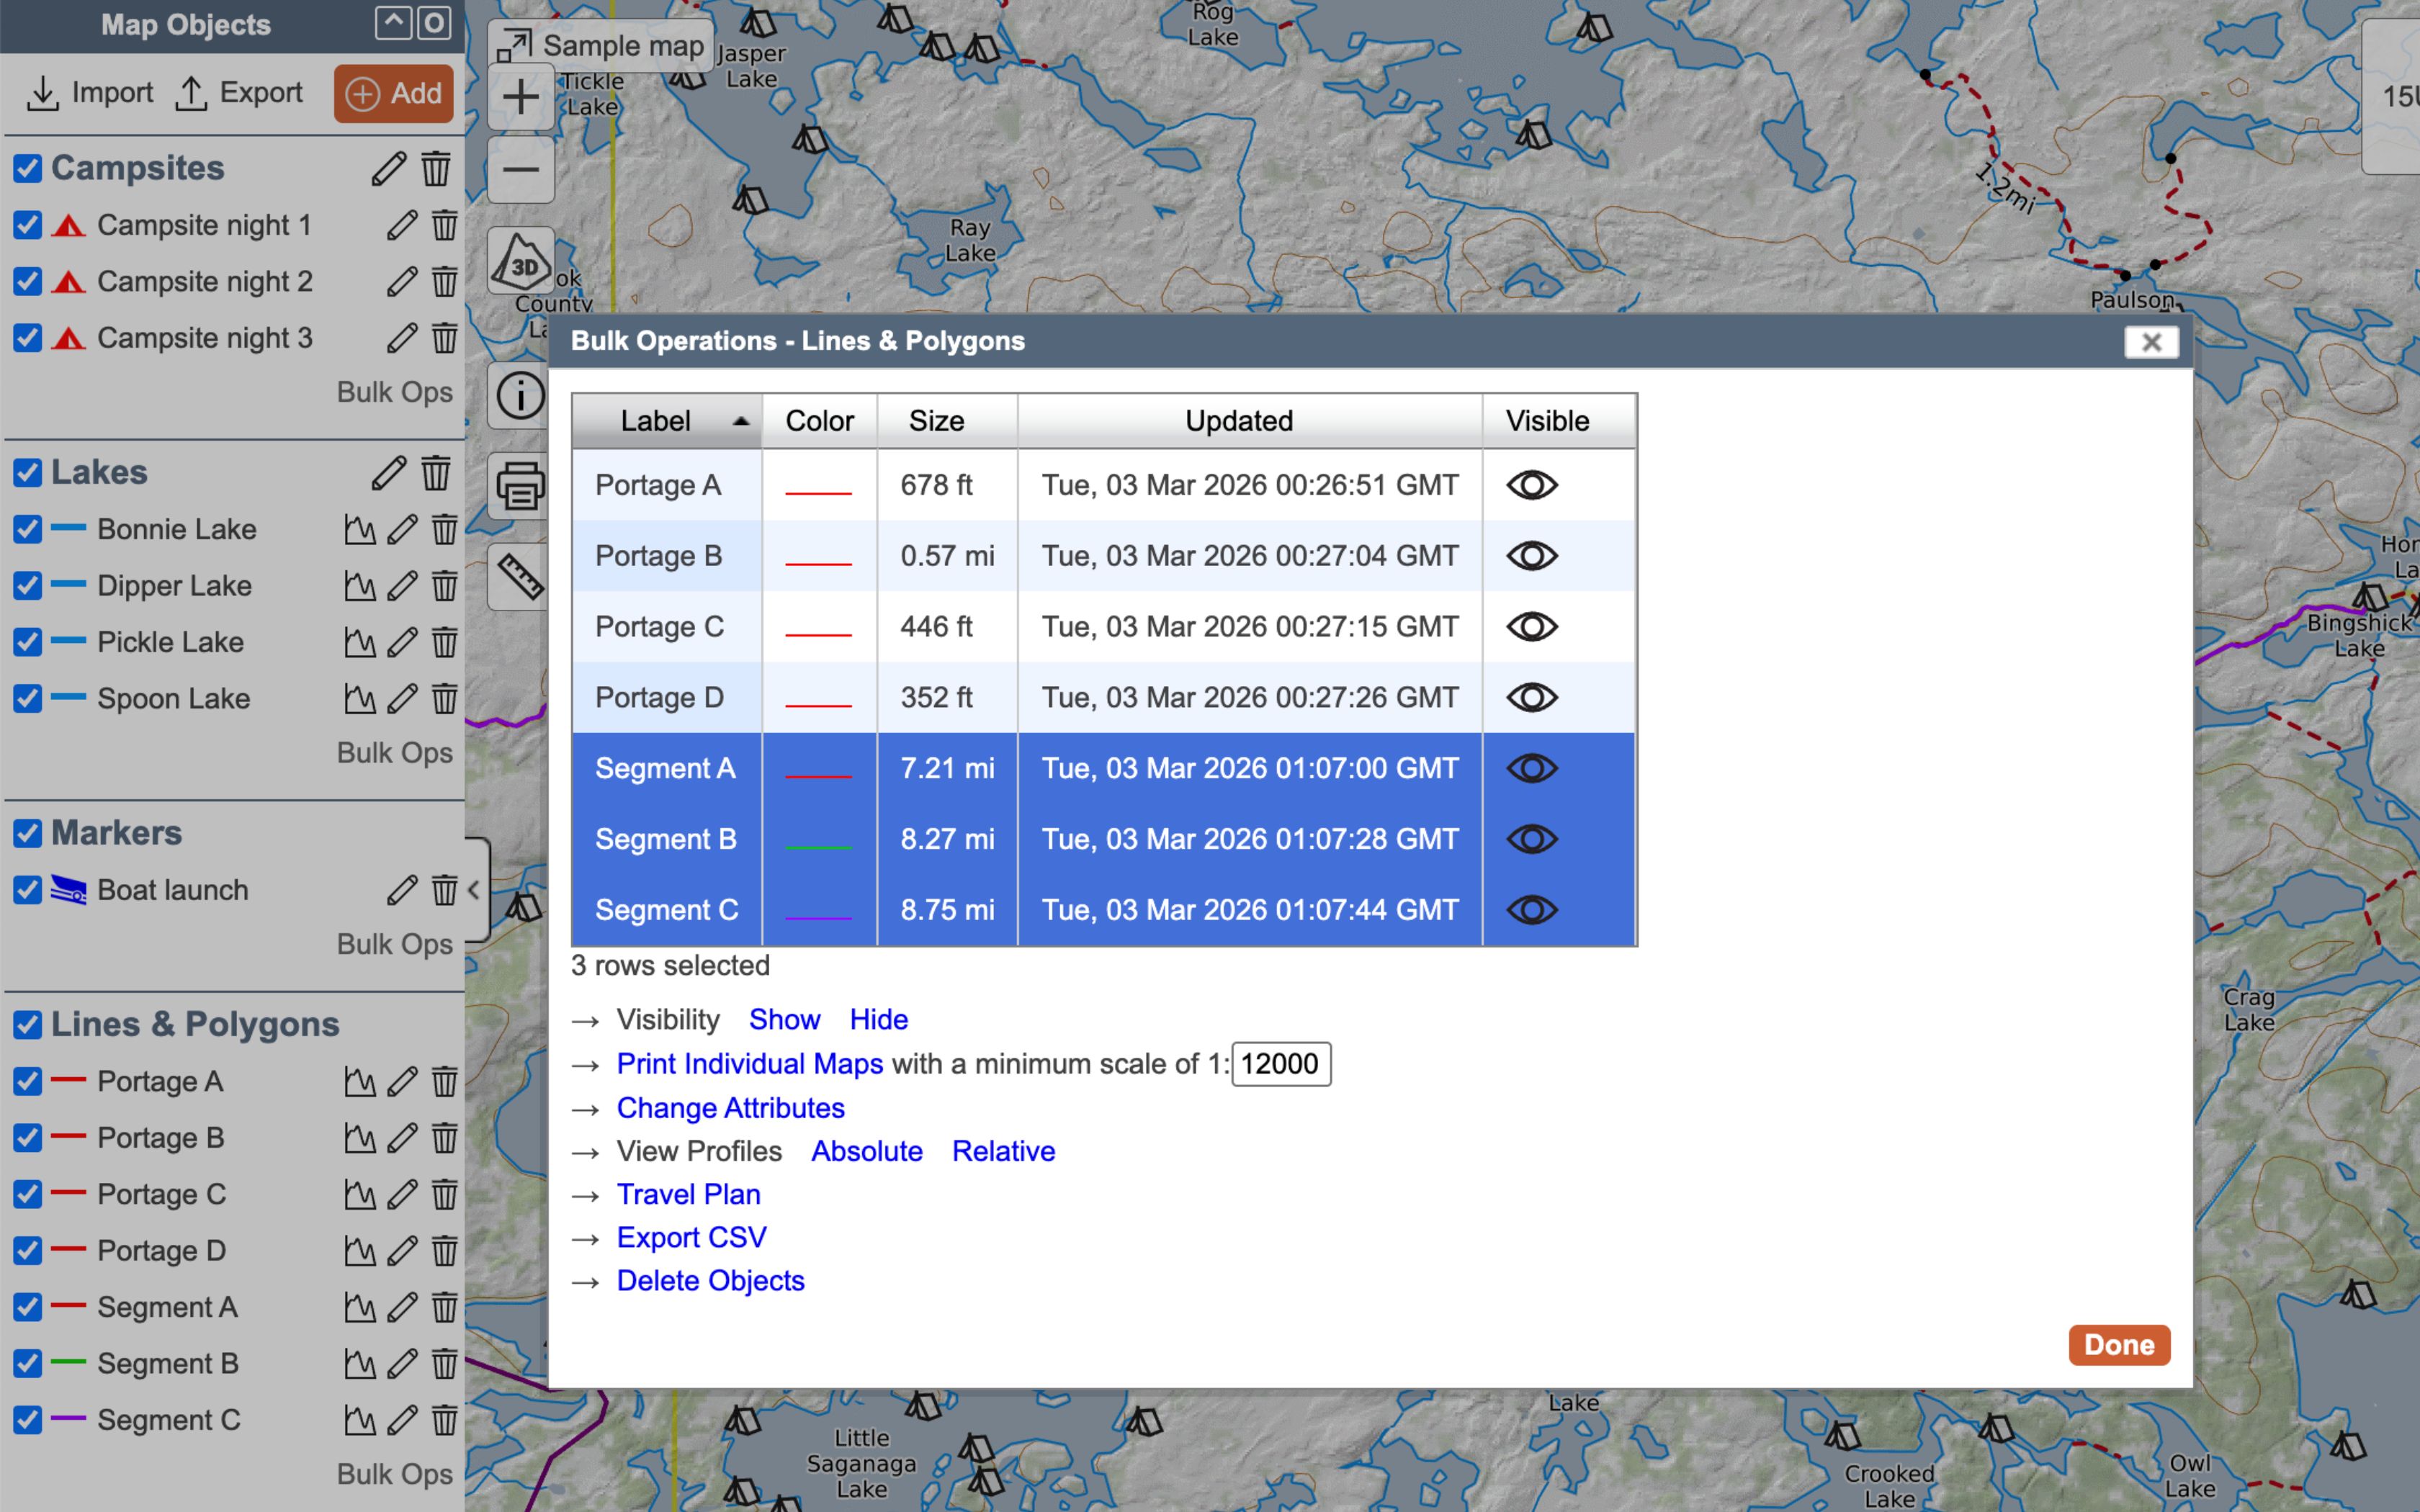
Locate the Bulk Ops link at the bottom of any folder containing items. It will open a box like this, containing a list of all the objects in that folder. You may have to scroll through the list if there are a lot of items. Select any combination of items or all items from the list before selecting what type of change to apply to those items.
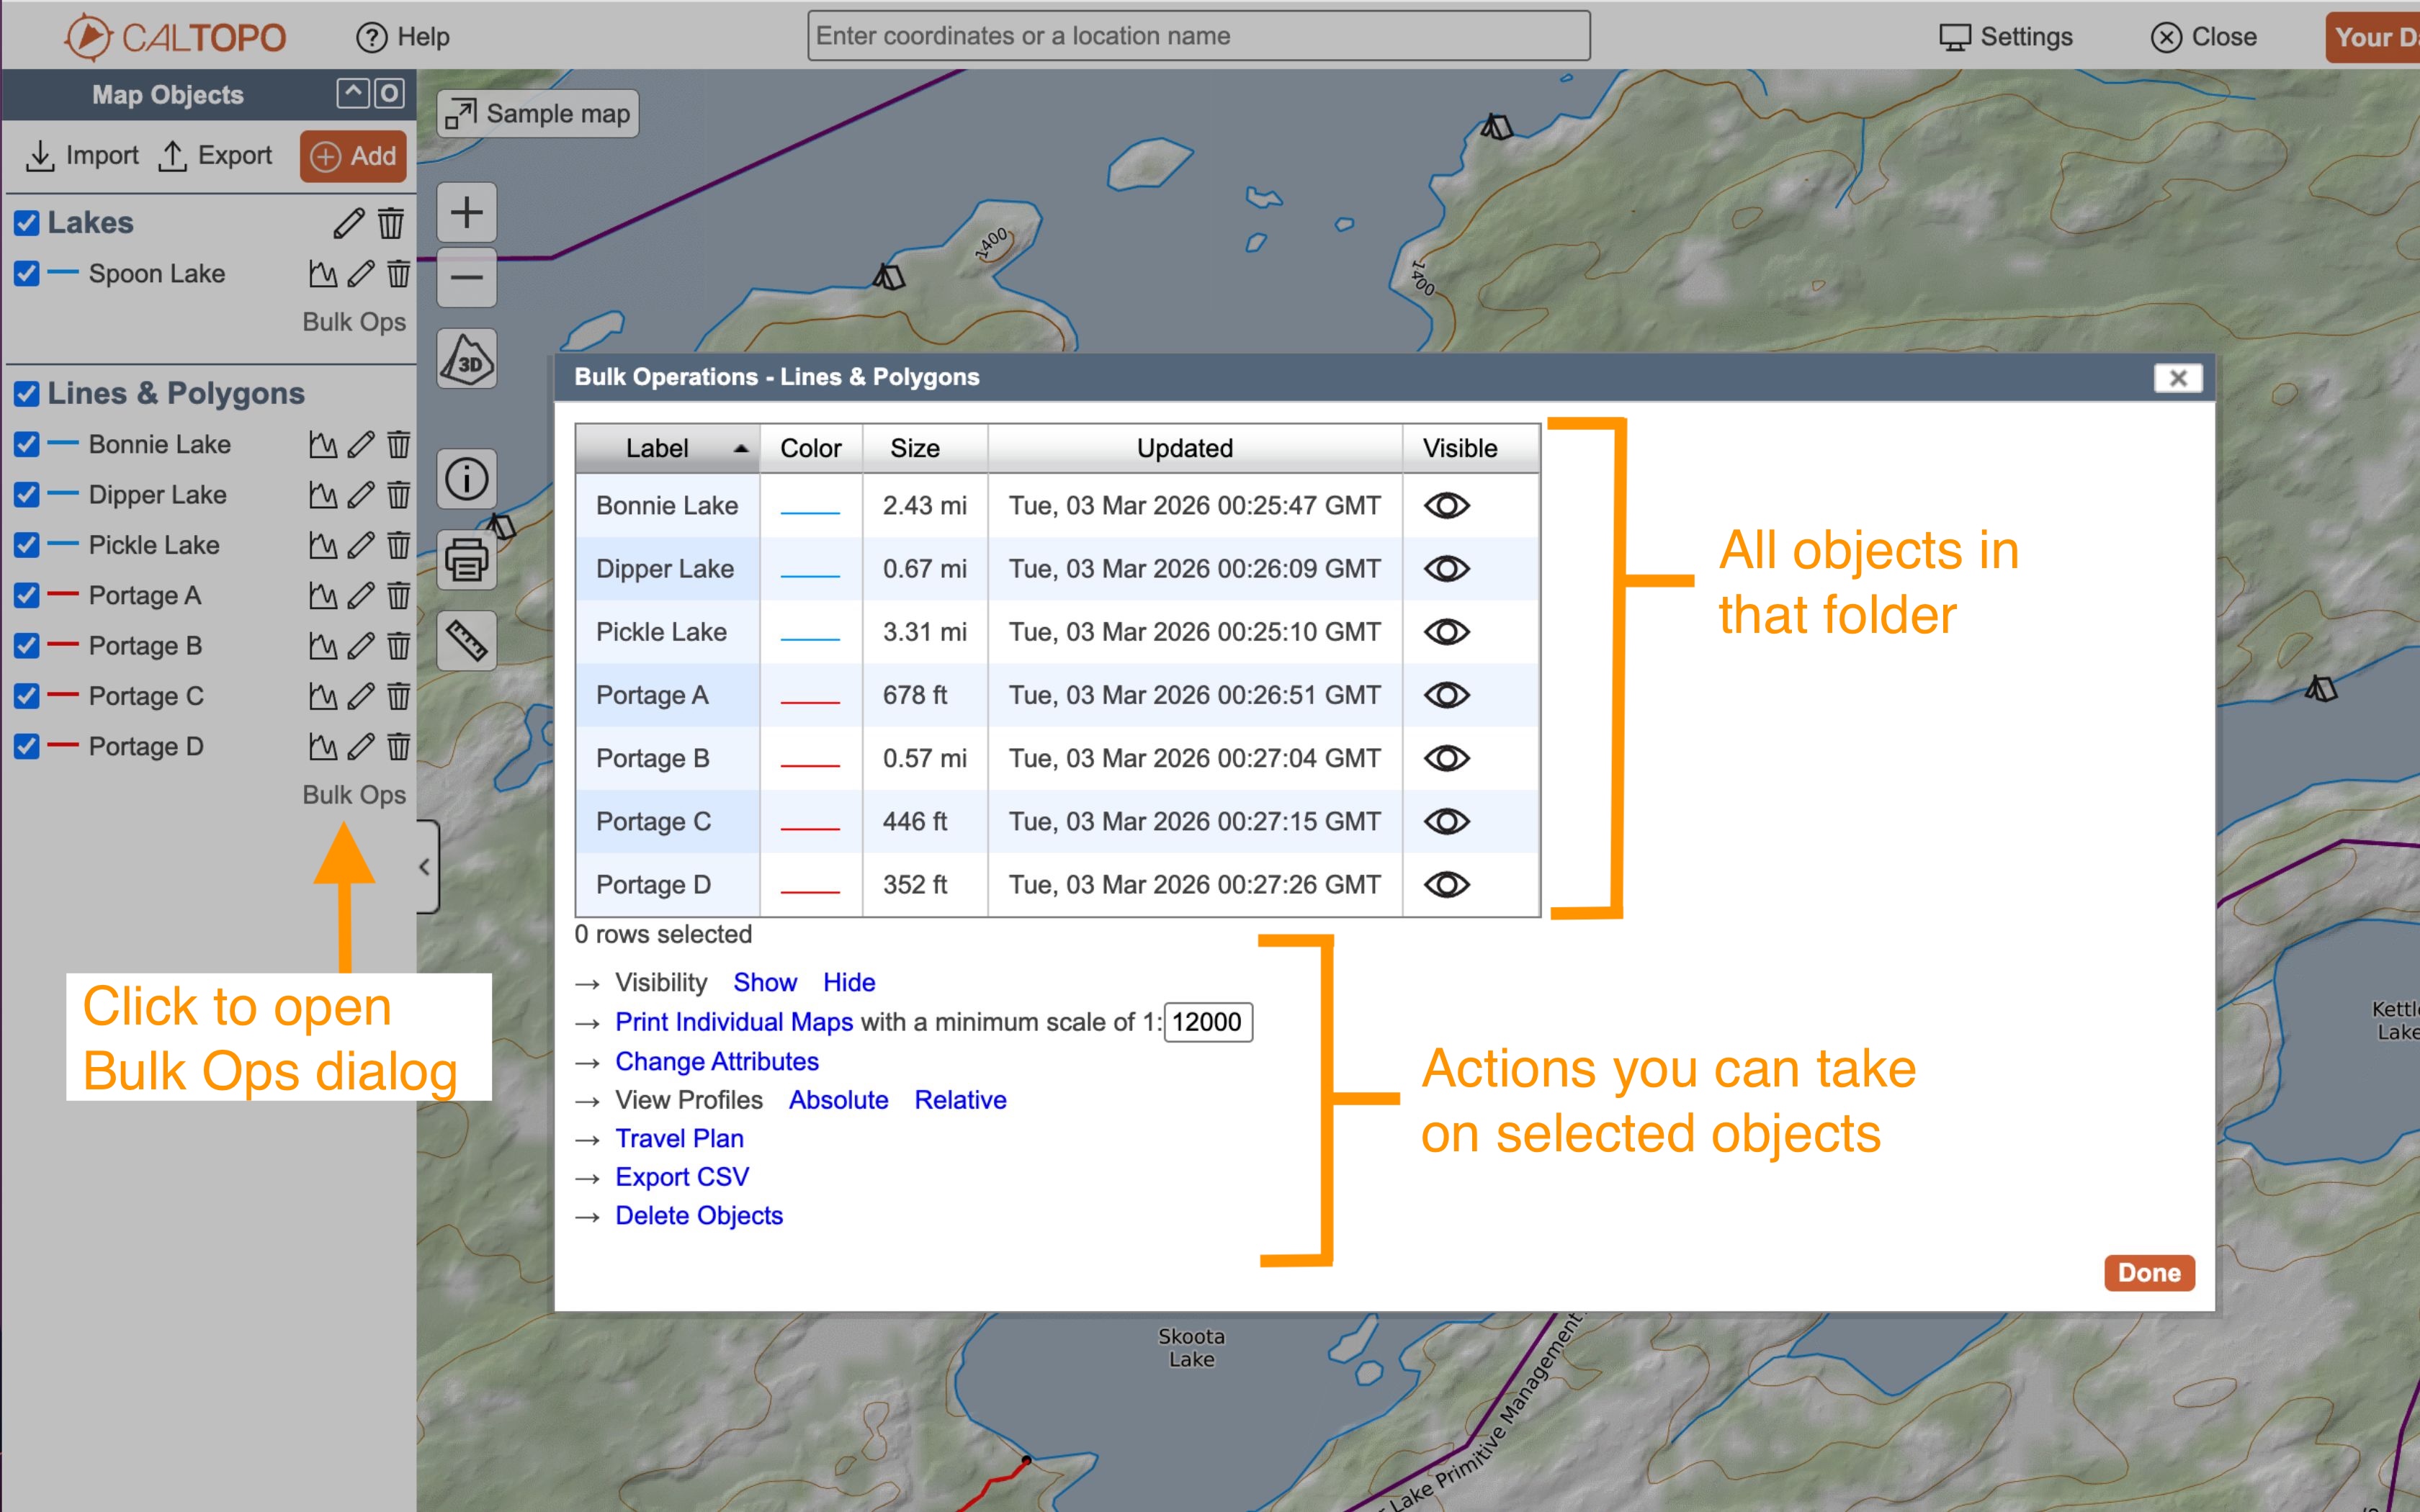
Select all the objects that you want to perform an action on. By default, all objects appear in alphabetical order in the Bulk Ops dialog. You can shift+click the first and last line objects to select a range of objects. If you want to select objects in a different order than they appear, use control+click on Windows or command+click on Mac to select the objects one at a time in the desired order. Then select the action you wish to perform from below the objects list.
Bulk Ops Examples
Below are a few examples in order to show how Bulk Ops works and what you can do with it.
Example 1:
In this image, we’ve selected all of the lines outlining lakes.. Clicking on “Change Attributes” opens the next screen.
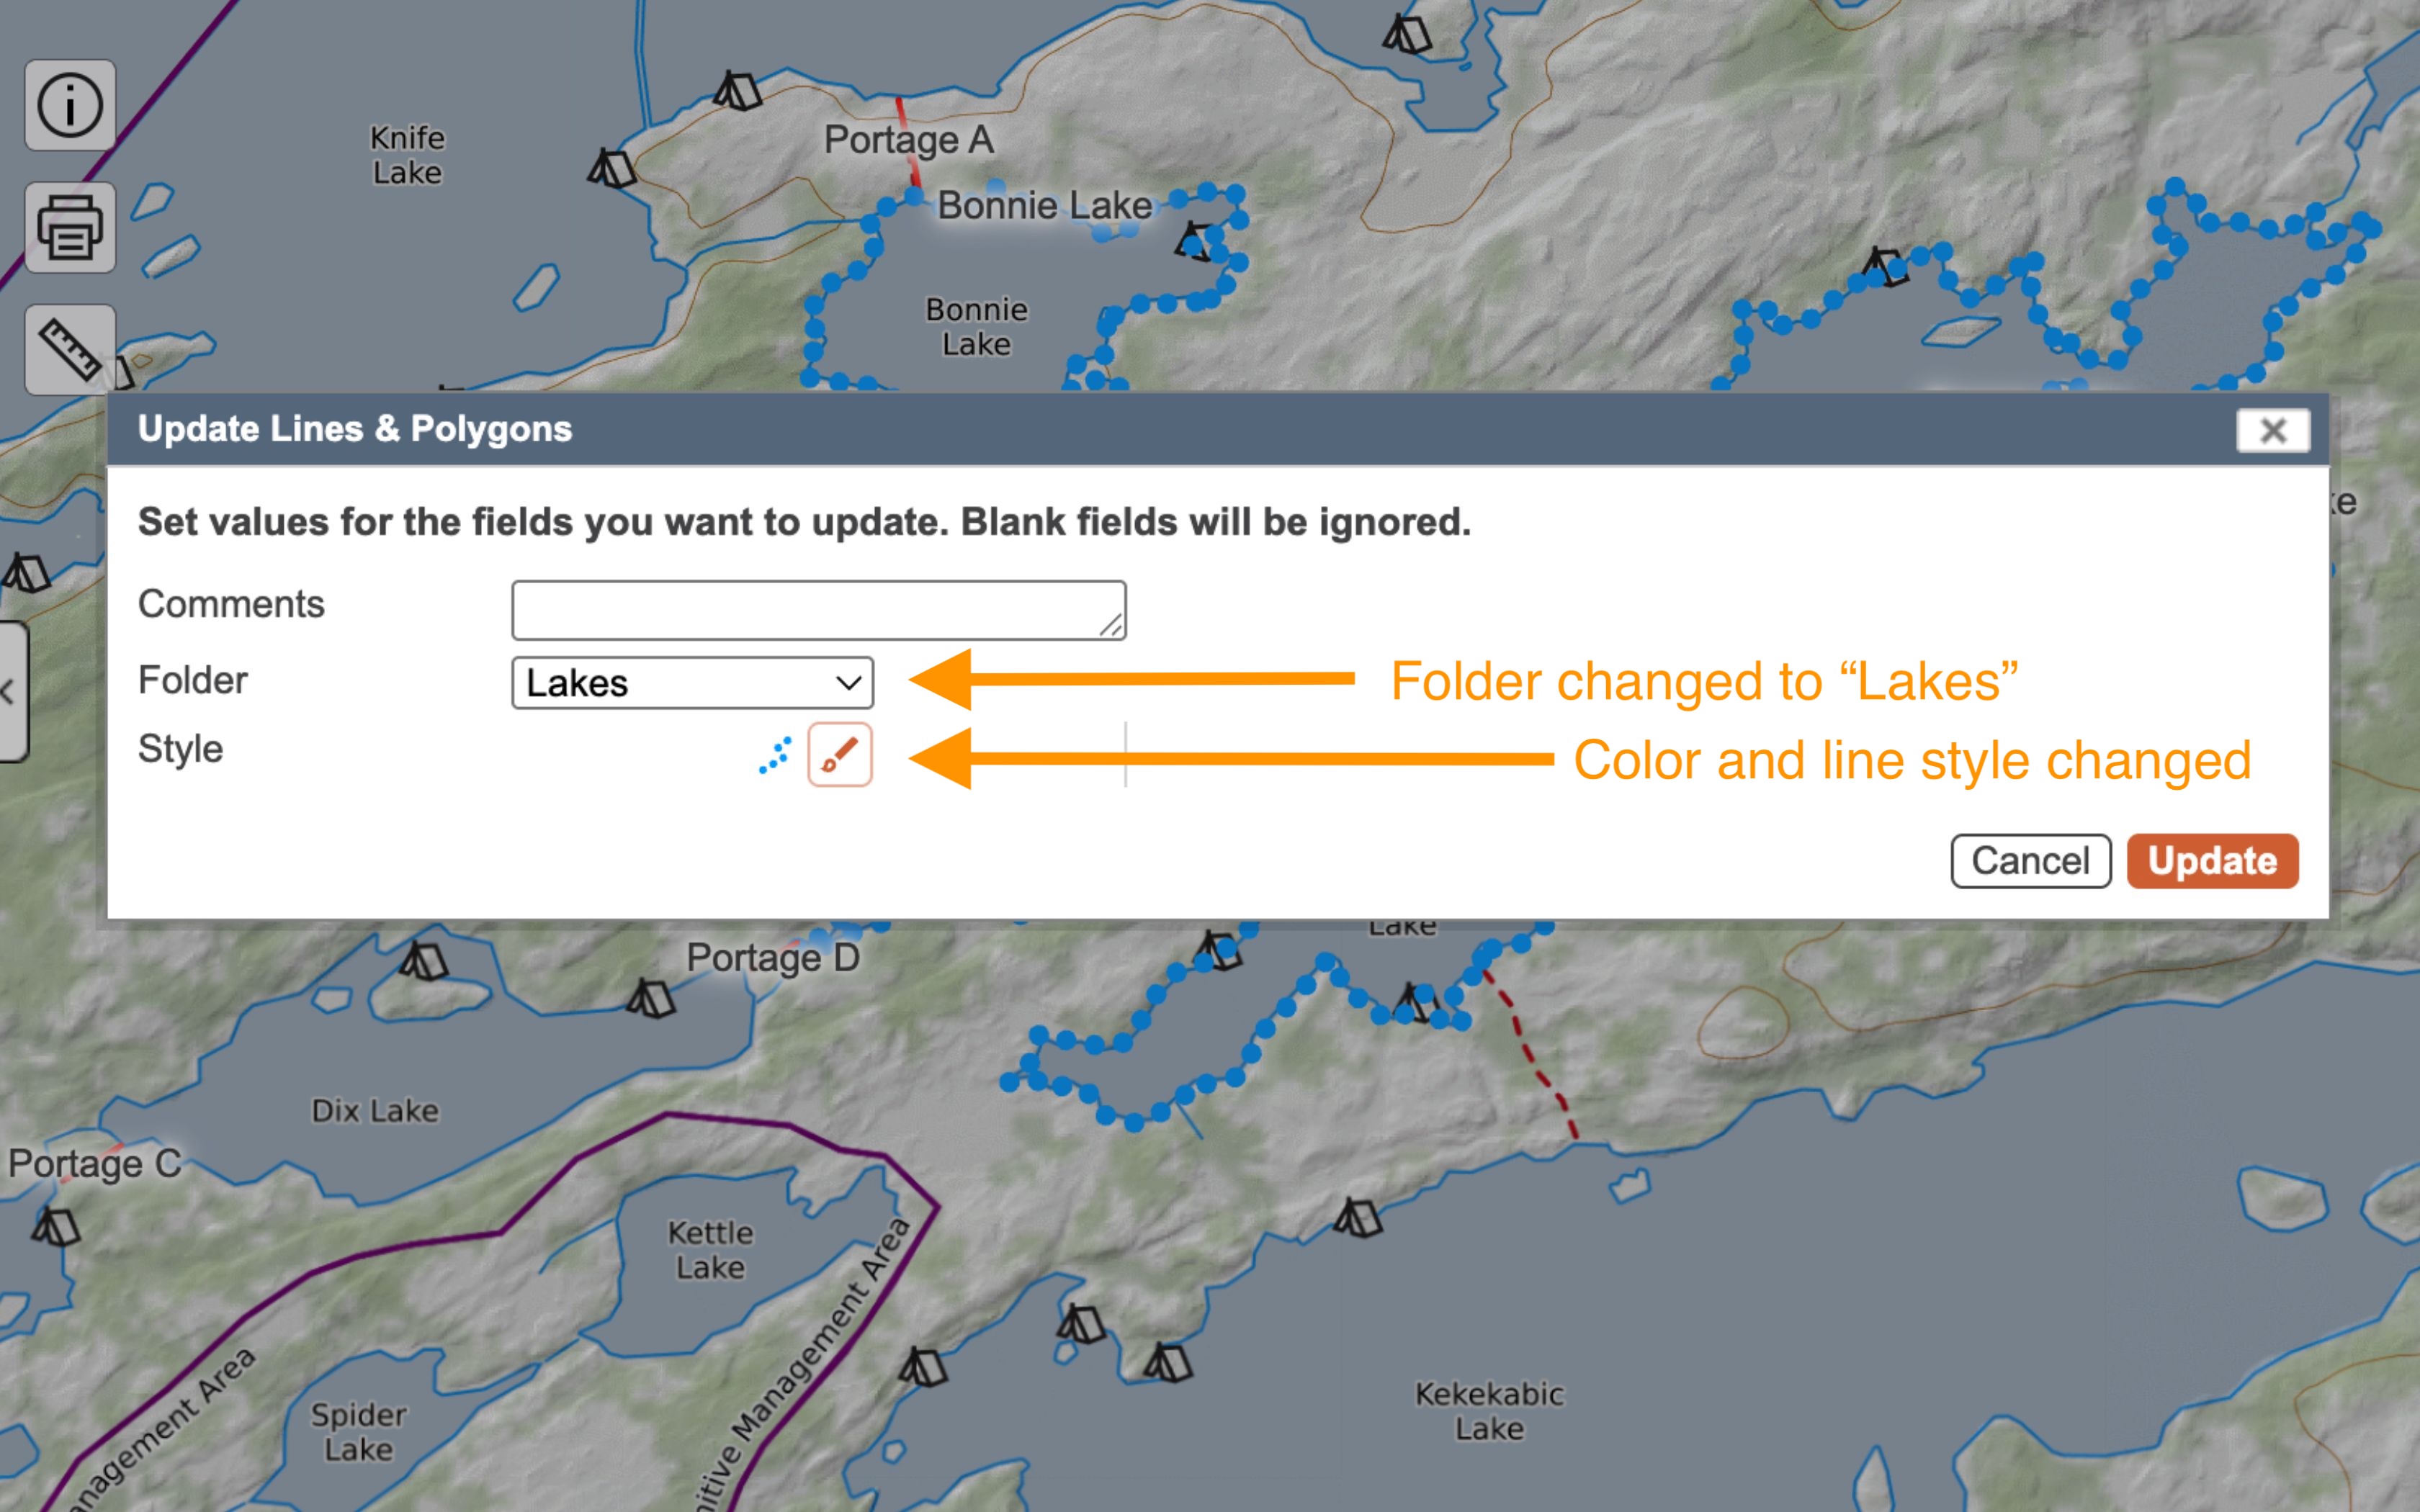
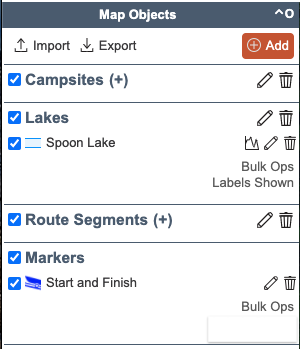
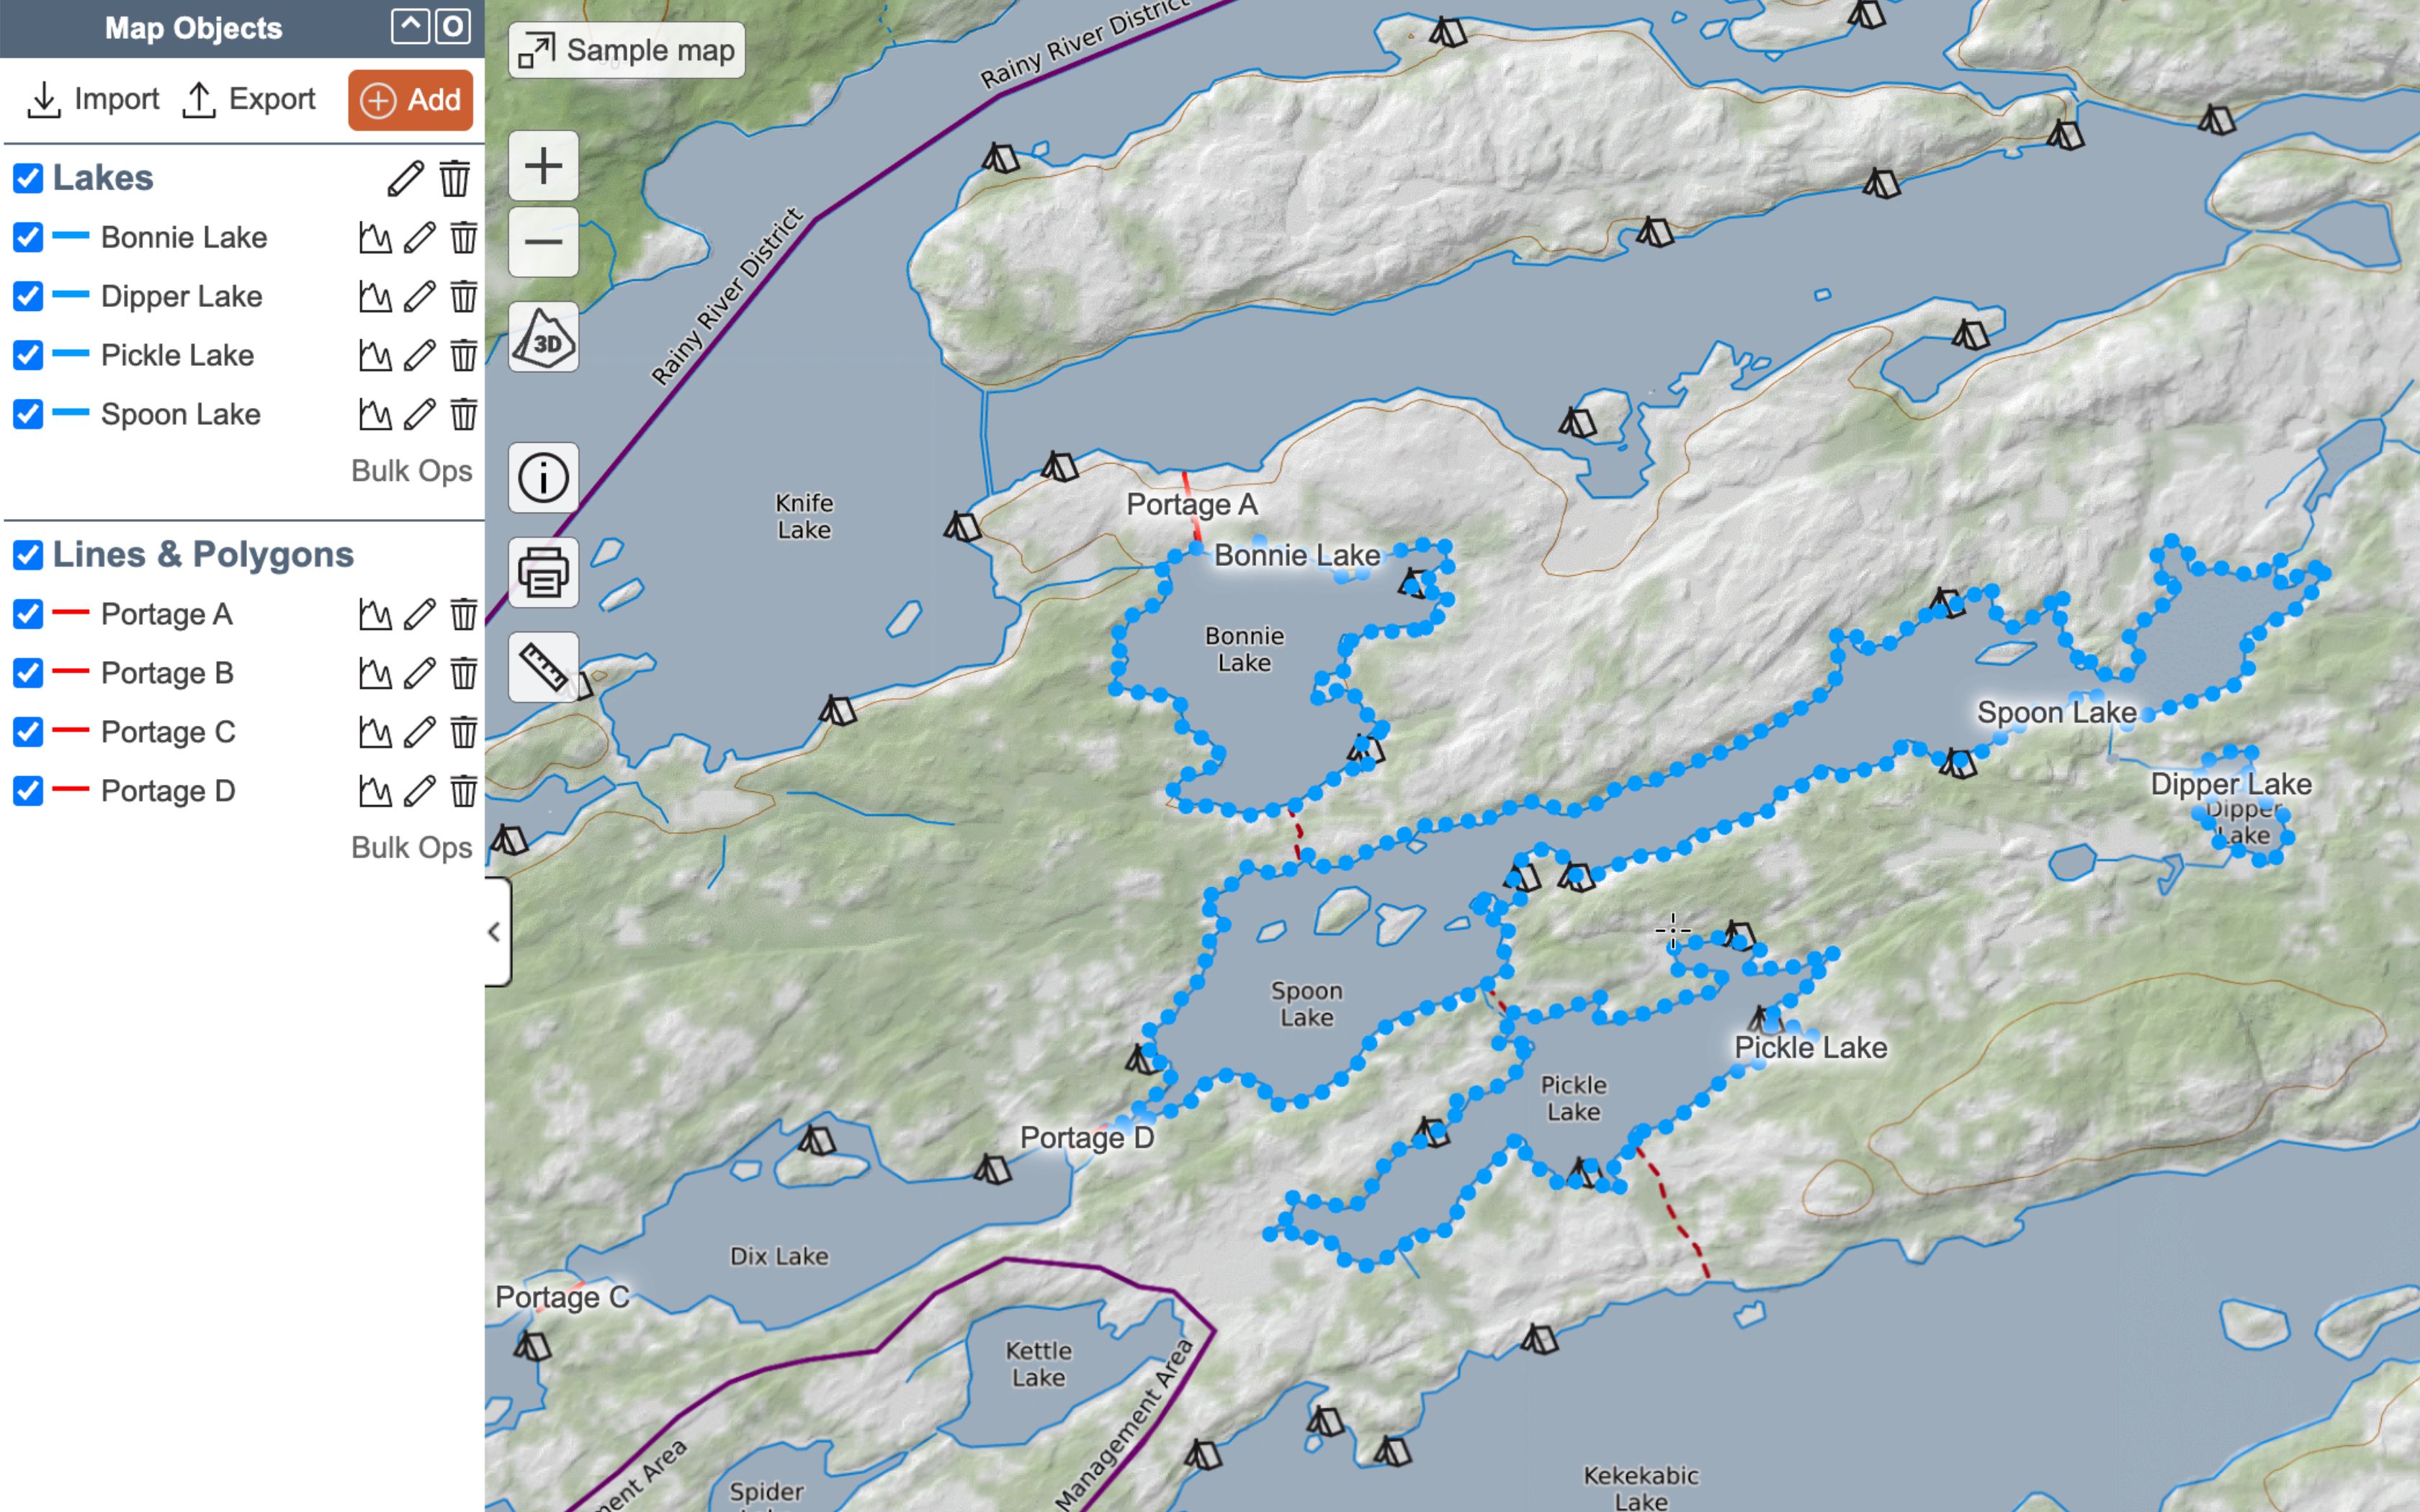
We’ve selected the drop down menu for folders, and then selected Lakes. Upon update, the items all move to the folder called “Lakes” as seen in the next image. Their color and fill will also reflect the changes made.
Example 2:
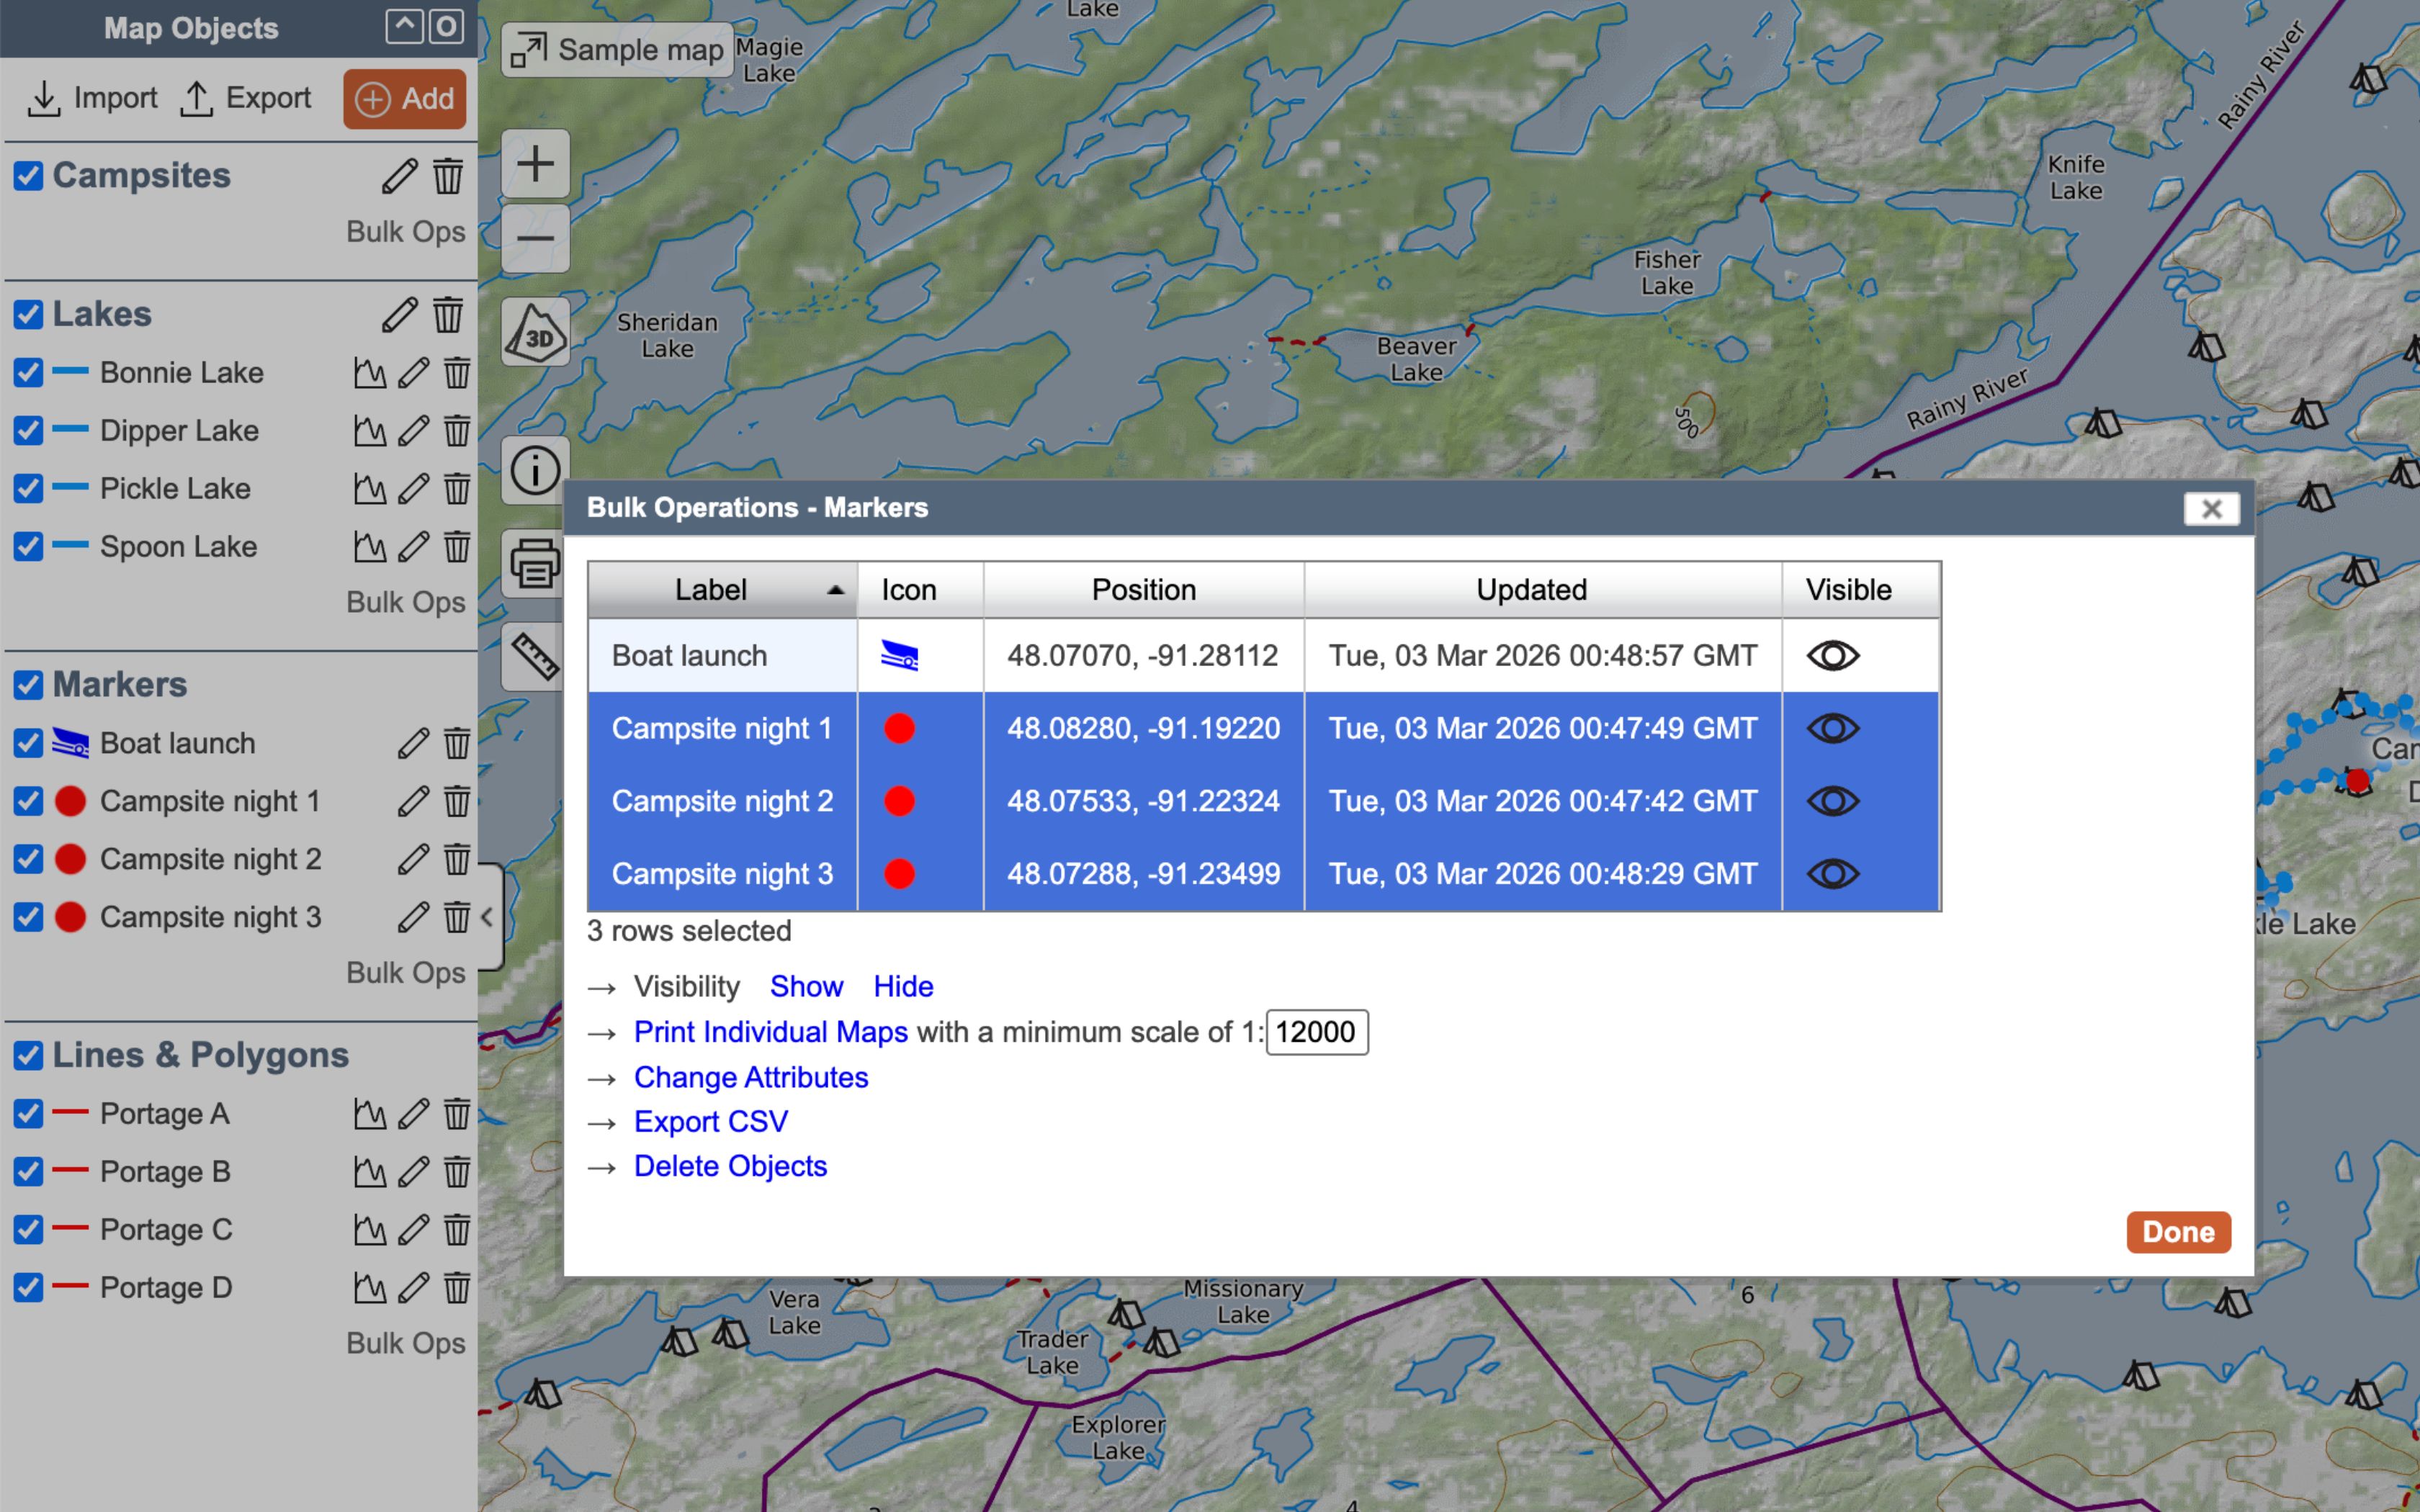
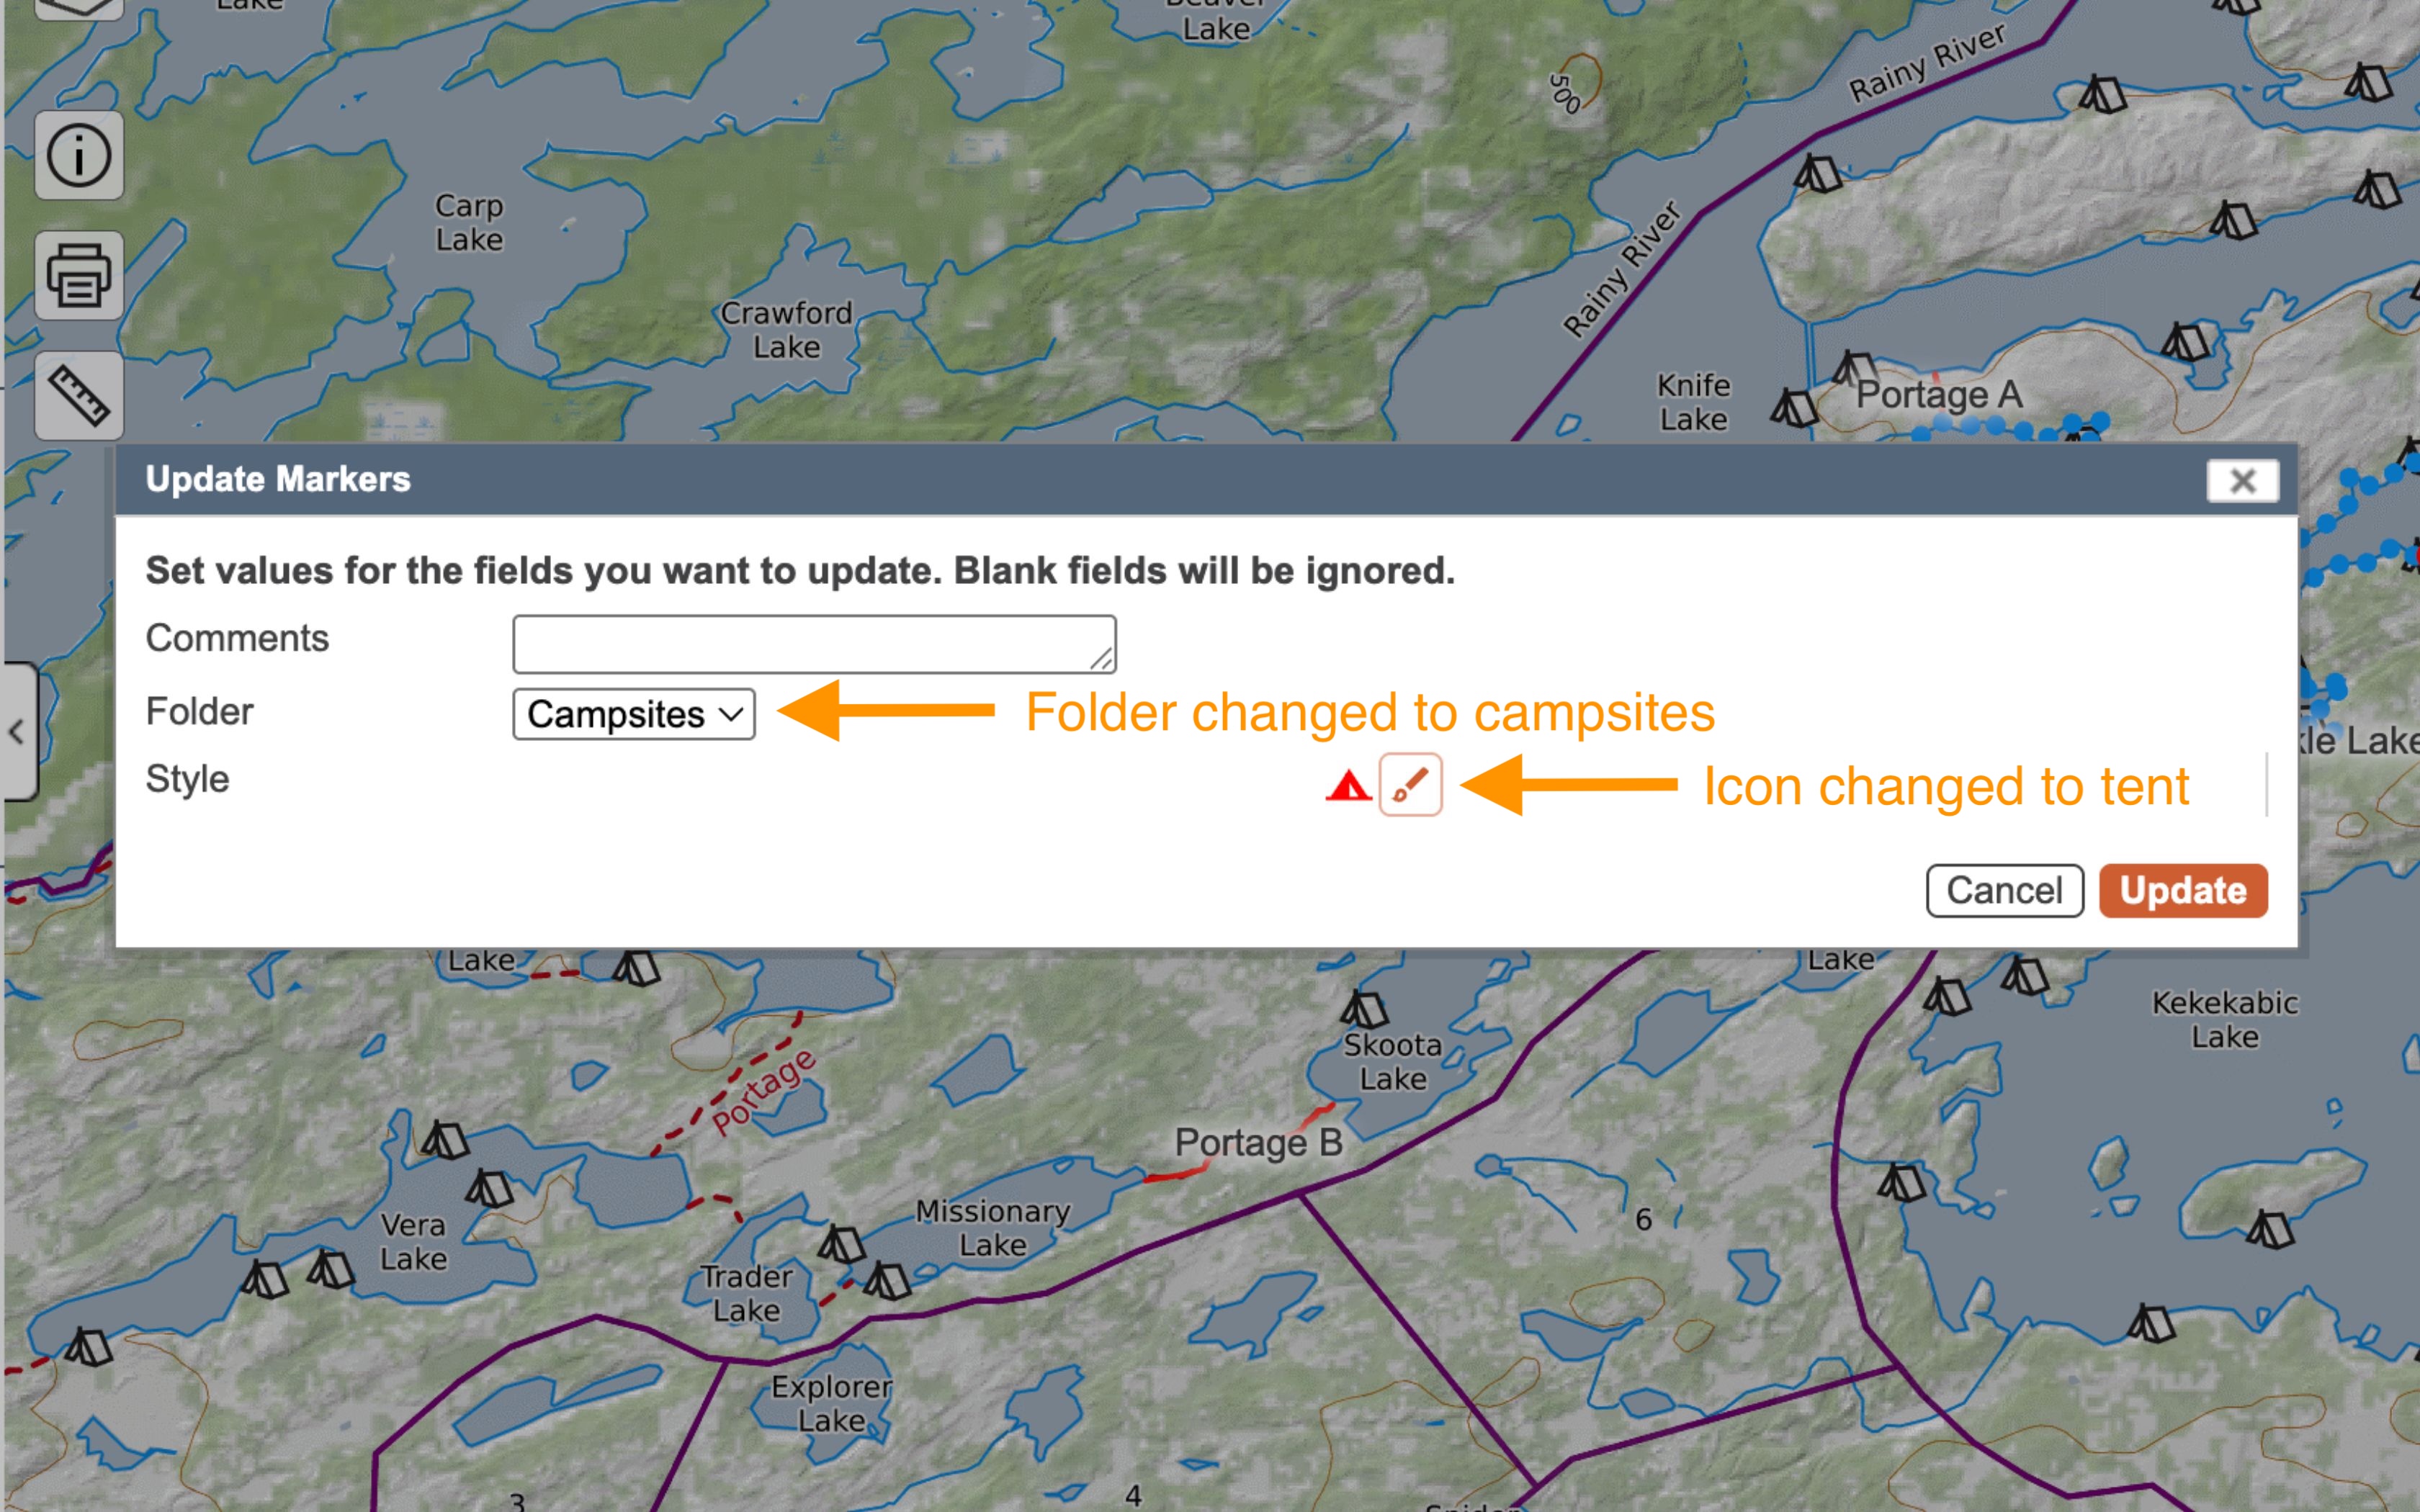
Maybe we start with a list of markers that indicate potential campsite locations. We’d like to move those to a campsites folder and make the icons appear as a tent for all of them.
- Create a new folder for campsites.
- Use Bulk Ops and Change Attributes from the Markers folder to move all the markers that represent campsites (and not the boat launch site) to the campsites folder.
- While in change attributes, change all the marker icons to the campsite symbol.
- Select all the dots but not the boat launch icon.
- Change the folder to Campsites. Click on the style picker, select the tent icon and then select Apply.
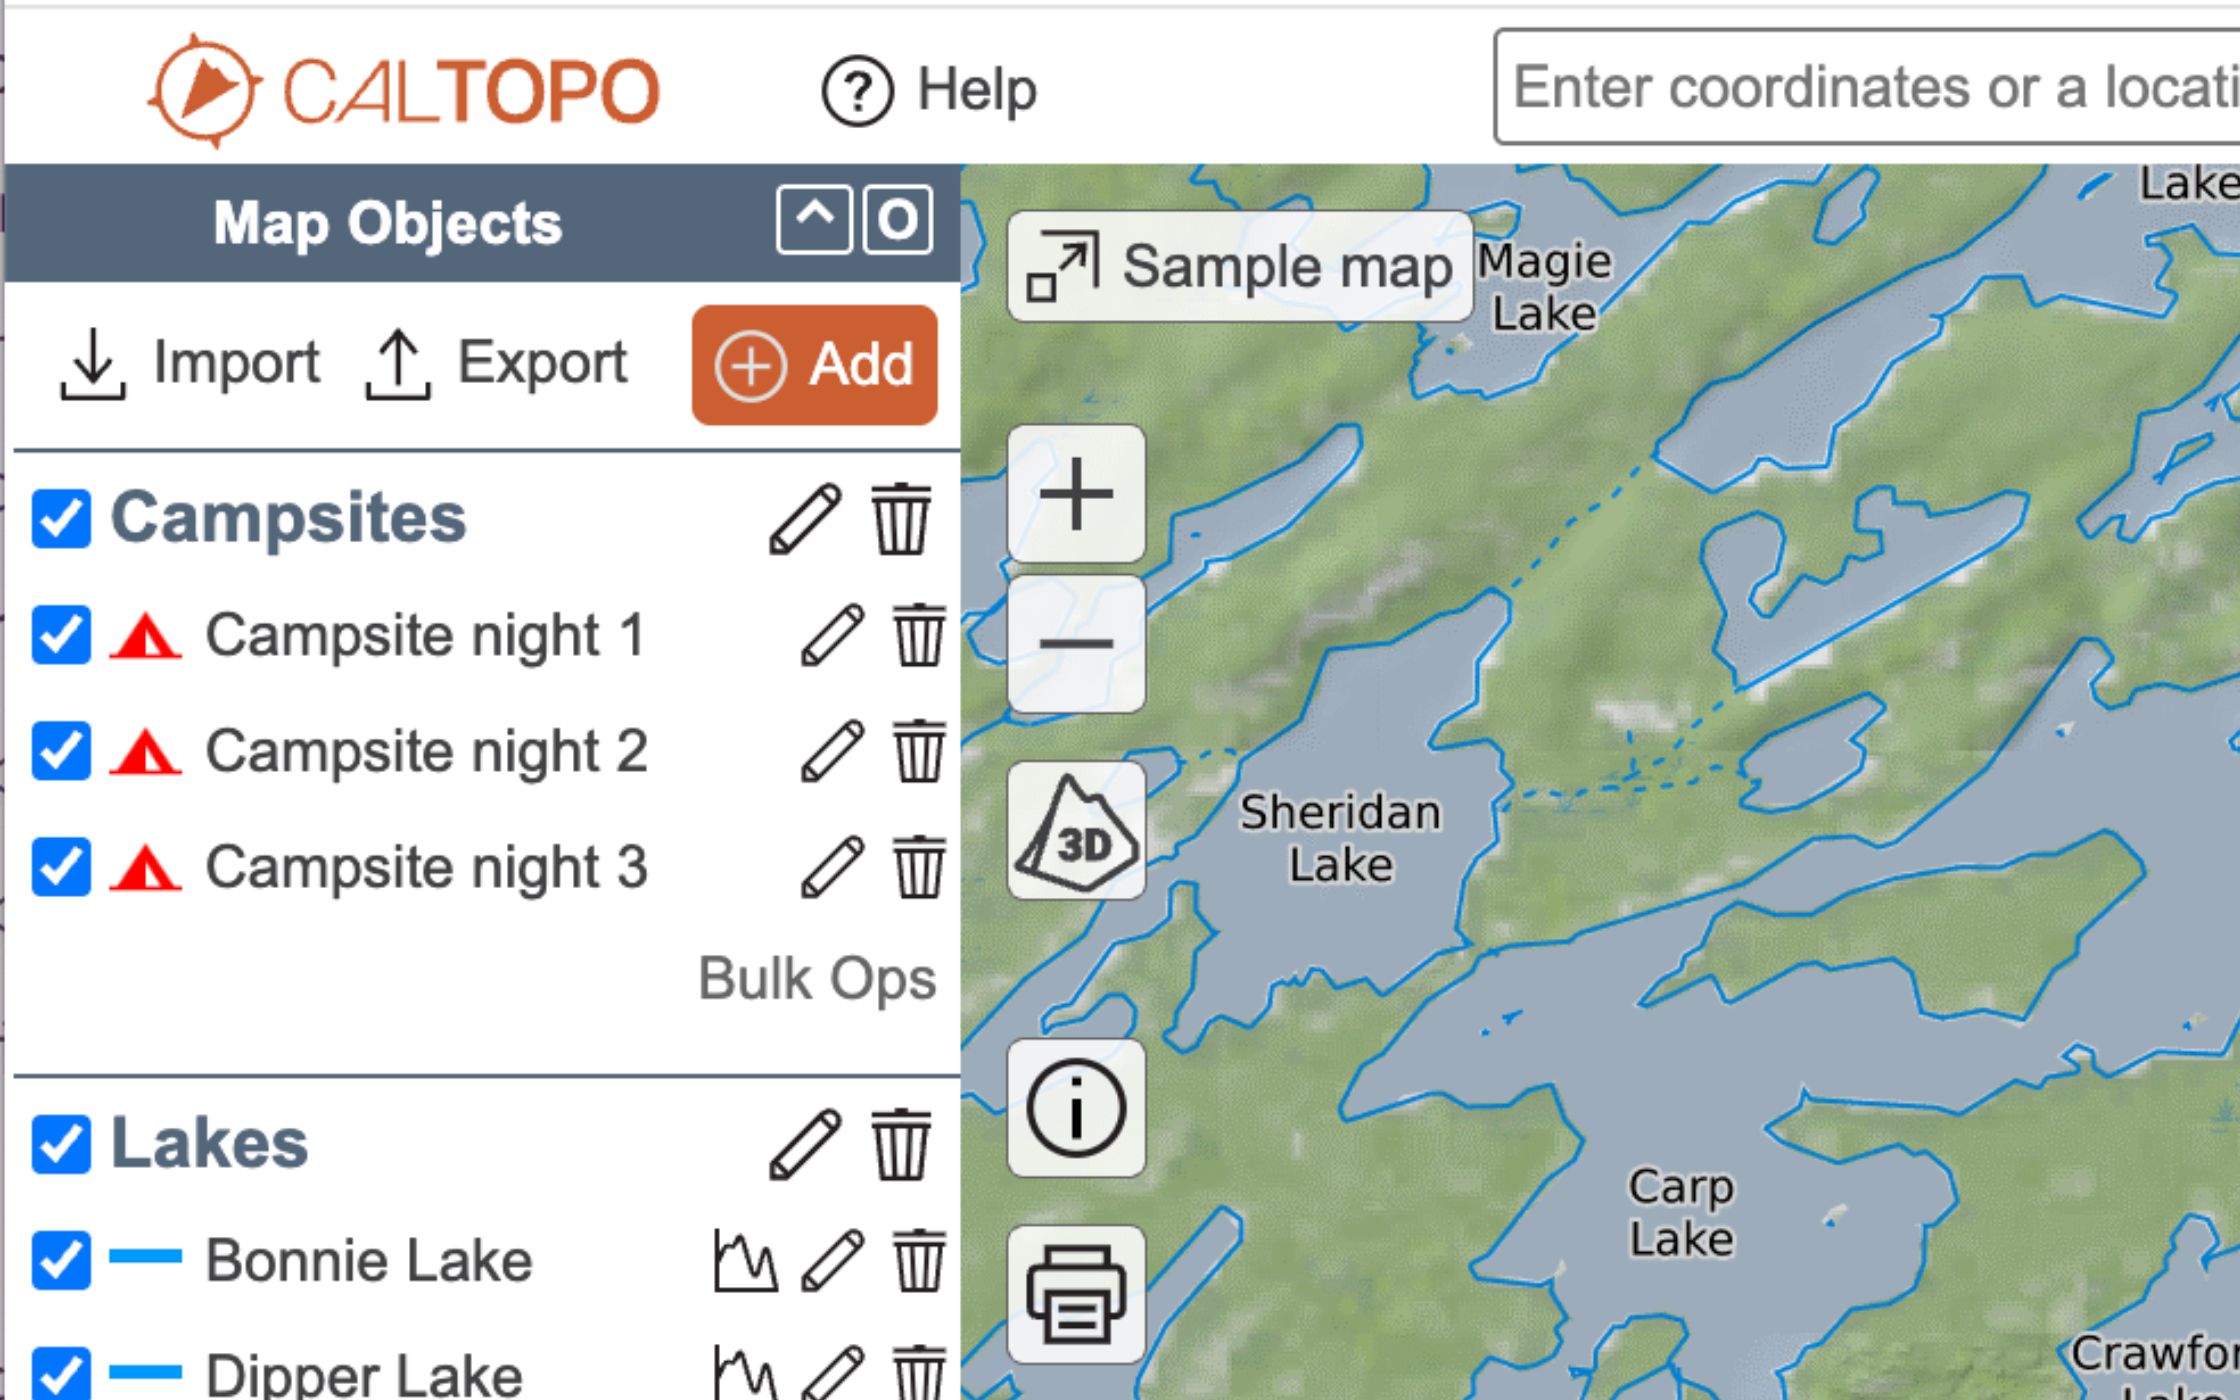
Result:
Other Things You Can Do With Bulk Ops
Bulk Ops contains other functions in addition to changing the object attributes. These functions allow for comparative analysis, or bulk actions such as printing and deleting.
Change visibility
You can show or hide multiple objects in the same folder at one time. This can be easier than changing visibility for individual objects in the Map Objects menu.
Print individual maps
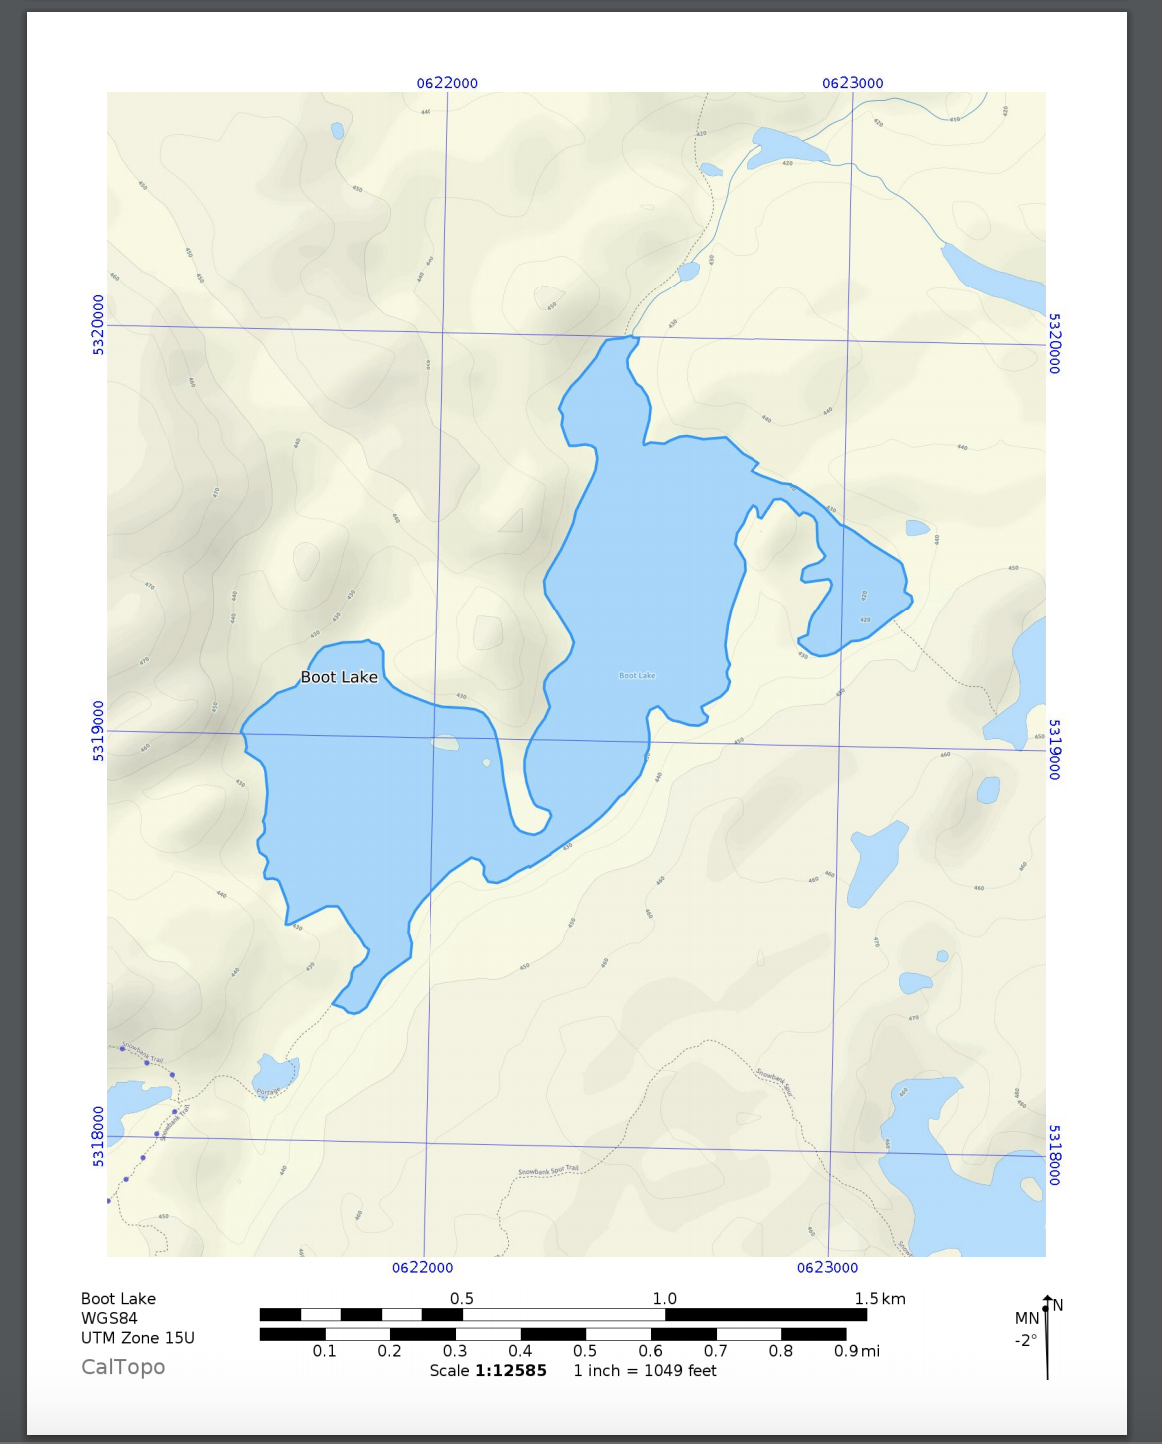
Some users may wish to print smaller-scale, individual maps of certain objects, such as a segment for a hike for each day. The controls for this are much simpler than the options from the regular print dialogue, as your only choice is a minimum scale. Select the objects to print individual maps of, click the link for “Print Individual Maps” and wait a moment for the PDFs to load. The maps will be in one document, but will have a single page for each object.
Here are examples for two of the lake polygons we’ve been looking at. The orientation of the print is automatic depending on the relative shape of the polygon object.

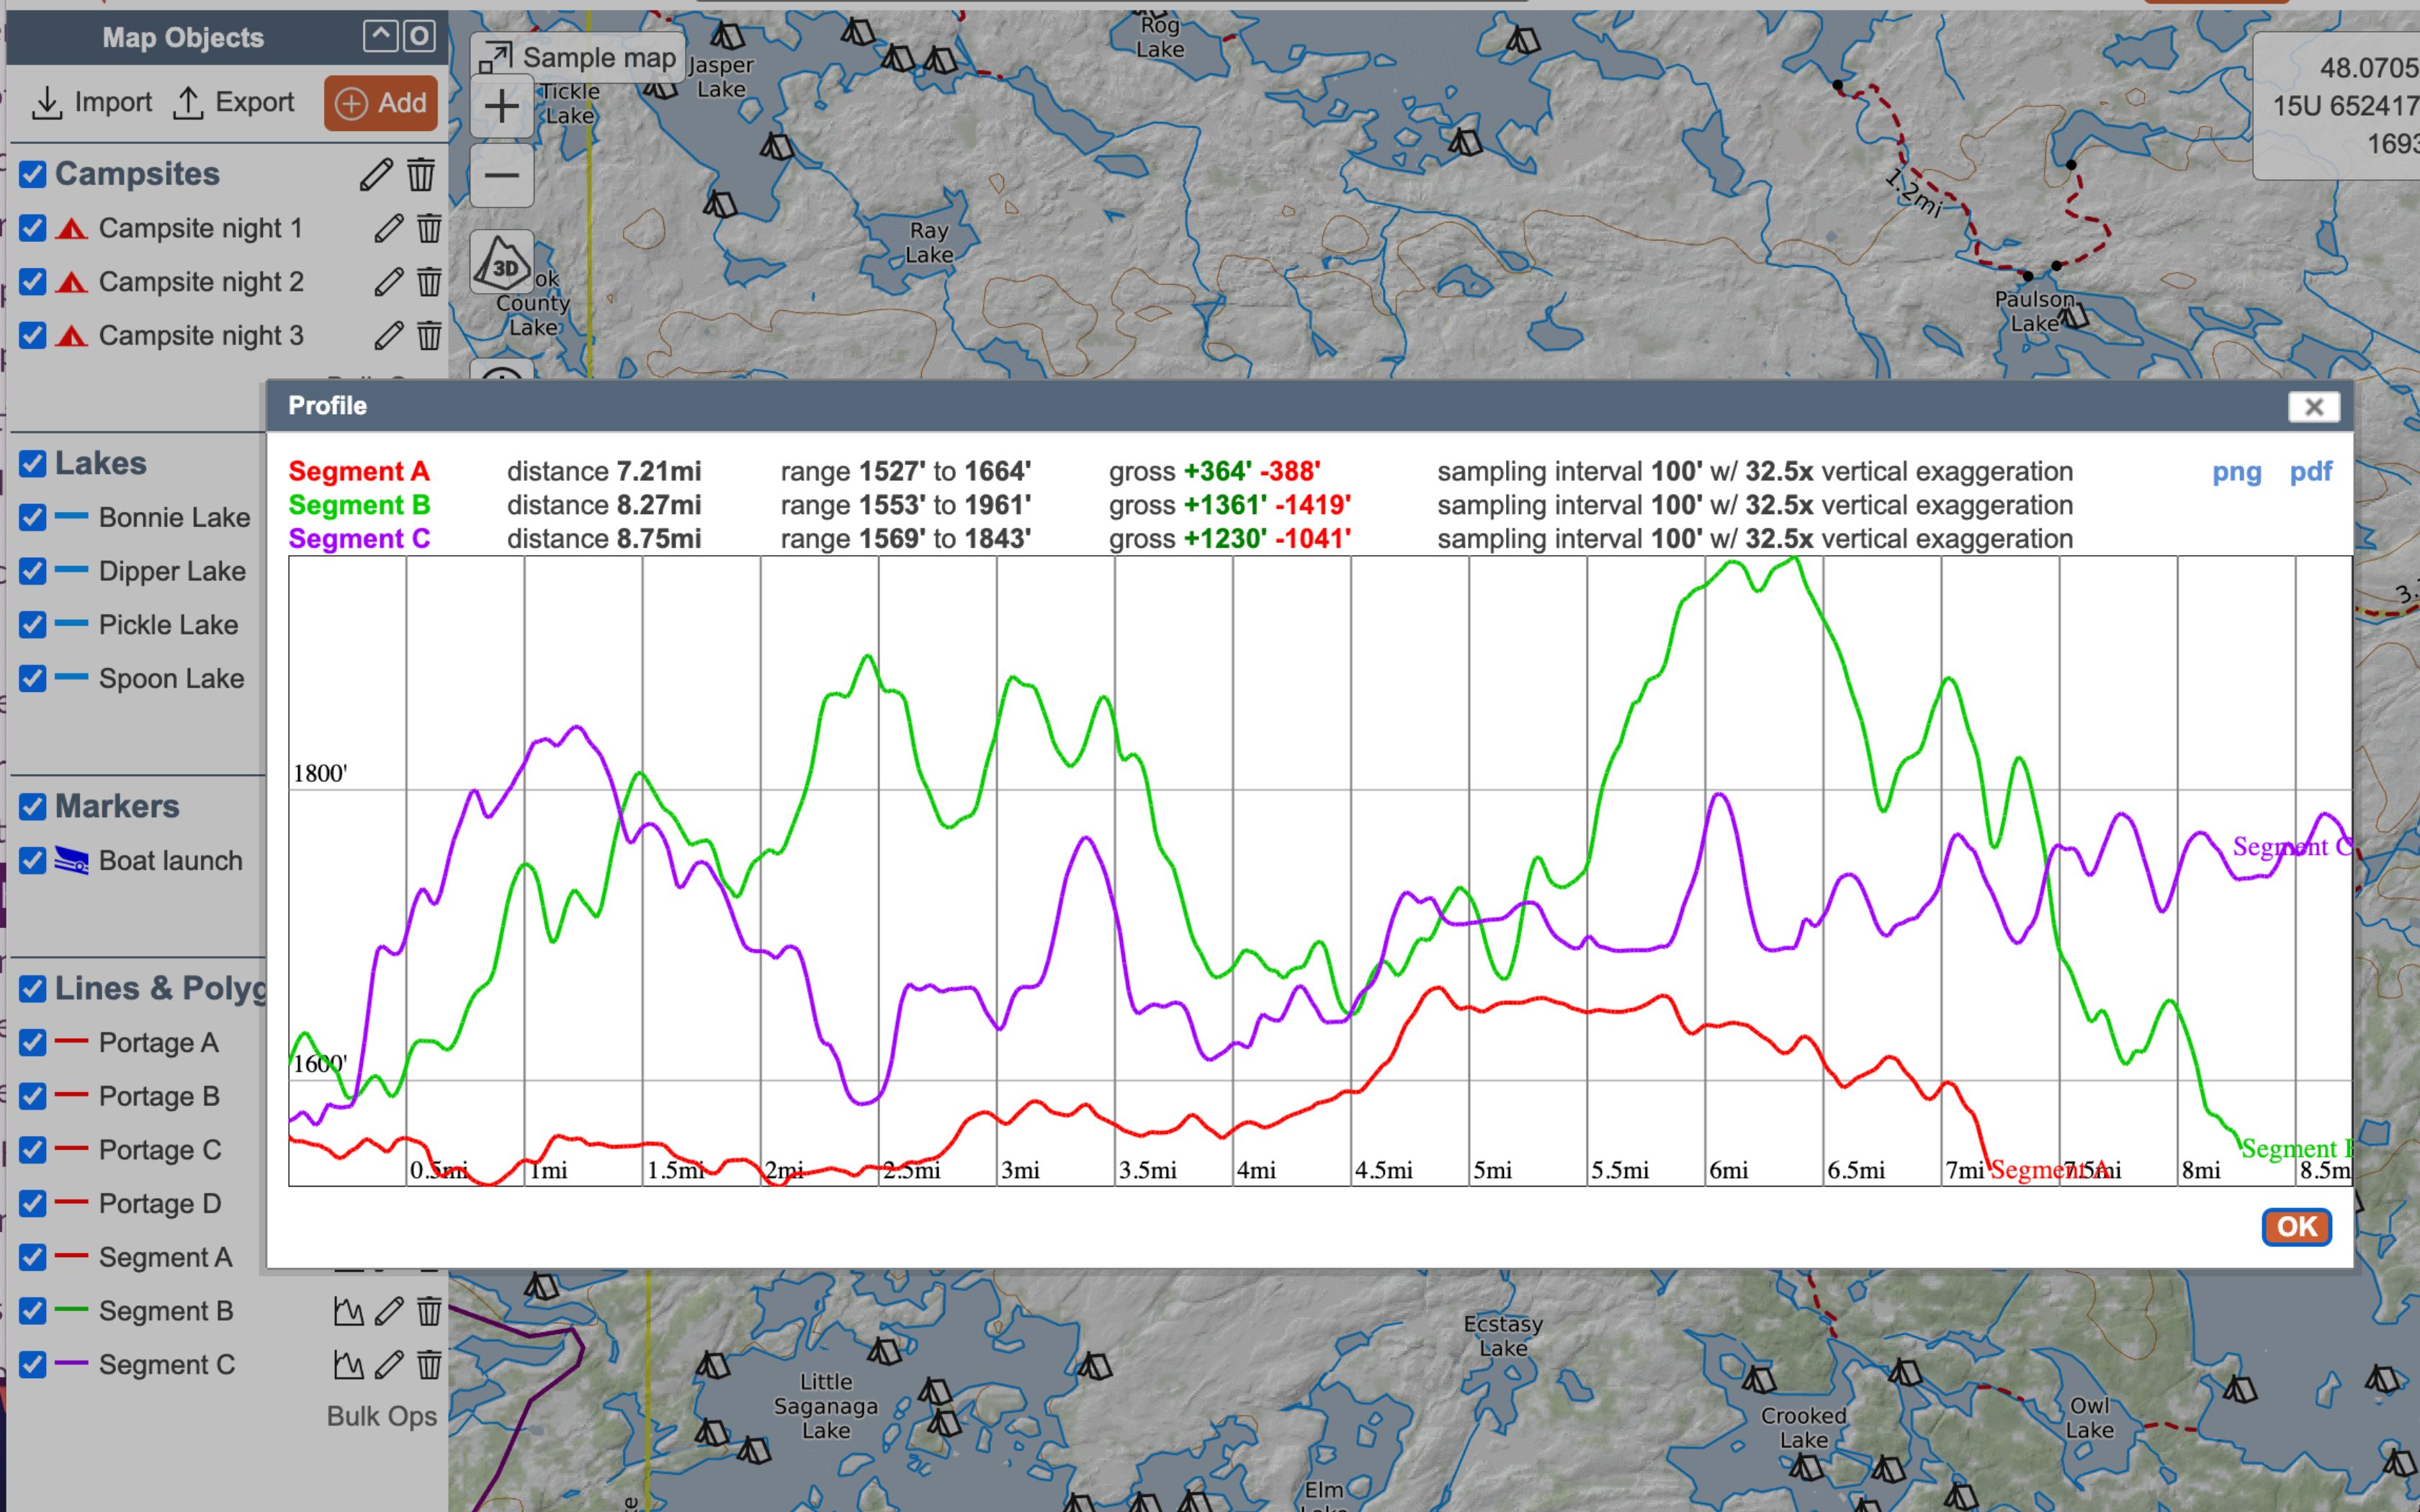
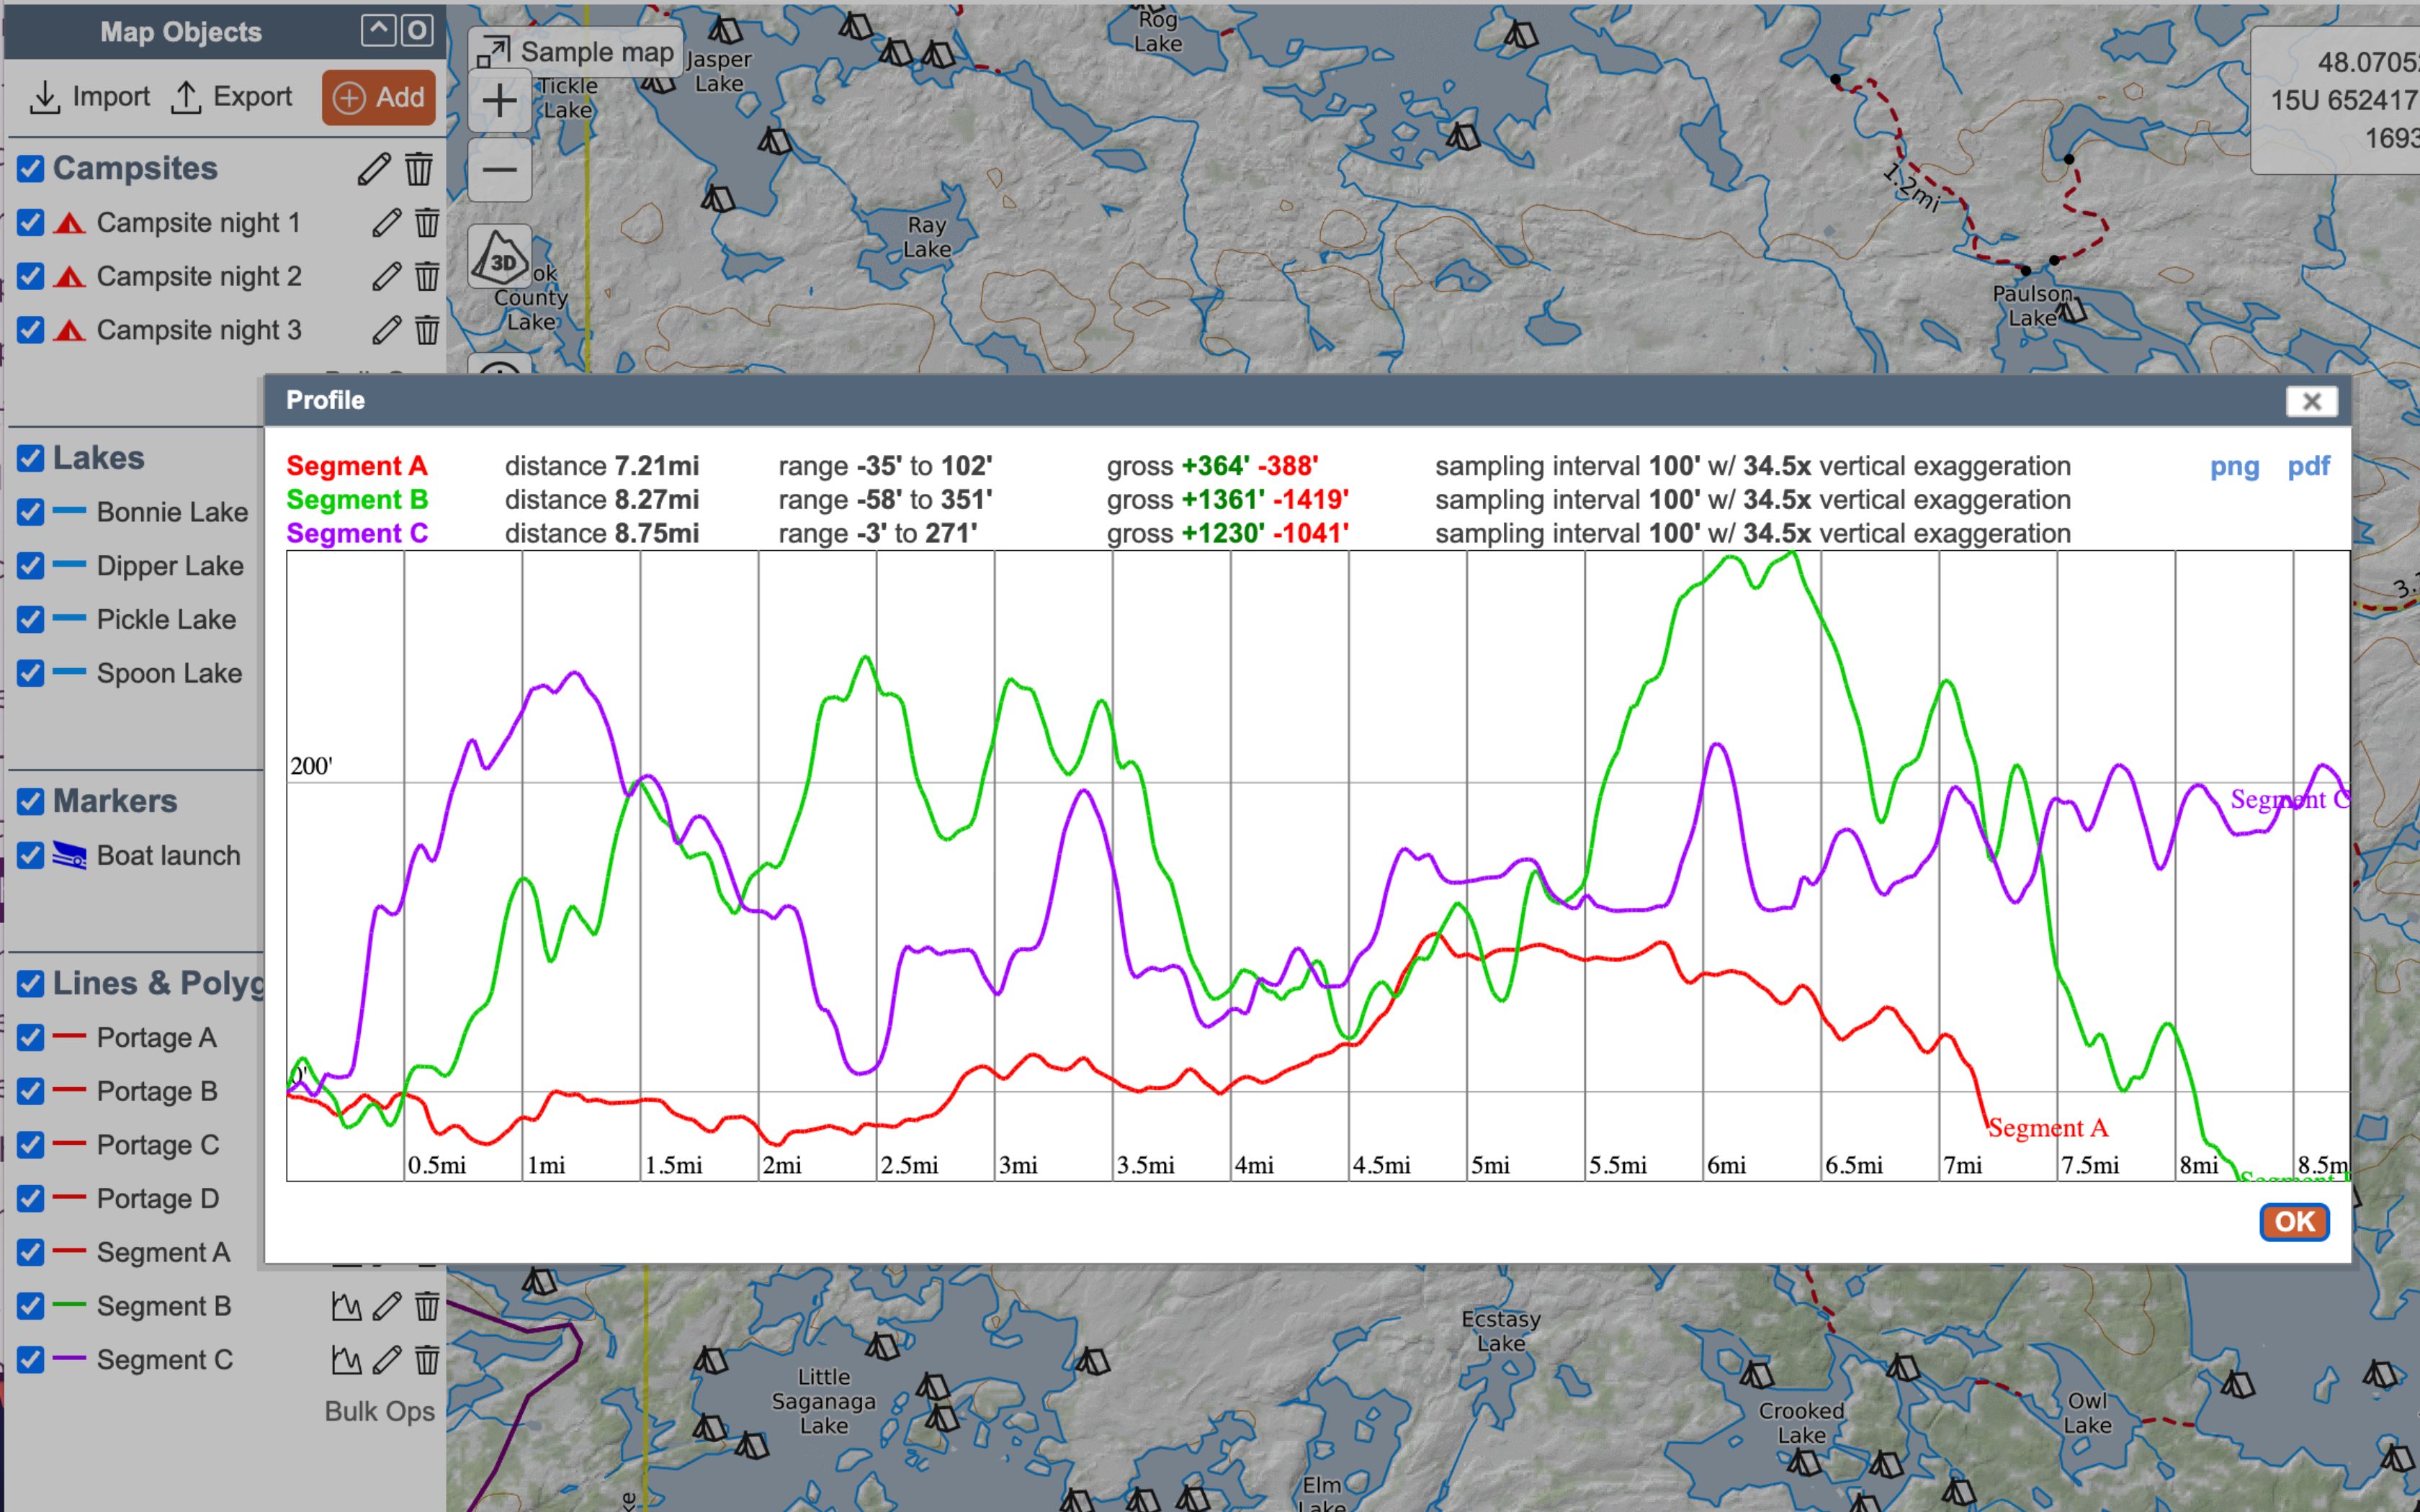
Compare profile: Absolute and Relative.
To view and compare line profiles, use the absolute or relative profile links. First select the objects to compare (all are selected here), then click one of the profile links. It will calculate the profiles and produce a graph.
While at first glance the two types of profiles look very alike, the key difference is reflected in the starting “elevation.” The first chart, the Absolute Profile, arranges the lines according to their actual starting elevation.
The second chart, Relative Profile, compares the relative elevation changes per line. They each begin at a zero vertical point, and are drawn relative to each other at that zero point. Thus, comparing segments A and B, A begins at an absolute elevation of about 1,410 ft and B begins at about 1,380 ft. On the other hand, comparing the relative elevations over time, we see that by 2.5 miles in, B has climbed some hundred feet while A has generally stayed flat or lost elevation. While you could still determine this information from the Absolute graph, the relative graph can depict difference more clearly.
Travel Plan
Pro, desktop and team users can create a detailed travel plan for multiple lines. Travel plans include the estimated time to travel each line based on the Munter Method for Time Calculation.
Visit the Travel Time and Plan section to learn more.
Export CSV
This option allows you to export a CSV file with data about the selected objects. For markers, you can export the label, icon style, position, date of last update, and visibility on the map. For lines and polygons, you can export the color, size/length, date of last update, and visibility on the map.
Delete Objects
To remove multiple objects at once from a map, use the bulk ops delete function. Open bulk ops, select all of the objects you choose to delete, click Delete, and then confirm you want to delete those objects. There is no recovery of deleted items, so use caution with this feature.