Managing Your Account Data
in this lesson
Manage your account items in Your Data. On this page we cover everything in the Your Data button, which you can access at the top right of your web view, or in the three-bar menu on the mobile app.
Topics on this Page:
Overview
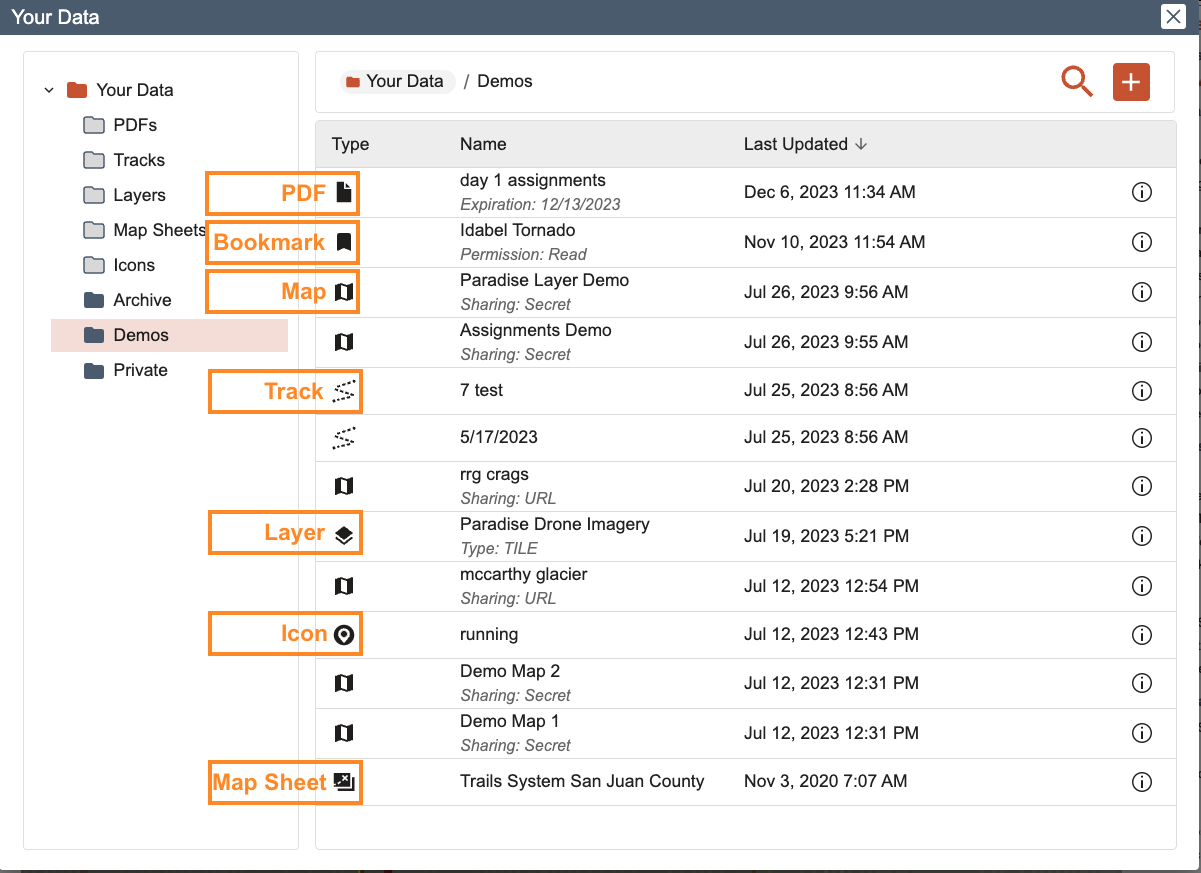
Your account can store the following data items:
- Maps
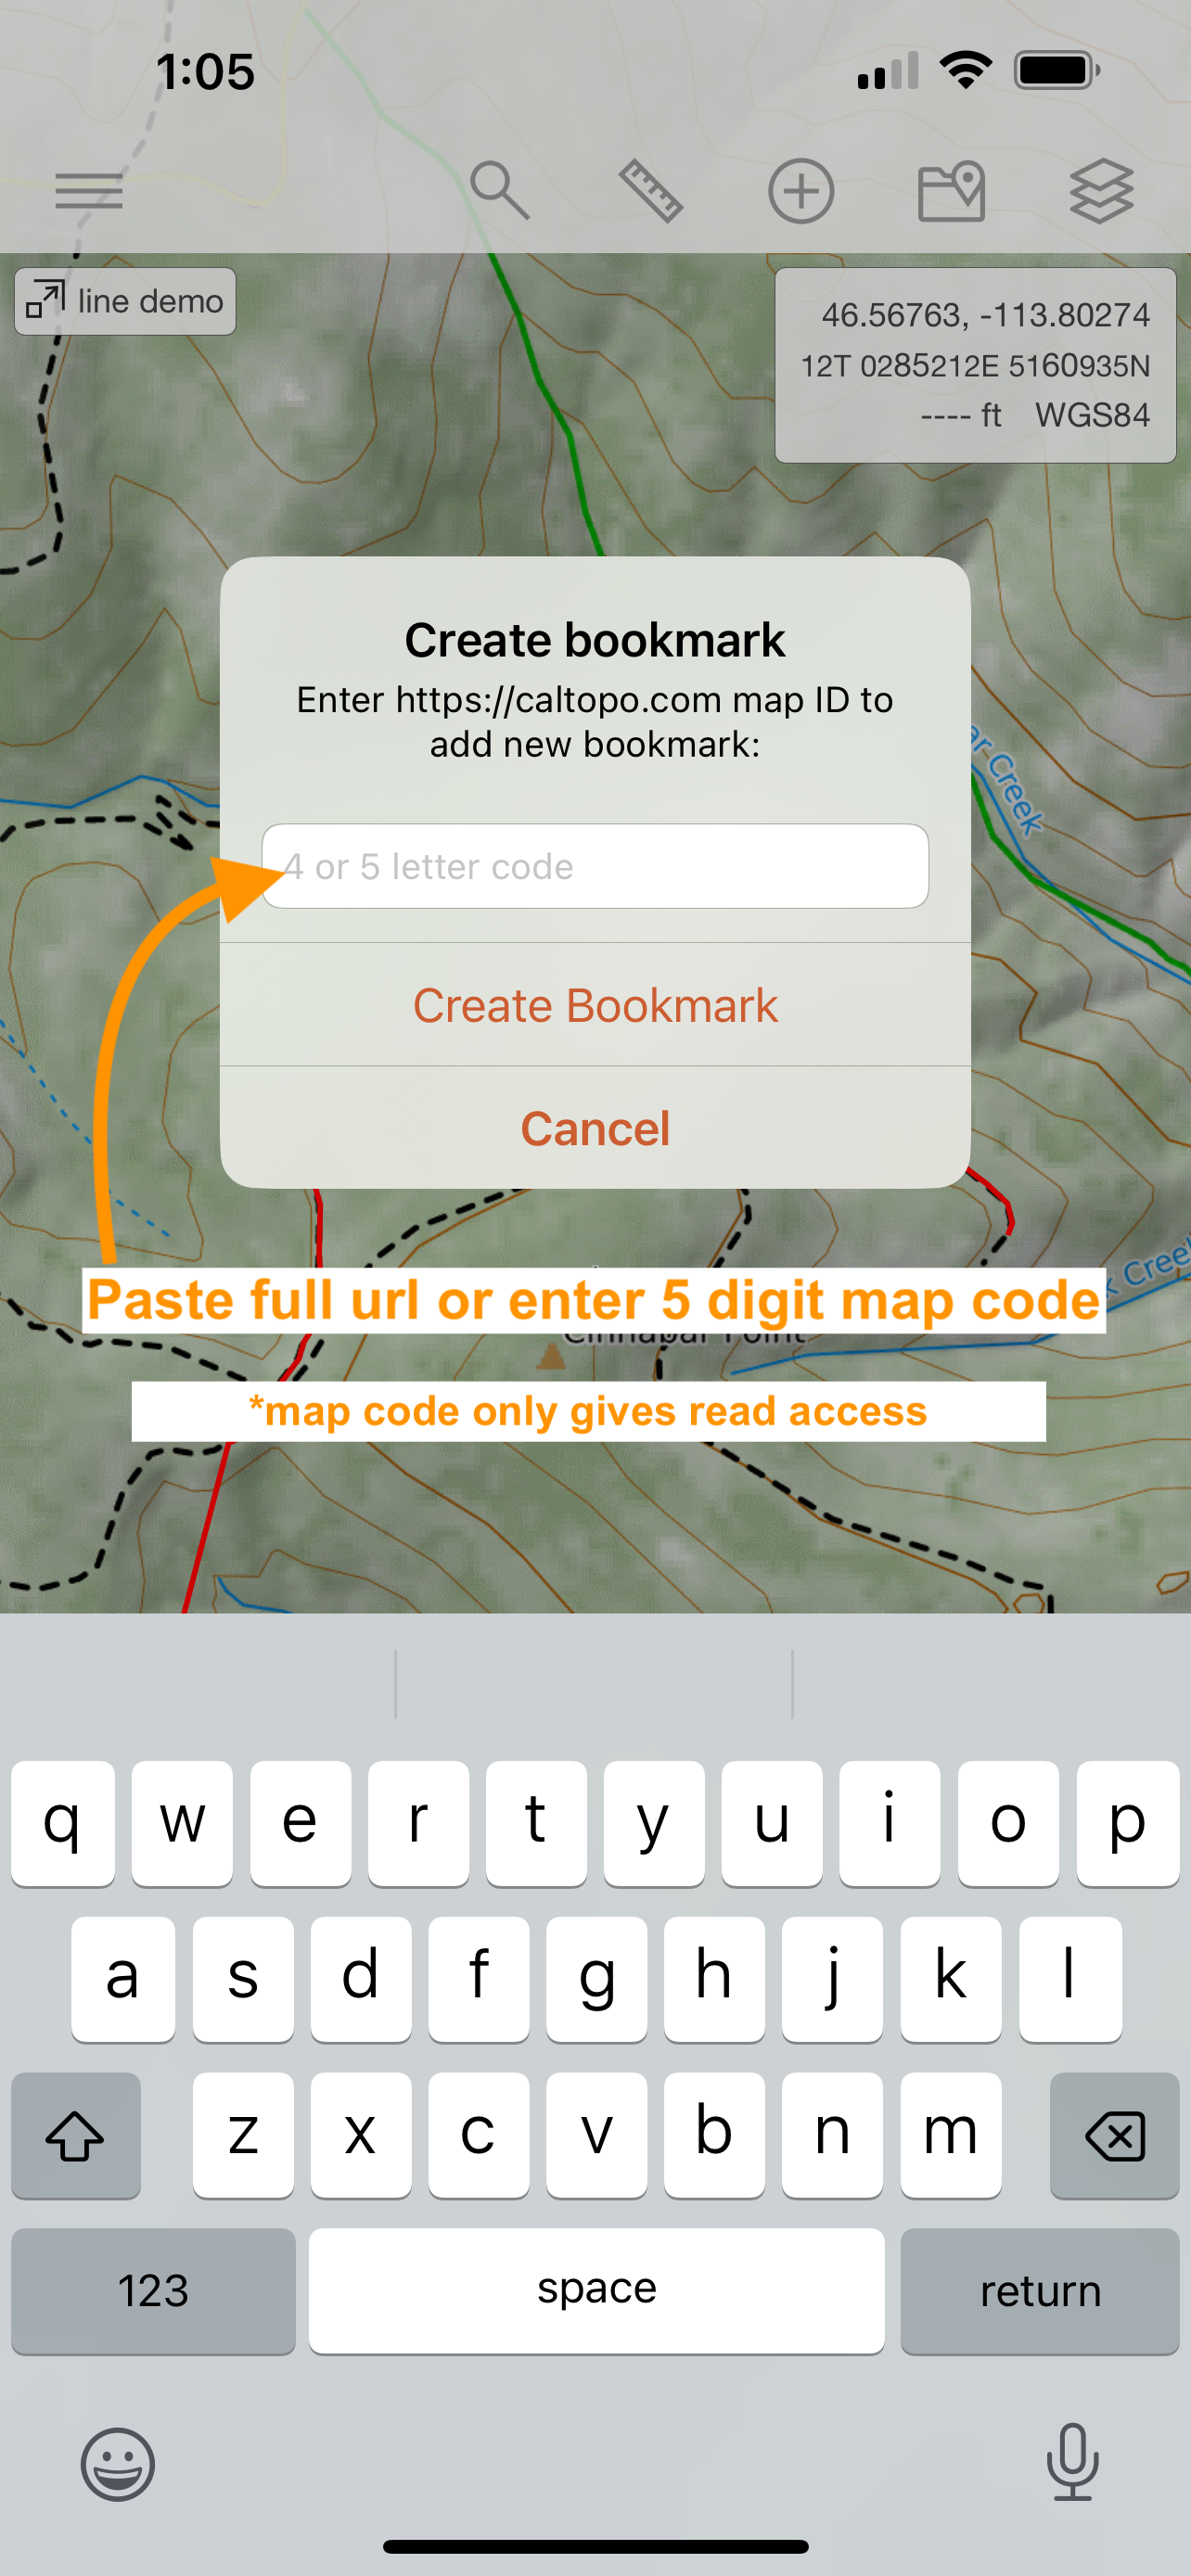
- Bookmarks (maps owned by other people)
- PDFs or JPEG “prints”
- Tracks (recorded via the CalTopo mobile app)
- Custom Layers
- Map Sheets
- Custom Icons
You can manage and edit these data items from Your Data. In general, to interact with Your Data on the web interface,
- Click once to select an item
- Click twice to open an item
- Hover to view more actions
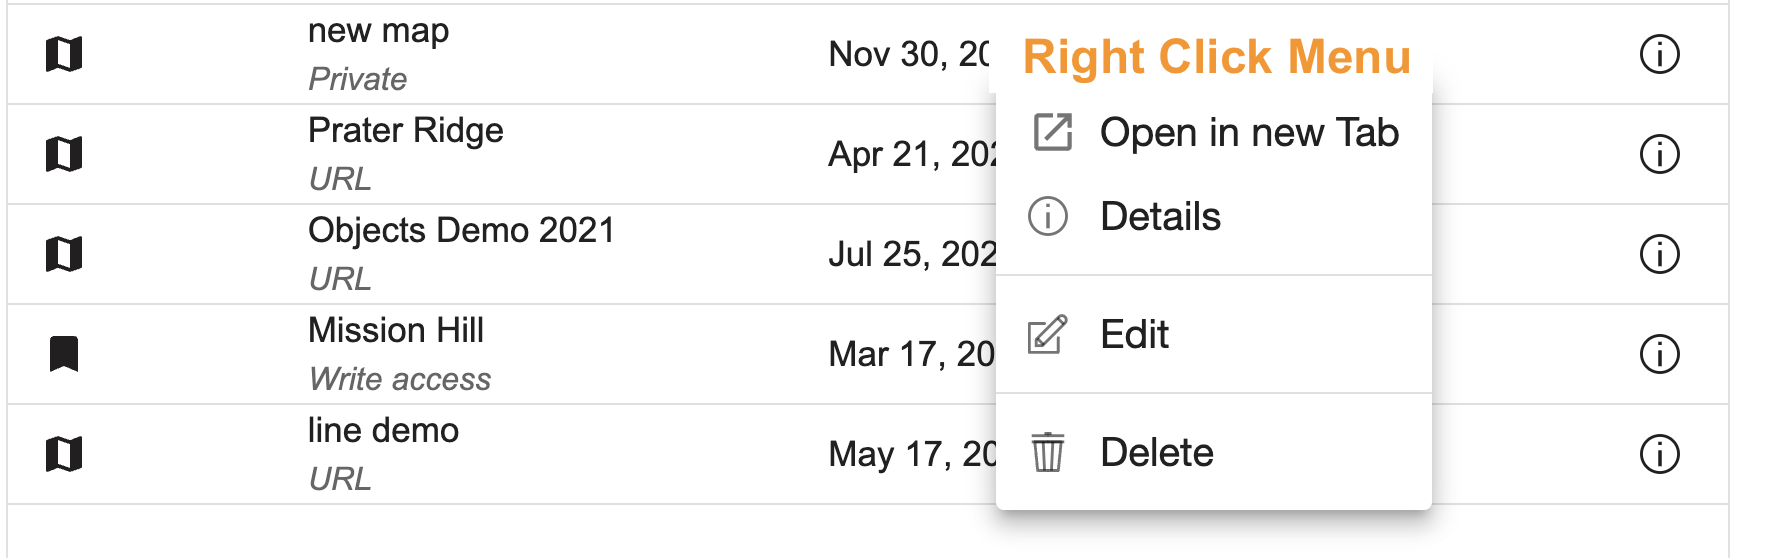
- Right click to view more actions
- Drag and drop is one way to move items between folders
- The add button at the top right lets you create new items
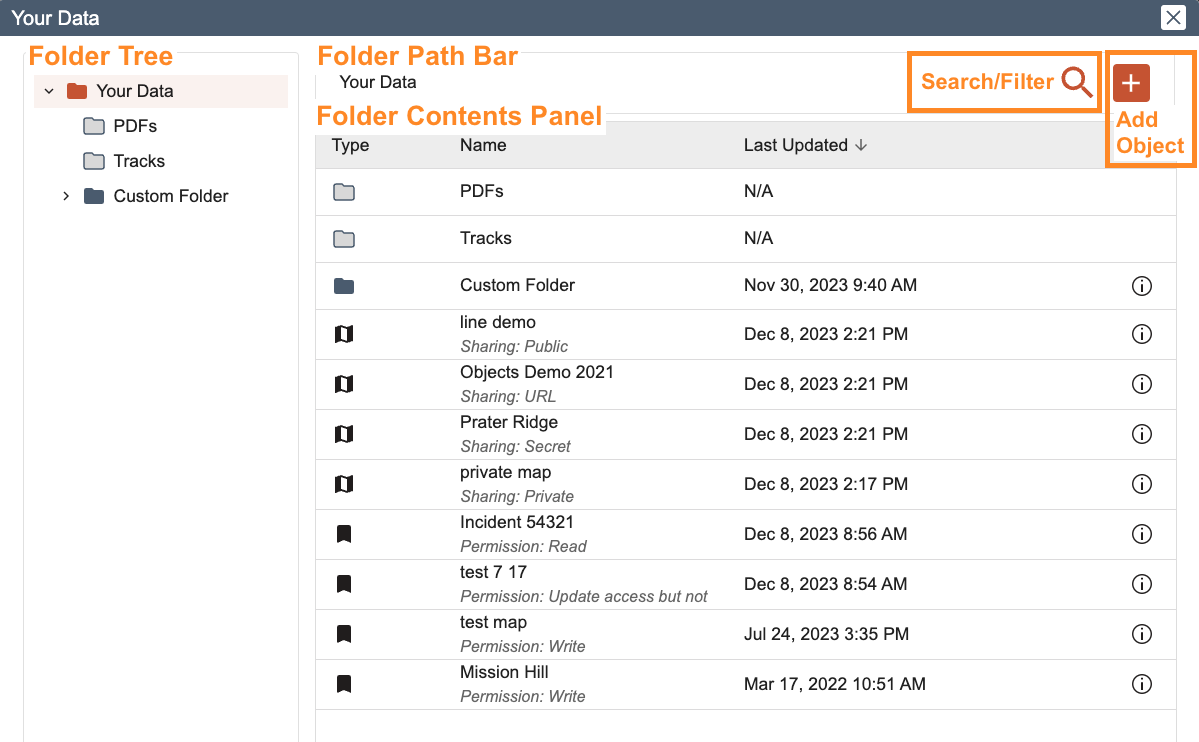
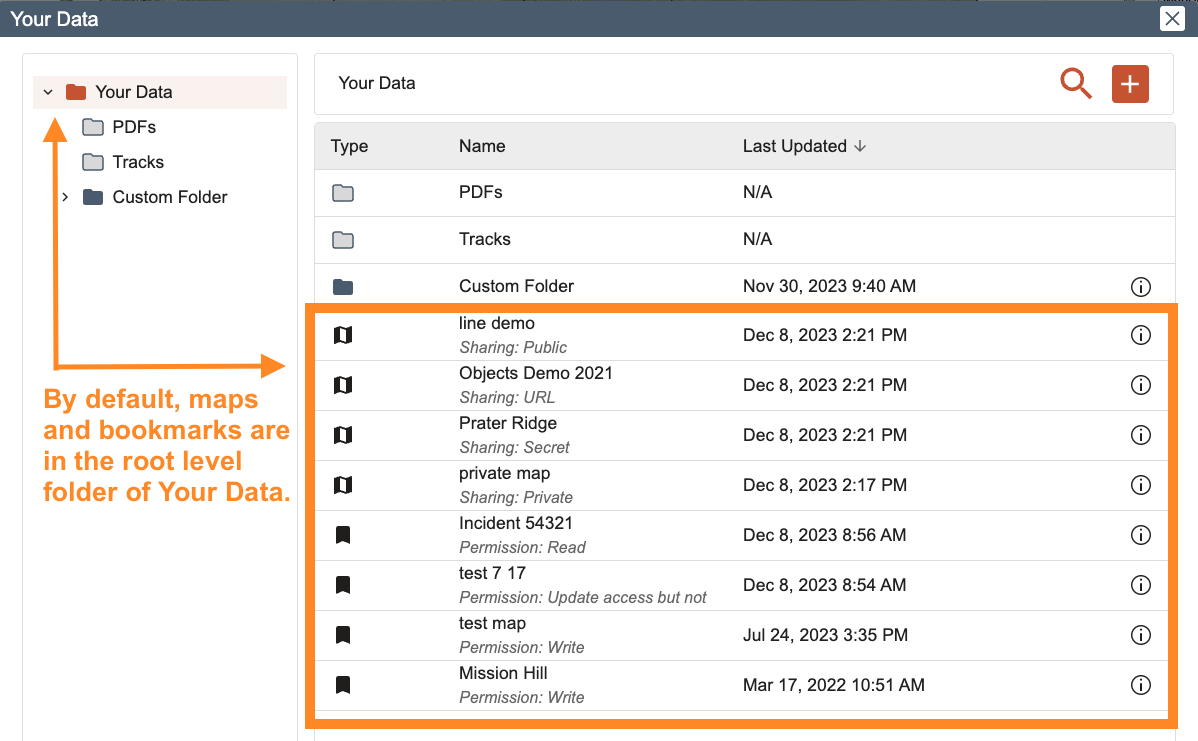
When you open Your Data, you see a window with folders on the left, called the Folder Tree. Folder contents are on the right in the Folder Contents Panel. At the top is the Folder Path Bar, as well as the search or filter button and the add object button. Your maps are listed in the root Your Data folder.
Use the folder tree and folder path bar to navigate between folders by clicking on a folder name. Right click on a folder for more options.
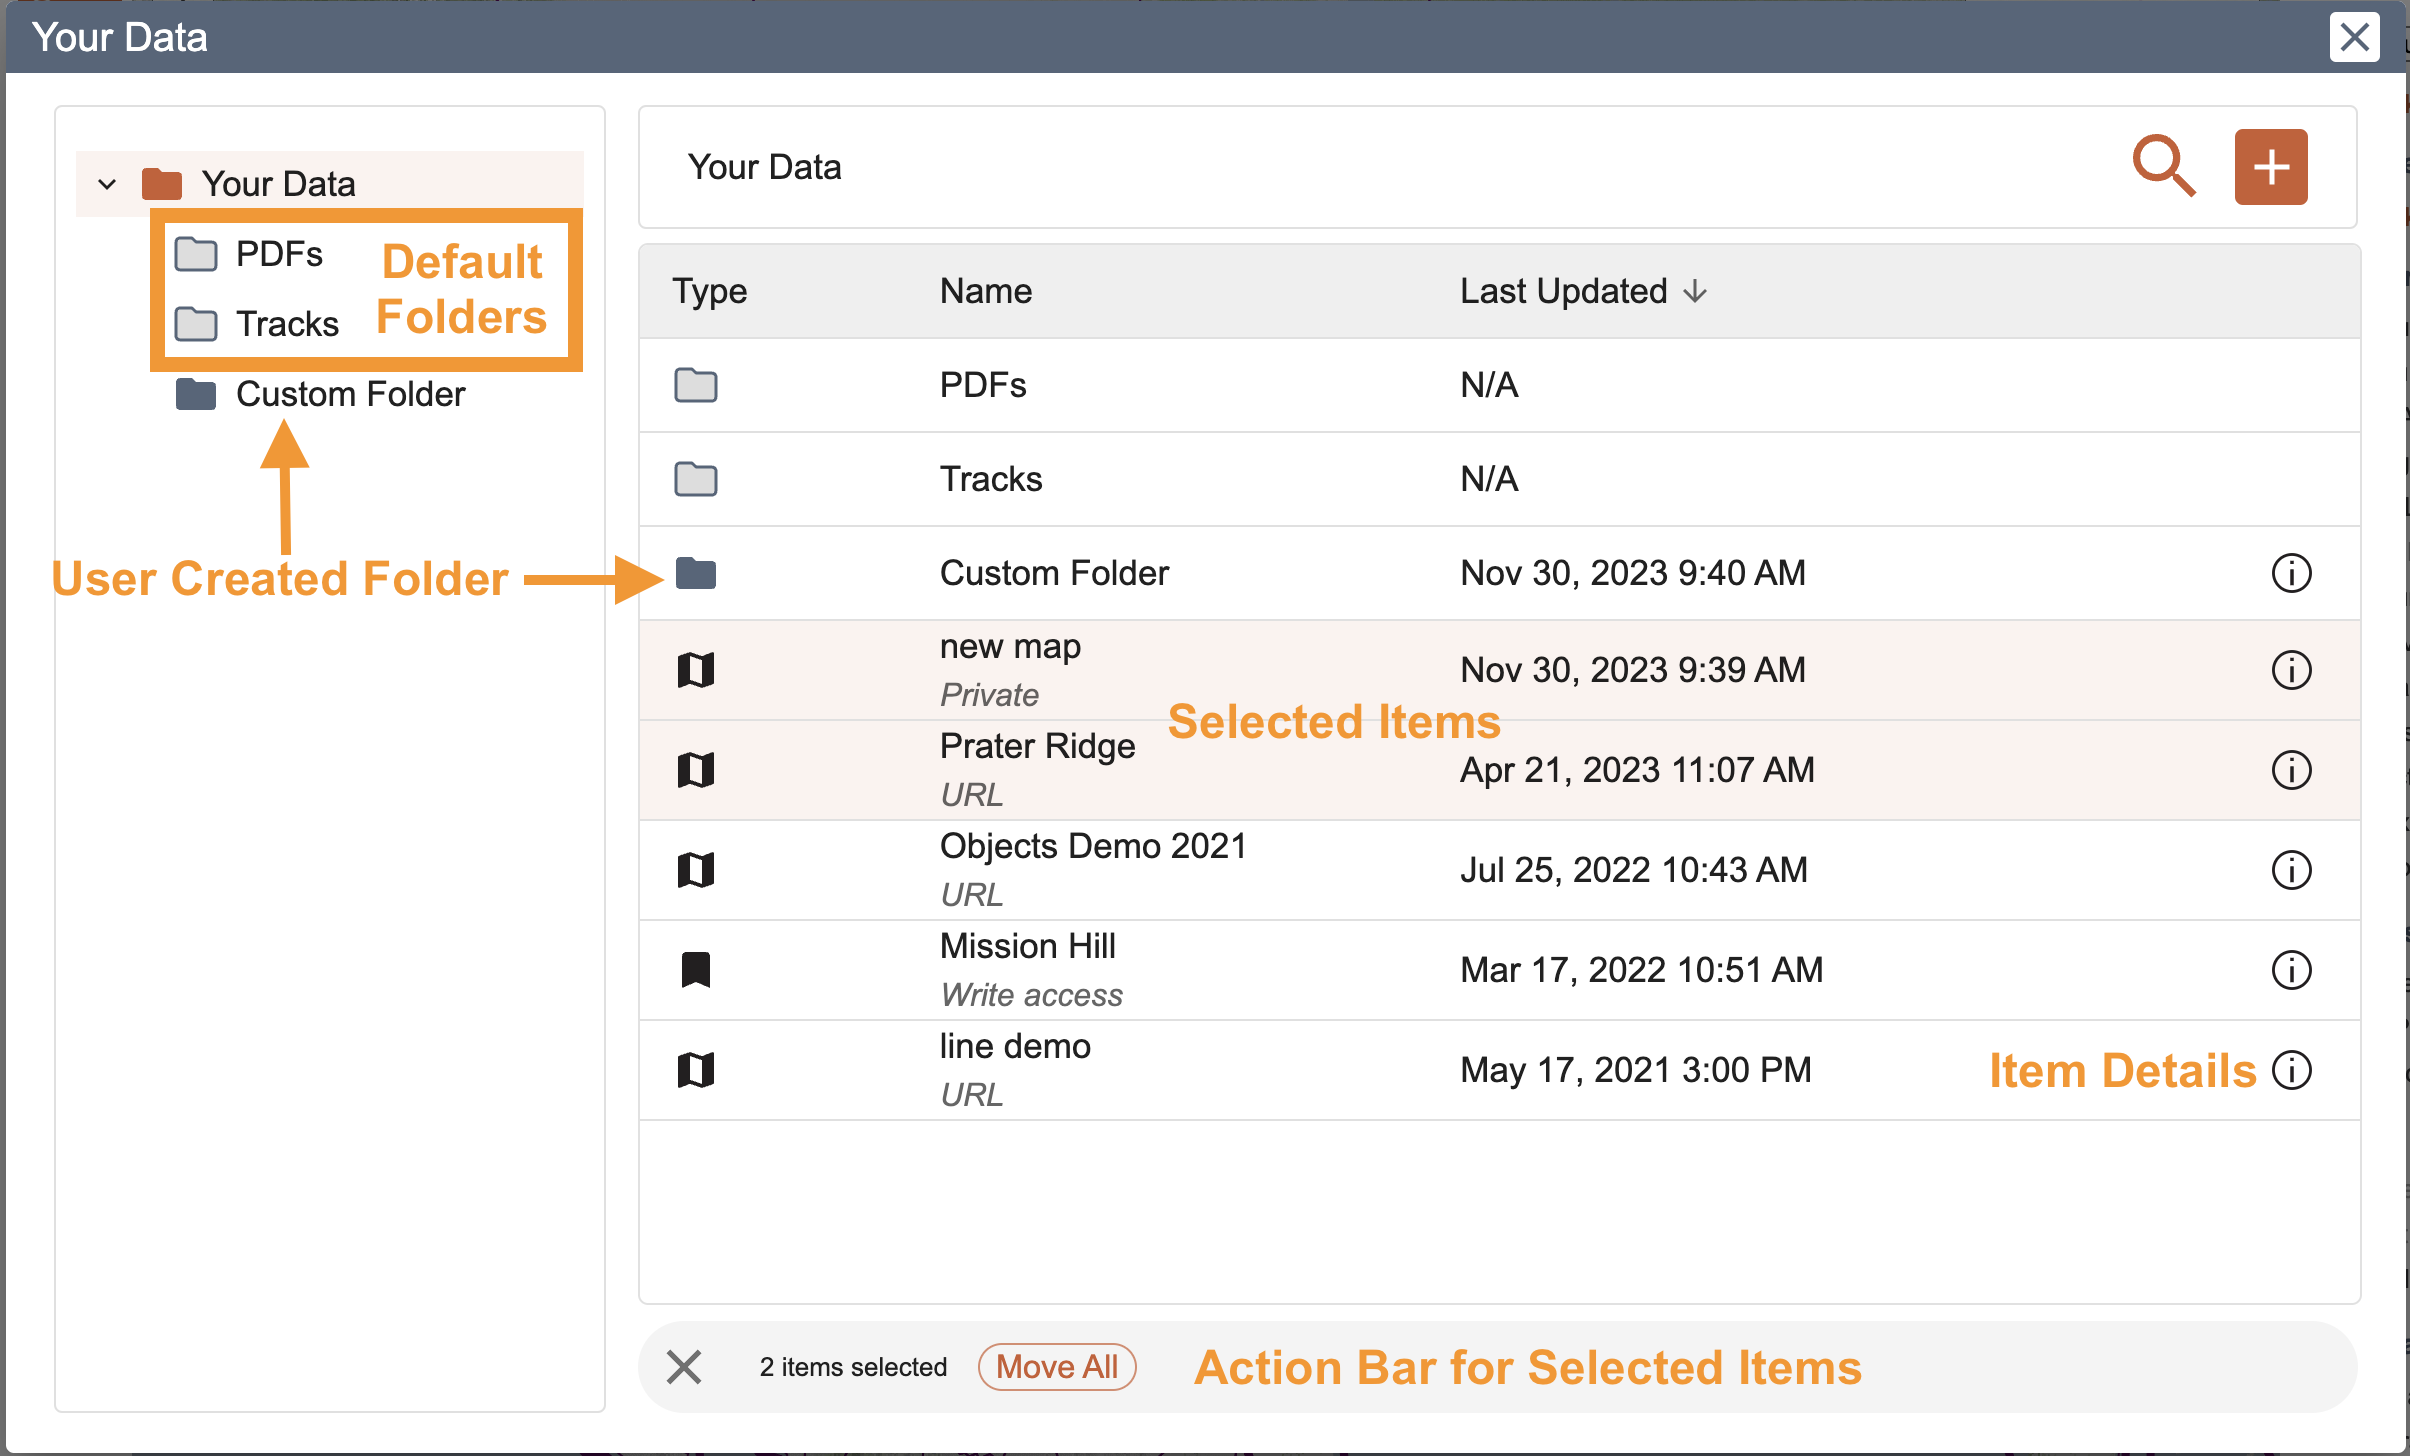
In the folder contents panel, open a folder or object by double clicking it. Select multiple items with ctrl-click or shift-click. Then use the action bar at the bottom to move those items.
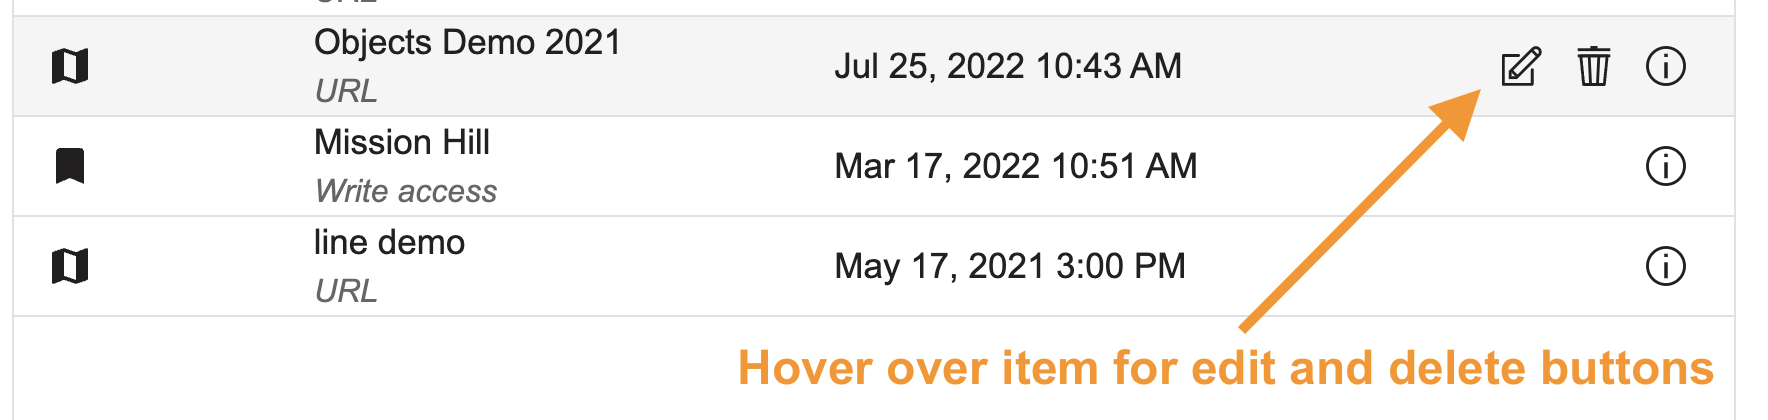
Hovering on an object in this panel will show you the edit and delete buttons. You can also right click to access more actions.
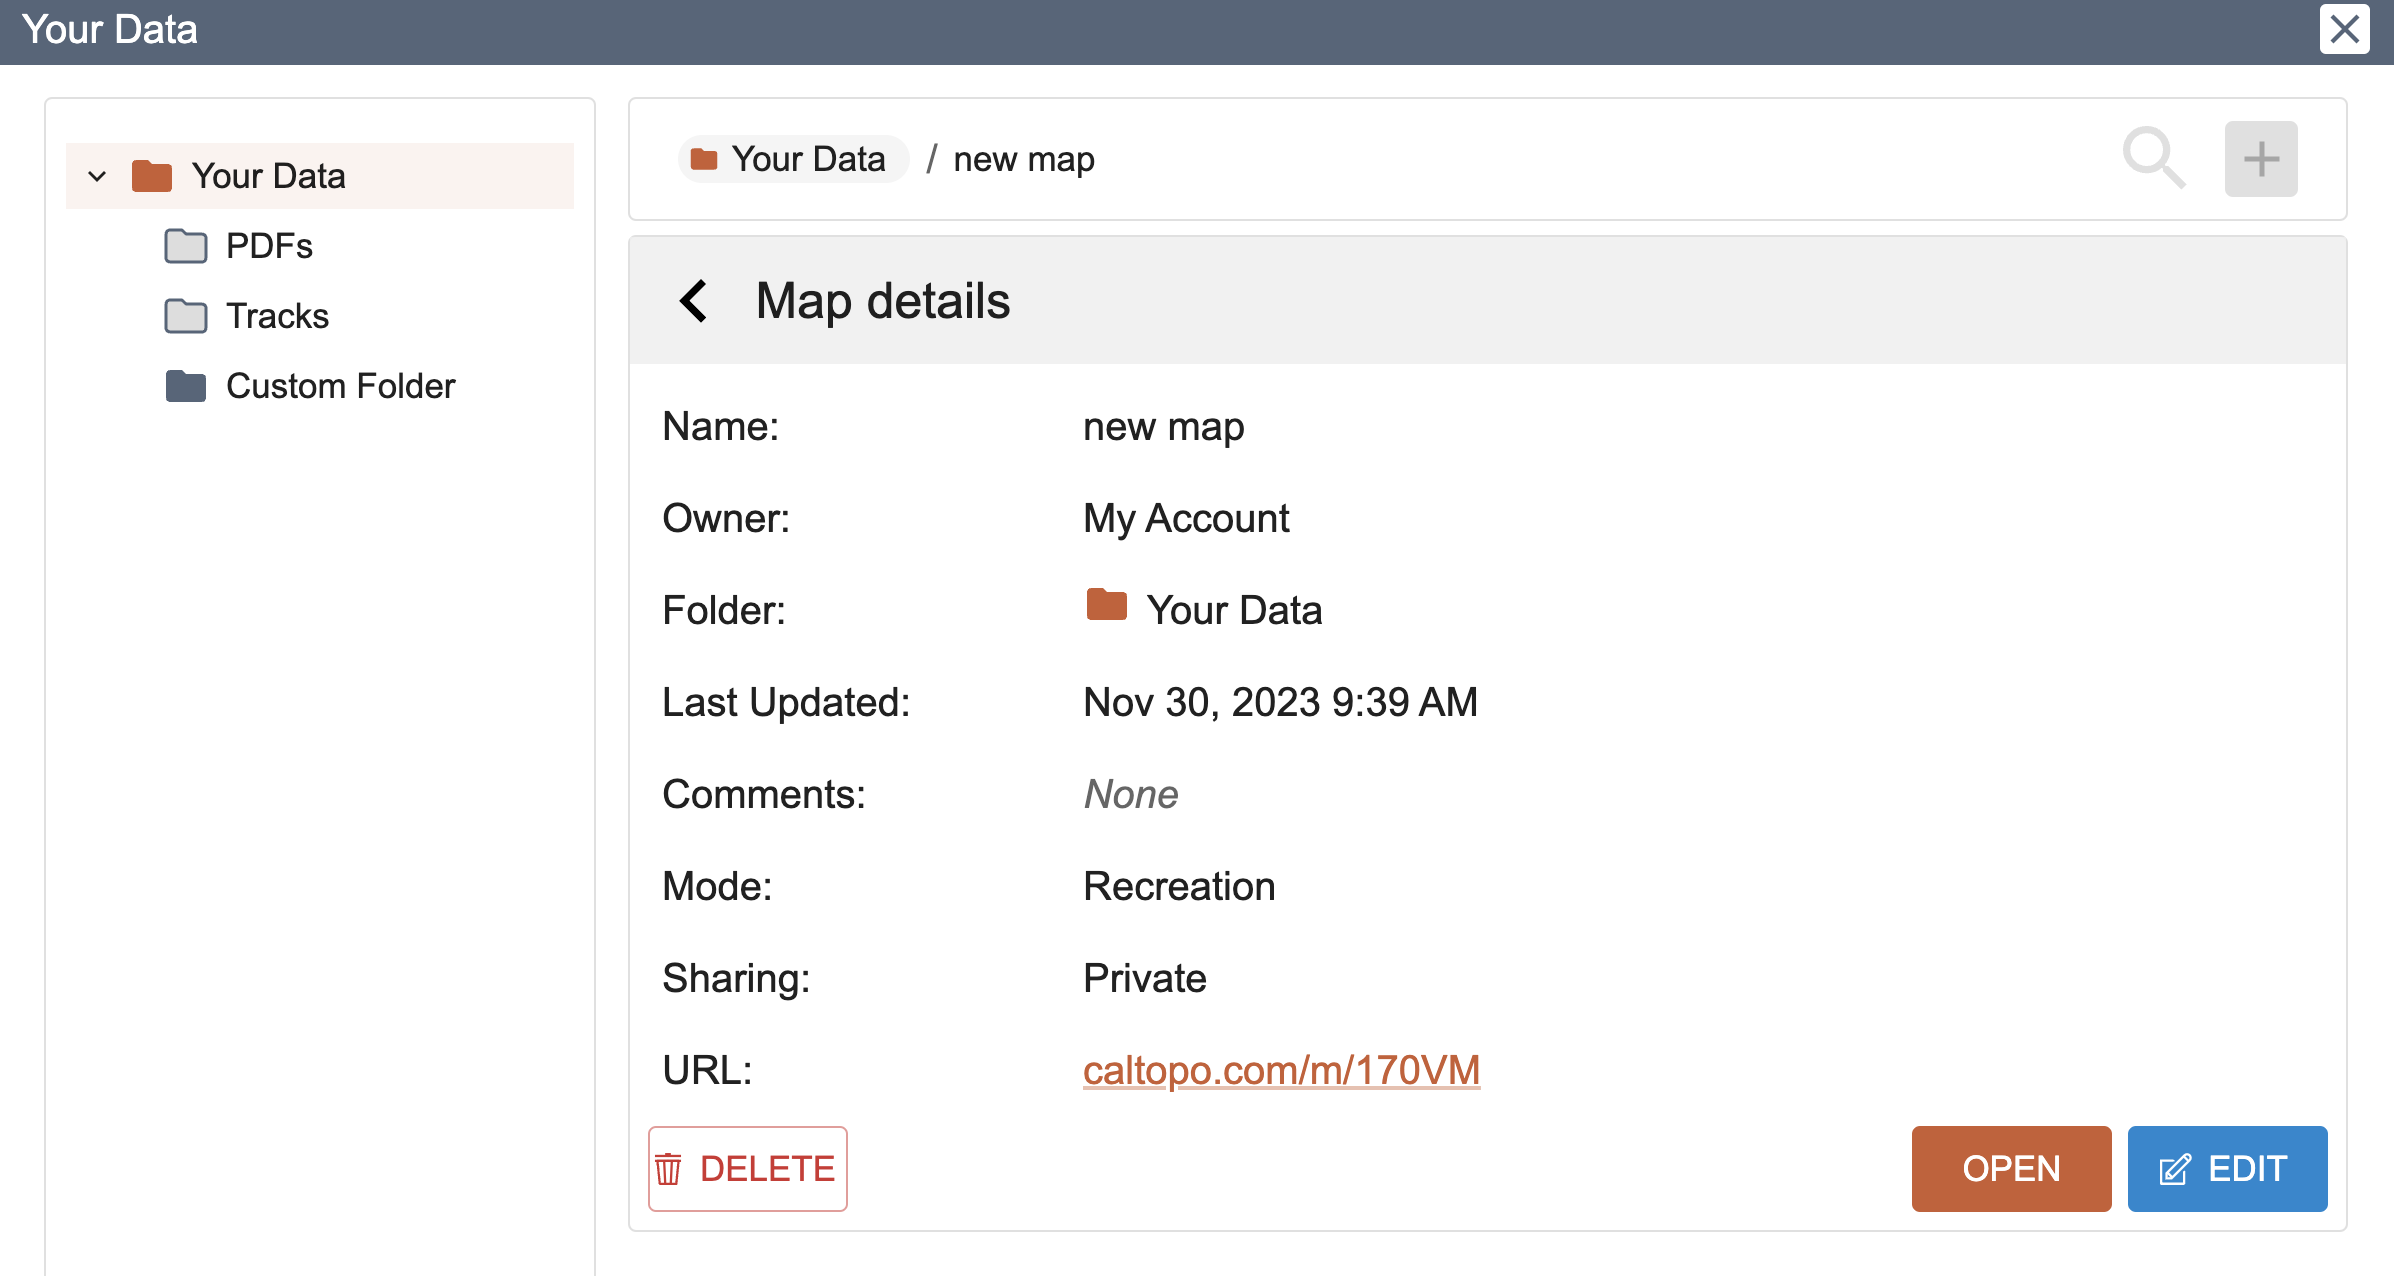
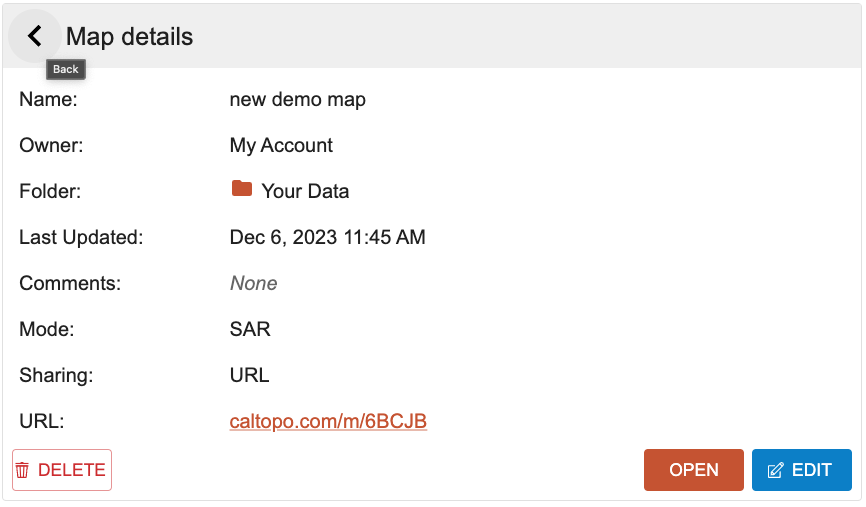
Use the info button for an object to see more details about an object such as description, sharing, and the URL for the map.
Search and Filter
The search function works as a filter for the active folder and any folders contained within, ie downwards in the file tree. It can not search upwards to any parent folders. For example, if you are in Your Data, it will search all the default folders and any custom folders inside your data. However, if you are in the Tracks folder, it will not search upwards to look through the maps in Your Data.

When searching in a folder that contained multiple object types, you may select the type of data you want to look for, thus limiting the results to only maps, or to only pdfs, for example. Entering text in the search box will look for any items containing that text. For example, here I can search for the word ‘new’ and it will filter to show only the map titled “new map.”
There are keyboard shortcuts for searching. Use ‘ctrl/cmd + f’ to open the search function, and esc to close it.
Folders
There are two types of folders in Your Data - default and custom.
Default folders are created by the system to hold otherwise unorganized data. You can not edit default folders. Each type of account object will be in a separate default folder - tracks, pdfs, icons, layers, map sheets. Maps and bookmarks are contained by the root level Your Data folder.
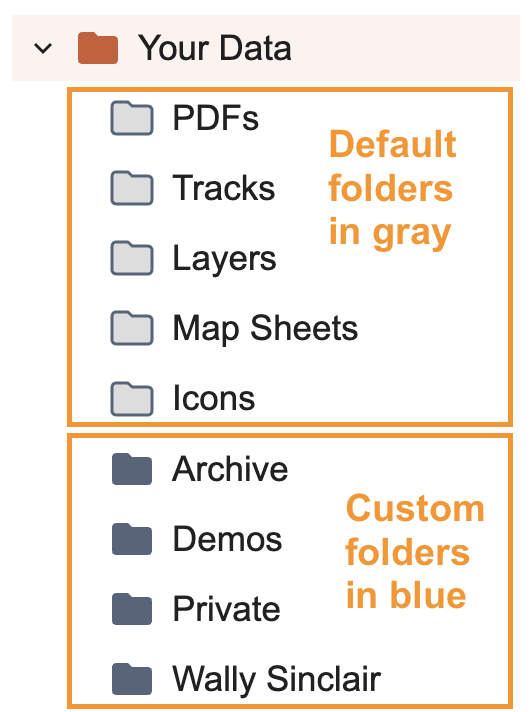
If you do not have any items saved to your account, you will not see any default folders in the list. Similarly, if you create custom folders and organize all your account data into them, your default folders will go away until you create any new, unorganized data.
From the folder tree, click a folder to view its contents. From the Folder Contents Panel, double click a folder to open it and view its contents.
Create new folders by using the + (add) button at the top right. Or right-click on the parent folder and select New, then select Folder. Move items to your new folder by editing items individually, or using bulk move via the action bar or drag and drop. Custom folders can contain more than one account object type. This allows you to create a folder that contains not only maps, but also pdfs, layers, map sheets, tracks, and icons.
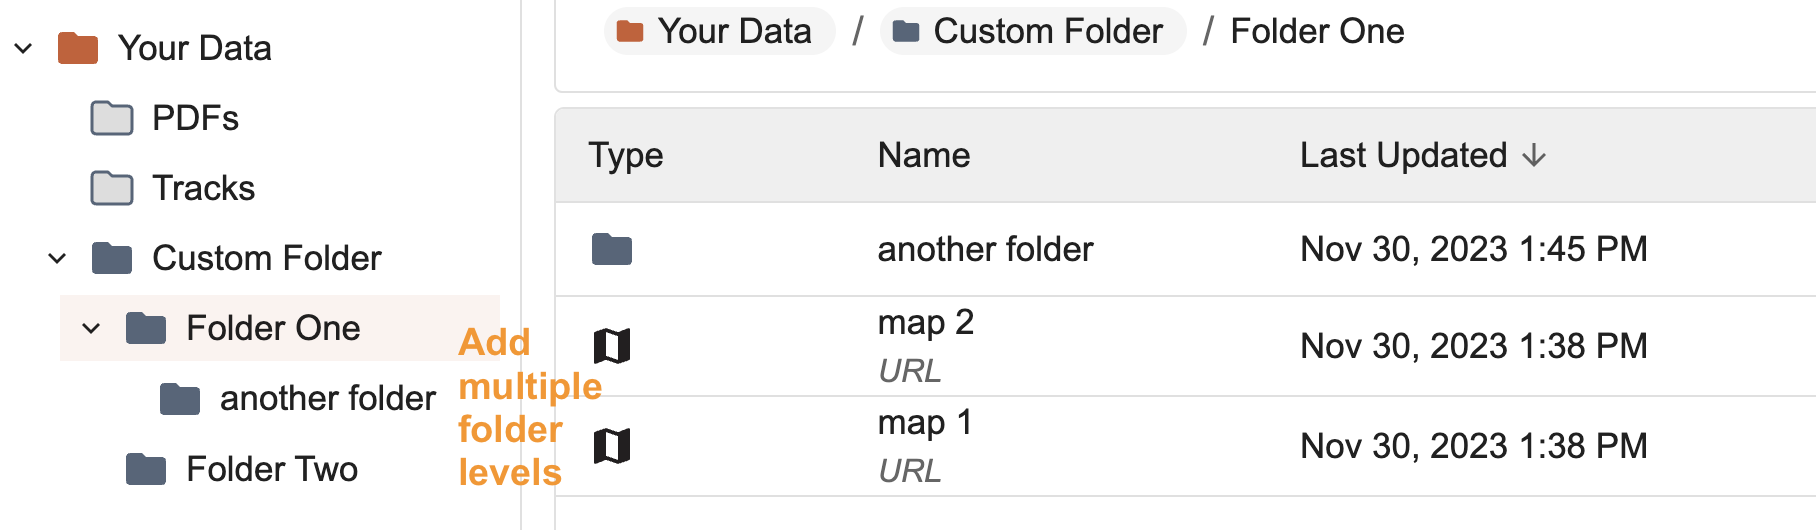
You can create as many custom folders as you like. You can also create folders-within-folders.
Folder Syncing between Web and Mobile
Users with large amounts of CalTopo data and/or limited space on their mobile device can use folder sync to control what data downloads automatically to mobile. Most users will want their entire data set to sync, and can disregard this setting. However, some users who have very large numbers of maps or other account items may want to organize their data in such a way as to not keep all of that data on their mobile device at all times.
A map, bookmark, track, or mapsheet that is not synced will not be available offline via your mobile app. If you open an unsynced map while in network service, it will sync and open as expected.
To use folder syncing, you must first create a new account folder. You can set the sync status of the folder either when you first create the folder, or by editing it later. Folder syncing only applies to custom folders that you create. It is not an option for default folders.
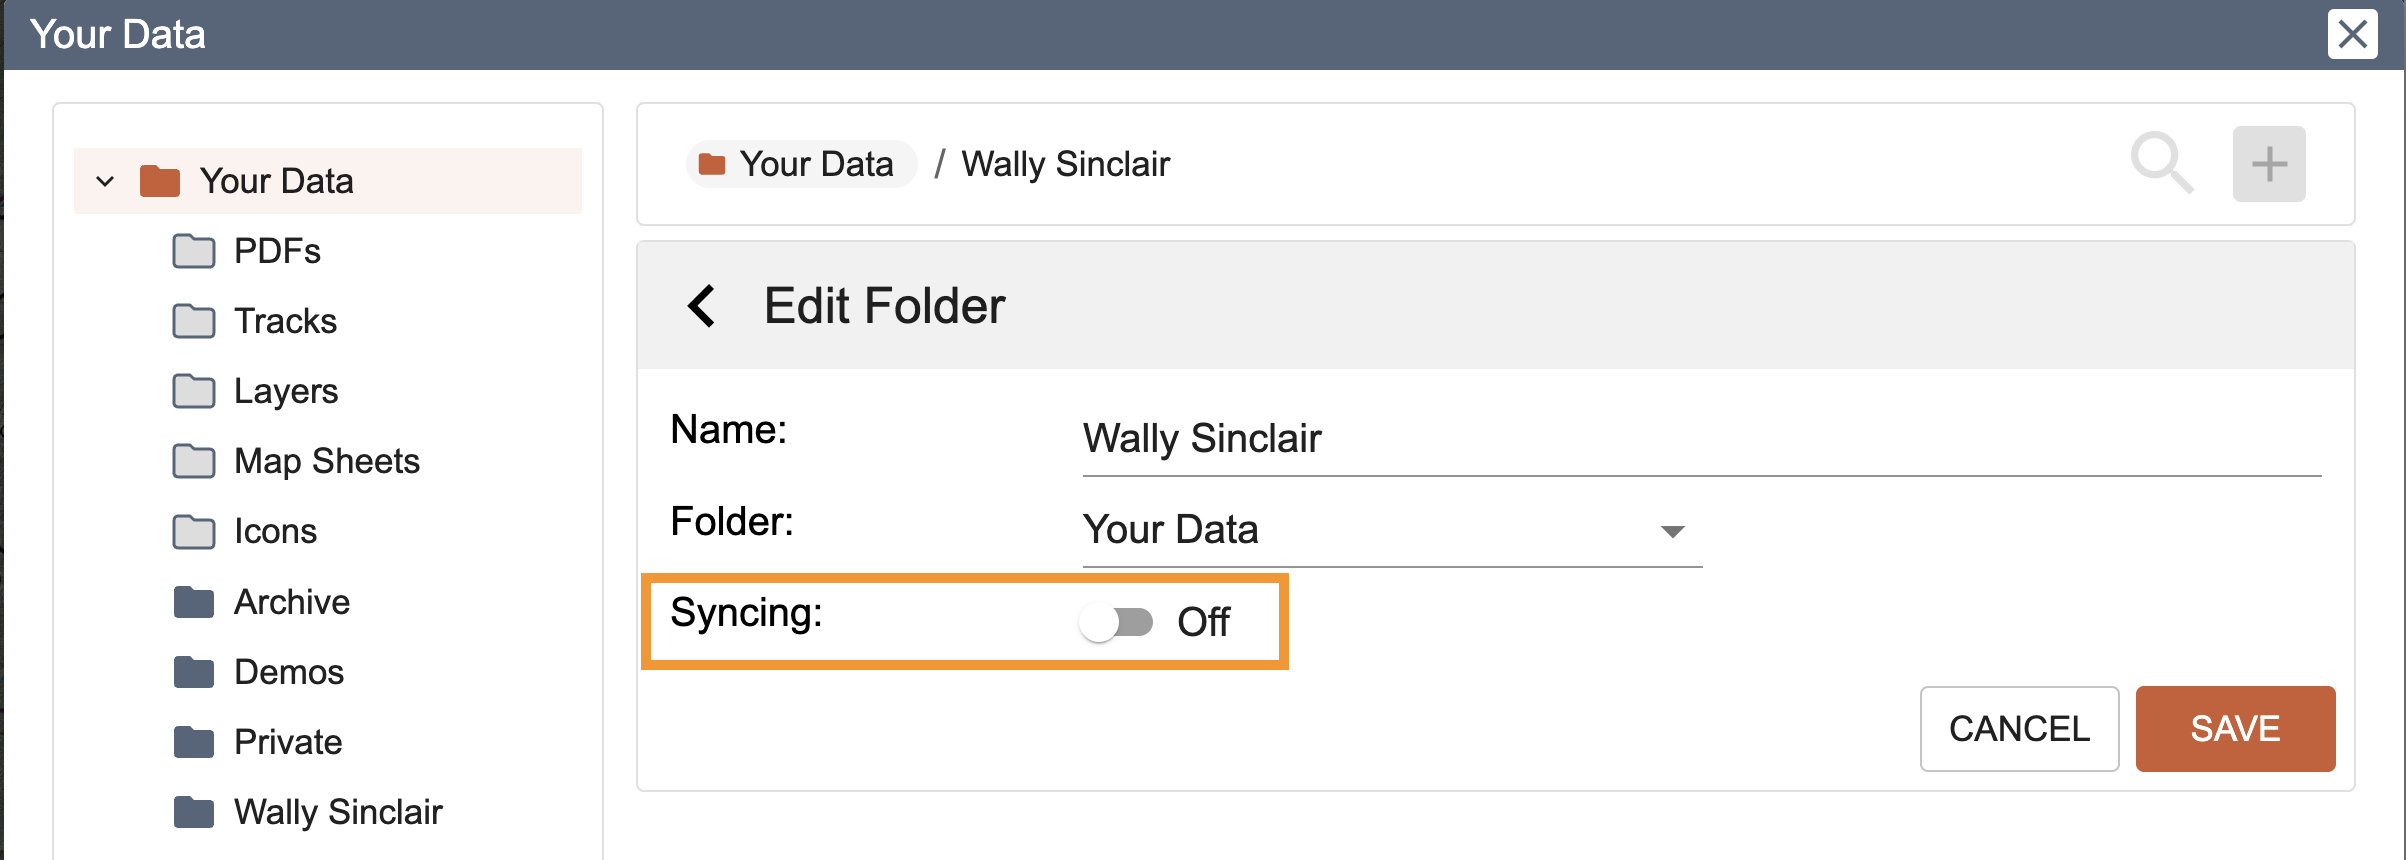
The default sync setting is ON. To edit the sync status on a folder:
- Web: Hover over the name of the folder and click the edit icon, or right click on the folder name in the folder list and choose “edit”. Click save.
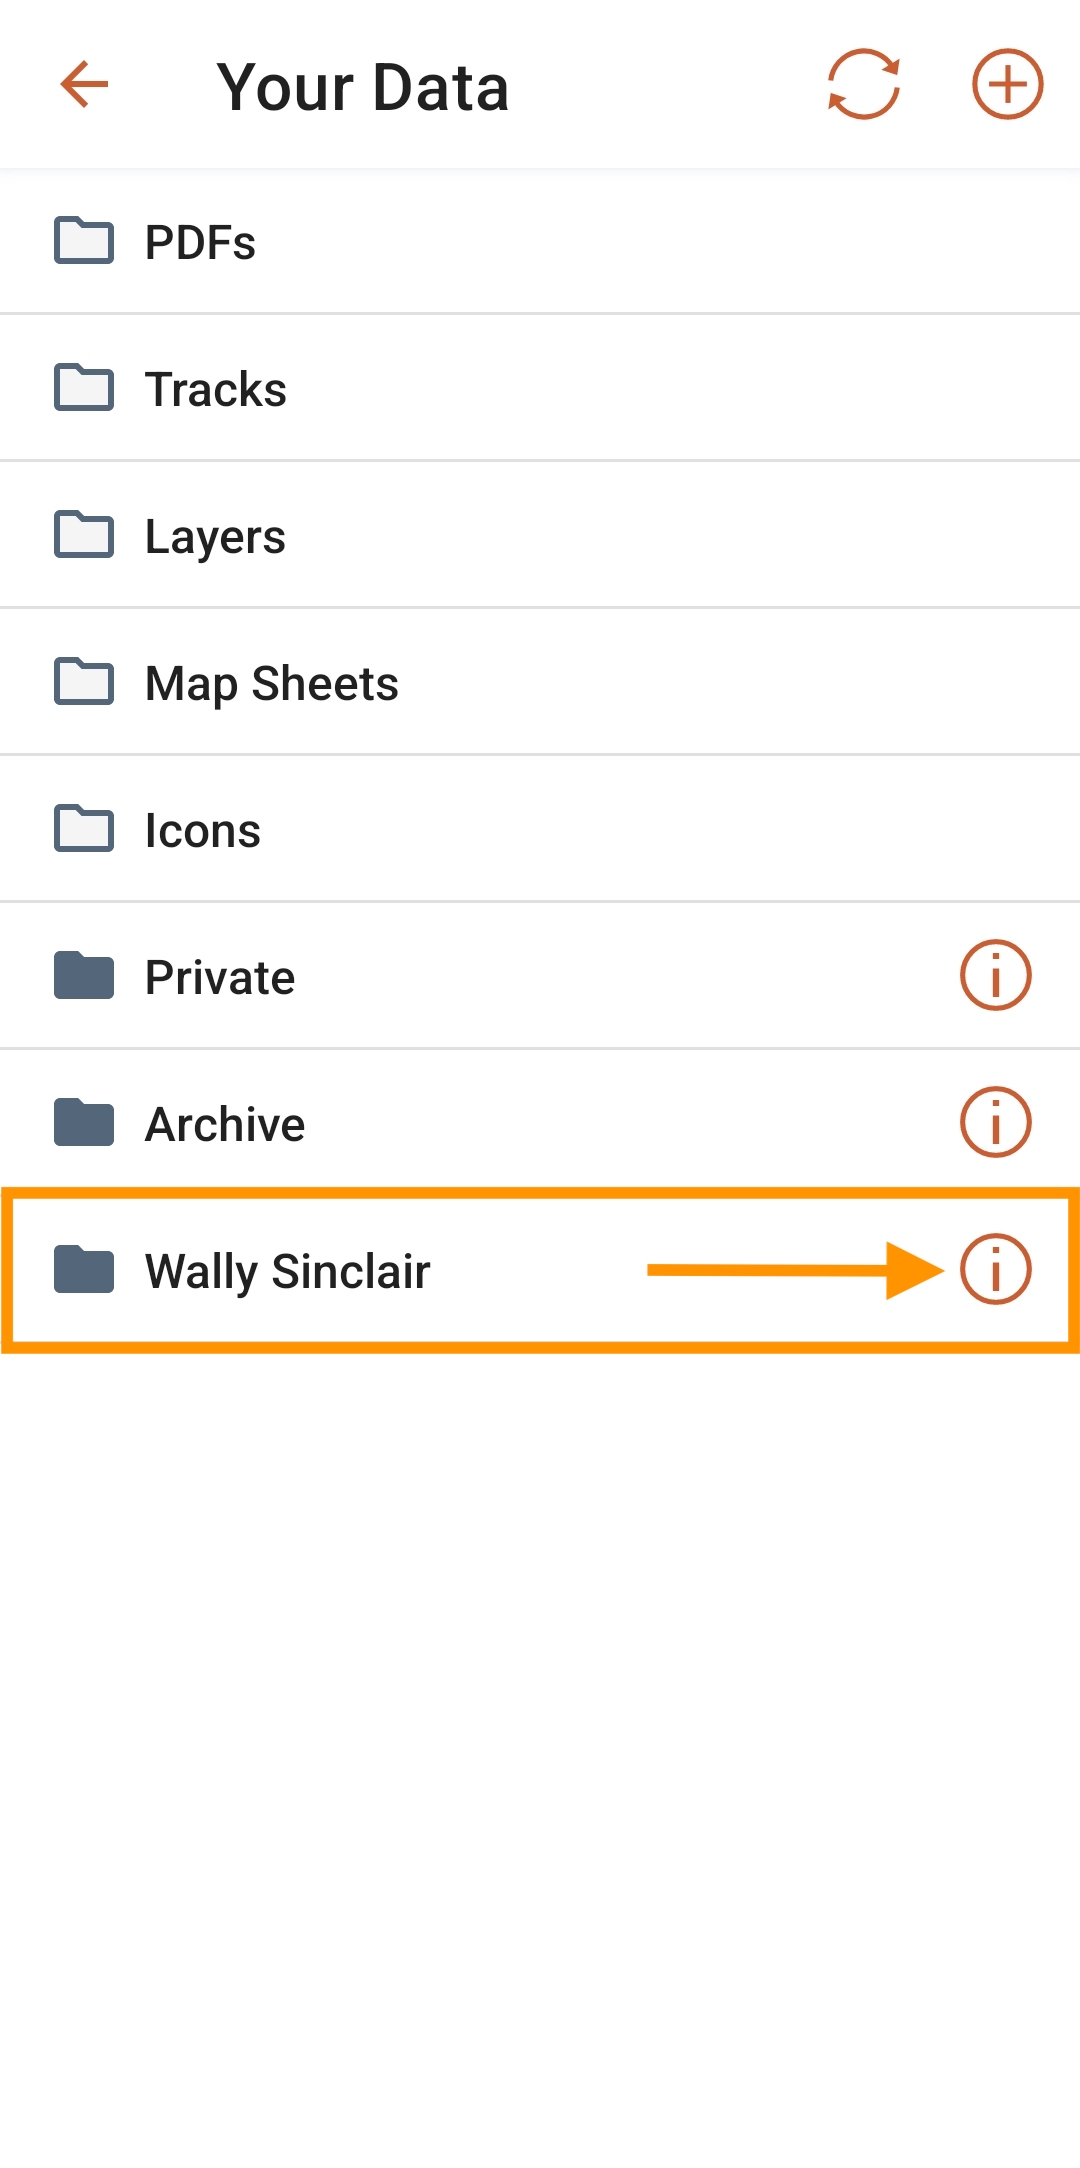
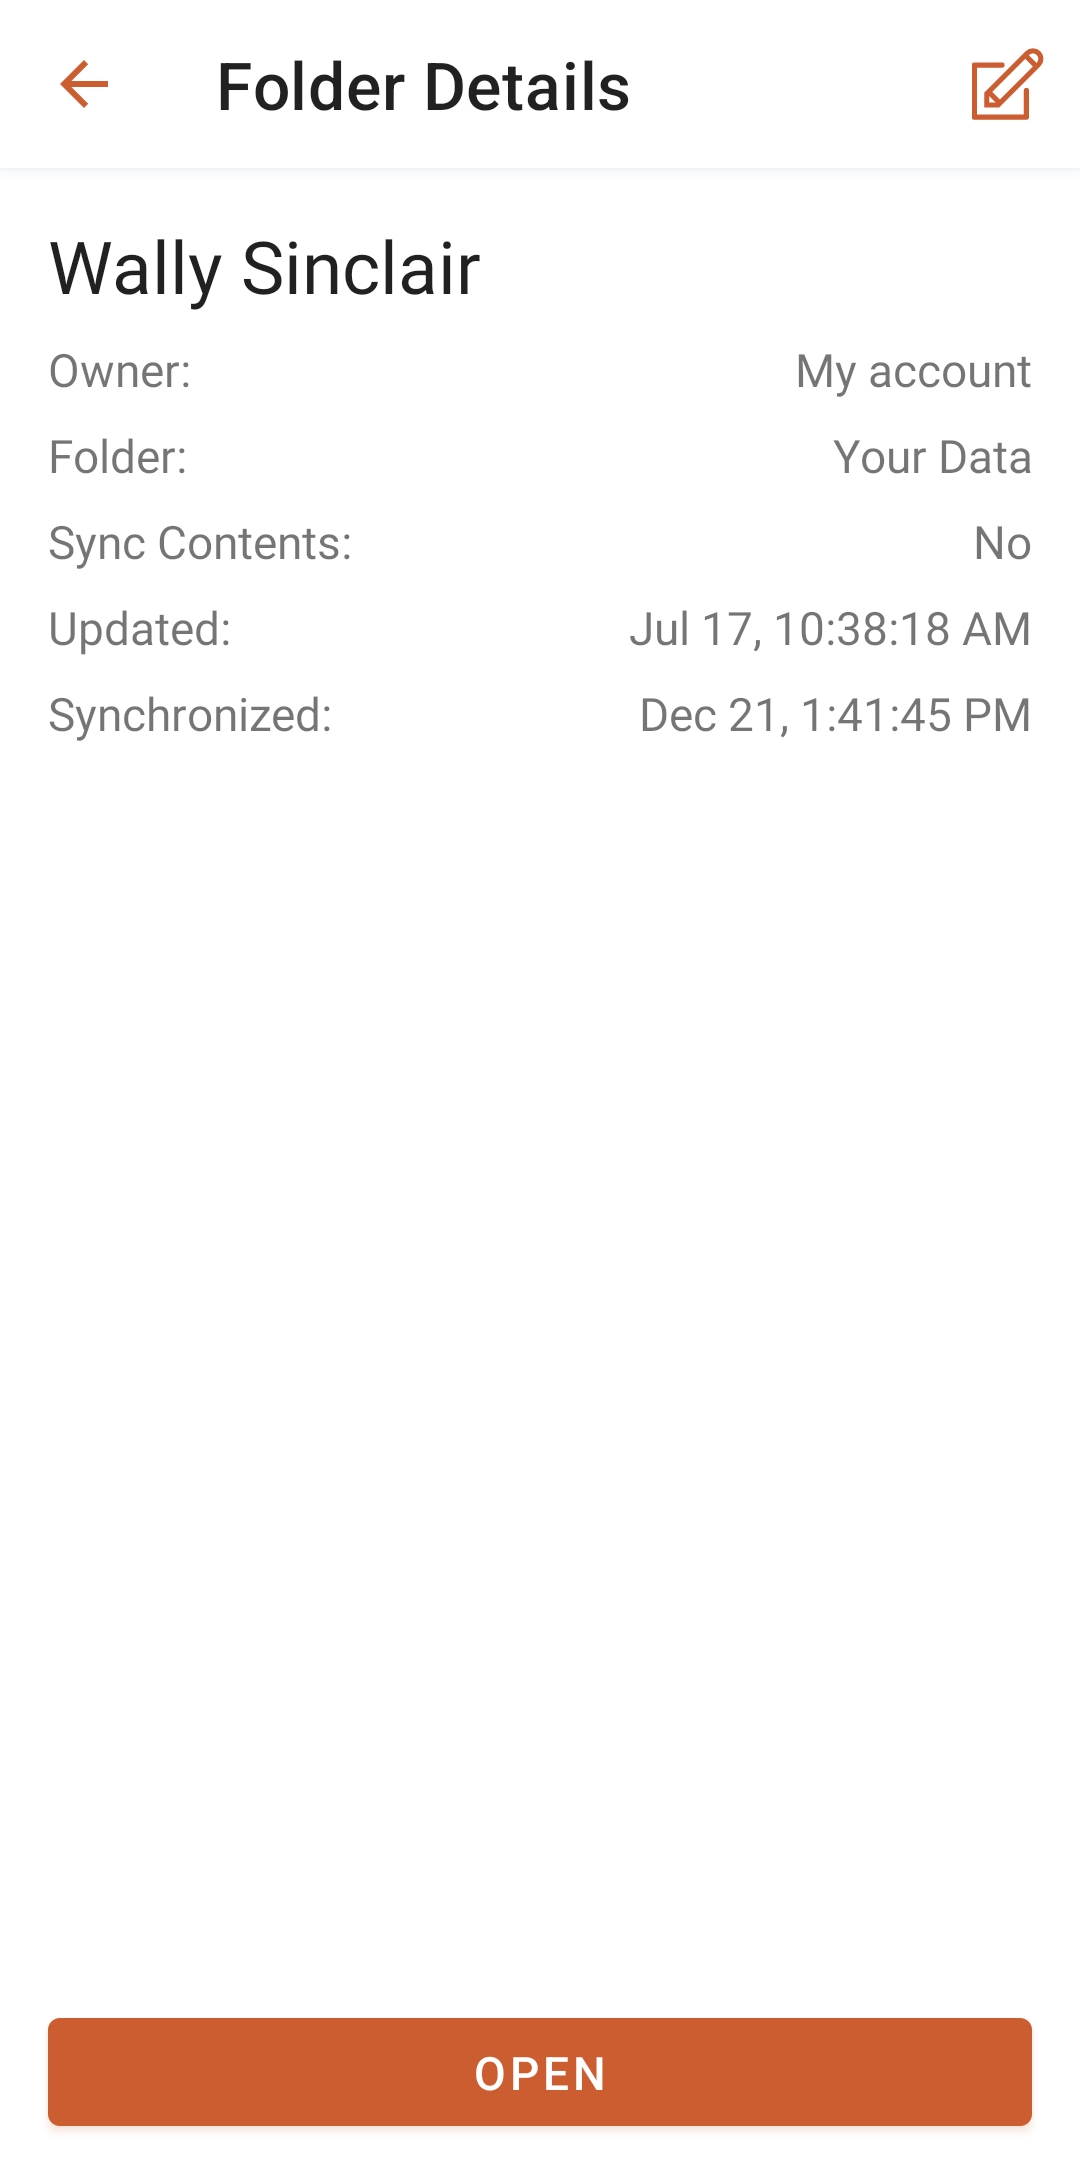
- Mobile app: In the folder list, tap the i (info) button on the same line as the folder name. In the upper right corner, click the edit icon. Toggle the sync switch to on or off. Click save.
- An unsynced folder can contain both synced and unsynced items.
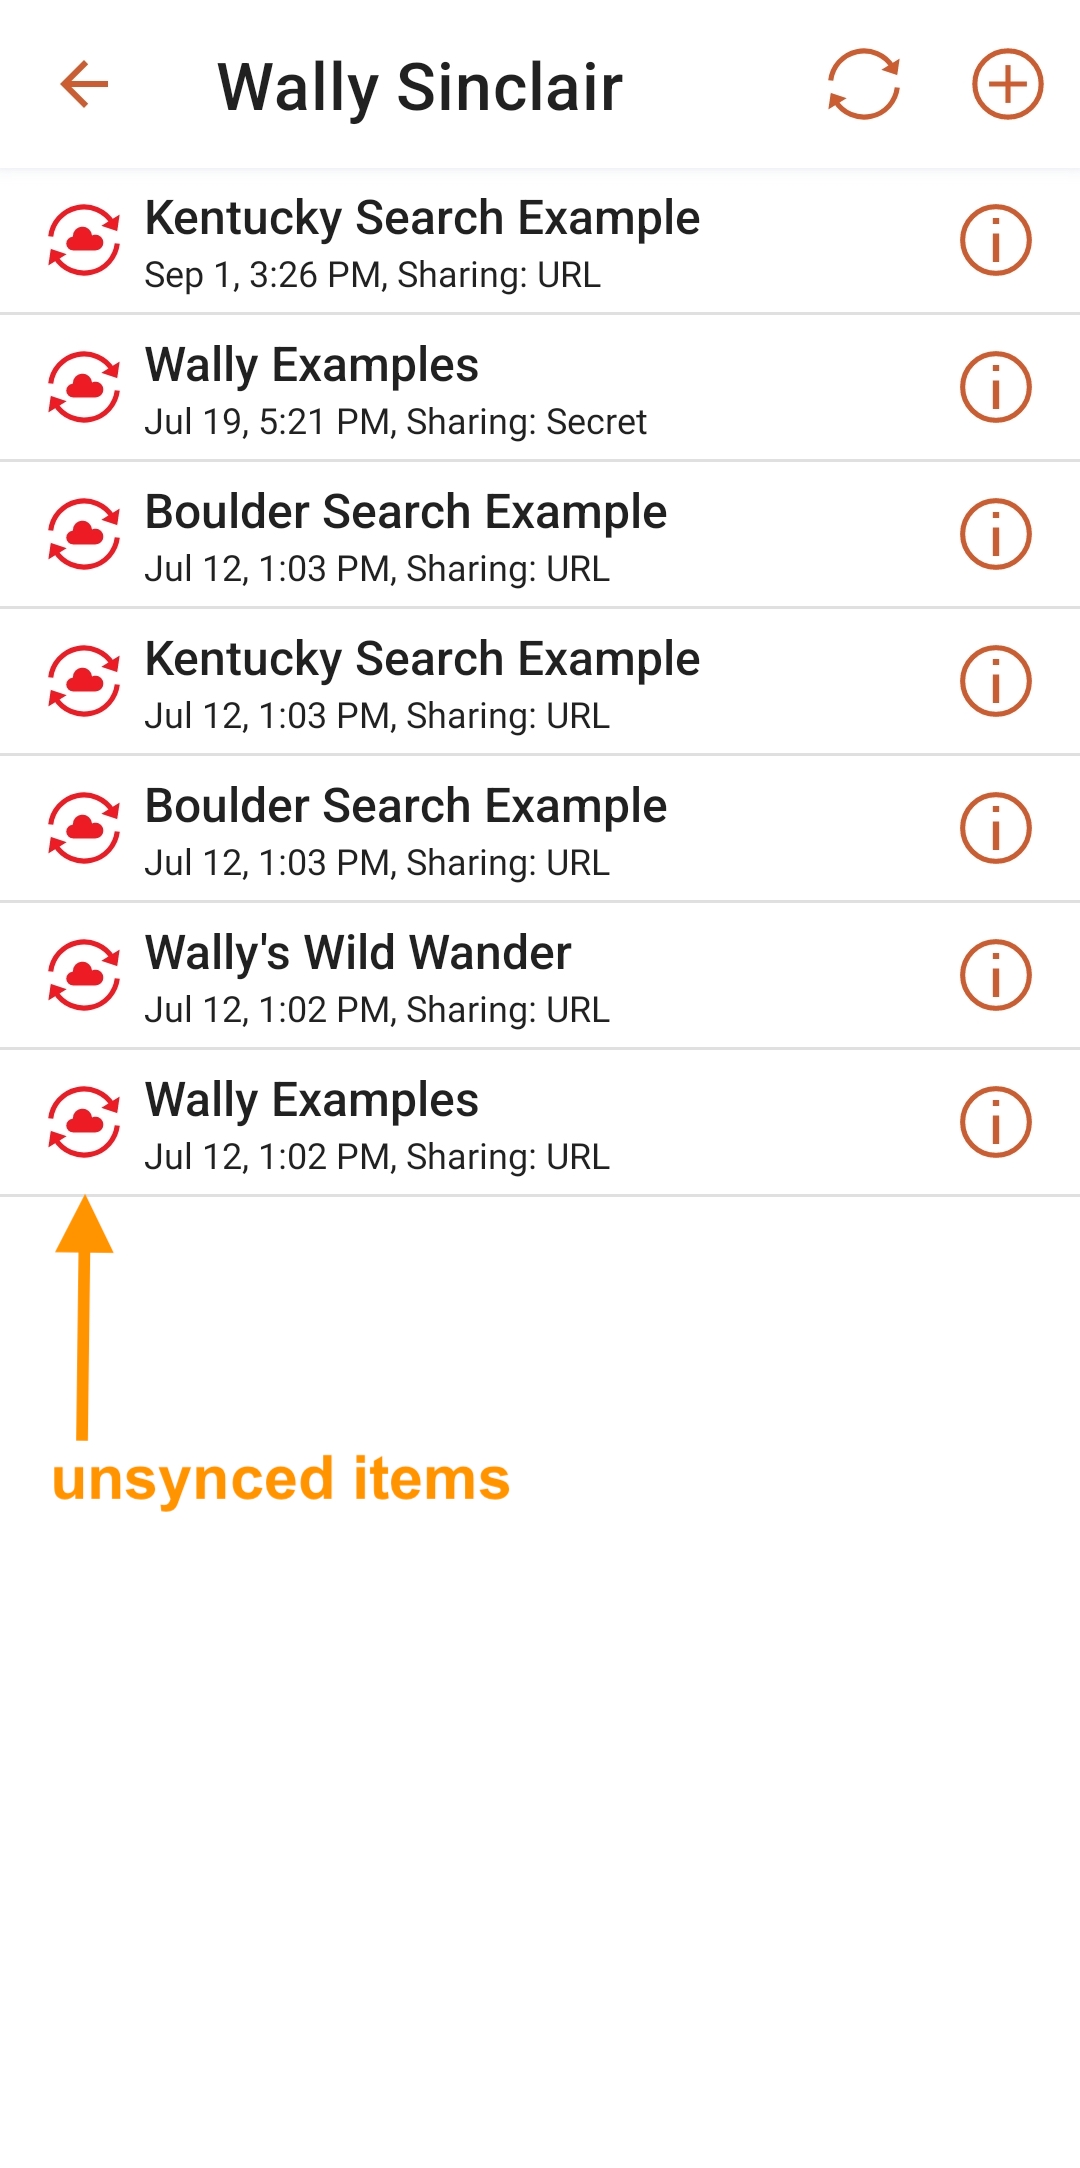
- When folder sync is set to off, nn the mobile device, you will still see the name of the folder, and be able to open and edit it. You will see a list of the data that the folder contains.
- There is a sync icon next to the title of the object - the red cloud in a circle of arrows means the items is NOT synced. Items that are synced have the appropriate black icon for that item. (EG map, bookmark, etc).
- Turning off folder syncing for a previously synced folder does not remove synced items from your device. To un-sync and remove items, you need to log out and log back in, or reinstall the app.
- The syncing setting only affects maps/bookmarks, tracks, and mapsheets.
- Map sheets will never sync by default and you must manually download each.
- Other objects types (icons, layers, pdfs) are not affected by the sync setting.
- If you create a new map using your mobile device and save it to an unsynced folder, that item will sync to your account (the web). There is no way to create a new map and have it only live on your mobile device.
- Use the circle arrows icon to refresh a folder, to check its sync status with your cloud account.
Account Item Types
Editing Account Items
Account items can be renamed, moved to new folders, or deleted from your account. Additionally each object has more edit tools that match the item type.
Edit an Account Item Hover over a object in the list in the folder contents panel to reveal the edit icon, which looks like a pencil and paper. Alternatively, you change view the object details first by clicking on the info icon, then using the edit button on the object details screen. Edit the info you want to change and click save.
Delete an Account Item This is identical to editing an account item, except you choose the trash icon from the item row, or the delete button from the item details page.
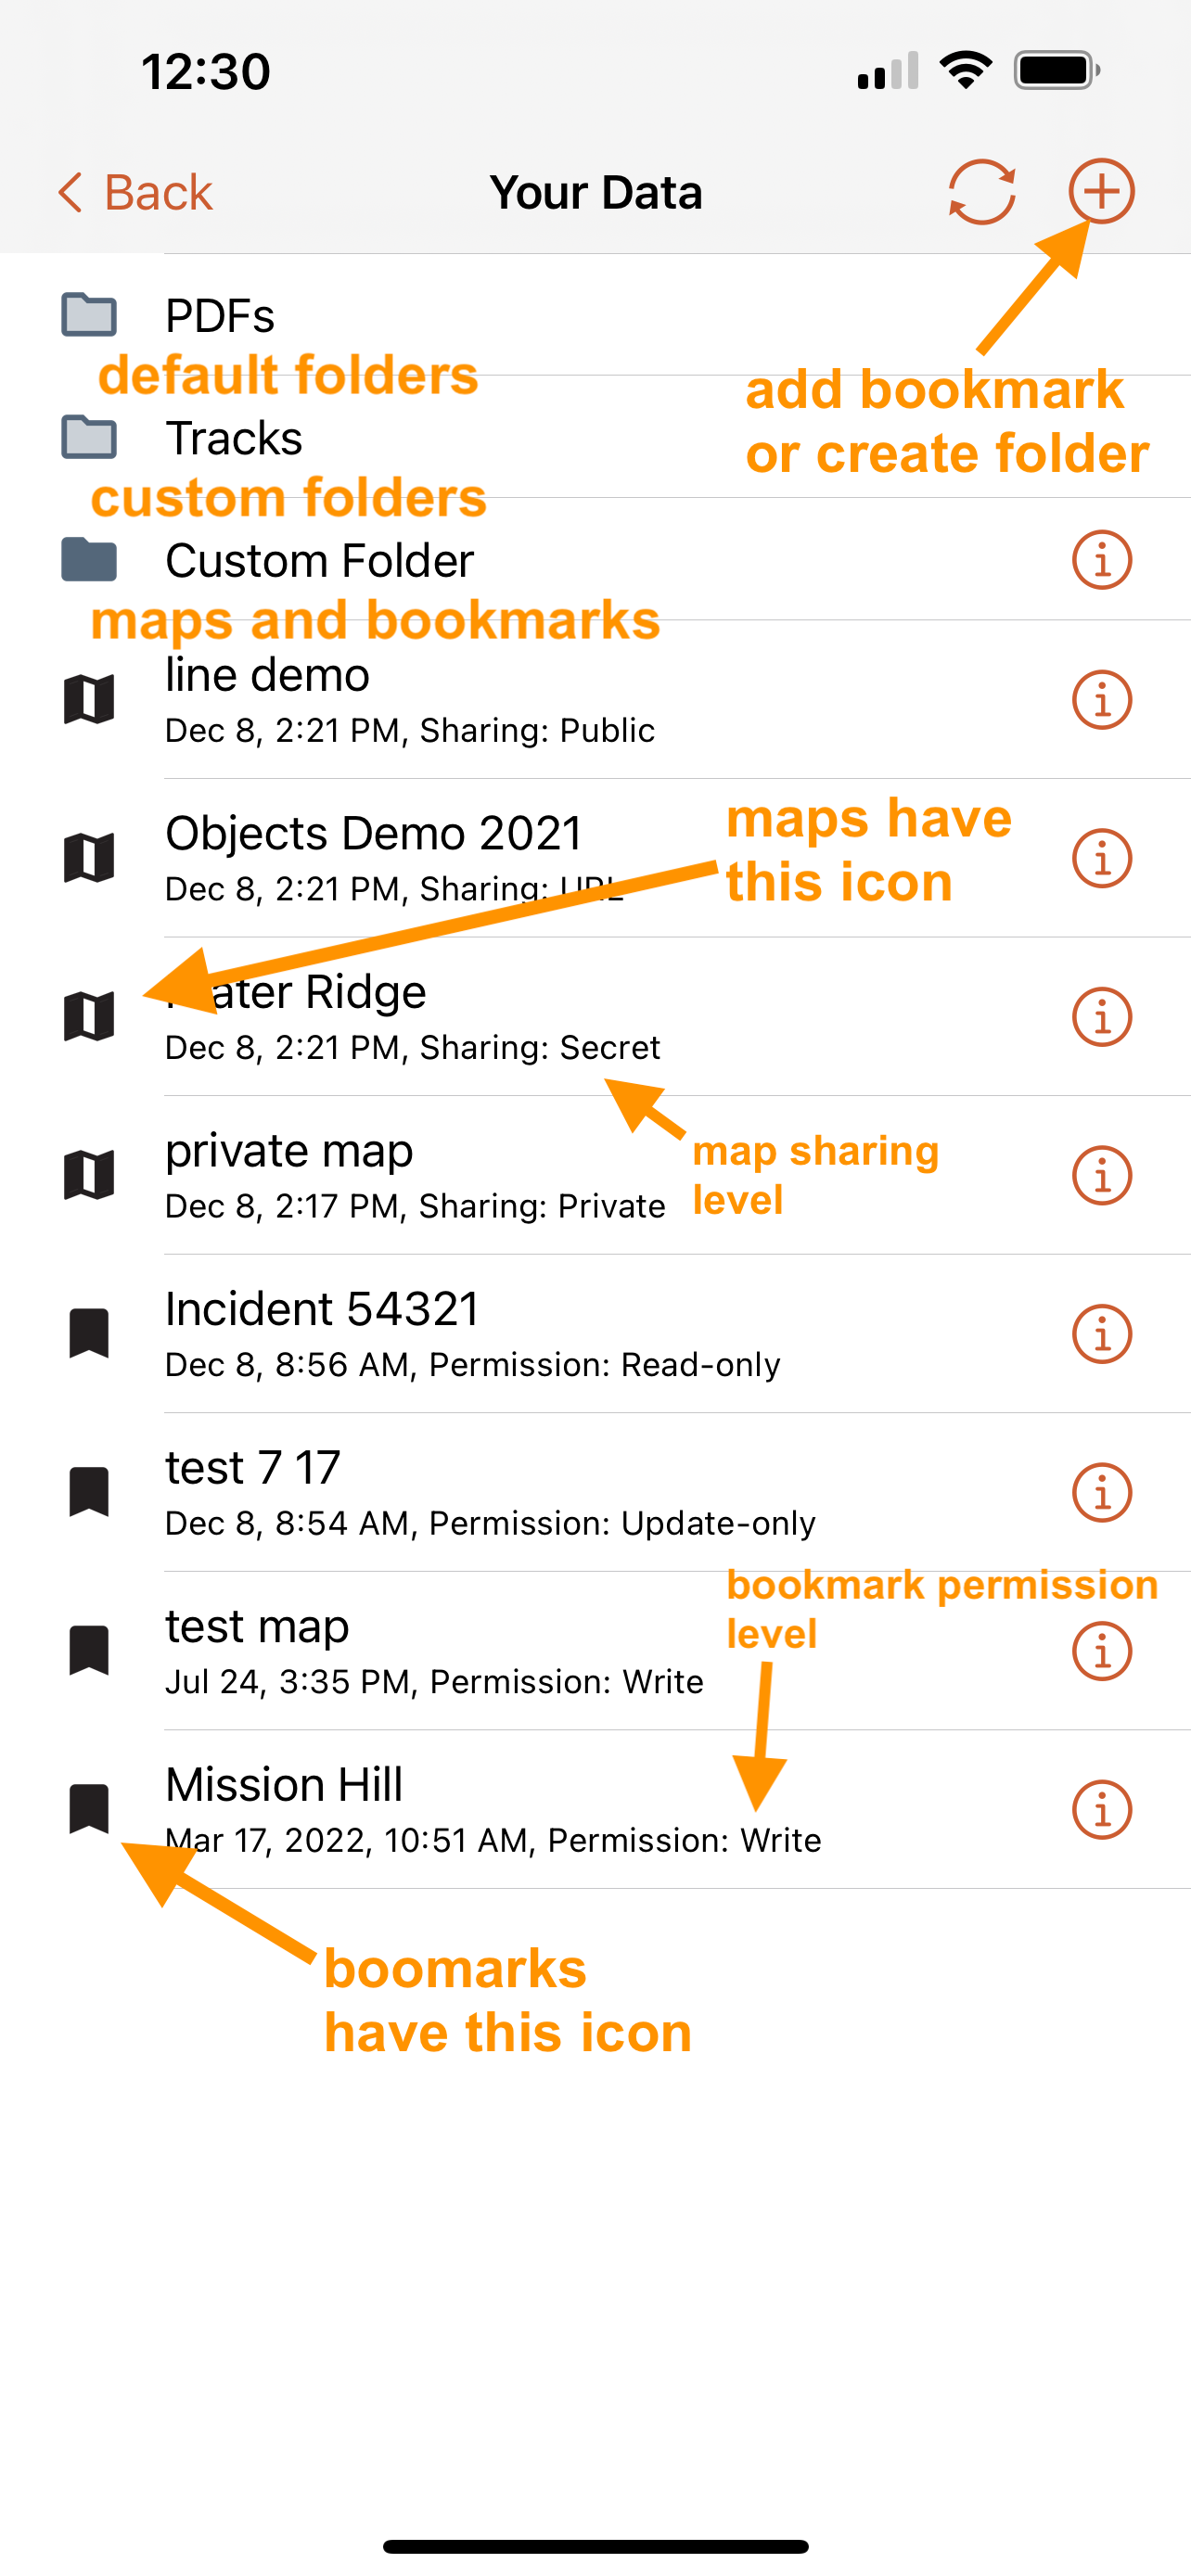
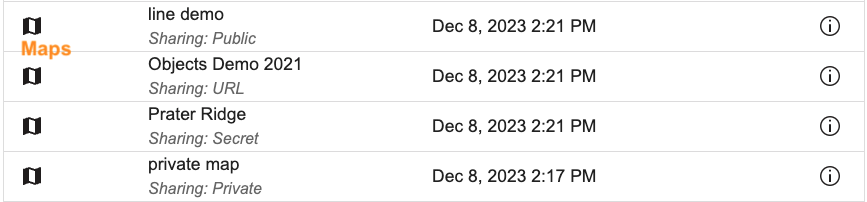
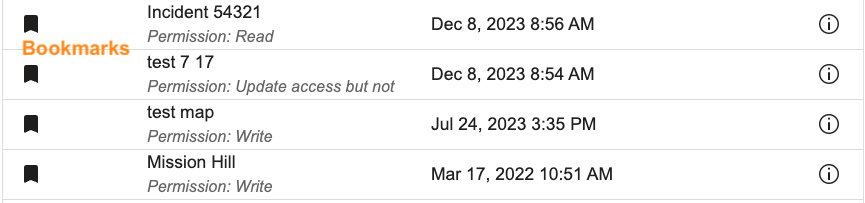
Maps and Bookmarks
Maps and bookmarks are stored together in the root folder of Your Data. Maps and bookmarks have different icons.
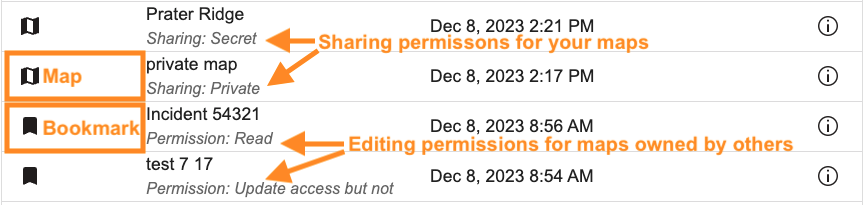
For maps, the line below the map title shows the sharing permission level for the map. For bookmarks, this second line shows the level of access that you have to the map.
Maps are your own. You created them on your account. Maps can be shared with other users, and each map has a sharing permission level that you designate. Public maps are searchable on the web and can be included in our shared maps database. URL maps are not searchable on the web, but anyone with the 5-digit map ID could open and view the map. Secret maps need a special code for others to see or use them. Finally, private maps can only be viewed by your account.
Bookmarks are maps that another account owns, but that you have some level of access to. The other account must set the sharing permission as public, url, or secret. For secret maps, the owner must give you a code to view the map. You may also get a code that allows you to update or edit the map. See the sharing section for more details.
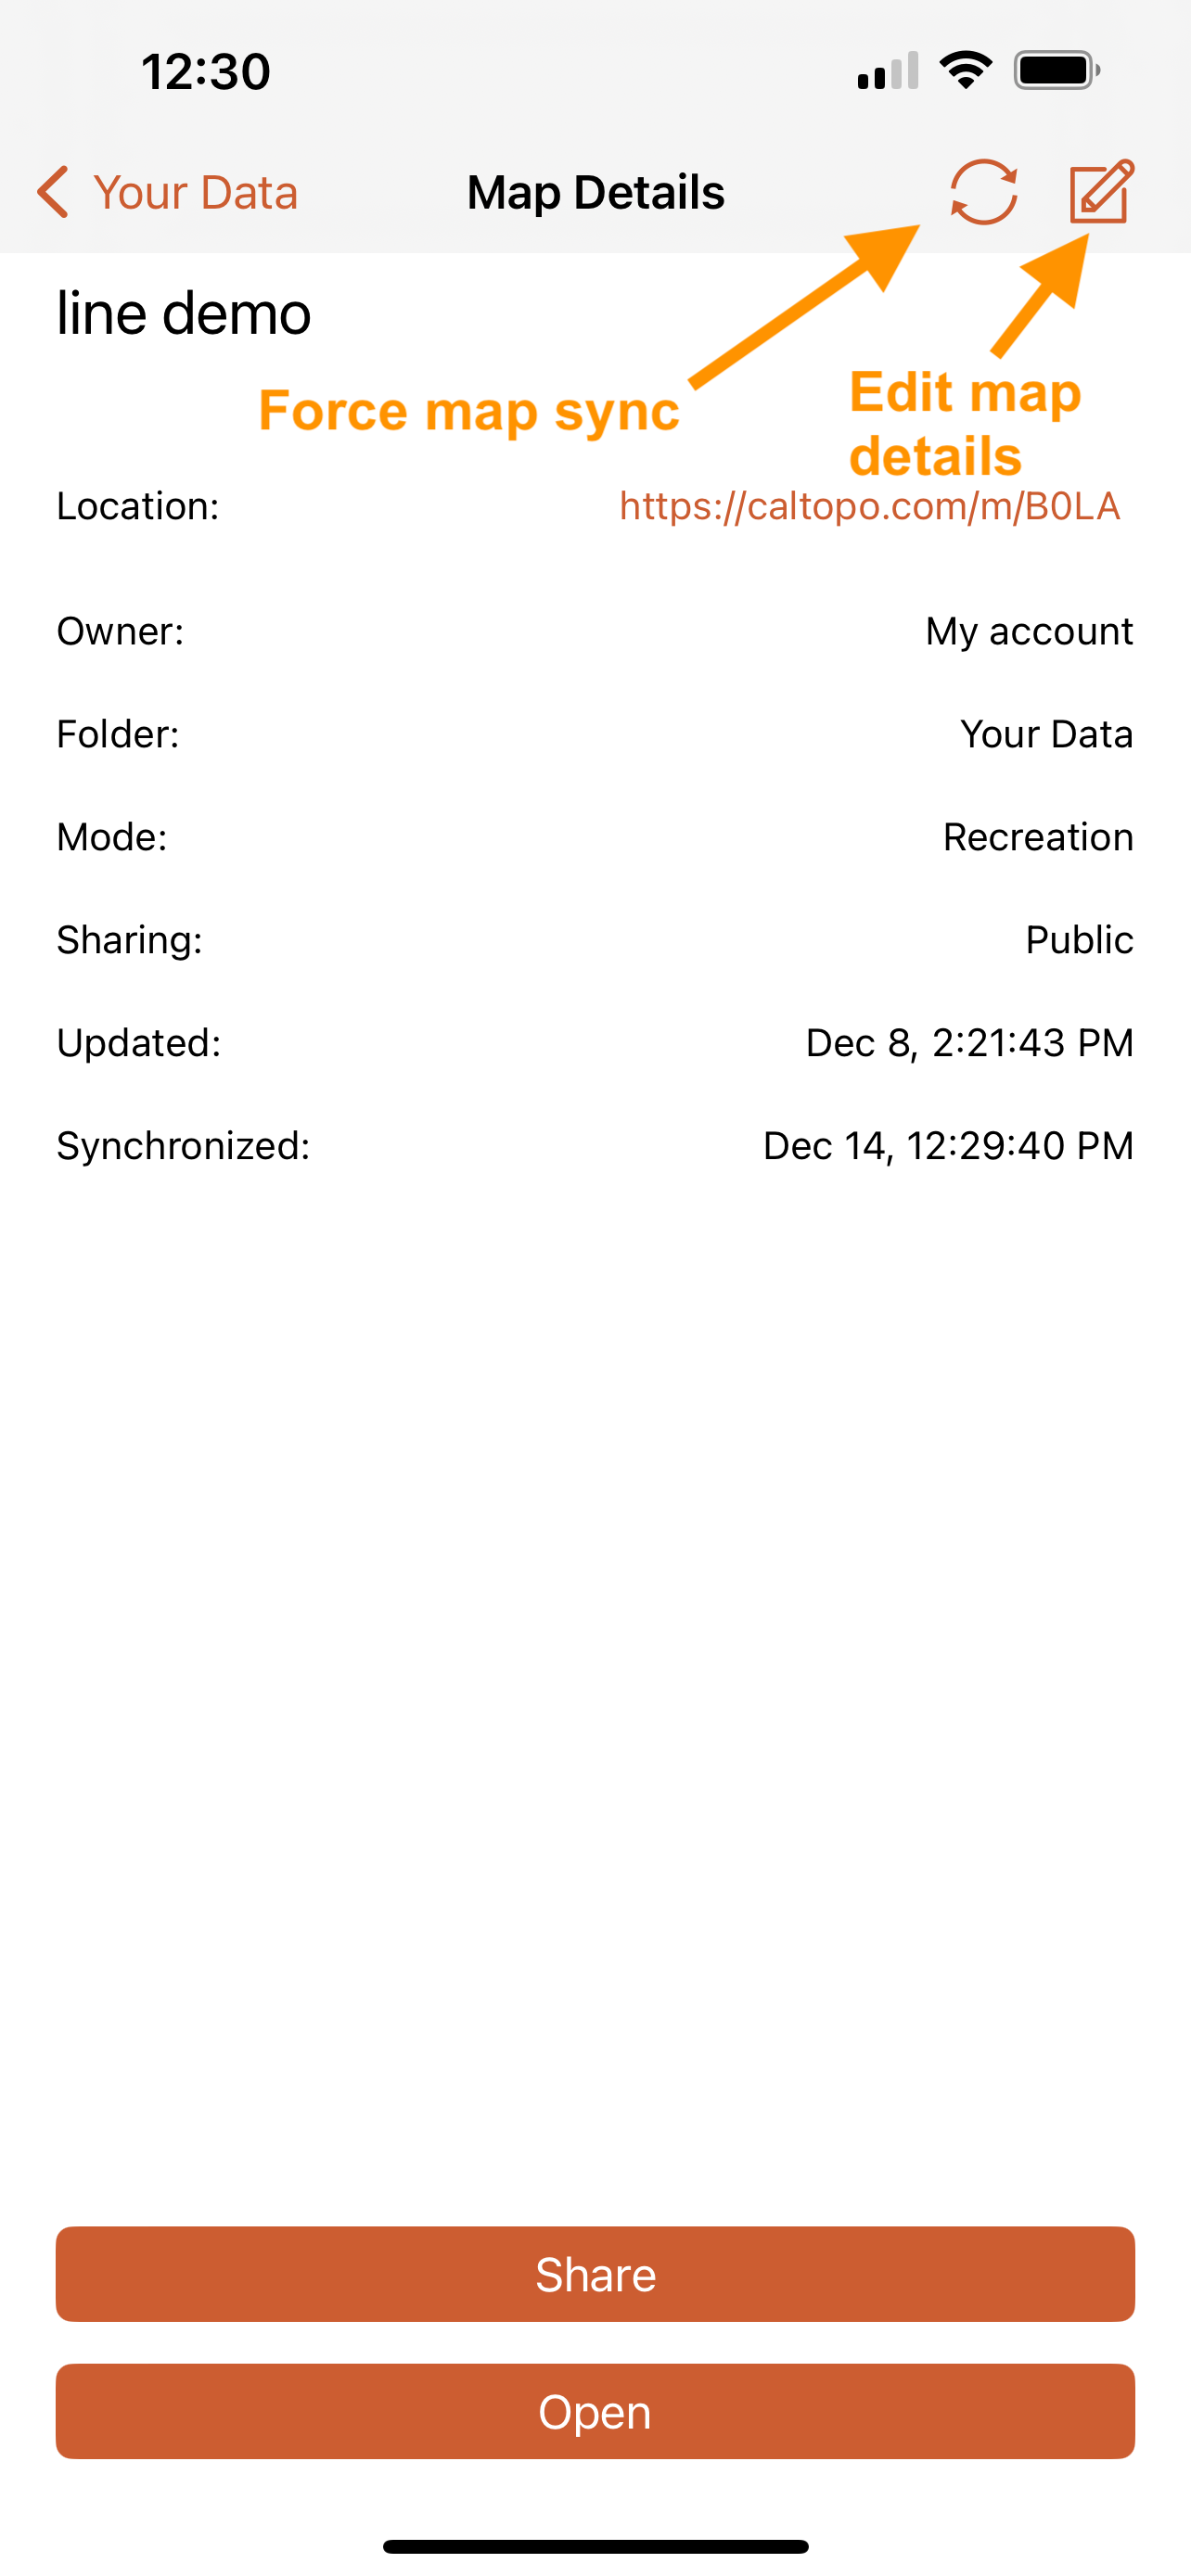
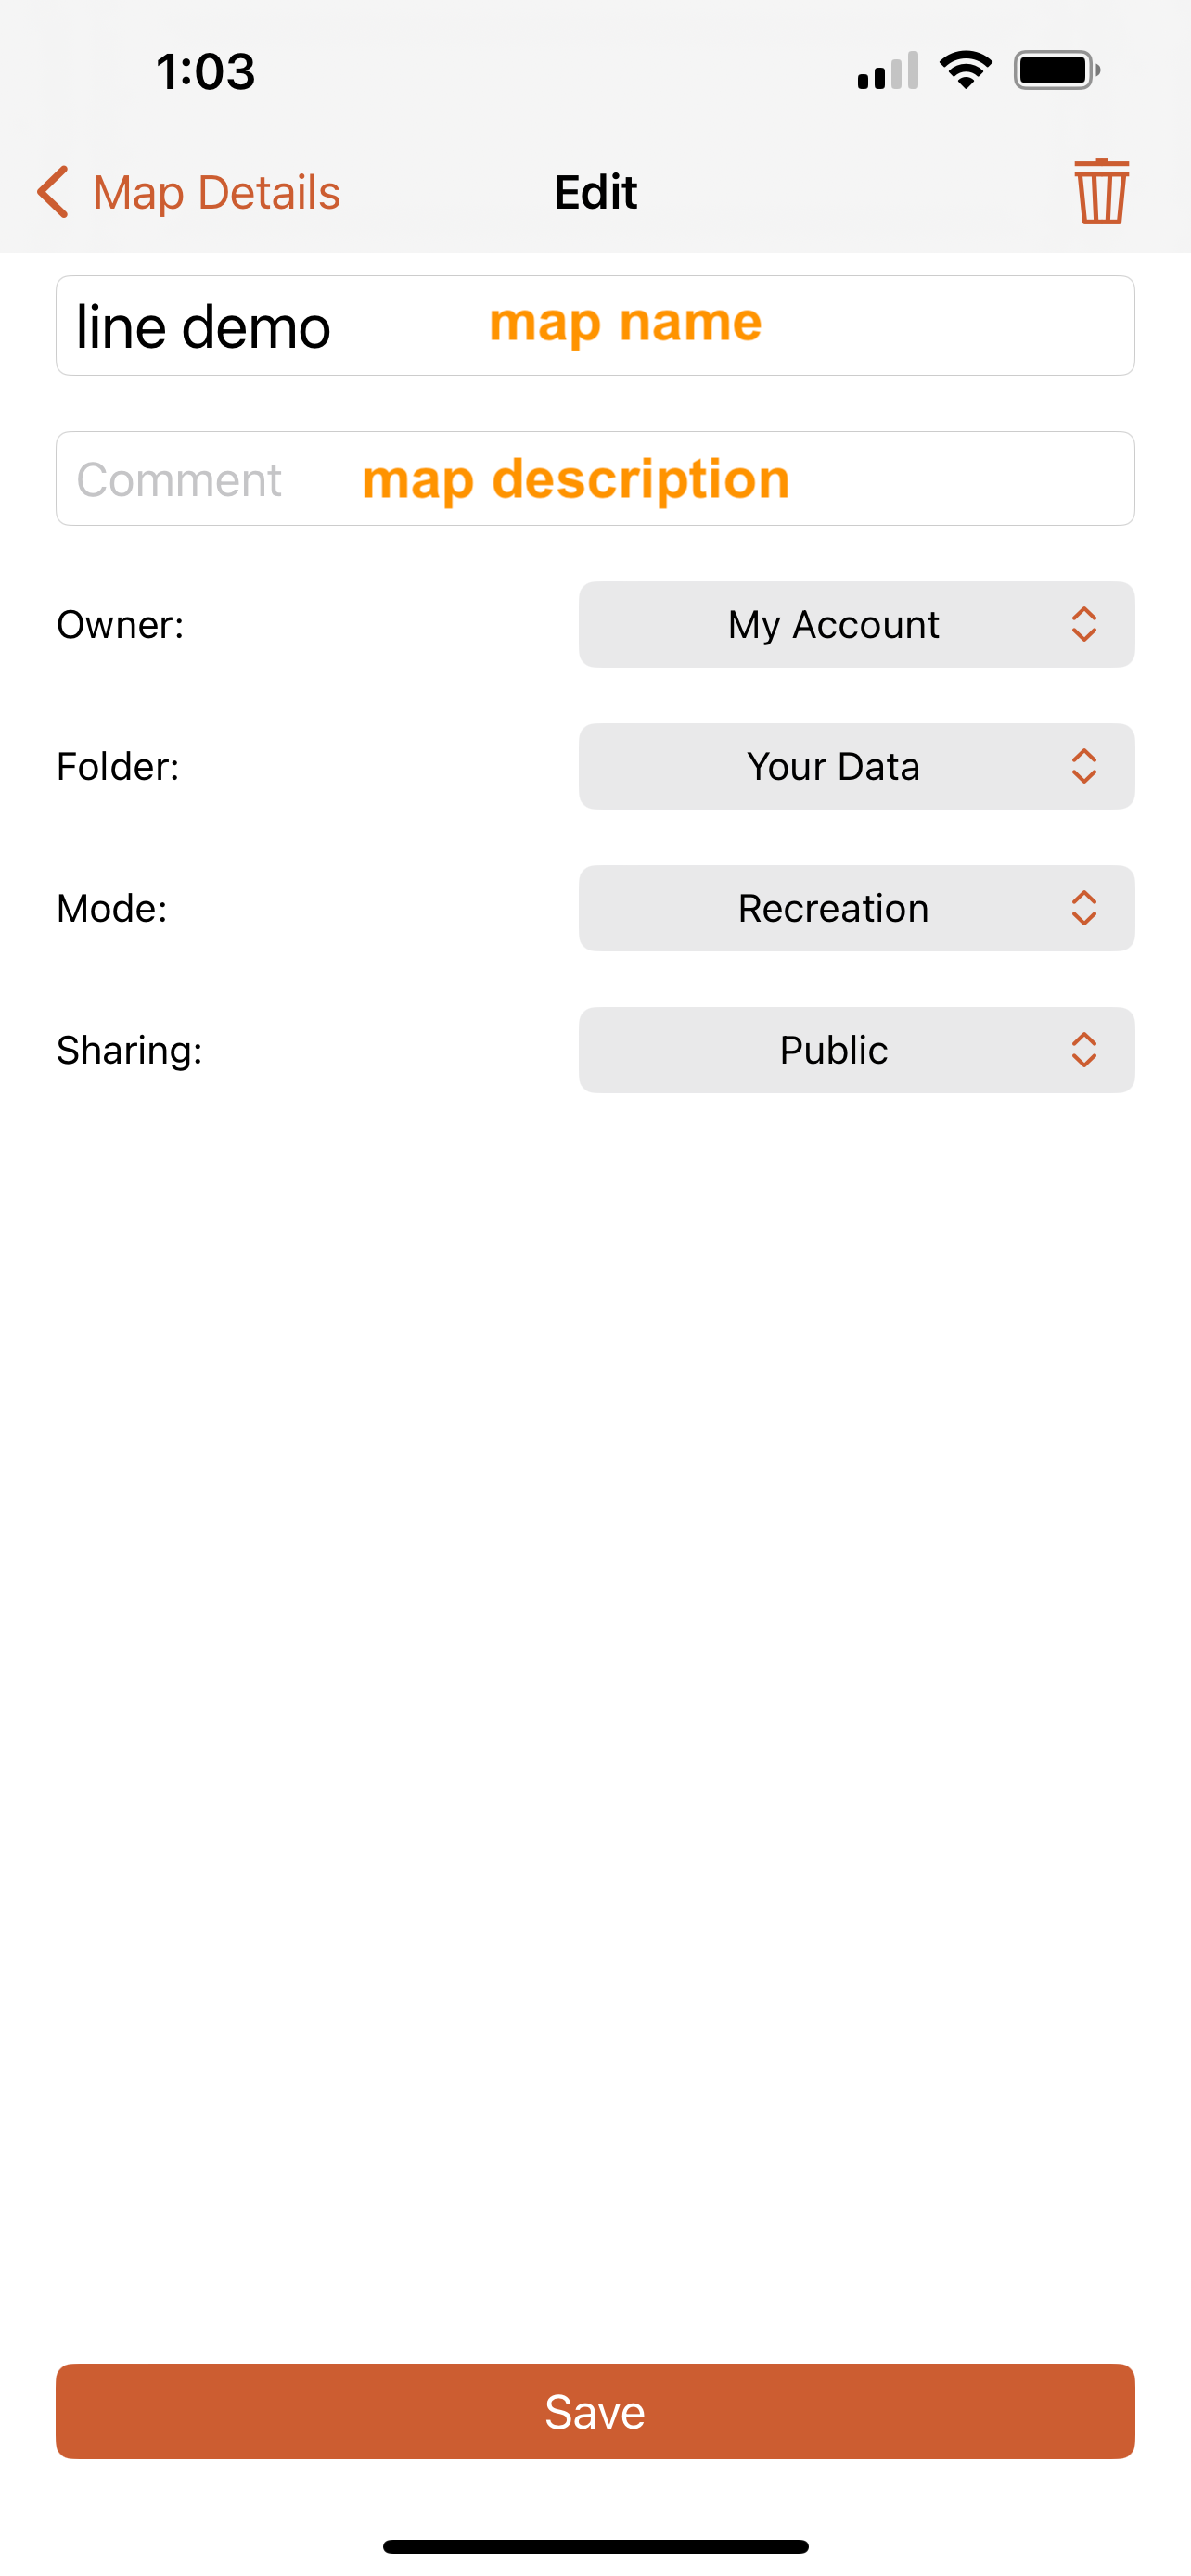
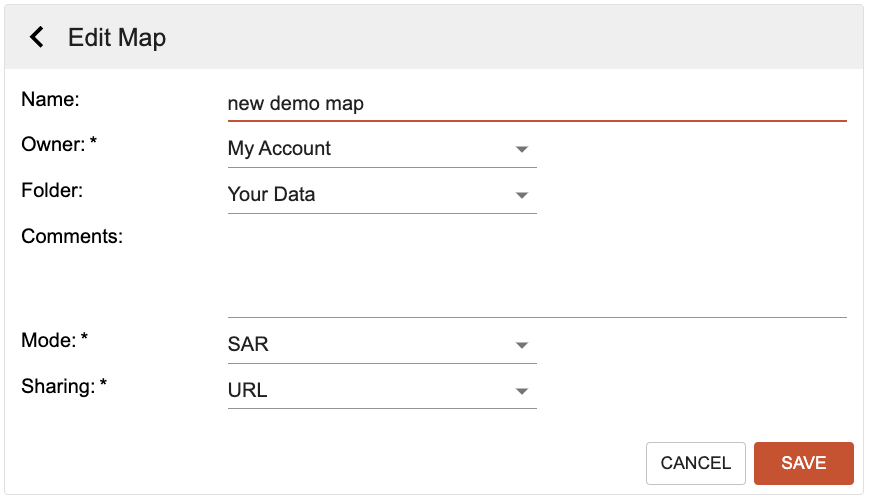
Editing Map Details
Edit a map in Your Data to:
- Change the name of the map
- Add a description to the map (comments)
- Move the map to a different folder
- Change the map mode (Recreational or SAR)
- Change the sharing permission level
- Move it to another connected account, ie Change Owner (for CalTopo Teams users)
To edit the map via Your Data, either click the i (info) button at the end of the title line in the map list, then click the edit button, or hover over the title line in the map list and click the edit icon.
Many of these tasks can also be done directly from the map if you have it open, by clicking the info icon on the left side of the map viewer to view the map details.
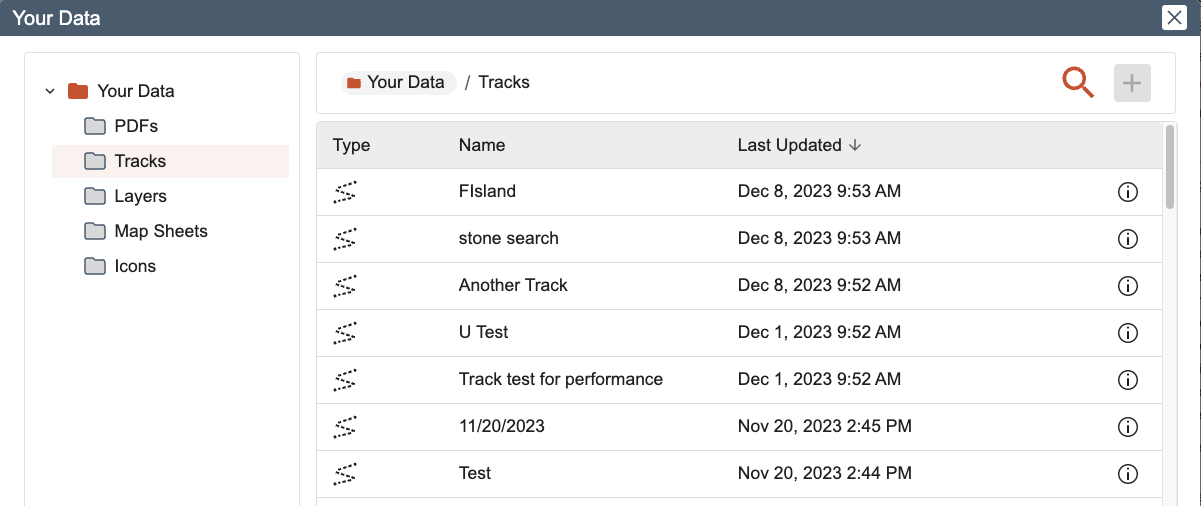
Tracks
Tracks are created by recording with the CalTopo mobile app. For more information about tracks go to this page. Click OPEN to open the track webview. Click a track name to view its details. From here, click edit to change the name of the track or it’s folder or account. Use the delete button to erase the track from your account.
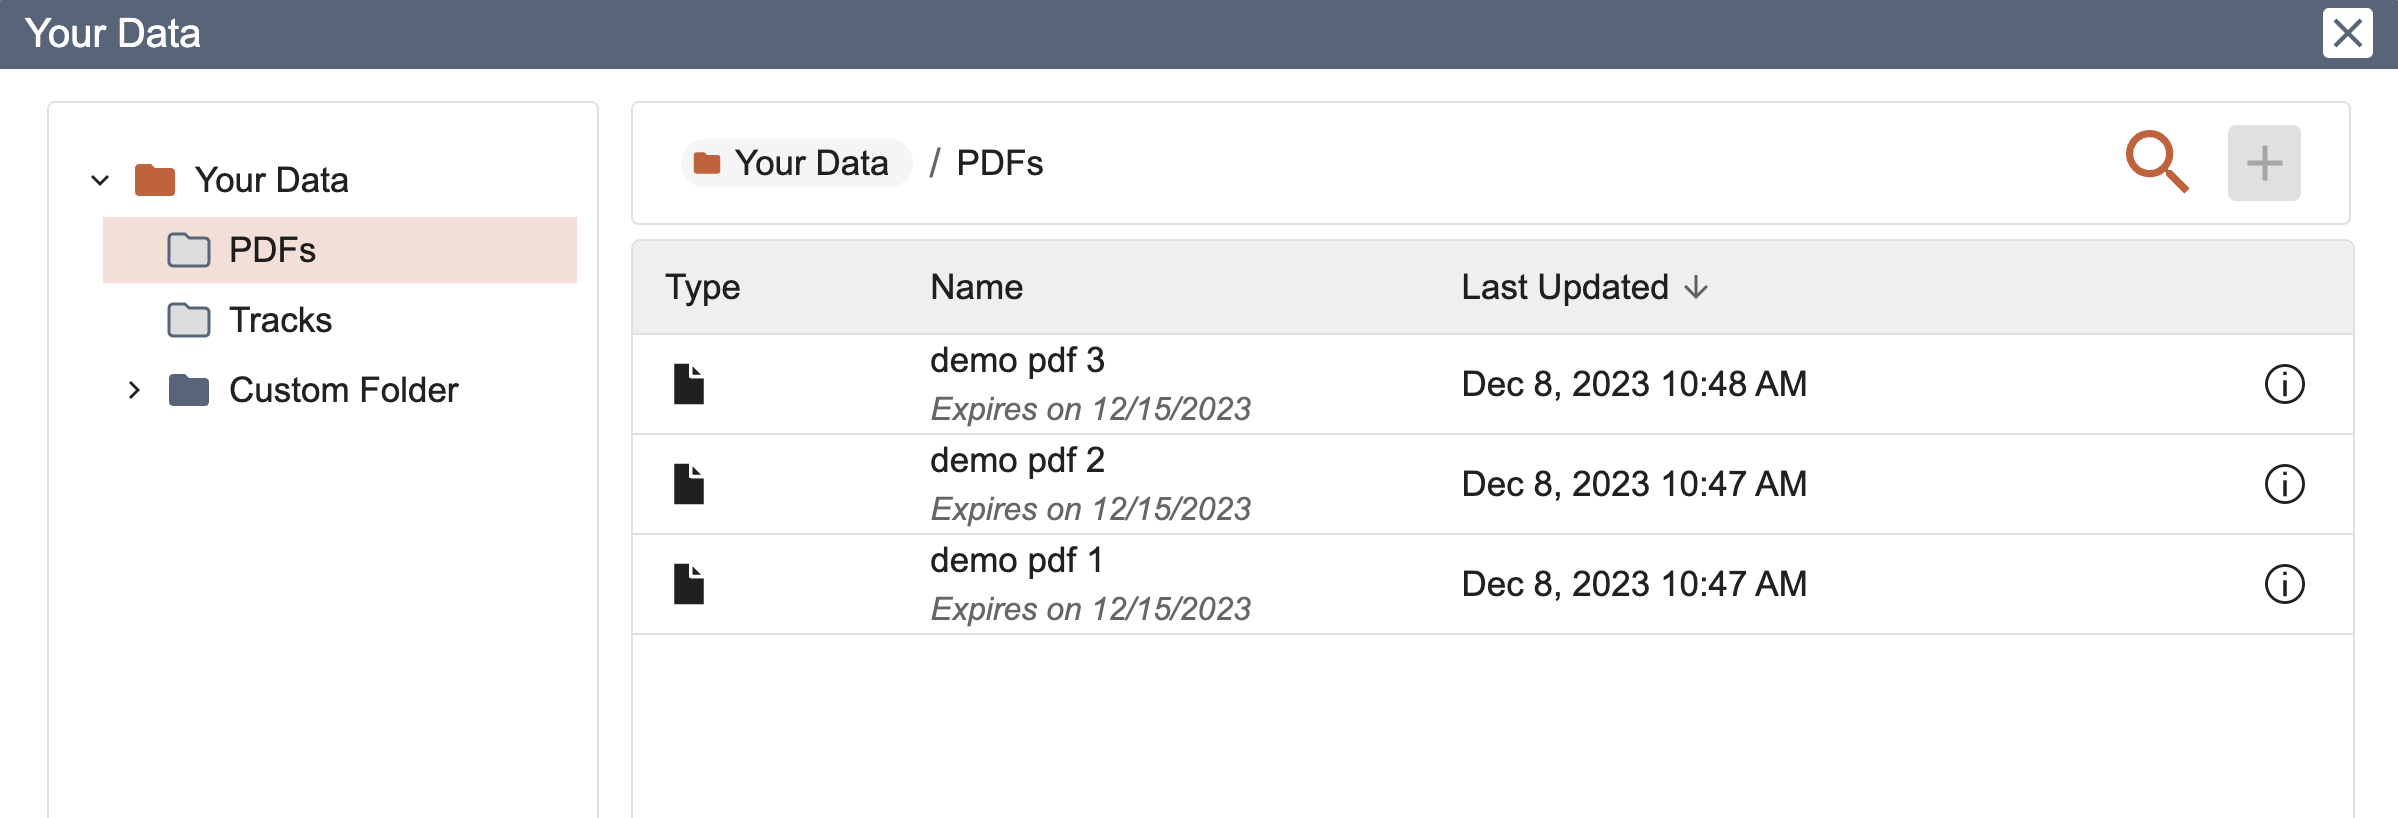
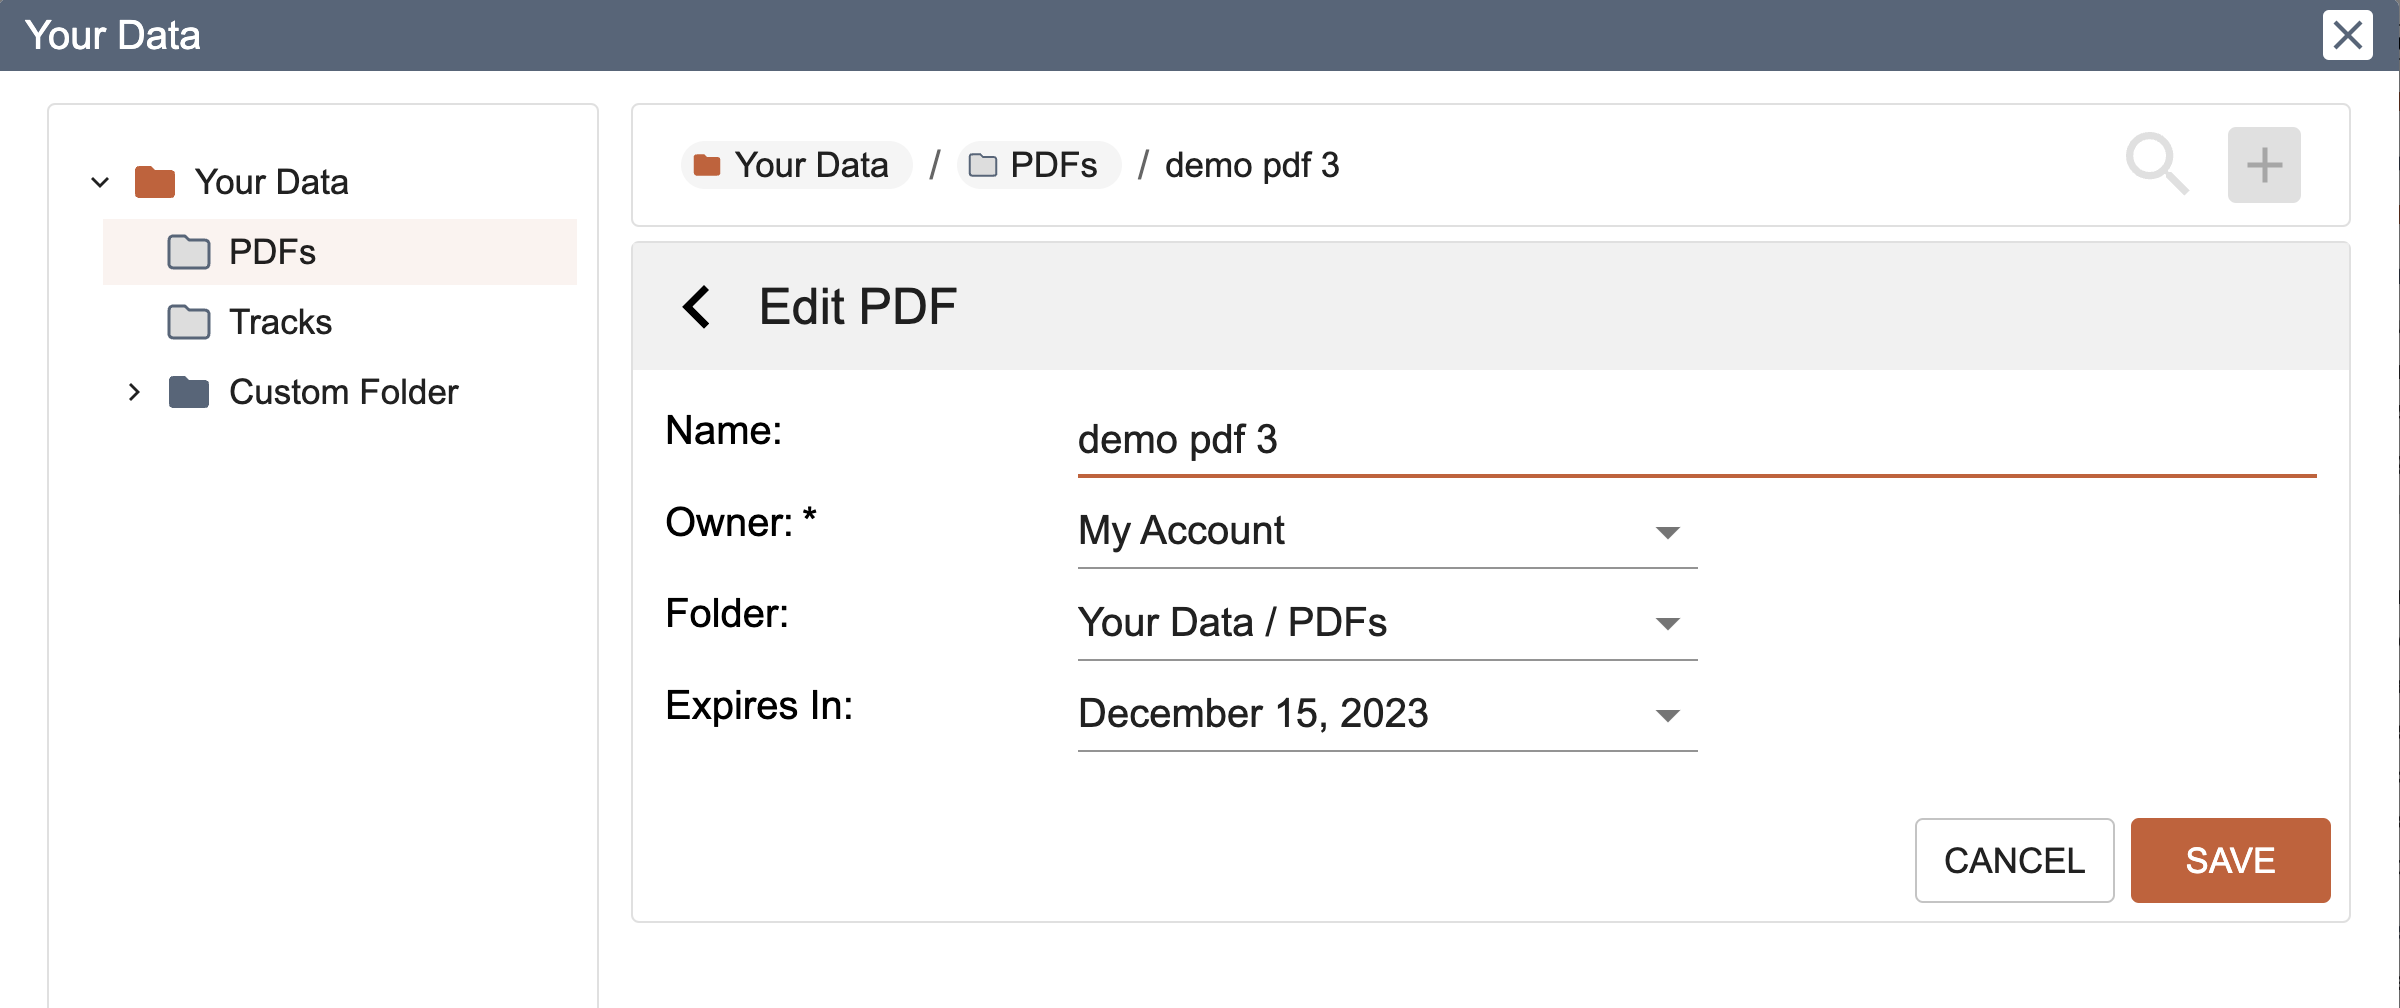
PDFs
Anytime you print a file in CalTopo, the file will list here until it expires. If you don’t download your PDF immediately after creating it, you can find it listed again here and open it. You can also change the expiration date using the drop down menu for “expires in” and see when the PDF was created. Delete PDFs you no longer need with the red X.
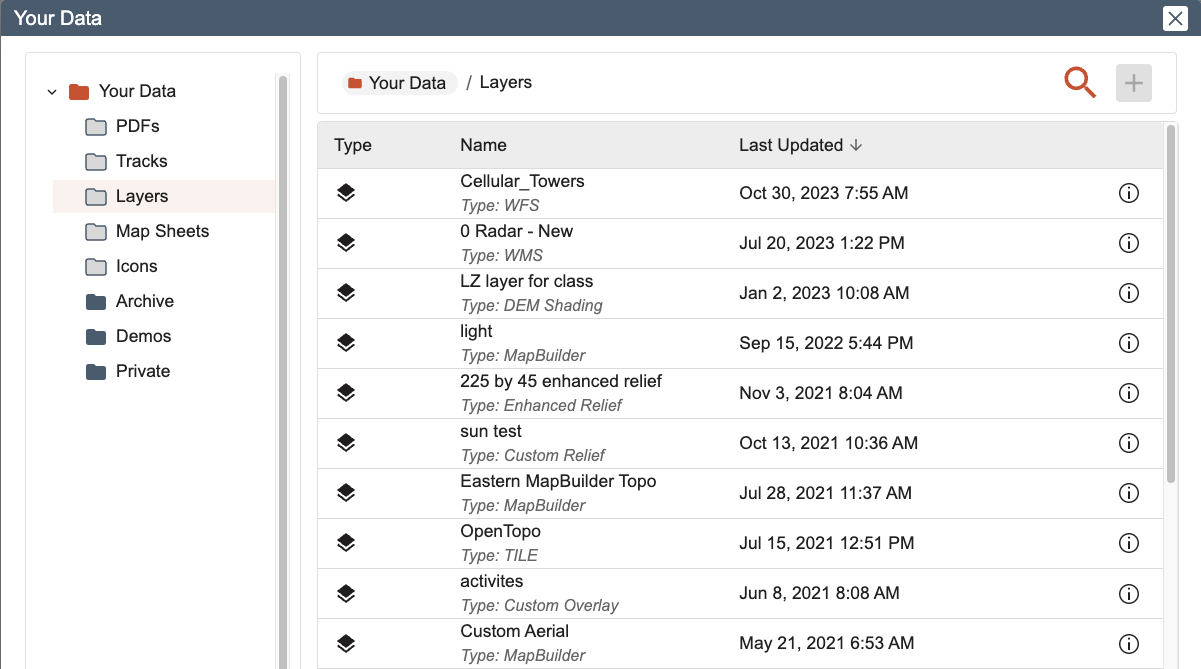
Your Layers
If you add and save custom layers to your account, you will see them listed here, as well as in your Base Layers list. You can remove layers you no longer need here by clicking on the red X.
Map Sheets
In this tab you can see and remove map sheets that you have saved to your account. The link below the list of your map sheets allows you to upload map sheets directly for which a Pro, Desktop, or Team subscription is required.
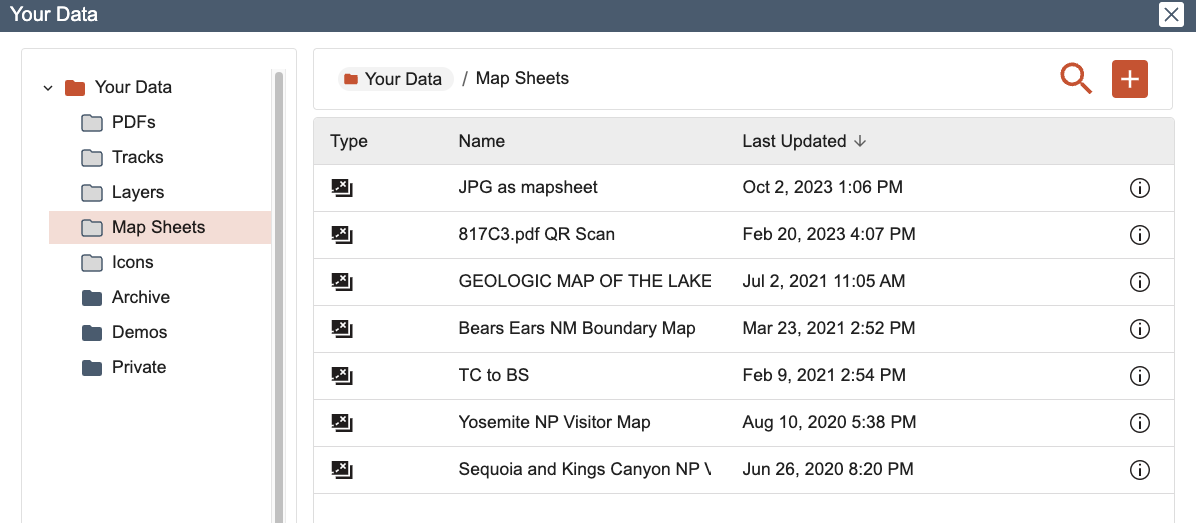
All accounts can take a Shared Map Sheet (access via overlay menu) and save it to your account for easy access. However, to upload a new map sheet, you must have a Pro, Desktop, or Team subscription. For more information about working with map sheets, go to the map sheets chapter.
Your Icons
(Available with a Pro, Desktop, or Team Subscription)
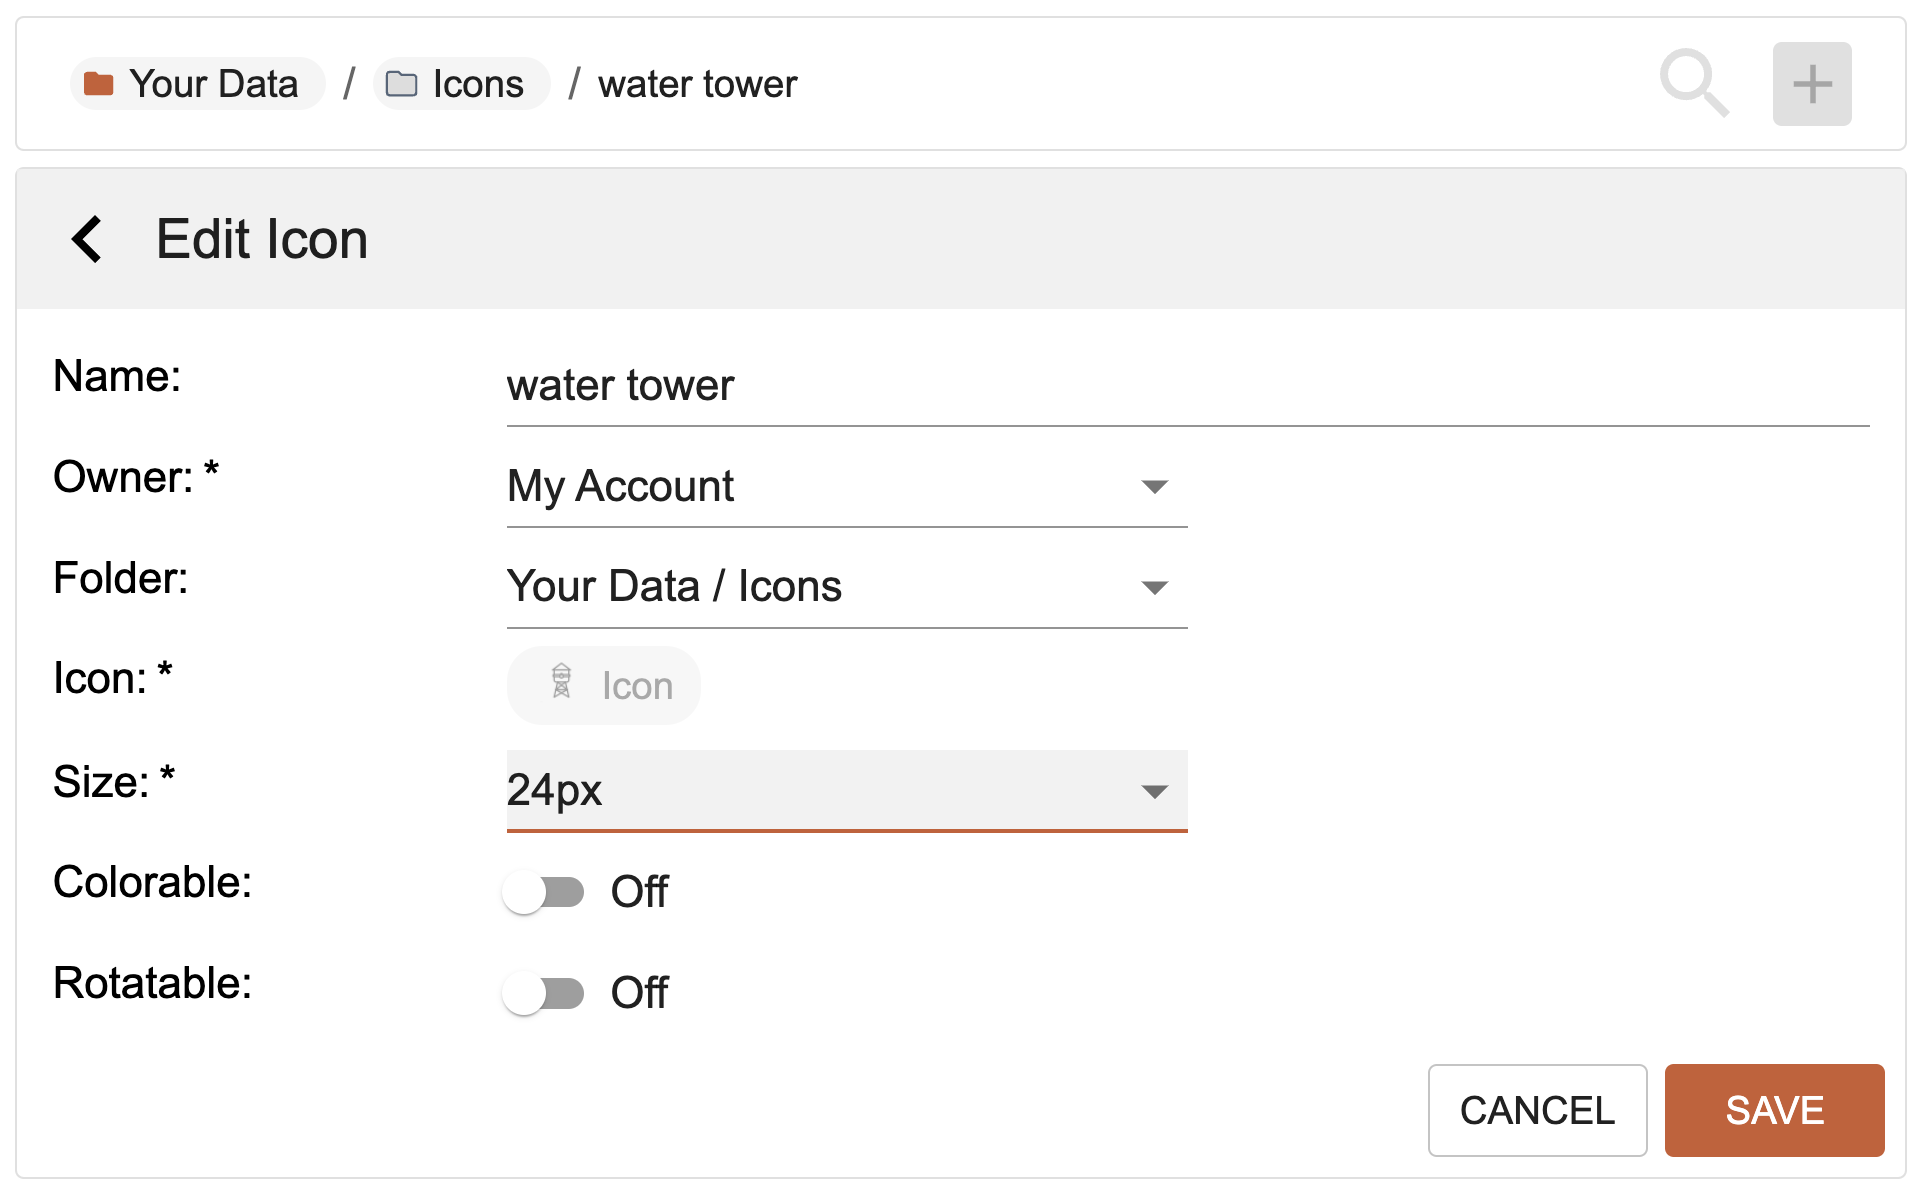
For Markers that you add to your maps, you can choose the icon used for the marker display on the map. Add your own custom icon images here and you will be able to access them in the icon menu when editing a marker. Pro subscription or higher required.

To add a new icon to your account, use the plus button in Your Data, at the top right corner. Use the "browse" button to upload the file. Appropriate file types include svg (recommended), png, and jpg (not recommended). Ico file types will not work. The size of your image should be smaller than 24x24 pixels.
After uploading, you can set the default size of your icon to be smaller if necessary. The colorable feature depends on the file that you upload. Any icon is rotatable, as this simply changes the orientation of the image.
If CalTopo is unable to render a custom icon, a broken browser image will be displayed instead. This means that for some reason the file is not supported and you should try a different file. If you try to generate a PDF with a broken custom icon, you will see an empty black square in its place on the PDF.
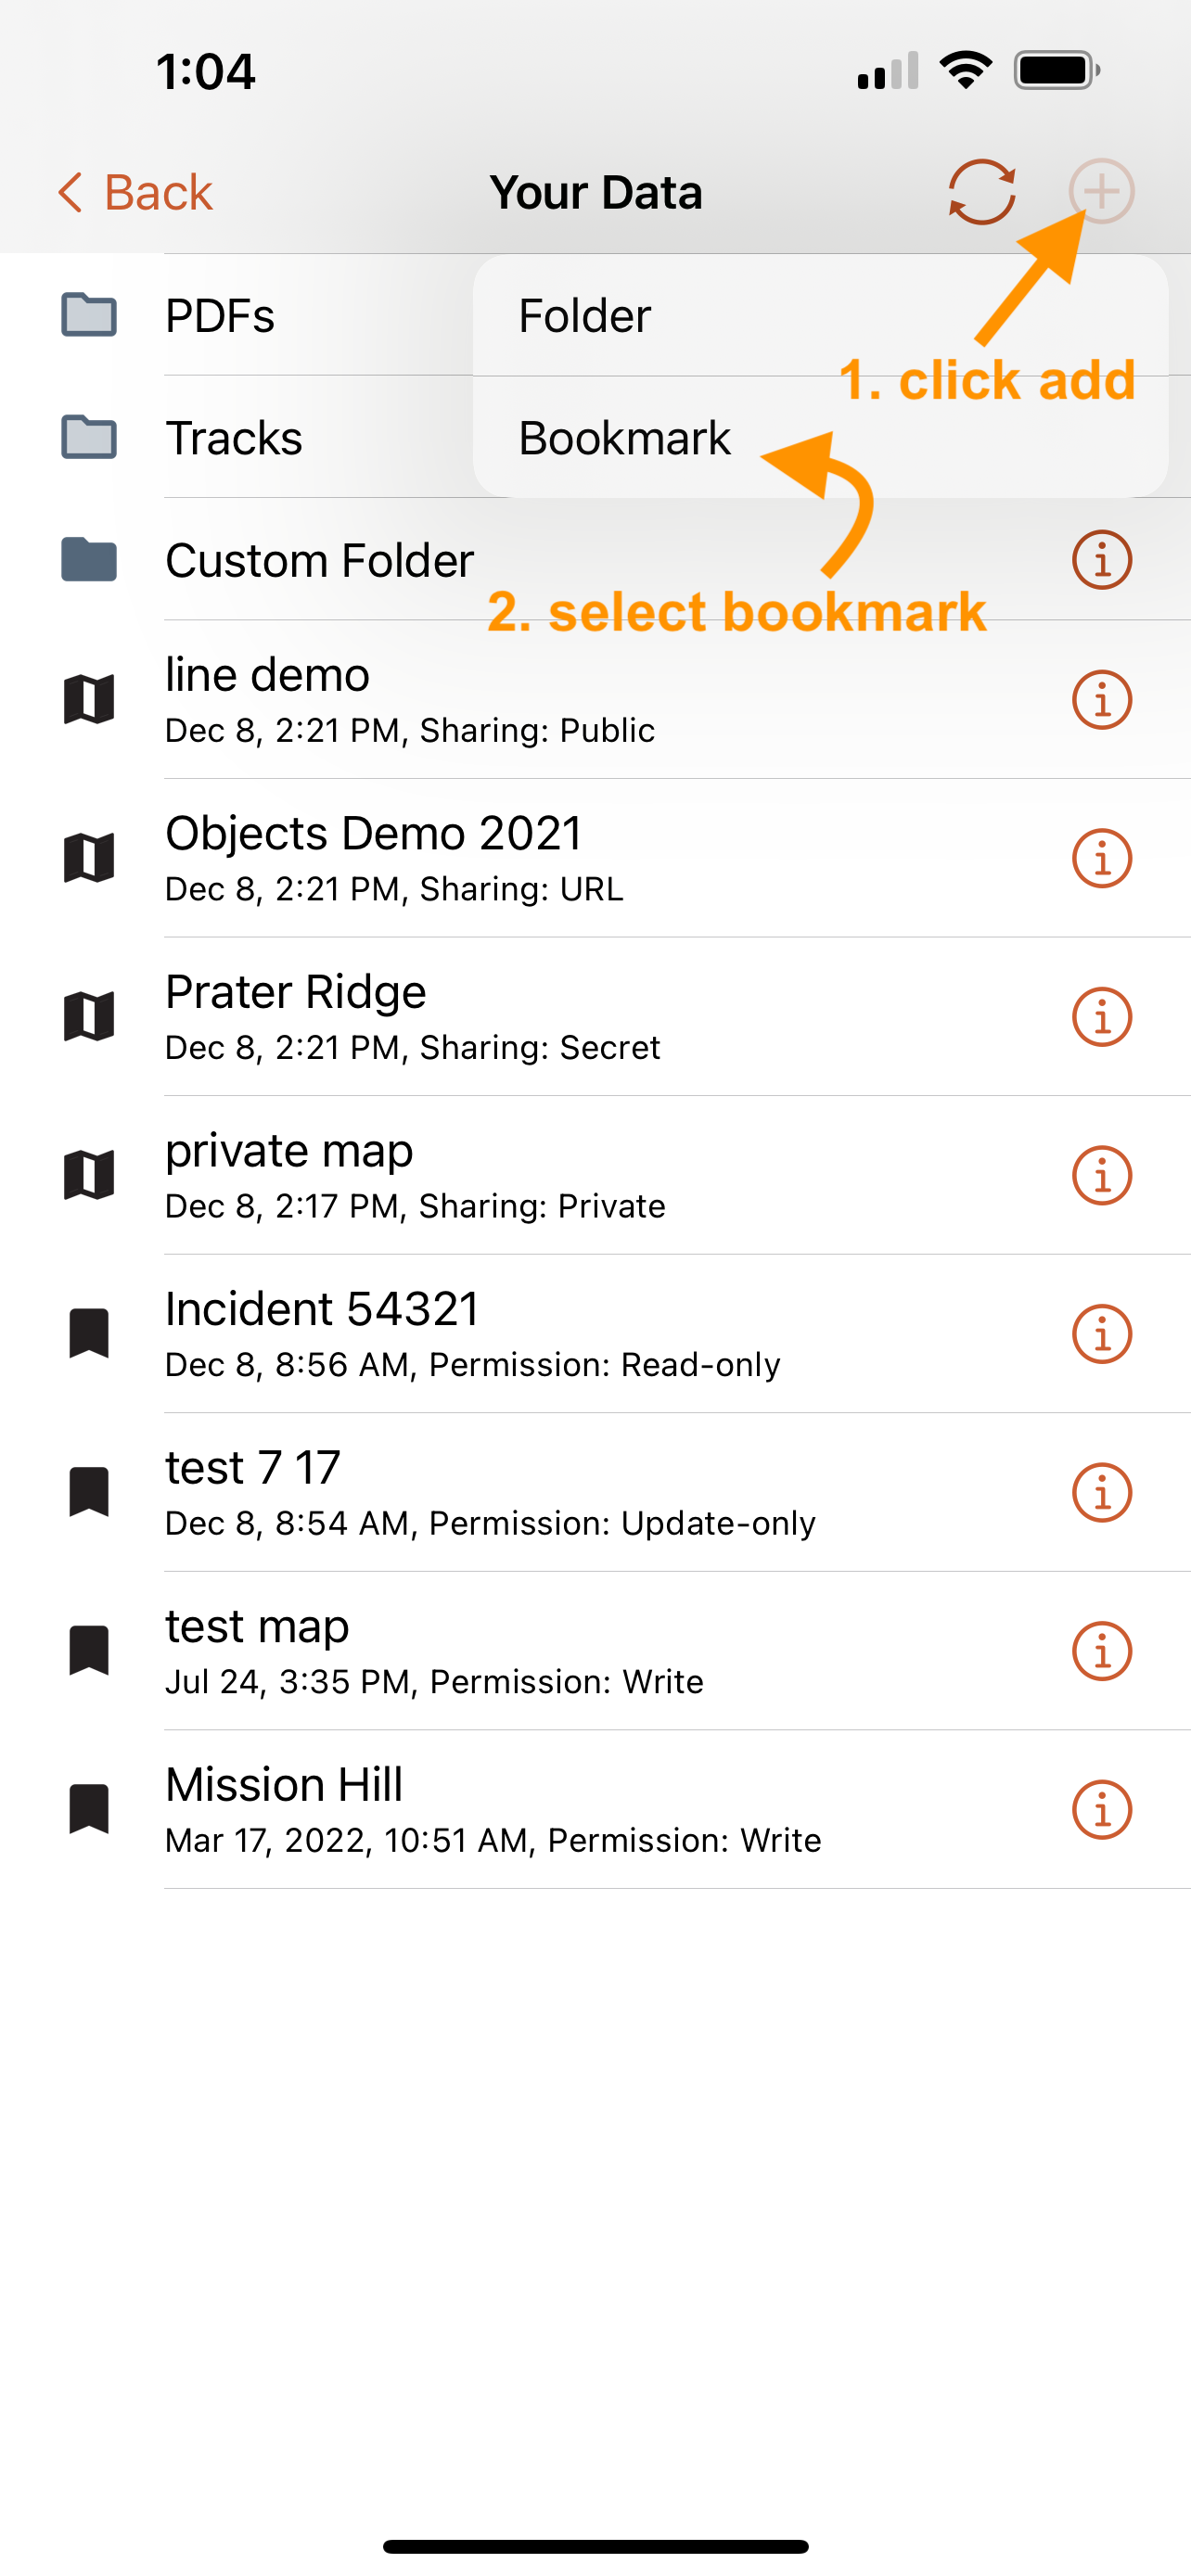
Account Items in the Mobile App
To your find your data in the mobile app, start by clicking the 3-bar menu in the upper left corner of the map viewer. Then click Your Data. Here you will find all the same folders and map list as on the web. To understand what each type of data is, see the sections above.
To open a map, click the line for that map. To see map details and locate the edit button for a map, click the info icon on the ride side of the map line. At the bottom of the screen here is a button to share the map. From here you can decide what level of access you want to give the person you are sharing the map with - read, update, or write. For more information about map sharing, see the sharing chapter.
From here, you can change the map name, add a description, move it to another folder, change the map mode and the sharing permissions.
At the top of this screen is a delete button, which will delete the map entirely, from your phone and web. It’s super gone and you can’t recover it, so be certain you want to get rid of it before confirming the delete action!
All types of account items will have an info icon next to them. Tapping this icon shows you more details about that account item. Tapping the name of an object will open it - for most items it will take you to more details about that item. However, for a map or bookmark, tapping the name will open the map.