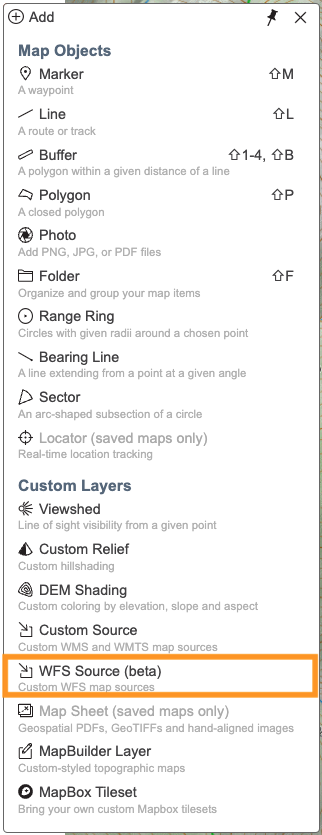
WFS Source
in this lesson
WFS, or Web Feature Service, is another way to add overlays to CalTopo, much like the Custom Sources we discussed in the previous section. The WFS server sends markers, lines, or polygons along with information about those places. The significant difference is that objects in a WFS overlay can be clicked, and additional information will pop up. If or when that information is updated by the agency or organization managing the server, those updates are automatic for those requesting the data. This is similar to the WMS, TMS, and WMTS we just covered, but clicking on that data does not create a pop-up with more information about that feature.
Web Feature Service requires a Pro or higher subscription and is currently in Beta.
Topics on this Page:
- Creating a WFS Source Layer
- Example EV Chargers
Creating a WFS Source Layer
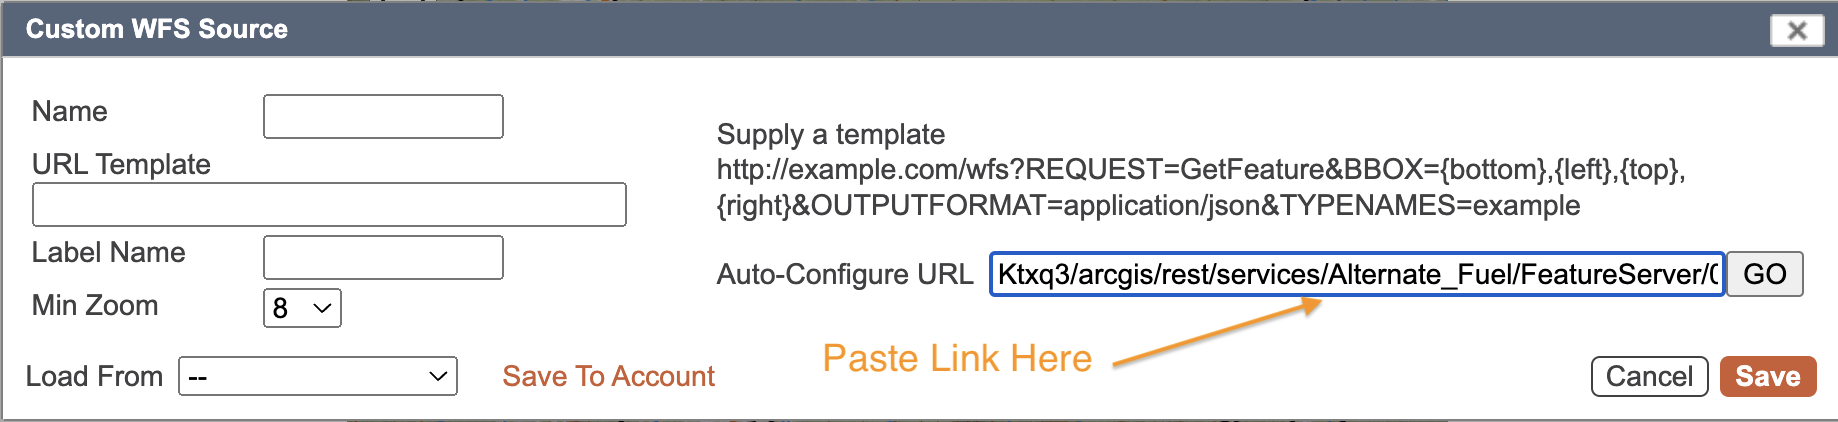
Let's start by taking a look at the edit box for adding a layer from a Web Feature Service.
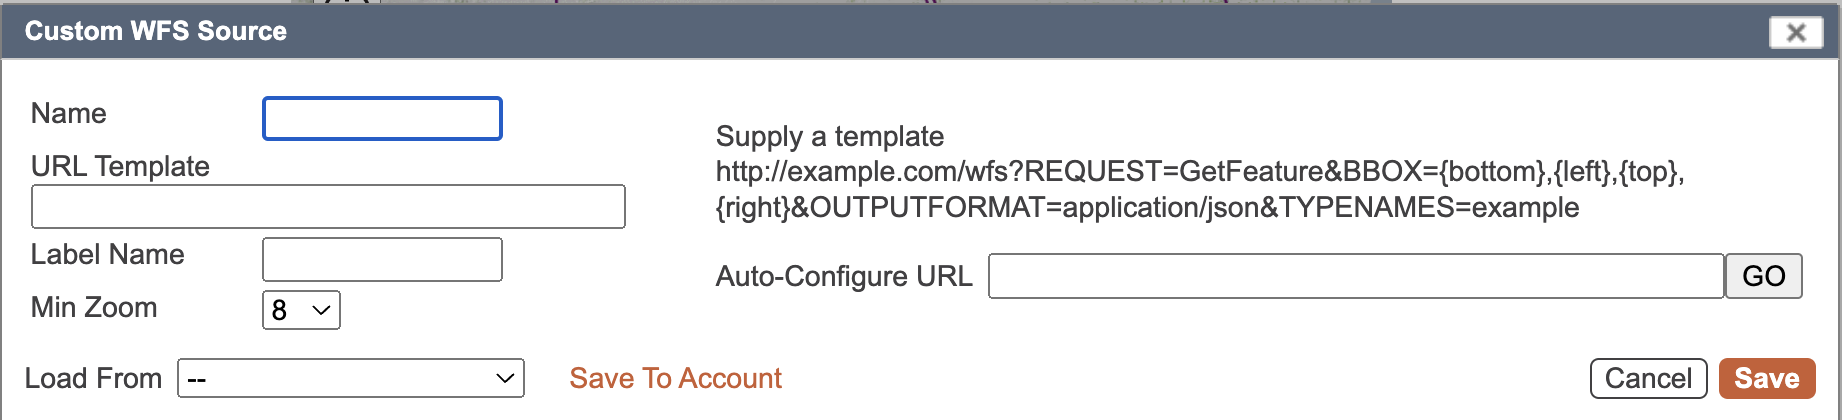
In the edit box, there are four areas where you can input information: Name, Label, URL Template, and Auto-Configure URL. If you have the URL of the JSON, you can put it into the auto-configure box, and we will configure the API and populate the URL template with that information. You would use the URL template only if the API is already configured. The name is something you can choose, but the label needs to come from the data in the pop-up. More information on finding the URL to put into the auto-configure box and on choosing a label is provided below.
WFS Source Layer, Example: EV Chargers
Let's walk through an example of how to find and set up a WFS layer on your map. We've chosen an alternative fuel dataset (mostly EV charging stations) generated by the Department of Energy. This is a great use of the WFS feature. It's likely that there will be an increase in charging stations over time, so as they get included in the dataset, the WFS overlay will reflect that change without you needing to import any more information.
Our first goal will be to find the URL we need to import into the auto-configure box. When searching the internet for data, we often come across interactive maps. Many of these maps will have links to their underlying data; it is this link we need to find. Here is the URL to the map shown below.
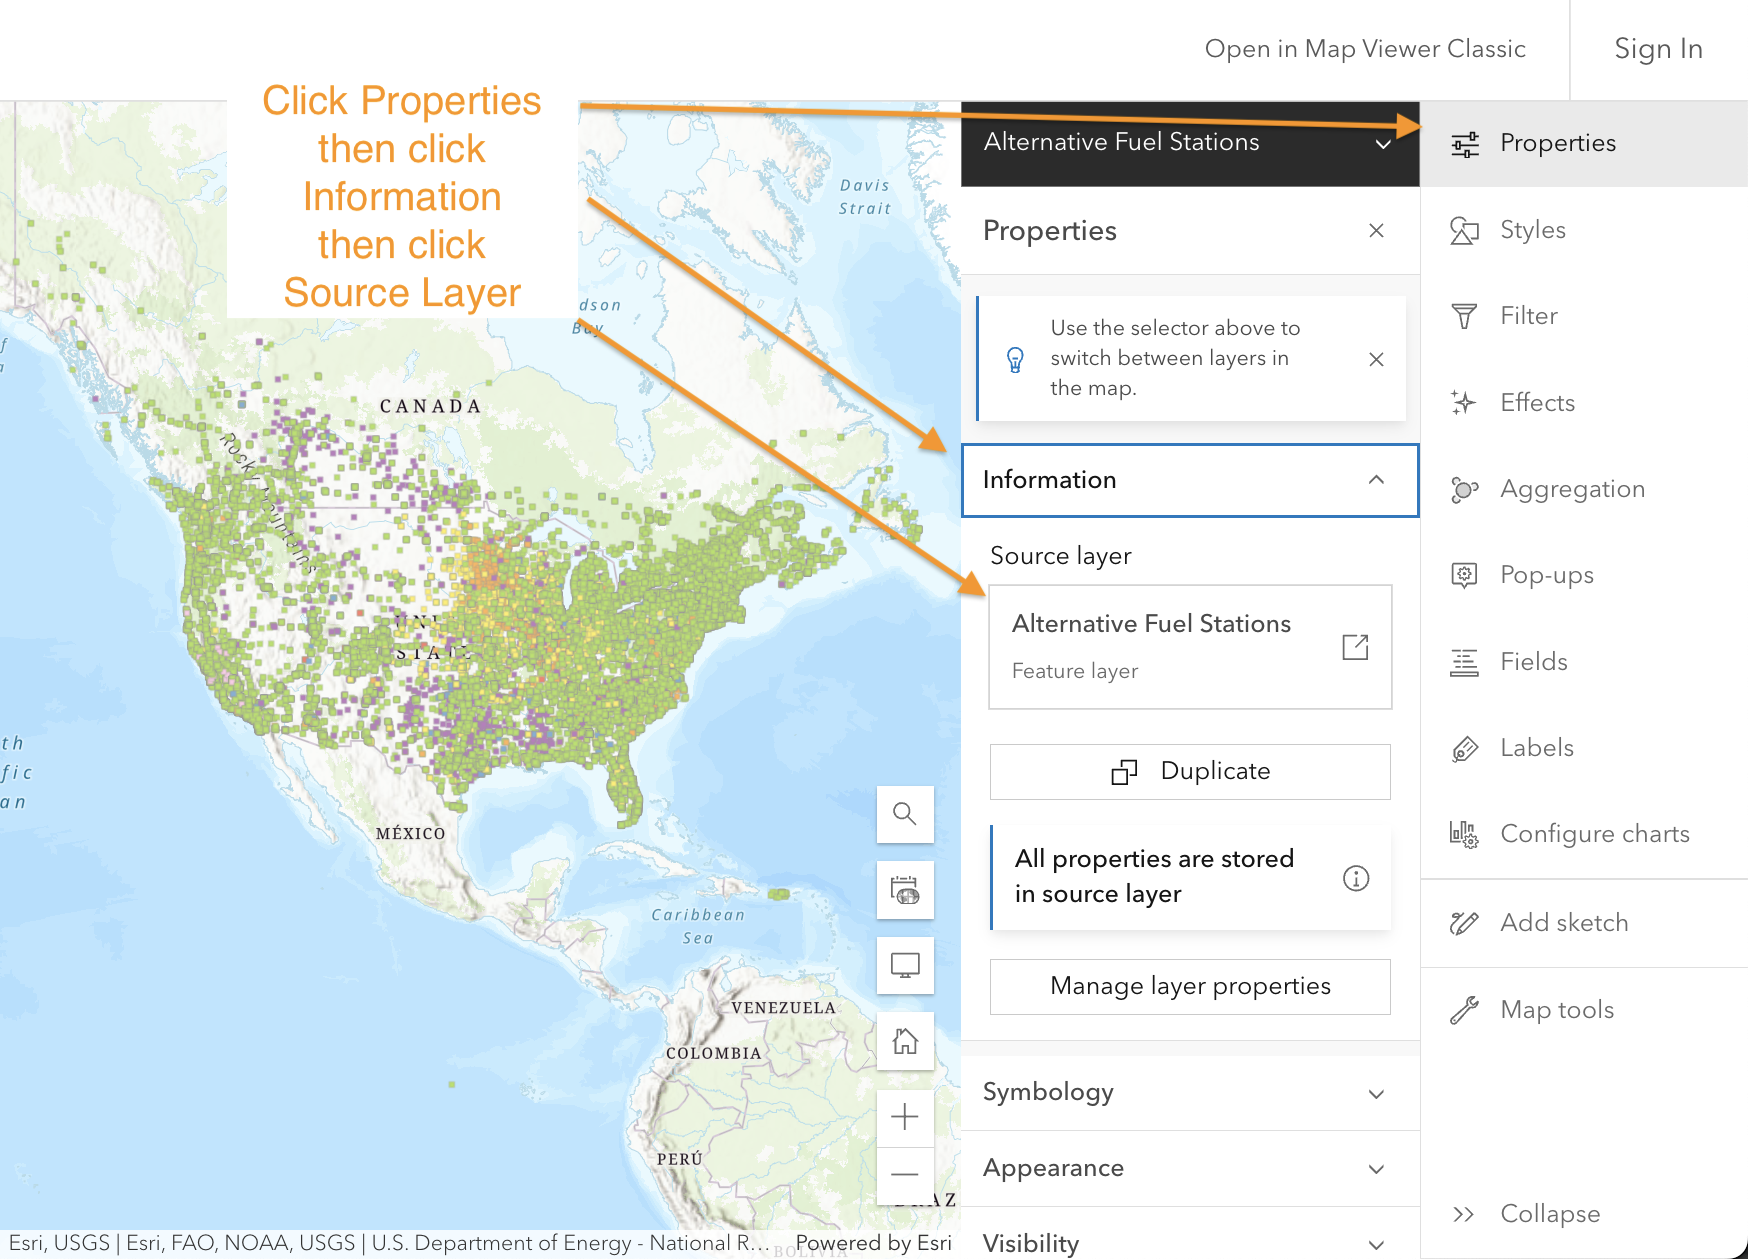
Once you click through the Properties, Information, and Feature Layer you will be taken to another page and that is where you will find the URL you need.
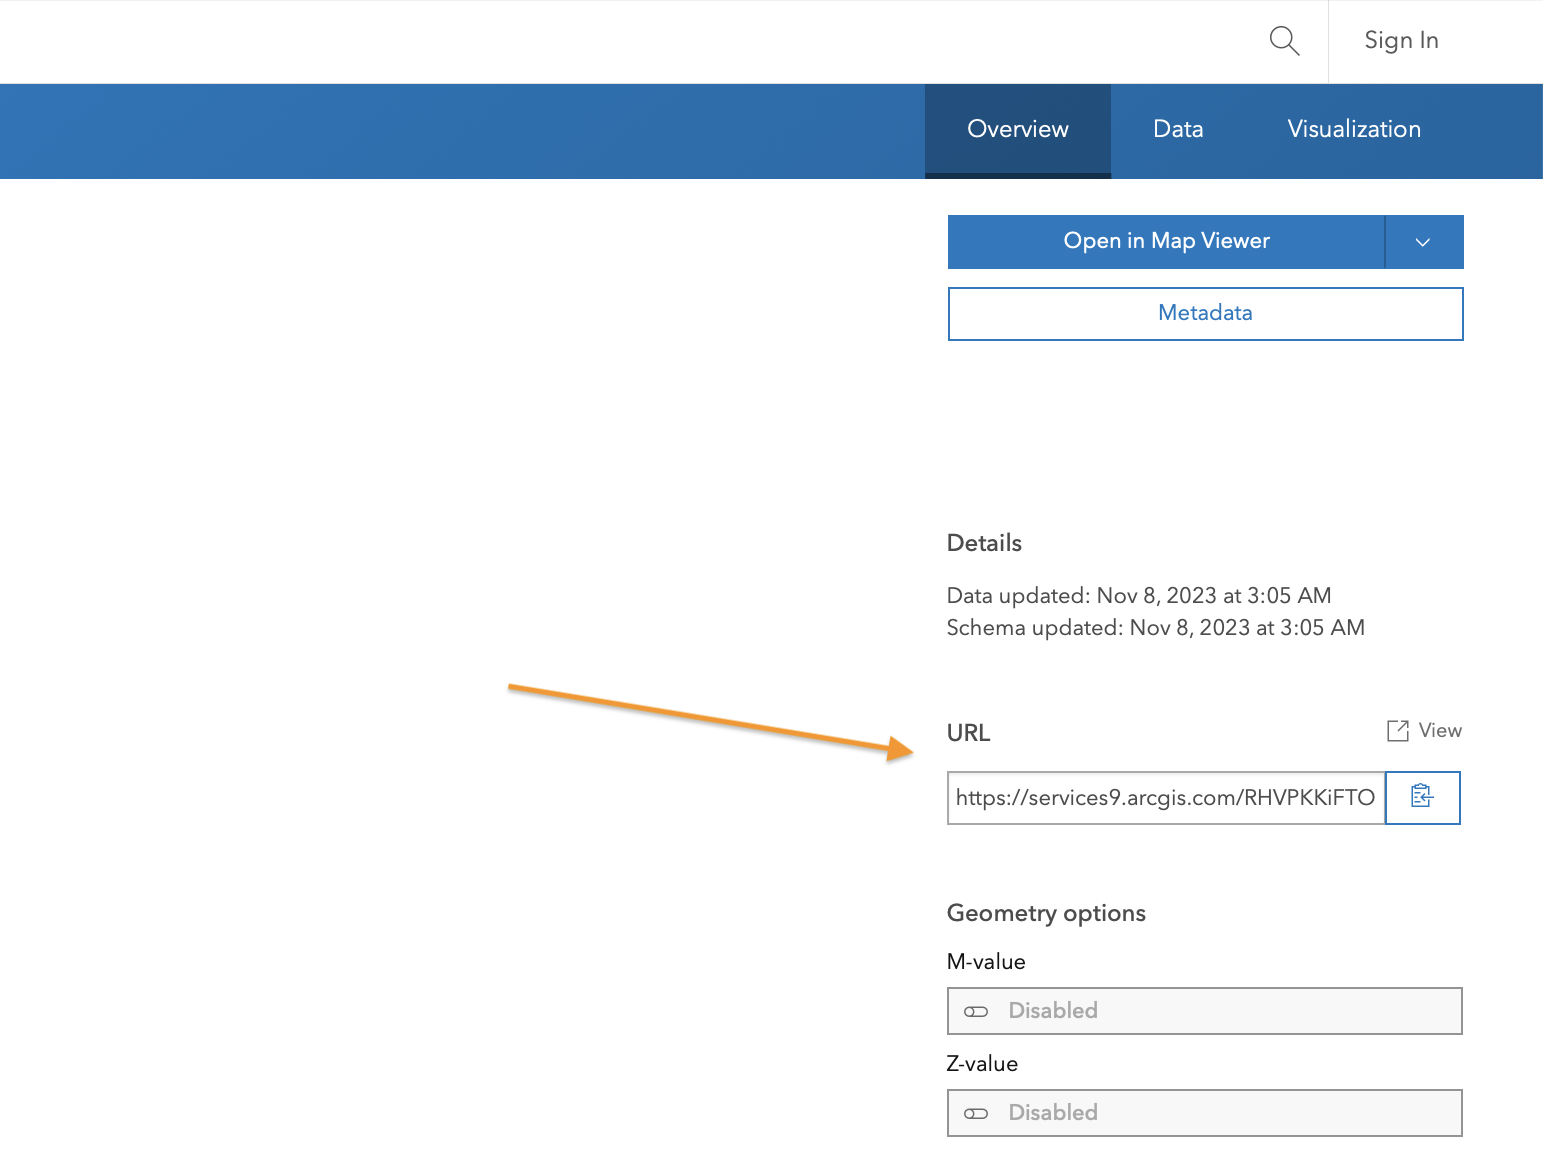
Now paste the URL into the auto-configure box and hit “GO".
After clicking go, a box will open, similar to the one below, displaying a list of features available from this service. In our example, there is only one. If there is more than one, you can only choose one; otherwise, you will get an error, and only the top choice will be used.
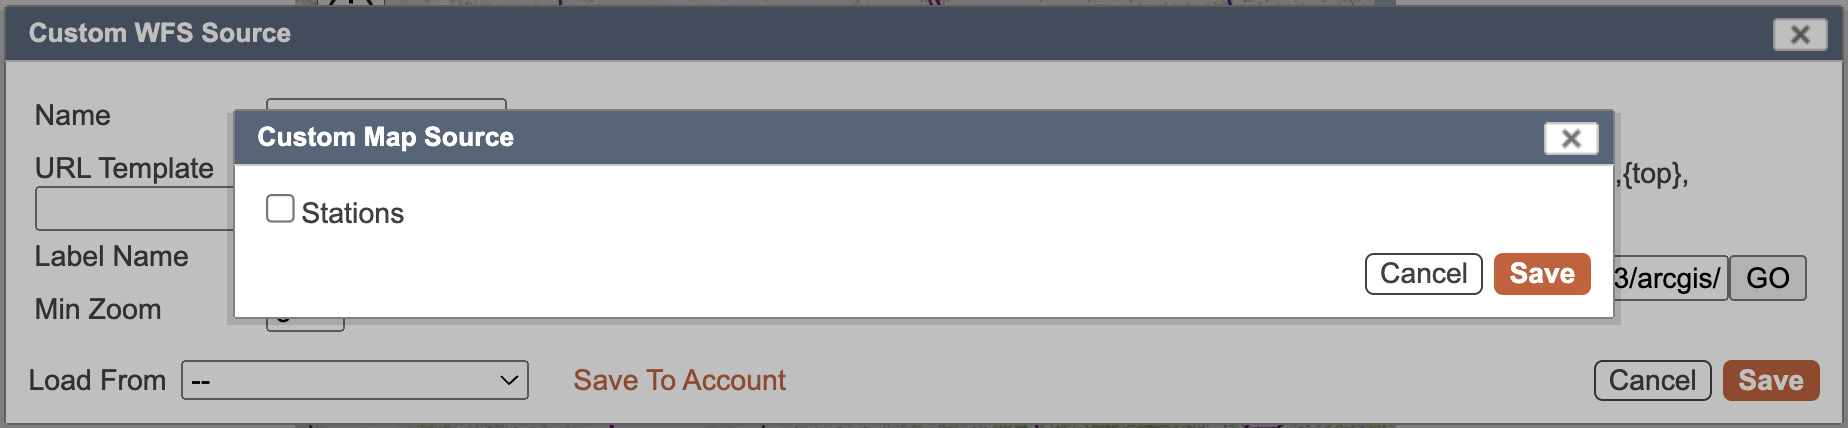
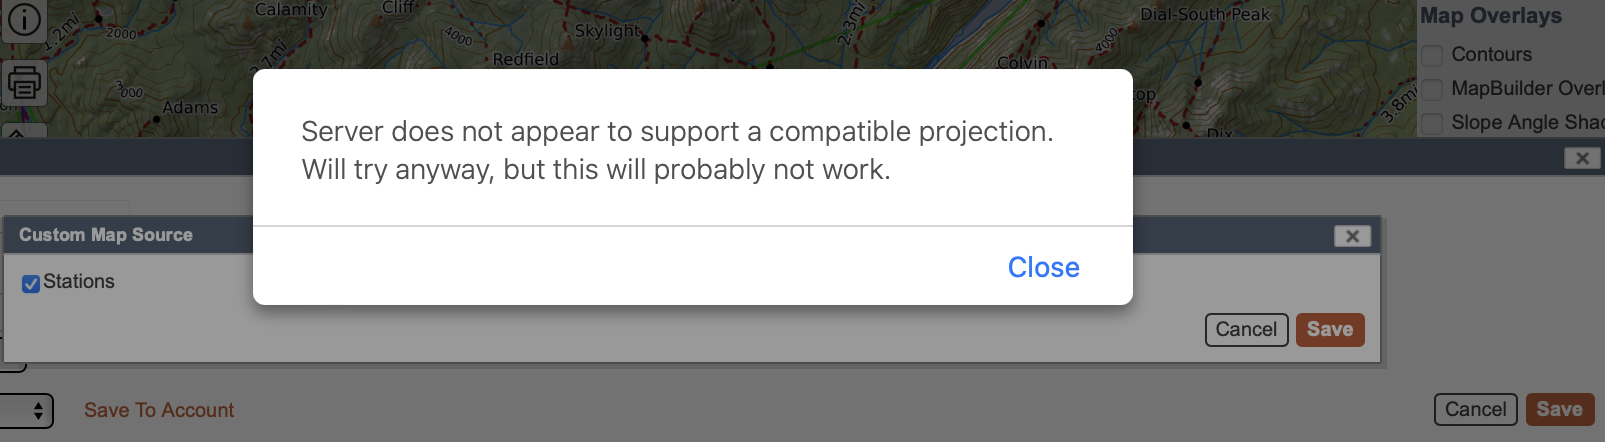
After checking which feature layer you want and you click Save, you may get an error message. Click on Close and see what happens. Most of the time things will work as expected.
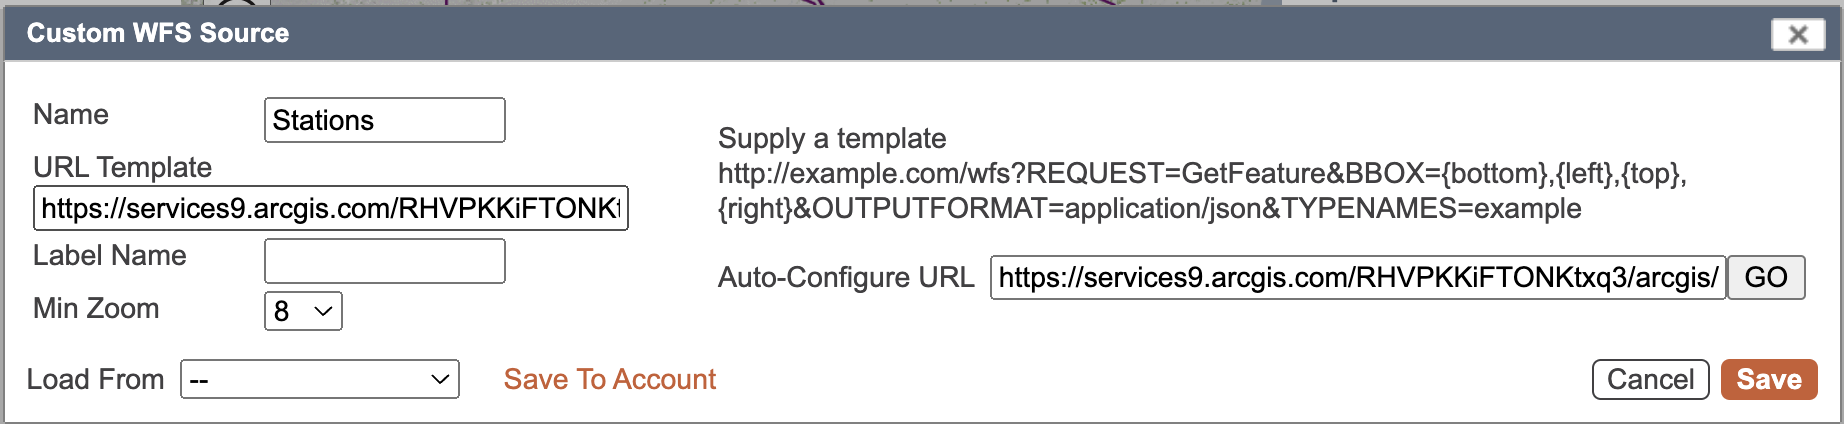
At this point a new link that appears in the URL template box. You should add or you can edit the title for your layer, then press Save to display the layer on your map.
You should get a new overlay, which you can toggle on and off from the overlays menu.
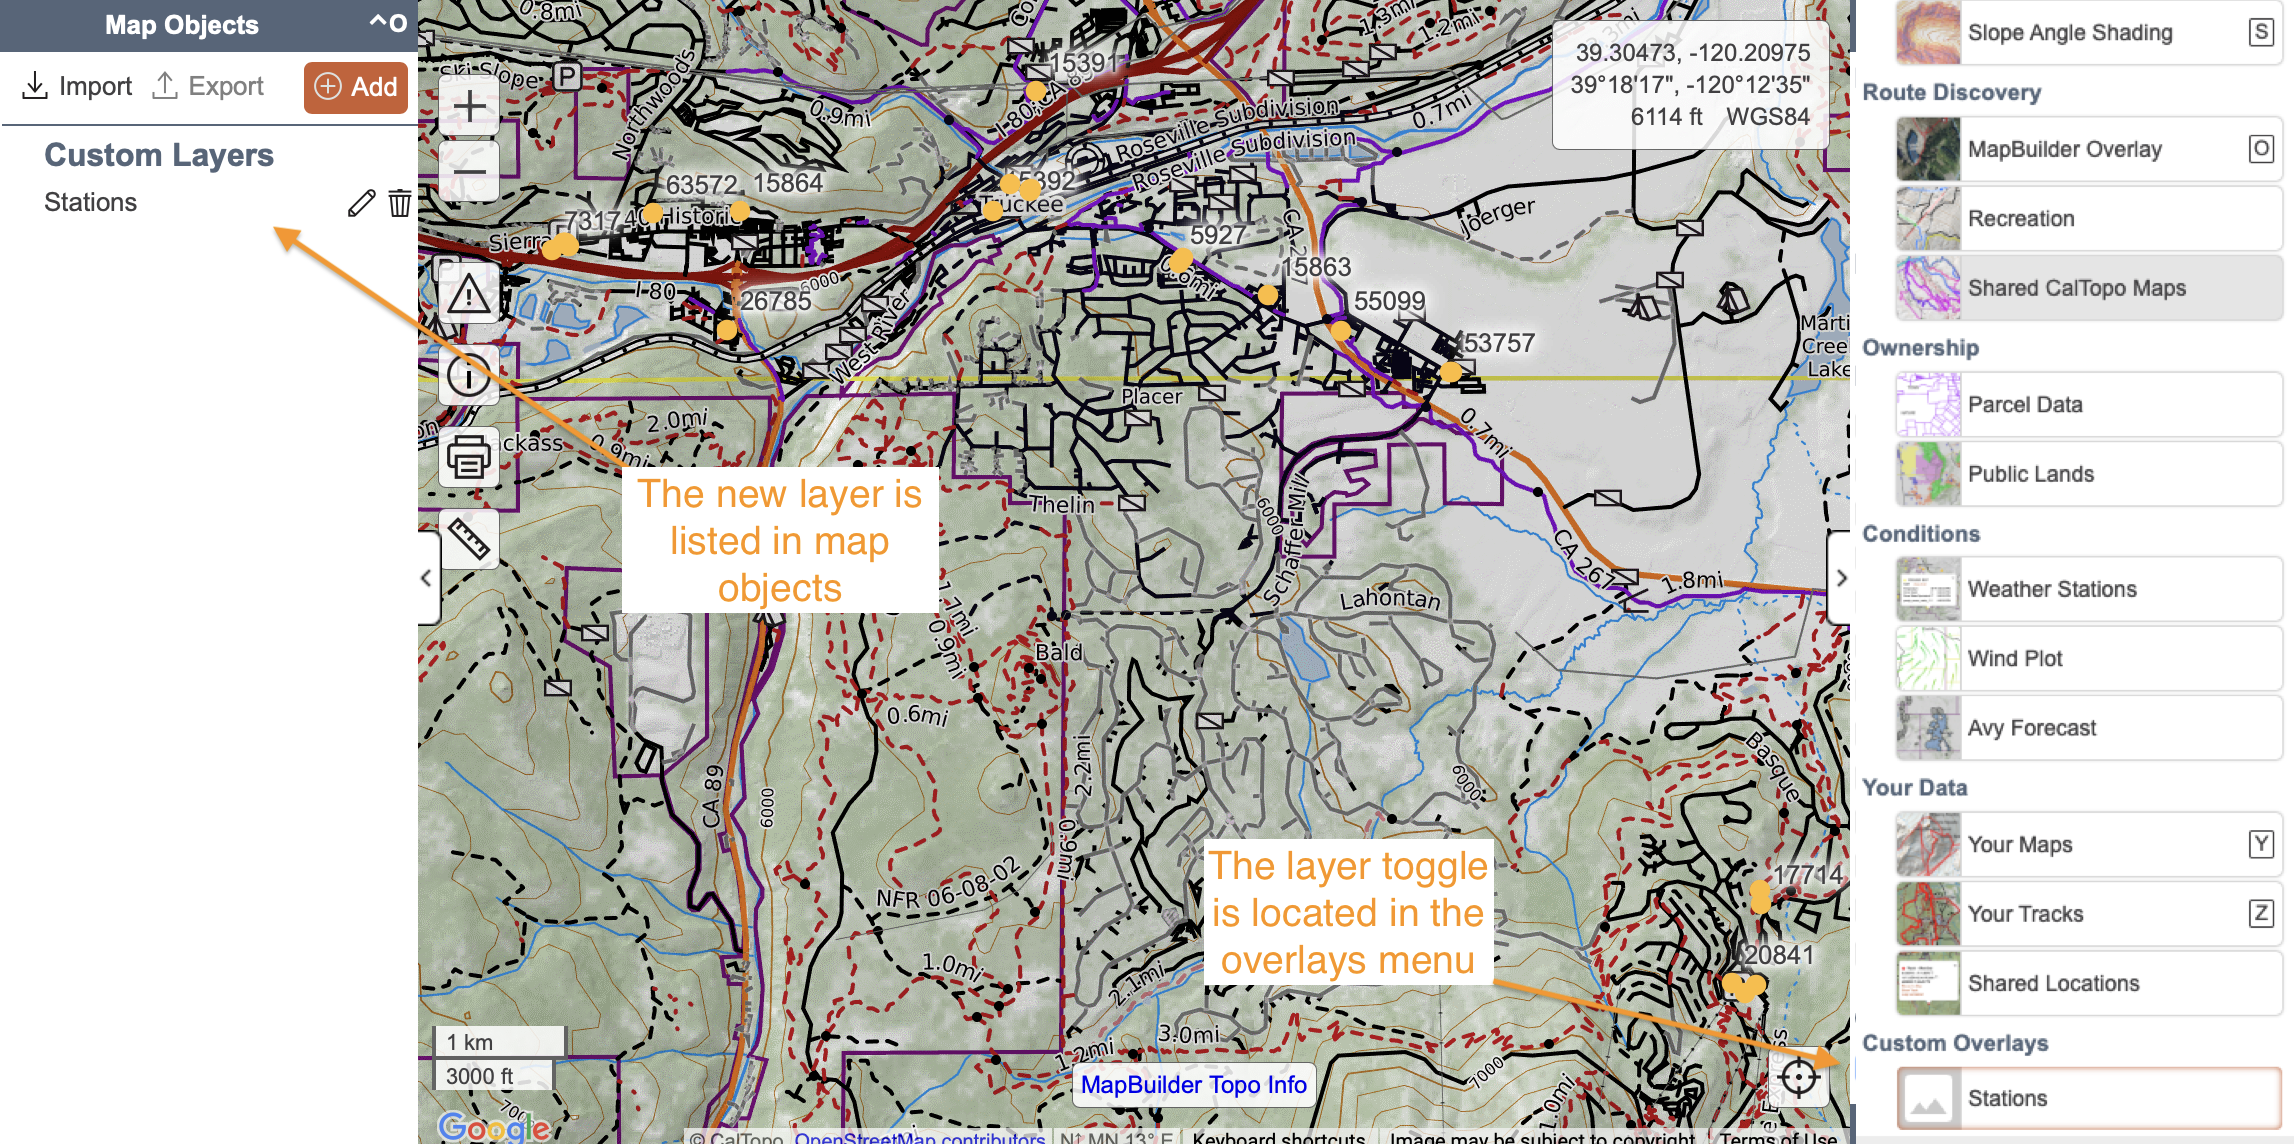
When you click on one of the features you get a small pop-up with some information. It is this information that makes a feature layer so useful.
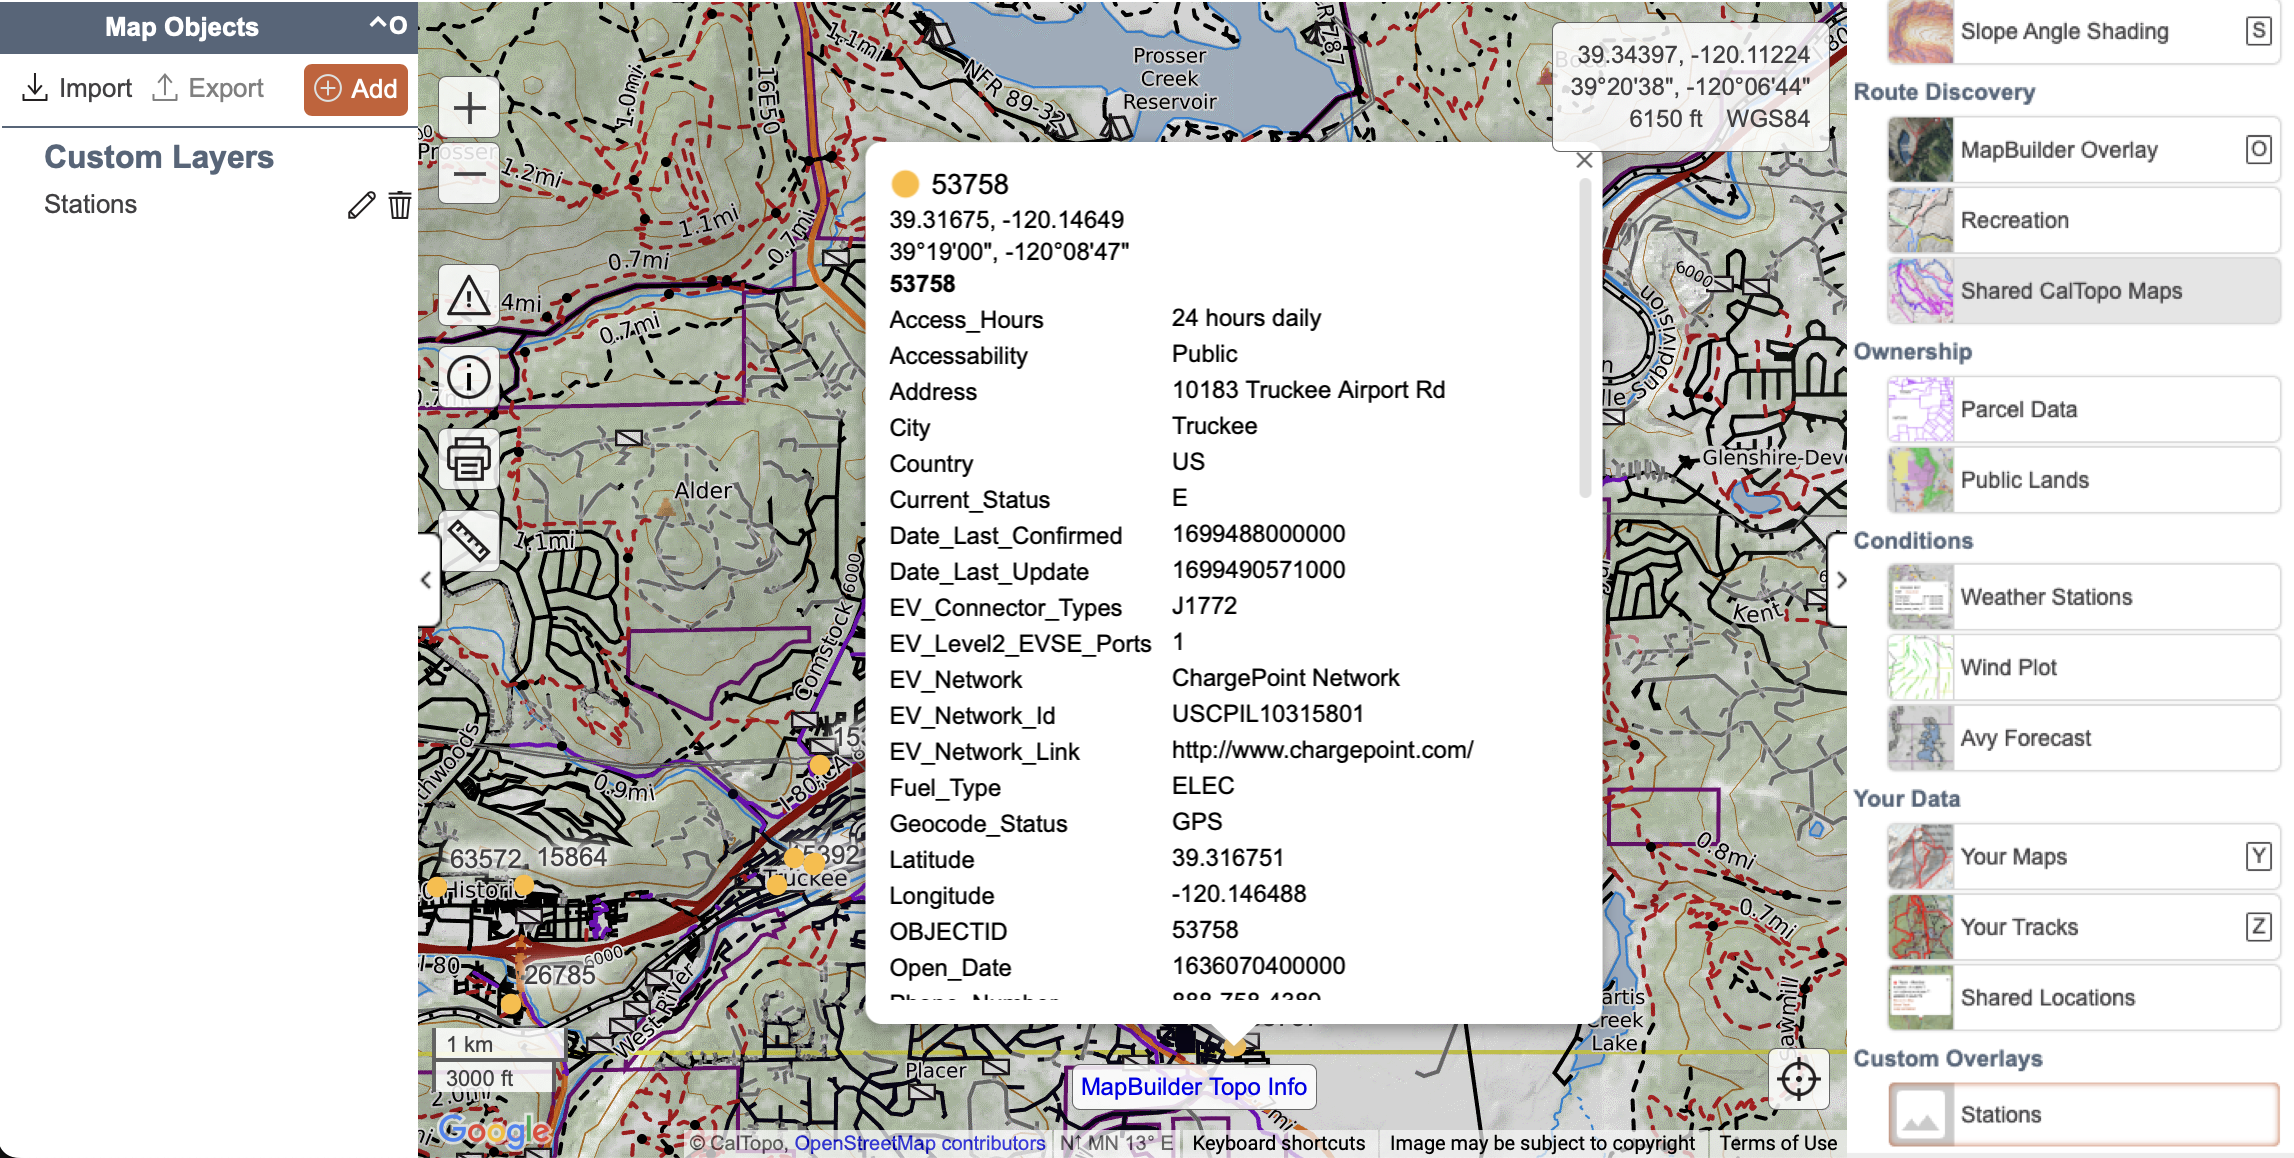
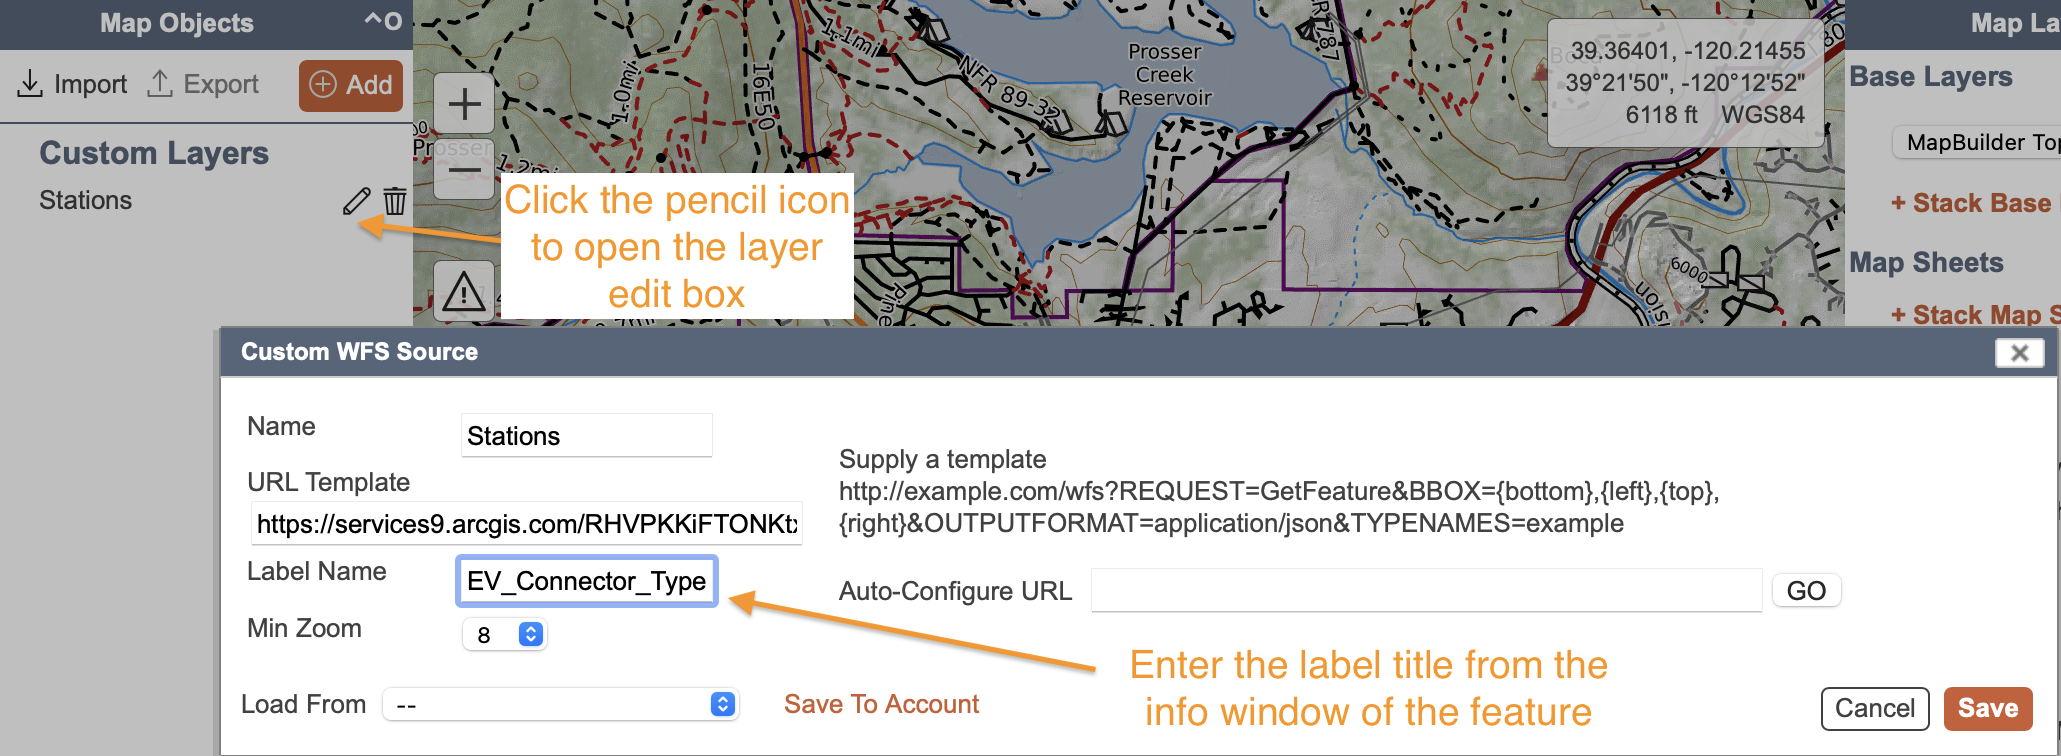
Looking at your new layer you'll notice that they are labeled. The label visibility will adhere to the label settings you chose under Settings. You have control over the label name, as any information from the pop-up can be used. After reviewing the pop-up information, choose the one that works best for you as a label. In this case we will choose the EV_Connector_Types so that we know what type of charger is located there.
To change the labeling we will click the pencil icon for our layer in the map objects menu to reopen the layer edit box. Once that is open you'll note an area where you can input the label you want. It is there we will put EV_Connector_Types.
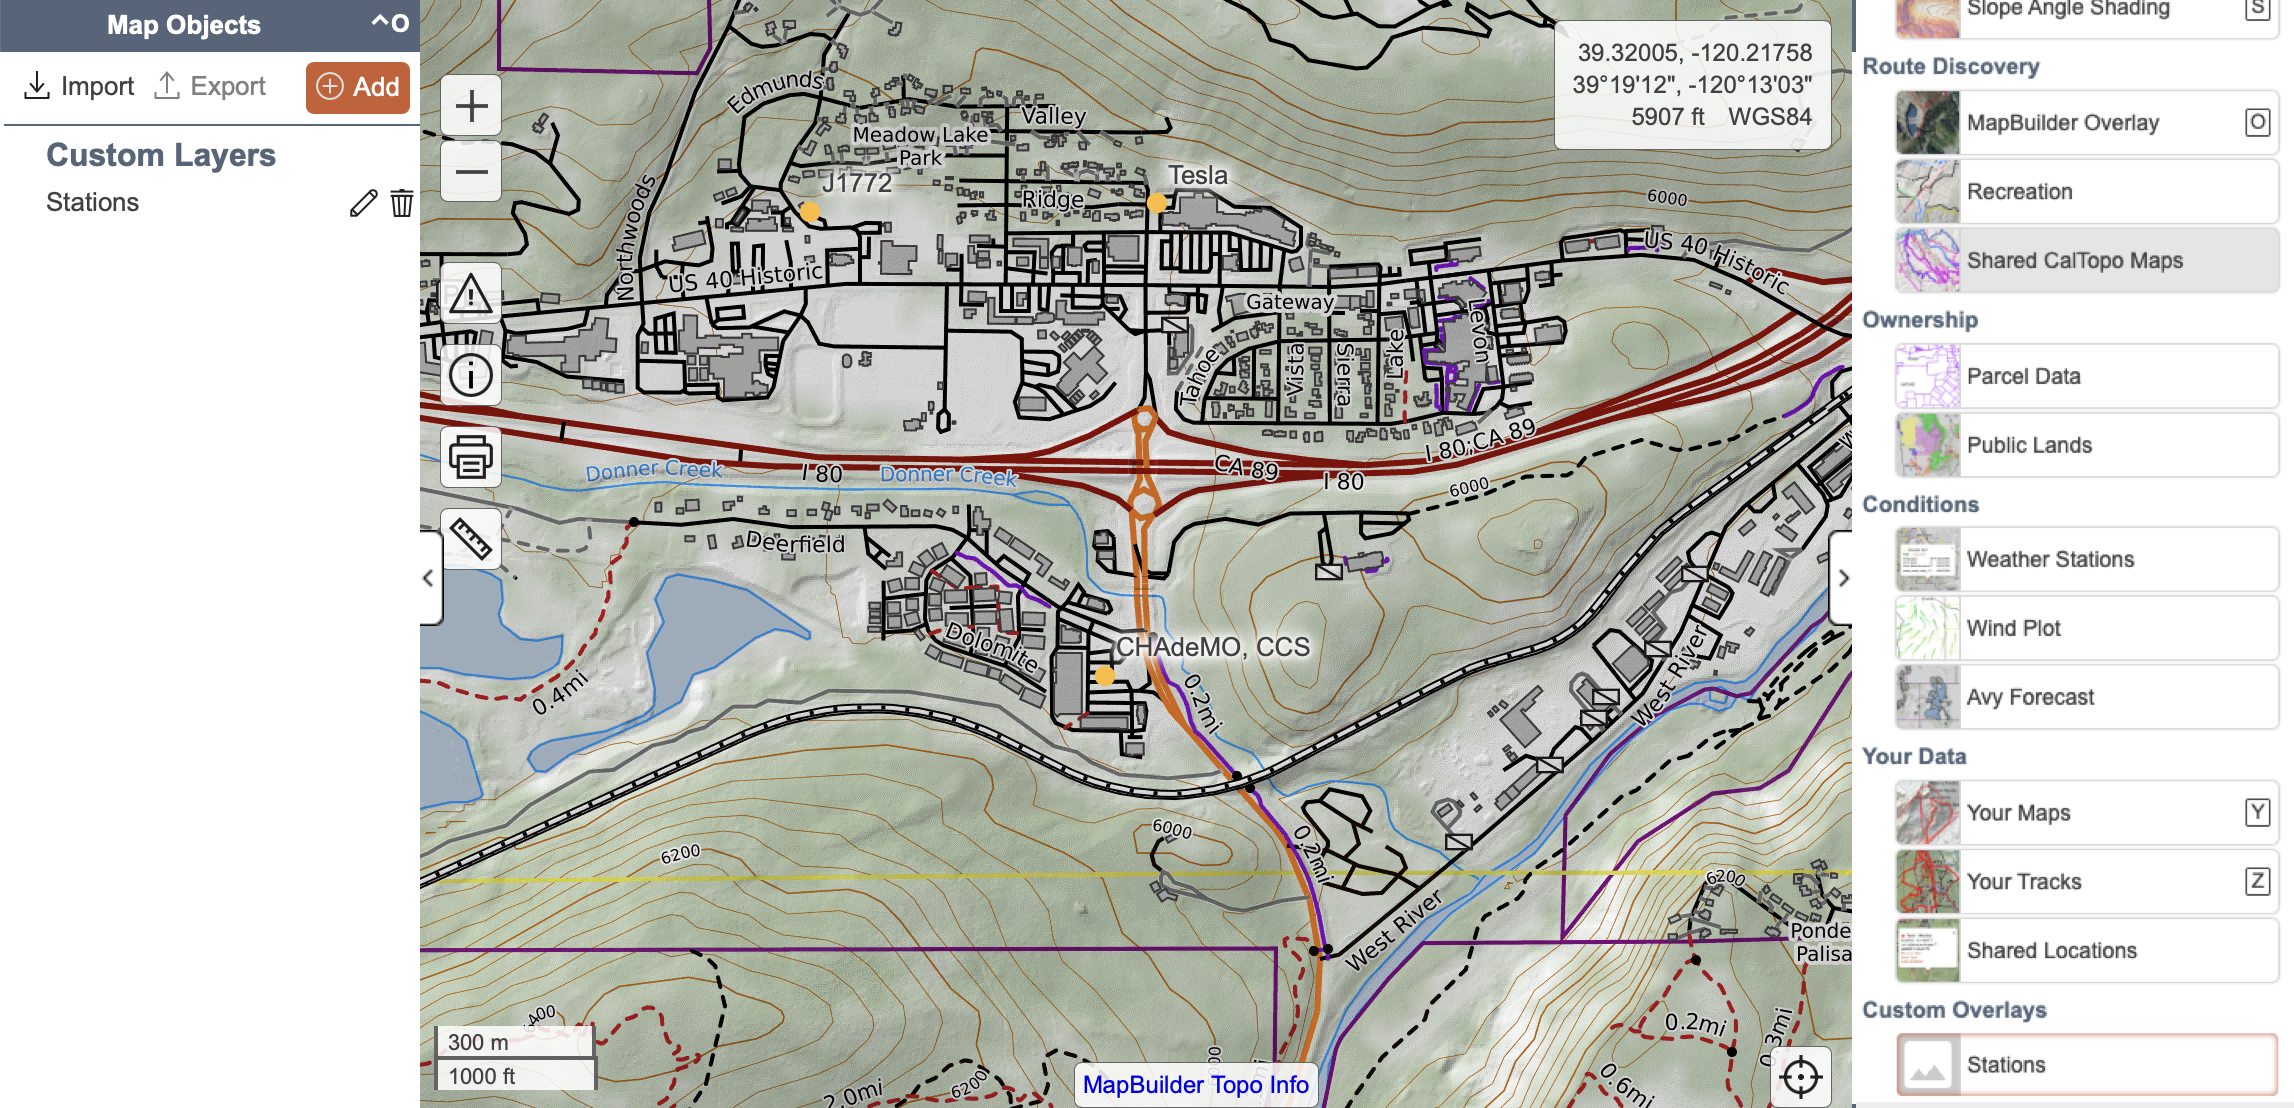
Once you have the label chosen and you hit save you will see the features on your map with the new labels.
Saving To and Editing From a WFS Source in Your Account
To save the layer to your account, click Save to Account at the bottom left of the edit box, as described in the custom layers introduction lesson. Editing is also covered there.