Importing Objects
in this lesson
Here you will find the basic process for bringing information from a file into CalTopo. To learn about the appropriate file types, please read the section introduction on the previous page.
Topics on this Page:
- Choose File and Objects, to import, and edit those objects.
- Import directly from a GPS unit.
Choose File and Objects
The import function is basically the same process whether you use GPX, KML, or a GeoJSON file. Click the Import button at the top of the Map Objects side bar, navigate your device to find the file you want to import, and select it. You can import items to a saved or unsaved map.
For a review of files types and the type of information they contain, go back to that section.

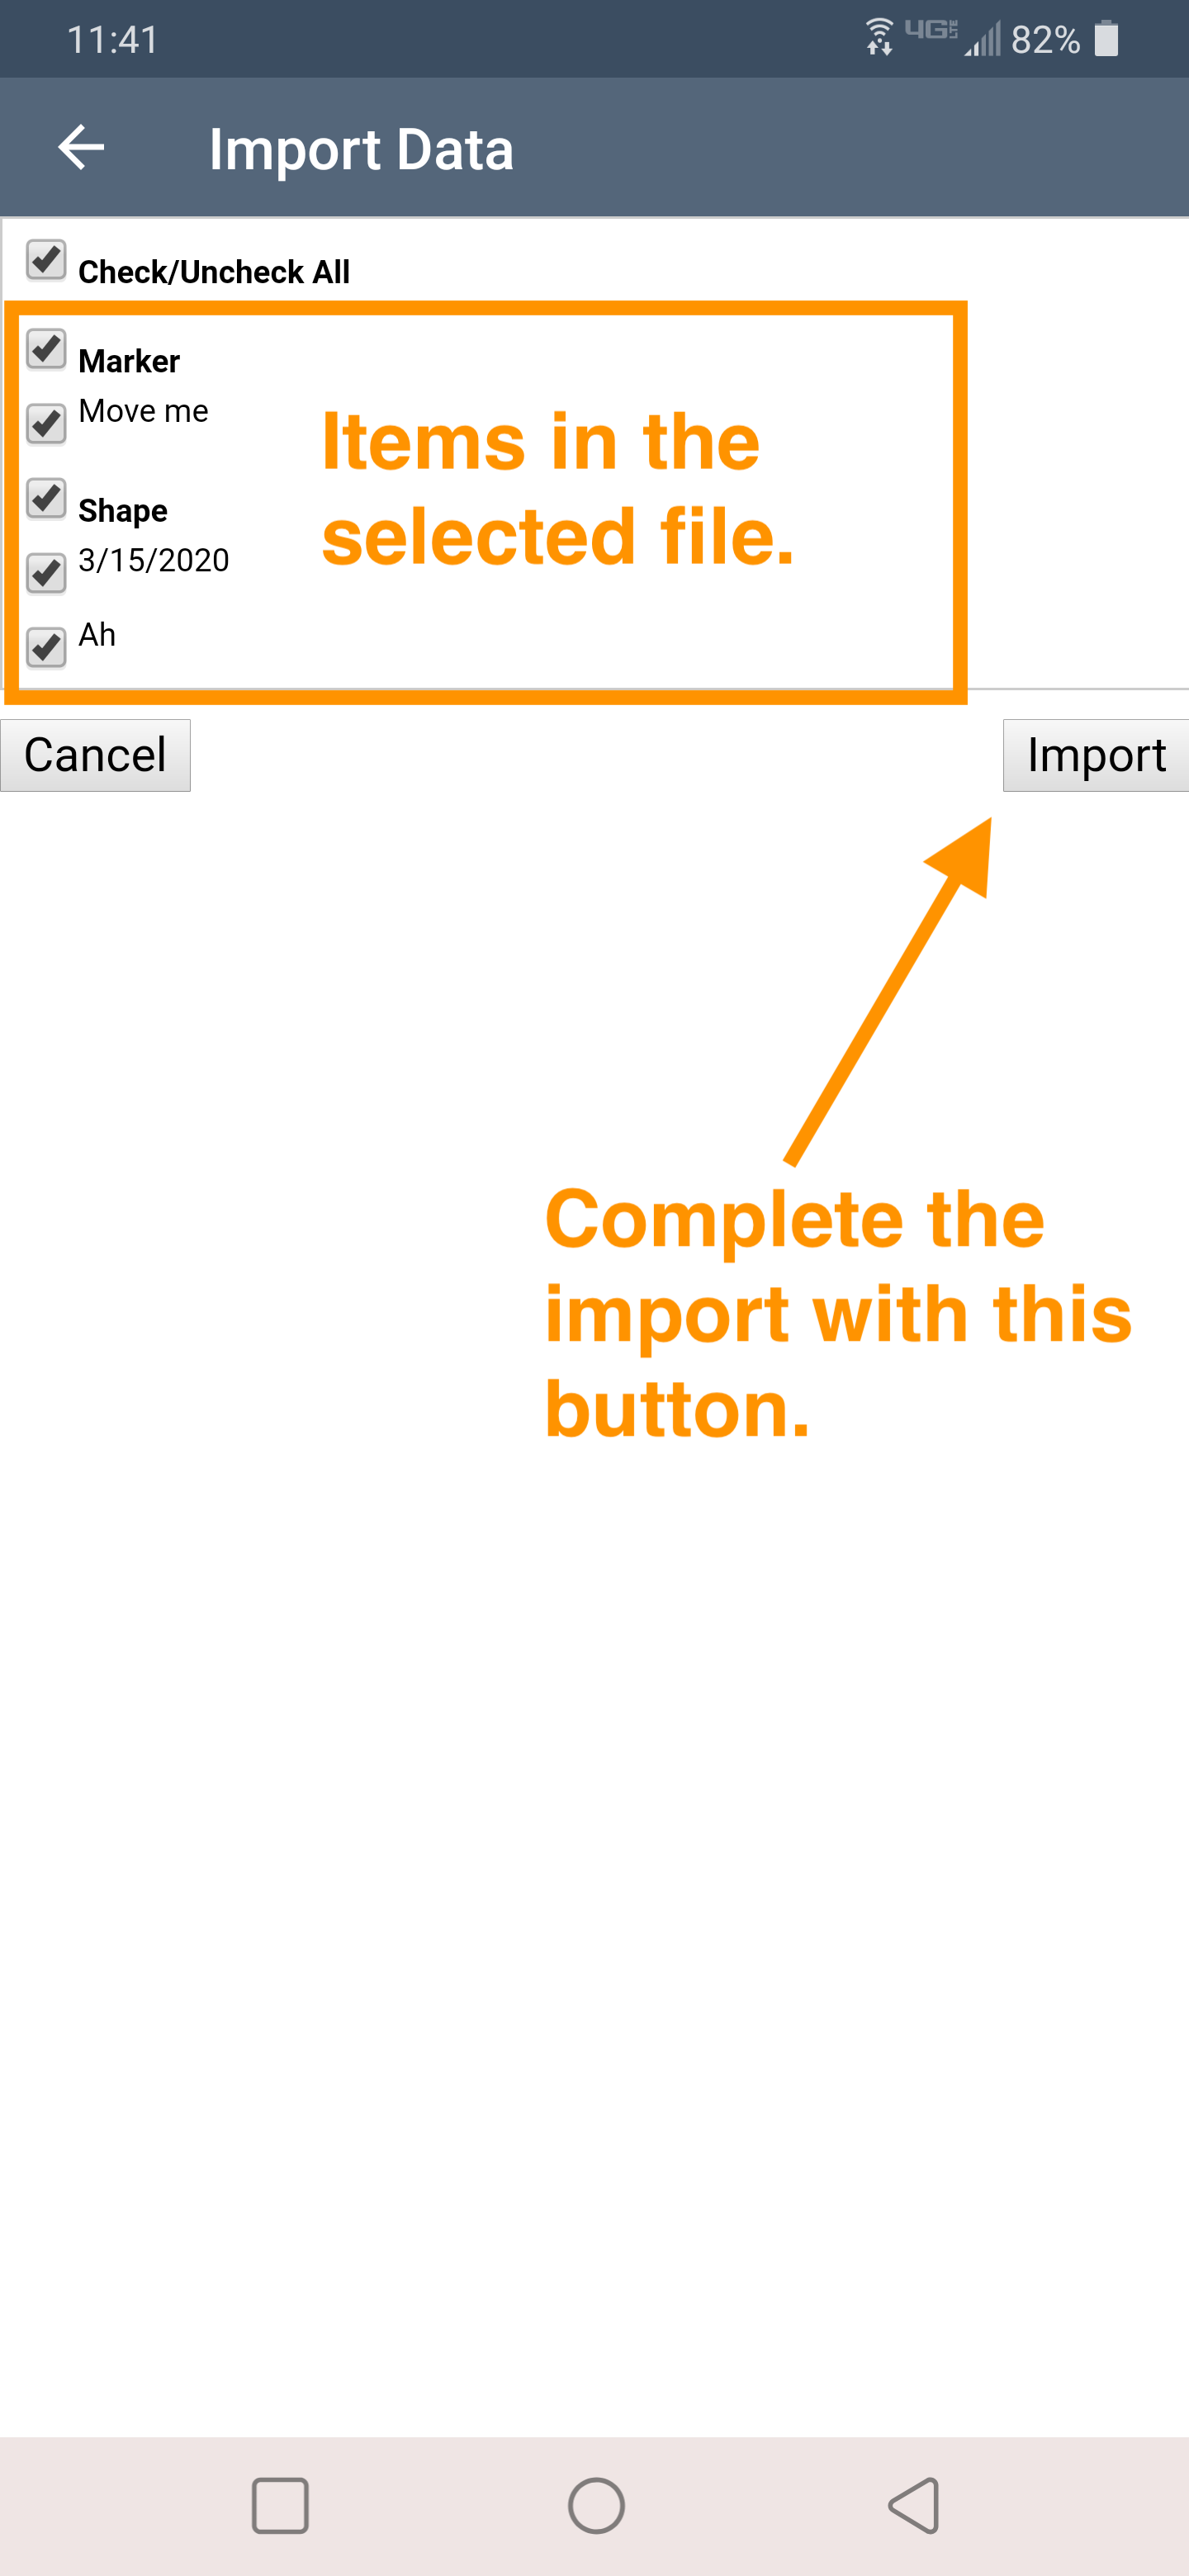
After the file uploads, you will see a dialog box listing the items in the file and some information about those items. First, this allows you to select specific items from the file to add to the map. All items are automatically checked, but you can deselect all using the top check box, or re-select all the items using this box. You can also select or deselect all Markers or all Shapes at once. Otherwise, clicking each individual item is the remaining method.
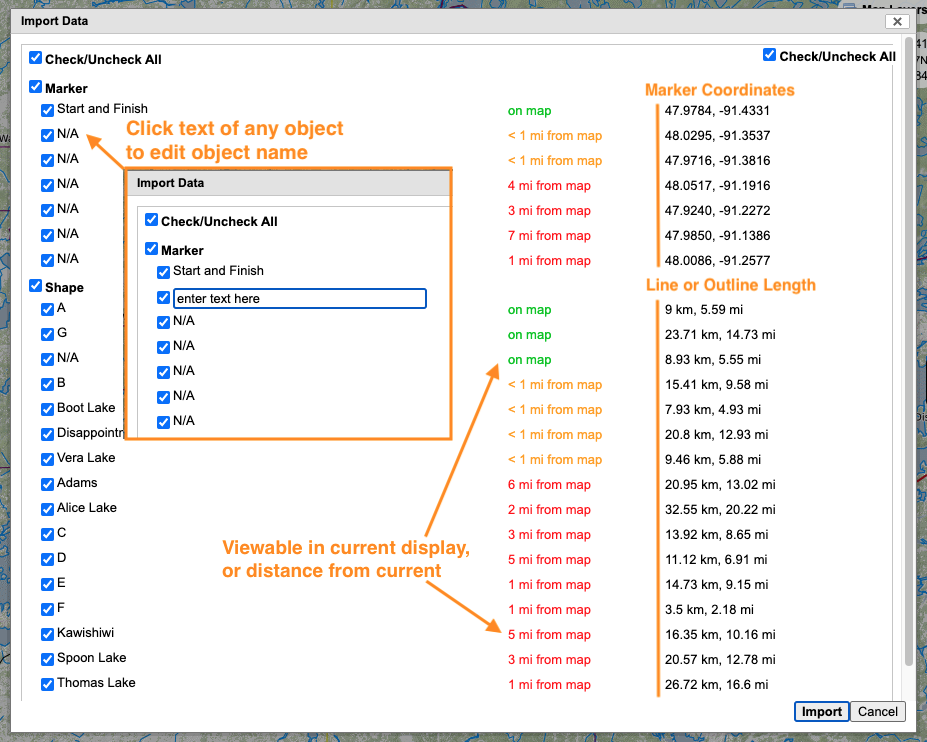
Change the name of the item on import rather than opening each item after importing it by clicking on the existing name for the item. Enter text in the text box and click anywhere else to complete that change.

The next column in the import box provides an idea of how near or far the item is located geographically from the current map view. If the item would be visible on the current map, it will show up in green as on the map. If the item is close to the map view, under one mile away, it will list in yellow as < 1mi from map. Finally, items a mile or more from the map view will display in red and show the distance from the current map view. This allows you to not import items that are not relevant to the current map by seeing if an item is located very far away.
The last column will show the coordinates of any markers in the file. For shapes such as lines and polygons, the length of the line or outline of the polygon is listed.
When you are happy with your objects names and selection for import, click IMPORT in the bottom right. If you imported a GPX or KML file, markers will import to the marker folder and shapes will go to the Lines and Polygons folder. They will preserve object color and style if the file contains such info and if the style is available in CalTopo.
To import a set of objects and preserve folders and organization of items, you will need to have a file in the GeoJSON format.
Importing in the Mobile App
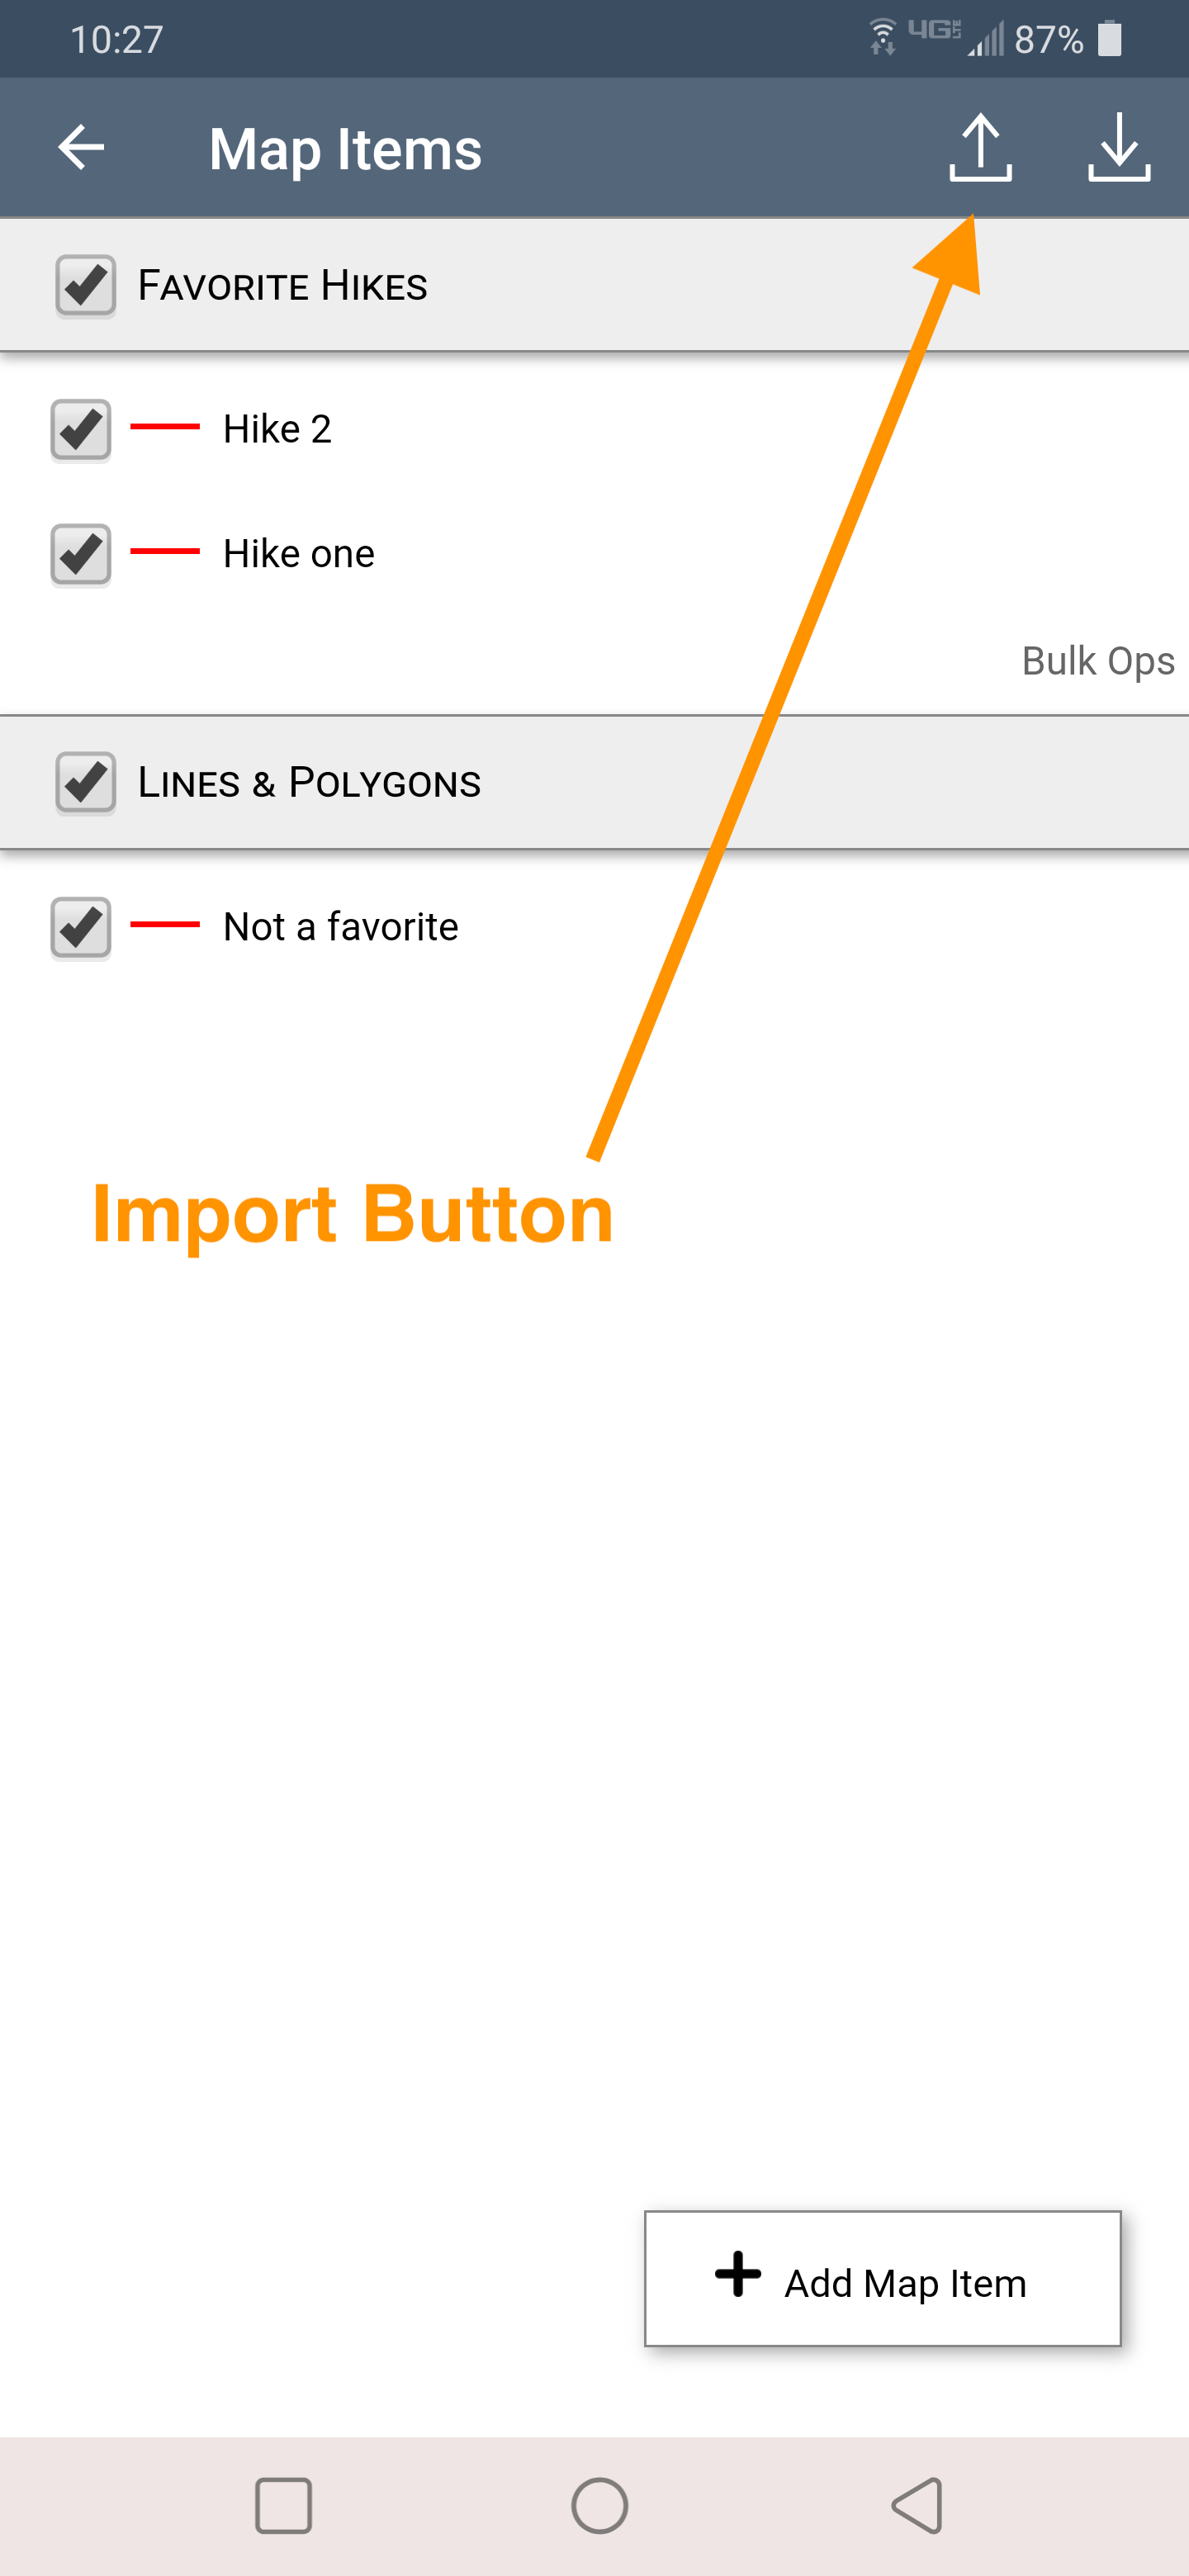
To import items to a map via the mobile app, first open the map item menu using the center button at the top of the screen. Then tap the import button at the top right (with the arrow pointing out of the box.)
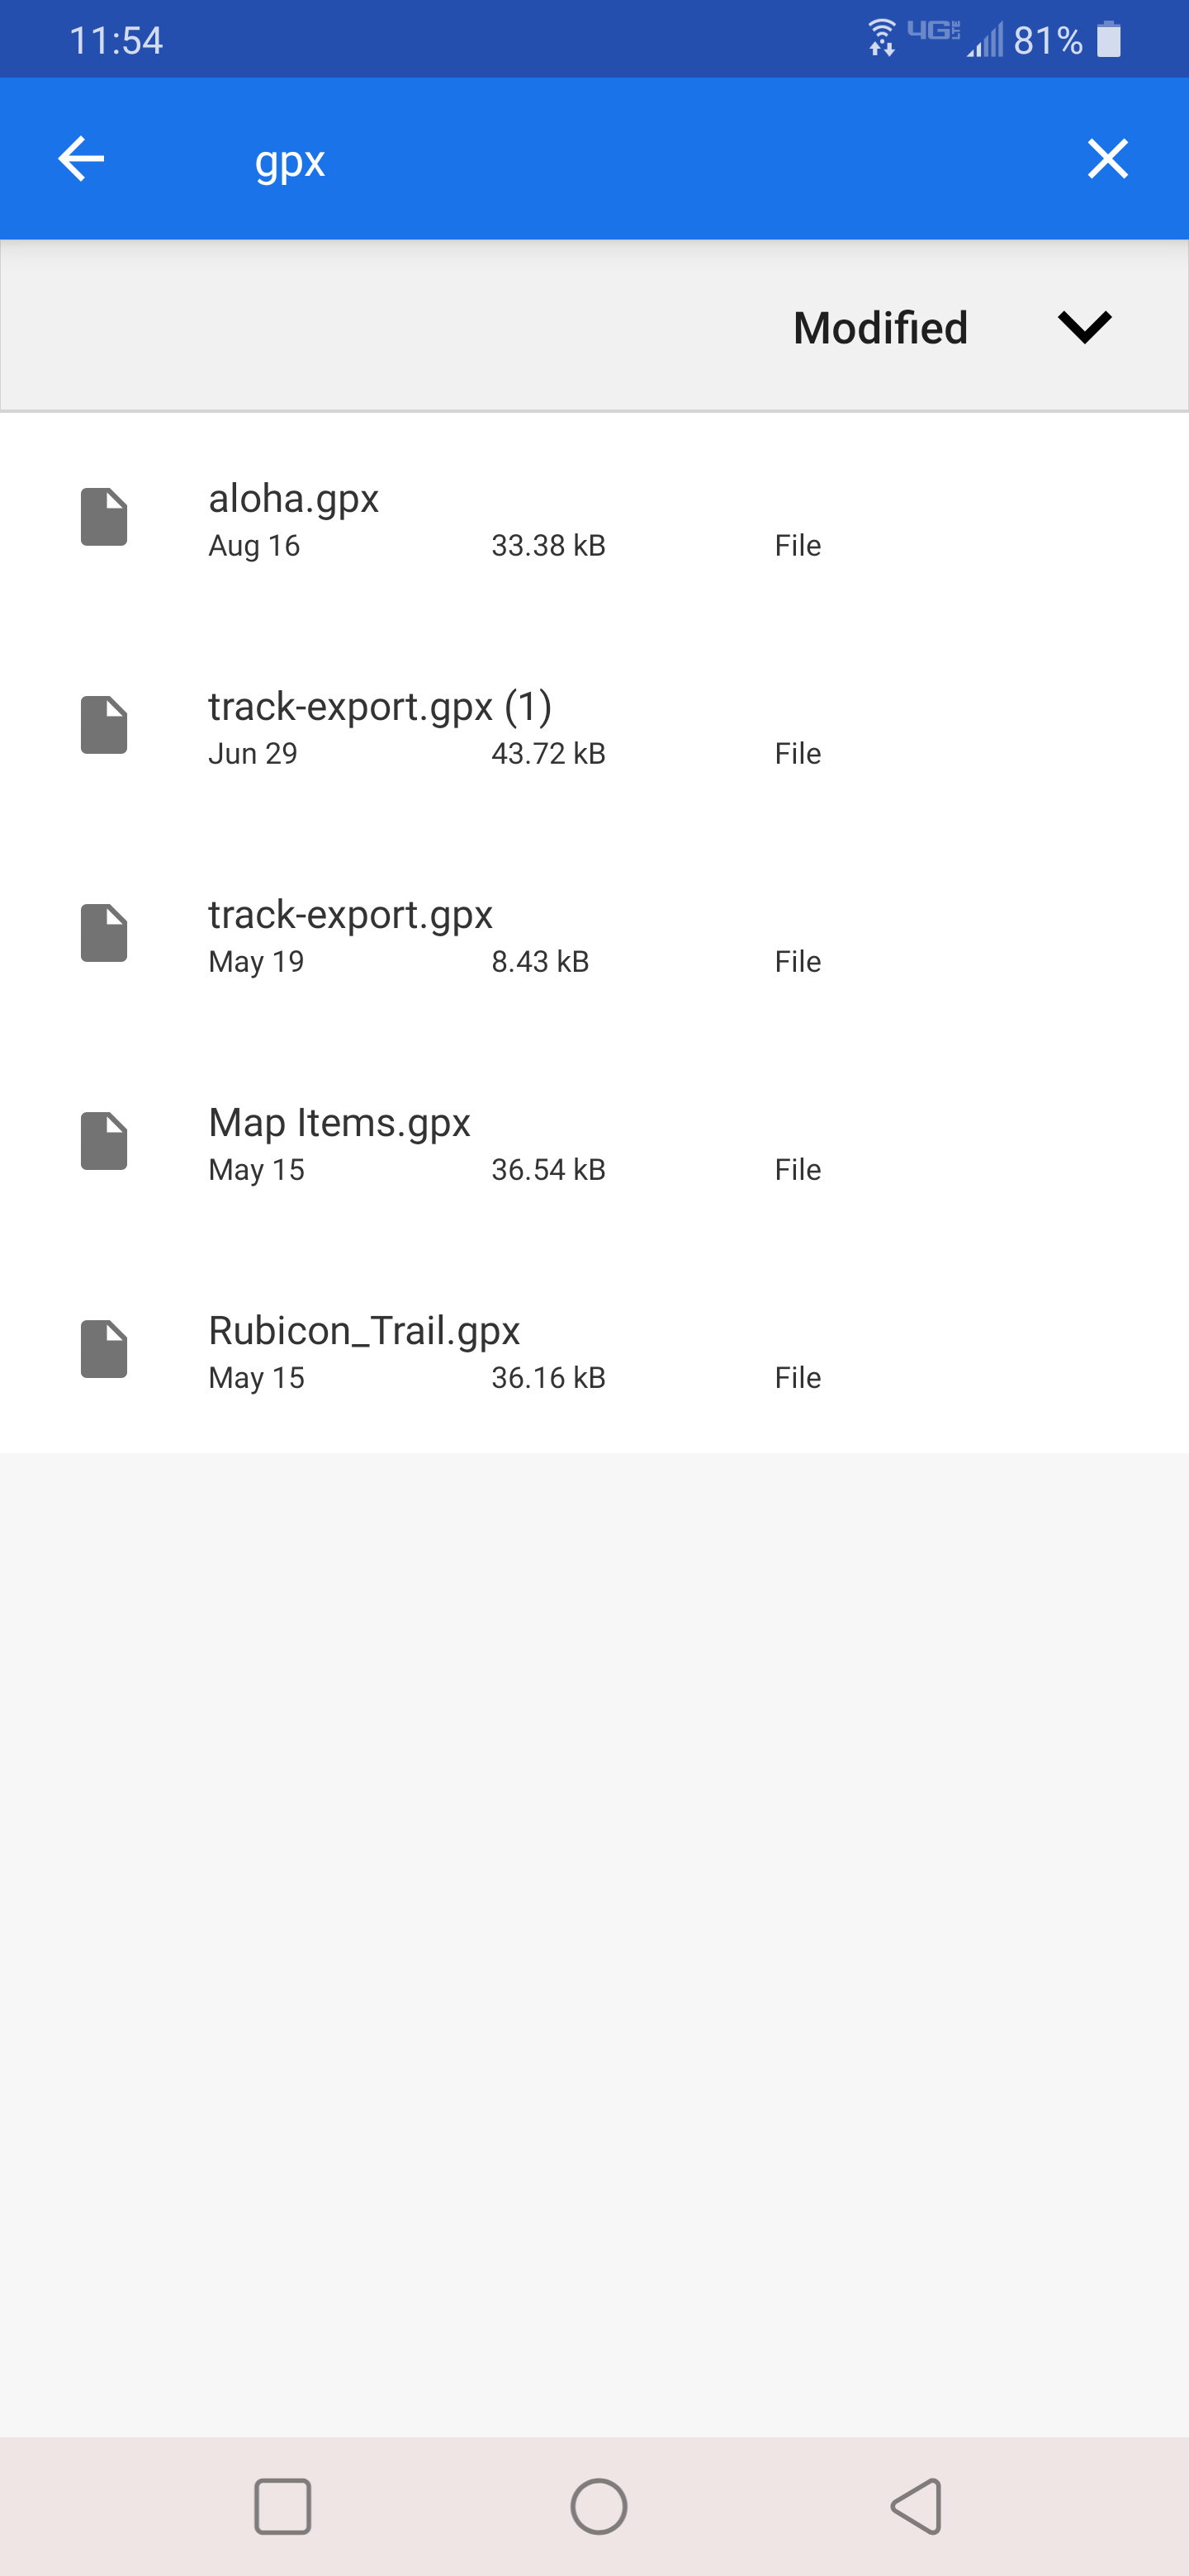
You will be able to choose any file from your device to import, but not any file will actually import. It still needs to be a .gpx, .json, or .kml file type. If you select your cute cat photo, unfortunately nothing will happen.
When you have selected an appropriate file containing map data, on the next screen you will have the option to choose which items from that file to import to the map. This is the same process as described above for the web browser, but the import page does not show the same level of useful information about the map objects, such as distance from the current map view.
Select or de-select the items and click Import. If you have a map open already, the objects will save to that map. If you do not have a map open, you will need to save your map in order to preserve the items.
Importing directly from a GPS unit
Most modern GPS units have the ability to work as a USB storage device and interact with your computer like any other USB device. You may have to dig through your settings menu in the GPS unit to allow this behavior.