Mutual Aid Incidents (Formerly Events)
in this lesson
Complex and large-scale incidents, such as wildfires and multi-day searches, can require extra manpower and cooperation between multiple organizations. Available to CalTopo team accounts, mutual aid incidents (formerly called Events) allow you to create temporary groups for managing these types of mutual aid events.
With Mutual Aid Incidents, you can quickly add users from outside the team and provide instant access to mutual aid incident-specific maps and data in order to improve communication and coordination.
Topics on this Page:
- What is a Mutual Aid Incident?
- Creating a Mutual Aid Incident.
- Adding Users to a Mutual Aid Incident from outside your team.
- Managing Mutual Aid Incidents and event maps.
What is a Mutual Aid Incident?
Mutual Aid Incidents are exactly what their name implies: they are temporary groups with an expiration date that are created for a specific large-scale incident.

Mutual Aid Incidents can include both team members and invited users from outside the team. All existing team members will have the same permission level to the mutual aid incident as they do to the main team account. If needed, you can grant an an existing team member additional access to a mutual aid incident; for example you could grant Manage permission for a mutual aid incident to a team member with Update permission on the main team account. Upgrading a team member’s permission level for a mutual aid incident will not affect the team member’s permission level for the main team account.
By default, invited outside users can only see maps and other data, such as an operational period map or a custom landing zone layer, that are part of the mutual aid incident. They cannot see any maps or data saved to the main team account unless you give them permission to do so. Outside users do not count towards your total user count for your team account- you can add as many outside users as needed for a mutual aid incident. Once added, each user will have access to all CalTopo features for the duration of the incident. Once the mutual aid incident expires, outside users will fall off the account automatically.
Creating a Mutual Aid Incident
Only team members with Admin access can create Mutual Aid Incidents. However both Admin and Managers can create sign up codes for existing mutual aid incident and invite users from outside the team to join. Admin and Managers can also view mutual aid incident information, such as the list of outside users who have joined the mutual aid incident.
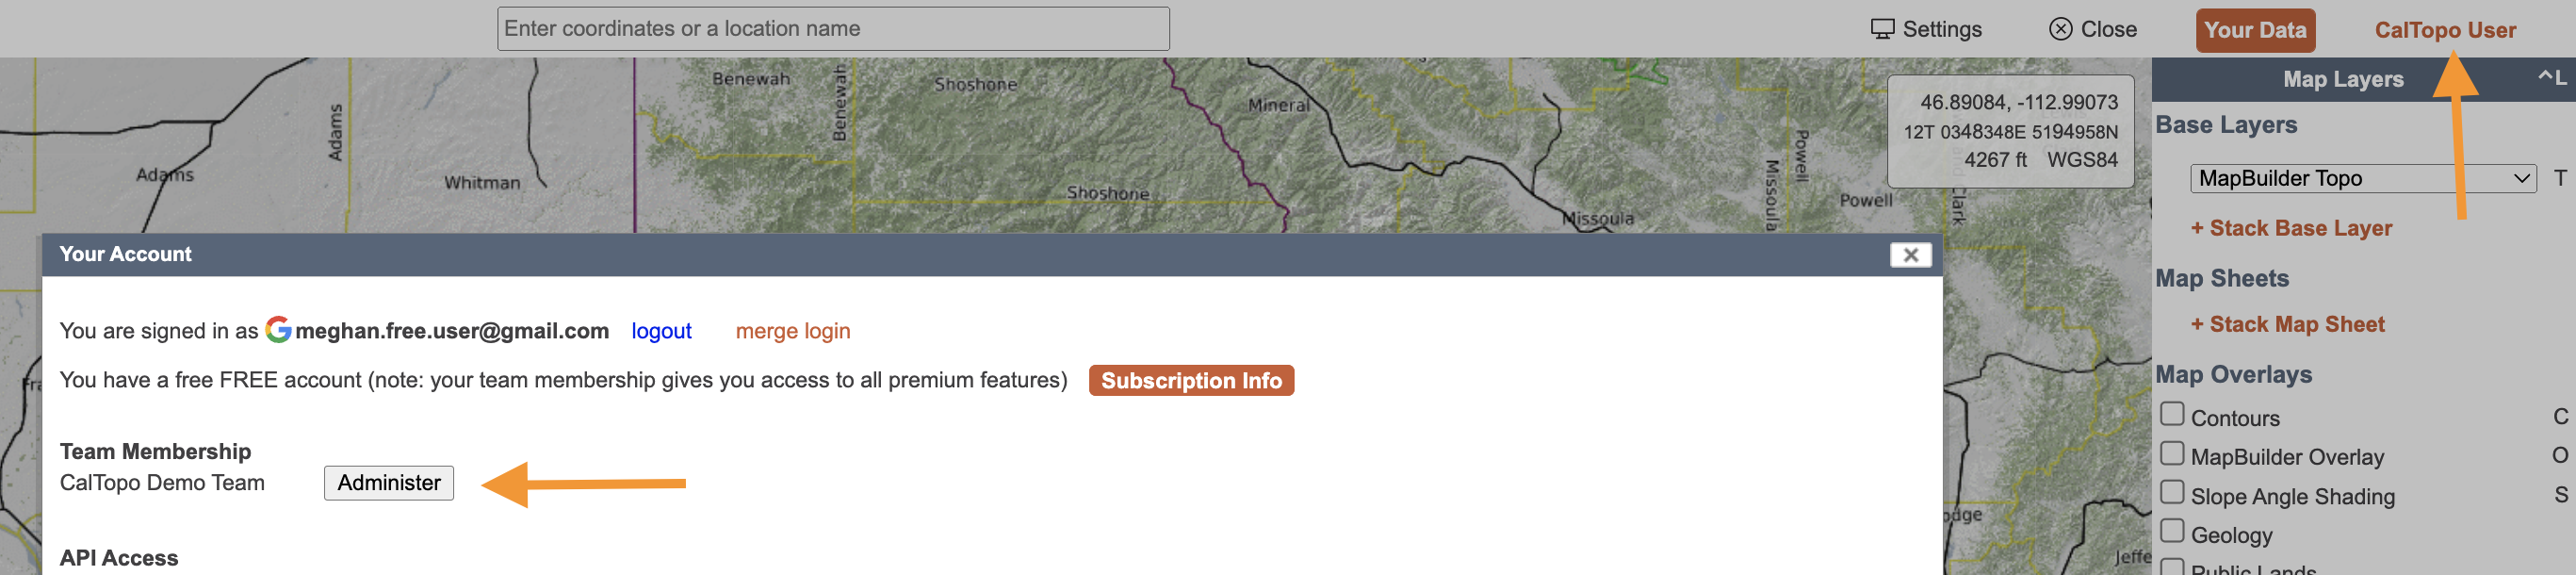
To create a mutual aid incident, navigate to your team admin page by clicking on your account name in the upper right hand corner and then clicking the Administer button next to your team name in the Your Account dialog.
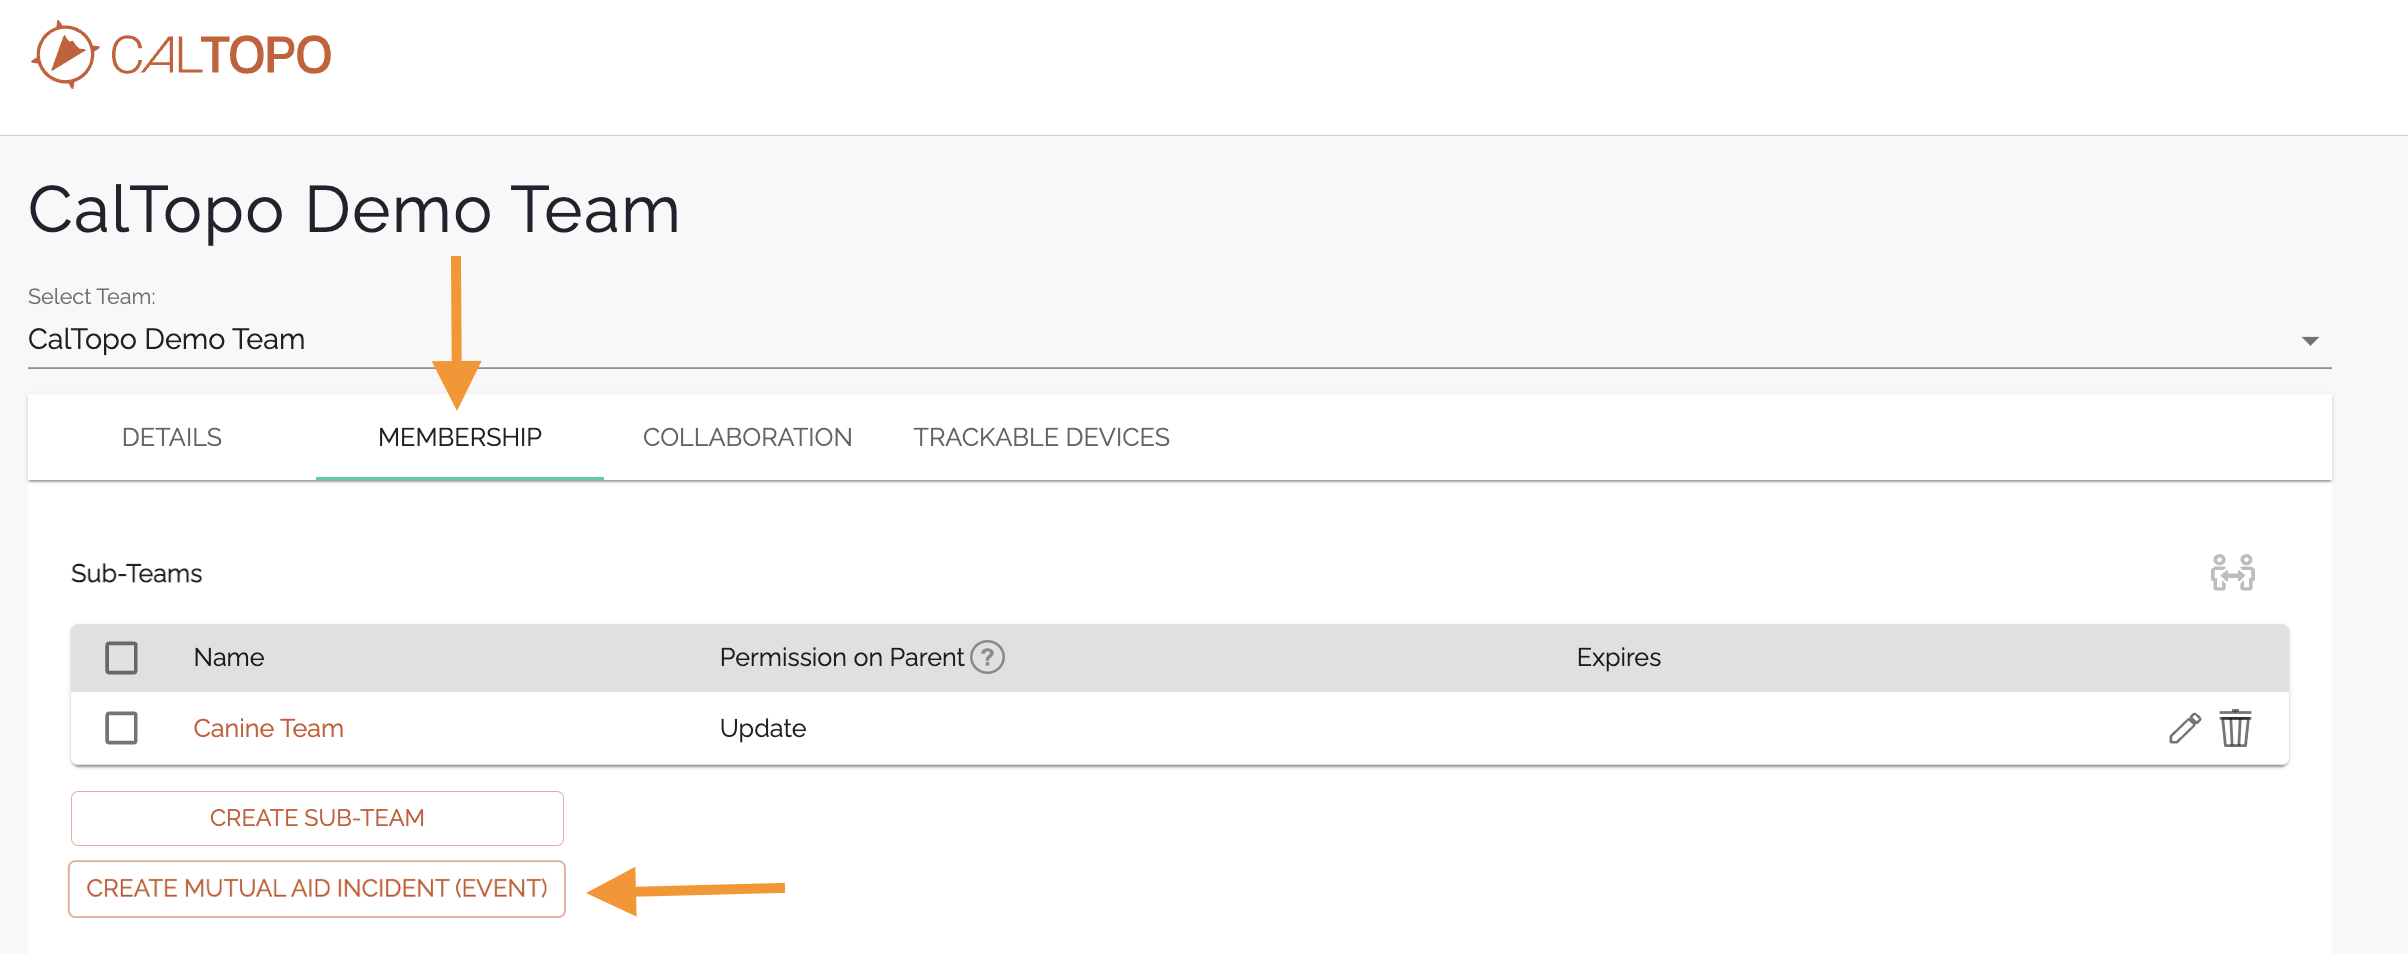
By default, the Membership tab will be displayed. To create a mutual aid incident, click on the Create Mutual Aid Incident (Formerly Events) button below the Sub-Teams list.
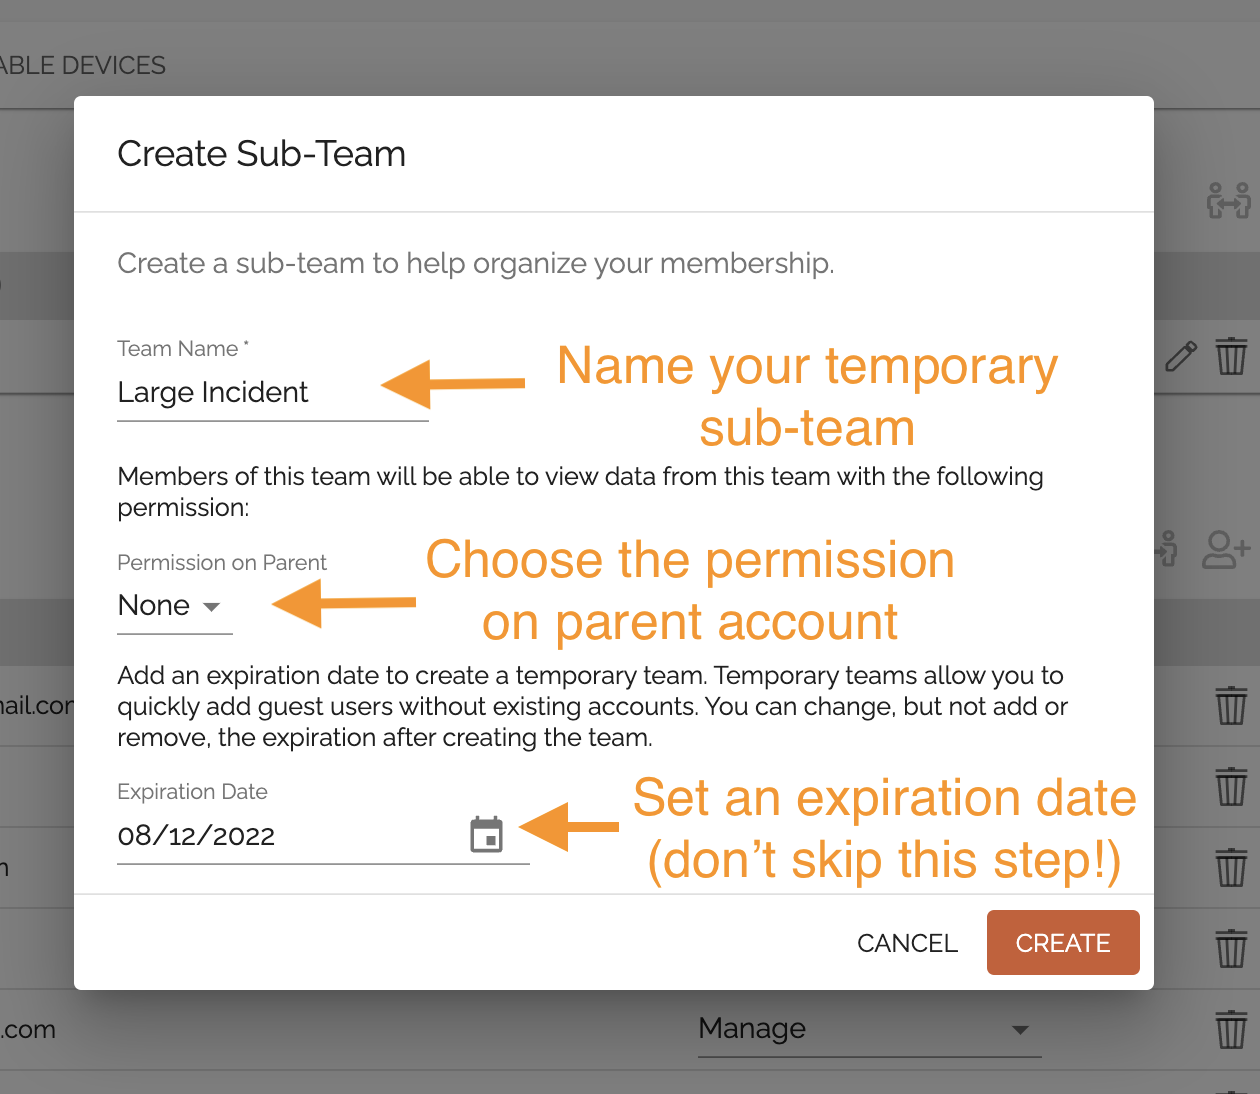
The Create Sub-Team dialog will appear. Type in your mutual aid incident name and select a permission level for the mutual aid incident on the parent team account. This determines if outside users that are part of the mutual aid incident can see maps in the parent team account and what they can do with those maps. In most cases, you’ll want to choose “None” from the dropdown menu. This will prevent any outside users from seeing maps or other data that is saved to the parent team account.
You will also need to set an expiration date. Choosing an expiration date is important because it is what distinguishes a permanent sub-team from a mutual aid incident. Select an expiration date that makes sense for your particular incident; expiration dates can always be adjusted or mutual aid incidents can be ended early at a later date.
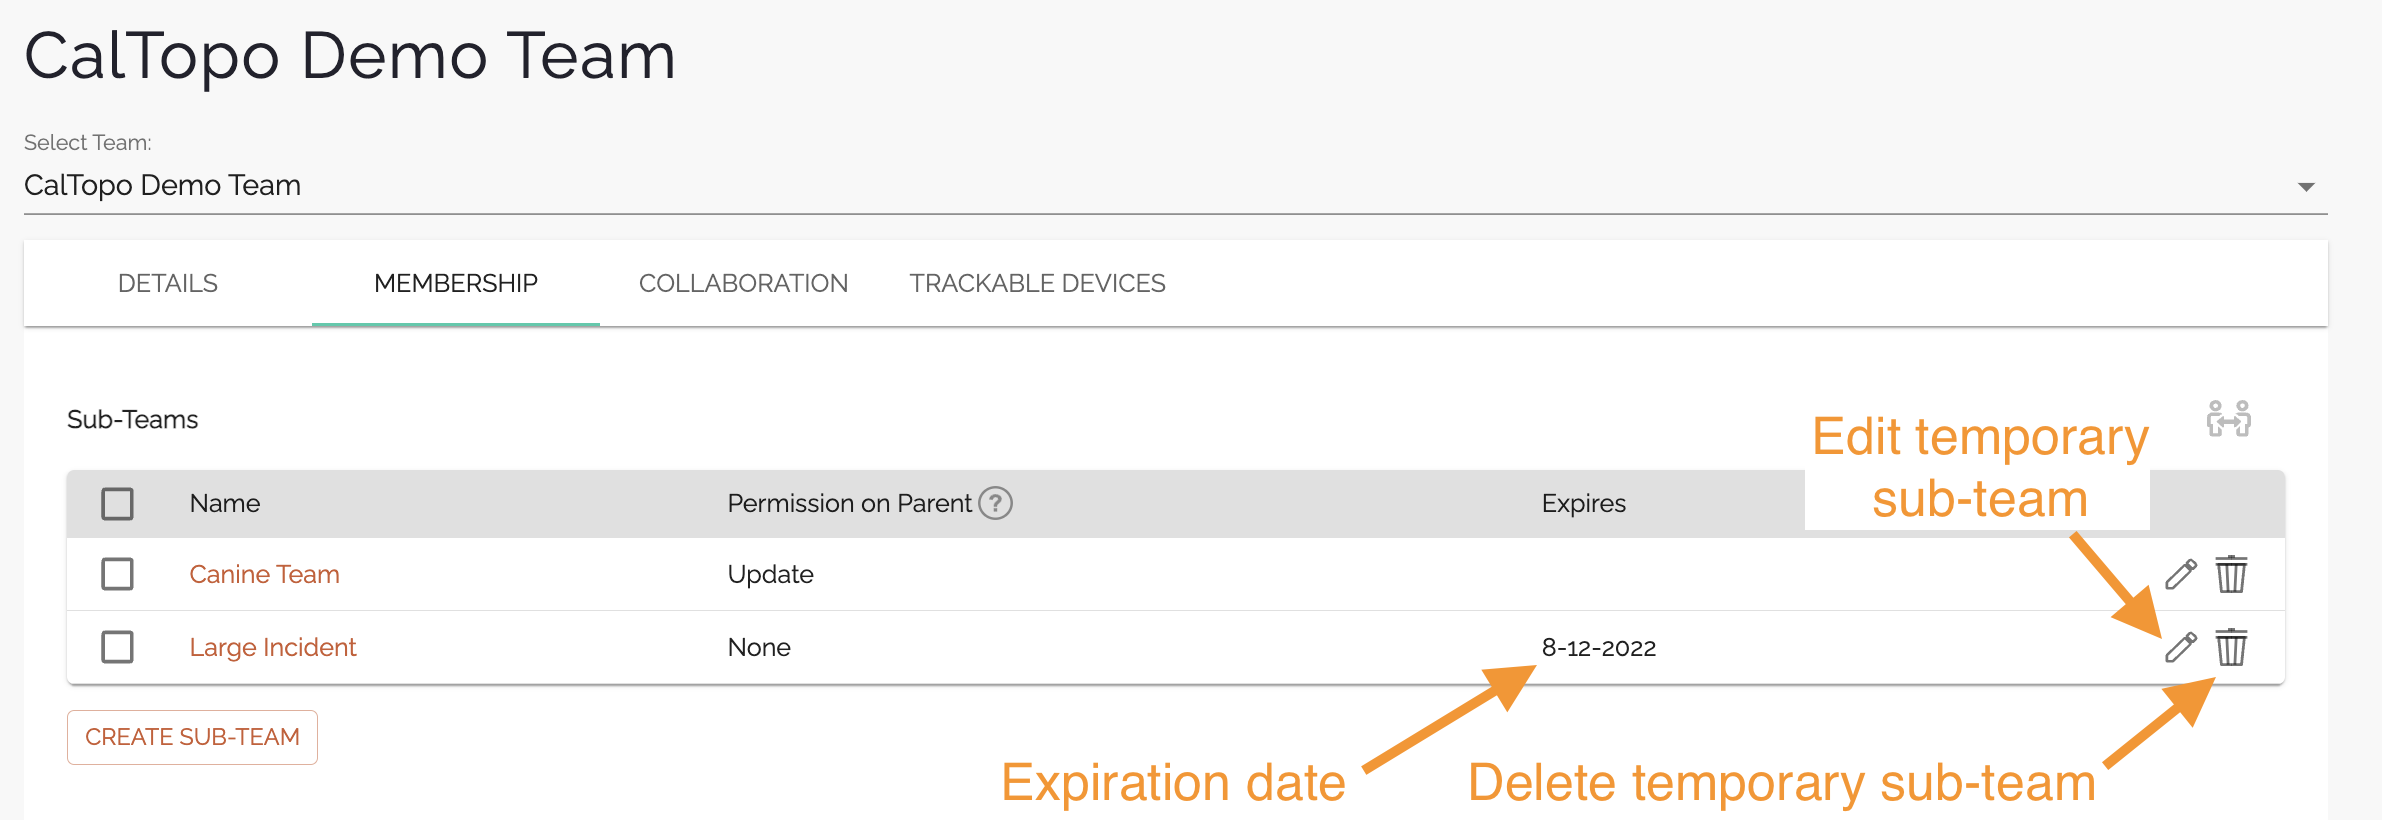
Click Create and your mutual aid incident will now appear at the bottom of the sub-teams list along with the permission on the parent account and the expiration date. You can edit the settings for the mutual aid incident by clicking on the pencil icon or remove the mutual aid incident entirely by clicking the garbage icon to the right of the mutual aid incident expiration date.
Adding Users to a Mutual Aid Incident from Outside Your Team
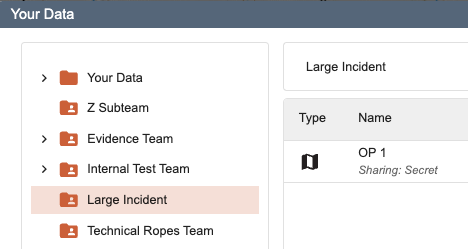
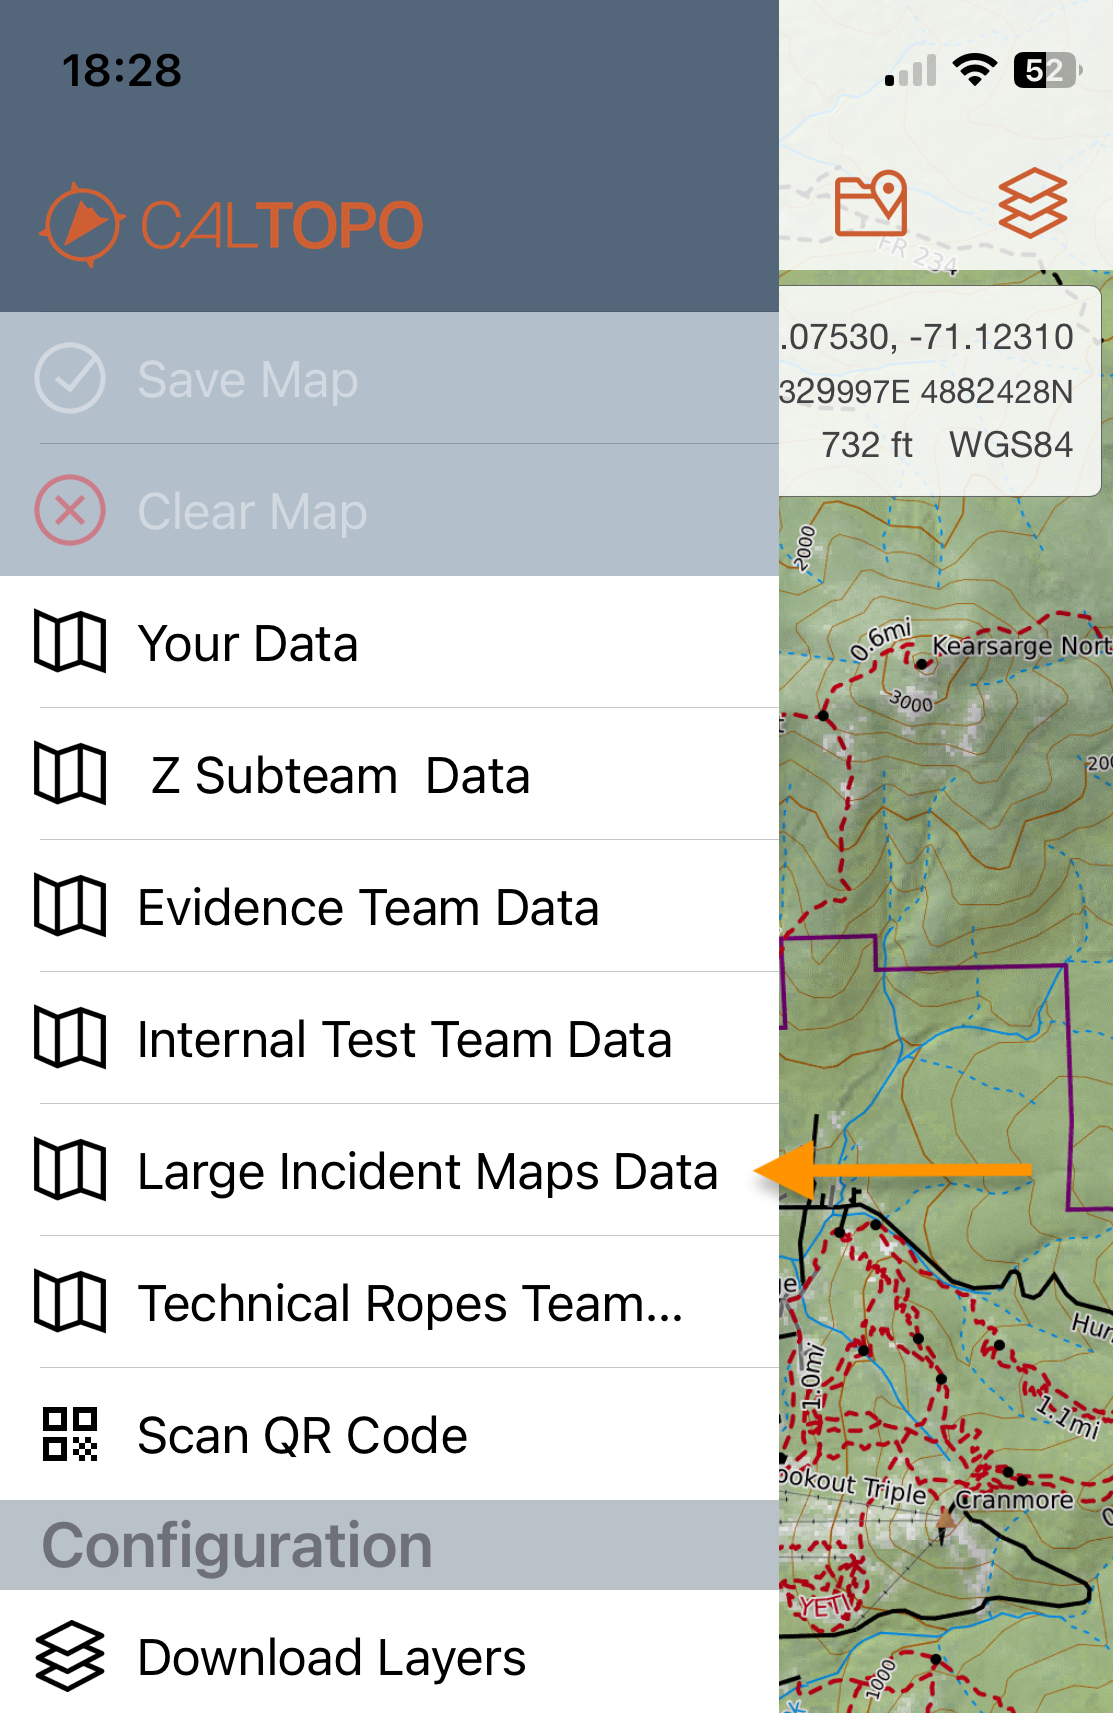
There is no need to add members from the main team to a mutual aid incident. By default, all members of the team that owns the mutual aid incident can access a mutual aid incident with the same permission they have on the team account. Once a mutual aid incident is created, members from the main team can access mutual aid incident maps in the Your Maps tab on the web or the three bar main menu on the mobile app for the duration of the mutual aid incident.
To invite outside users or upgrade the permission level of existing team members for a particular incident, click on the mutual aid incident name in the Sub-Teams list. A new page will open for that mutual aid incident. Select Create Code below Signup Codes.
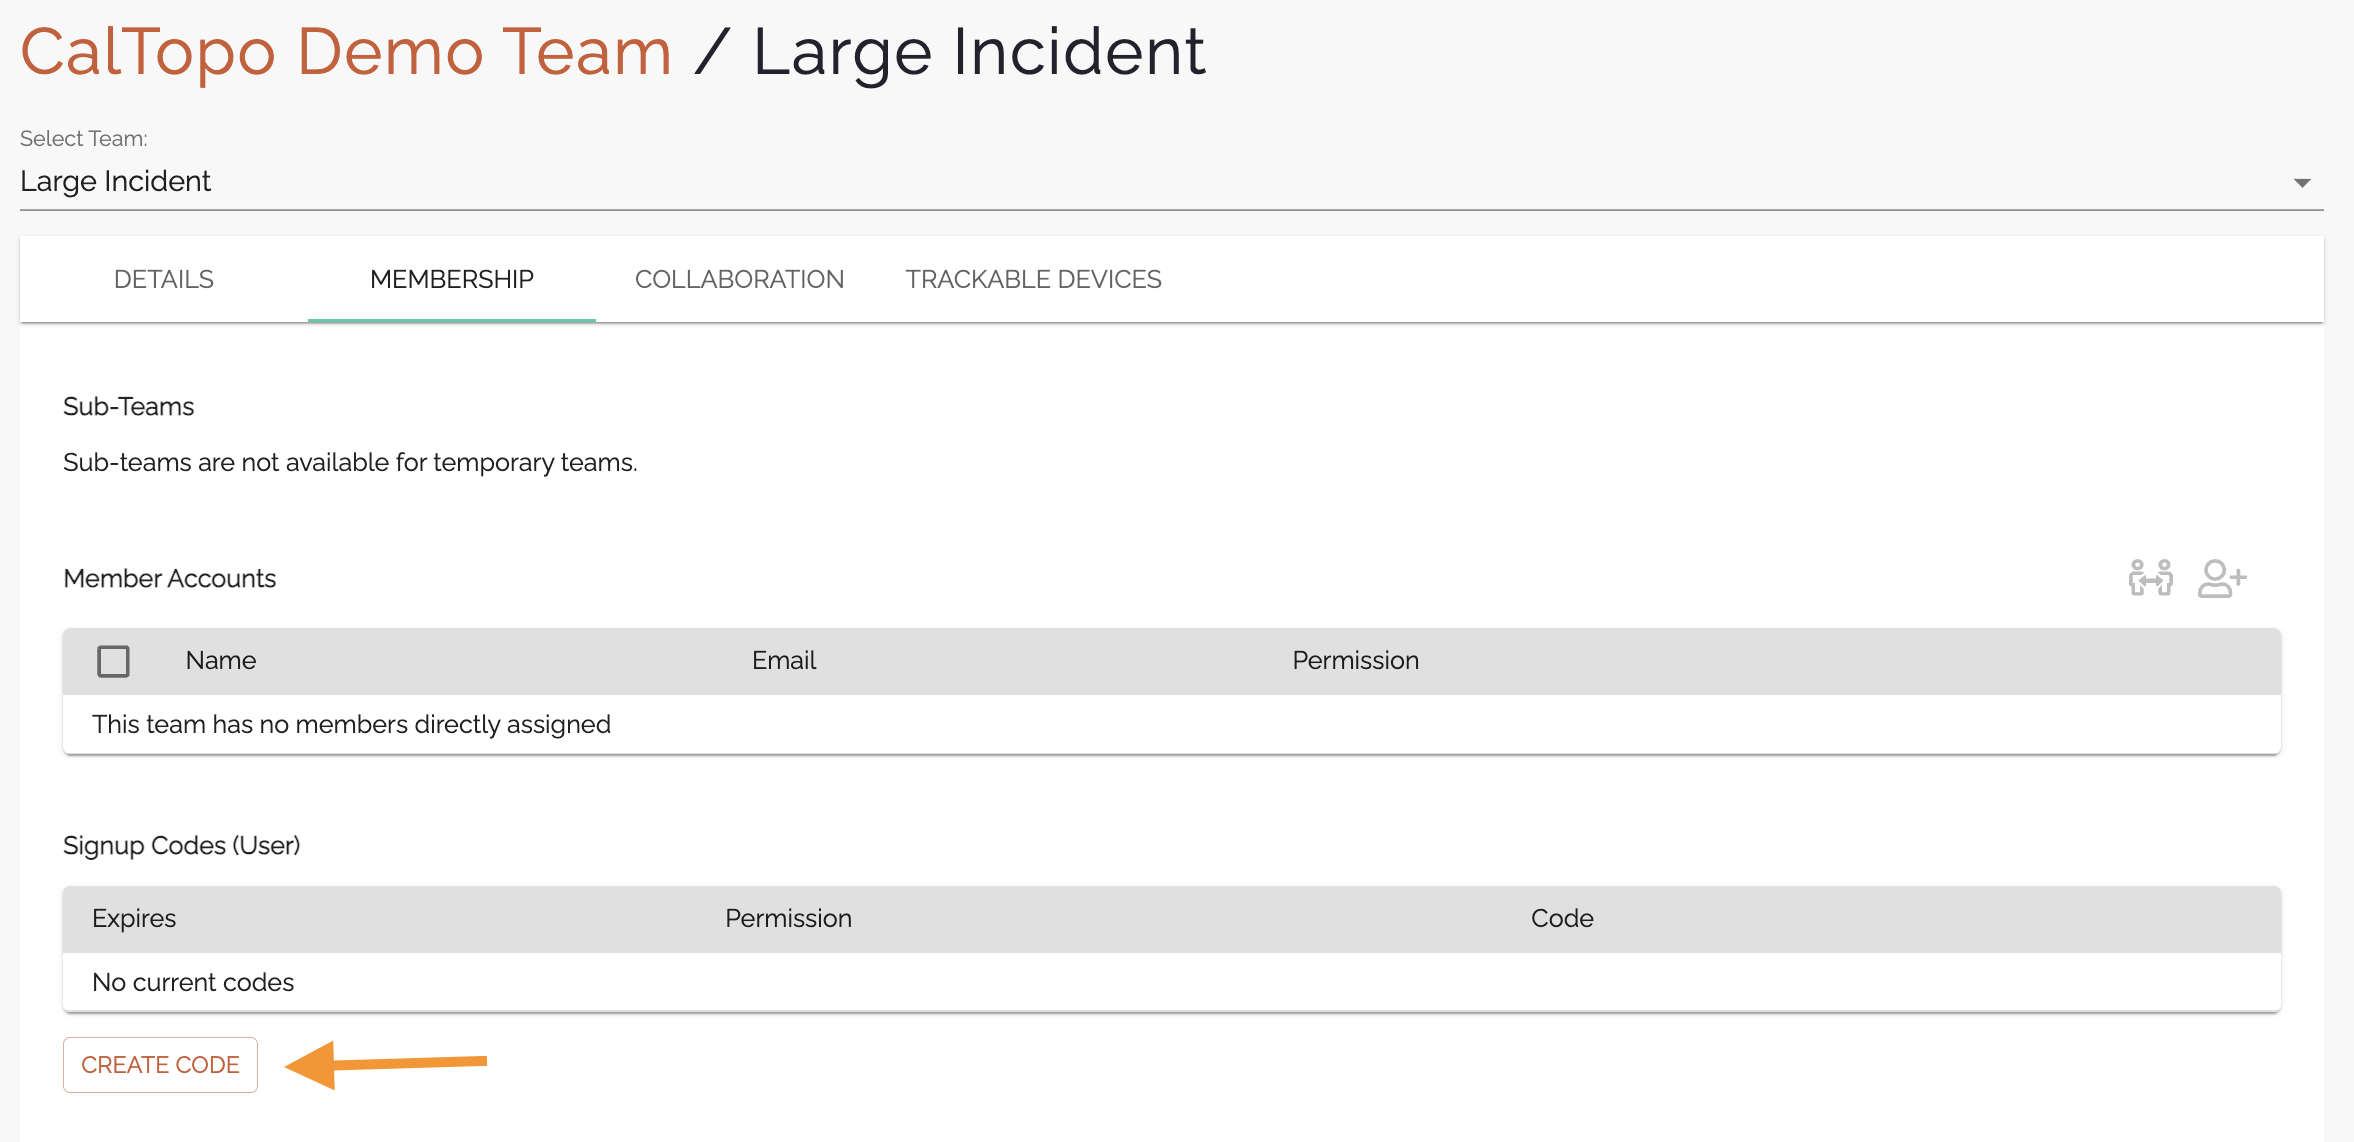
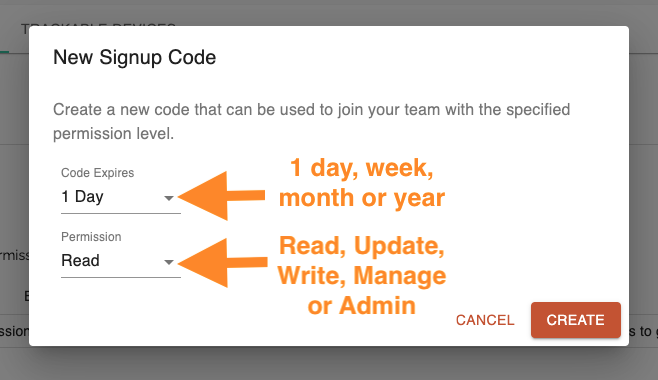
A New Signup Code dialog will appear. Use the drop down menus to select an expiration date and permission level for the code and then press Create.
For an explanation of the different permission levels, please see the Permission Levels for Team Members chart. The permission levels for the mutual aid incident will essentially be the same as what is listed in the chart- the only difference is that they will apply to the mutual aid incident and not the main team account.
The new sign up code will appear in the Signup Codes list along with the expiration date, permission level, shareable link and QR code. You can remove the code by clicking the garbage can icon. Please note that once a code is removed or expired, it will only prevent new signups using that code; it does not remove anyone who has already joined the mutual aid incident using the code prior to removal or expiration.

You can generate multiple signup codes with different levels of access to the same mutual aid incident. Sign up codes can be shared with existing team members to upgrade their access to a particular mutual aid incident or with outside users to temporarily add them to the mutual aid incident.
Shareable links
Shareable links can be typed directly into a browser or shared via text or email. If a user is opening a shareable link on their mobile device, instruct them to download the CalTopo mobile app from the Google Play or Apple Store first for the best experience and functionality.
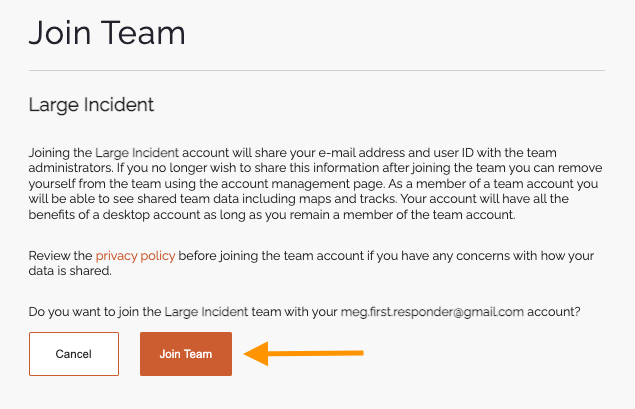
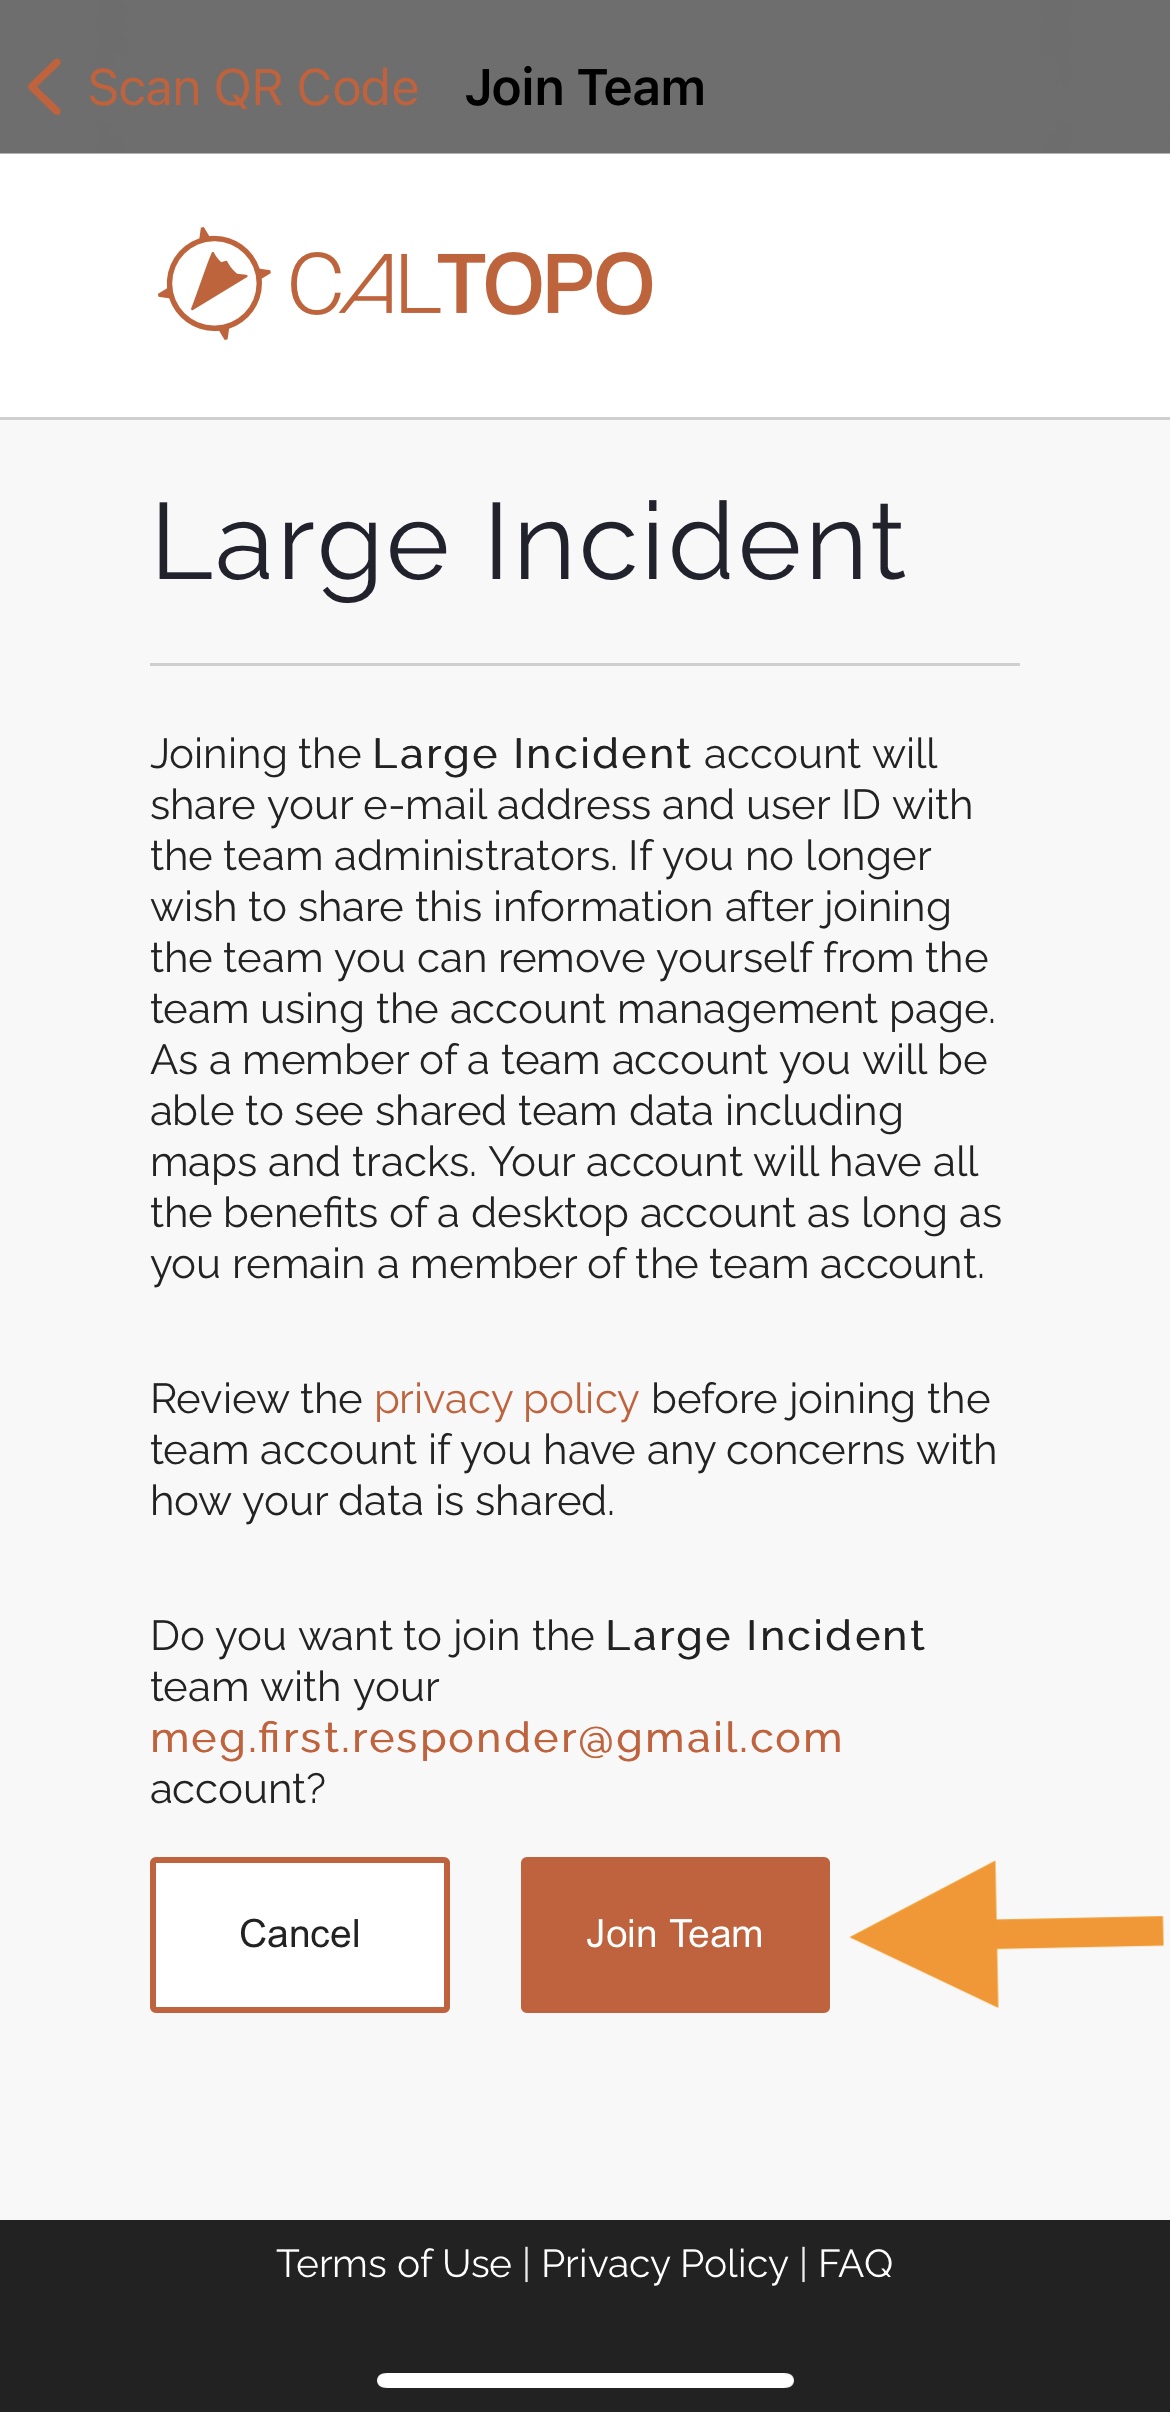
To join a mutual aid incident using a shareable link, click on the link. You will be prompted to sign into your account and asked if you want to join the team's mutual aid incident. Select Join Team to join the mutual aid incident.
You will now be able to access mutual aid incident maps under the Your Maps tab on the web or in the three bar main menu on the mobile app for the duration of the mutual aid incident.
QR codes
QR codes are meant to be scanned with a mobile device. For the best experience and functionality, mobile device users should download the CalTopo mobile app from the Google Play or Apple Store. Using the CalTopo mobile app to join a mutual aid incident also allows for the creation of a guest account if the user does not have their own individual CalTopo account.
All screenshots below are shown for iOS devices. The actual icons may differ on Android devices but the process is still the same.
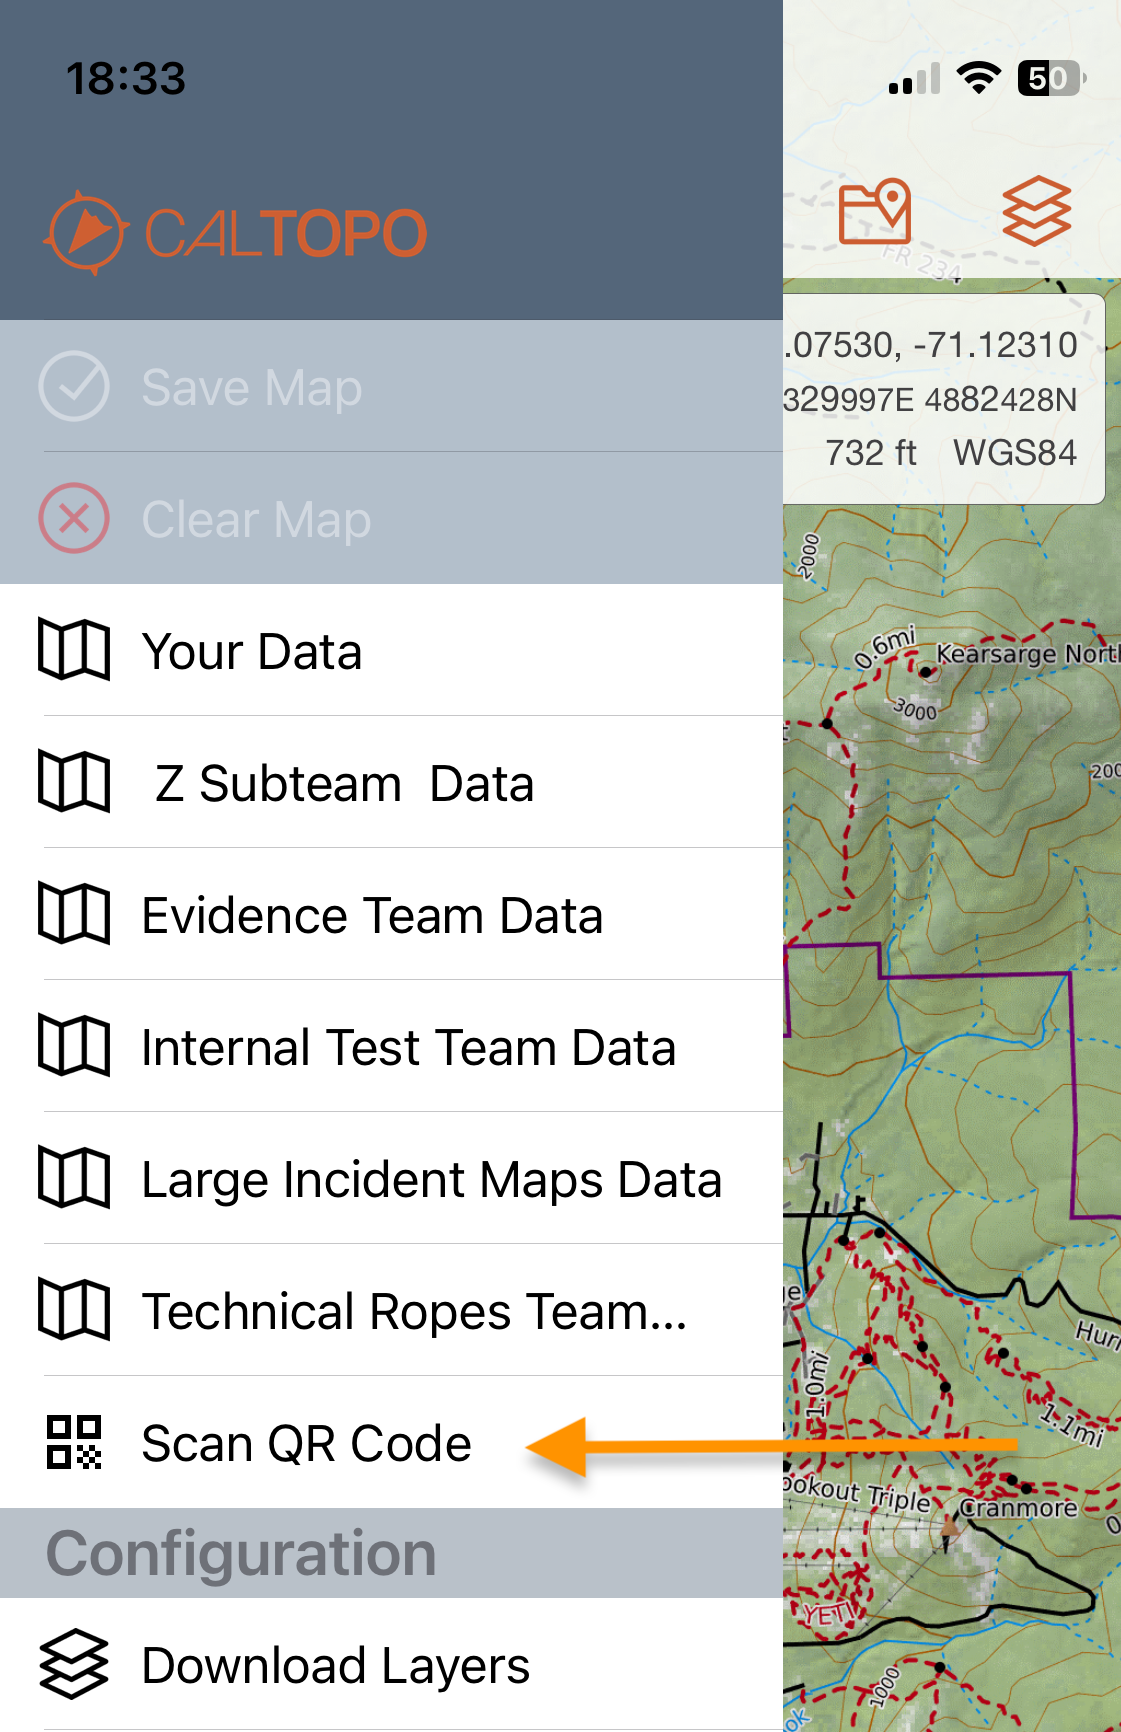
To join a mutual aid incident using a QR code with an existing CalTopo account, log into the mobile app. Click the three bar main menu and select Scan QR Code.
Scan the mutual aid incident QR code. You will be asked if you want to join the team's mutual aid incident. Select Join Team to join the mutual aid incident.
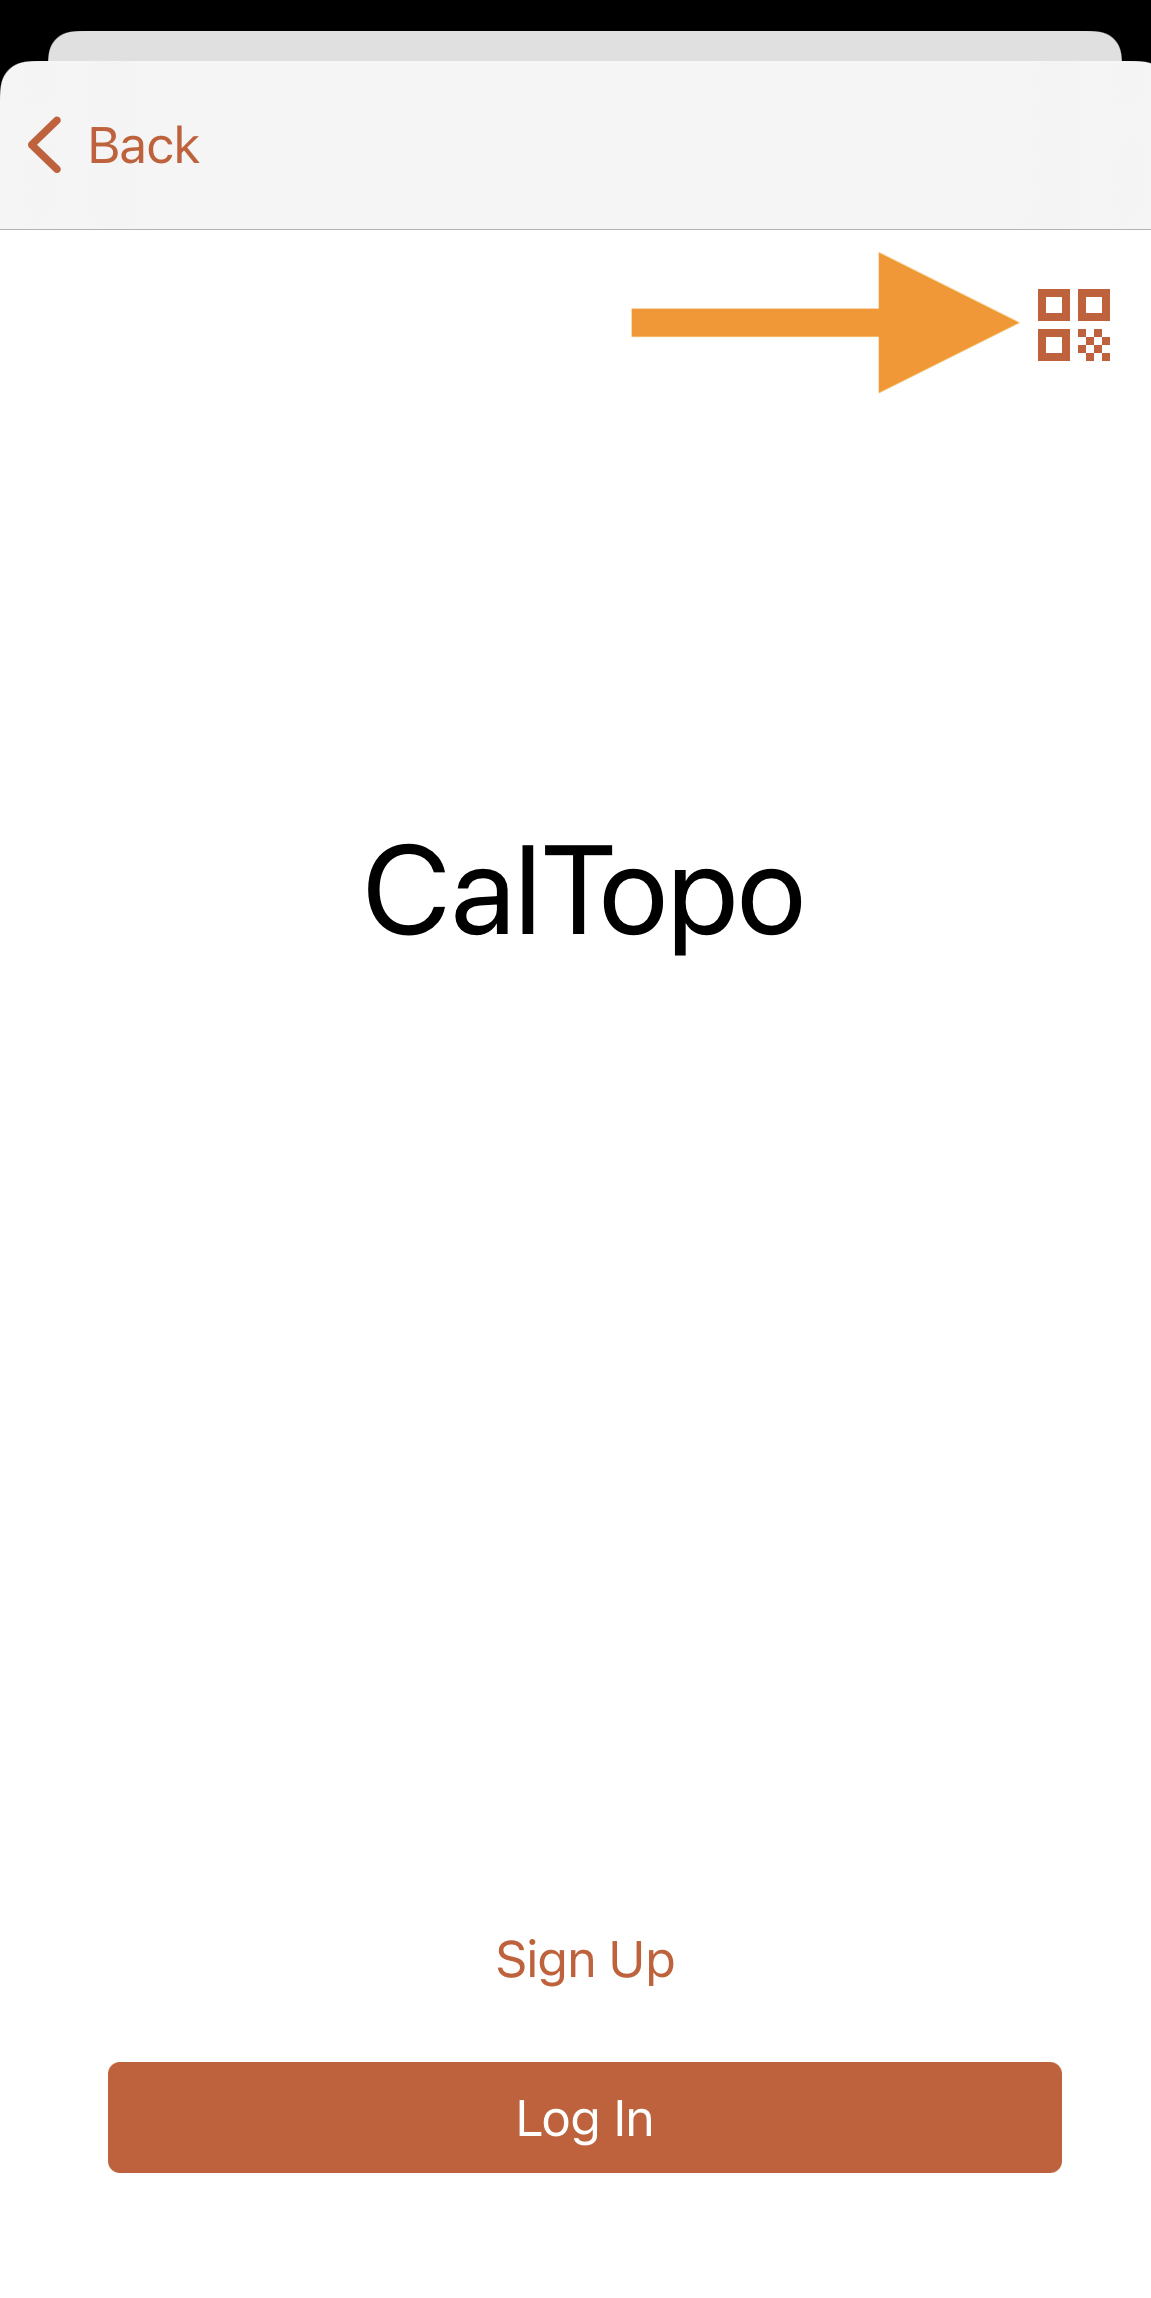
To join a mutual aid incident using a QR code without an existing CalTopo account, open the CalTopo mobile app. Click on the QR code icon in the upper right hand corner of the Welcome screen.
Scan the event QR code and the Guest Activation page will open.
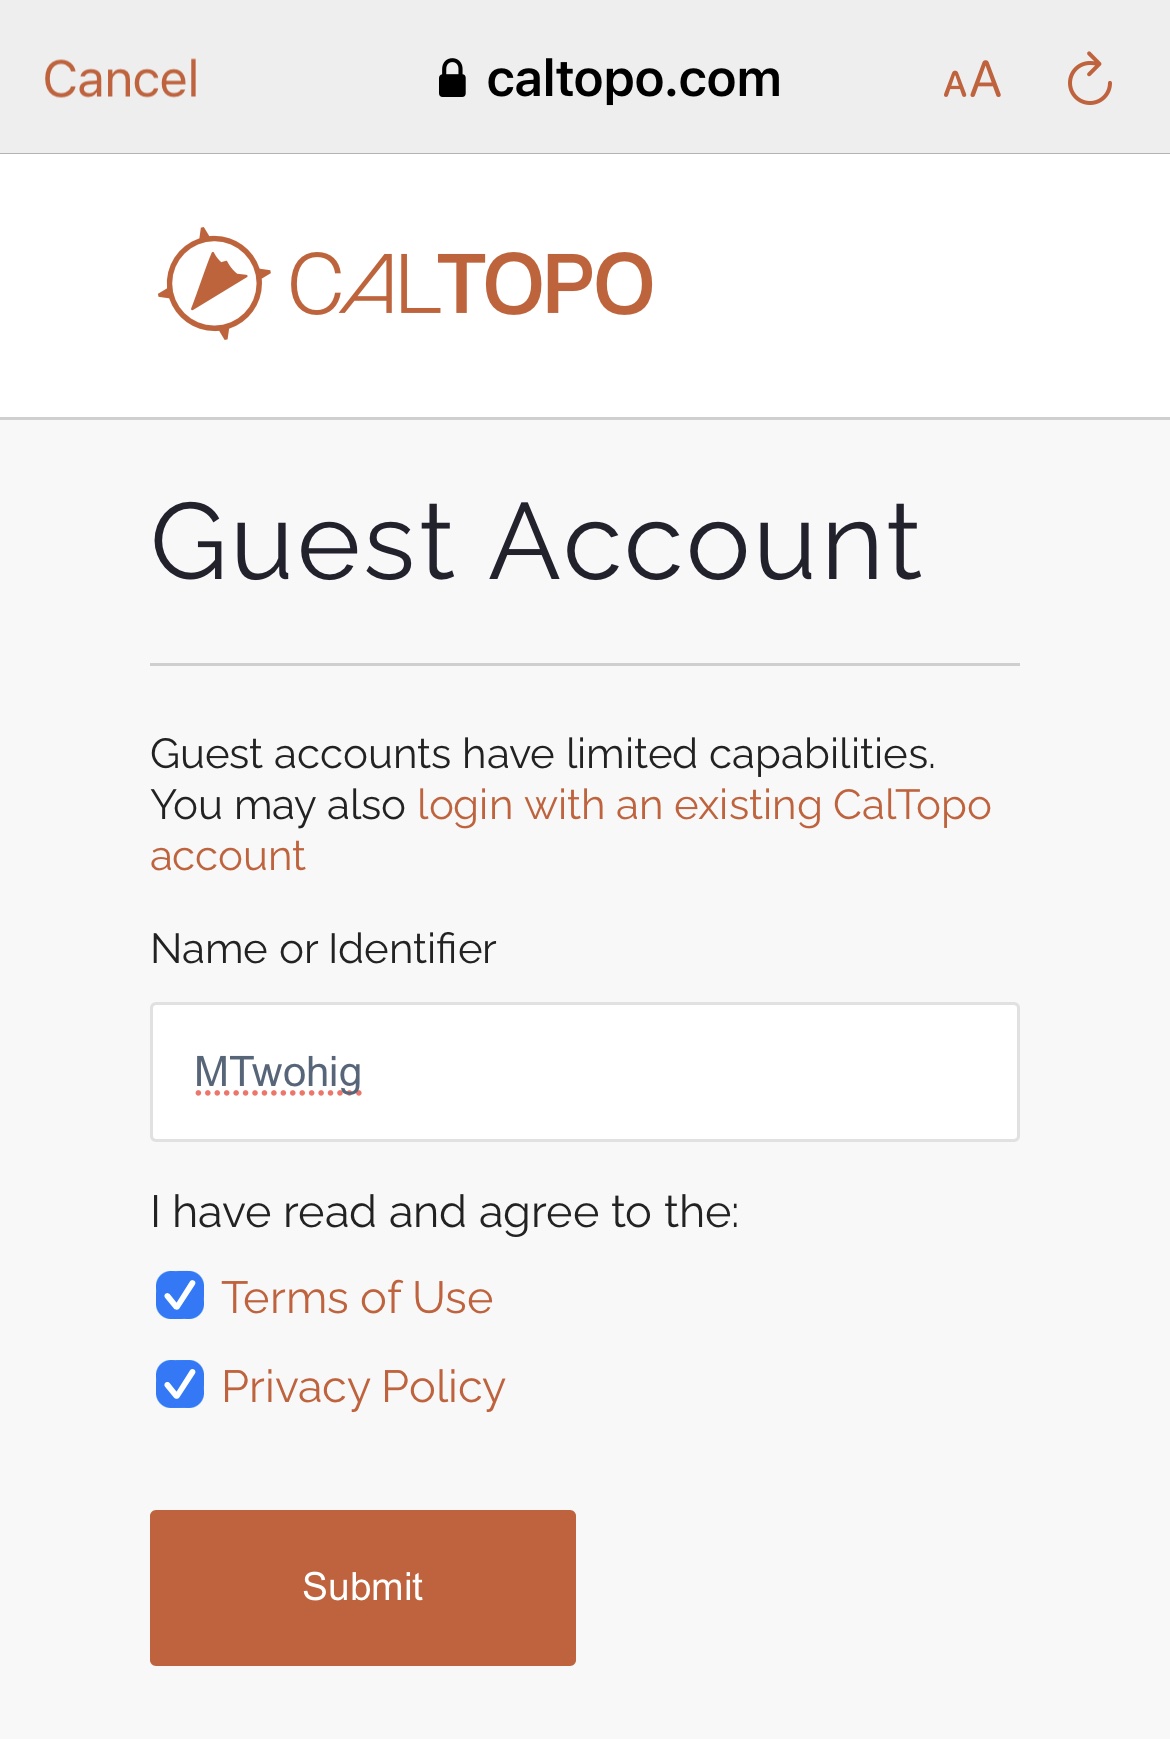
Type in your name or an identifier, accept the Terms of Use and Privacy Policy and then click Submit. A temporary guest account will be created with your name or identifier @Guest. You will then be asked if you want to join the team's mutual aid incident. Select Join Team to join the mutual aid incident.
Once you've joined a mutual aid incident using the mobile app, you will be able to access mutual aid incident maps in the three bar main menu on the mobile app for the duration of the mutual aid incident provided you don’t log out of the mobile app. Once you log out, you will no longer be able to access the guest account or the mutual aid incident. For this reason, it is recommended that outside users create a CalTopo account to join a mutual aid incident.
Managing Mutual Aid Incidents
Mutual Aid Incident Users
Any outside user or existing team member who uses a sign up code to join a mutual aid incident will be listed under Member Accounts on the mutual aid incident page. Their email, name and permission level will be displayed. You can remove a member from a mutual aid incident by clicking the garbage can icon.

Team members who did not upgrade their permission level for the mutual aid incident will not be listed under Member Accounts but they will still have the same permission to the mutual aid incident as they do on the main team.
Mutual Aid Incident Maps, Layers and Data
You can manage mutual aid incidents just like you would manage your main team account! Create and share mutual aid incident-wide maps and custom layers, add trackable devices, track the real time location of mutual aid incident members using the mobile app and more. Just remember - mutual aid incident members will only see maps that you save to the mutual aid incident specifically. If you save a map to your regular team account, mutual aid incident members won’t see it unless you have given them visbility into the parent team account.
Once a mutual aid incident expires or is deleted, all mutual aid incident maps, layers and other data will be automatically moved to the main team account and all outside users will fall off the team account.