Building CalTopo Layers
in this lesson
There are two types of custom layers: layers built from CalTopo sources, and layers sourced from outside of CalTopo. In this lesson, we explore how to build custom layers from within CalTopo via sources already provided. In the following lessons, we look at bringing in layers from external sources.
Please note: some custom layers require a paid susbcription. Go to Individual Subscriptions and Pricing to learn more about the different features offered at each subscription level.
Topics on this Page:
- Custom MapBuilder (Desktop Subscription or higher.)
- Viewshed (Free)
- Custom Relief (Free)
- Terrain Shading (Free)
Custom MapBuilder
Custom MapBuilder layers require a Desktop, Team, or Enterprise account.
Wishing that MapBuilder Topo had more of one thing and less of other things? Desktop, team or enterprise users can create their own custom MapBuilder Topo layer! Select what you want displayed and/or emphasized and leave out the rest.
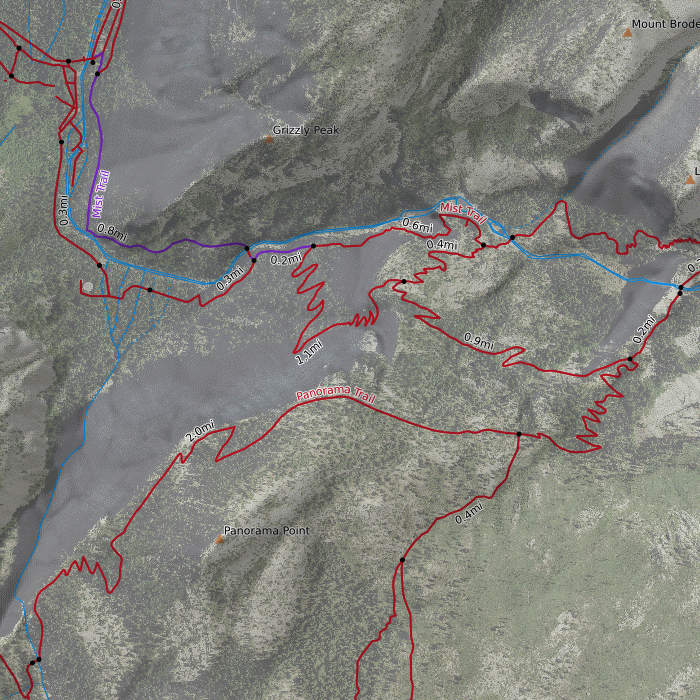
Want to highlight trails on an aerial imagery background? You can easily create a custom MapBuilder layer to do just that!
How to Create the Custom MapBuilder Layer

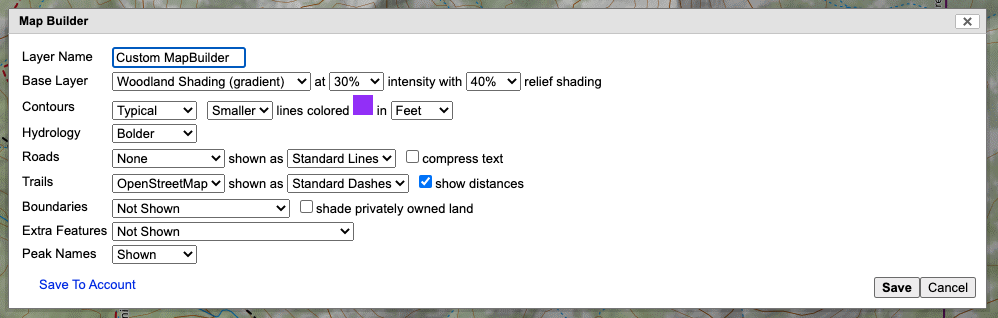
Choose a base layer and set your intensity with or without relief shading. Then choose what you would like displayed on your custom MapBuilder Layer and how you want it displayed (contours, hydrology, roads, trails, boundaries, extra features and peak names) Click Save and your custom MapBuilder Layer will be displayed in the mapviewer at 100% by default.
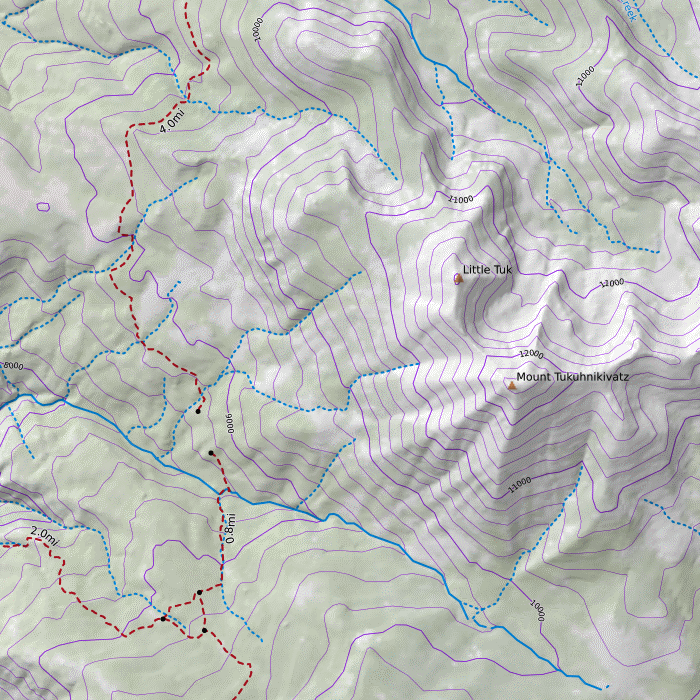
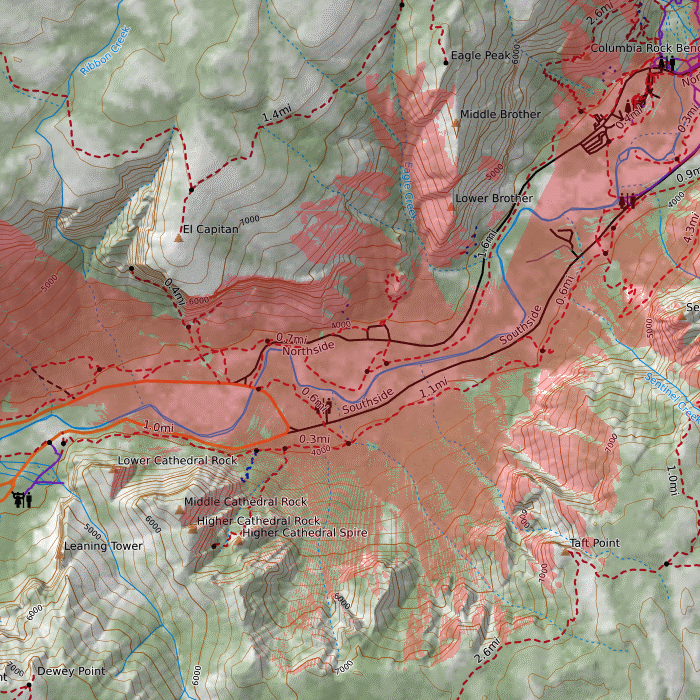
Here is an example of a completed custom MapBuilder dialog and the resulting layer. Notice these specifications mute the background a bit, change the color of the contour lines and emphasize hydrology and peak names.
Currently this layer is unable to be created or displayed on the mobile app.
Viewshed
Viewshed custom layers show you all the areas that are visible from a given point. This layer can be useful for estimating radio effectiveness, planning photographs or simply finding a great view for your lunch spot.
Curious if the famous photo spot at Taft Point in Yosemite National Park lives up to the hype? Viewshed custom layers can give you an idea what you’ll be able to see from that perspective.
How to Create a Viewshed Layer
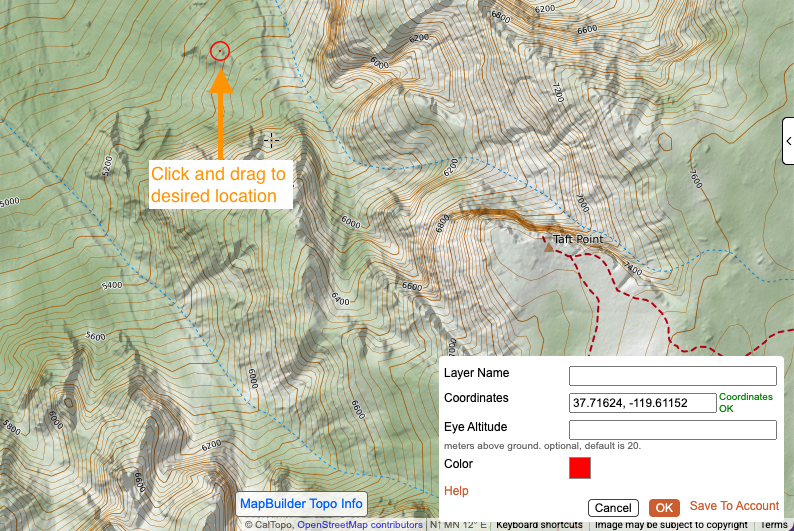
A bullseye target icon will appear on the map when you select this layer. Click and drag it to the location where you want to see the viewshed from; alternatively you can edit the coorindates in the viewshed dialog. By default the eye altitude will be 20 m above the ground; you can change this as desired in the dialog that appears in the lower right hand corner of the mapviewer. For example, 2 m would be approximately eye level for an adult. Name your layer, select a color and then press OK. The layer will populate and the areas that are visible from your designated point will be shaded with your chosen color.
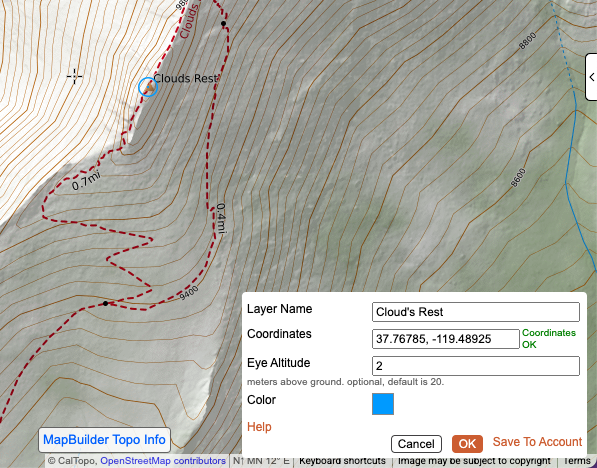
Here is another example of a completed viewshed dialog and the resulting layer. On a clear day, the view from Cloud’s Rest appears to be pretty impressive!
Custom Relief
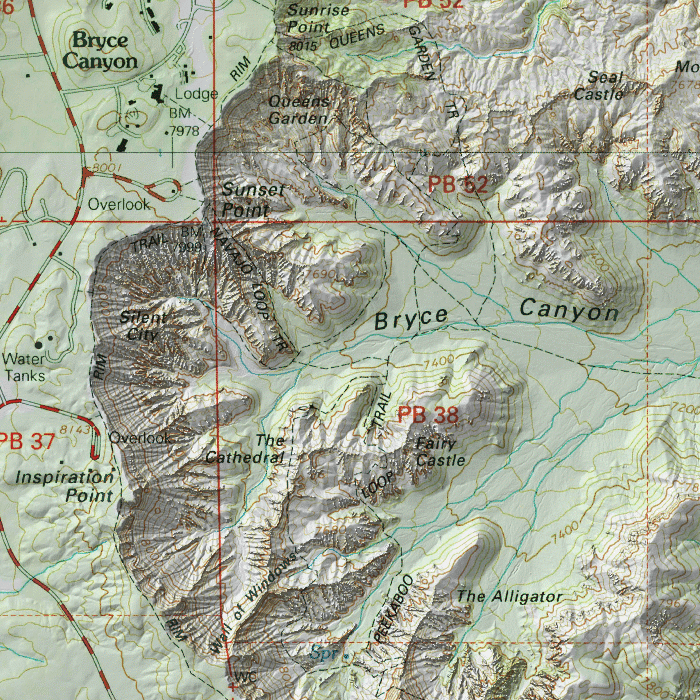
Shaded relief uses shadows to emphasize the three-dimensional topography of terrain. It is often layered under other base layers in order to better distinguish features such as mountains, valleys, gullies, plateaus and canyons. For example, stacking custom relief with Scanned Topos allows you to create startling contrast between the rim and canyon in Bryce Canyon.
This layer allows you to designate the type of shaded relief as well as the position of the sun in order to create your own custom relief layer.
How to Create a Custom Relief Layer
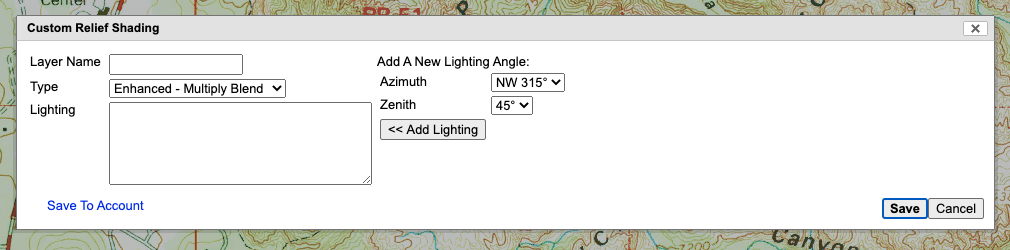
- Select a type of shaded relief.
- Standard relief has cranked up exaggeration to lessen how much it washes out the rest of the map. This type of relief plays well with most topographic maps but small details can be lost. Enhanced relief uses a multiply blend, where each pixel on the map is multiplied by the intensity of the hillshade on a 0-1 scale. This darkens the image a bit but does a much better job of preserving it. It’s a good choice for combining with aerial imagery since there’s less washout.
- Pick an azimuth (compass direction) and zenith (angle above the horizon) for the position of the sun and then click Add Lighting. You can add multiple combinations to get your desired lighting effect.
- Click Save and enjoy your own custom shaded relief!
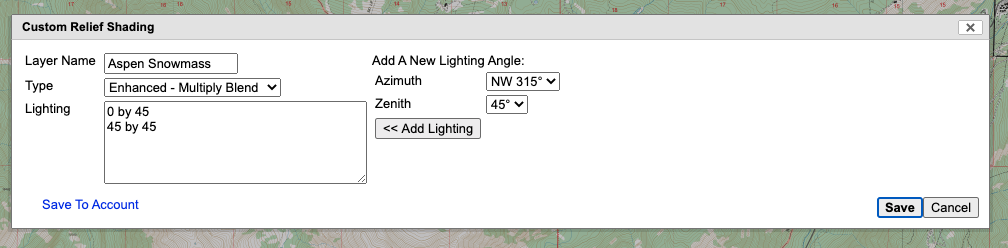
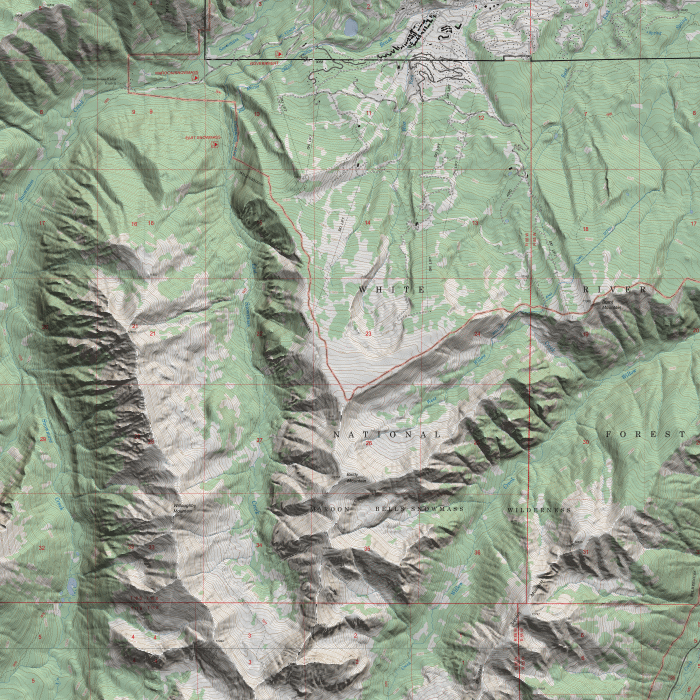
The example below shows a completed custom relief dialog and the resulting layer. Notice how more than one lighting rule has been added to create a truly unique relief.
Terrain Shading
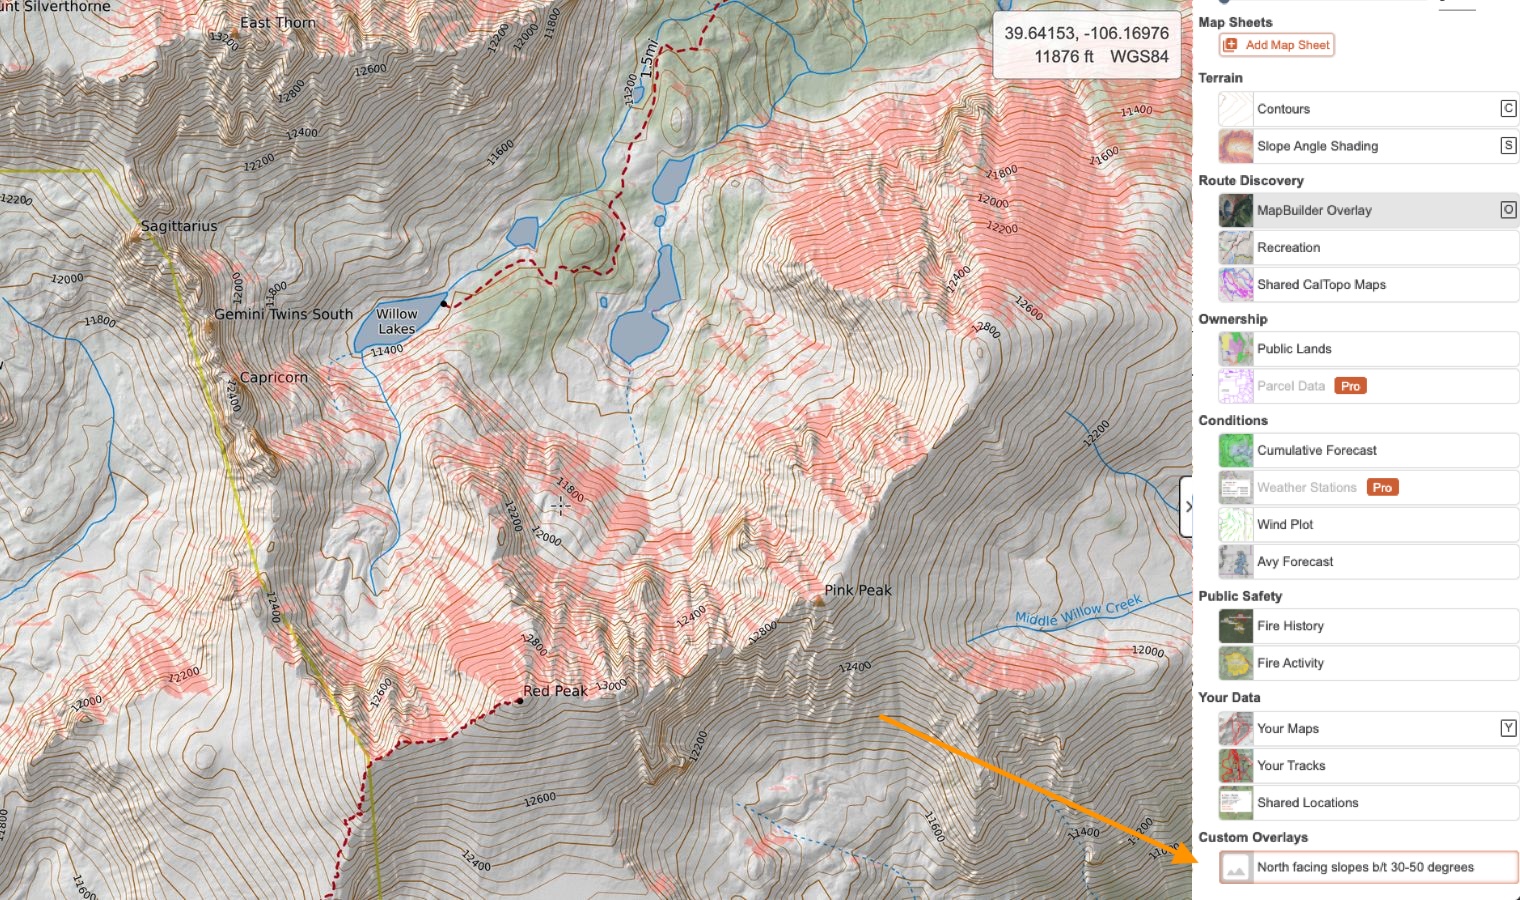
The Terrain Shading tool makes it easy to visualize terrain on your terms. This layer allows you to designate rules to call out specific parts of the terrain using CalTopo’s underlying datasets. You can create custom shading schemes based on elevation, slope, aspect and/or tree cover. Here’s a few examples of custom Terrain Shading layers you can create:
- Shade south-facing, 30-40 degree slopes that could offer up fantastic corn skiing.
- Specify flat areas with no tree cover for possible helicopter landing zones.
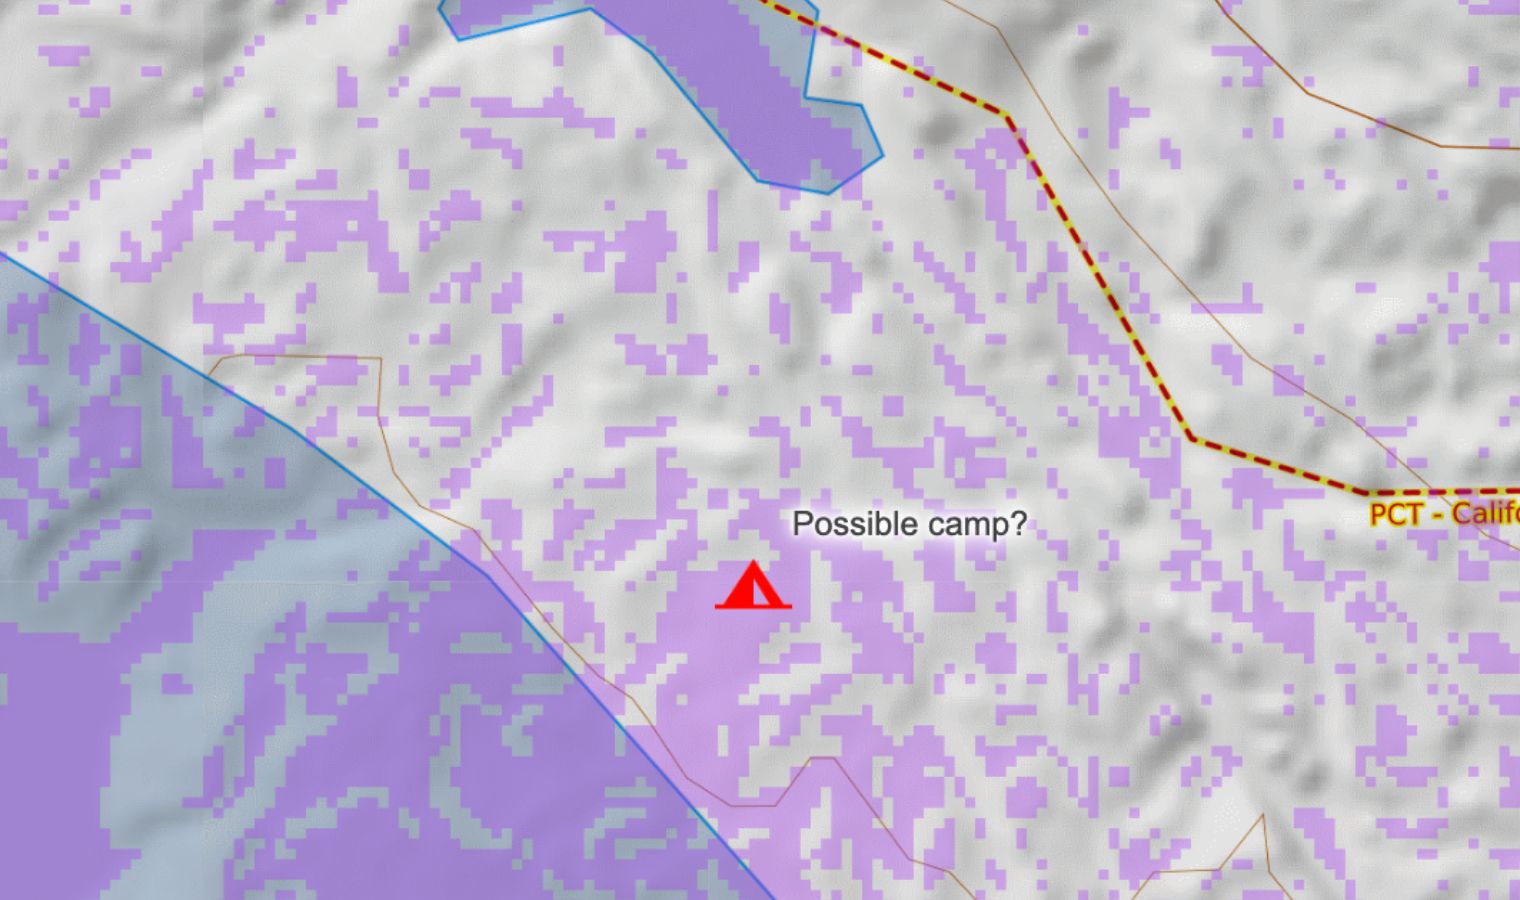
- Identify flat spots for possible campsites prior to setting out on a multi day backpacking trip (shown below).
How to Create a Custom Terrain Shading Layer
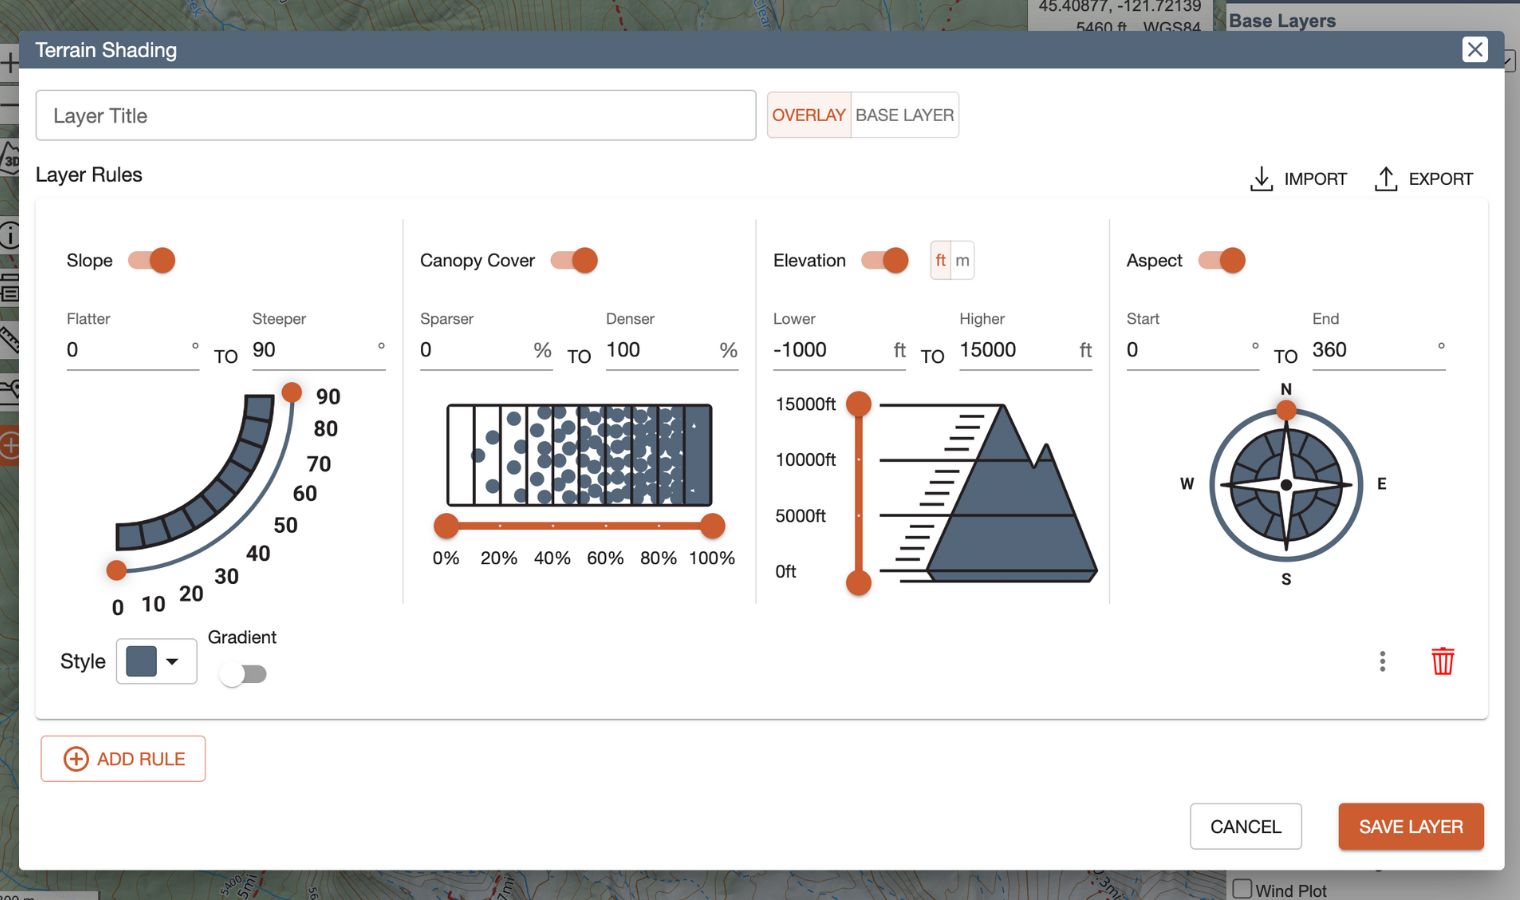
To start, enter your layer name and choose either overlay or base layer. Overlay is selected by default and will create a custom overlay that is transparent; selecting base layer will create a layer that is solid (although you can adjust transparency like any other base layer).
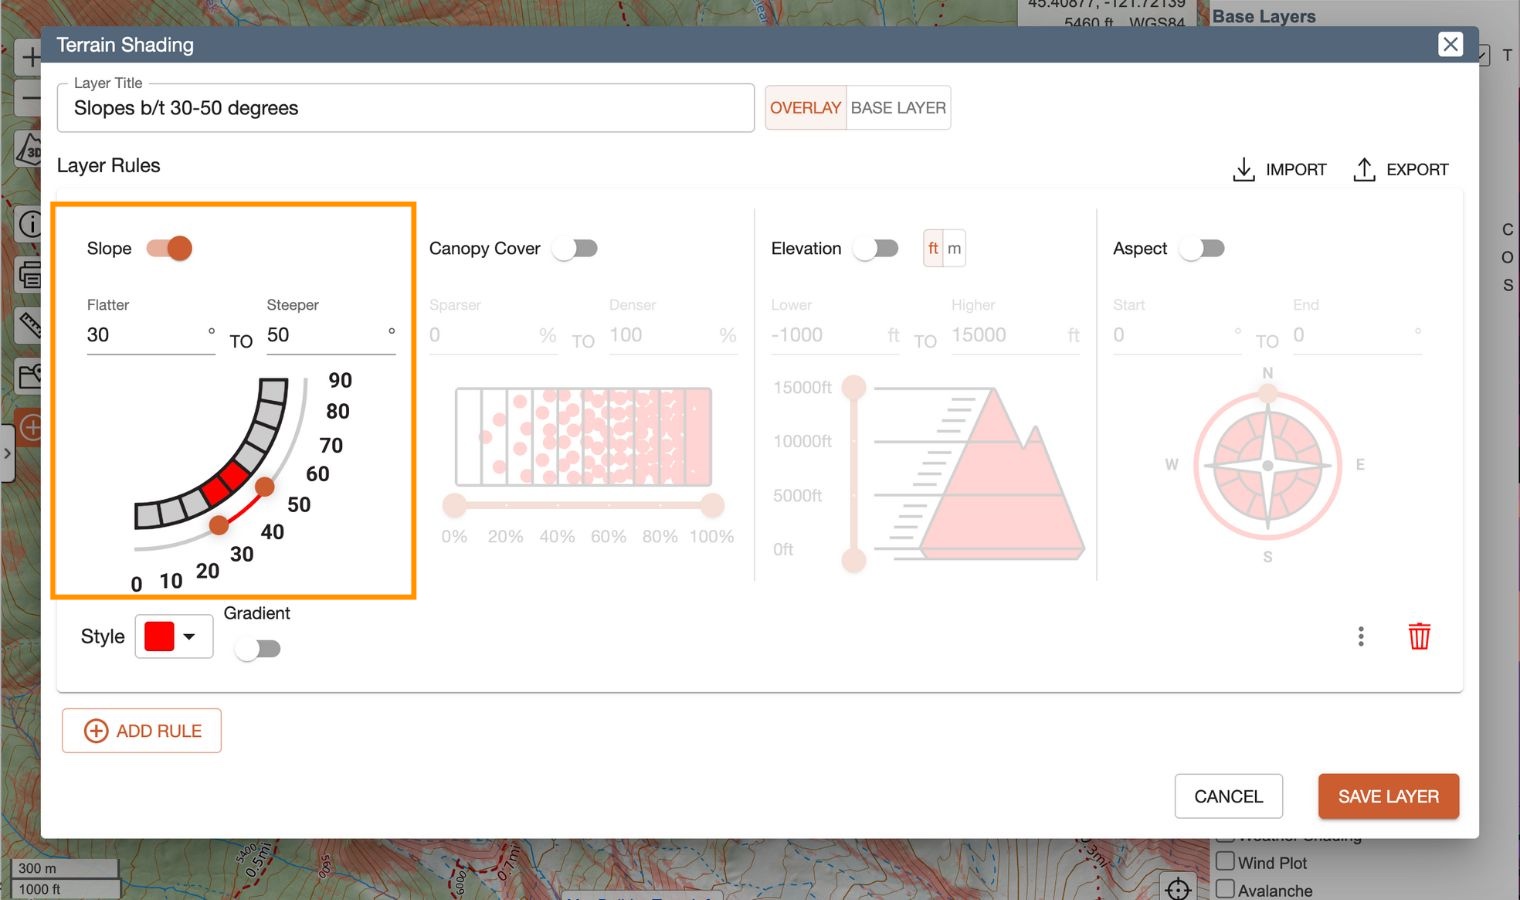
Next create a rule for the layer. A rule tells the program to shade any part of the terrain that meets the condition(s) you set. To turn on a condition, move the toggle to the right and then either manually enter in the specifics of the condition or drag the orange slider handles on the graphic. You can set one or multiple conditions for slope angle, canopy cover, elevation, and/or aspect in your rule. The images below show a rule with one condition versus a rule with 2 conditions.

Choose a color using the Style drop down menu for the rule. If you would like the rule to appear as a gradient, move the Gradient toggle to the right and select the second color. You can add additional rules using the +Add Rule button. Keep in mind additional rules will follow their designated conditions independently of the other rules. Rules can be duplicated using the vertical 3 dots or removed using the Garbage can icon in the lower right.
Choose the Save Layer button to display the custom terrain Shading layer on your map.