Map Sharing
in this lesson
CalTopo allows you to control who can access the maps you make and what they can do to those maps. In this lesson we will discuss the different types of base permissions that you can assign to a map as well as how to give other users access to your map by generating shareable links and QR codes.
Topics on this Page:
Base Permissions
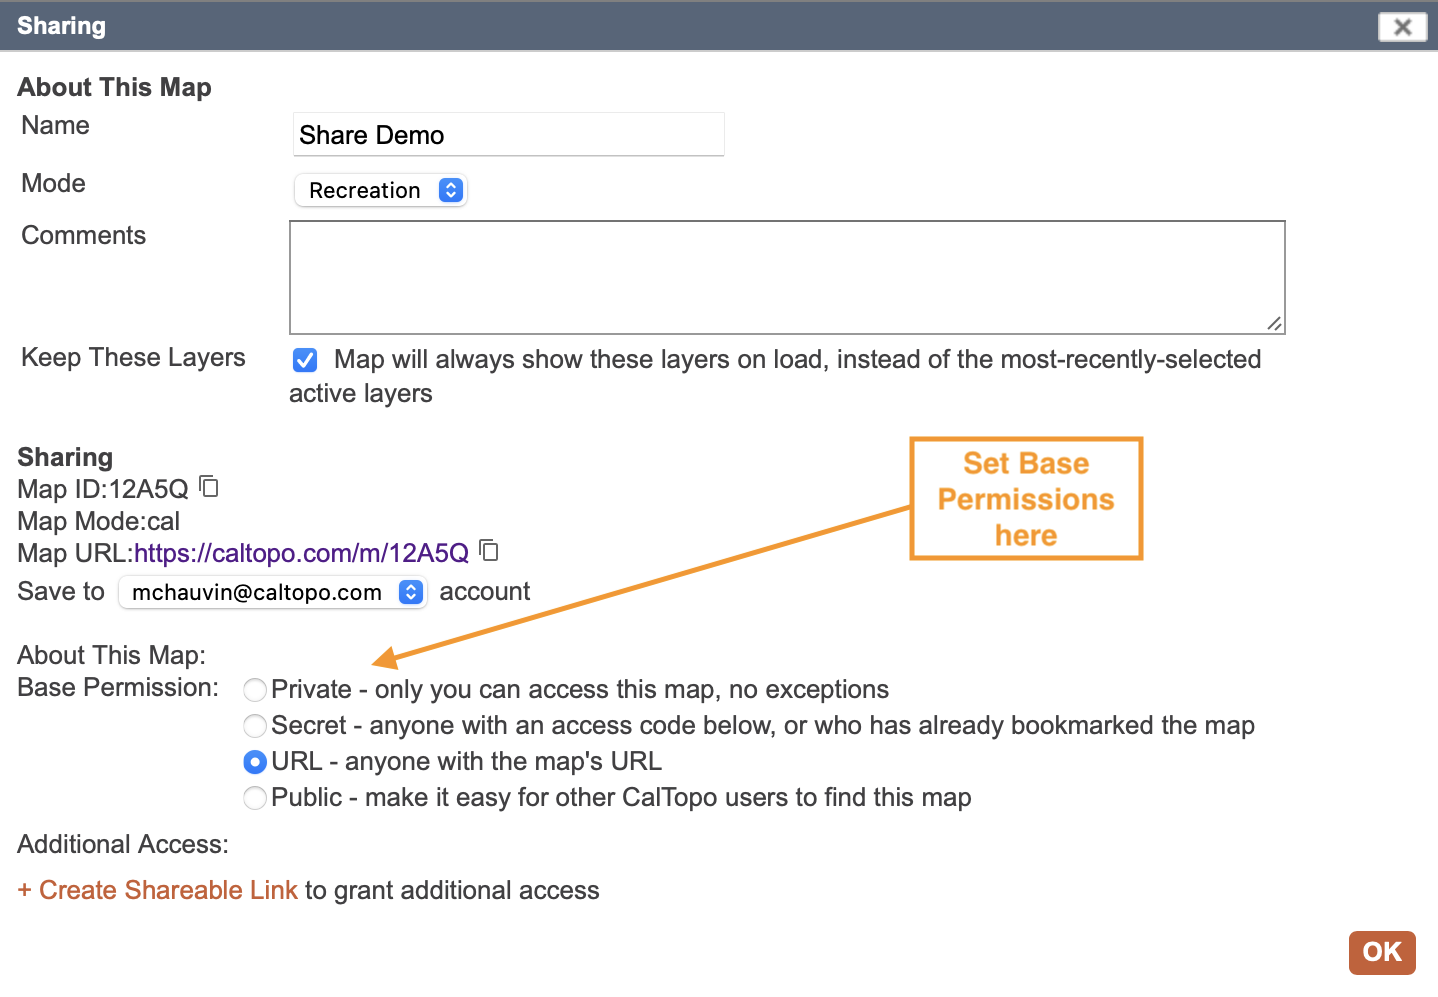
Base permissions designate who can view your map and how they can access it. When saving a map on the web, you have the option to change the base permissions for the map.

There are four different base permissions that you can assign to a map:
-
Private maps are only visible to you. Even if someone else knows the map's URL, they will be unable to view it. The only way to give someone else access to a private map is to change the base permission.
-
Secret maps cannot be viewed with the map URL only. When the map is set to Secret, you must create access codes in order to share the map with others. You can create multiple access codes to give different users different levels of access to the map. These access codes can be shared as a link or as a QR code.
-
URL maps allow anyone who knows (or guesses) the 5-digit map ID in the URL to view the map. This is the default option for all maps.
-
Public maps show up on CalTopo's Shared Maps overlay and are indexable by Google. Anyone can search and view your map. Use this option for map data you want to share with the world!
For URL and public maps, you need to create access codes in order to allow users to update or edit the map. These access codes can be shared as a link or as a QR code.
Access Codes: Shareable Links and QR Codes
You can grant other users READ, WRITE, or UPDATE access to a saved map by generating shareable links and QR codes. Remember that you cannot create access codes for private maps; if you wish to share a private map, you first have to change the base permission.
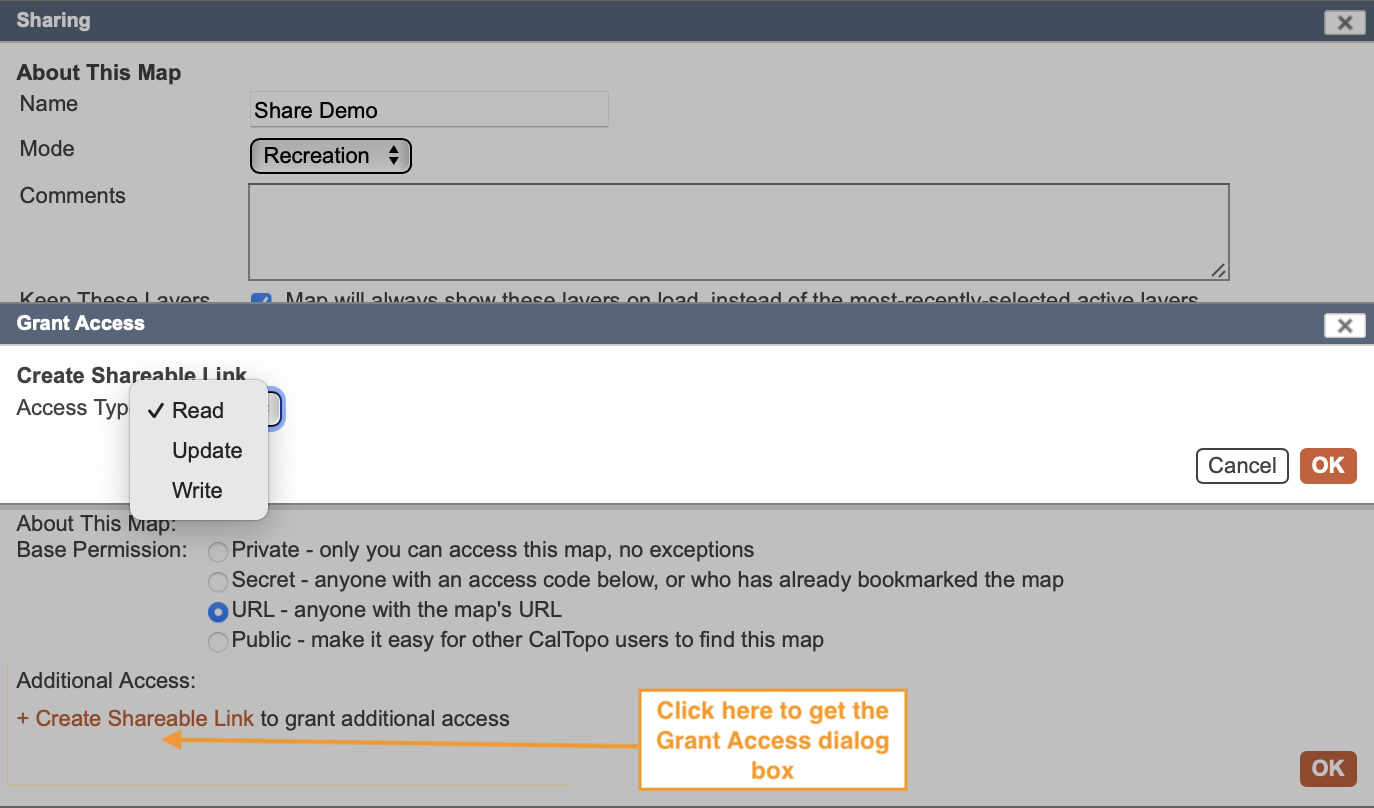
In order to create shareable links and QR codes, click on + Create Password or Shareable Link at the bottom of the Sharing dialog.
This will open the Grant Access dialog. Click Create A Shareable Link and select which access type you would like to create a link for from the drop down menu.
Access Types
There are three different access types to choose from:
-
Read means that another user can only view your map. They cannot edit the map. Read only links are not necessary for URL or public maps since these can be shared with read access using the map ID or URL.
-
Update means that another user can add objects to your map, but not edit or delete your objects. They are able to modify any objects they add themselves.
-
Write means another user can edit the map. They can add, delete and edit all objects on the map.
Once you have selected your desired access type, click OK and a unique shareable link and QR code will be generated for that access type and appear under Additional Access in the Sharing dialog. You can generate multiple shareable links with different levels of access for the same map.
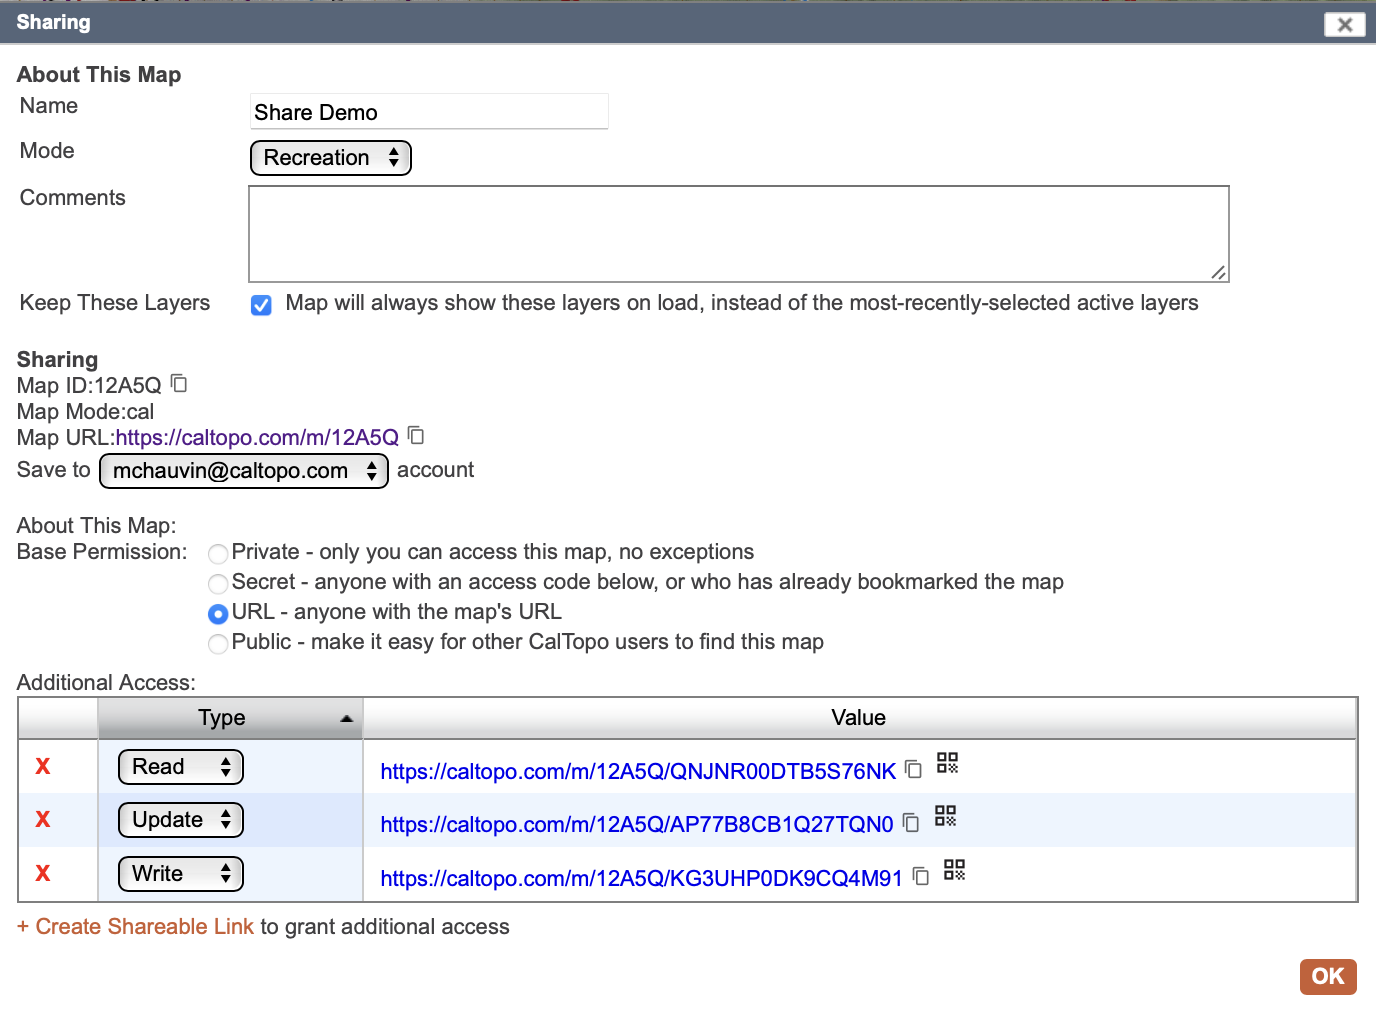
You can share shareable links and QR codes with as many users as you would like. If you would like to remove an access code, simply click the X to the left of the access code you wish to remove.
Please note: removing an access code will prevent future users from using the code but it will not remove access for anyone who has the map bookmarked in their account. You can change the base permission of a map to Private to prevent other users from viewing and accessing the map after you have already shared it but keep in mind that this will prevent all users with whom you've shared the map from viewing and accessing the map.
Shareable links
Shareable links can be emailed, texted or typed into a search bar. To copy the link, you can click the copy icon at the end of the link. Use the paste command to paste the text into an email or document. To create a QR code you can click the QR icon next to the copy icon.
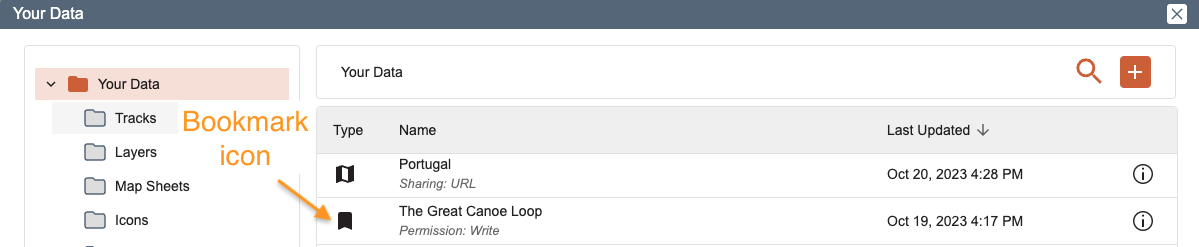
If someone uses the shareable link to access the map, they will be given the specified level of access to the map and the map will be automatically added to Bookmarks in their account if they are logged in or log in after opening it. A bookmarked map can be accessed at a later date by clicking on Your Data and then selecting the Bookmarks tab. More information on bookmarked maps can be found in the Managing Your Data lesson.
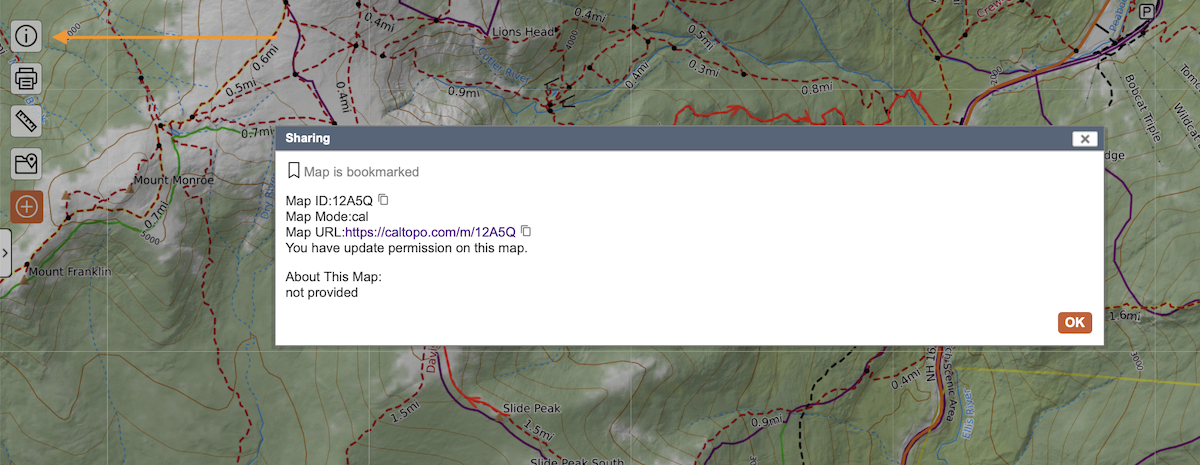
Clicking on the ⌽ symbol also know as the "Details/Sharing" button for a shared map will bring up the Sharing dialog, which displays whether or not the map is bookmarked, the 5-digit map ID and URL as well as any comments added to the map.
If you wish to give someone a higher level of access to a map that you have previously shared with them, simply generate a new shareable link with the higher access level and give it to them. The shareable link with the higher access level will override the existing access level for that map.
QR Codes
QR codes are meant to be scanned and opened with the mobile app. To view the QR code, click on the QR icon displayed at the end of the shareable link. A separate tab displaying the QR code will open.
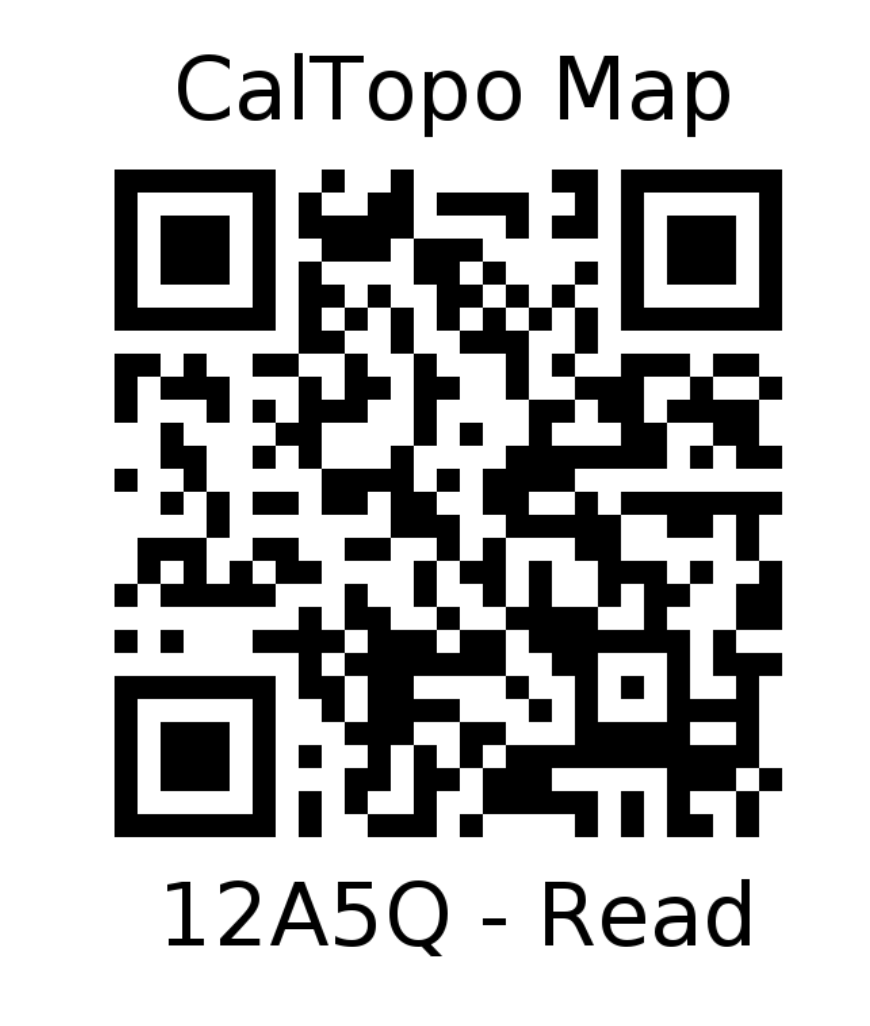
Below the QR code is the 4 digit map ID for the map the QR code is tied to and the level of access it grants to that map. In the screenshot above, the 4-digit map ID is 055J and the level of access is Read.
Using a QR code to access a shared map has the same results as using a shareable link (which is described in the previous section).
Sharing with the Mobile App
Any map created and saved on the mobile app will have the URL base permission by default. If you wish to change the base permission of a map, this must be done from the web; you cannot change the base permission of a map in the mobile app at this time.
There are a number of ways to use the mobile app for sharing maps. The processes are the same on both the iOS and Android app. Most of the screenshots below show the processes as seen on the iOS app; where the layout or icons on the Android app significantly differ, screenshots are shown for both.
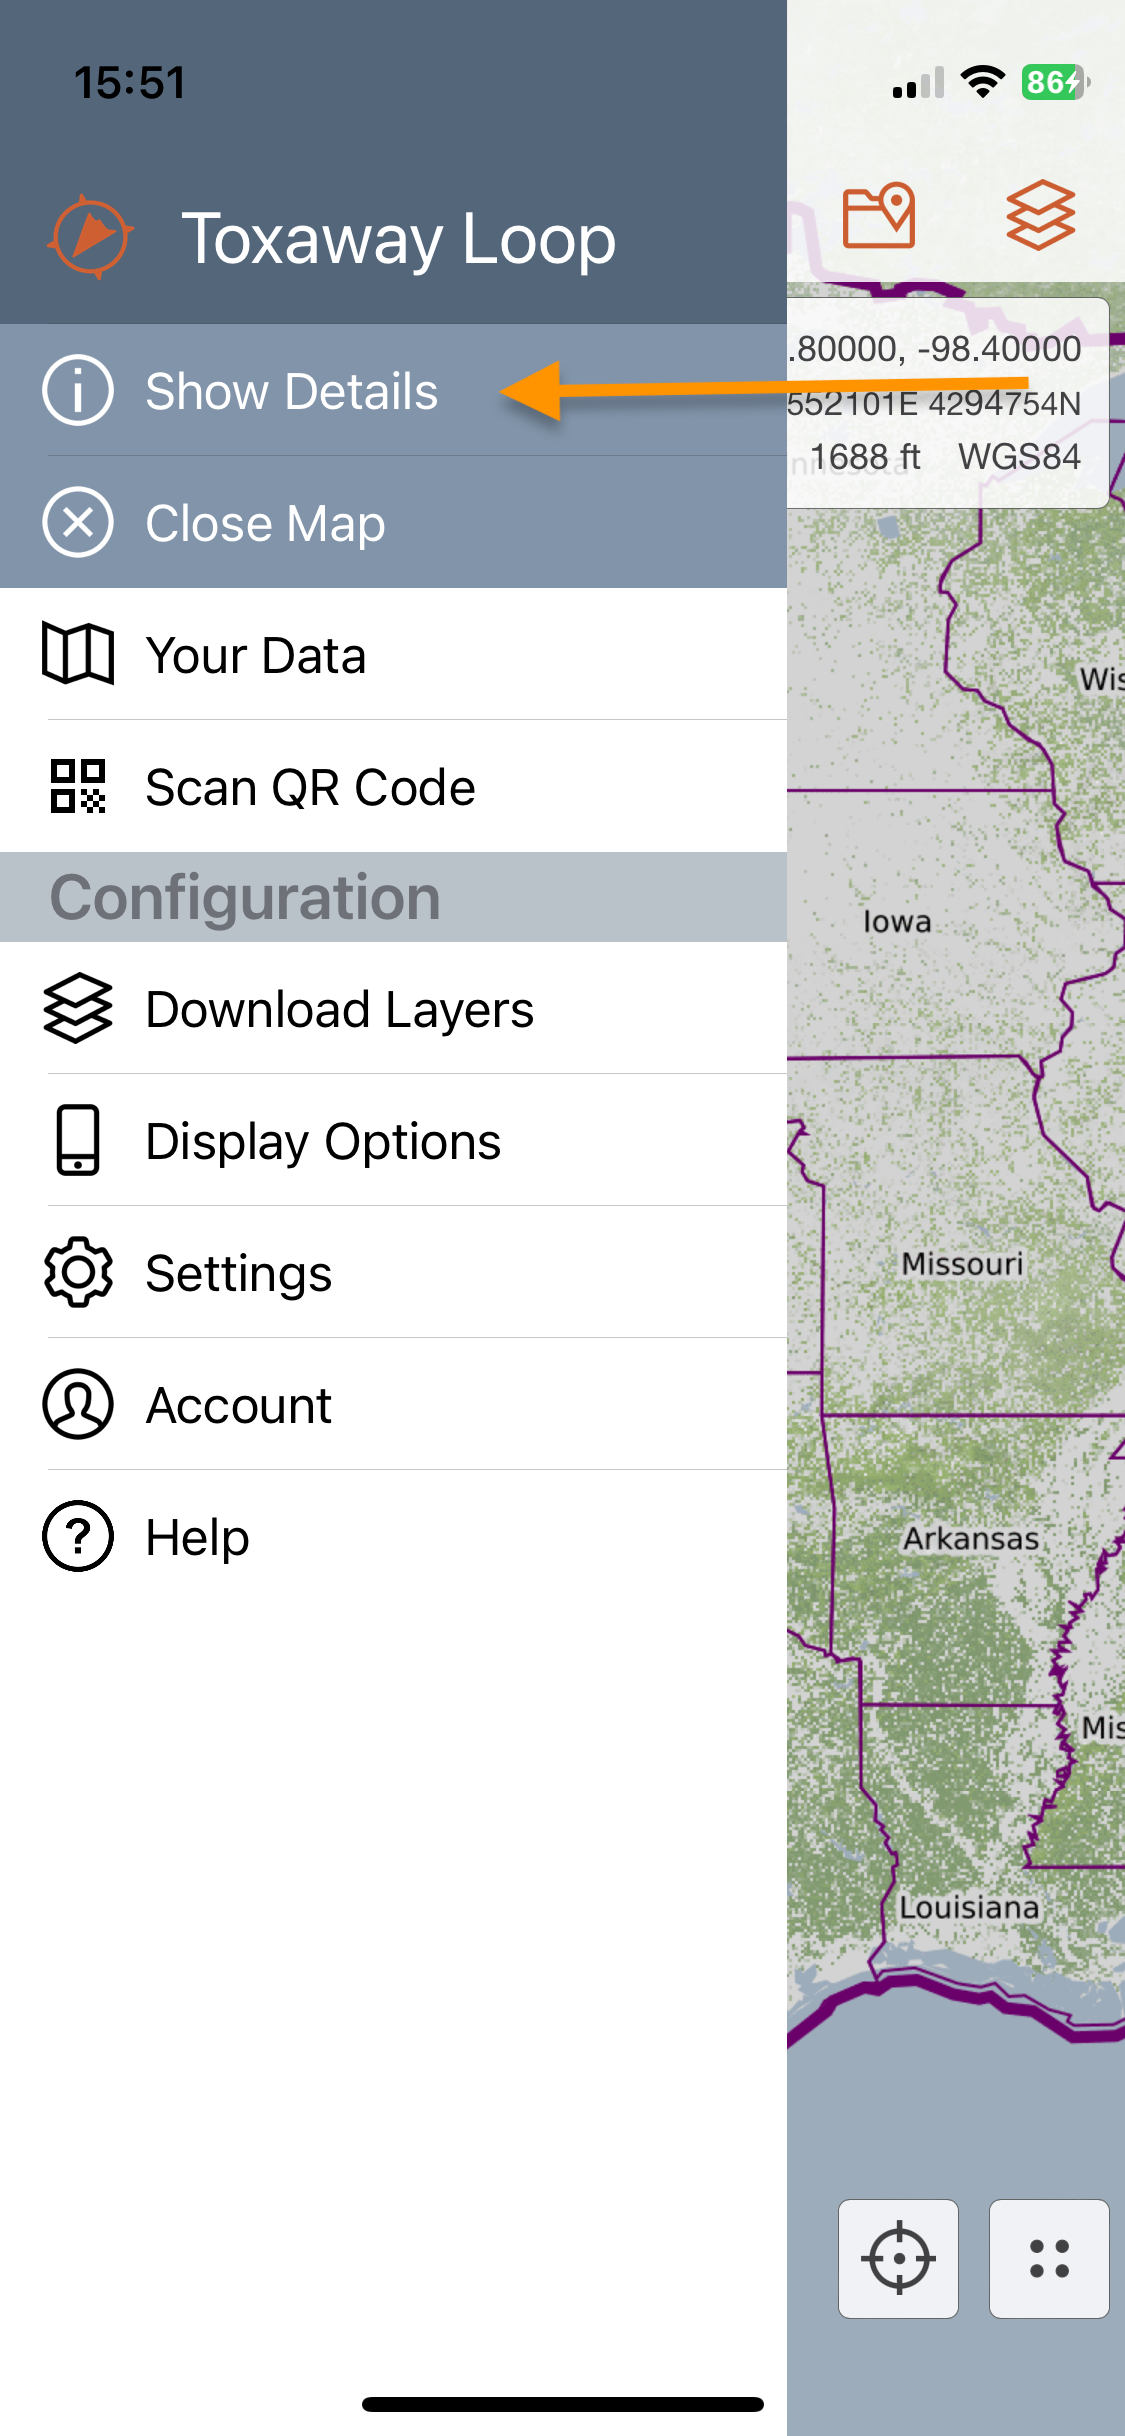
First let's look at how you can share from the mobile app itself. Just like on the web, you can generate shareable links and QR codes in the mobile app. With the map open, click Show Details in the 3 bar main menu. This will open the Map Details screen.
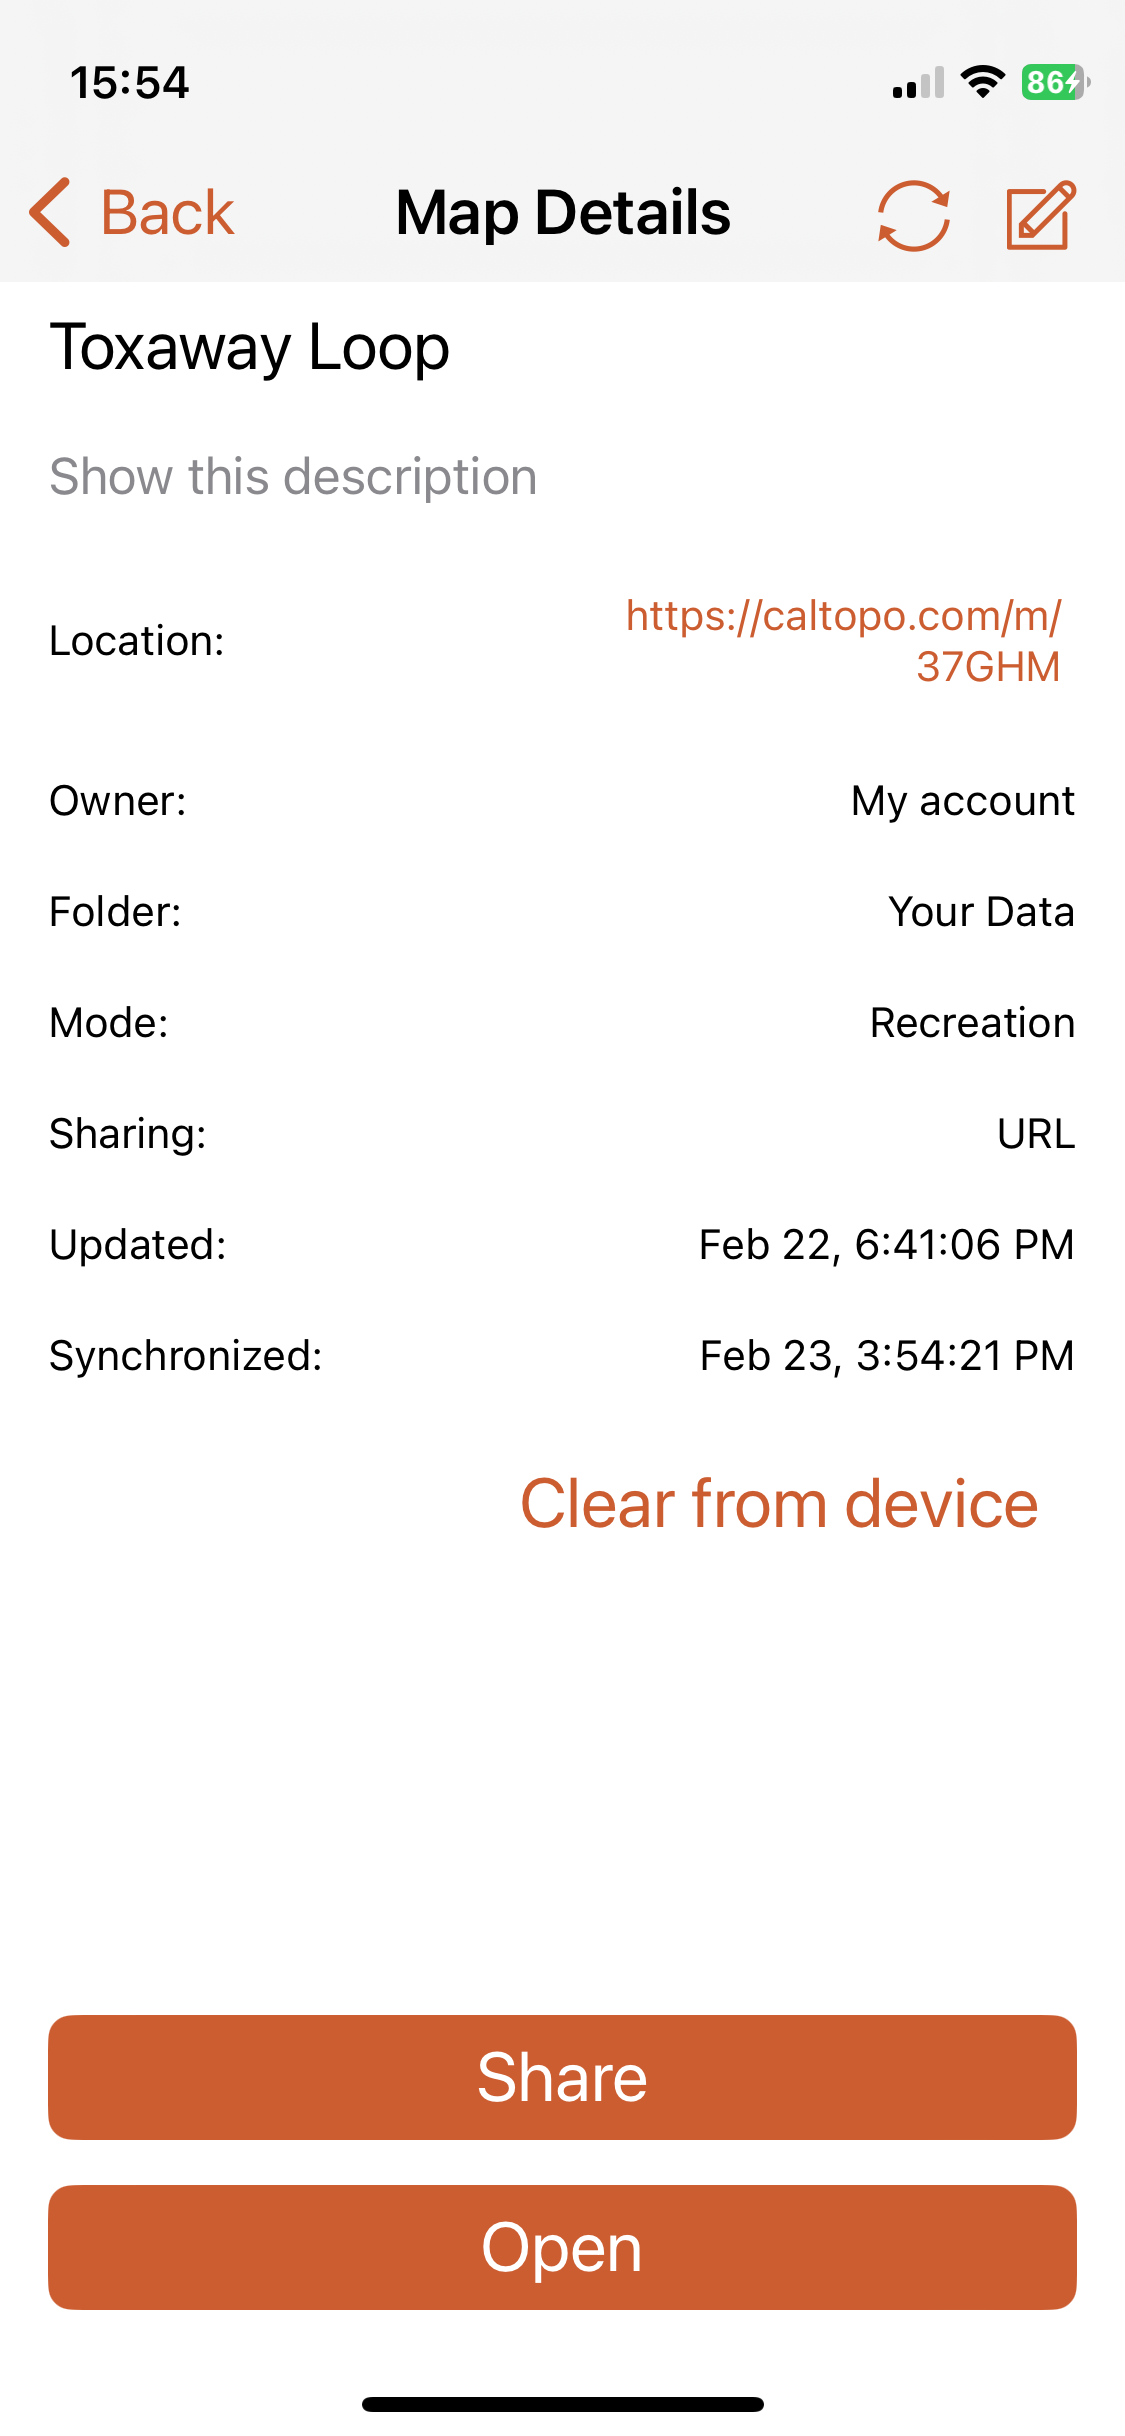
To create a shareable link, click on the Share button.


A new screen will open where you can choose to share with a QR code or a link and then you'll be prompted to choose the permission level.
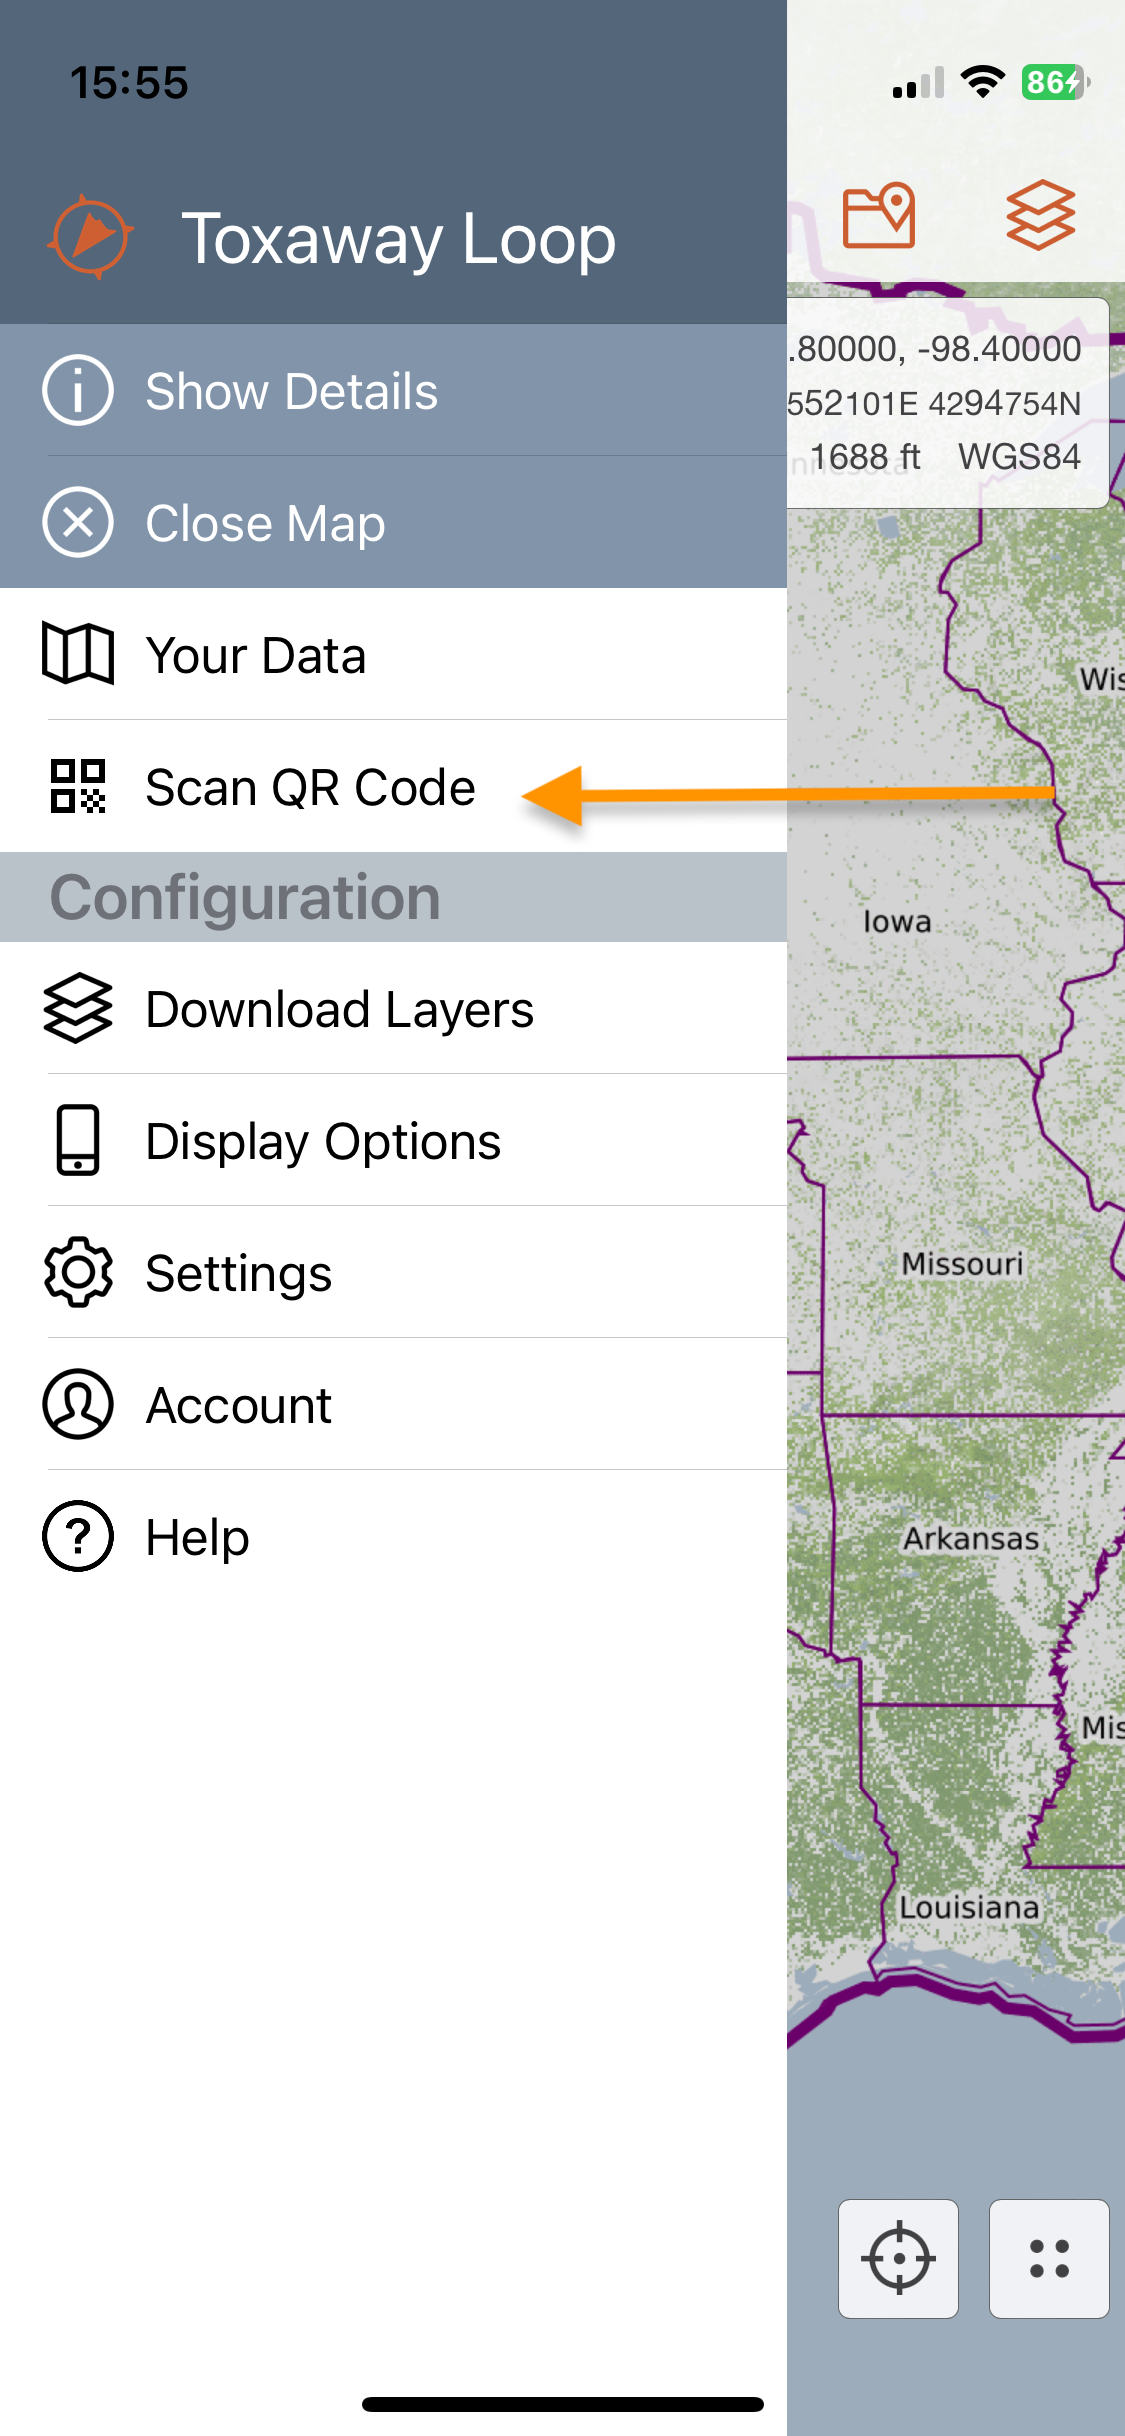
You can also use the mobile app to the scan QR codes for other maps that are shared with you. To scan a QR code using the mobile app, select Scan QR Code from the 3 bar main menu. If you haven't already, enable your phone to allow CalTopo access to the camera. The camera will then open with an orange scanning box displayed on the screen.

Align the orange box that appears with the QR code; it will read the QR code automatically and then turn teal once it has successfully recognized the code.


Upon recognizing the code, the mobile app will ask if you want to bookmark the map. Select Create on iOS or Ok on Android and the app will open that map with the specified level of access and add it to your bookmarks. You must have a network signal to be able to open the map for the first time. Map ownership and the type of access you have will appear alongside the map name in the Maps list as well as on the Map Details page.

