Recording Tracks
in this lesson
You can use the mobile app to record a track as you travel your route. Any track recorded with the mobile app will be automatically saved to your account and can be saved to a specific map. While you record your track, you can display information such as elapsed time, distance and elevation gain. You can also view data about previously recorded tracks such as the elevation profile as well as navigate the track in both forward and reverse directions.
This lesson will cover how to record and manage your tracks using the mobile app. In addition we will also discuss GPS accuracy since we frequently receive questions about this topic from users.
Topics on this Page:
Remember if you plan to record a mobile track in an area without a data connection, you will need to download base layers for that area ahead of time in order to view your track on a map while you are offline. Please refer to the previous lesson for instructions on how to download base layers for offline use.
How to Record a Mobile Track
You can record a mobile track using the CalTopo mobile app with or without a saved map open. If you wish to save your mobile track to a particular map, it is easiest to have the map open before you start recording your track. The screenshots below show the steps for recording a mobile track with a saved map open. If you did not have a saved map open, the process for recording a mobile track would still be the same.
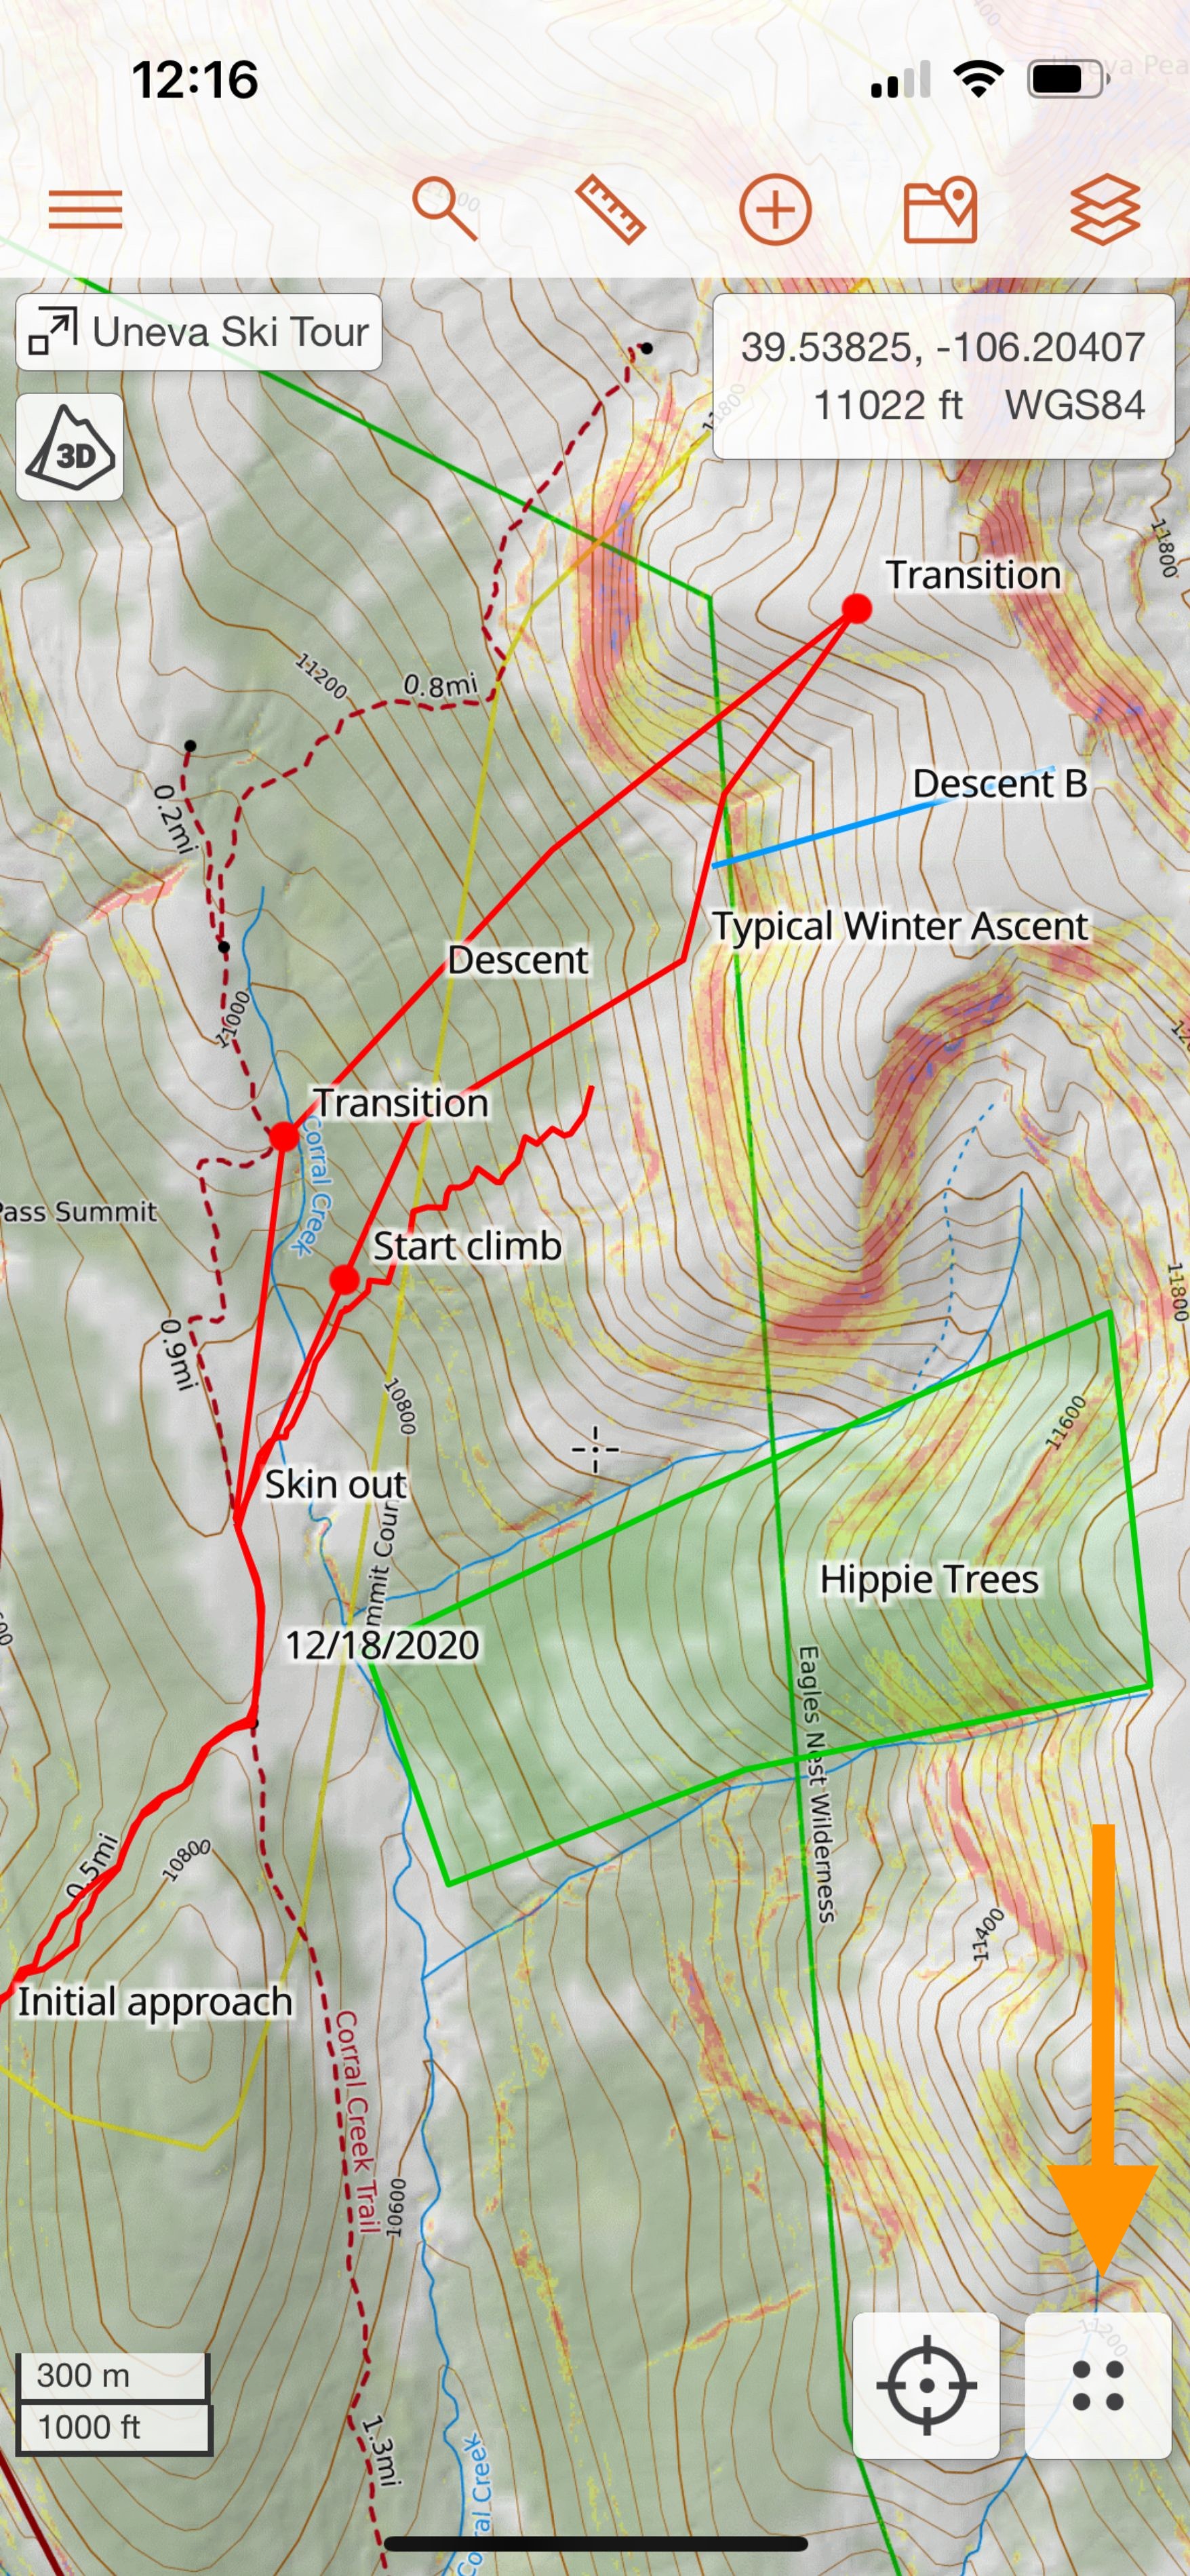
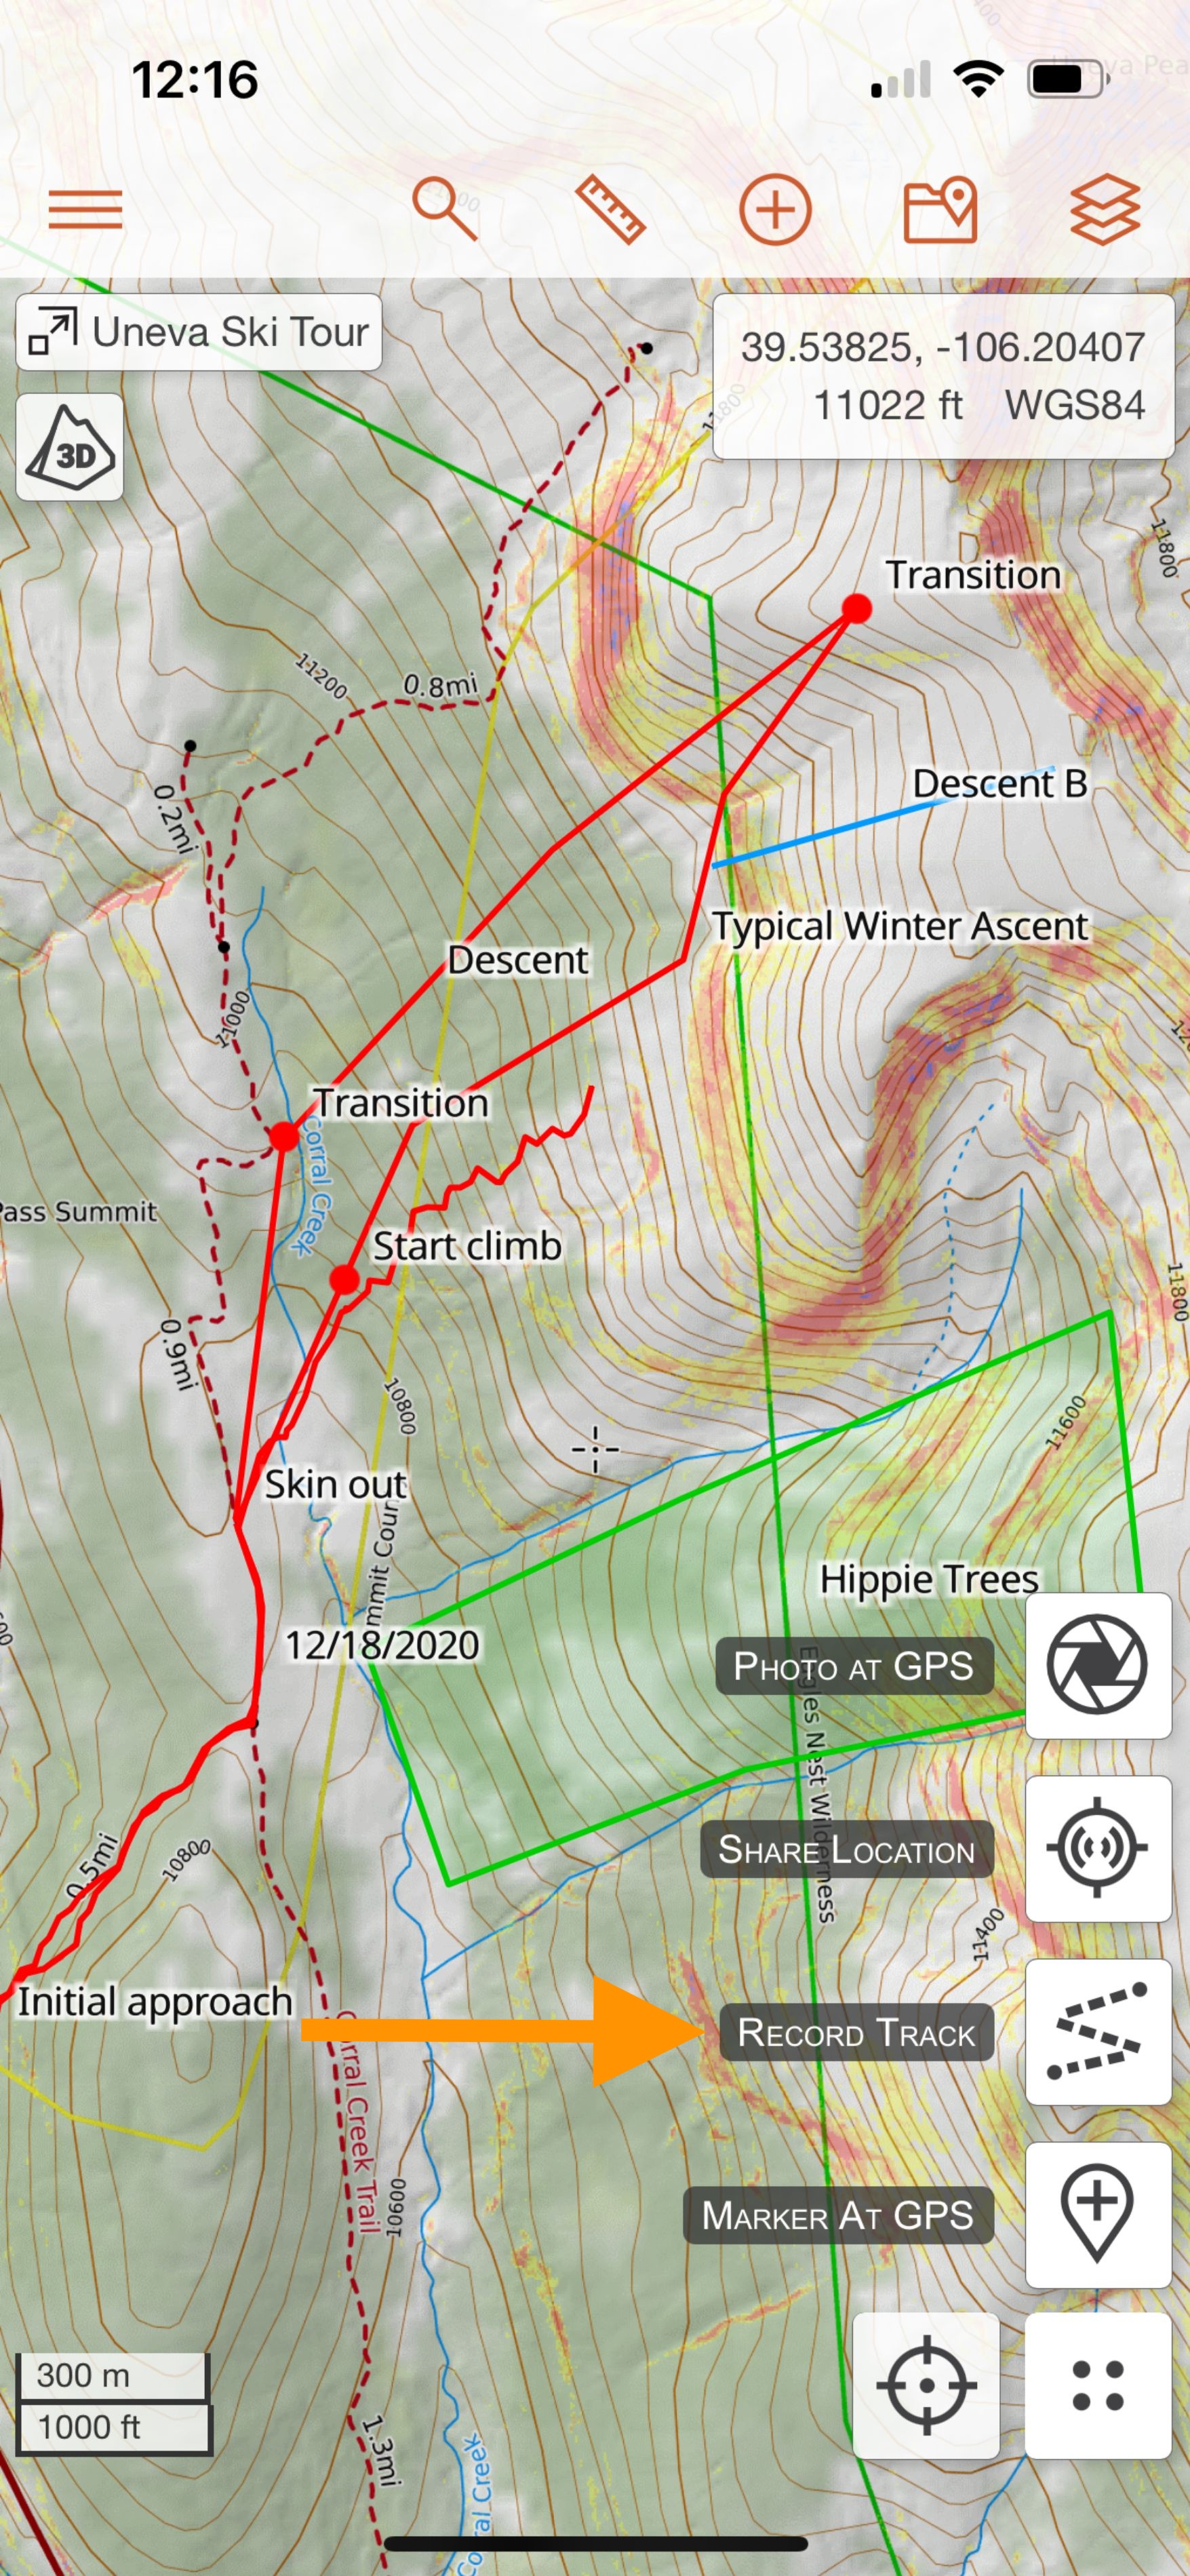
To begin recording your track, tap the 4 dot location menu in the lower right corner of the map viewer and select Record Track.
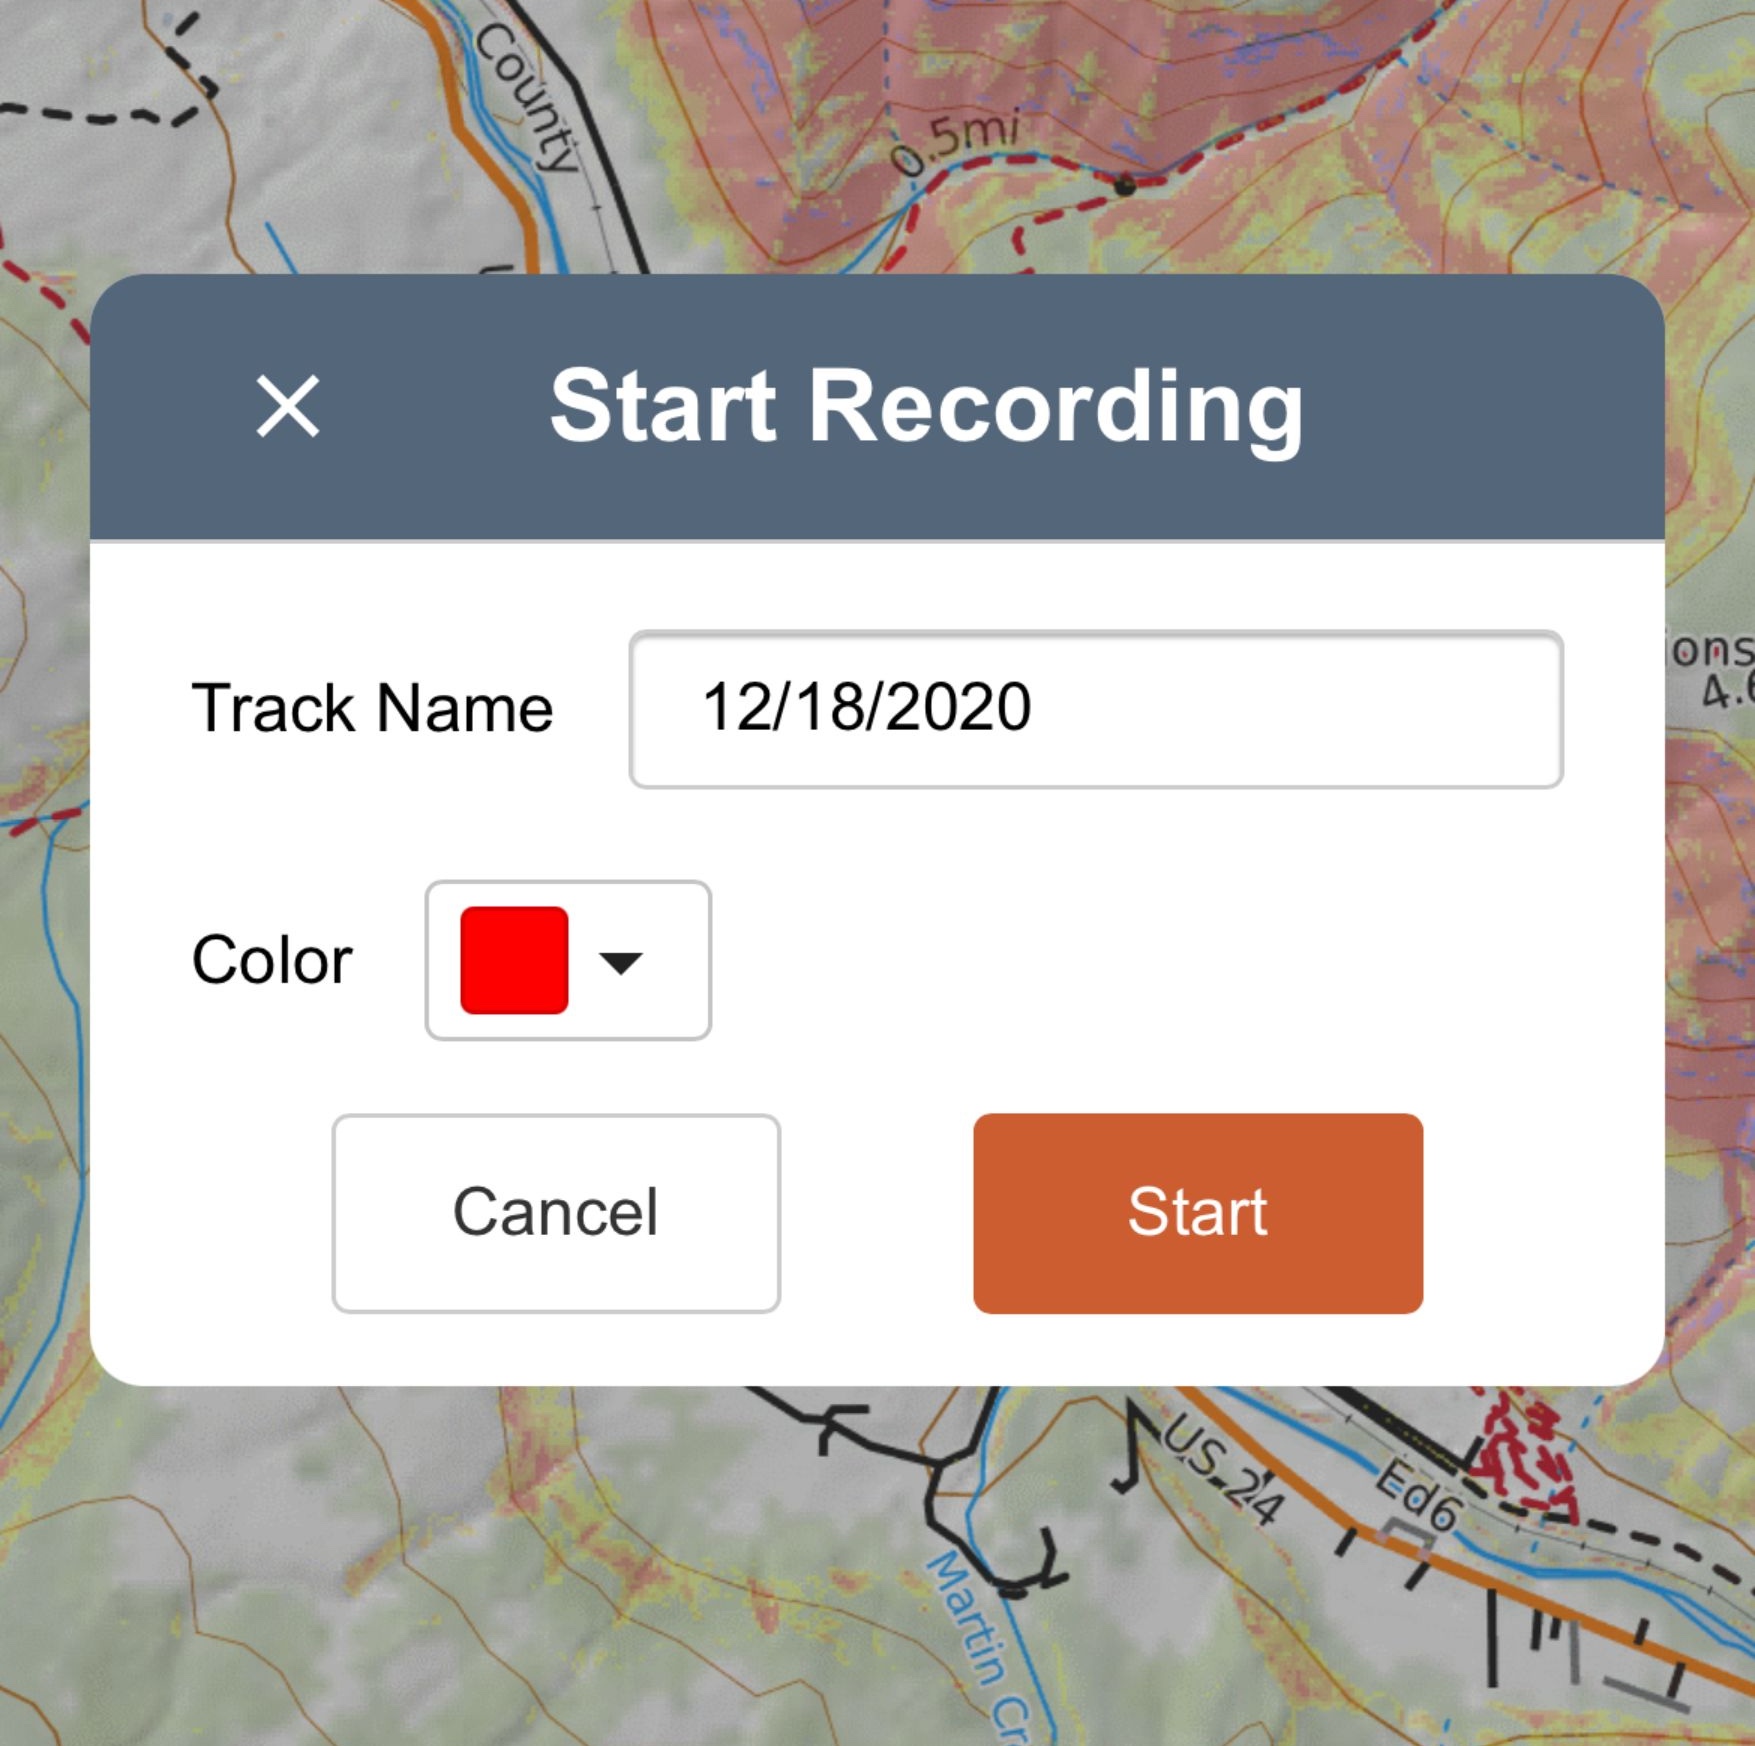
The Start Recording dialog will appear. By default, the track name will be today’s date. You can change your track name if you wish. If you don’t have a saved map currently open, the track will save to your account only. However if you do have a saved map open (as in our example), the track will save to your account and the map that is currently open. Tap Start and the track will begin recording.
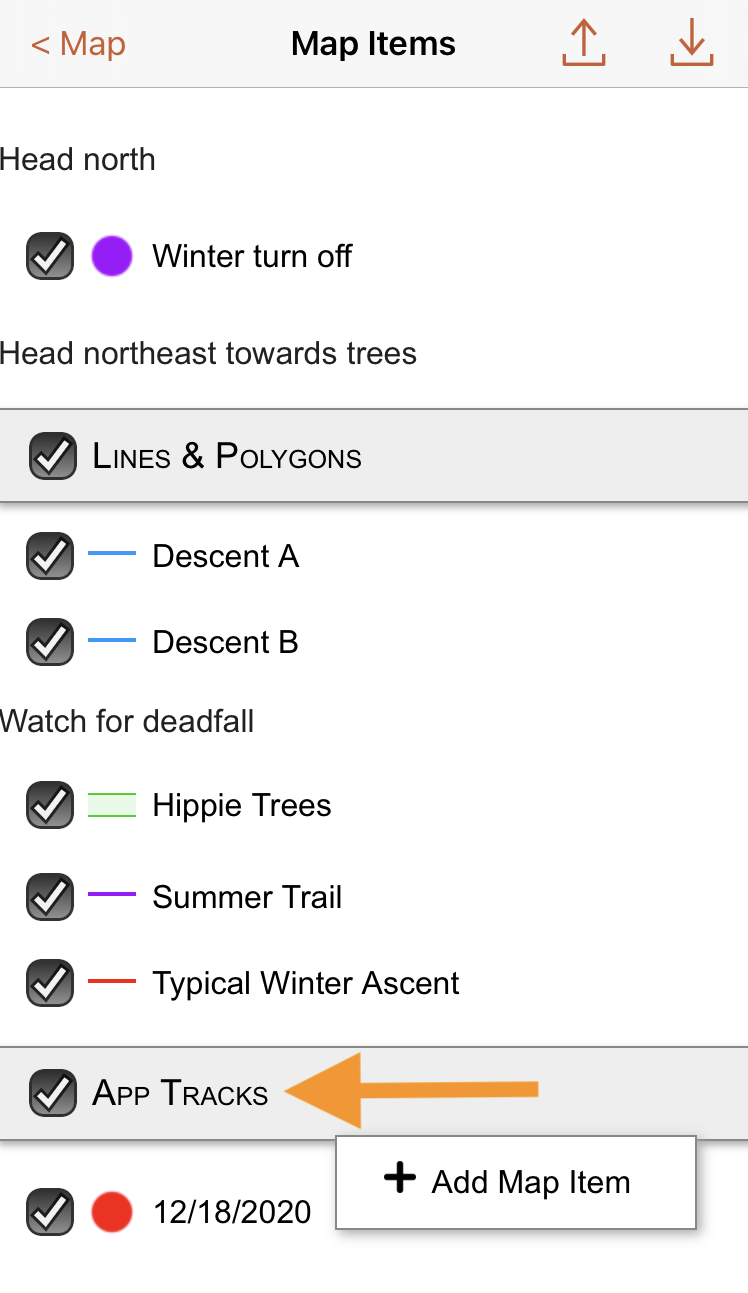
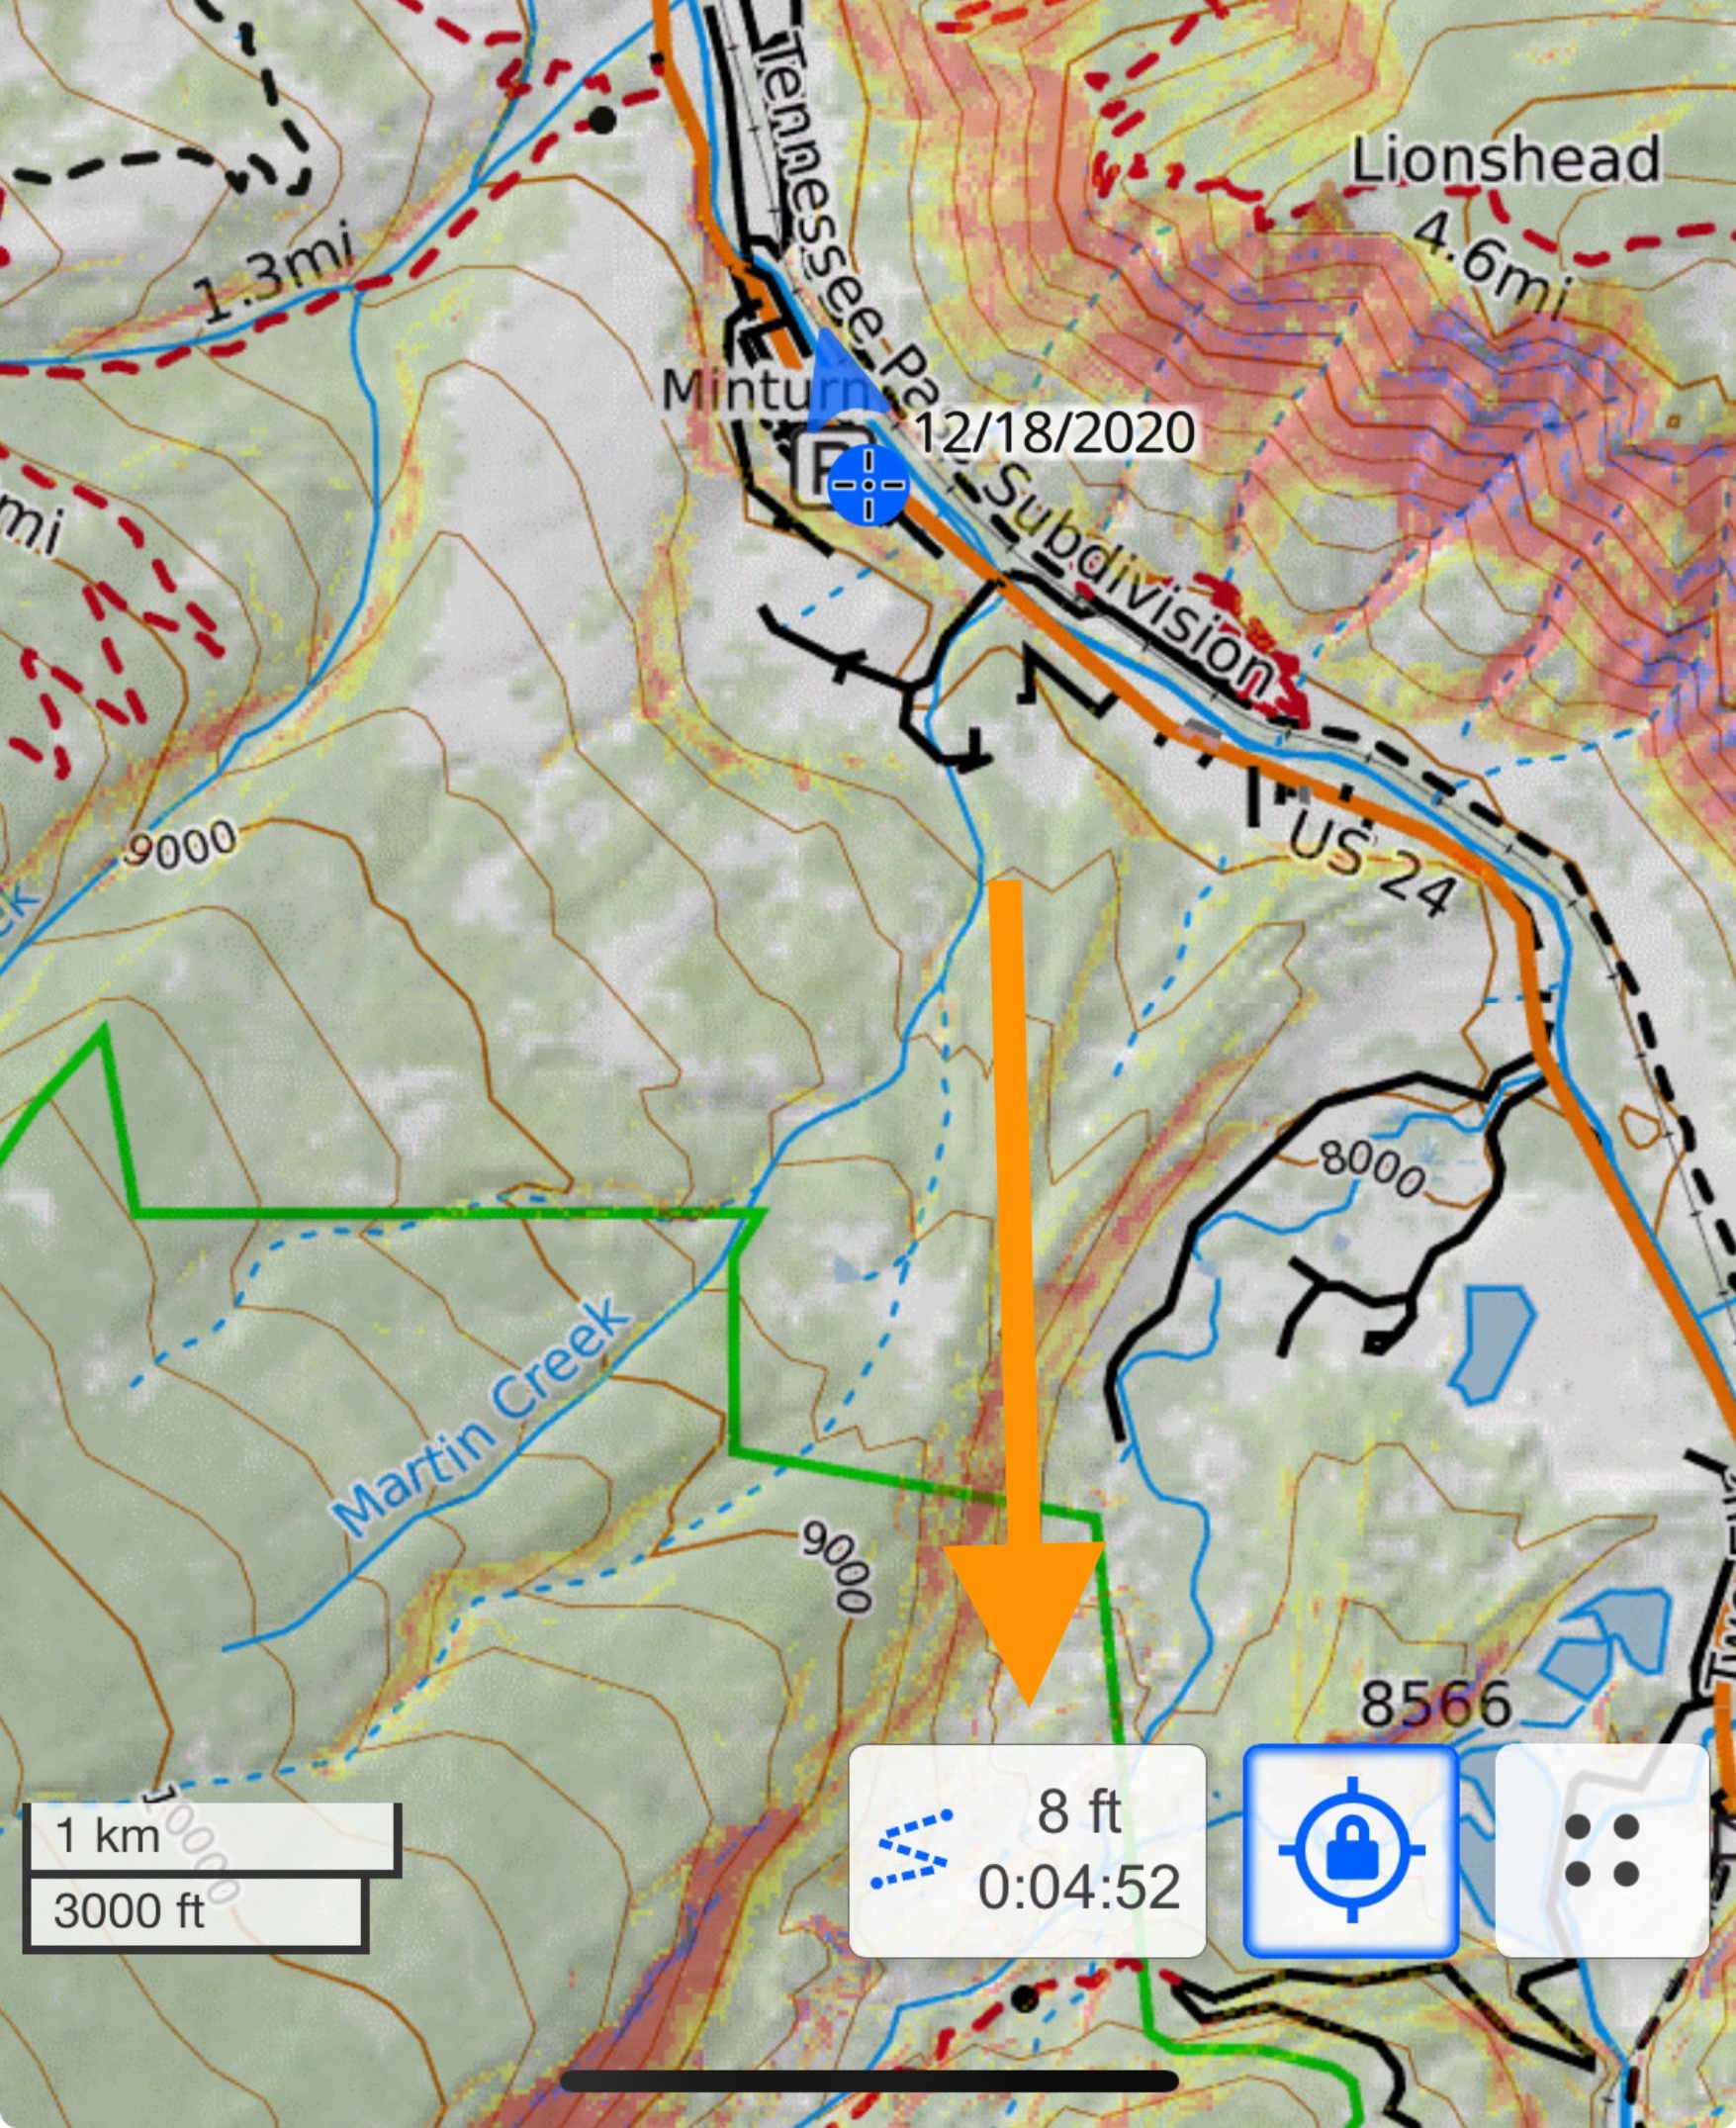
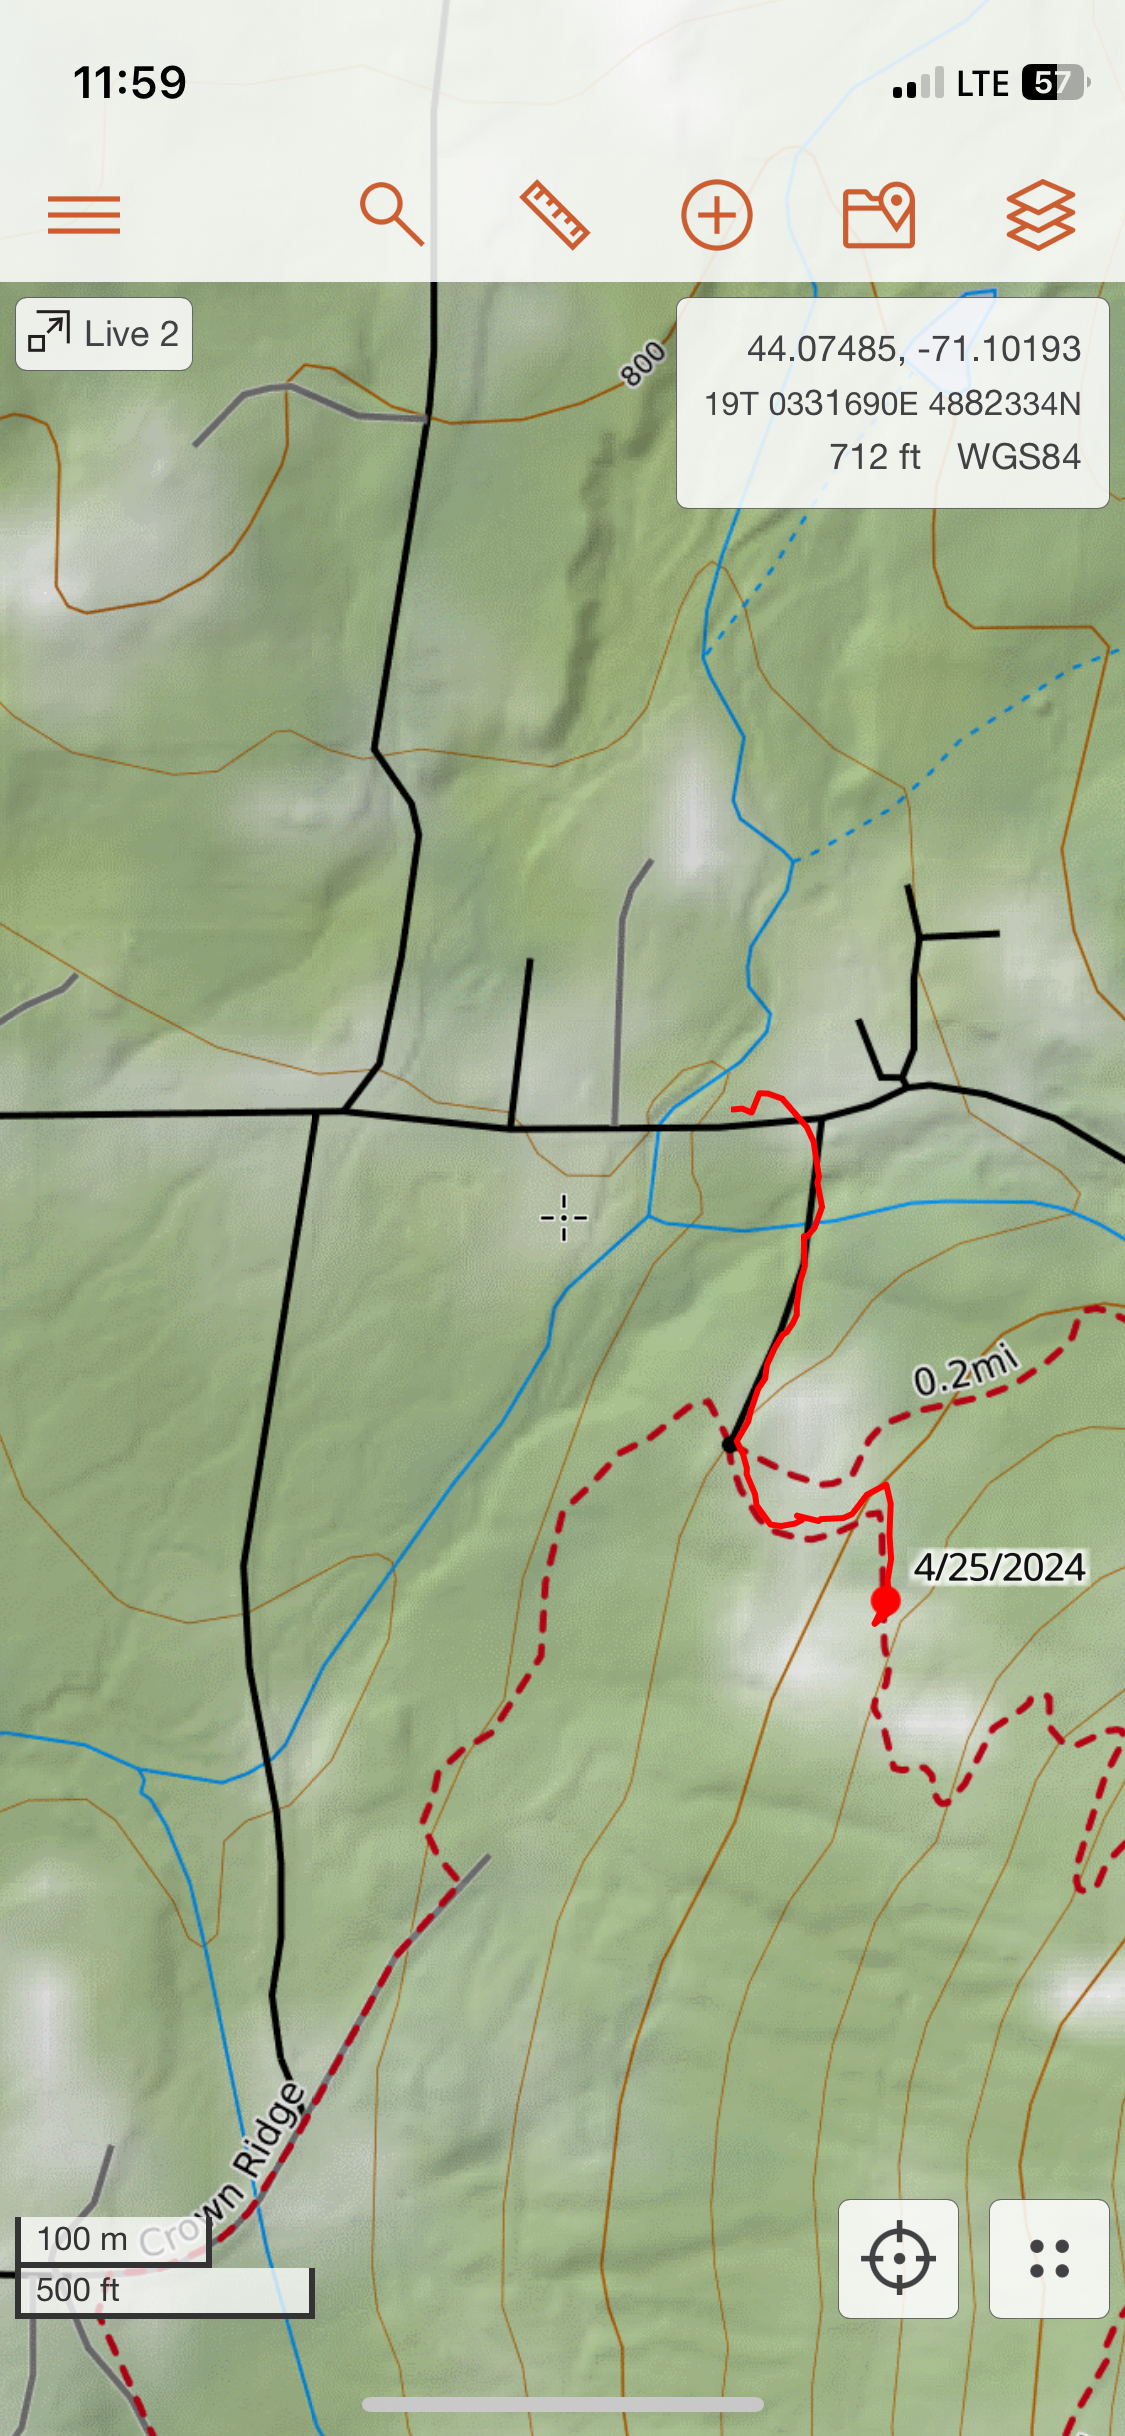
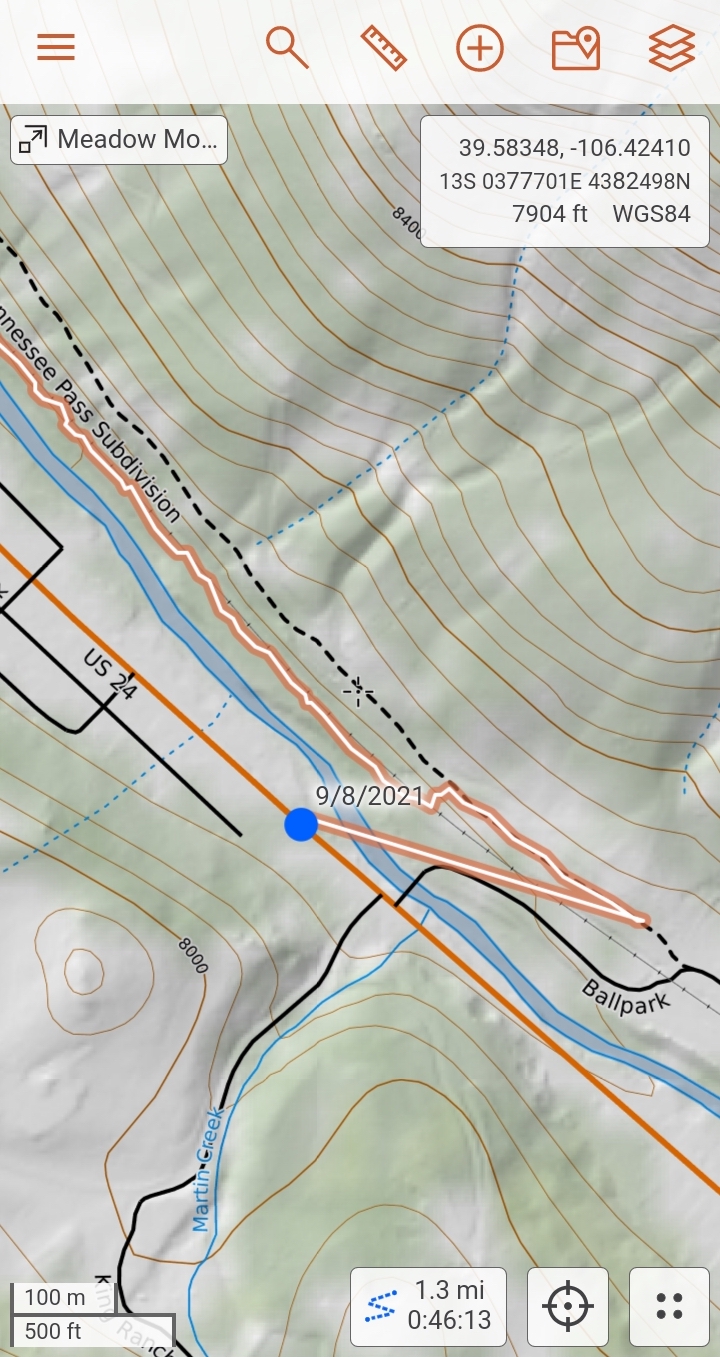
The map viewer will center on your current location which will be indicated by a blue dot and compass arrow. As you move, your previous track will be indicated by an orange and white line. If your track is being saved to the map then your track will appear in the App Tracks folder on the Map Items page while it is recording
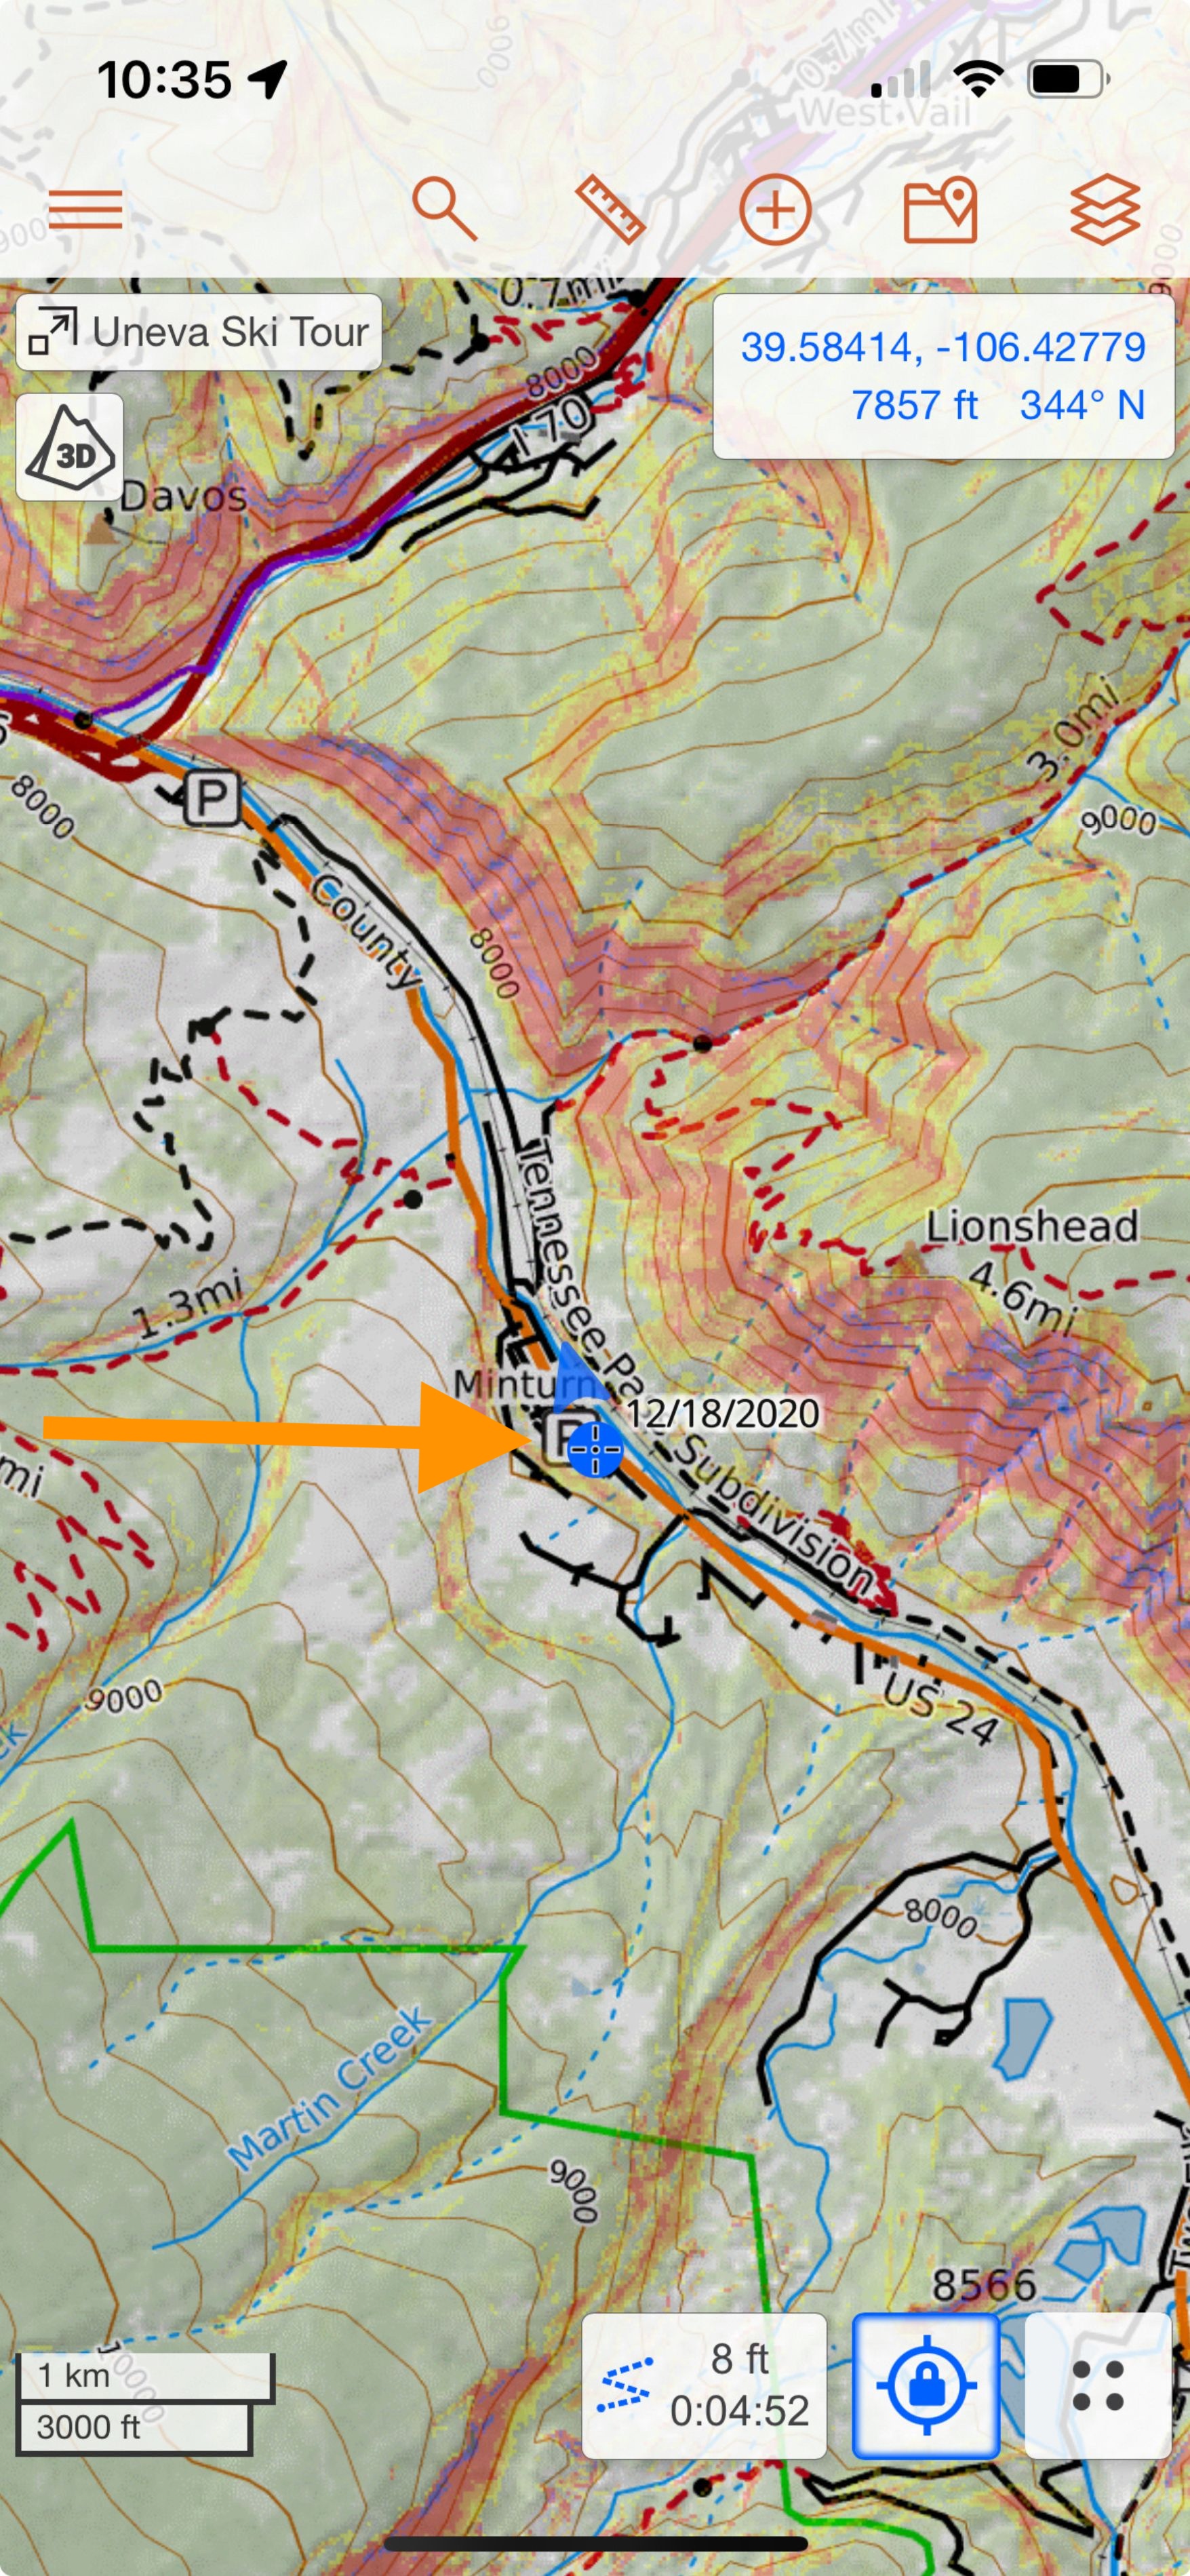
As long as you have a data connection, anyone viewing the map will be able to see your track. If you don’t have a data connection, the track will save locally to your mobile device and then automatically sync once a data connection is reestablished.
A Recording dialog will also appear in the bottom of the map viewer with the elapsed distance traveled and time as you move around. Tapping the Recording dialog will bring up a Track Information dialog with the track name, elapsed distance traveled, elevation gain and time. You will also see a link to attach photos to the track as well as options for deleting, making changes to or finishing the track.
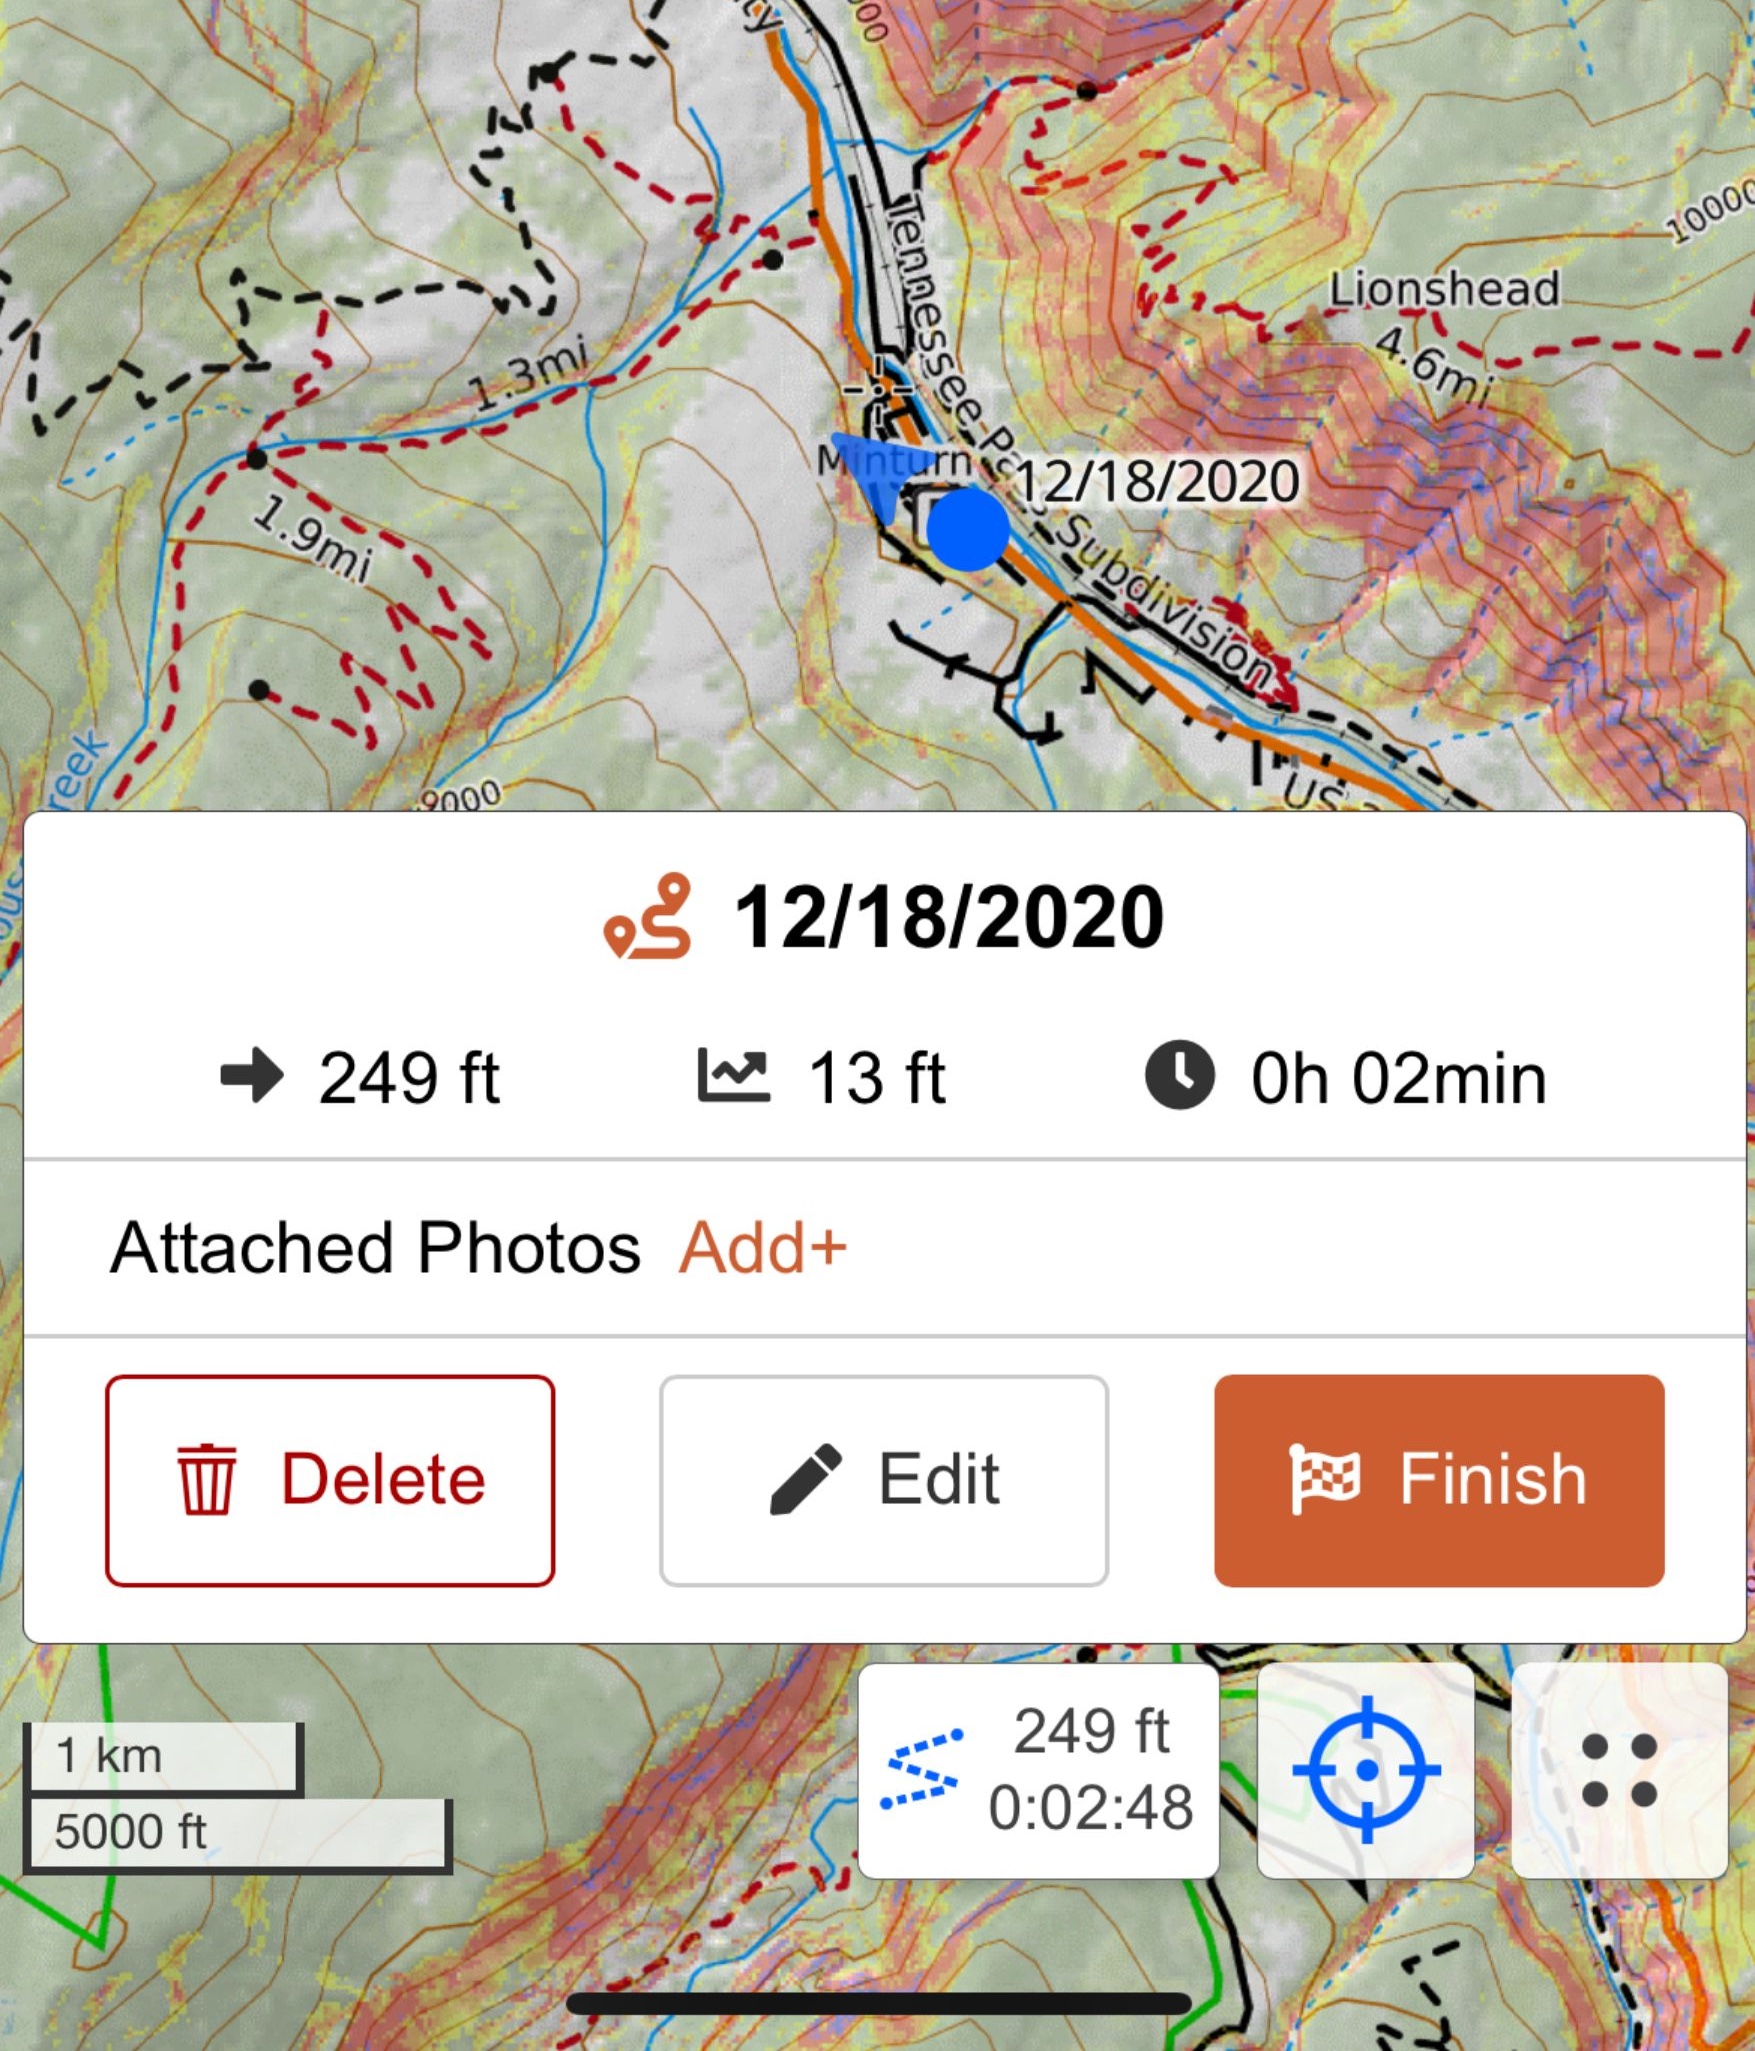
Tap Delete to permanently delete the track from your account and the map (if you are recording the track to a map).
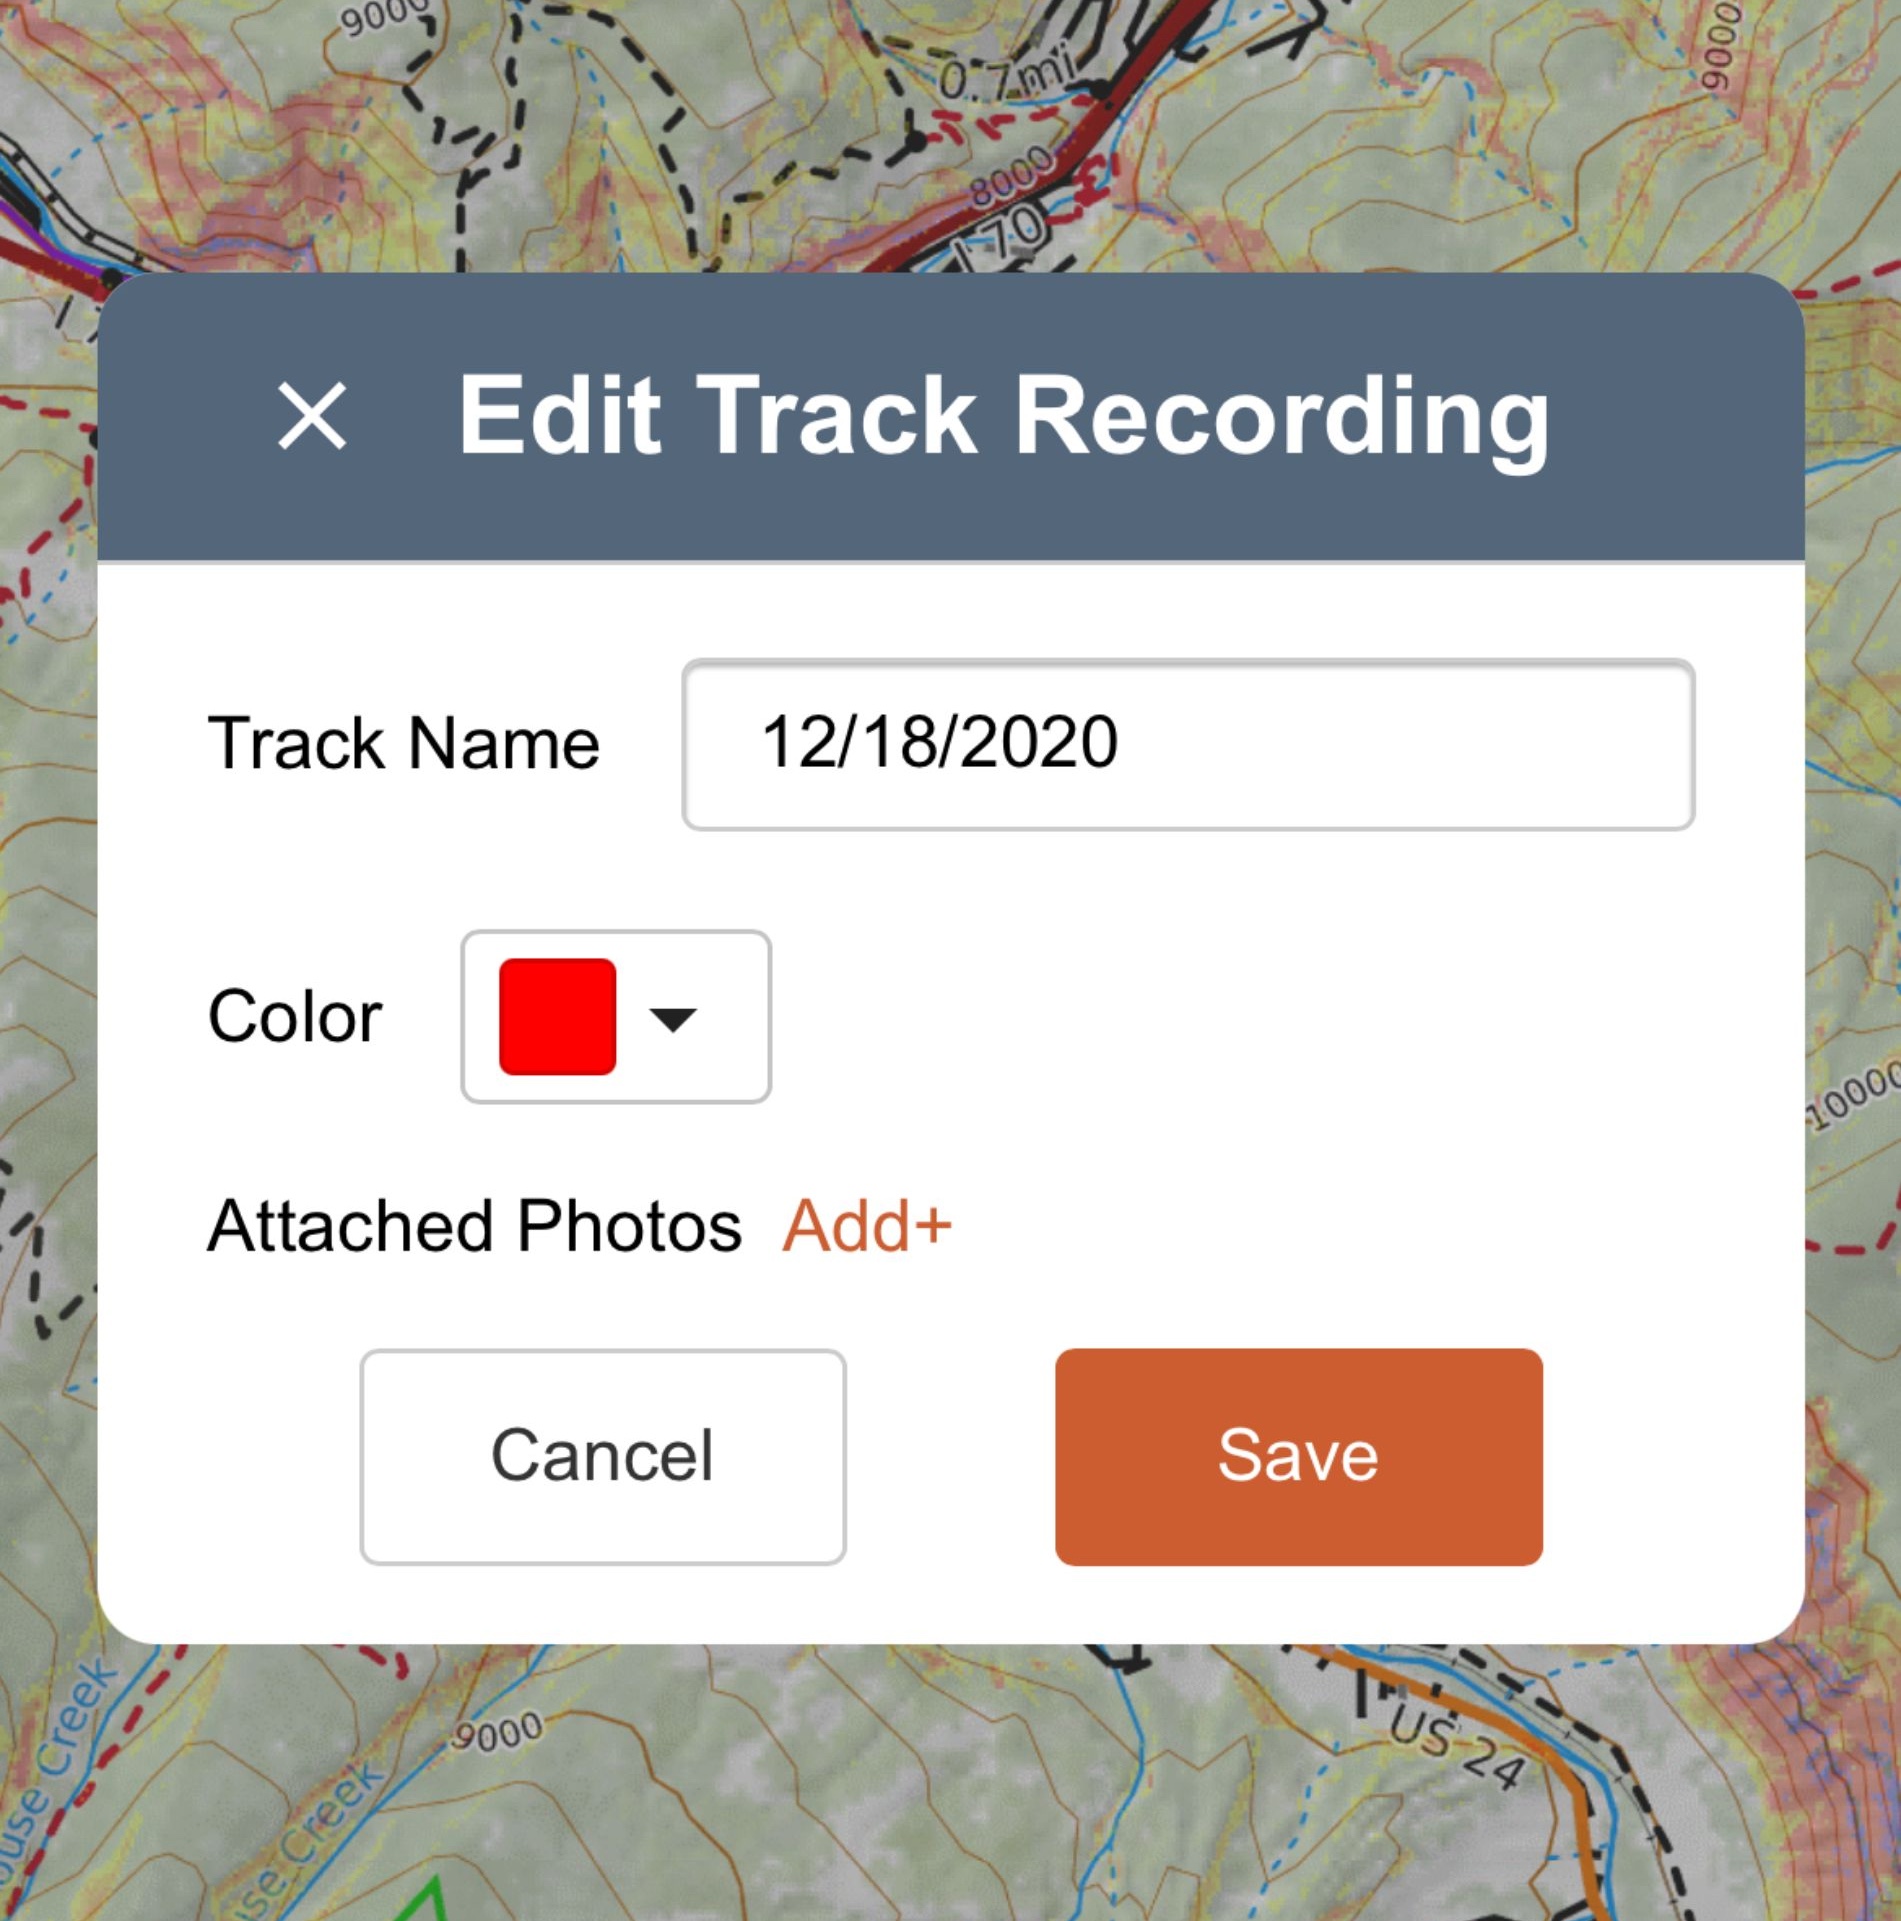
Tap Edit to open the Edit Track Recording dialog. You can change the track name and/or color as well as attach photos to the track. Tap Update Track to update the current track with any changes.
Tap Finish to end and save the track recording to your account and the map (if you are recording the track to a map). If the track is recording to a map, it will appear on the map and move from the App Tracks folder to the Lines & Polygons folder on the Map Items page.
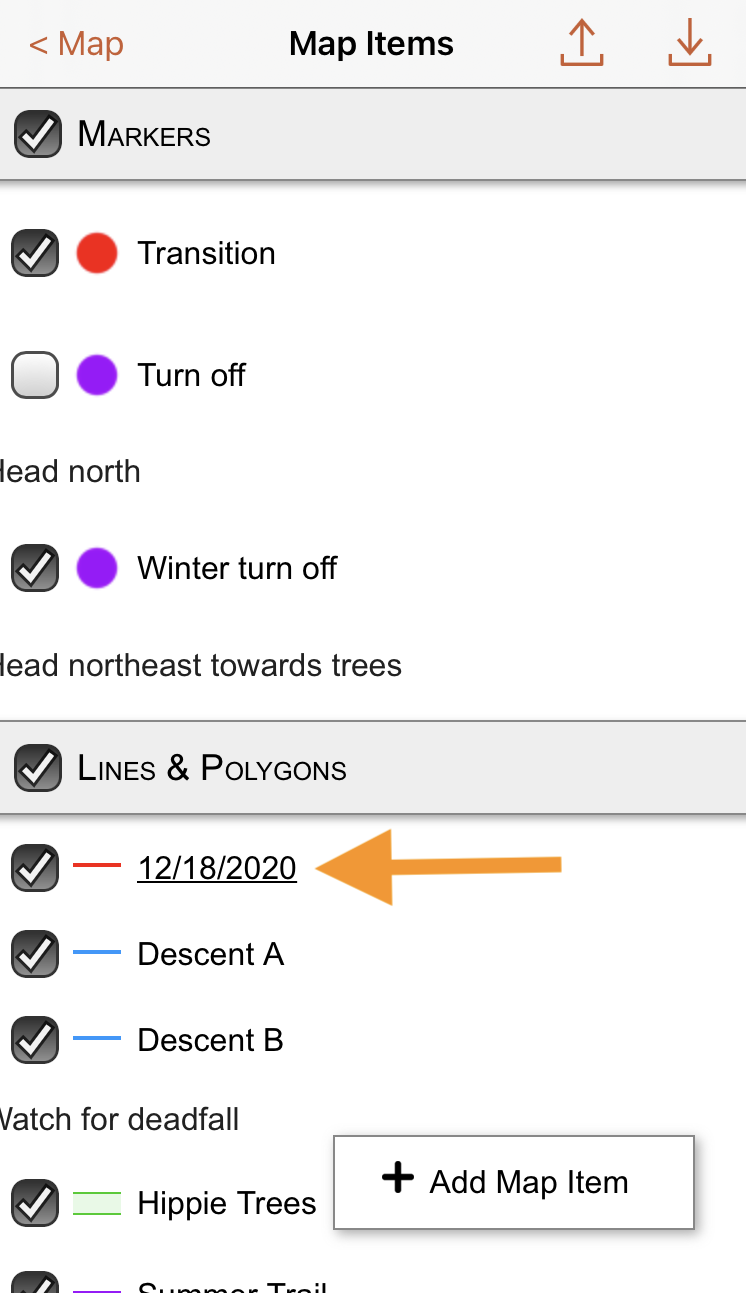
If the track is only saved to your account, it will disappear from the map viewer and it will not appear in the Lines & Polygons folder on the Map Items page.
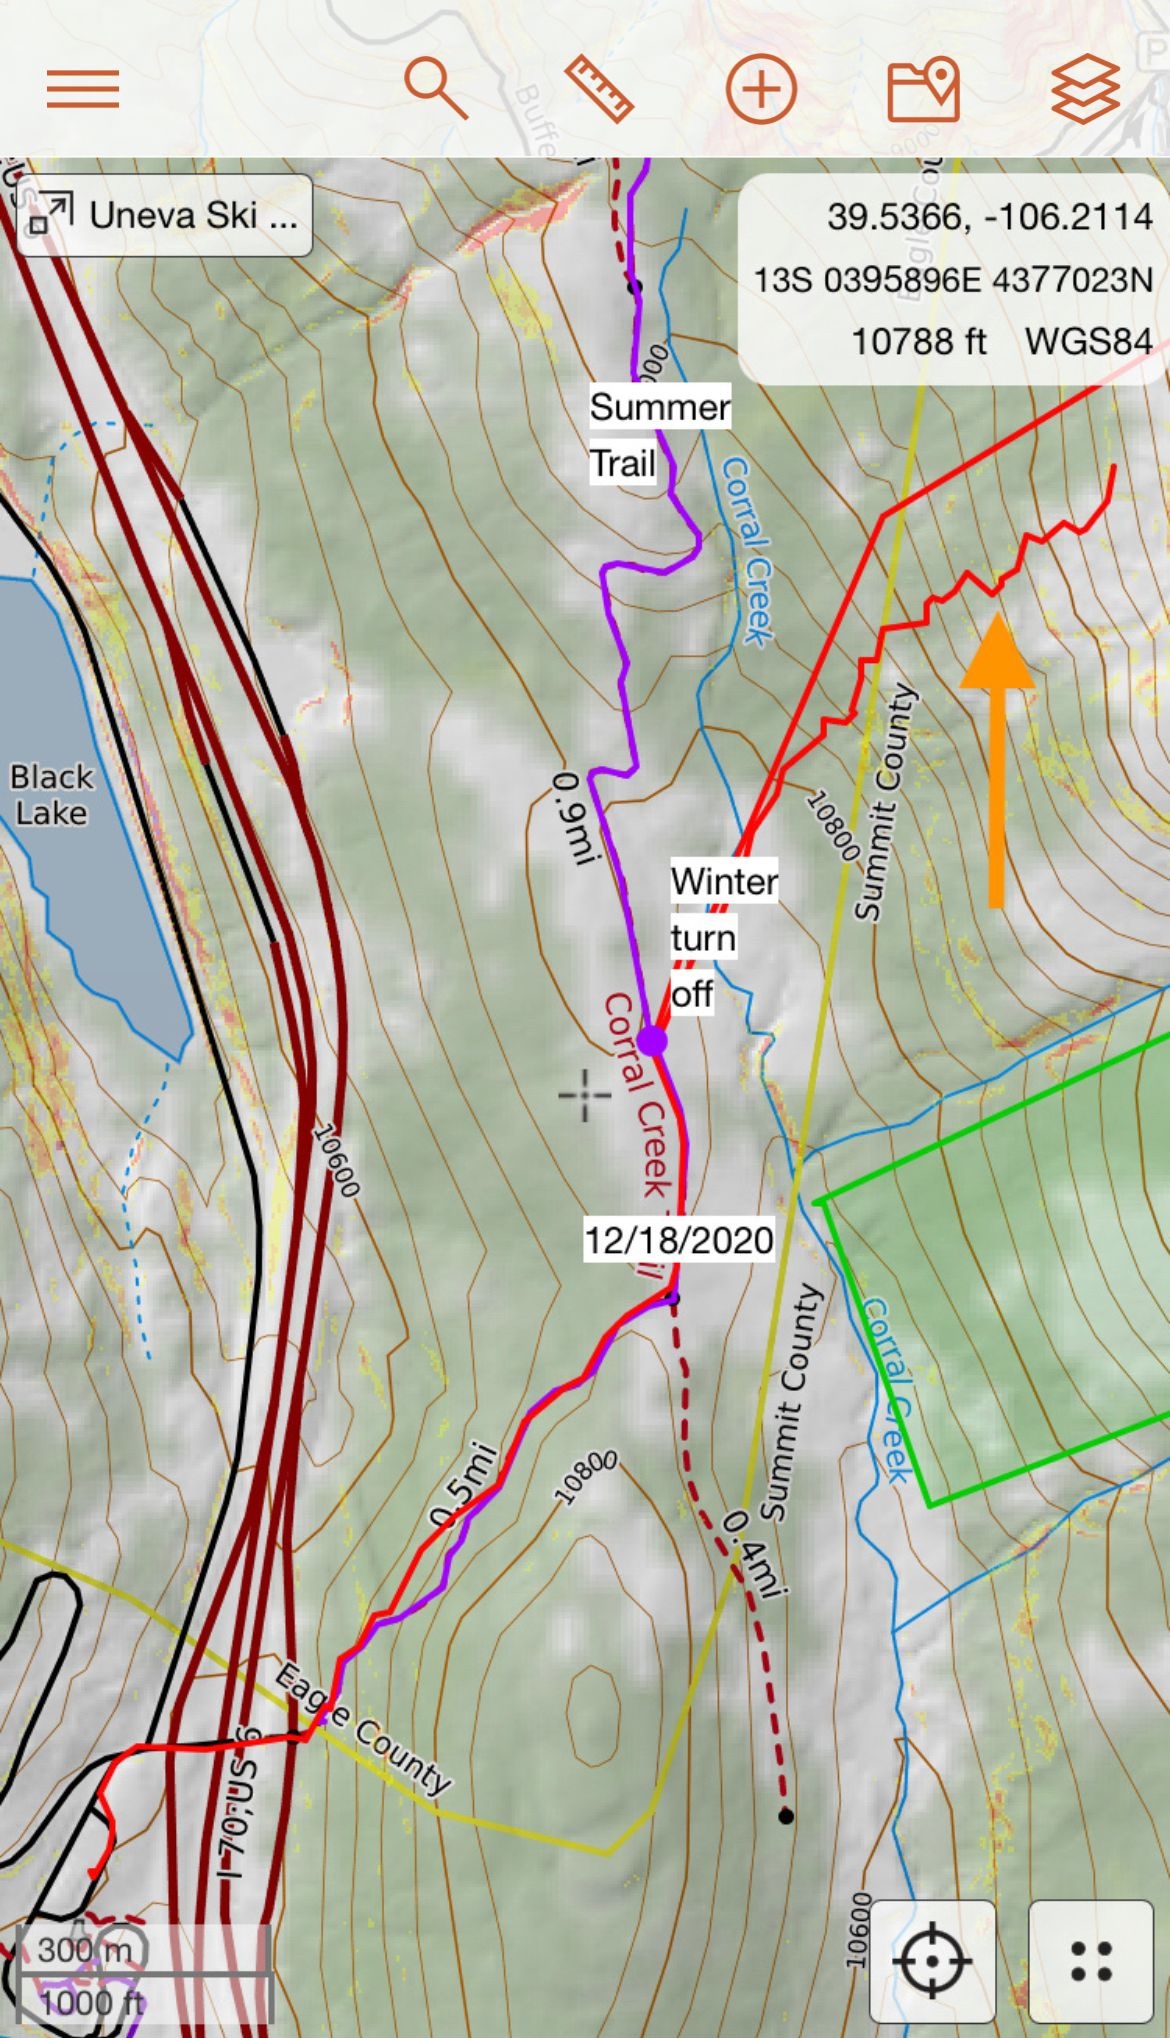
Truncating
At times, individuals may initiate a track prematurely, resulting in its initial segments being distracting on the map or revealing private information such as someone's home. This is where truncating becomes useful. Truncating involves removing the beginning segment of the recorded line on the map. While the entire recording will be saved to the user's account, those viewing a shared map will observe the truncation. The individual recording the track will not notice the truncation until they stop recording. Nevertheless, the person recording can choose to truncate the line to exclude any private information from appearing on the shared map.
To truncate, click the track line and you'll have the the option to Truncate Here. By clicking that you will delete the line from that point to the start of the line. Anyone with the appropriate access to the map can truncate the track.

Managing Tracks
Whether or not you save a track to a specific map, all tracks recorded with the mobile app will be saved to your account in Your Tracks (on the web) or Tracks (on the mobile app). At this time you can’t import gpx tracks from other devices or apps into Your Tracks.
Your Tracks on the Web
To view a list of tracks saved to your account on the web, click on Your Data in the upper right corner of mapviewer and then select the Your Tracks tab. Once the track list is open you can edit the name of the track by clicking the edit/pencil icon or delete the track from your account by clicking the red X.
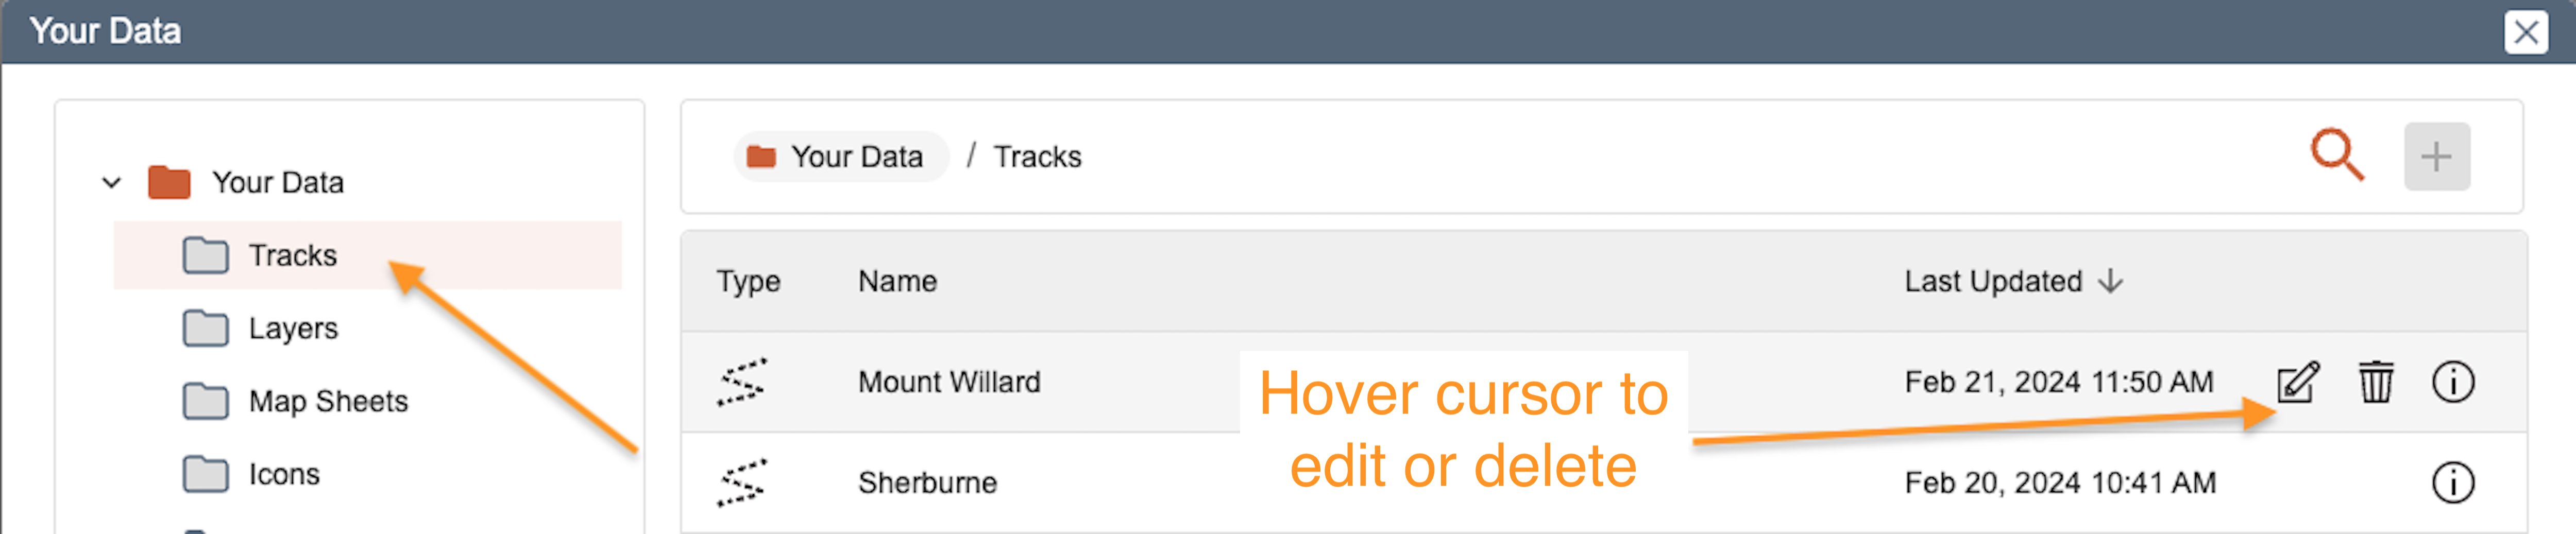
To view Your Tracks on the web, click on the Your Data button and then select the Your Tracks folder
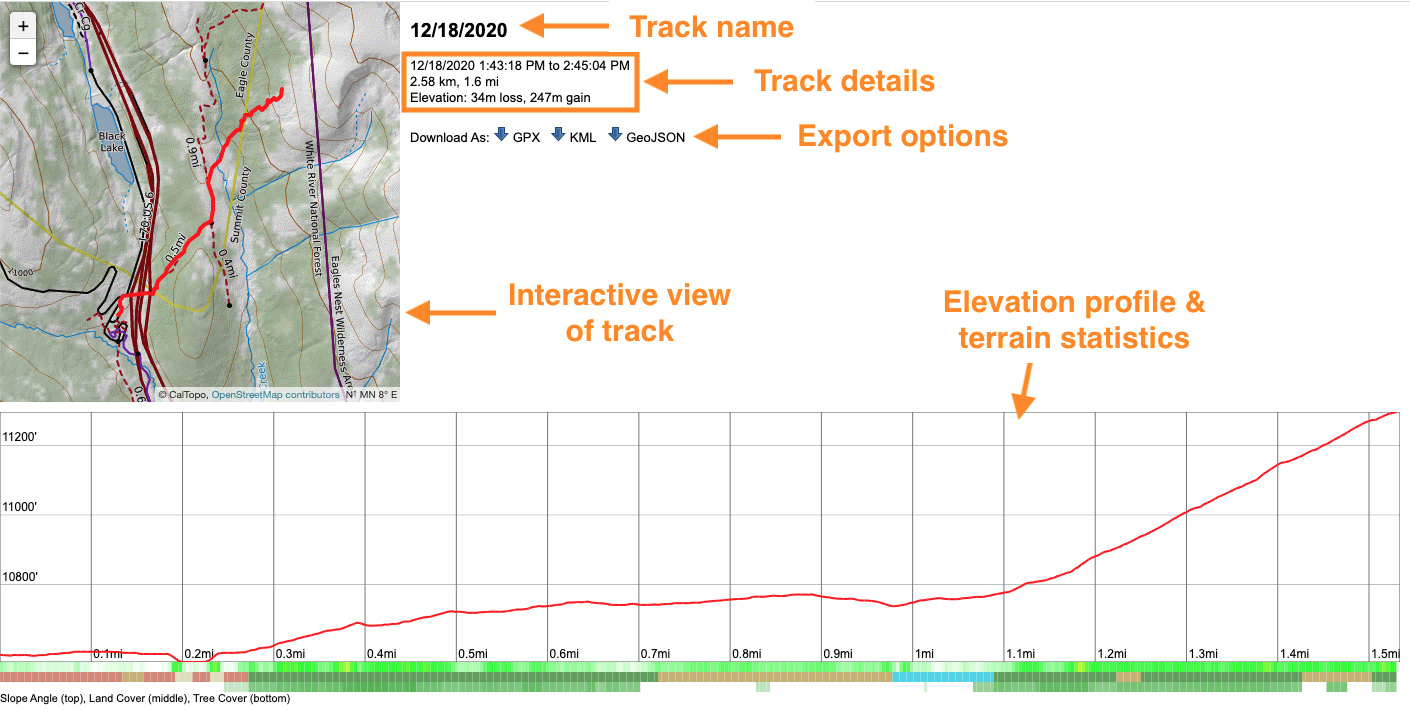
There are two ways to see the details of a track on the web. First, click on a track name to open up the Track Details Page for that track. On the Track Details Page you'll see an interactive image of the track as seen on the map, the track name, start and end time, total distance, elevation loss and gain, and options for exporting the track. You will also see an elevation profile along with terrain statistics such as slope angle, land cover, and tree cover for the track.
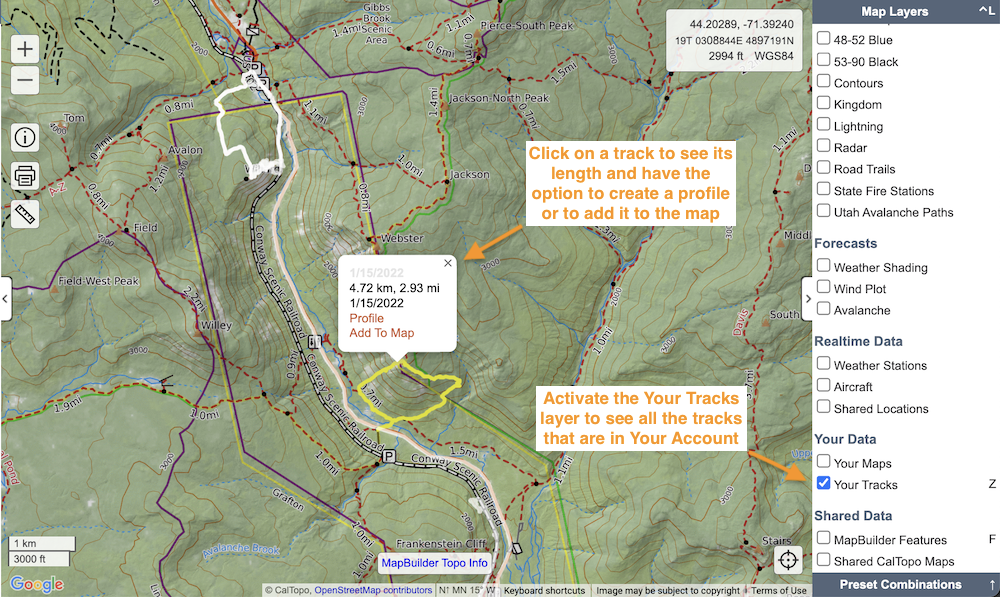
Second, in the Map Layers Menu scroll down and check the Your Tracks layer. This will put all your tracks in your account on the maps as semi-transparent overlays. If you click on the semi-transparent track you want, you will see a name link, length of the track, date of the track, a Profile link, and an Add to Map link. If you click the name you will be brought to the Tracks Detail Page, clicking Profile will give you a profile in the Map Viewer, and finally if you want the track to be added to the map as a line you can click Add to Map.
Tracks on the Mobile App
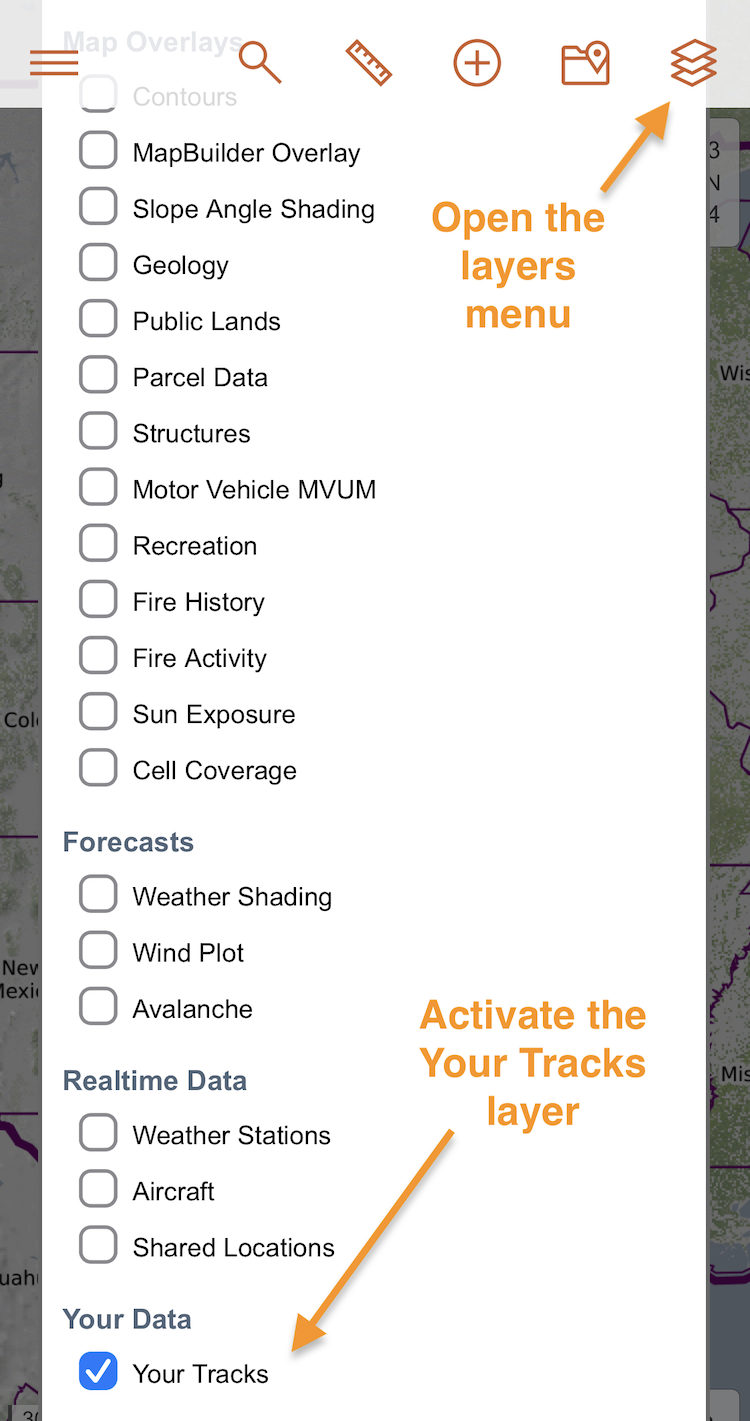
Like on the web there are two ways to see your tracks on the Mobile App. You can turn on the Your Tracks layer in the layer menu and see all your tracks in your account in the map viewer as semi-transparent overlays. You can also find a track by going to a list of tracks in your account.
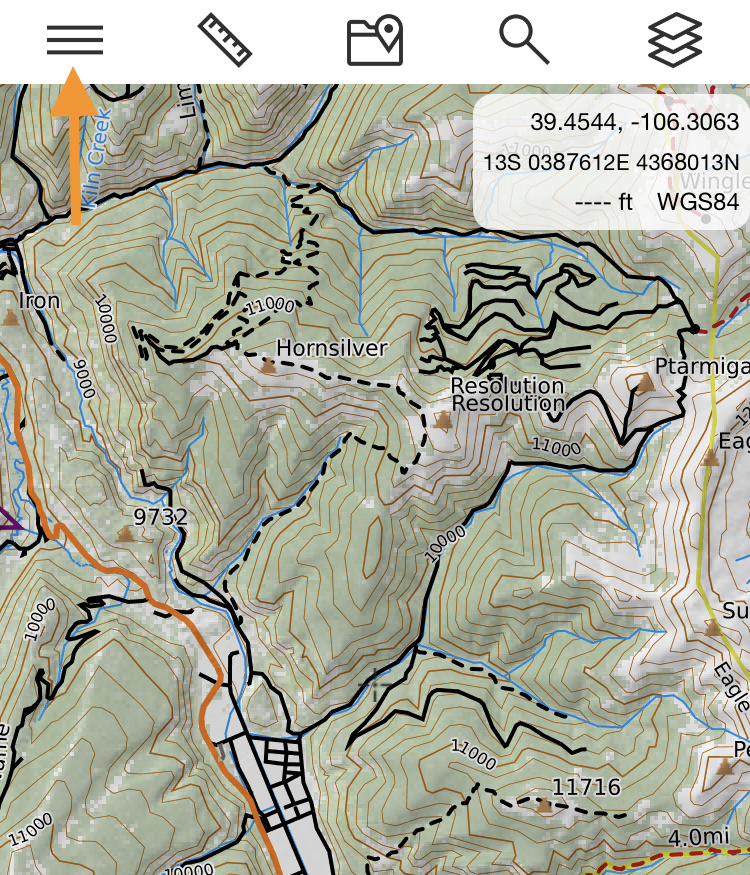
To see a list of tracks saved to your account on the mobile app, tap the three bar main menu and select Tracks.
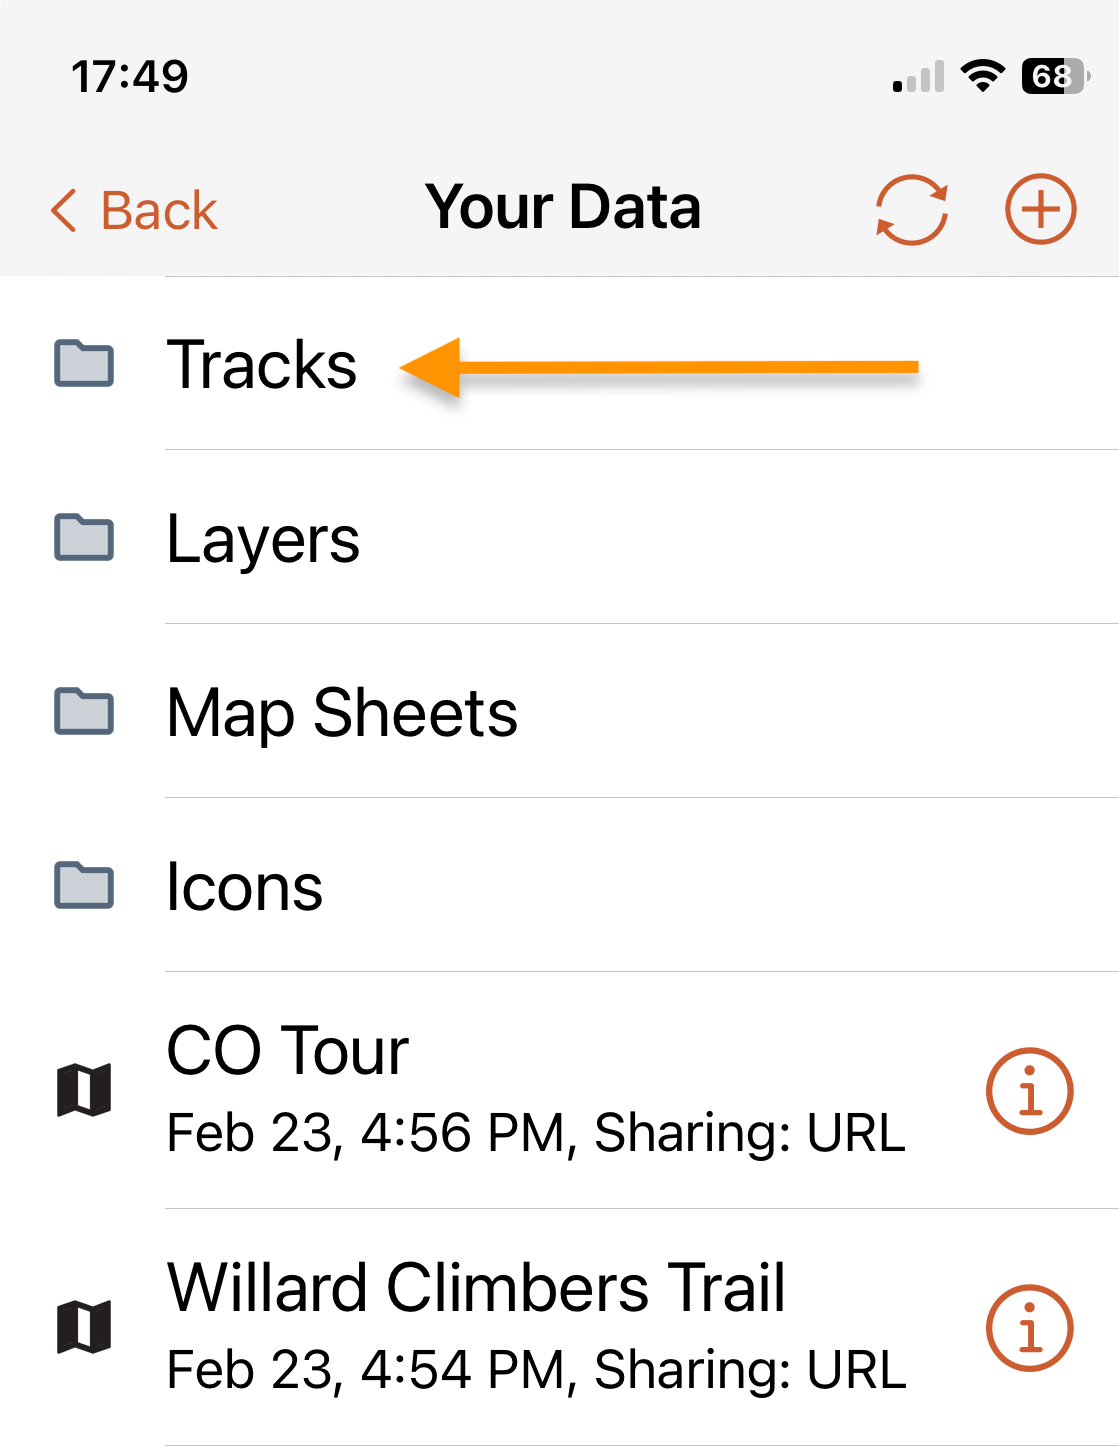
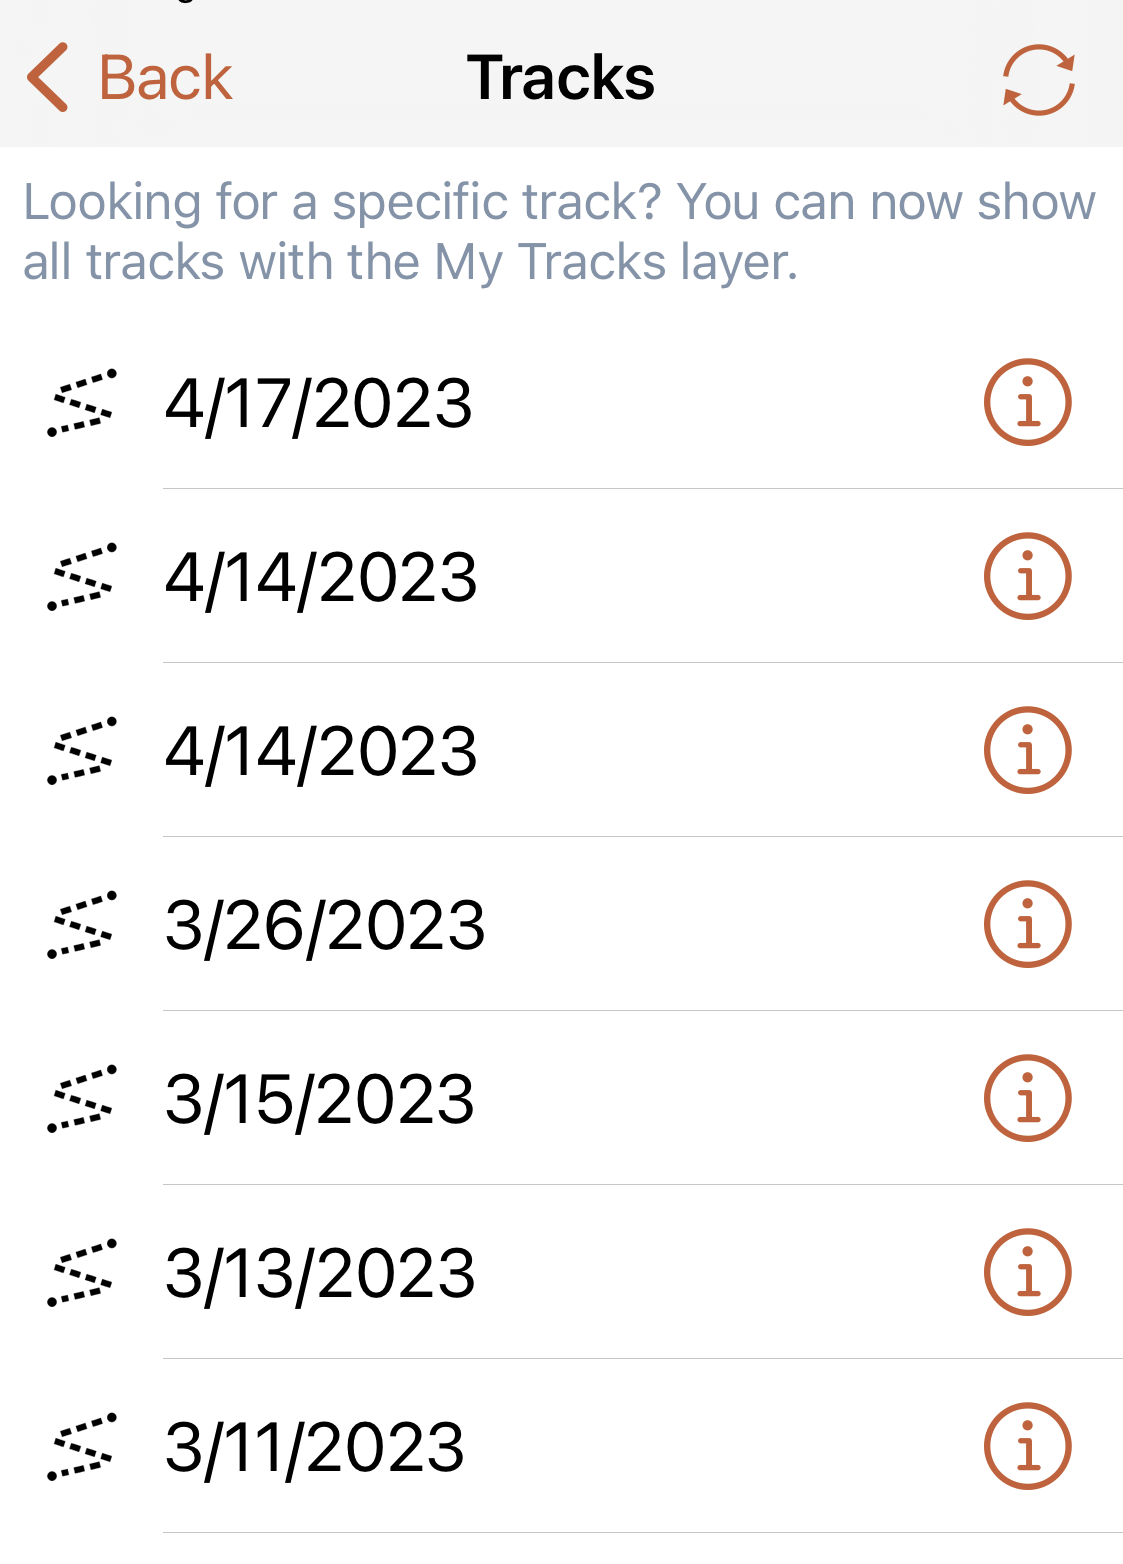
The Tracks page will open with all your tracks displayed. You can tap the sync arrows icon to sync your tracks with your account.
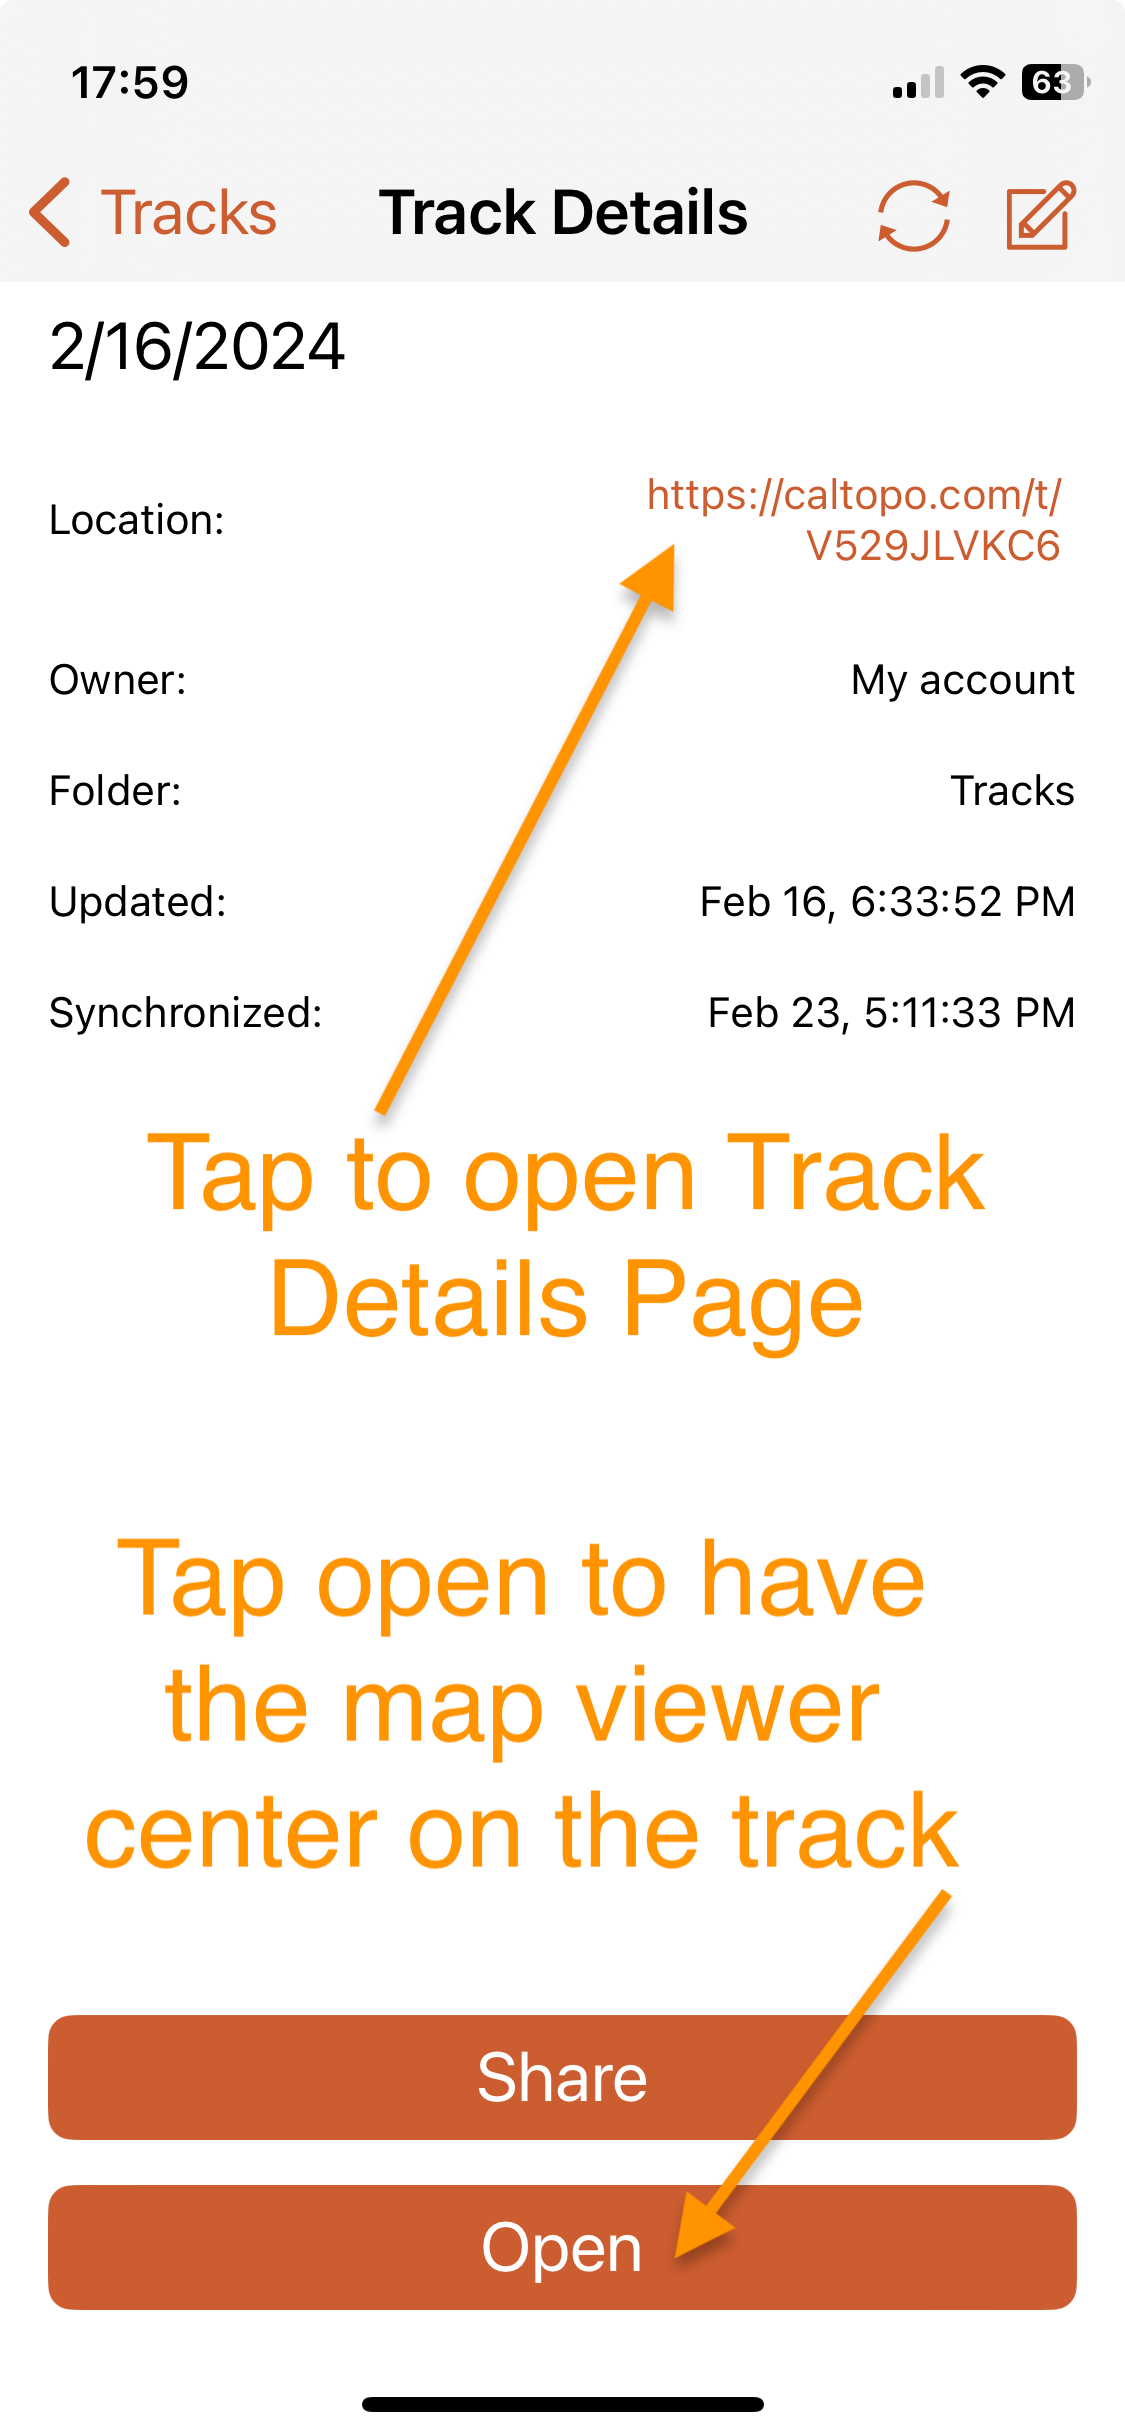
Tapping a track will open some track information. There you will find a link to the Track Details Page we mentioned earlier. On the bottom of that information page you will see Center on Map. Clicking this will activate the Your Track layer and bring you to the track with the dialog box open that will allow you to see a profile, navigate to the start or finish of the track, or add the track to the map.
When you tap Center on Map you activate the Your Tracks layer and although you will be centered on the track you chose, all your tracks will appear as a semi-transparent line. Whether you arrive at your chosen track by first activating the Your Tracks layer or via the list and tapping on the Center on Map link you will need to uncheck the Your Tracks layer in the layer menu to hide all the tracks, otherwise you will have semi-transparent lines everywhere you have a track.
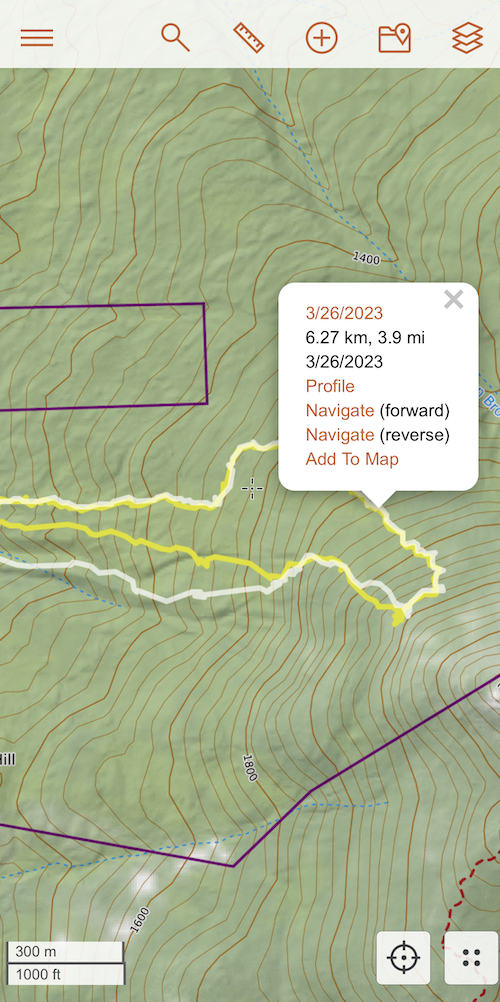
Regardless of how you found your track of interest you can use the dialog box and generate a profile, add the track as a line to the map, and navigate to the start or the finish of the track. Tracks cannot be deleted from your account or their names be edited from the Mobile App. You can only do that from your account on the web.
GPS Accuracy
Users often ask about the accuracy of recorded tracks with the mobile app. Some users point to how track length and elevation recorded with the CalTopo mobile app may differ from planned routes or tracks recorded by other GPS devices or apps.
It's important to remember that many factors can influence GPS accuracy, such as satellite geometry, signal blockage or reflection, weather and climate conditions, and the actual design and quality of the GPS receiver in the mobile device itself. In addition, raw GPS data can be messy, and so some programs use techniques to smooth the tracks when recording or importing them, such as applying a smoothing algorithm.

At this time, CalTopo does not do any smoothing when recording tracks in its own app. This, along with a huge range of other outside factors, can cause the resulting recorded track to differ from the planned route or recorded routes from other GPS devices or apps.
Although the overall accuracy is still incredibly good, these differences are expected and are a normal part of the experience of using any GPS product. Check out this blog post for a more in depth discussion of GPS accuracy as well as the results of an interesting experiment comparing 4 different devices!
Setting the Track Recording Detail
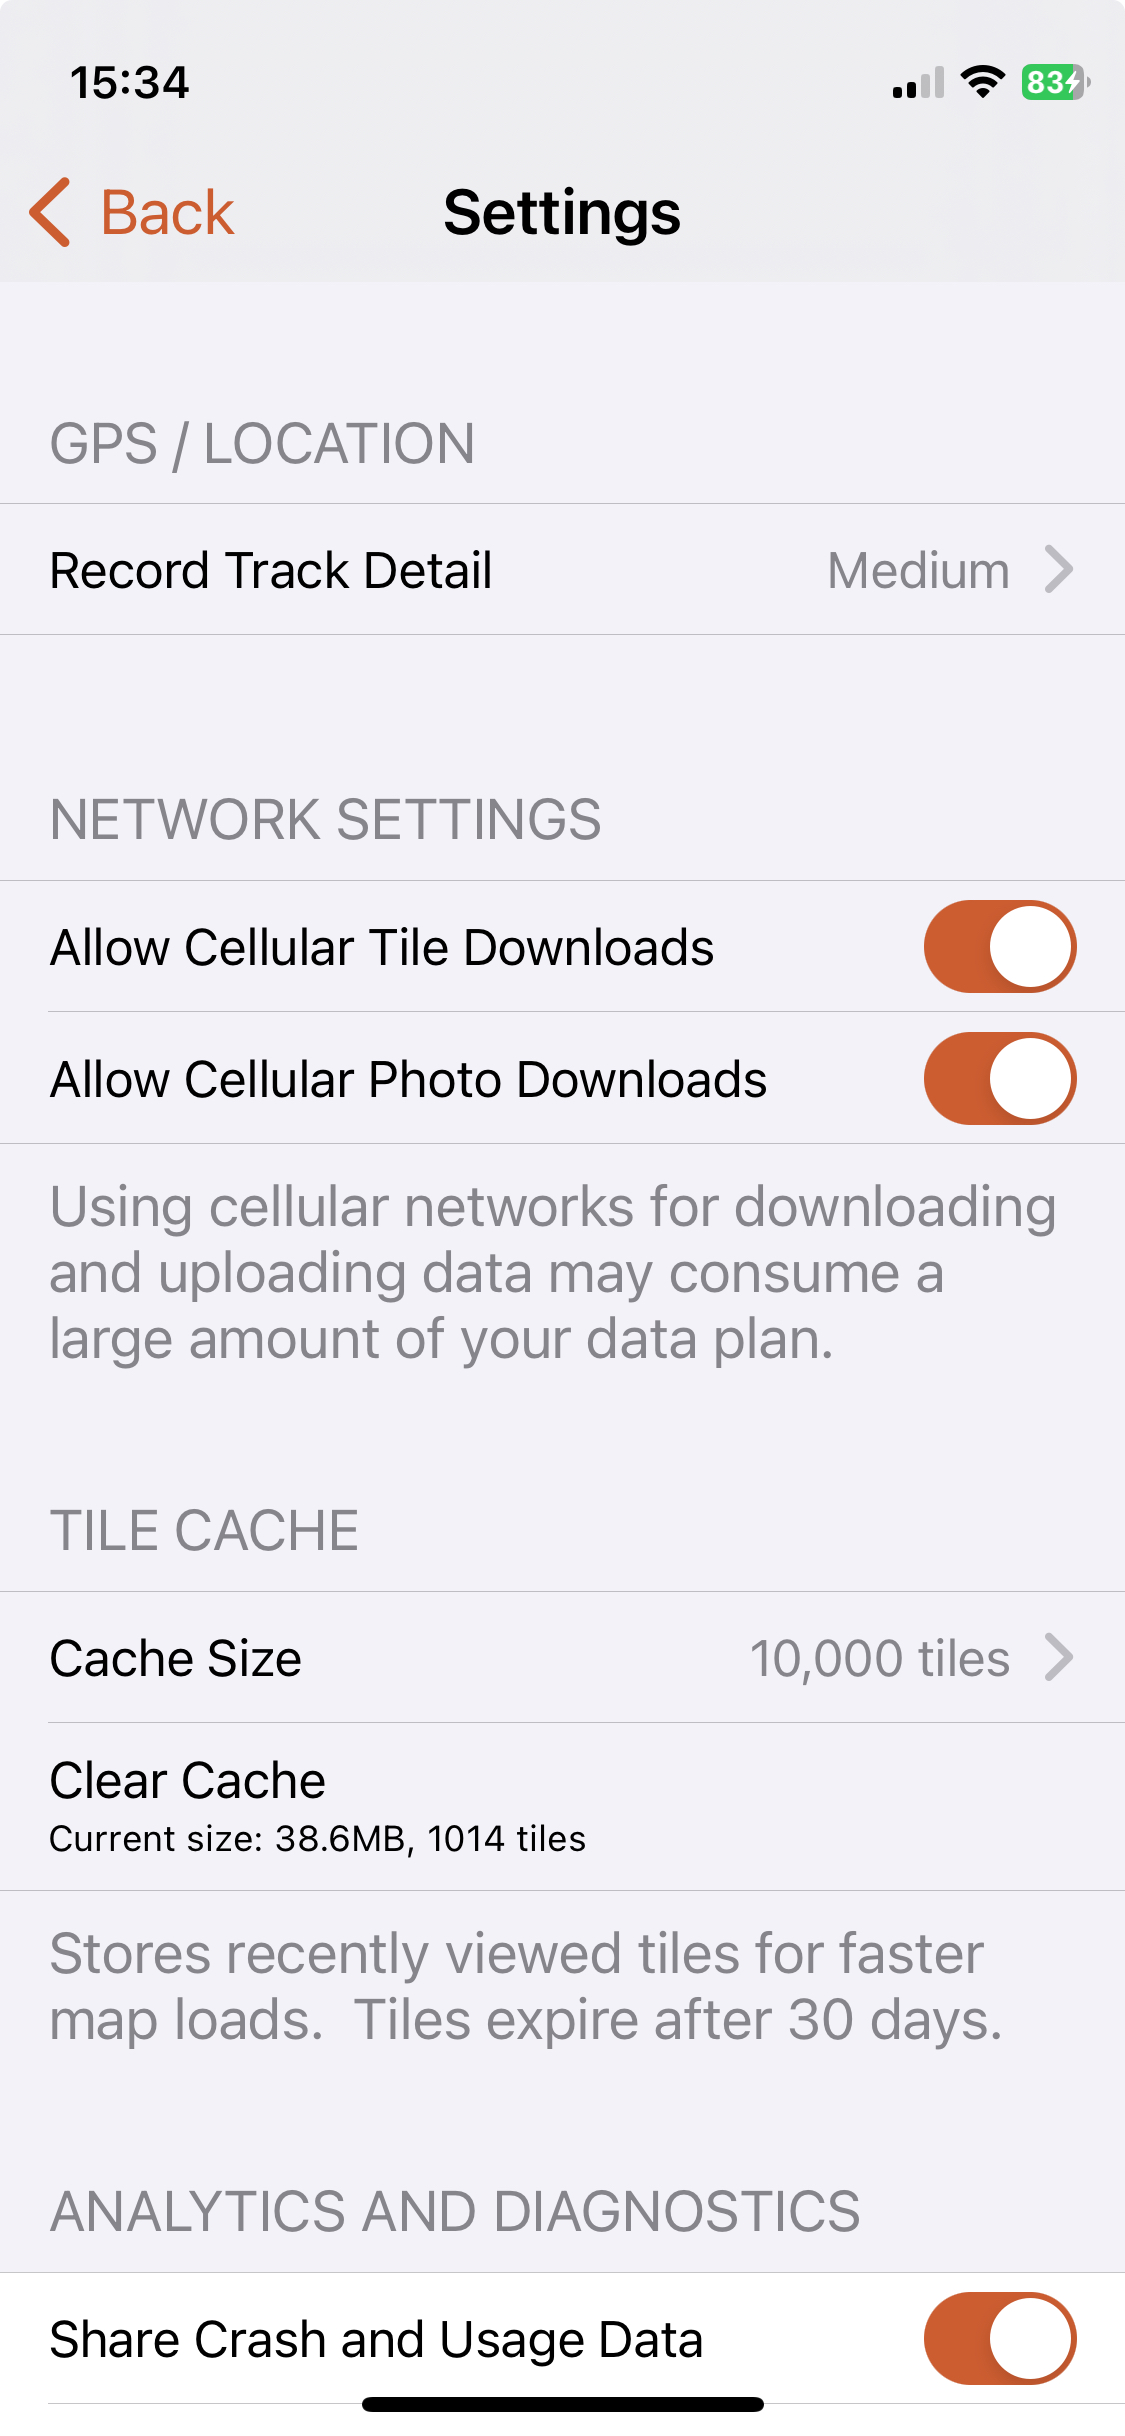
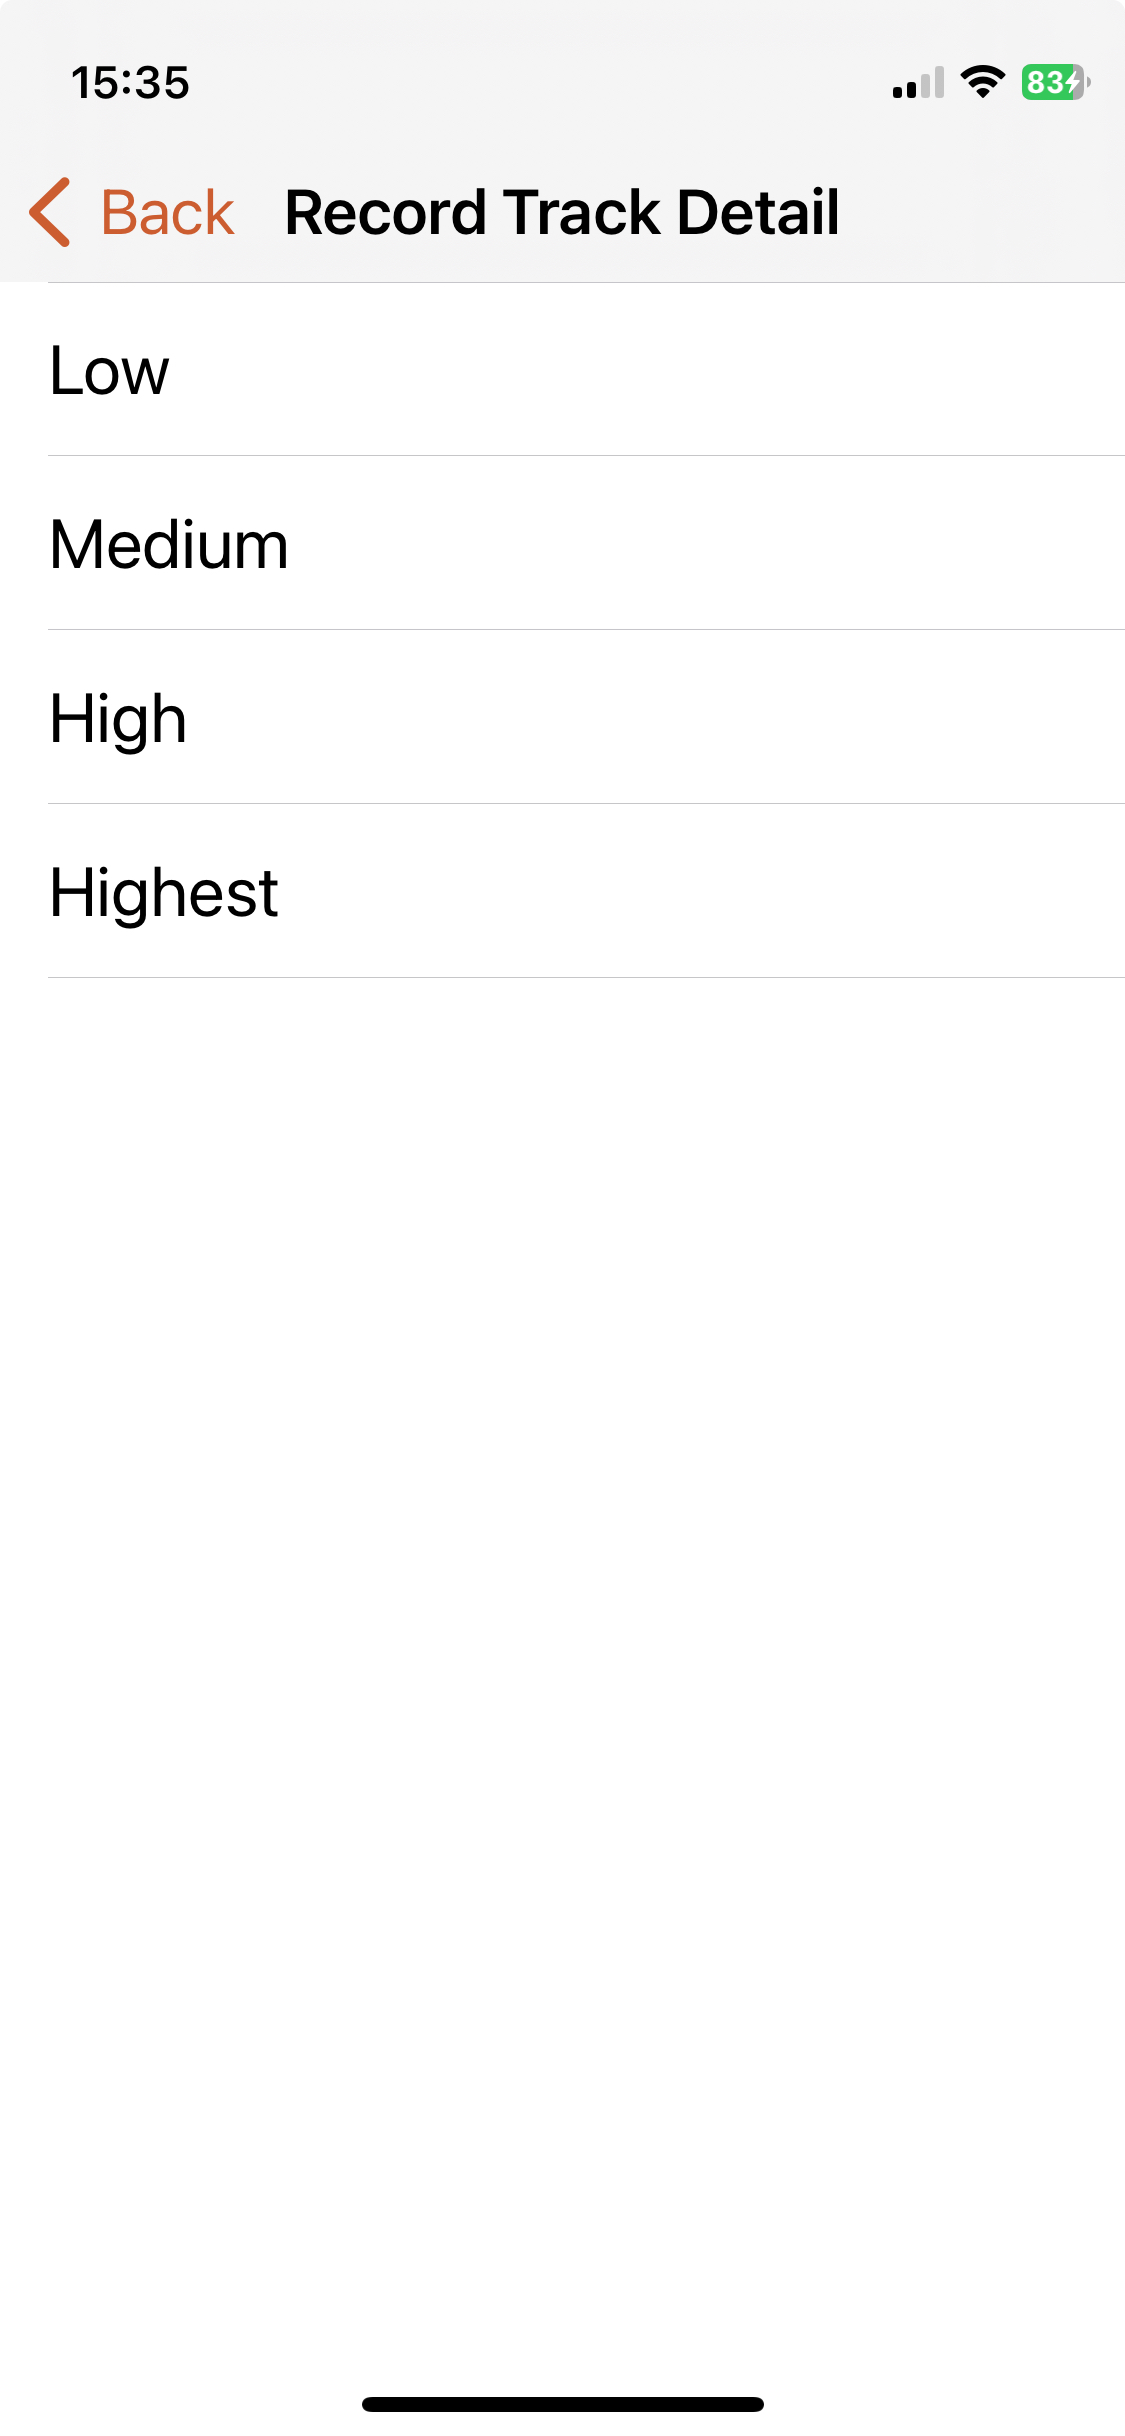
As mentioned above, CalTopo does not smooth tracks. One way to help reduce the messiness or errant zigzags is to choose the correct setting for how often the GPS will take a data point. Tap the three-bar menu button, then tap Settings. There, you can choose the Record Track Detail. You will find four settings: Low, Medium, High, and Highest. Here is how often the GPS will record a data point for each setting:
- Low: Every 30 seconds
- Medium: Every 10 seconds
- High: Every 5 seconds
- Highest: Every 2.5 seconds
It may be somewhat counterintuitive, but choosing the highest setting may create a more inaccurate track. The setting you should choose is based on the speed at which you will be traveling. For someone in a car, Highest would be appropriate. For downhill mountain biking or skiing, High is best. For walking, hiking, uphill skiing, or mountain biking, Medium is the best choice. For a slow walk, bushwhack, or steep climb, Low is the best setting.
Troubleshooting Recording Tracks
Why do I get straight lines when I record a track?
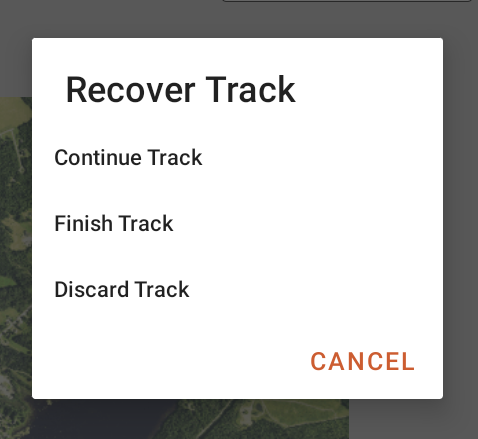
The CalTopo mobile app uses your mobile device’s GPS to determine where you are when you use any of the app’s location functions, including recording a track. However you may notice straight lines in the track that don’t accurately reflect where you actually travelled, typically after the app has been in the background (such as when the screen is off and the device is in your pocket). You may also see a Recover Track dialog with options for continuing, finishing or discarding the track. Examples of both of these are shown below.
The most common cause for straight lines in recorded tracks is aggressive battery management by your mobile device that restricts background access to the GPS or kills the app when it’s in the background. The straight lines occur because the app wasn’t allowed to access the GPS while the app was backgrounded so the track jumps from the last time the GPS was accessed to your current location, resulting in a straight line.
This can be resolved by ensuring the CalTopo mobile app is allowed to run in the background with continued access to GPS. Battery management settings vary by mobile device although commonly this can be fixed by turning battery optimization and battery saver settings off in your mobile device’s settings for the CalTopo app. Some mobile devices also have system management settings that may affect what an app is allowed to do in the background. Consult your mobile device’s user manual if you are unsure how to change battery and/or system management settings.