Moving Your Data From Other Mapping Programs
in this lesson
With all the recent improvements and exciting new features, you may want to move data from another digital mapping program to CalTopo. But where do you start? How do you go about moving the markers and waypoints you’ve meticulously added, the routes you’ve planned and the mobile tracks you’ve recorded? Never fear, you don’t have to give up all your carefully compiled data and hard-earned miles to embrace the power of CalTopo. This page will walk you through the entire process, from start to finish.
Topics on this Page:
- Exporting your data from other mapping programs
- Importing your data into CalTopo
- Tips for organizing your data in CalTopo
Get ready to level up your digital mapping game!
Exporting Your Data From Other Mapping Programs
The first step in this process is to export your data from the other mapping program. When you export your data, you will export it in a particular file format. CalTopo works with three different file formats: GPX, KML and GeoJSON. The most common format (and the one you will probably use) is GPX although each of these file types has it’s time and place. You can learn more about the information contained in each file type and when it might be a good choice in the File Types section.
Depending one what mapping program you are working with, the export process may be relatively straightforward or it may be a little complicated. To streamline things, we’ve compiled step-by-step instructions and links from some of the most common mapping programs below. Scroll through or click to jump to a specific program:
AllTrails
Data can be exported from the AllTrails website in a wide variety of file formats. We will cover how to export one of your recordings or maps here.
Export one of your recordings:
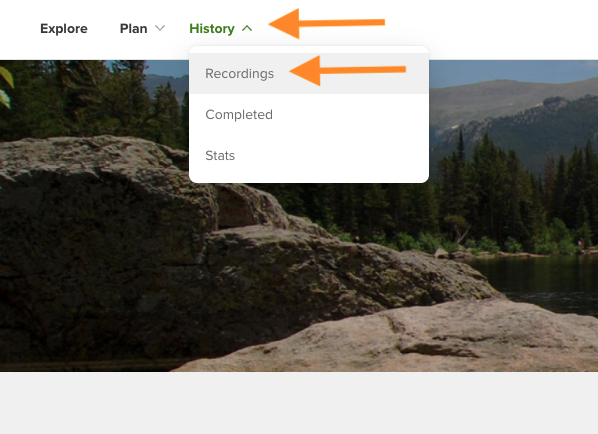
- Log into alltrails.com on the web. Hover over History in the upper right and select Recordings from the drop down menu that appears.
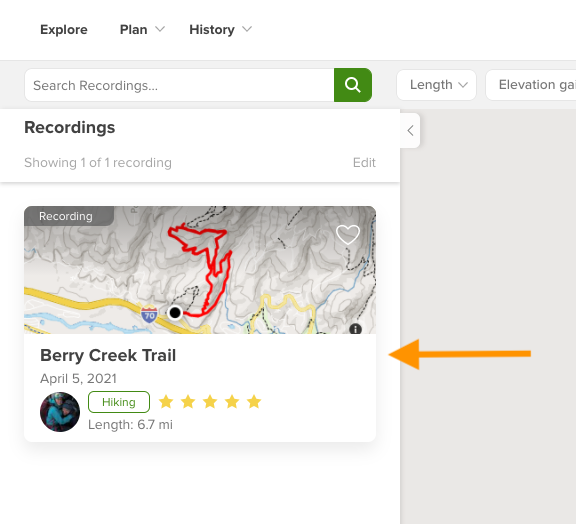
- Click on the name of the recording to open the recording page.
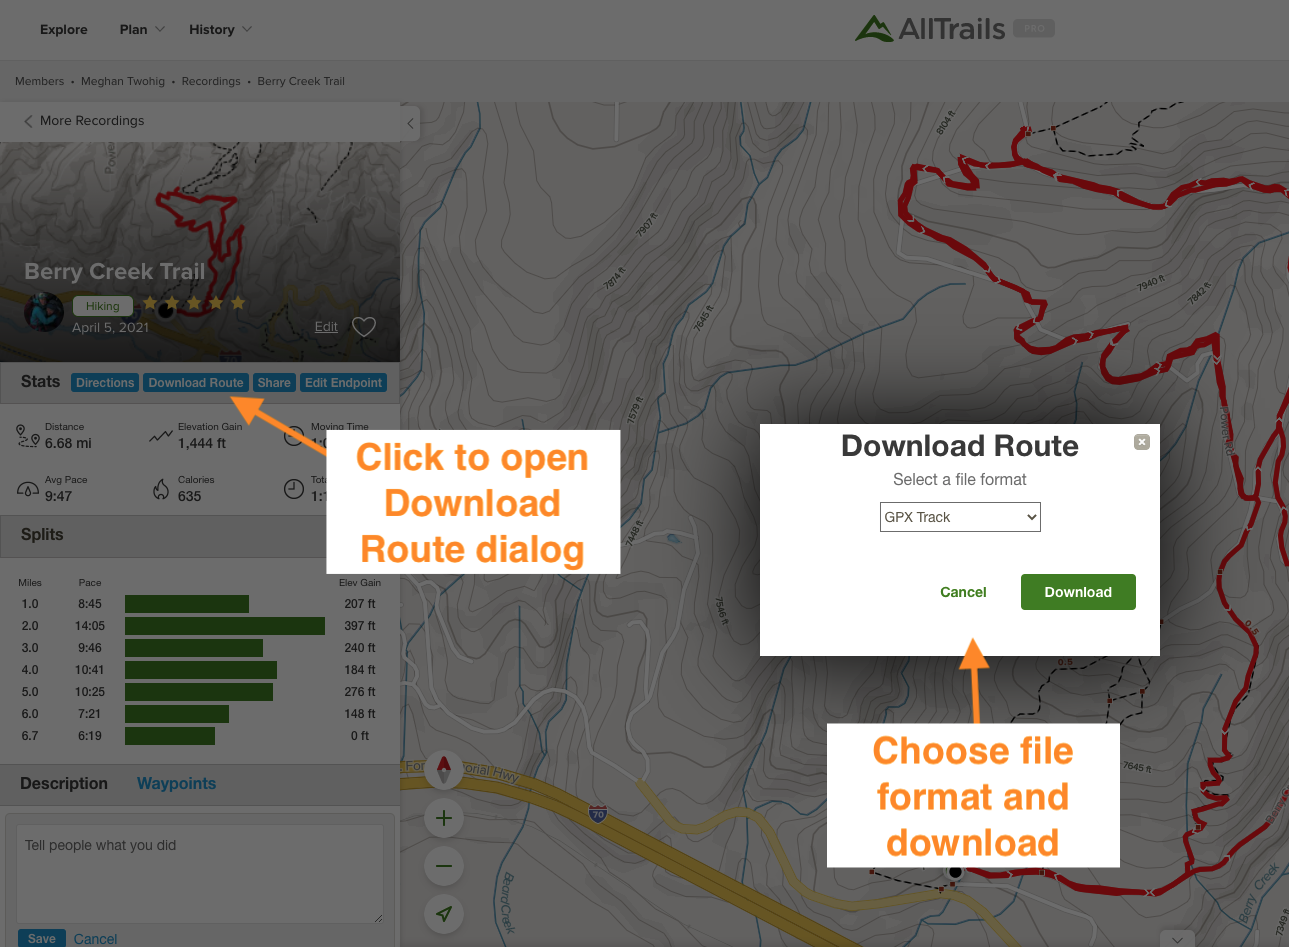
- Click Download Route to export the recording.
- Select the file format that you wish to export and then click Download.
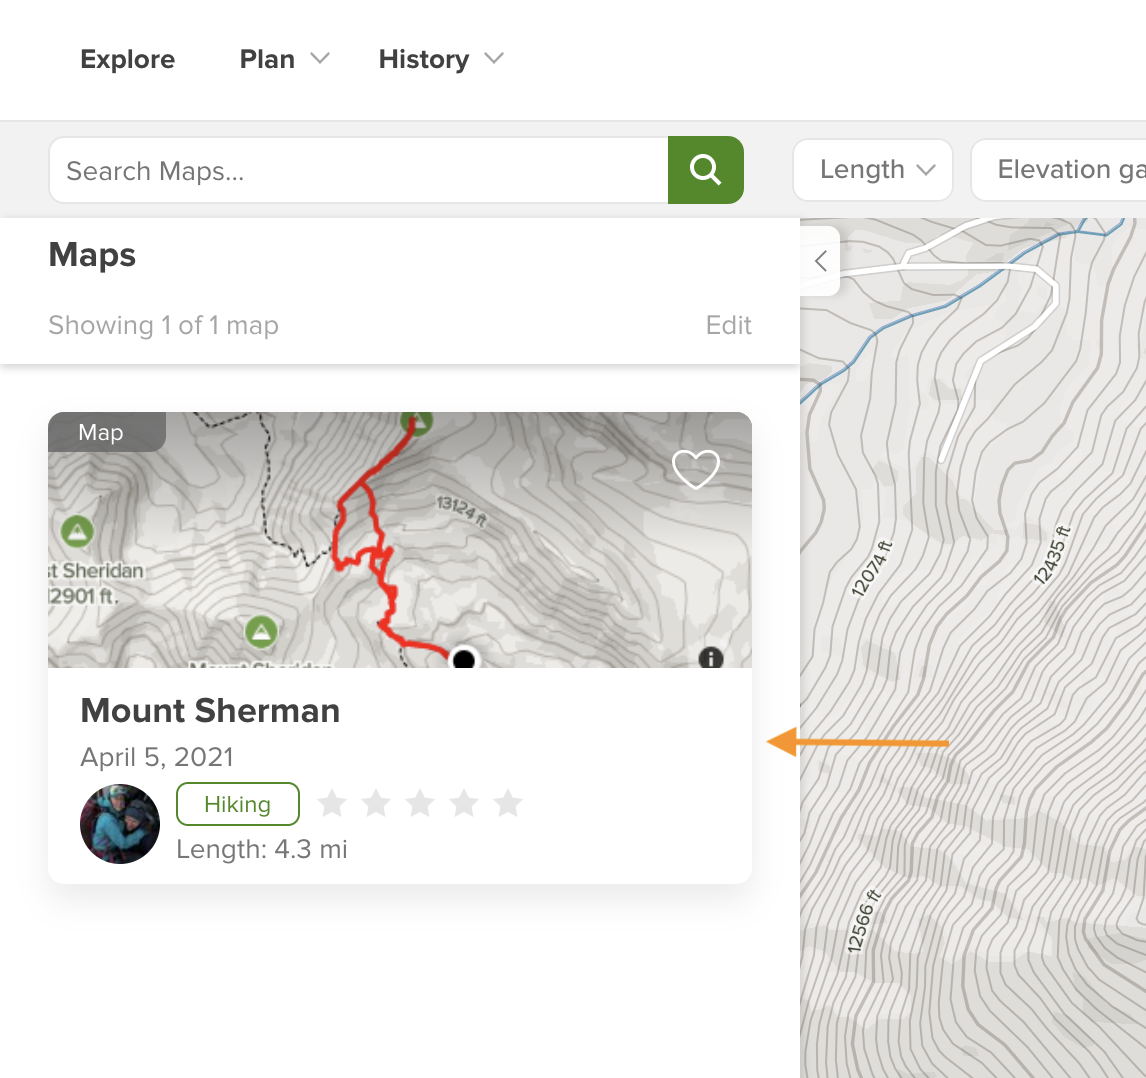
Export one of your maps:
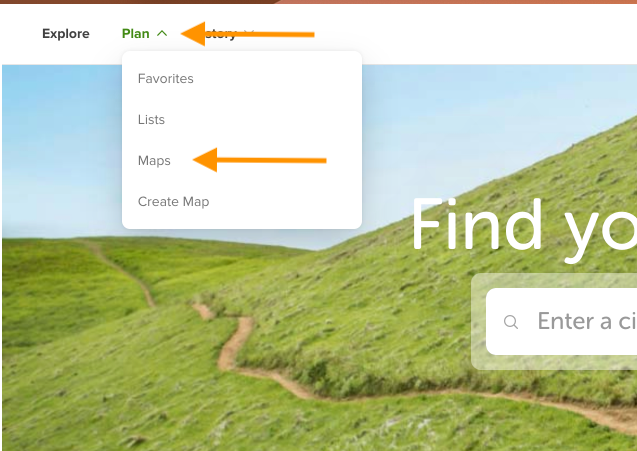
- Log into alltrails.com on the web. Hover over Plan in the upper right and select Maps from the drop down menu that appears.
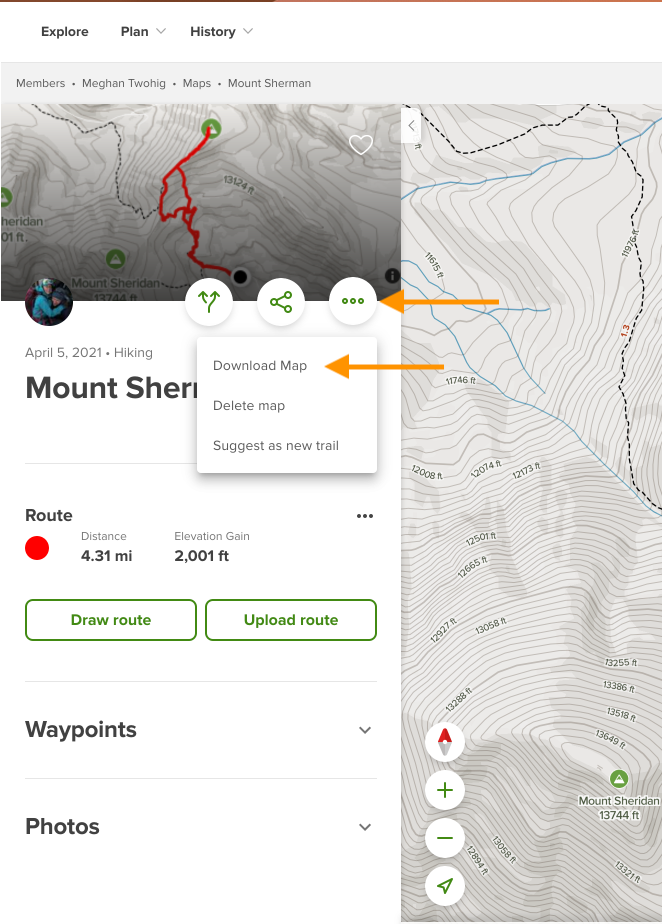
- Click the name of the map you wish to export.
- Click the 3 dot menu and select Download Map to open the Download dialog.
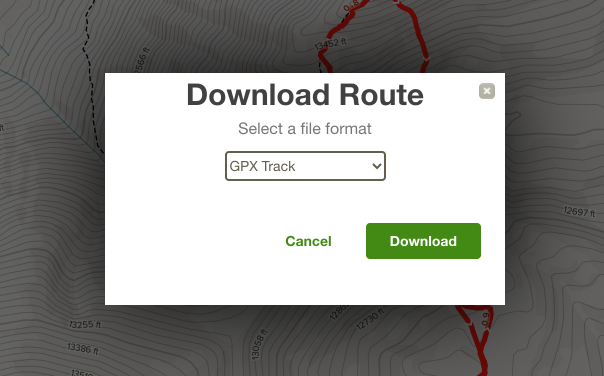
- Select the file format that you wish to export and then click Download.
Tip: You can also export data from a trail page or another member’s recordings or maps. Please see AllTrails’ support page for more information on how to export from those sources.
Avenza
Data can be exported from the Avenza mobile app as a GPX or KML/KMZ. We will cover how to export a single map feature or all the map features on a map here.
Export a single map feature:
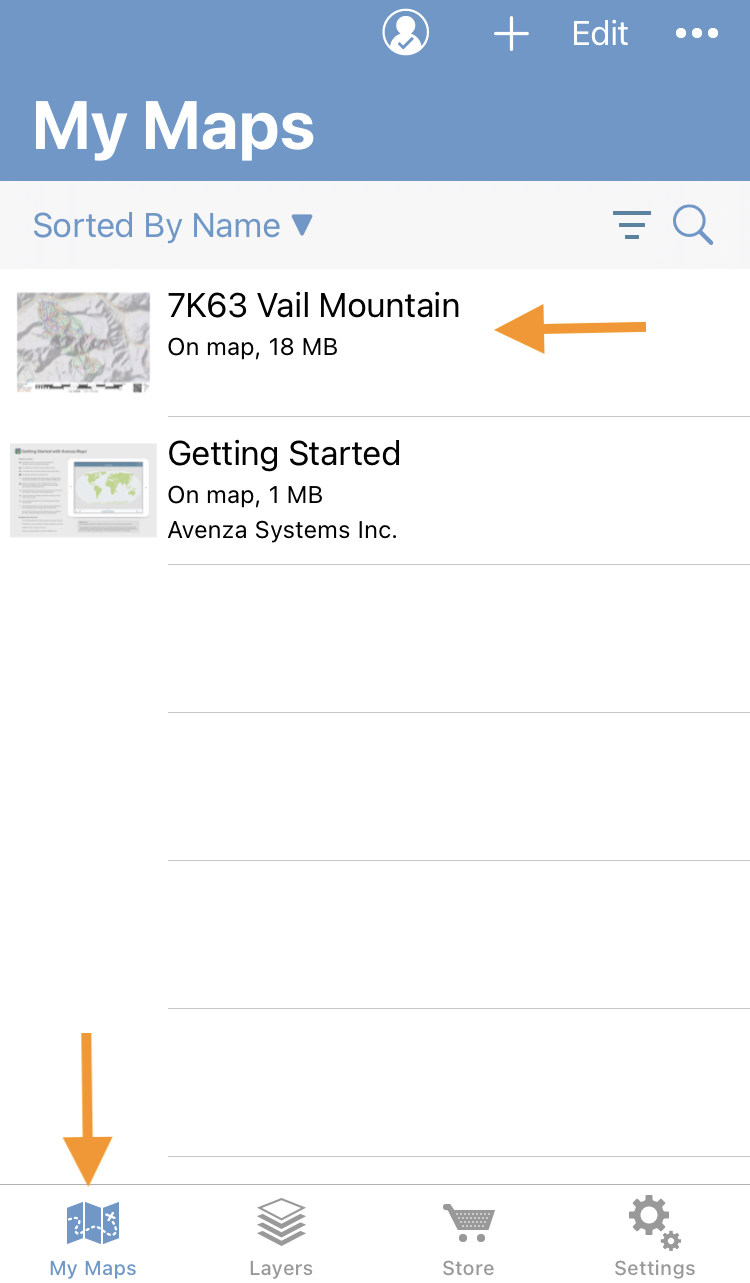
- Log into the Avenza mobile app and tap the My Maps icon in the lower left. Select the map you wish to export data from.
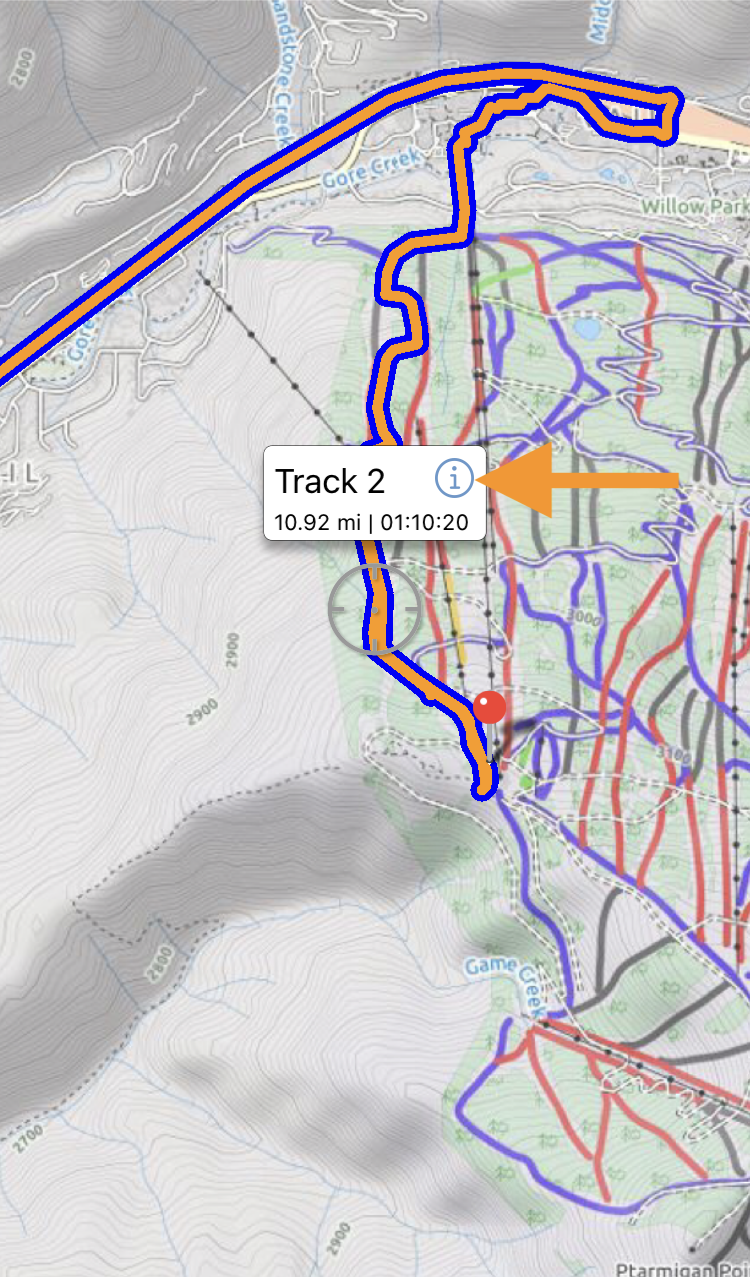
- Tap the map feature (placemark, track etc) on the main map and then tap the information icon in the map feature dialog to open the Edit screen.
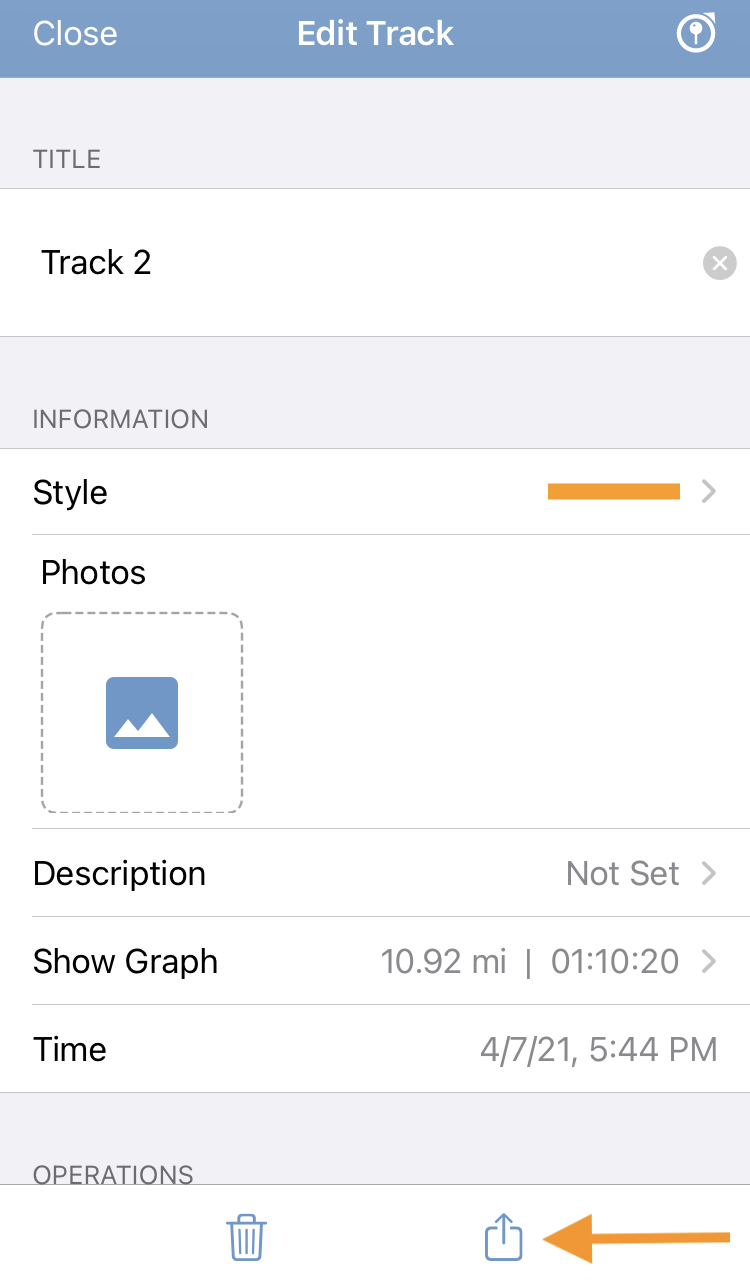
- Tap the Export Map Features icon in the lower right and select a destination for the file (email, cloud storage app, etc). Available destinations will depend on what you have on your mobile device. The simplest method is often to email the file to yourself.
Export all the map features on a map:
- Log into the Avenza mobile app and tap the My Maps icon in the lower left. Select the map you wish to export data from.
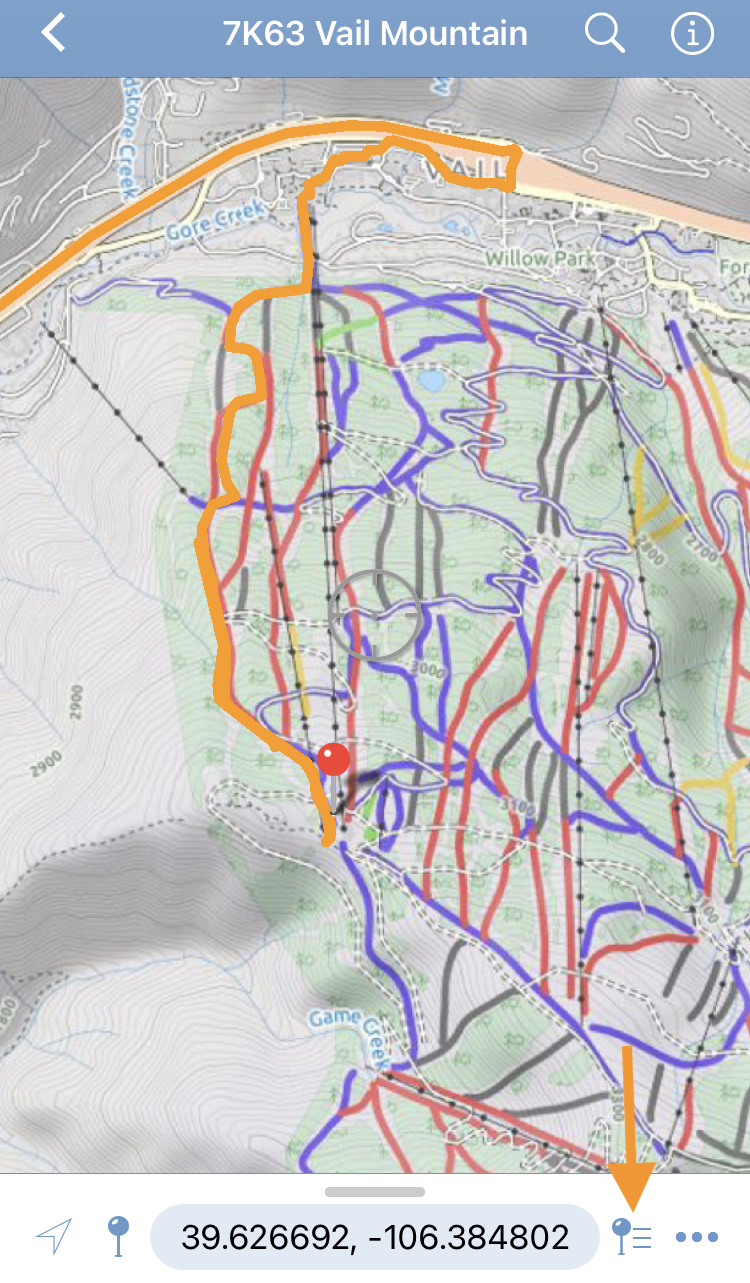
- Tap the Map Features icon in the lower right.
- Tap the Export Map Features icon in the lower right.
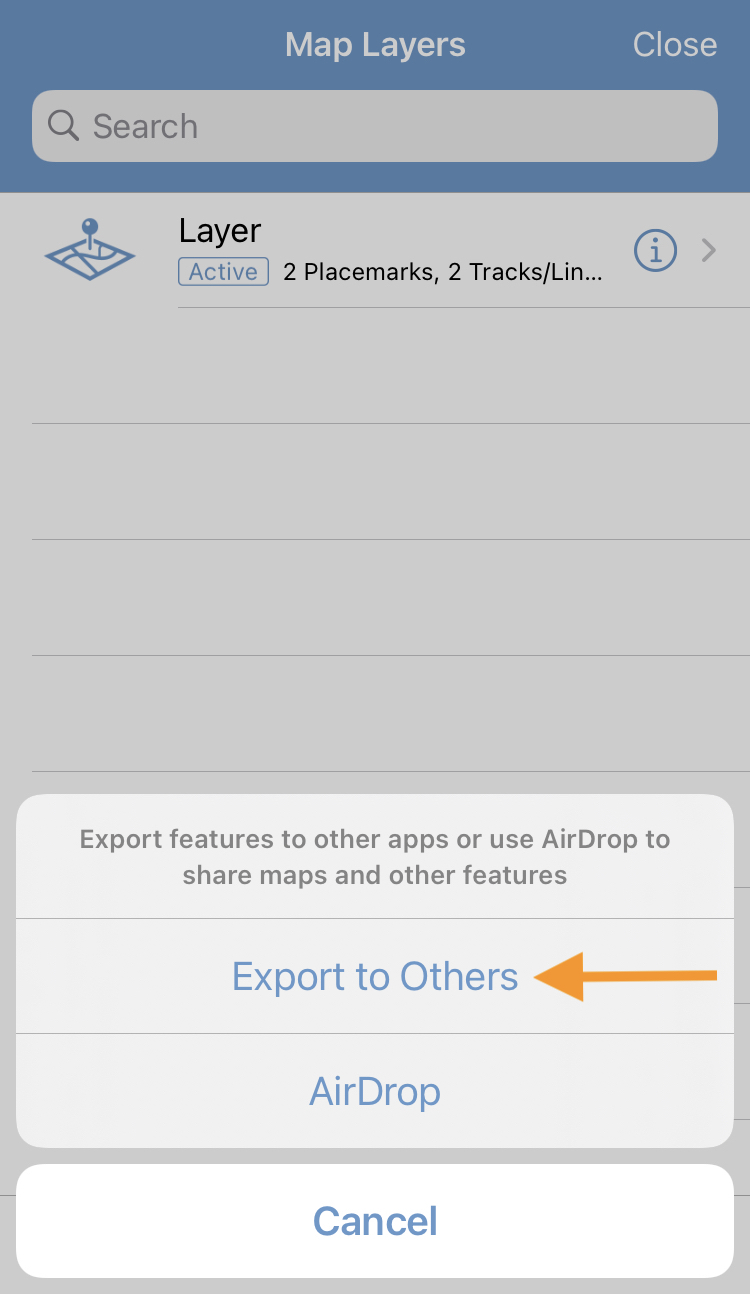
- Choose Export to Others.
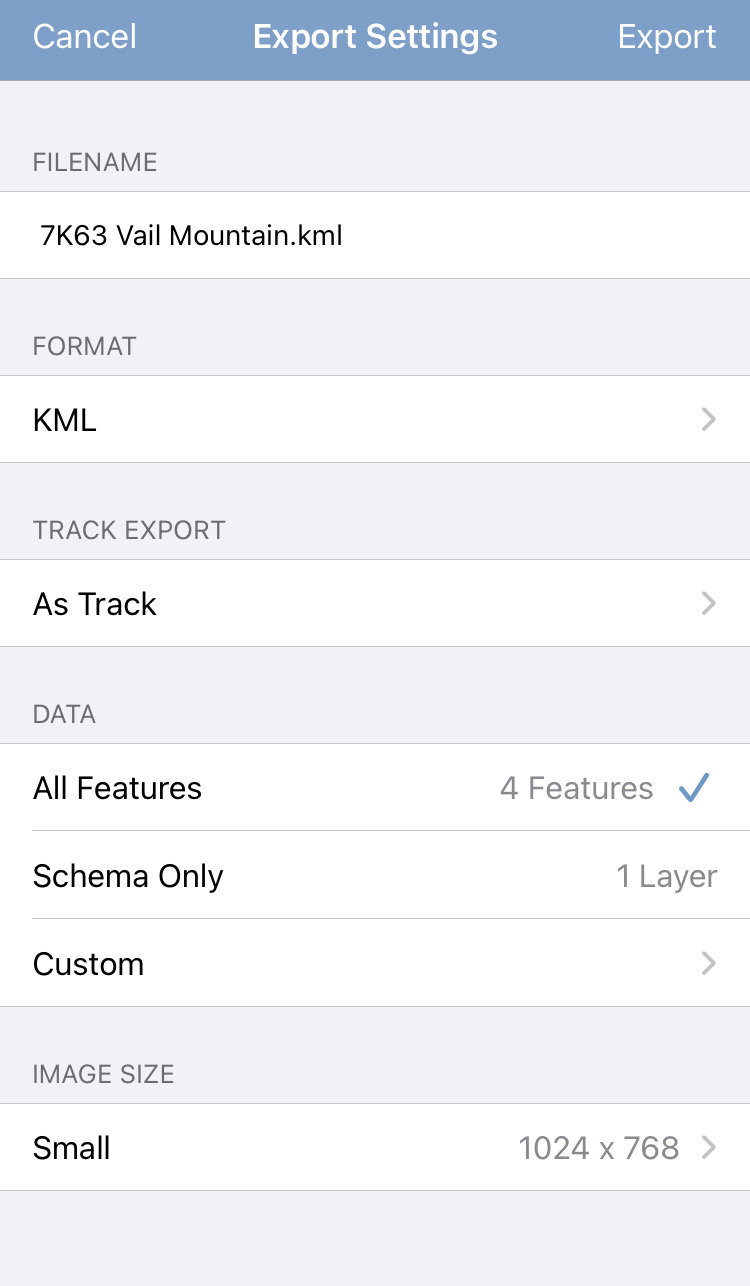
- Select the desired file format and export settings. Tap Export and then choose a destination for the file (email, cloud storage app, etc). Available destinations will depend on what you have on your mobile device. The simplest method is often to email the file to yourself.

Backcountry Navigator
If you’re using Backcountry Navigator Pro, data can be exported as a GPX or KML/KMZ file from the BCN Pro mobile app. If you are using Backcountry Navigator XE, data can be exported as a GPX or KML/KMZ file from the Backcountry Navigator XE website. The processes for each application are described below.
Export from Backcountry Navigator Pro:
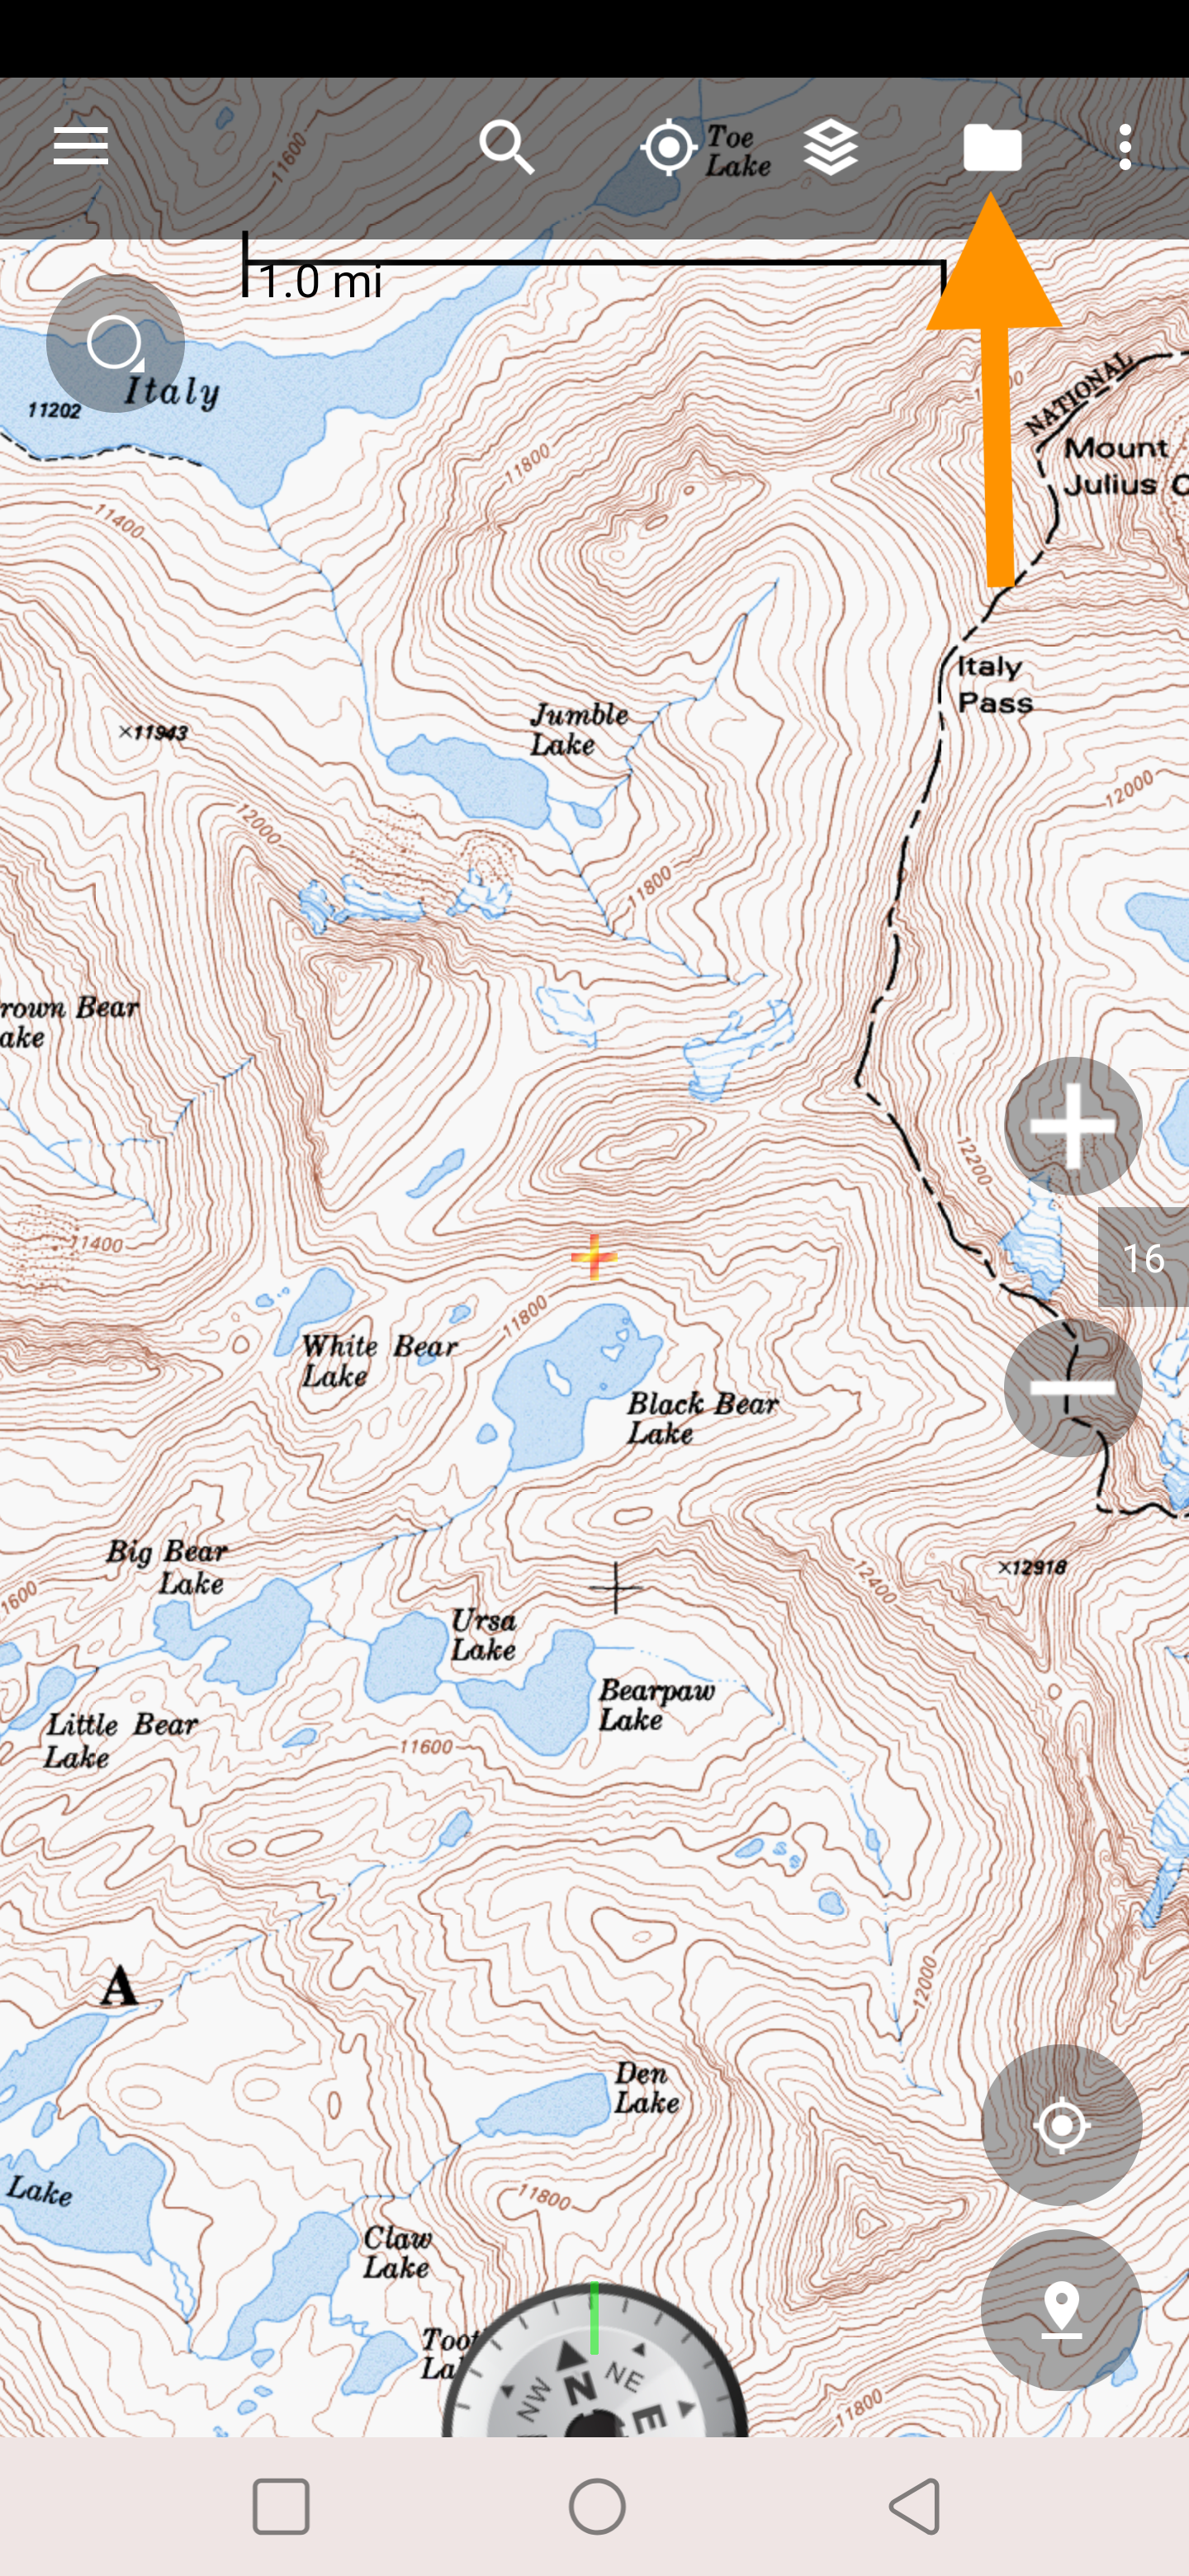
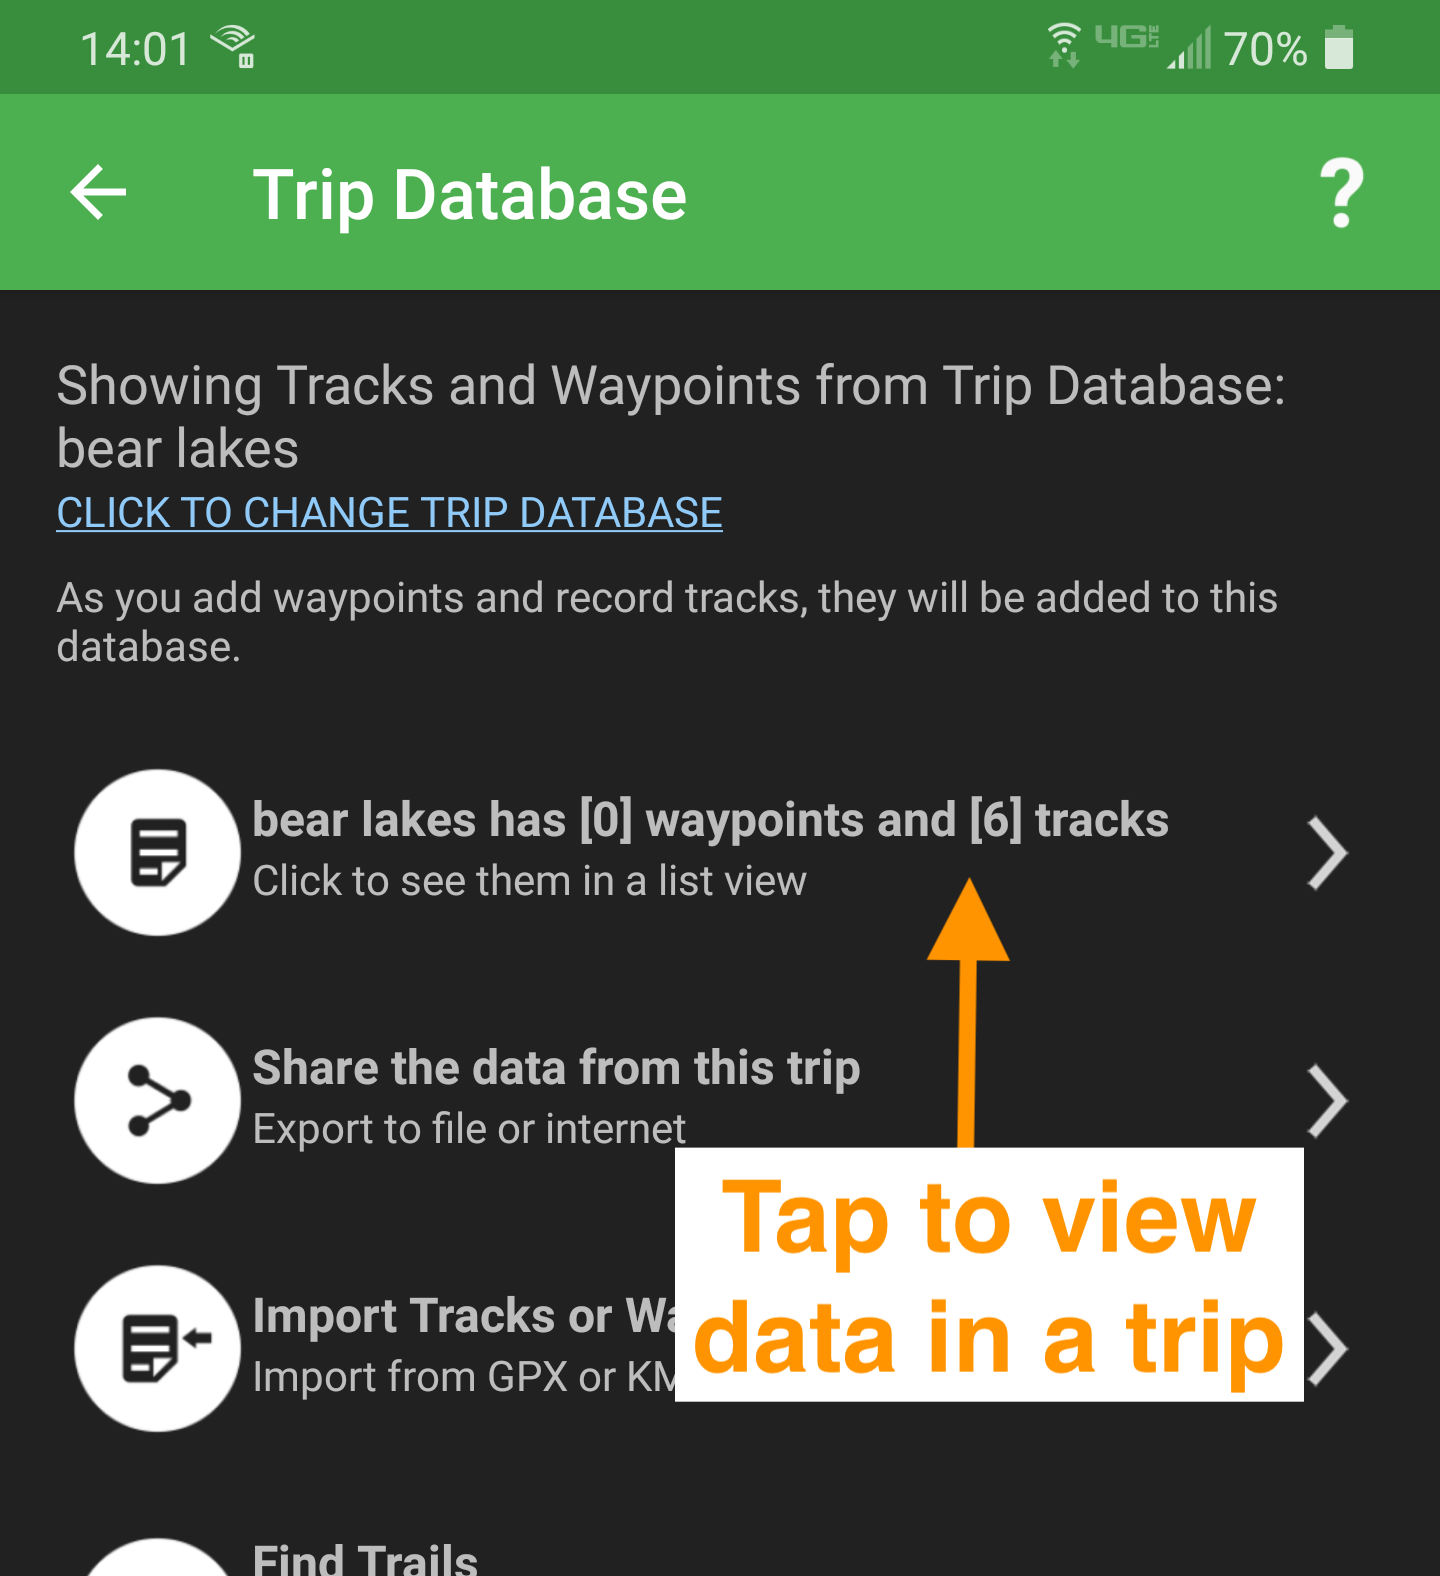
- Log into the Backcountry Navigator Pro mobile app. Tap the Trip Database icon in the upper right to open the Trip Database screen.
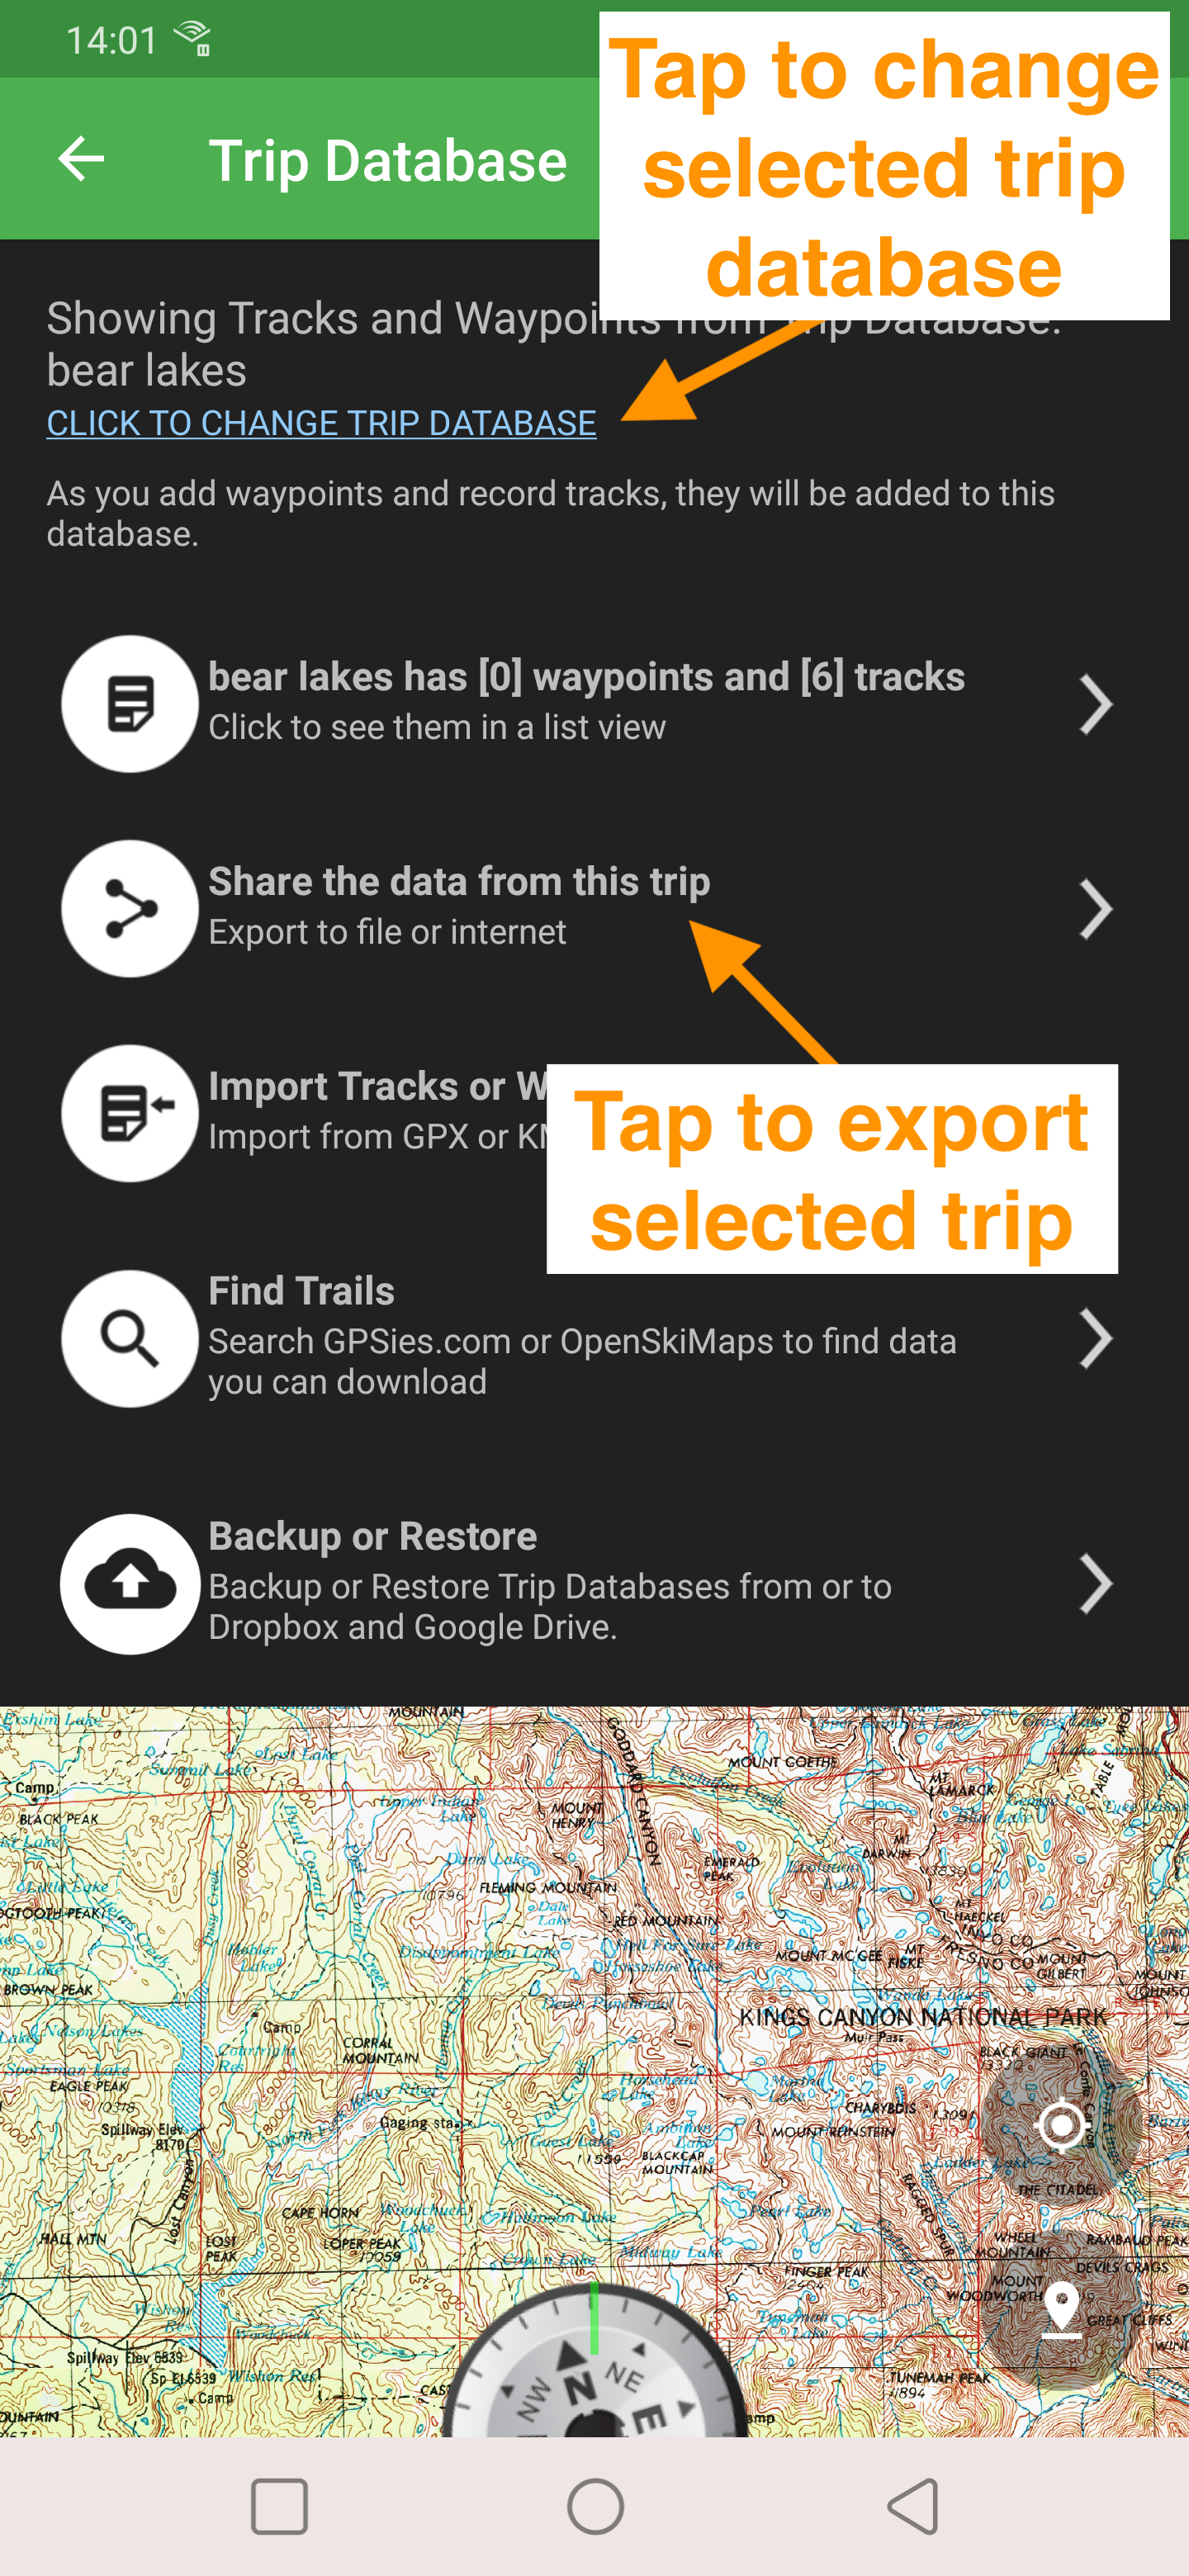
- Make sure you have the Trip Database with the data you wish to export displayed. If you do not, tap CLICK TO CHANGE TRIP DATABASE link to select the appropriate Trip Database.
- To export all the data in the trip database in one file, tap Share the data from this trip to open the Export screen.
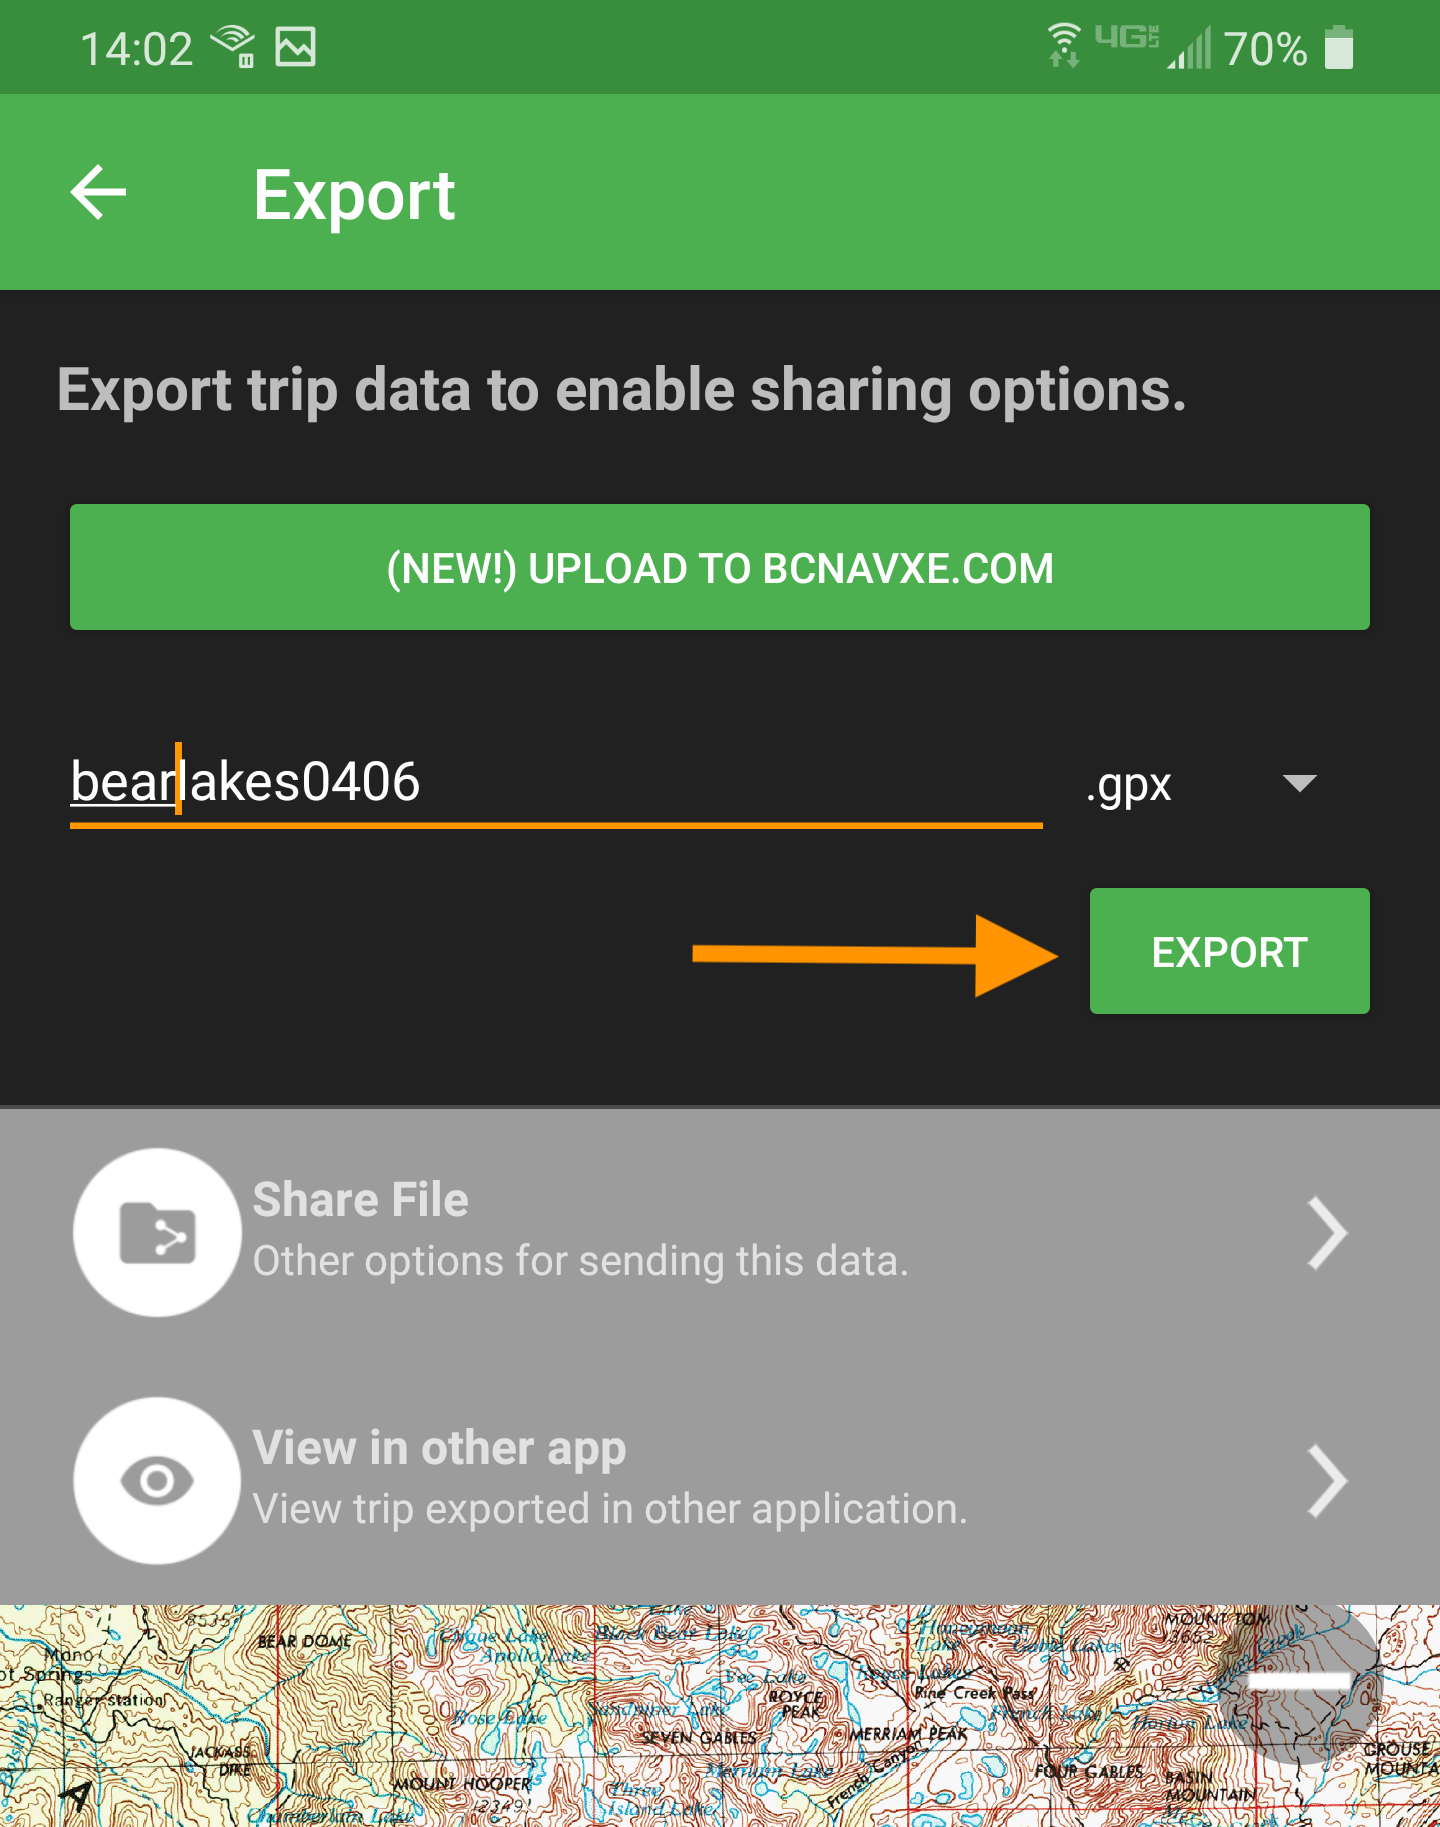
- Use the file format drop down menu to select the file format you would like to export. Tap Export to export your data.
- Alternatively you can export select data as opposed to the whole trip. On the Trip Database screen, tap the top list item (it should have the name of the trip database and then something like “...has [4] waypoints and [6] tracks.”)
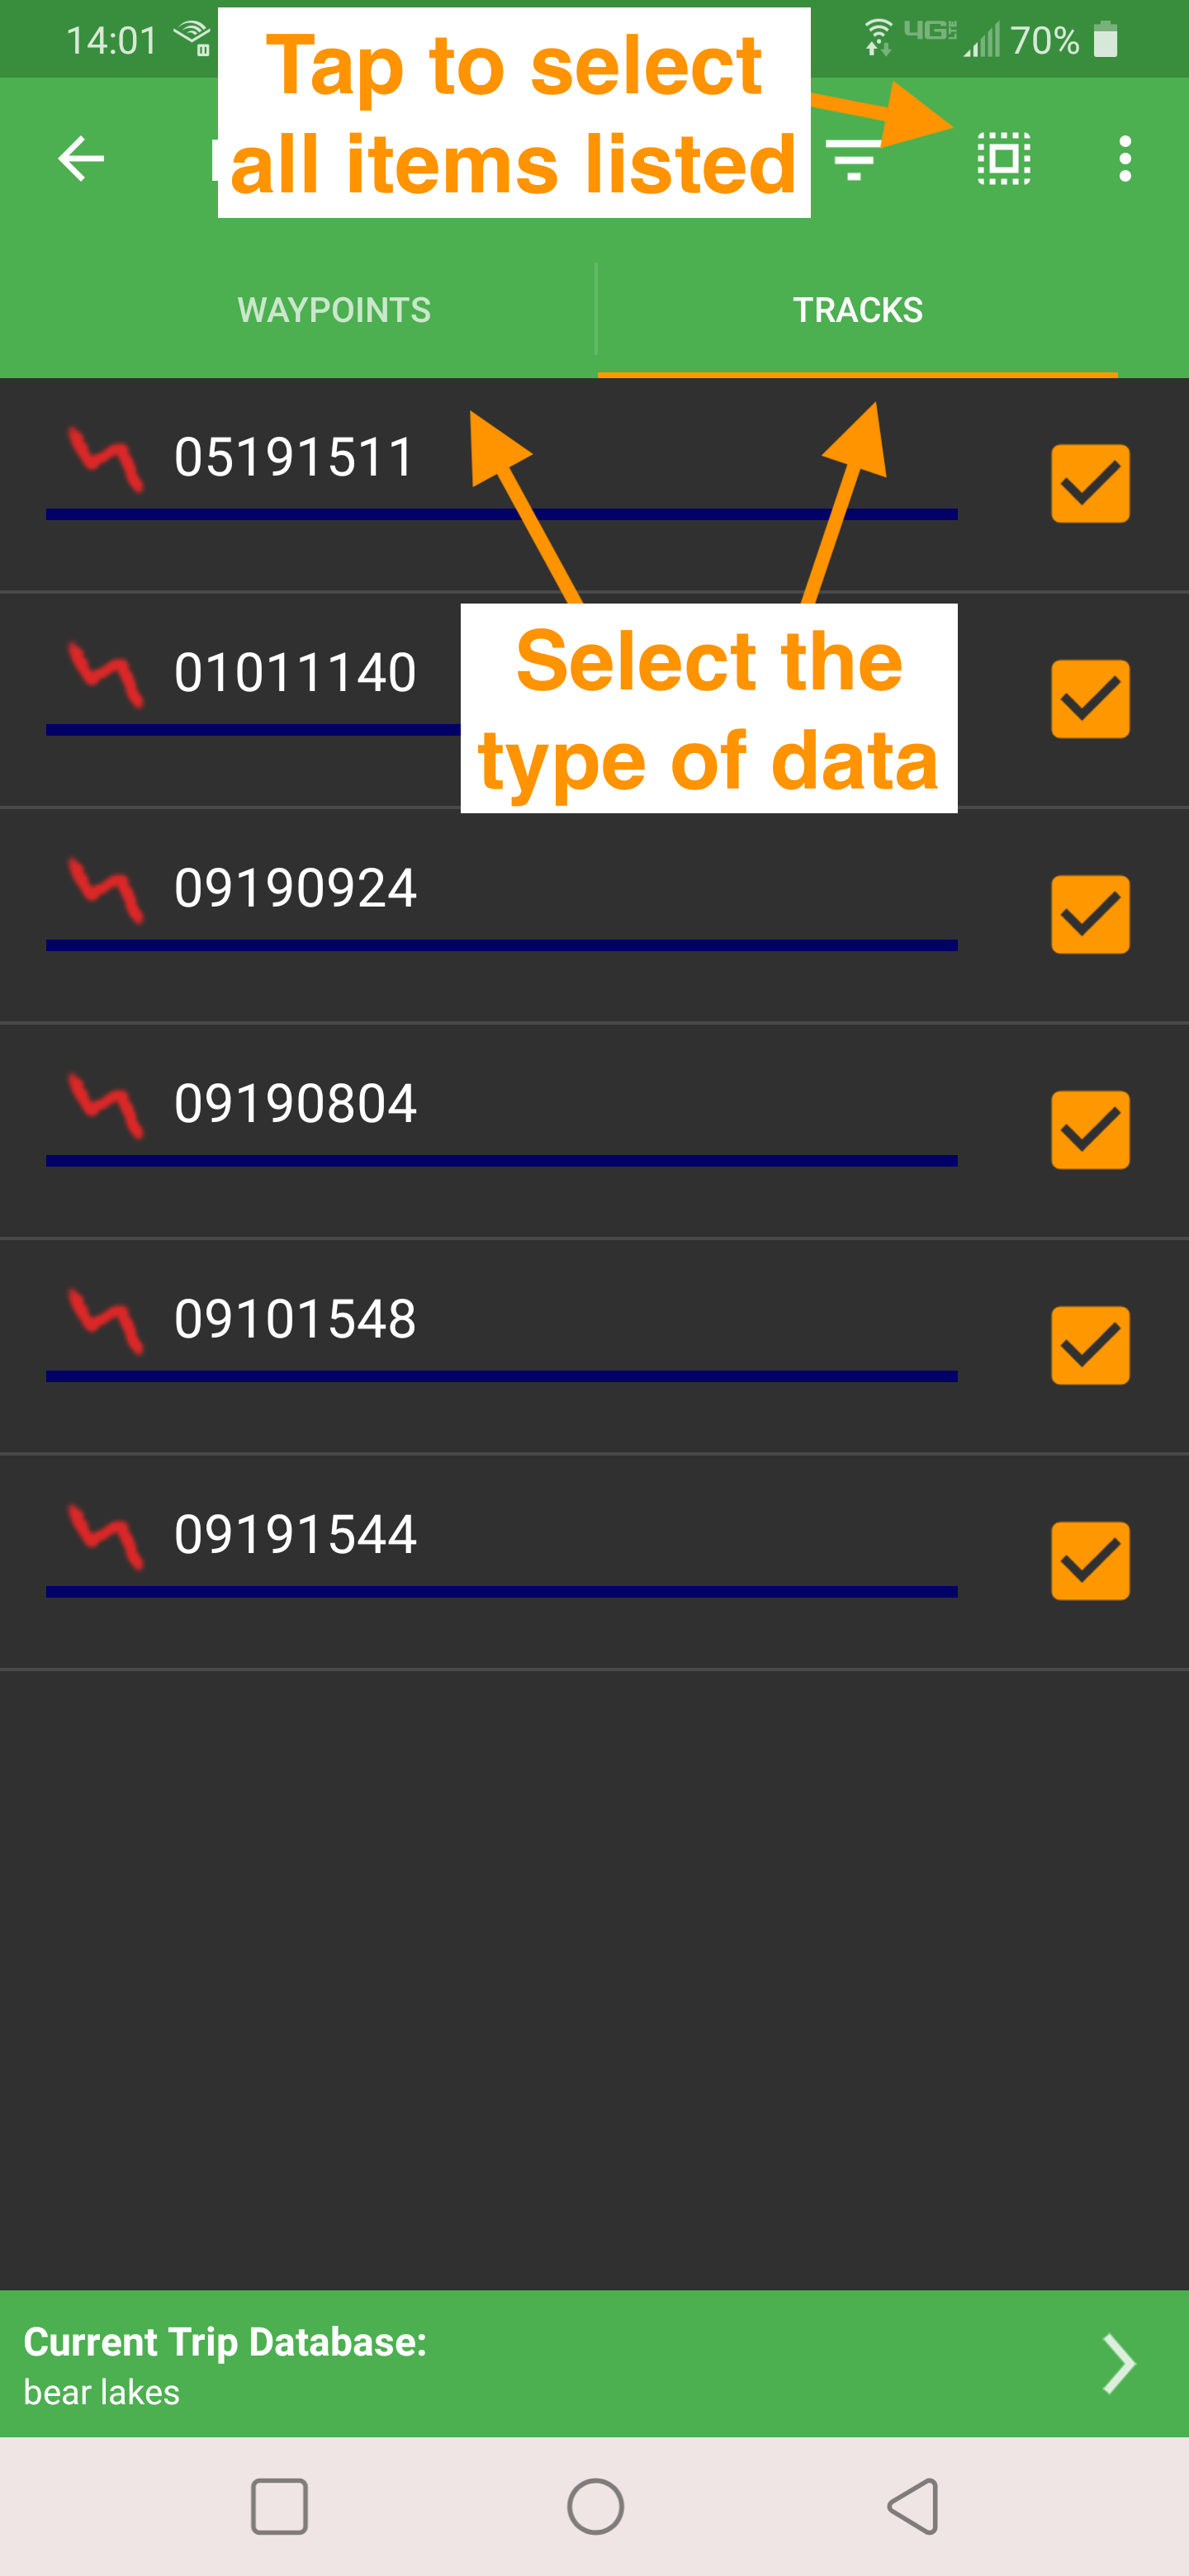
- This will display all the data in the trip database in listview with waypoints in one tab and tracks in another tab. Select the tab for the type of data you wish to export. Each type of data must be exported separately.
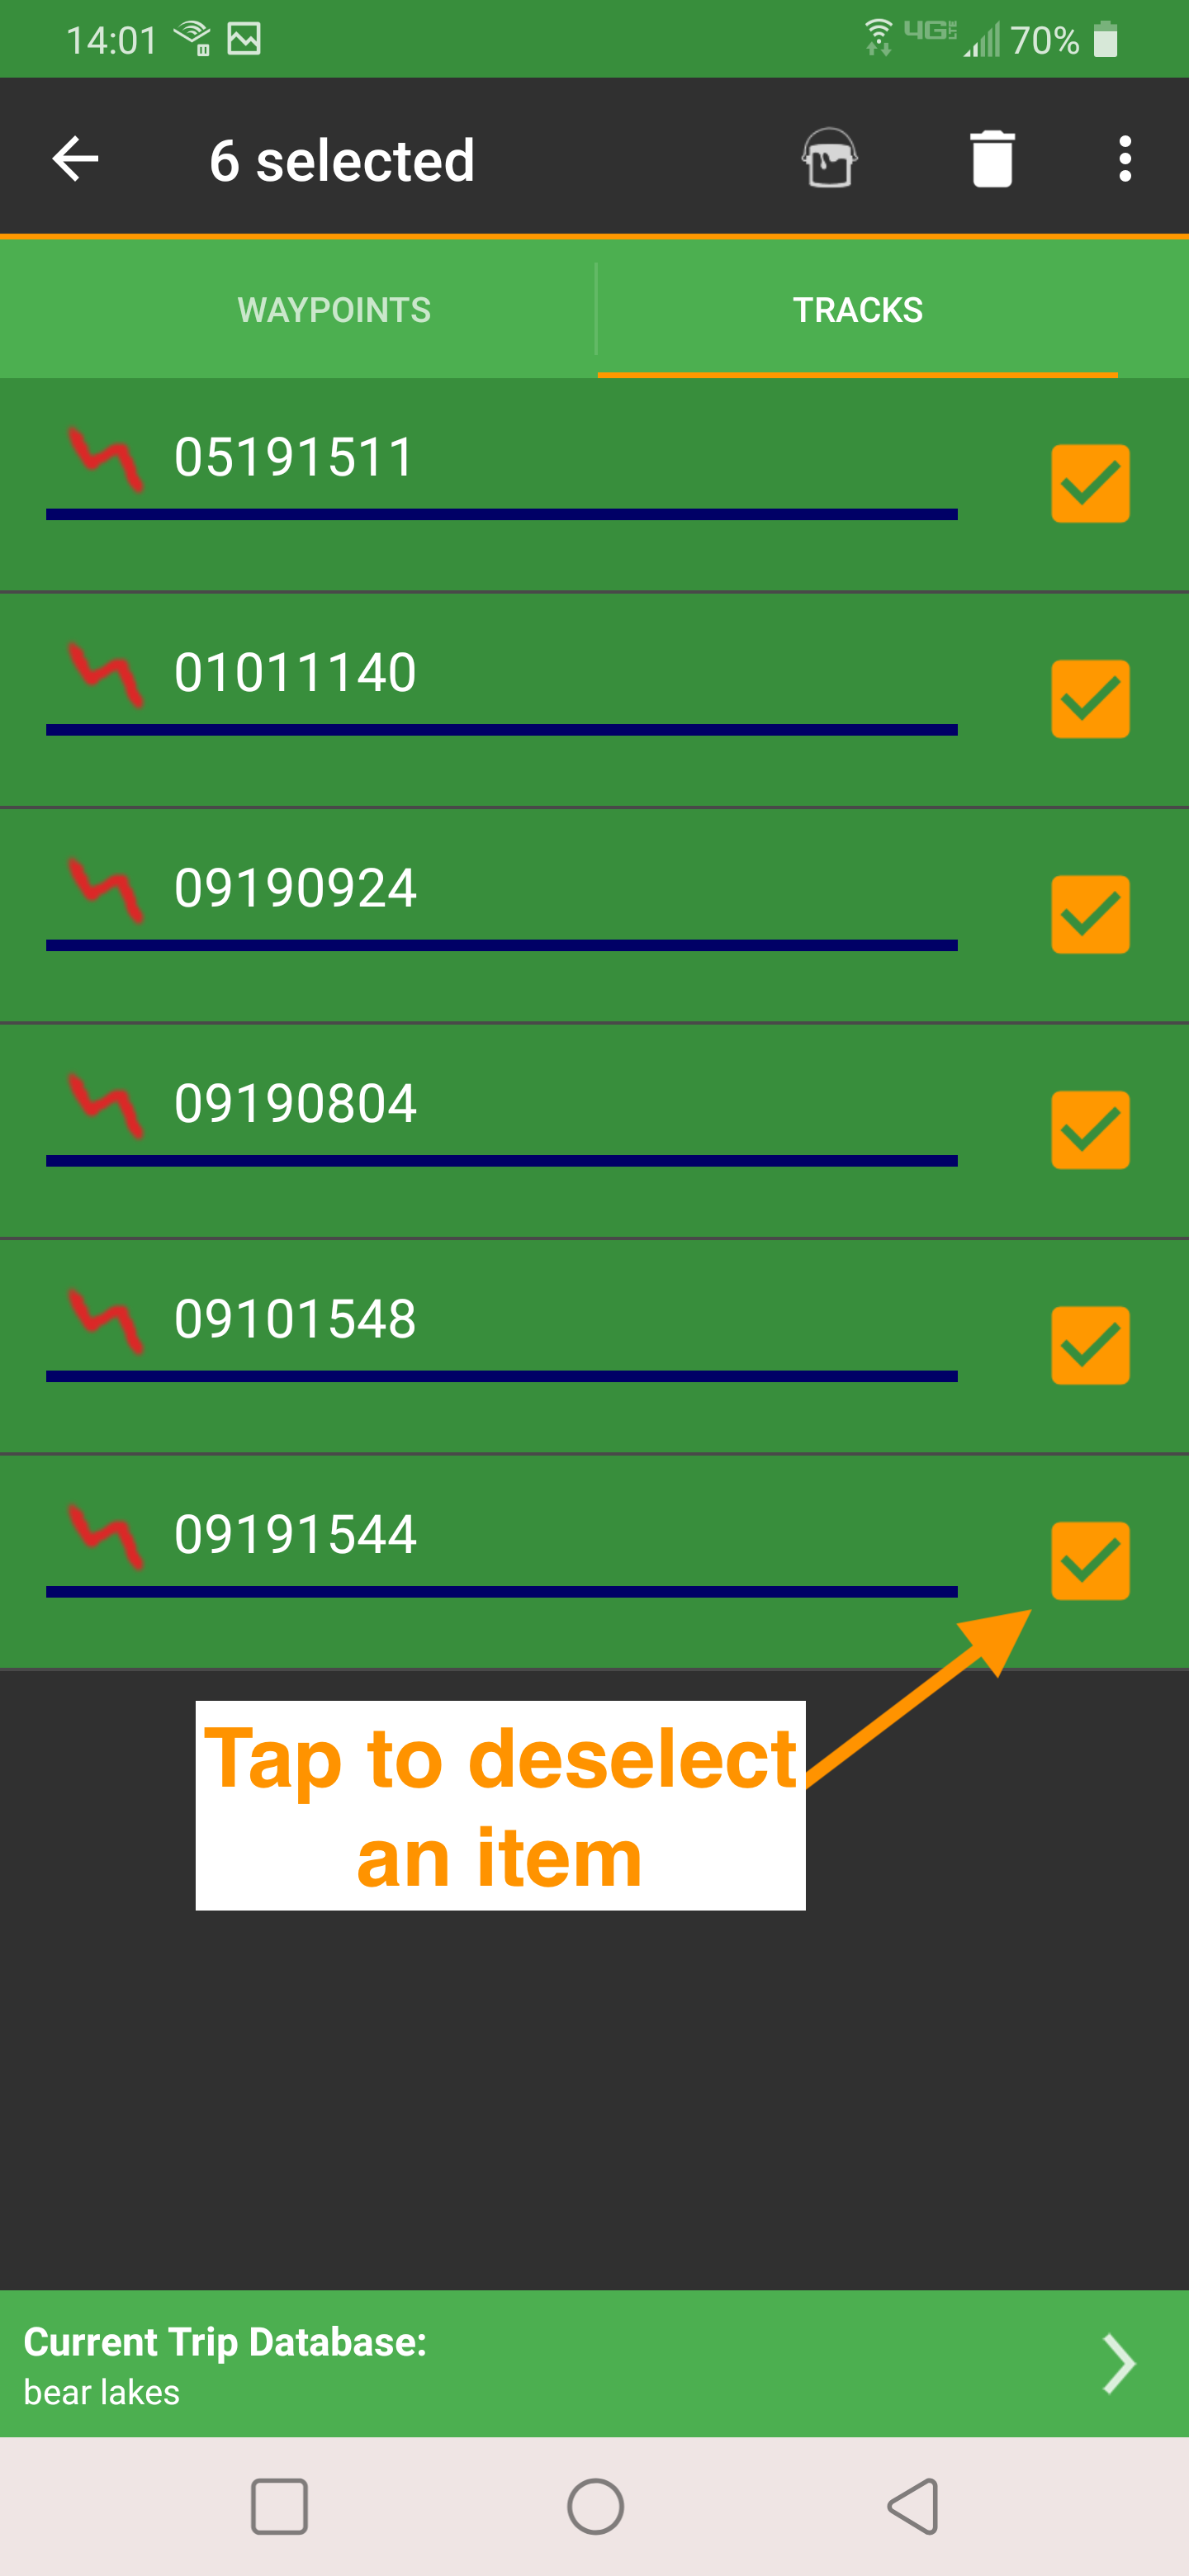
- Select the specific items you wish to export. Tap the square-inside-a-dotted-square icon to select all items. Tap on any items that you don’t want to include in the export to deselect the item.
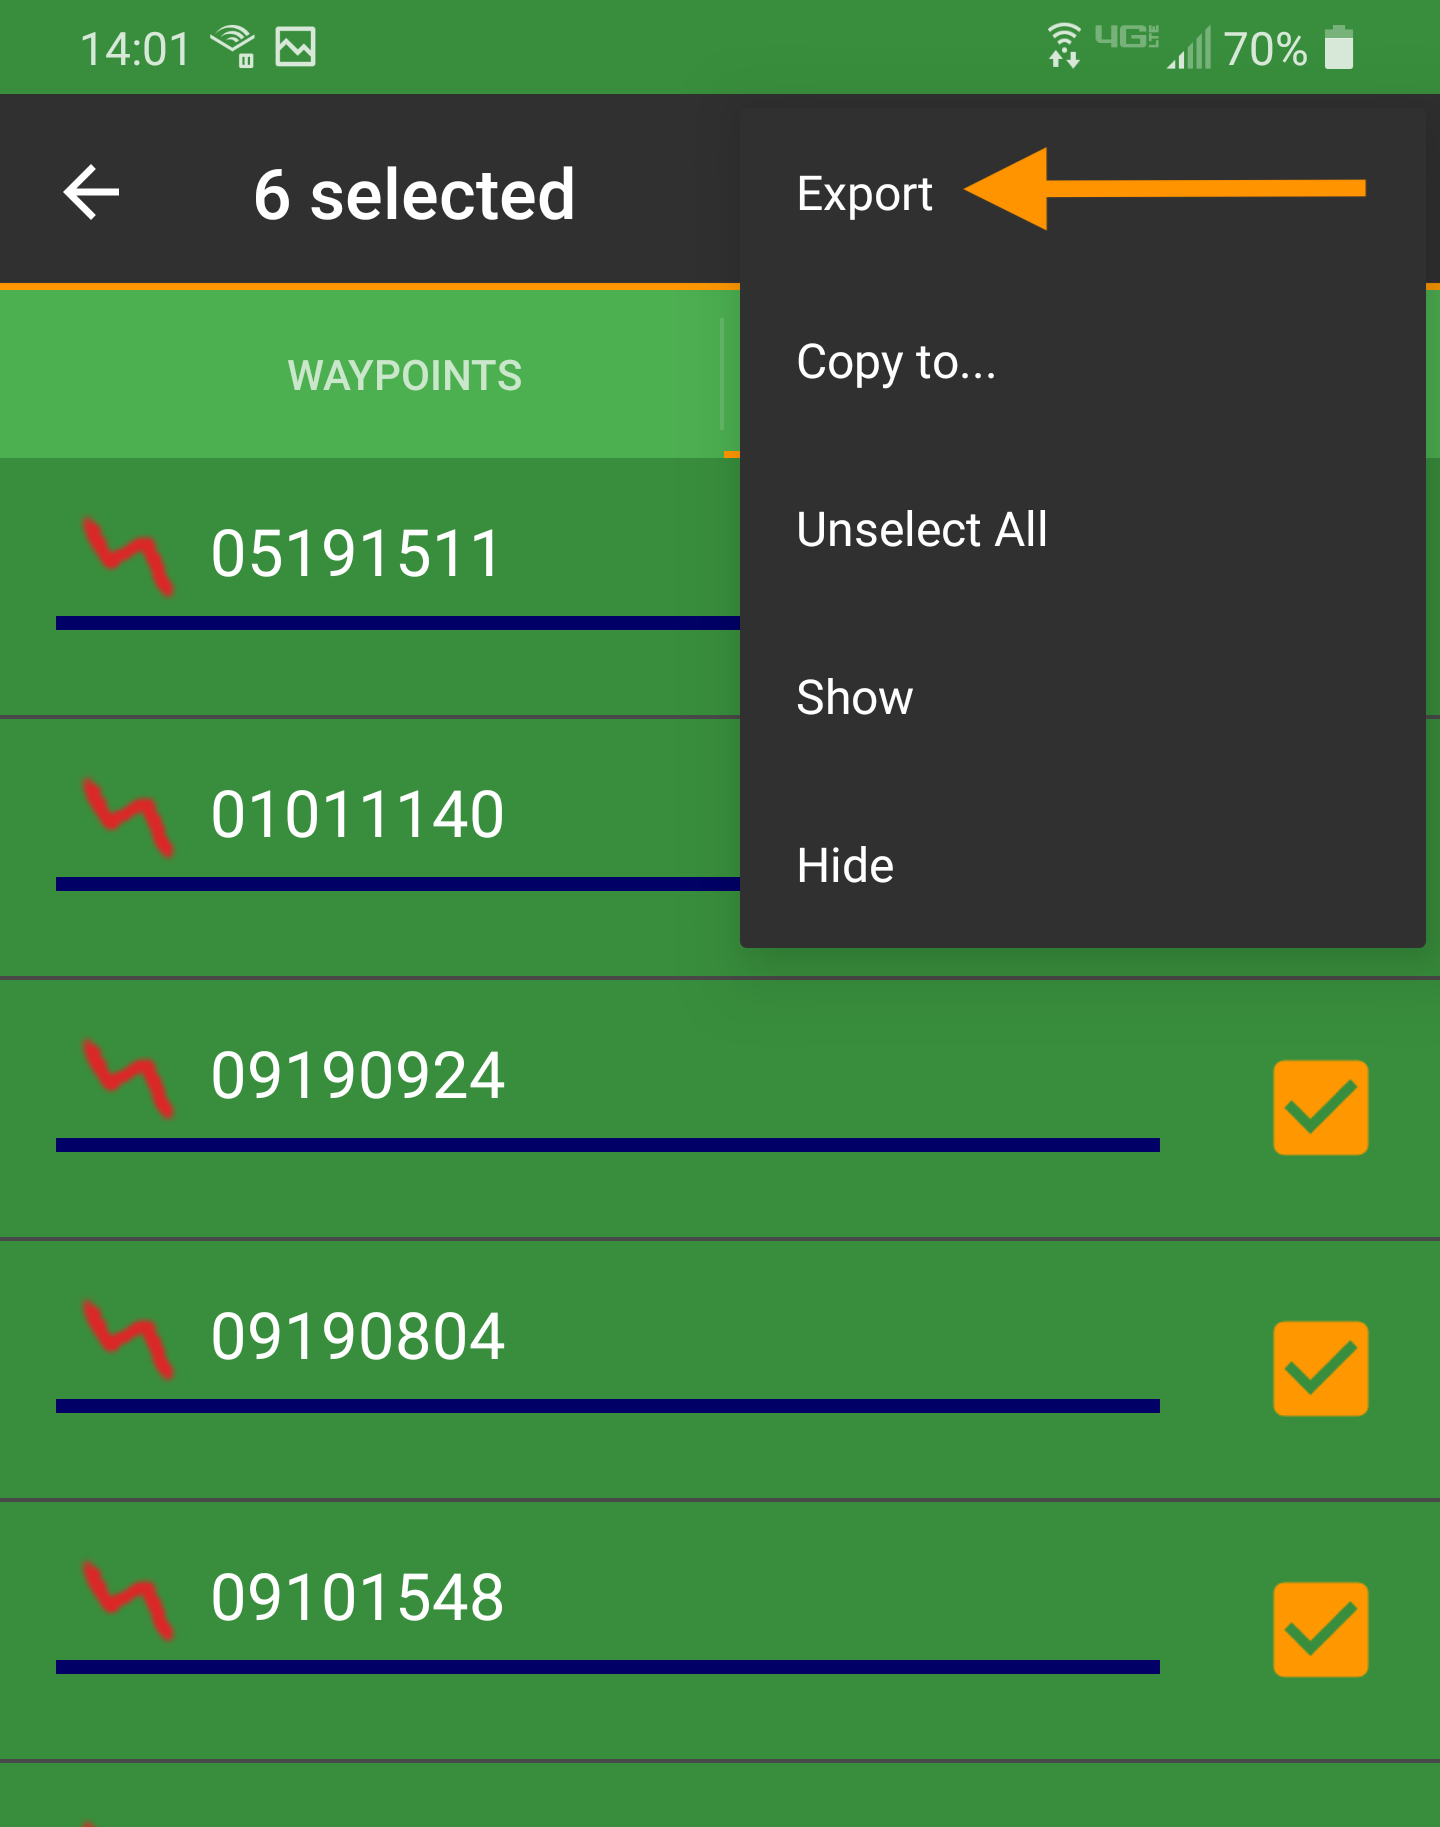
- Once you are happy with your selection, tap the 3-dot icon in the upper right and select Export to open the Export screen.
- Use the file format drop down menu to select the file format you would like to export. Tap Export to export your data.
Export from Backcountry Navigator XE:
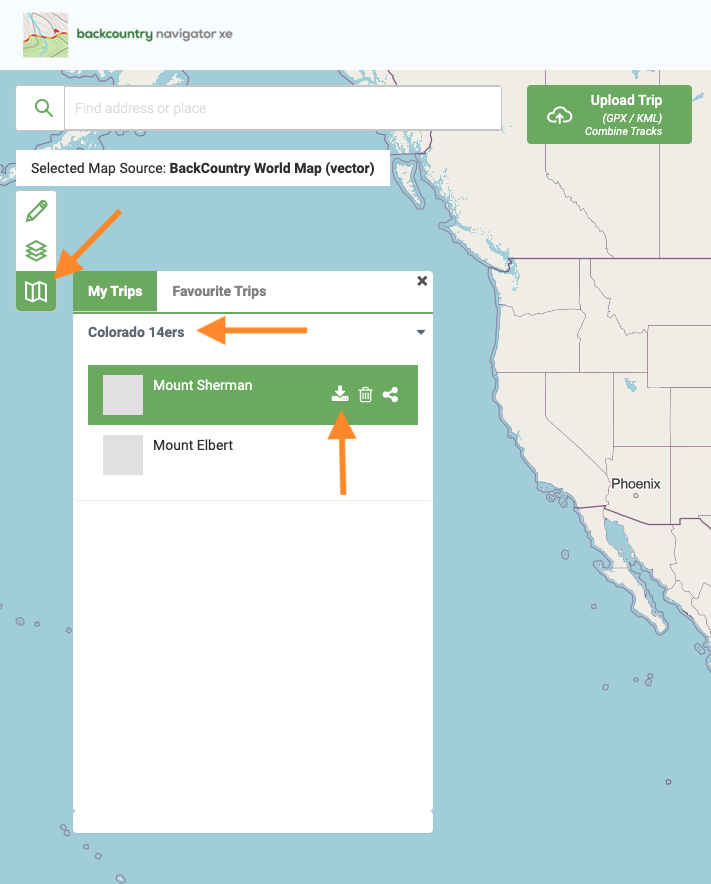
- Log into bcnavxe.com on the web. Click the map icon on the left side to open the My Trips side panel.
- Click the name of the folder and then the name of the trip that you wish to export from the dropdown menu. Hover over the trip’s name and click the Export icon to export the trip as a KML.
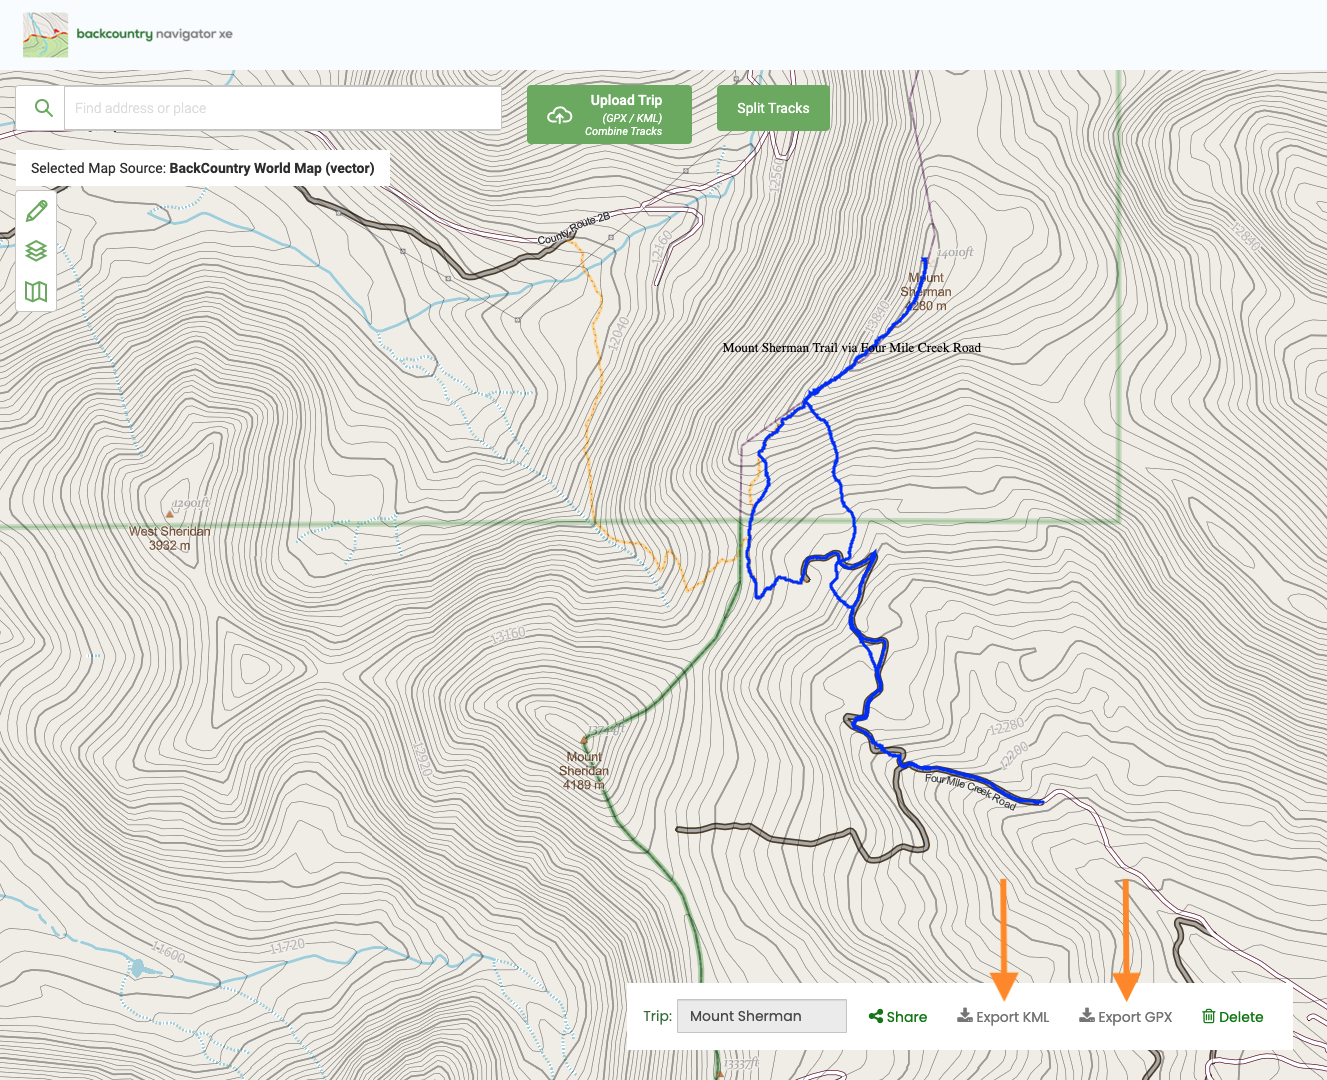
- Alternatively you can click on the trip’s name to display the data in the main map. Click on either Export KML or Export GPX along the bottom of the main map to export the trip data in the desired format.
FATMAP
Data can be exported from the FATMAP website as a GPX file.
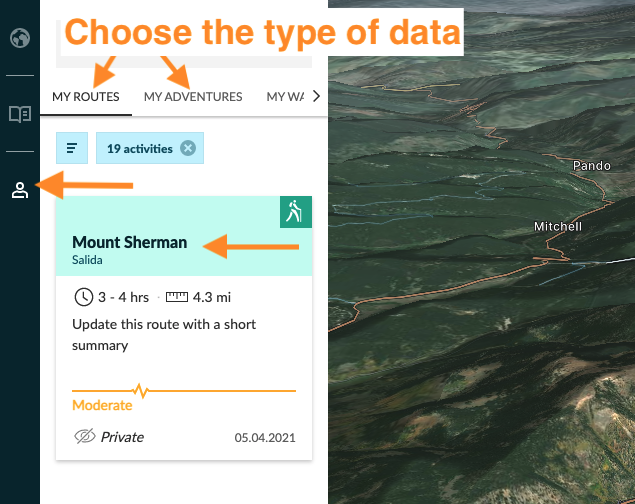
- Log into fatmap.com on the web. Click on the Profile icon on the left sidebar.
- Click the name of the data you want to export from My Routes or My Adventures to open the Route/Adventure Details panel.
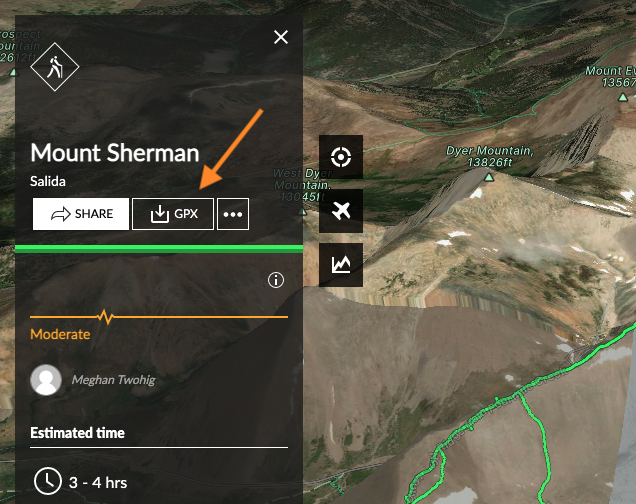
- Click the GPX button below the name and your data will be exported as a GPX file.
Gaia GPS
Data can be exported from the Gaia GPS website as a GPX, KML or GeoJSON file.
-
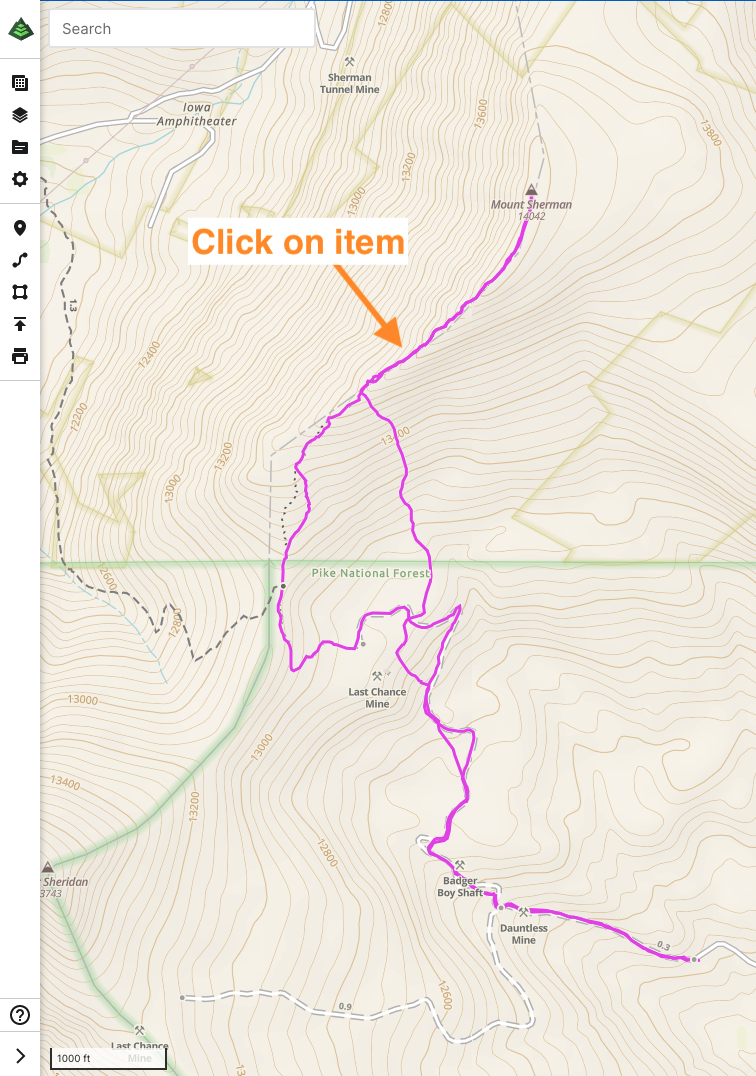
Log into gaiagps.com/map on the web. Click on the map item you wish to export on the main map to expand the data sidebar.
-
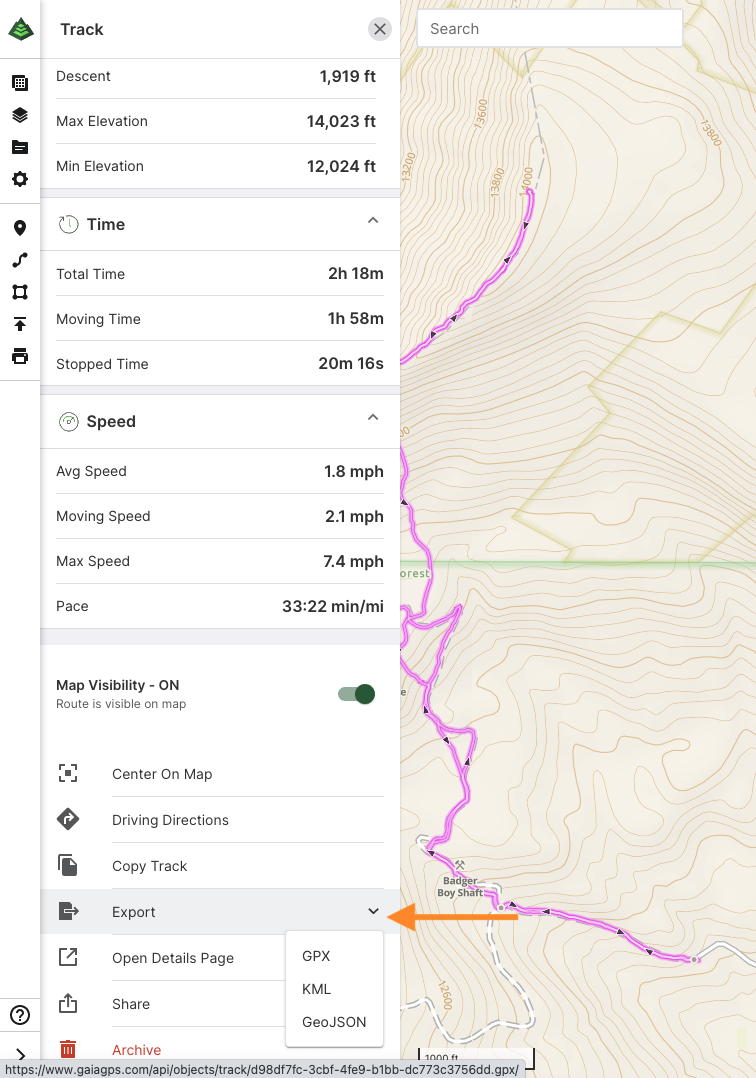
Scroll down and click the Export dropdown menu. Select the file format you wish to export.
-
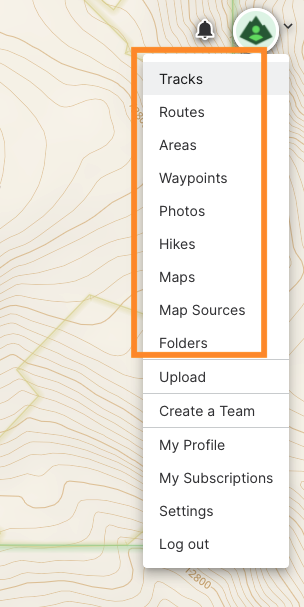
Alternatively you can export a map item from the details page for the item. Click on your name in the upper right corner and select the type of map item (Tracks, Routes, Waypoints, etc) you want from the dropdown menu.
-
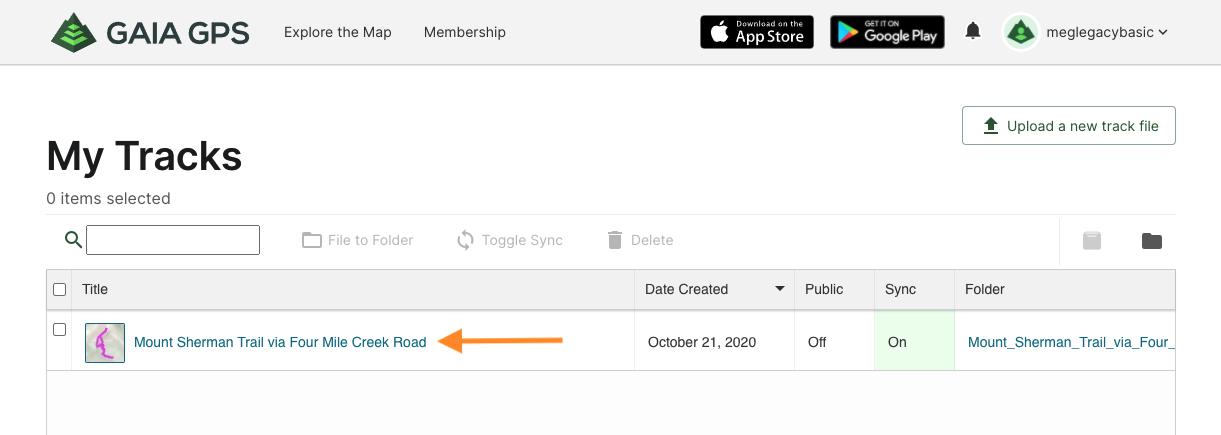
From the map item's page, click on the name of the map item to open the Details page for that item.
-
Click on the Data dropdown menu and select the format you wish to export.

Tip: If you have a lot of data that you want to export all at once, it can be really helpful to organize your data into specific folders on Gaia GPS beforehand (such as by trip or area). Then export each folder using the same method outlined in steps 3-5 above.
OnX
Data can be exported as a GPX or KML file using the Export function in the Web Map on the OnX website.
-
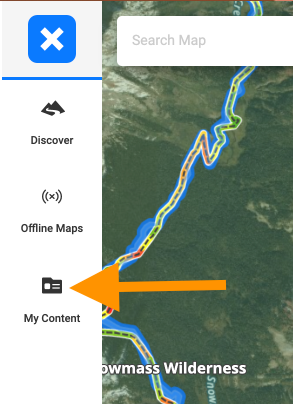
Log into onxmaps.com on the web. Click on My Content in the left sidebar.
-
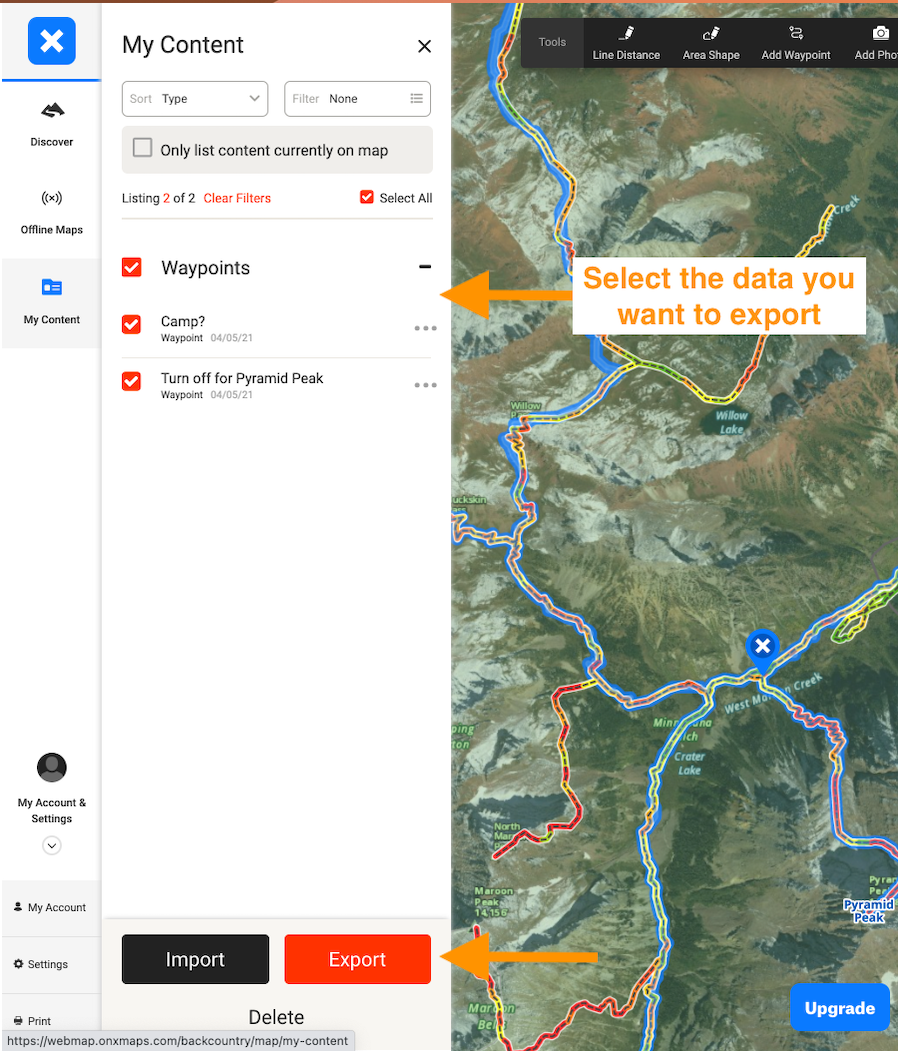
Only the selected mark-ups (waypoints, lines, tracks, etc) will be exported. Make sure to select all the mark-ups that you wish to include in your exported file and click Export.
-
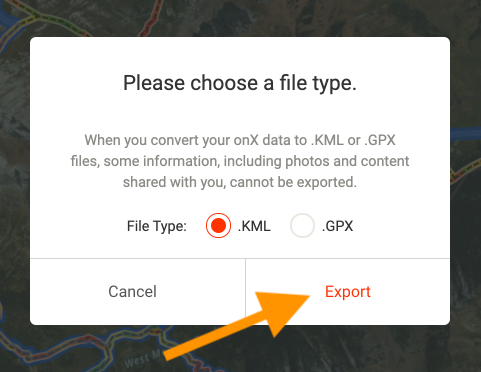
Select the file format you wish to export and then click Export.
Importing Your Data into CalTopo
Once you’ve downloaded your data in the desired file format from your old mapping program, CalTopo makes it simple to import your data into either the web or mobile app. Importing Objects walks you through the import process on both platforms.
Tips for Organizing Your Data in CalTopo
If you’re new to CalTopo, it can be a little intimidating at first. Here are a couple tips for organizing your imported data in CalTopo to help you get started!
- Import the data into an unsaved map and then save it OR import the data into an existing saved map. As long as the data is part of a saved map, you will be able to access that data from either the web or mobile app. If you’ve never created a map in CalTopo, make sure to check out Making your First Map.
- Create maps for specific adventure, trips or areas. Many mapping programs display all your data at once on the main map. In CalTopo, only the data for the map that you are currently viewing is displayed. If you have a ton of data saved to one map (think hundreds of markers, routes and/or tracks), it can really slow down the program’s processing speed. Consider organizing your imported data into individual maps by adventure, trip or area. This can make your maps and data much more useful and easier to use. Copying to a New Map covers how to move data from one map to a new map and can be a helpful tool for dividing and organizing your maps, especially after a big import.
- Create folders to organize your data within a map. Folders are the organizational rockstars of CalTopo. You can create meaningful folders to organize your data, move map objects between folders as needed and adjust folder visibility. Learn more about creating and using folders in your maps in the Folders section.