Upload a Map Sheet
let's begin
If you have a Pro or higher subscription, you can create new map sheets by uploading an image file. Some files will be geo-referenced, others may require you to manually geo-reference the image onto the map.
Topics on this Page:
- Uploading a New Map Sheet as a Map Object
- Manually Aligning or geo-referencing an uploaded Map Sheet
- Save or Add a Map Sheet to Your Data
Uploading a New Map Sheet as a Map Object
This feature is only available for pro, desktop or team accounts. To upload a map sheet, you must be working with a saved map, meaning you have added at least one object, such as a marker, to a map, then used then saved that map to your account.
How to Upload a Map Sheet
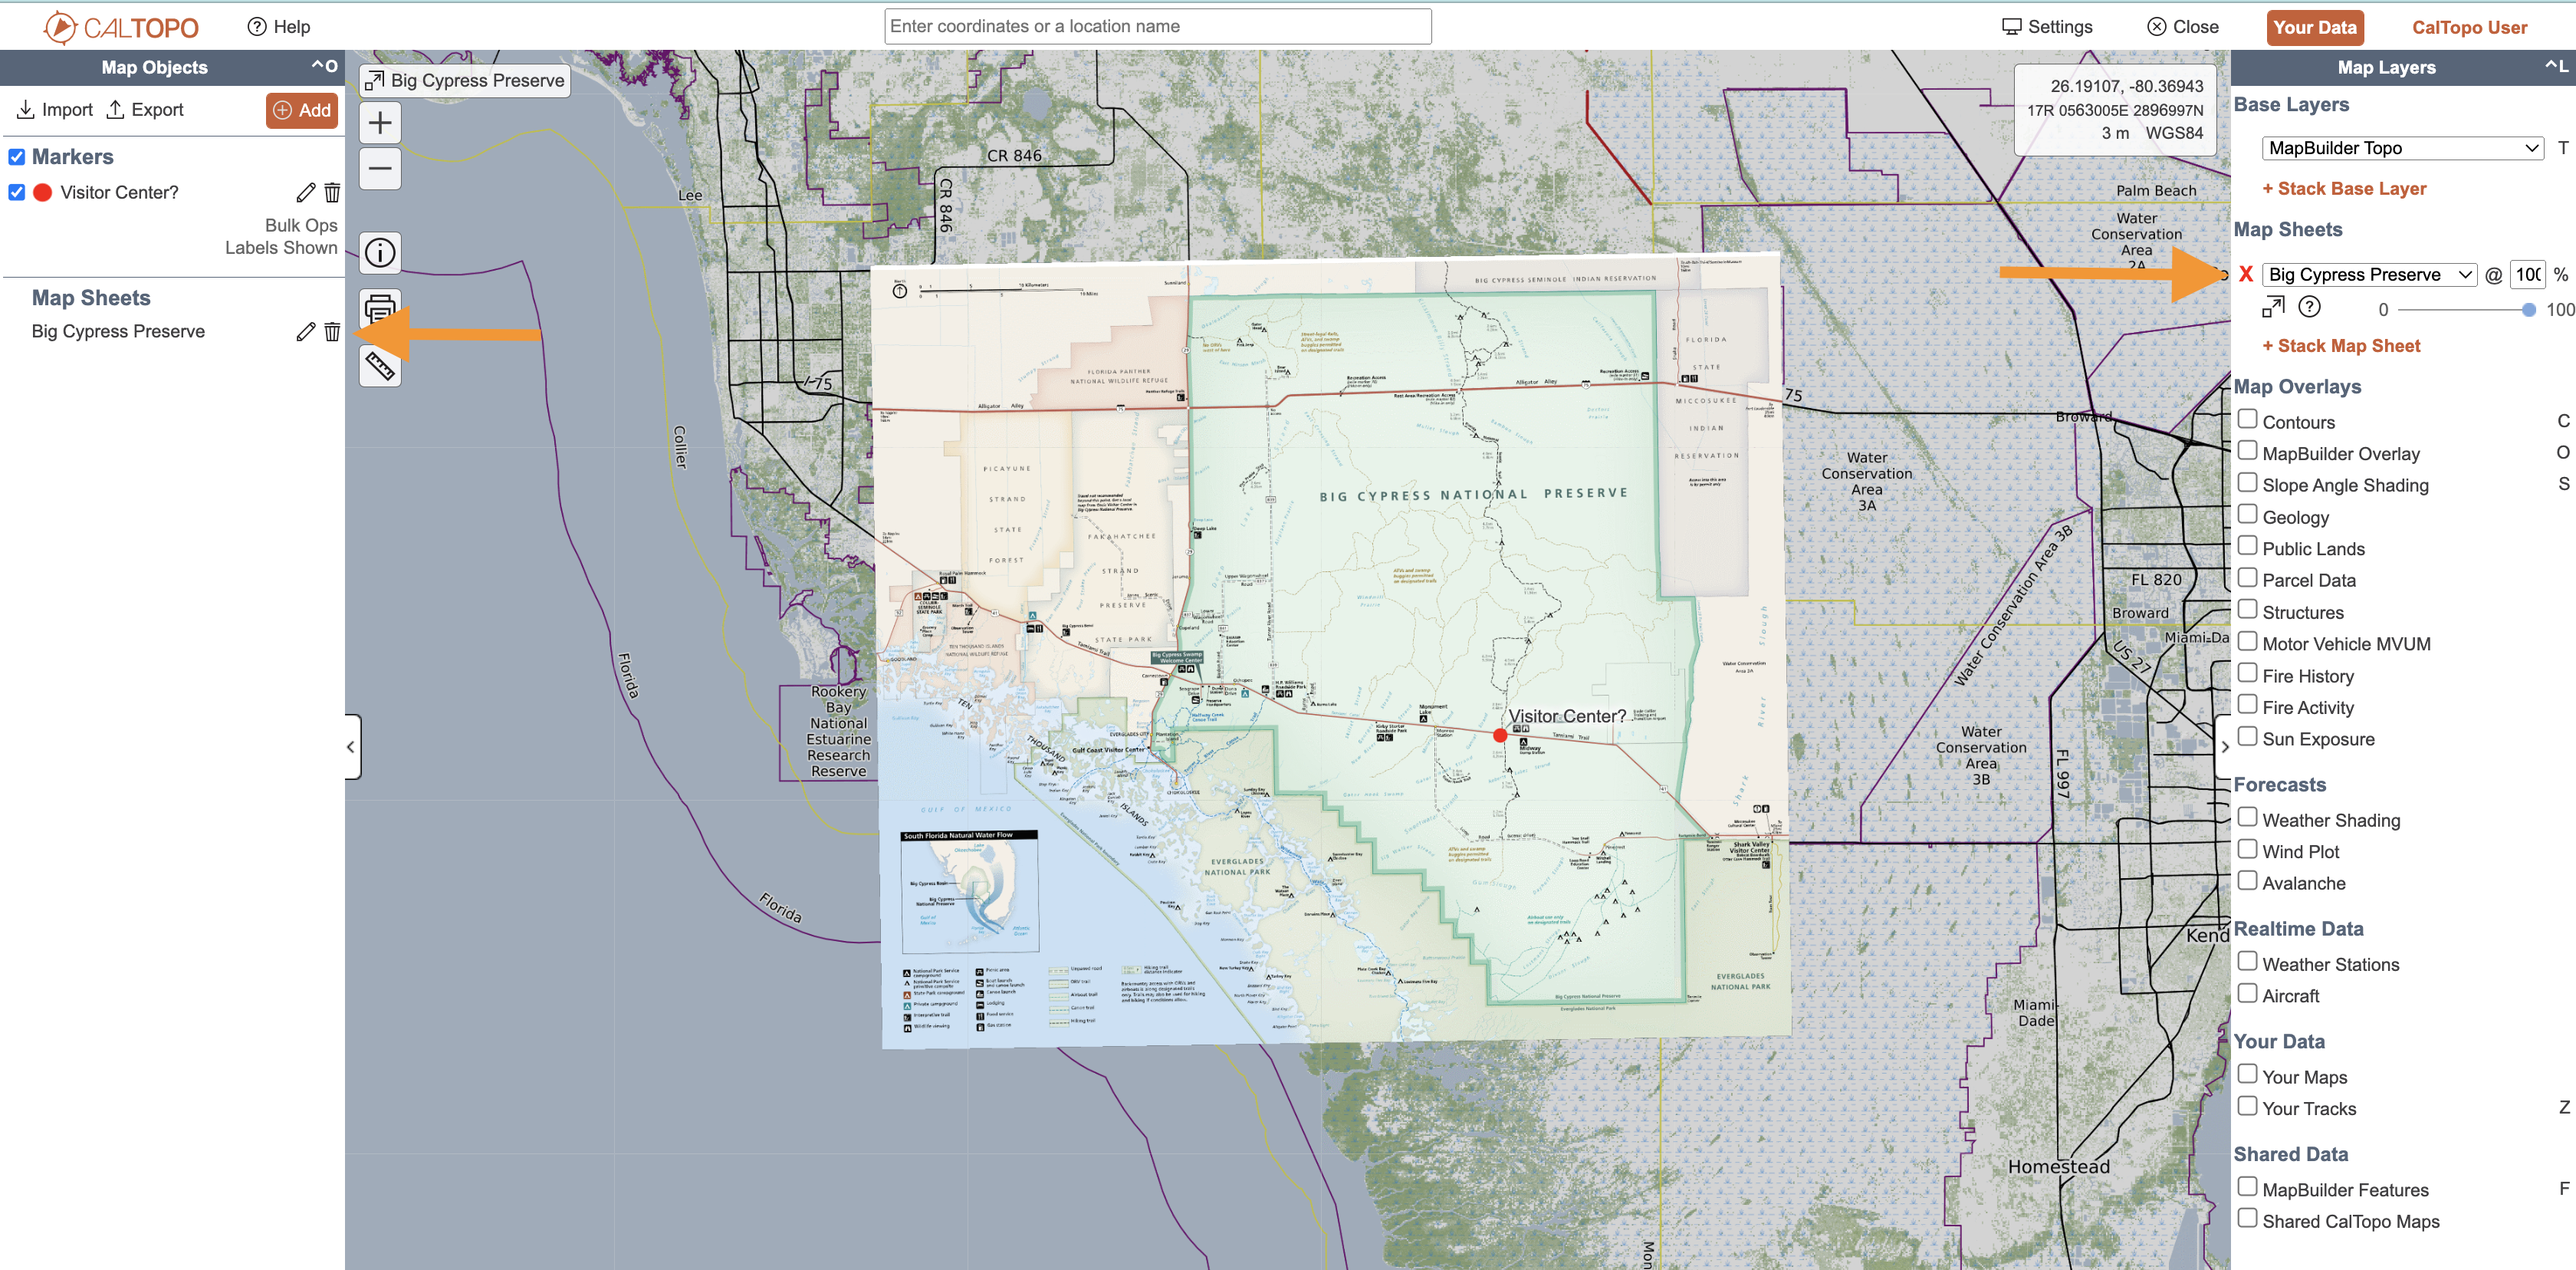
Here is an example of how to use this feature. We’ll walk through uploading a PDF file of a map of the Big Cypress National Preserve in Florida. There isn’t a lot of information about this preserve on any of the base layers available on CalTopo so it makes a good choice to add as a map sheet.
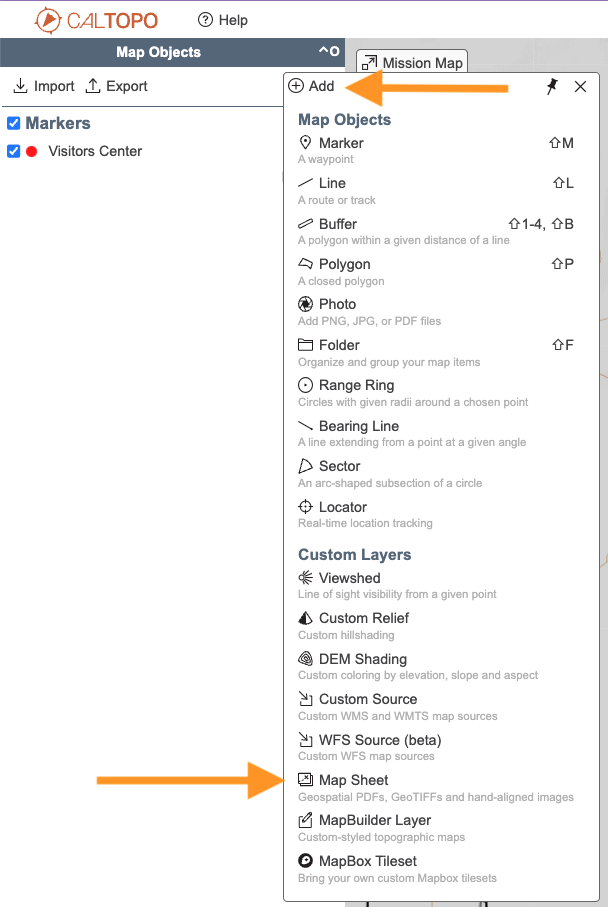
With a saved map open, click the +Add menu on the left side of the map viewer and select Map Sheet from the bottom of the list.
The map sheet dialog will appear. Name the map, upload the file and select whether or not to share the map publicly. The maximum upload size is 40 MB. If you are trying to upload a file larger than 40 MB, creating a custom layer in MapBox is probably a better option.

Click Add to upload the file. If the file contains geospatial alignment data (such as a georeferenced PDF file), then the map sheet will automatically align. If not, then you receive the following dialog and manual alignment will be required.
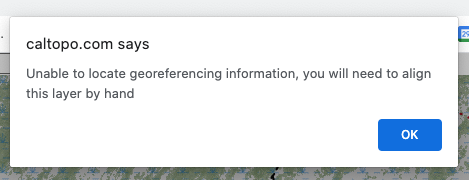
Manual Alignment for an image that does not have geopgraphic information
To manually align your map sheet, match two points on the image with two points on the map. Try to choose very obvious and well established locations on both the image and map so it's easier to align your map sheet. Right-click on the map sheet and select “Georeference> Mark Point” to mark image points. Right-click on the mapviewer and select “Georeference> Mark LatLng” to mark corresponding coordinates. As you mark image points and coordinates, move the opacity slider to see how well the map sheet is aligning. You can zoom in/out and remark image points or coordinates as many times as needed. The video below demonstrates the manual alignment process.
Geo-Referencing a Map Sheet
To view the full process of aligning a map sheet, watch this short video.
Once you are happy with the alignment of your map sheet, press Save.
Map sheets that are added to the map will appear in a Map Sheets folder in the Map Objects menu on the left side of the map viewer as well as in the Map Sheets dropdown menu on the right.
Saving a Map Sheet to Your Account for Future Use
Currently the map sheet is only added to the map. To save the map sheet to your account, click on the pencil icon to the right of the map sheet name in the Map Sheets folder. A dialog will appear and you can click Save To Account to save the map sheet to your account for future use.
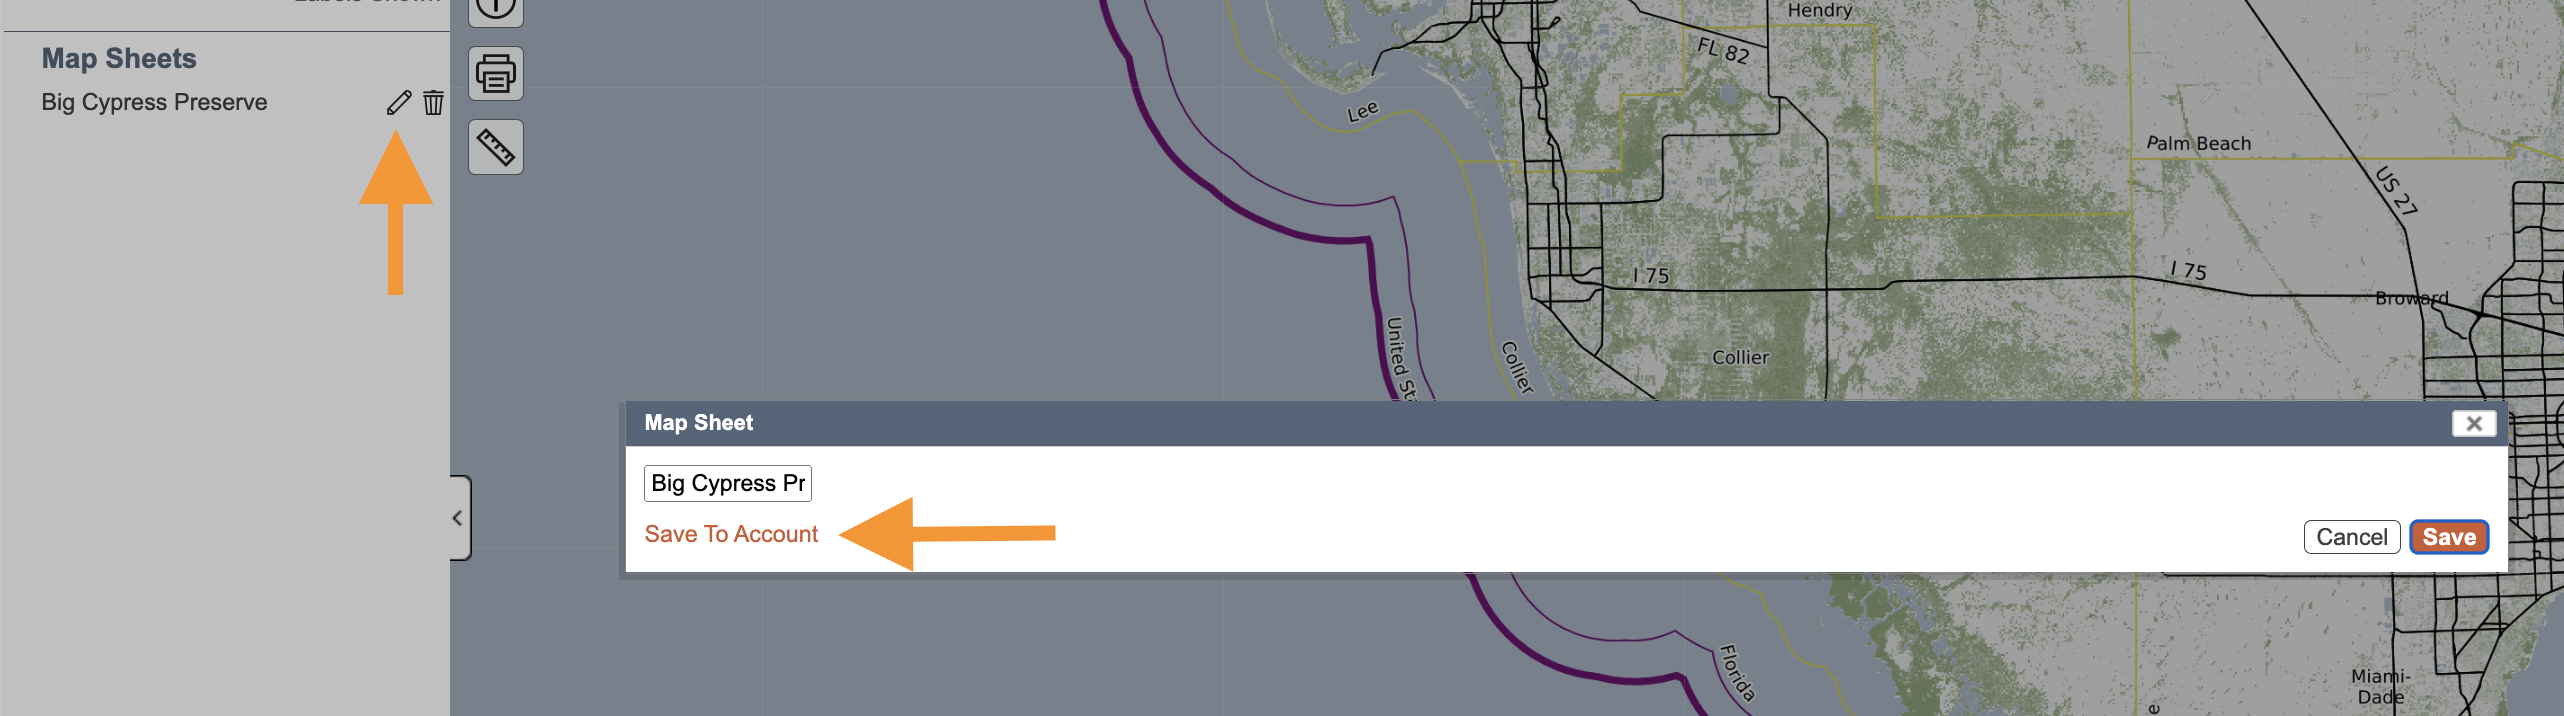
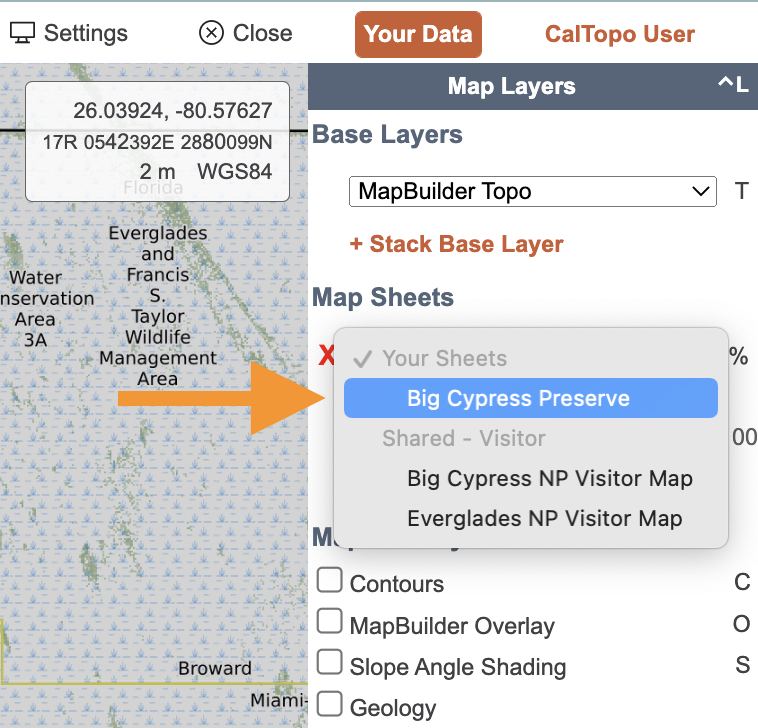
Saved map sheets will appear in the Map Sheets tab of your account. In addition, saved map sheets will also appear in the Map Sheets dropdown menu on the right hand side above Shared Sheets when you are viewing that particular area in the map viewer.
Alternatively you can upload map sheets directly to your account via the Add Map Sheet button at the bottom of the Map Sheets list in the Map Sheets tab of your account.
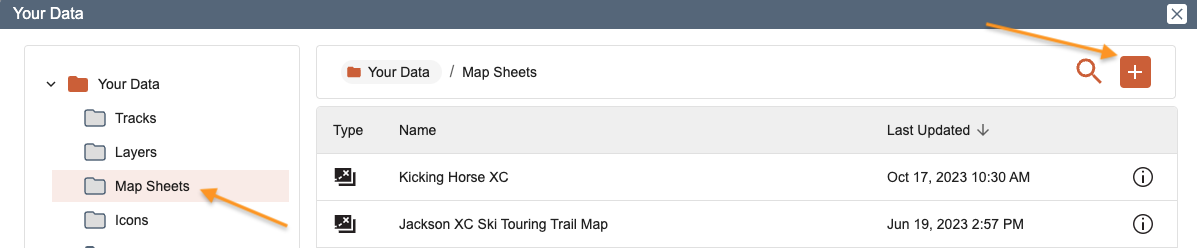
Uploading map sheets via this method will save the map sheet directly to your account but will not automatically add the map sheet to your map.
If you would like to view the map sheet on your map, navigate to the area where the map sheet is located and then click the Map Sheets drop down menu on the right hand side of the map viewer. Any map sheets saved to your account in that area will appear at the top of the list under Your Sheets. Click the map sheet to display it in your map.